THANK YOU
for purchasing the Dipstick Handle Replacement from CravenSpeed. This product is made from the highest grade materials, and is guaranteed to be free from defects.
You can buy our
CravenSpeed The Dipstick Handle Replacement for here
1. Remove your factory dipstick and wipe it clean with paper towel.
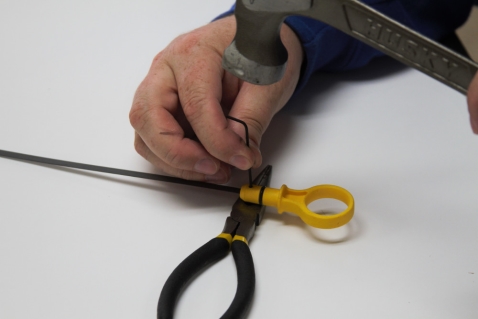
2. Using a mallet and the included 1.5mm Allen Key as a punch, tap the spring pin out of the factory dipstick handle and separate the two pieces. The factory handle and spring pin are not needed from this point on, but it’s a good idea to keep them. You will be using the steel dipper section.
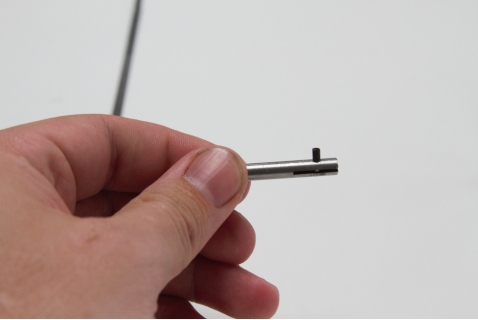
3. Push the 4mm slotted spring pin into the steel insert. You may need to squeeze the spring pin together slightly with the pliers to get it started. (An extra pin is included in case one gets lost)
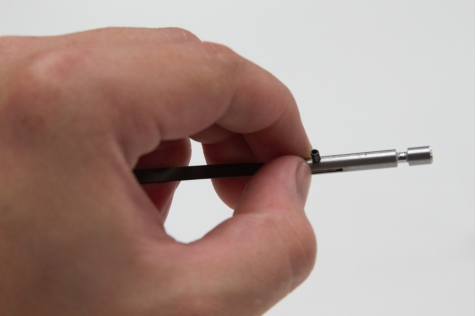
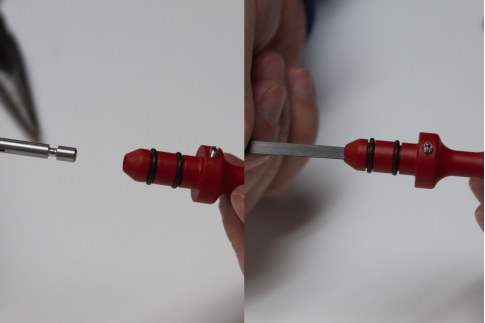
3. Take the steel insert and locate the thin slot on one side. Slide the handle end of the factory dipstick into the slot.
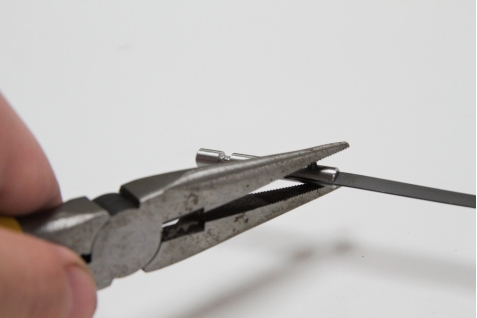
4. While holding these two pieces together so that their holes remain centered, use your pliers to press the slotted spring pin flush with the side of the steel insert.
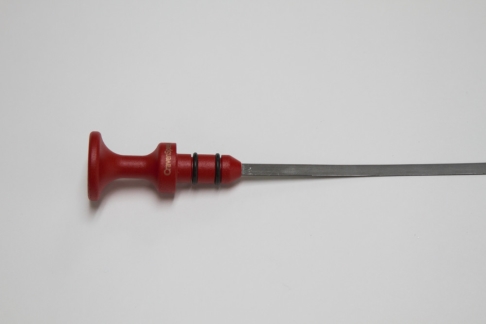
5. Take the red powdercoated dipstick handle and thread the M3 set screw a little ways into the threaded hole on the side of the handle flange. Do not fully seat the set screw just yet.
6. Place the steel insert/factory steel dipper assembly into the hole on the end of the dipstick handle until it is fully seated into the handle. Finish by tightening the M3 set screw so that it engages the slot machined into the steel insert. Do not overtighten as a snug fit should be just fine.
7. Reinstall the improved dipstick and admire your handiwork!
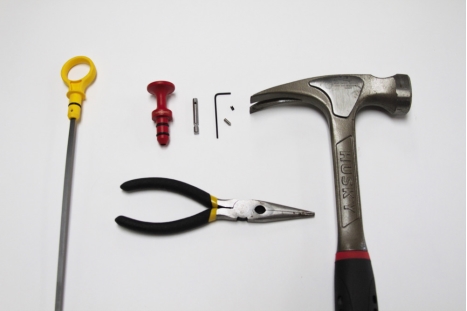
Parts Included:
Tools Required:
Procedure