THANK YOU
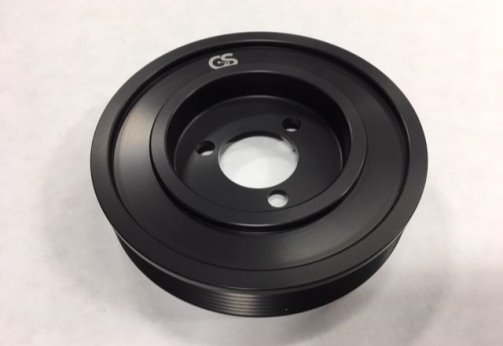
for purchasing the MINI R56 Crank Pulley from CravenSpeed. This product is made from the highest grade materials, and is guaranteed to be free from defects.
You can buy our
CravenSpeed Lightweight Crank Pulley for MINI Gen 2 here
Parts Included:
-
R56 Lightened Crank Pulley
Tools Required:
-
Floor Jack
-
Jack Stand
-
Wheel Chock
-
Impact Wrench w/ Lug Nut Socket
-
Phillips Driver
-
T30 Torx Driver
-
Ratchet Wrench w/extension
-
E10 External Torx Socket
-
Ft/lbs Torque Wrench
-
21mm Box End Wrench
-
R56 Belt Tensioner Tool (optional)
NOTE:
Please follow directions carefully and use caution when working around and under a lifted vehicle.
-
Locate a level, clean, and well-lit area to perform this upgrade. Disconnect your MINIs negative battery terminal and secure the cable away so that it cannot accidentally come back into contact while you’re working on the vehicle.
-
Set a wheel chock behind the rear passenger side wheel and jack up the front passenger side wheel. Secure a jack stand under the vehicle, remove the front passenger side wheel and set it aside.
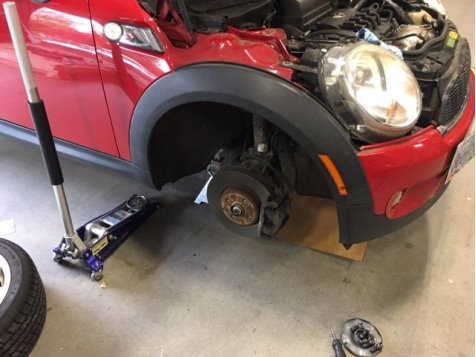
-
Next, we’ll need to remove the inner fenderwell liner. Locate and remove all fasteners that attach the liner to the inside wheel well. There will be (2) T30 Torx srcews and a handful of plastic Phillips type fasteners. Once they’re removed the inner fender liner can be completely removed from the vehicle and set aside.
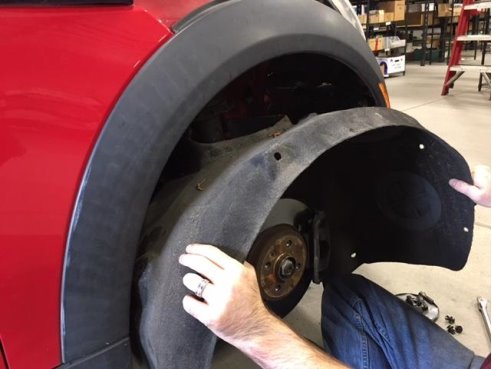
-
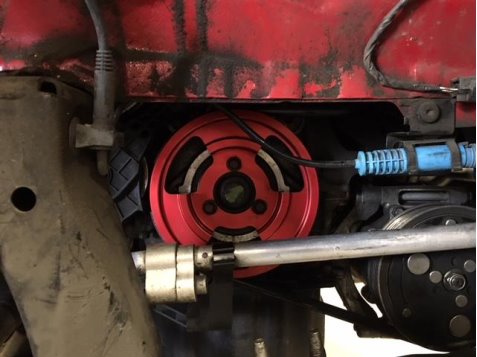
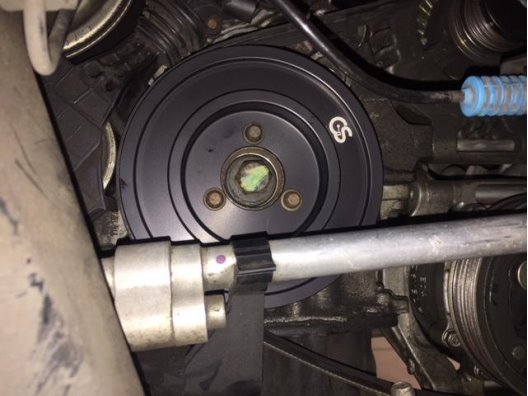
Once the inner fenderwell liner is removed, you’ll be able to see the crank pulley clearly.
NOTE:
Our vehicle already had an aftermarket pulley fitted, but the proceedure is the same regardless of what you have installed.
-
Next, we’ll need to take the tension off of the drive belt. This can be accomplished a couple different ways. The tensioner is accessed from the topside of the engine compartment and located behind the intercooler piping. The large arrow in the image below points to the 21mm, 12-point end of the tensioner where you want to attach your tool. The smaller arrow designates the tensioner hold-lock. When you have rotated the tensioner arm far enough, you can push this hold-lock button in, let the pressure off the tensioner and it will hold it out of the way while you work around the drive belt.
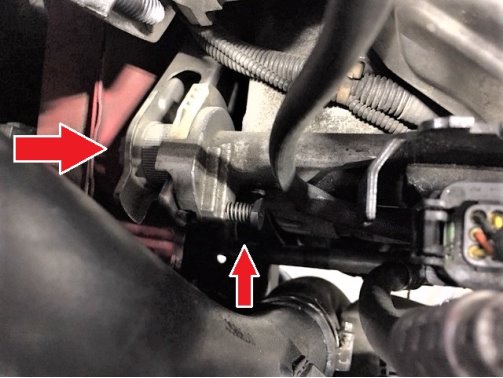
-
The easiest way to take the pressure off of the tenisioner is to utilize a purpose-built R56 belt tensioner tool. You may also be able to use a 21mm box end wrench, but there may not be a whole lot of room in there to get the nessecary travel the tensioner requires to engage the hold-lock button. Your final option is to go in from the bottom and use a pry bar (or similar) to push up on the tensioner arm while you have an assistant topside to engage the hold-lock once the arm has moved far enough.

-
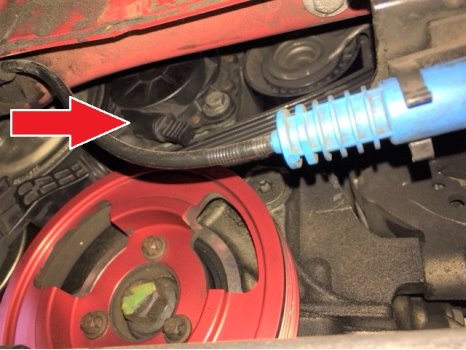
Now that you have the main belt tensioner locked up and out of the way, you have one more mechanism to disengage before the crank pulley can be removed. It’s called the Friction Wheel and it rides against the crank pulley and drives the H20 pump. You disengage this wheel by locating the tensioner tab and pulling it out until you see a hole in the metal band behind the tab. Once you see this hole, push the tab up until the hole indexes with a pin located at the opening of the tab housing.
-
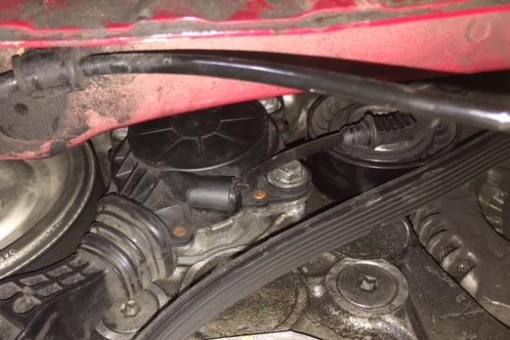
You can now remove the crank pulley. Use an E10 external torx socket to remove the three screws.
DO NOT remove the large center bolt.
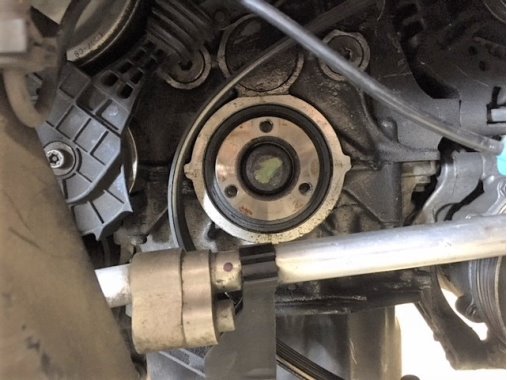
If the pulley wants to spin while you’re loosening the screws, put the car in gear to hold it in place. While you have the pulley off, take a few moments to inspect the condition of the crank seal. If it appears to be leaking or damaged in any way, go ahead and replace it now.
-
Install the CravenSpeed Lightweight Crank Pulley and tighten the (3) external torx screws to 20 ft/lbs with a torque wrench.
-
Slip the main belt back onto the CS pulley and make sure the ribs line up against it and the a/c compressor pulley. Release the pull tab for the friction wheel and park the tab back into it’s housing. Push up on the belt tensioner and the hold-lock should spring out and allow the tensioner to engage the main belt again. Double-check that the ribs in the main belt are correctly engaging the various pulleys.
-
Reinstall the inner fenderwell liner and fasteners, reinstall your wheel, remove the jackstand, and lower the car. Don’t forget to remove the wheel chock and reconnect your battery as well. Start the car, visually inspect and listen for anything odd or concerning. If everything checks out, take your MINI for a spin around the block. Congratulations! You’re done with the CravenSpeed Lightweight Crank Pulley install!