THANK YOU
for purchasing the MINI R56 Coolant Hose T-fitting from CravenSpeed. This product is made from the highest grade materials, and is guaranteed to be free from defects.
You can buy our
CravenSpeed Coolant Hose T-fitting for MINI Gen 2 here
***EXTREMELY IMPORTANT*** THE ENGINE MUST BE COLD PRIOR TO INSTALLATION OF THIS PRODUCT.
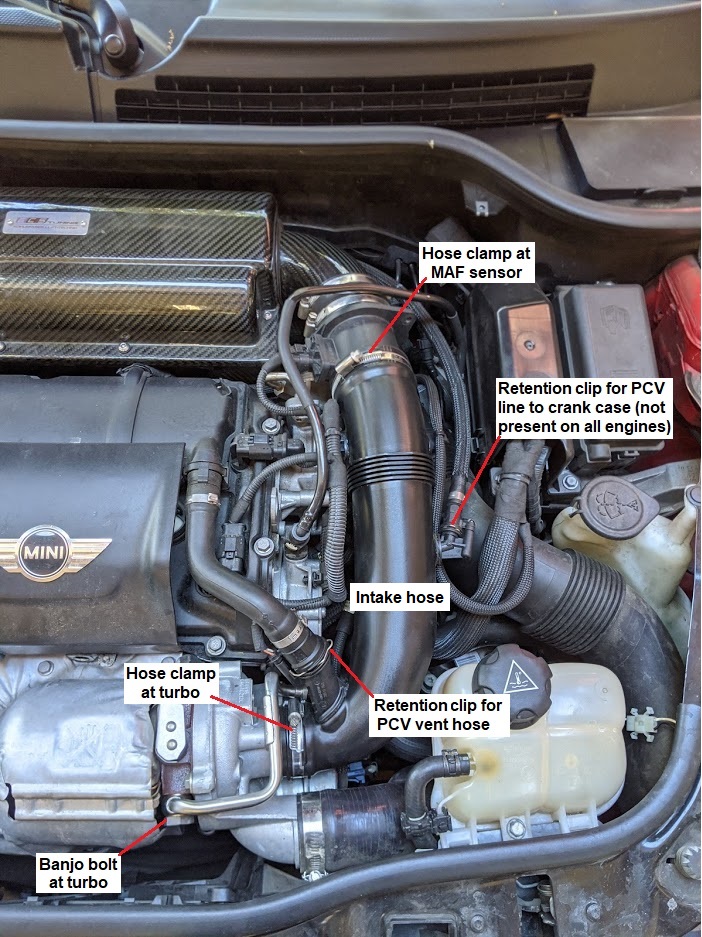
1. Remove the intake hose from the air filter box / MAF sensor to the turbo. Loosen the hose clamps and release the clip that secures the connections for the PCV system..
2. Remove the 10mm screw that secures the coolant reservoir and remove the reservoir. Disconnect the elbow fitting on the bottom by first pulling out the metal retention clip. Some coolant will spill, so try to strategically place a drain pan to capture it.
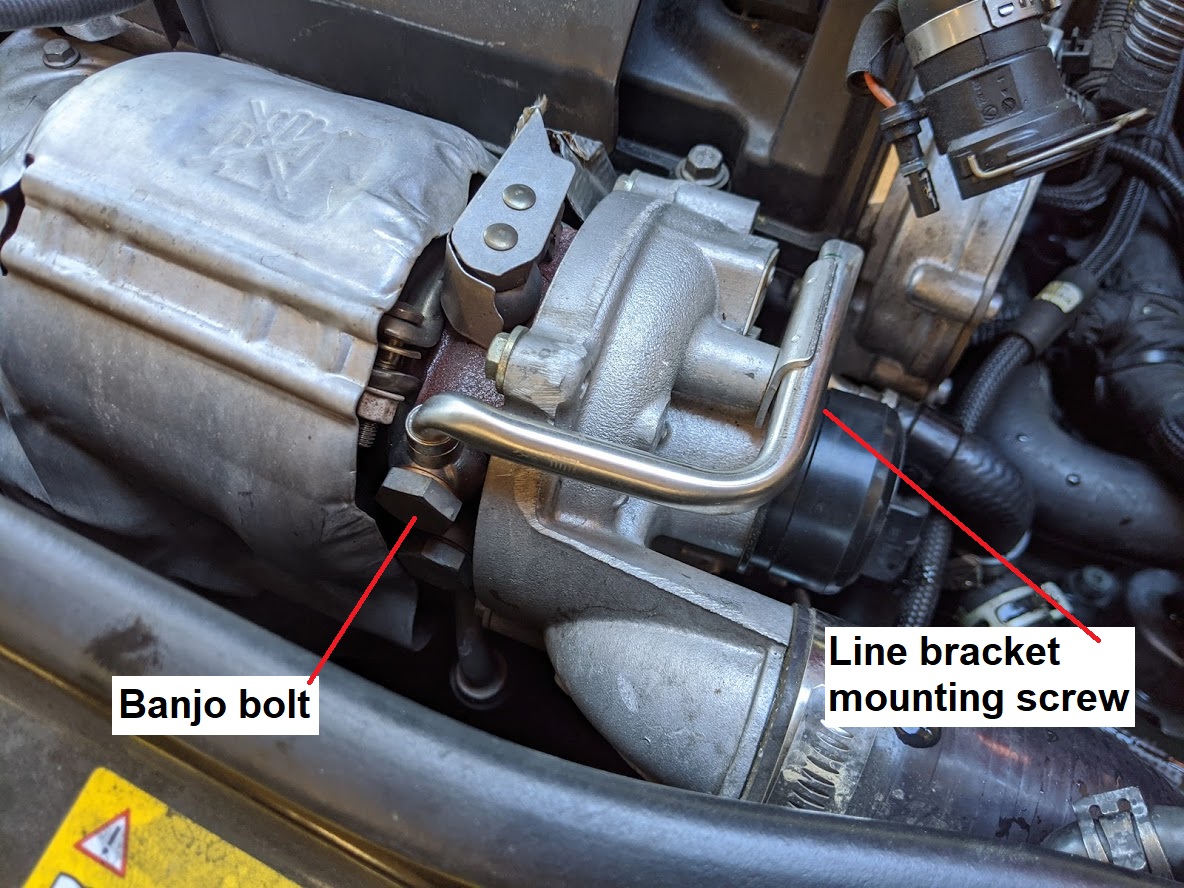
3. Remove the banjo bolt on the turbo, and the line bracket mounting bolt on the turbo.
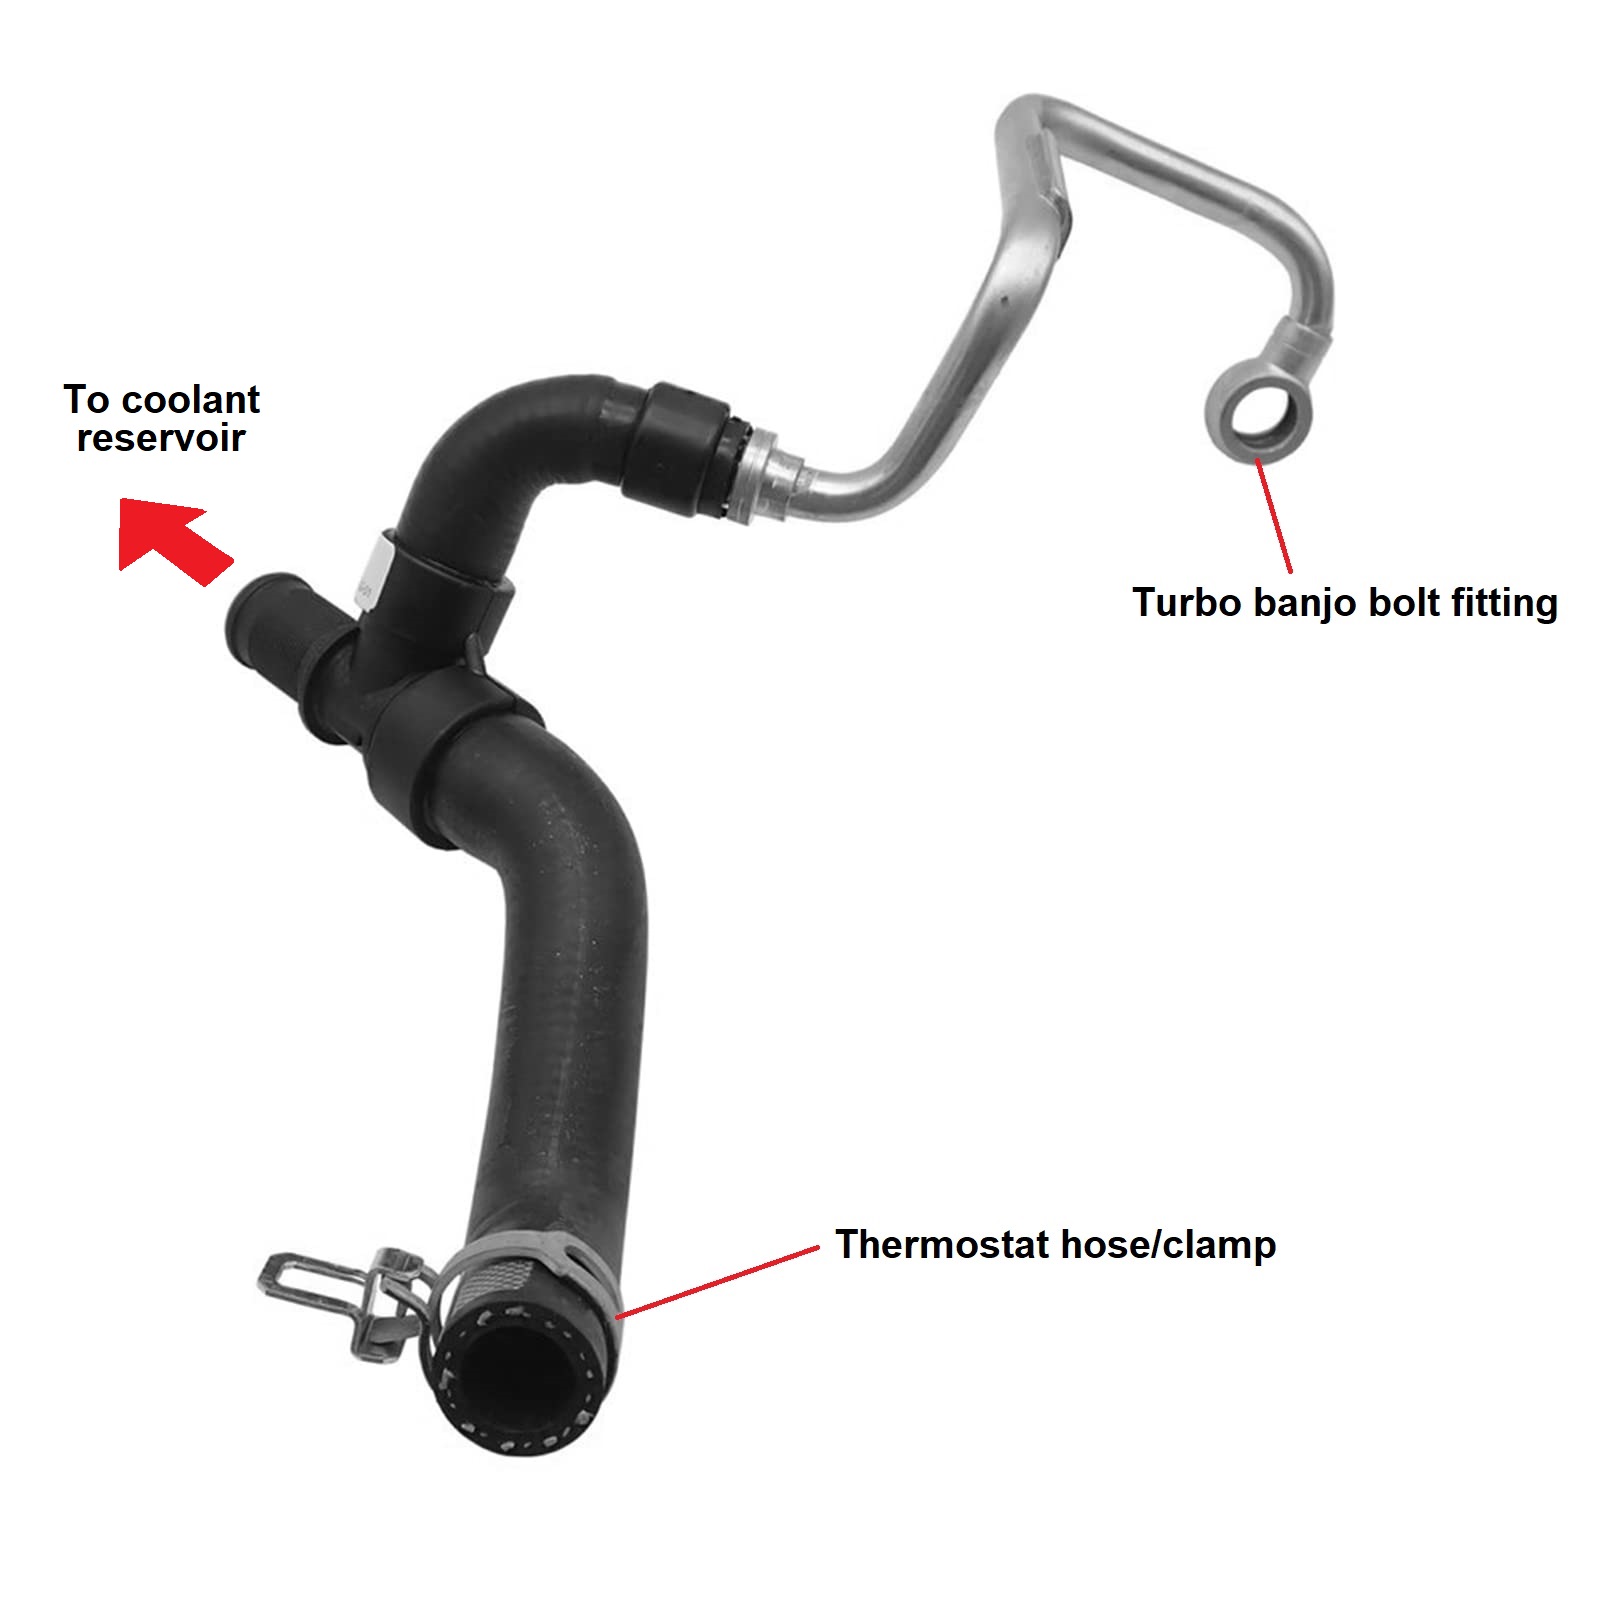
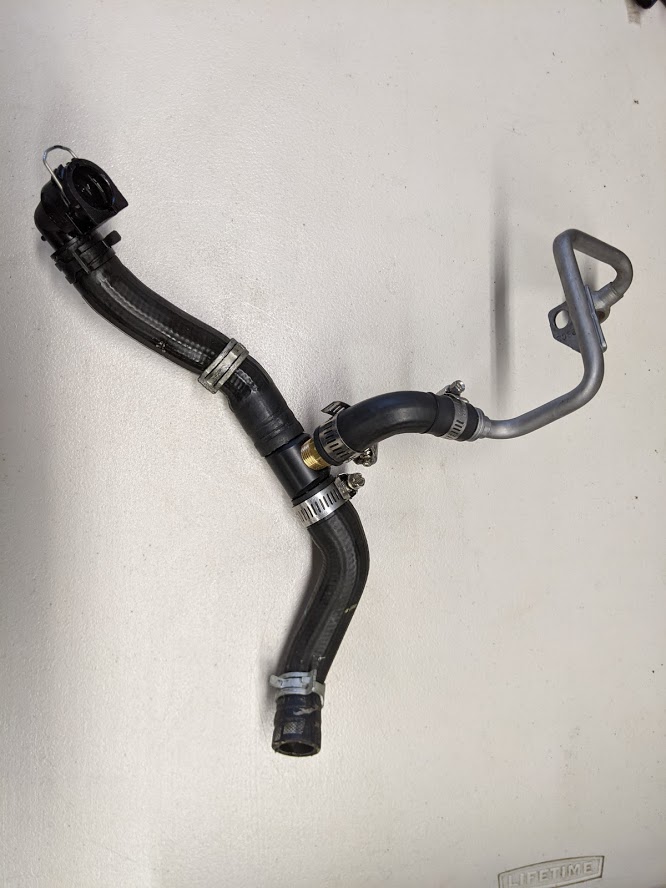
4. Follow the hose from the 'T' to the thermostat. Using pliers, loosen the hose clamp and slide it back along the hose. (You may have to do this by feel as it is difficult to see.) Pull the hose off the thermostat connection and try to collect the coolant that will spill. Remove the entire hose assembly from the engine compartment, then use some pliers to release the hose clamp affixing the coolant hose to the plastic 'T' and remove the hose.
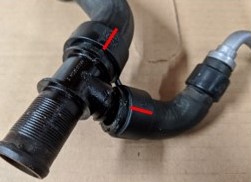
5. Carefully cut the plastic fittings that hold the remaining hoses to the plastic 'T' fitting on the original coolant tube assembly. (See red lines in the picture below.) You may use a Dremel tool with a cutting wheel, but be careful to not cut all the way through and damage the hoses. Stop before cutting all the way through then insert a screwdriver into the cut and twist it to break the last bit of plastic. Remove the hoses from the plastic 'T'.
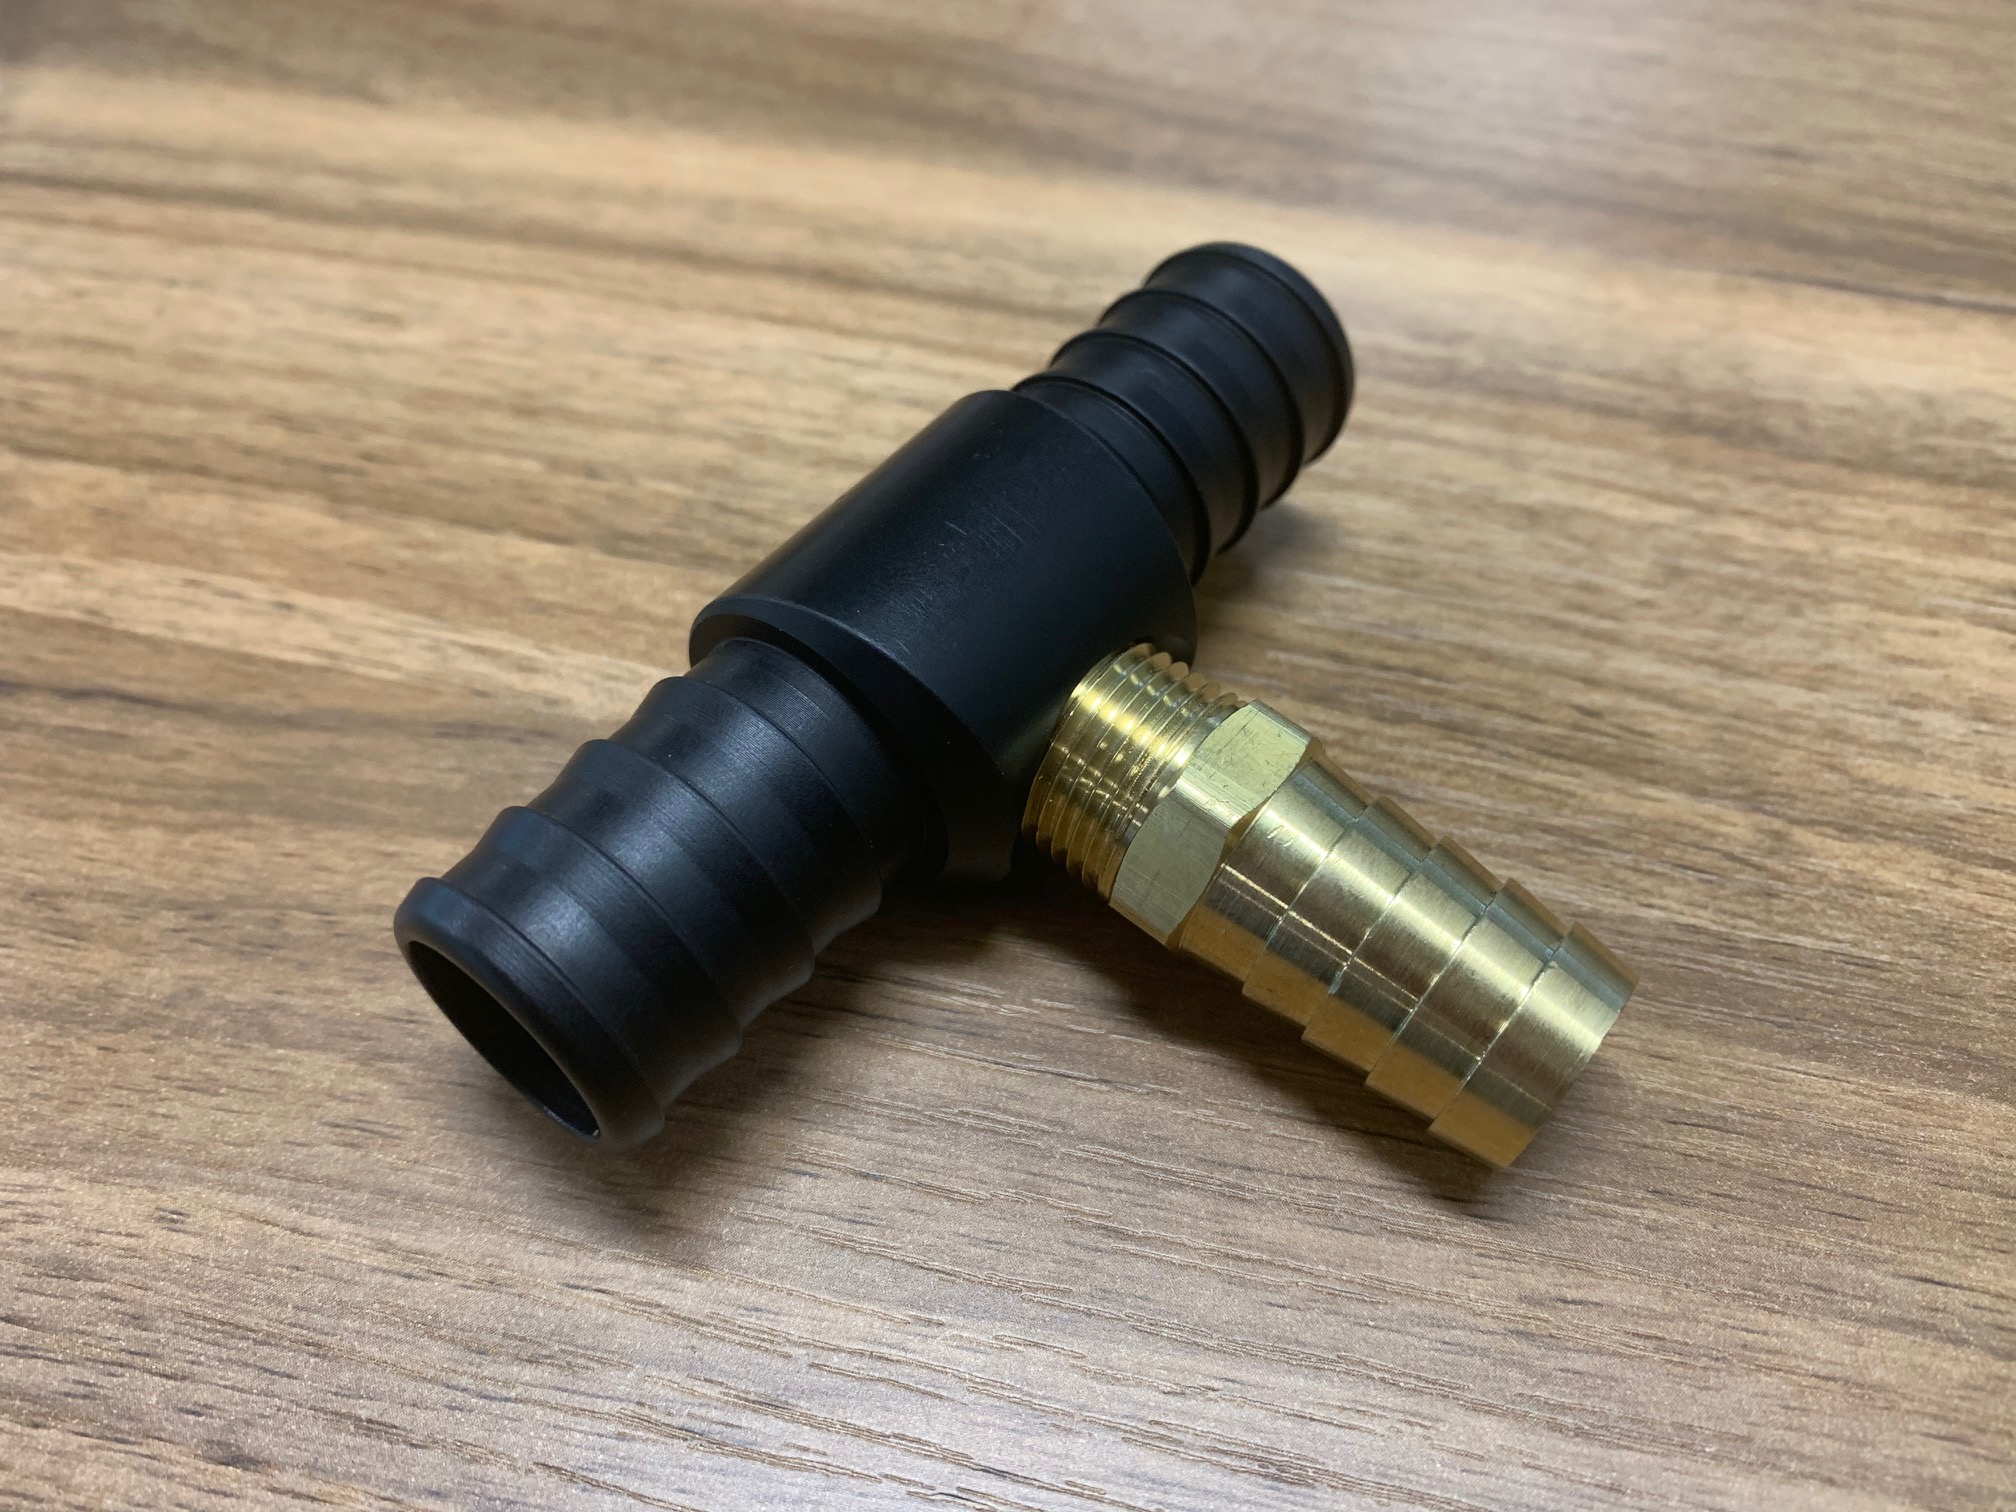
6. Screw the brass hose barb fitting provided in the kit into the aluminum pipe section to create the new 'T'. Use a small amount of high-temperature RTV to seal the threads and tighten with a wrench.
7. Transfer the hoses to the new metal 'T' fitting. You may re-use the hose clamp for the coolant reservoir hose if it's still good, then use the provided hose clamps for the other two ports. Leave the hose clamps loose for now to allow the hoses to rotate on the 'T' fitting while getting everything dialed in.
8. Install the complete cooling hose assembly, starting with the thermostat connection and then the turbo banjo fitting (using new crush washers). After adjusting the hoses so there are no twists or kinks, tighten the hose clamps.
9. Re-install the coolant reservoir and replace the lost coolant.
10. Re-install the intake hose, ensuring all connections are secure so you don't get any codes when you start the engine.
11. Start the engine and allow it to come up to temperature so the thermostat opens and the fan runs. Check for leaks and top up the coolant as necessary.
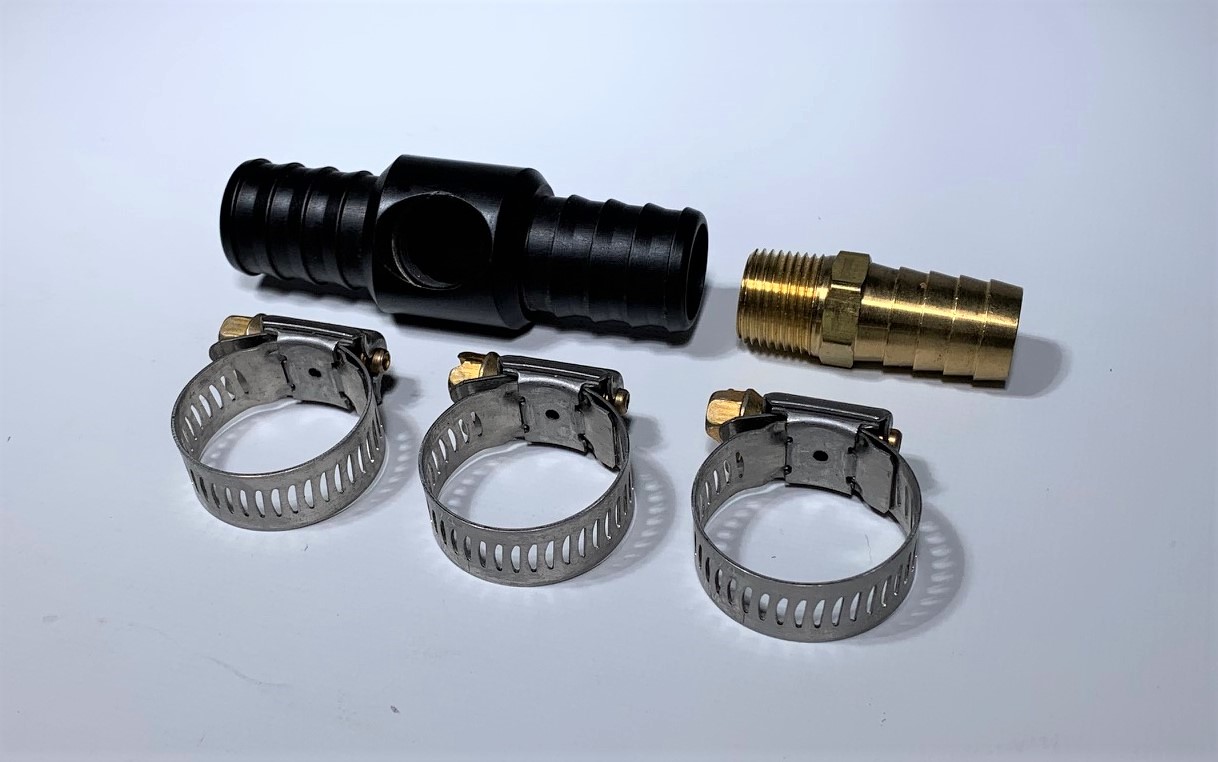
Parts Included:
Tools Required:
Procedure