THANK YOU
for purchasing the MINI Shift Well Cover - Gen 2 from CravenSpeed. This product is made from the highest grade materials, and is guaranteed to be free from defects.
You can buy our
CravenSpeed Shift Well Cover for MINI Gen 2 here
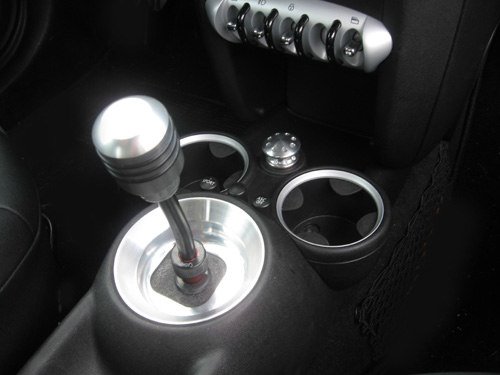
1. Remove shift knob from lever. Shift knob comes off by pulling straight up with a bit of force. To remove the Craven Speed shift knob, simply loosen the set screw and twist the knob off the lever.
2. Use a T27 Torx driver to remove the screws from the two front cup holders and place them somewhere safe for reinstallation later.
3. Use a T20 Torx driver to remove the screw from the rear cup holder and place with the front cup holder screws.
4. Carefully, use a flat-head screwdriver to separate the piece of the console that contains the handbrake boot from the main portion. Work from the back to the front as the front as the most secure clip.
5. Remove the silver top from the hand brake by prying with the flat-head screwdriver.
6. Use the flat-head screwdriver to open the clips on the bottom of the boot, allowing it to be removed.
7. With the boot removed, you will have access to the back clip underneath that holds the stock handle on.
8. Use the flat-head screwdriver to pry up the clip to release the plastic handle from the steel shaft and button.
9. Lift the back of the console to allow you to see the underside of the front cupholders.
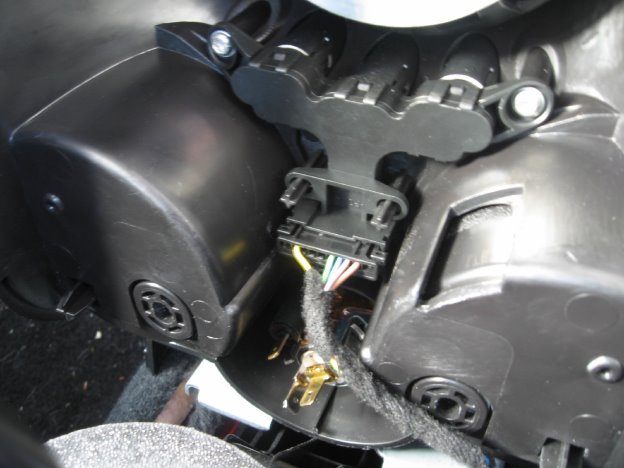
10. Remove the small plug for the lighter socket by pulling.
11. Remove the larger plug by depressing the two side clips and pulling.
12. Place detached console on a good working surface face down.
13. Use a flat-head screwdriver to release the clips that hold the shift boot onto the console.
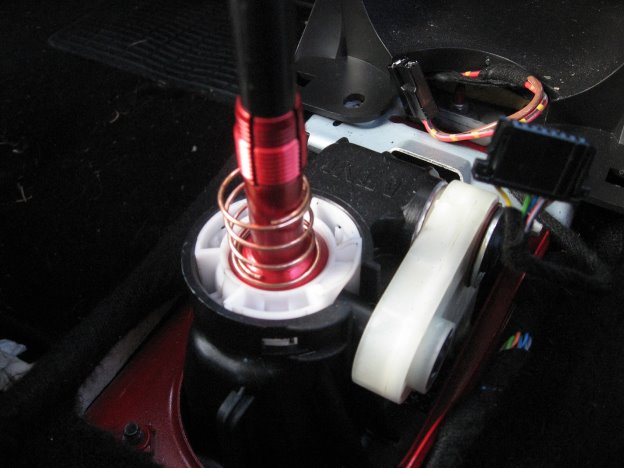
14. Remove the collet collar off of your CravenSpeed shifter. If you have the stock shifter, skip this step.
15. Slide the spring over the shifter shaft. Allow it to sit on the ball of the center pivot.
16. The grommet may be pre-installed into the dust plate. If not, do so at this time and slide the assembly over the shift lever and down onto the spring. You can choose either side you want to face up.
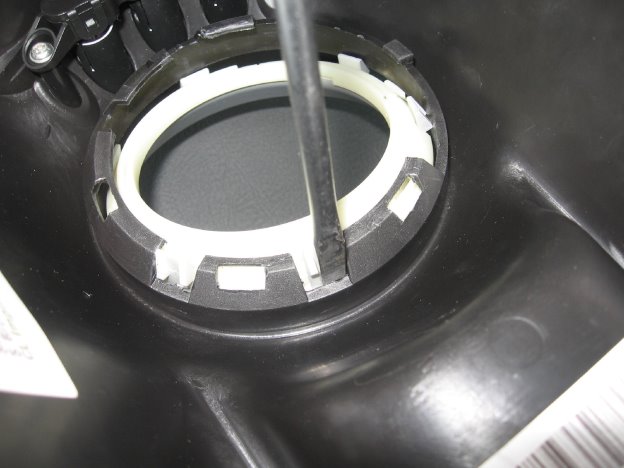
17. From the topside of the center console, align the two pins on the shift well cover at 12 o'clock, then press the cover down to snap it into place.
18. Put the console back into a position where you can re-attach the two plugs under the front cup holders.
19. Use a T27 Torx driver to re-attach the two front cup holder screws.
20. Use a T20 Torx driver to re-attach the rear cup holder screws.
21. Slide front of the e-brake console piece in before pressing the rest into place.
Parts Included:
Tools Required:
Procedure