THANK YOU
for purchasing the ND MX-5 Miata Short Throw Shifter from CravenSpeed. This product is made from the highest grade materials, and is guaranteed to be free from defects.
You can buy our
CravenSpeed Short Shifter for ND MX-5 Miata here
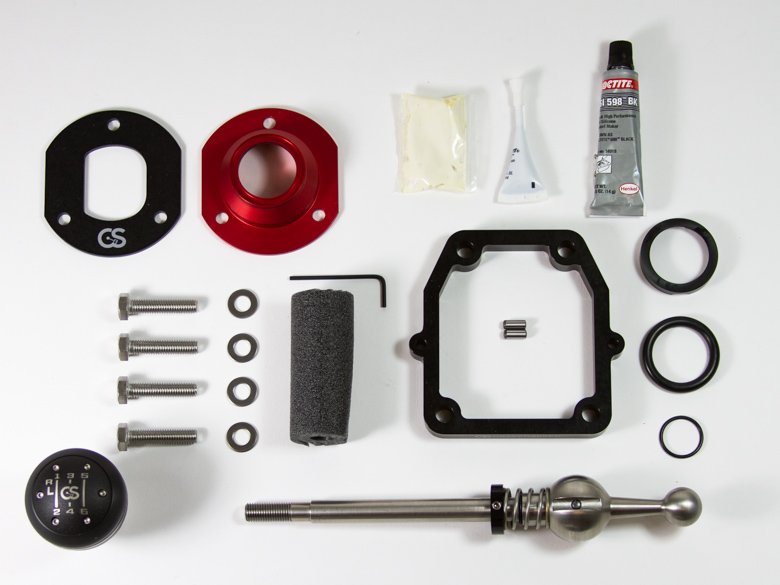
Parts Included:
-
1 x Short Shifter Sub-Assembly
-
1 x Reverse Lockout Plate
-
1 x Shift Retainer
-
1 x Housing Spacer
-
1 x O-ring, large
-
1 x O-ring, small
-
1 x Upper Pivot Cup
-
4x M8 x 35mm Flange Screws
-
3x M6 x 20mm Flange Screws
-
2 x M5 x 12mm Dowel Pins
-
1 x Short Length of Foam Tubing
-
1 x White PTFE Multipurpose Grease Packet
-
1 x RTV Transmission Sealant Tube
-
1 x Threadlocker Tube
Tools Required:
-
5/64" Allen Key (included)
-
Trim Panel Removal Tool (Flat-bladed Screwdriver may be used with care)
-
Philips Screwdriver
-
10mm, 12mm & 13mm Sockets
-
Ratchet Wrench w/ Extension
-
Lady Foot Pry Bar
NOTE:
This install may seem a bit intimidating at first glance, but honestly, it is fairly simple and straightforward. We recommend reading through the instructions entirely before you begin. If you are unsure of your mechanical abilities, please seek out a friend that can assist you or a professional shop that can complete this install for you. We recommend that you perform this upgrade when the vehicle is cool, as the transmission and related components can be extremely hot to the touch.
Removing the Center Console
-
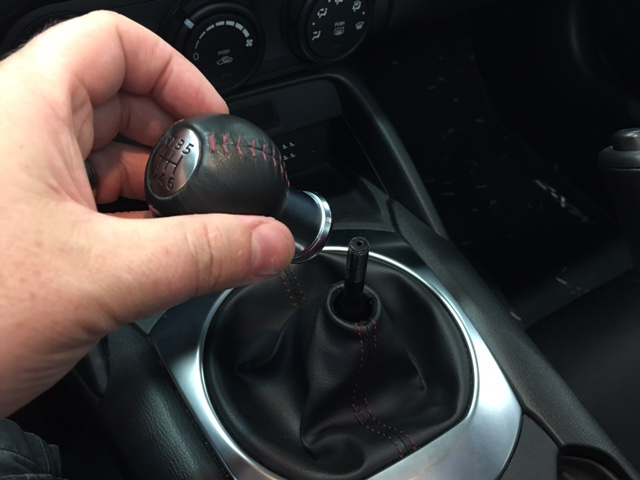
Sit down in the driver’s seat, engage the parking brake, and remove the OEM shift knob by unscrewing it counter-clockwise. It may be installed very tightly, but it does unscrew.

-
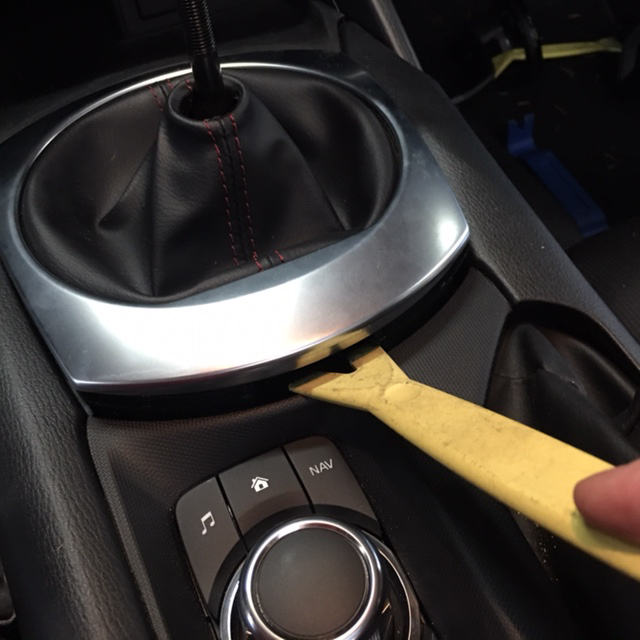
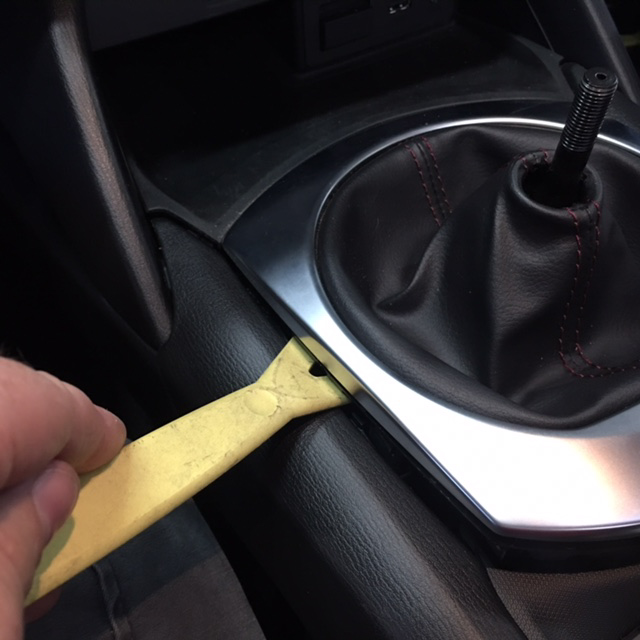
Utilizing a trim panel removal tool, pry around the shift boot bezel to release it from the center console. Lift it off of the shift lever and set aside. Slip the foam collar up and off as well.
-
Remove the two Phillips screws affixing the thin bridge section of the center console, just forward of the shift lever.
-
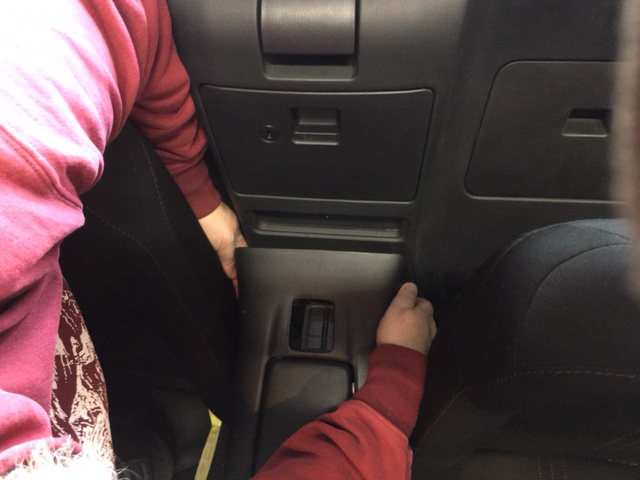
Turn around and grasp both sides of the center console towards the back where it meets the back panel of the interior. Tug upwards until the rear side clips release. Do not pull upwards too high, just enough for the rear clips to release. Use caution as the clips can be fragile.
-
Sit back down in the driver’s seat and release the two clips at the front of the center console where it meets the dash. There is one clip on either side, just carefully pull up.
-
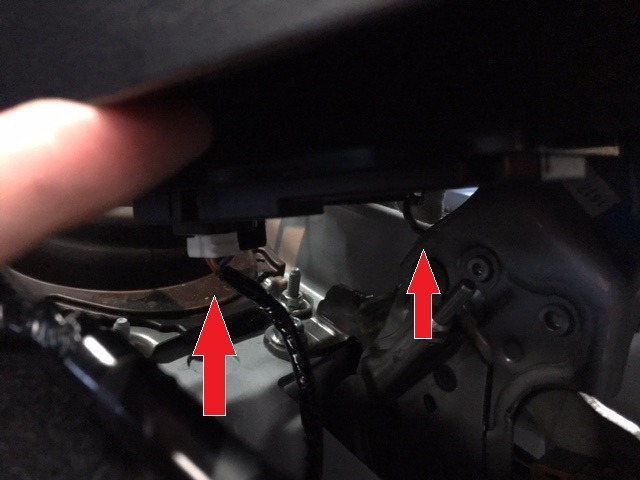
With all the center console clips released, reach underneath of the center console and disconnect the infotainment dial wiring. There is a small clip/lock on the front side of the plug that needs to be depressed before it will disconnect downwards. The last step before completely removing the center console is to reach in again and disconnect the parking brake boot from the metal arm assembly. There is a tab on the boot that is slipped through a hook attached to the parking brake arm. Pull the tab down and slip it off of the hook.
-
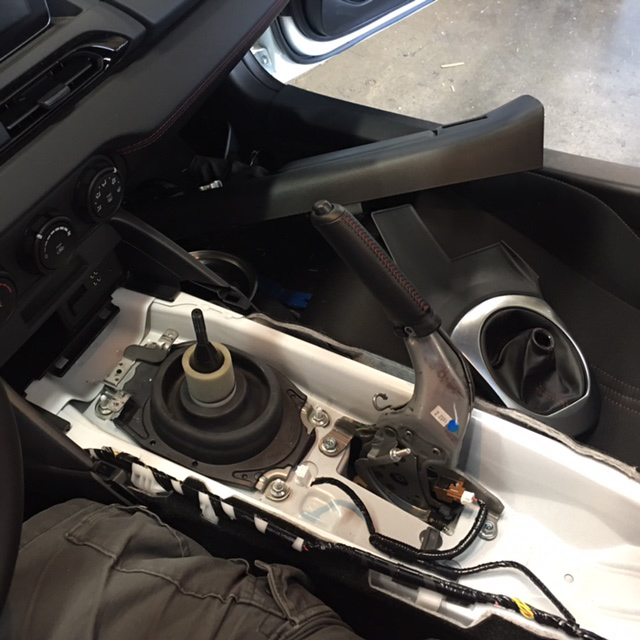
You can now tilt the rear half of the center console up and towards the dash. Be mindful of the two fragile front clips of the center console. Make sure they don't fall back into place while you’re tilting the center console up and off.
Removing the factory shifter assembly
-
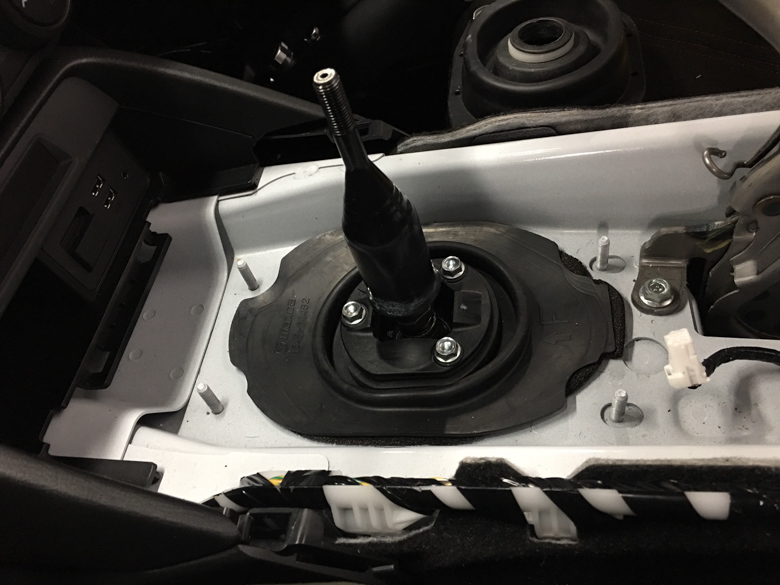
Using the 10mm socket and wrench, remove the (4) 10mm nuts that hold down the metal structure of the rubber shift lever boot. A deep well socket and extension may come in handy here. Remove the rubber shift lever boot by slipping it up and off of the shift lever. A little WD-40 sprayed around the lever will allow it to slide up and off without much effort.
-
Underneath the rubber shift lever boot you will find a flat rubber seal that surrounds the shifter housing and is adhered to the transmission tunnel of the body. Peel this seal off and set aside.
-
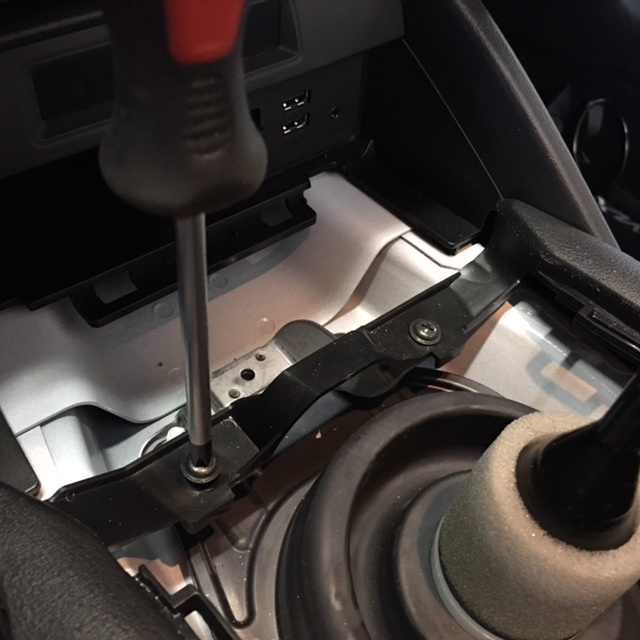
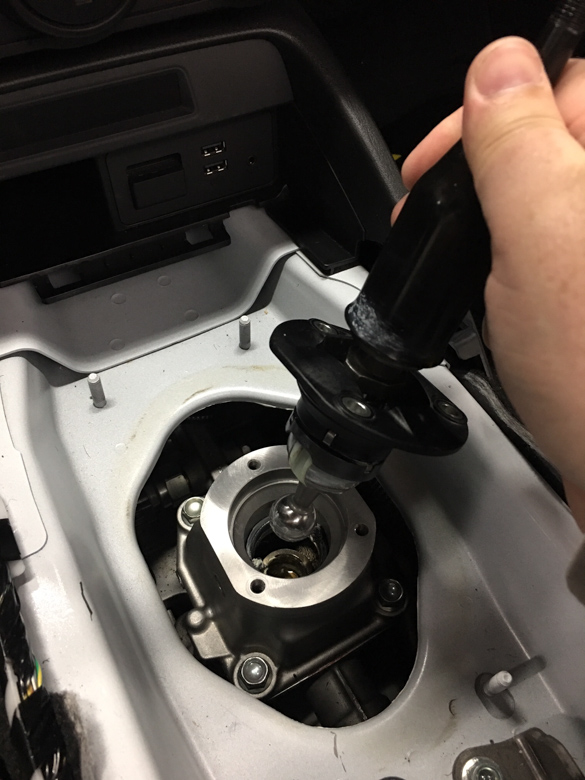
Remove the (3) 10mm screws on top of the shifter housing that hold the shift lever assembly into place. You will not be reusing these 3 screws, so label them and place them in your parts bin. Pull the shift lever assembly up and out of the shifter housing. Wipe off the pivot balls and set the assembly aside. You will not be reusing this factory assembly, so add it to your parts bin as well.
Pro Tip from
Miata.net
:
From this point forward it’s a good idea to use a
magnet
attached to a piece of string attached to avoid dropping any hardware into the transmission.
-
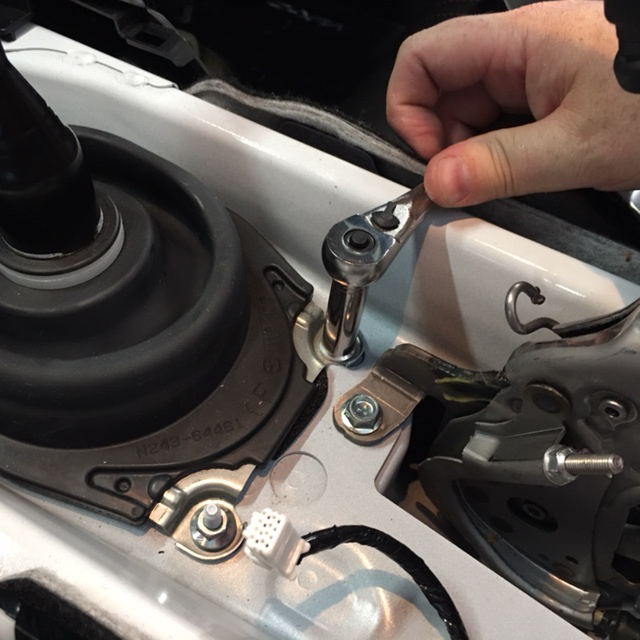
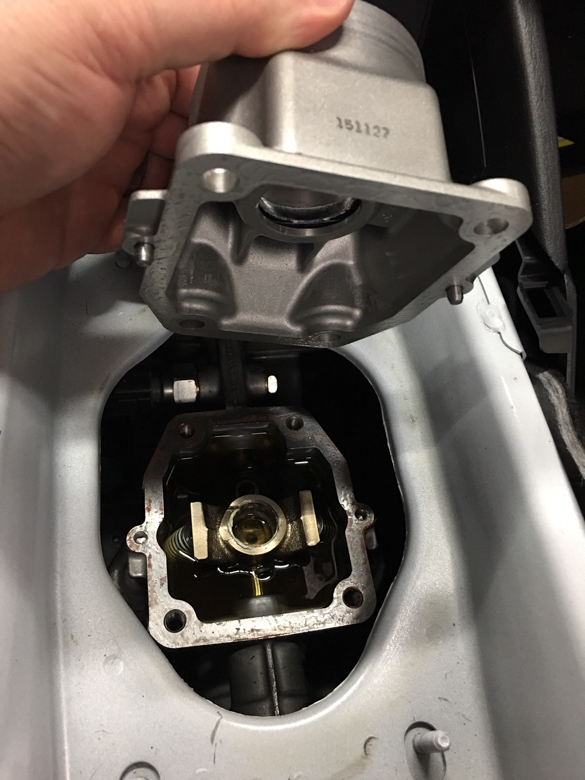
Remove the (4) 12mm screws around the perimeter of the shift housing. The shift housing is also affixed to the transmission via RTV sealant, so it will not just pop right off. There is a ‘tab’ casted into the front edge of the housing that you’ll need to pry up with a tool of your choosing. We utilized a small pry bar (lady foot), but you may be able to 'jimmy' a small screwdriver in there and complete the task.
-
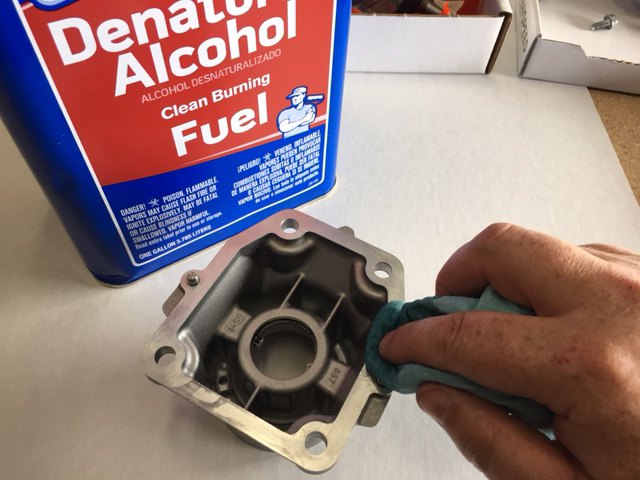
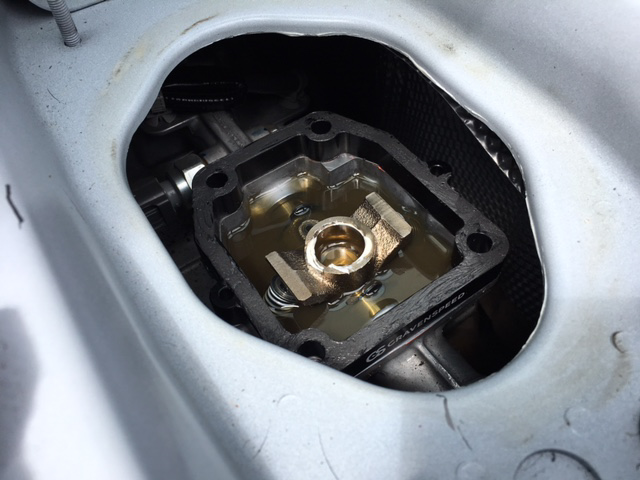
Once the shift housing is removed, clean up the mating surfaces of both the transmission and the shifter housing to prepare for the installation of the CravenSpeed Short Shift Kit. We used a utility knife blade to scrape the remaining RTV and then some denatured alcohol to clean the surfaces. Alternatively, you may also use some brake cleaner, but be mindful about not getting any of it into the transmission and contaminating the transmission fluid.
Installing the CS Short Shifter Assembly
-
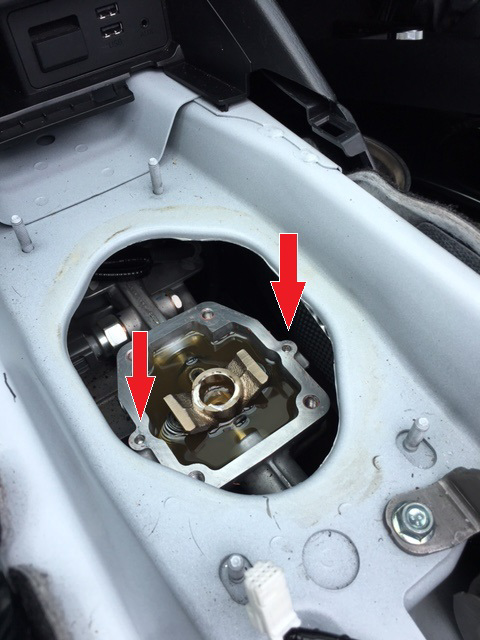
Insert the two (2) M5 x 12mm dowel pins into the holes on either side of the transmission housing.
NOTE:
Use caution when installing the pins so that you do not drop one into the transmission.
-
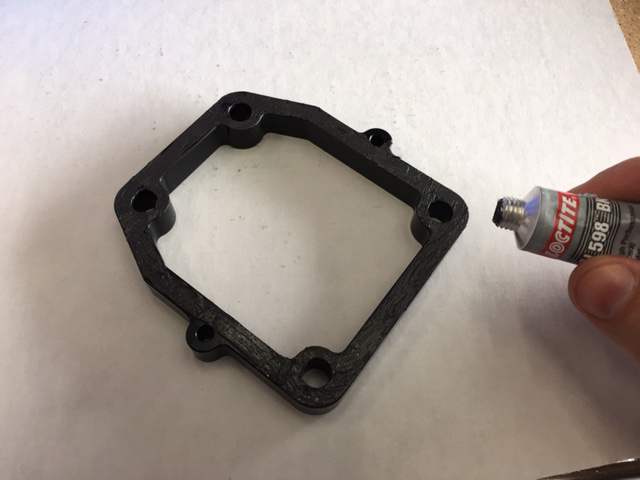
Before installing the black anodized shift housing spacer, take a moment to test-fit it into place along with the shifter housing and two (2) provided 5M x 12mm pins prior to applying the RTV sealant. If the dowel pins and holes do not line up perfectly you may drill out the spacer's holes ever so slightly until you get a drop-in fit. After you have confirmed fitment, take the housing spacer and apply a thin film of the included RTV Transmission Sealant to both mating surfaces (top and bottom). Apply it sparingly as you do not want any excess sealant squishing out and getting into the transmission.
-
Place the shift housing spacer onto the transmission, indexing it with the dowel pins you just installed.
-
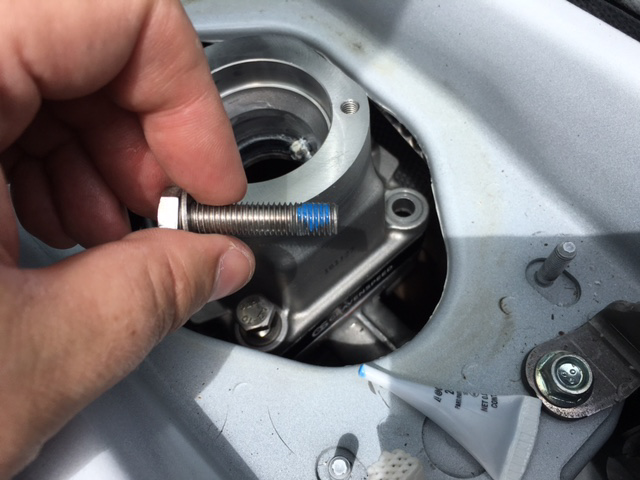
Next, set the shift housing back into place on top of the spacer making sure the dowel pins in the housing spacer index with the small holes on the spacer. Add a small drop of threadlocker to the end of the threads of the the four (4) M8 x 35mm flange head screws, insert them into the four corners of the shift housing spacer, and tighten onto the transmission housing with your 13mm socket and wrench. NOTE: The kit contents image shows separate screws and washers, but we have upgraded the kit with flange-head screws.
-
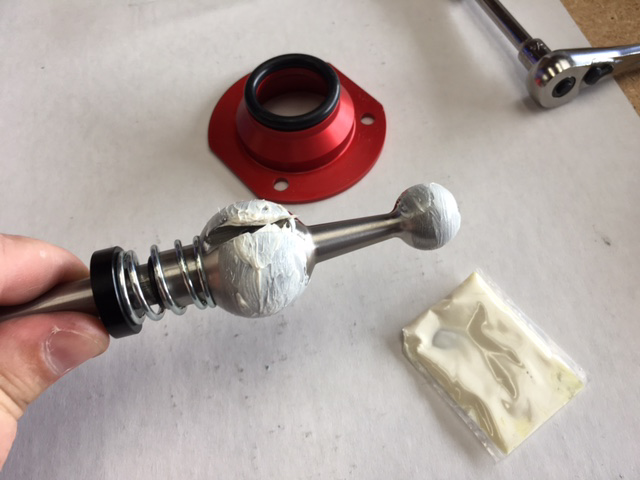
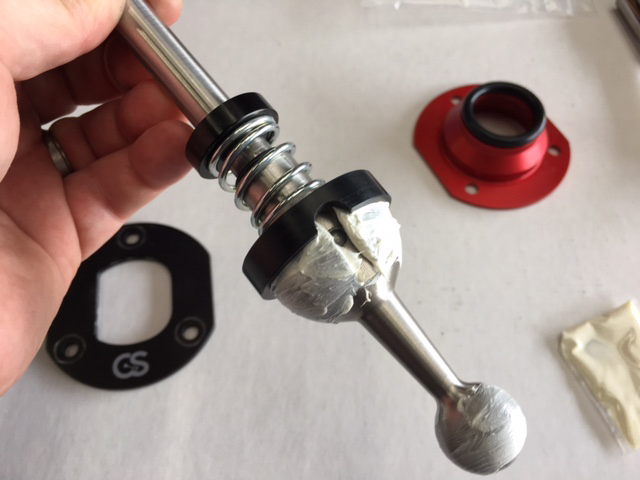
Take the Short Shifter Sub-Assembly and apply a film of White PTFE Multipurpose Grease to the lower and main pivot sections. NOTE: The grease included with your kit may look slightly different from the packet in the images.
-
Place the Upper Pivot Cup over the shaft section and down onto the main pivot. Orient the half-circle cut outs so they line up with the slots in the main pivot.
-
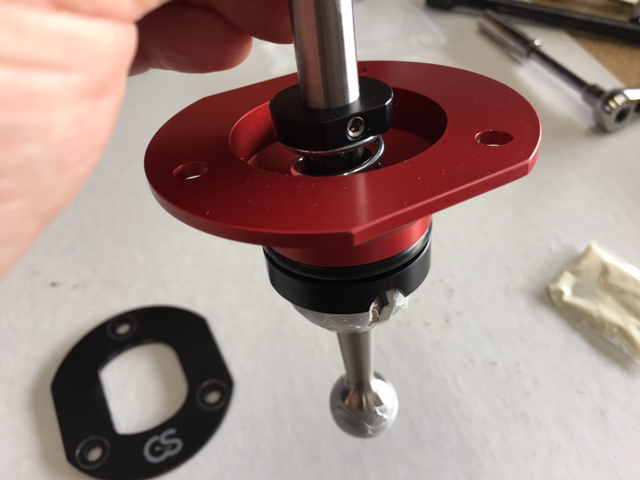
Set the Large O-Ring over the shift shaft and down onto the flat side of the Upper Pivot Cup. Next, place the red anodized Shift Retainer on top of the Large O-Ring so that it’s groove captures the o-ring.
-
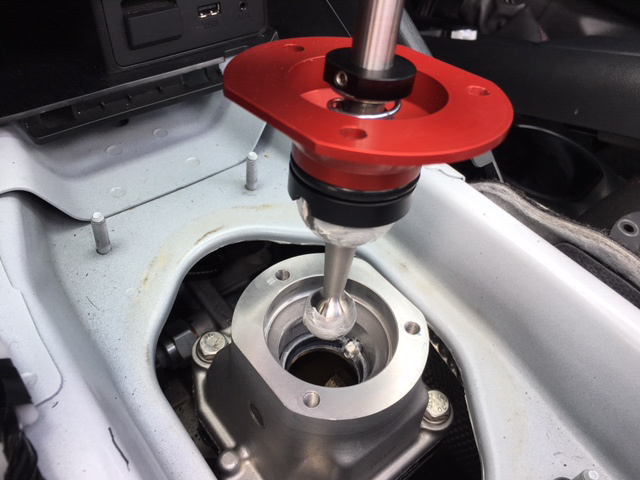
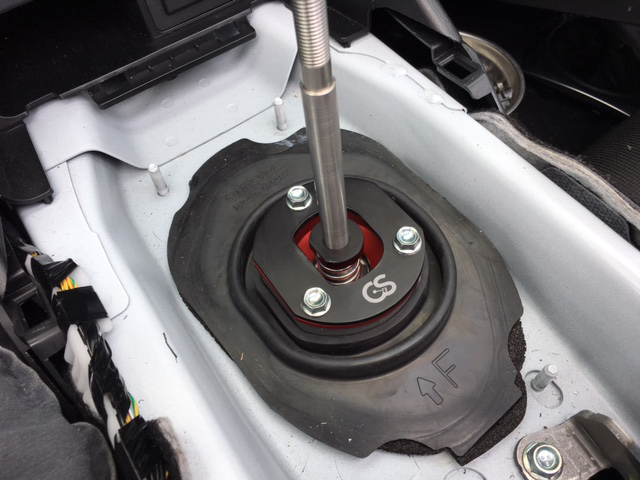
Insert the Sub-Assembly into the shift housing being careful to line up the slots of the main pivot with the internal locating pins of the shift housing. Also, you’ll need to orient the Sub-Assembly so that the flat side of the spring collar is facing the driver’s side of the vehicle.
-
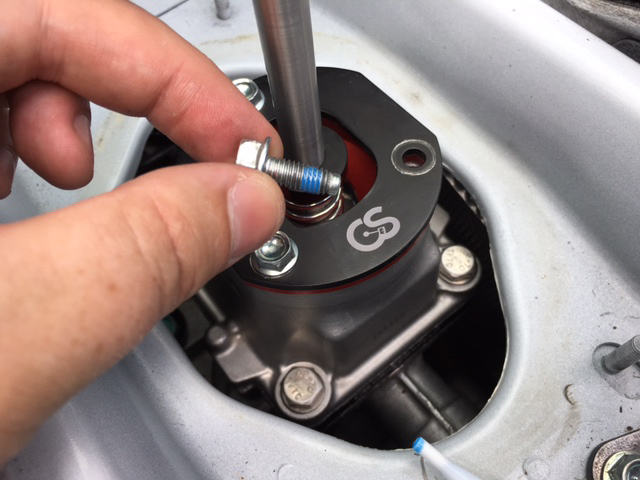
Line up the three holes with the holes on the top of the shift housing. Place the black nylon Reverse Lockout Plate over the Sub-Assembly so that the three holes line up with the Shift Retainer and the shifter housing. Add a small drop of threadlocker to the three (3) 6M x 20mm flange-head screws and install them into the shift housing affixing all components.
-
Place the flat rubber seal back onto the top of the transmission tunnel.
-
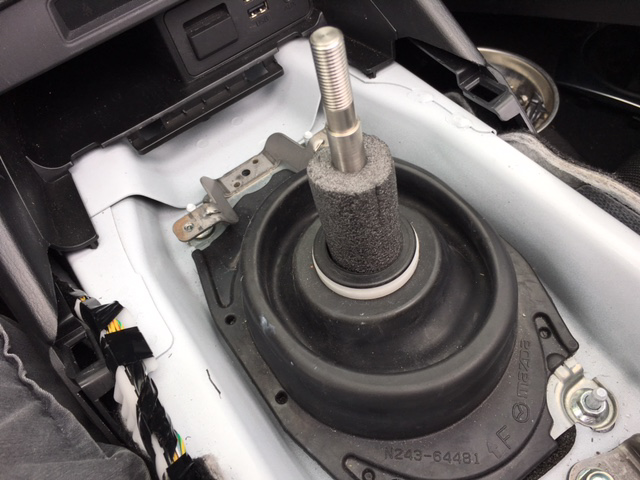
Set the shift lever boot/metal frame back onto the transmission tunnel studs and replace the (4) 10mm nuts.

-
Install the Short Length of Foam Tubing over the shift lever, through the rubber boot, and coming to rest on top of the spring collar.
-
Replace the center console making sure you reconnect both the parking brake boot and the infotainment wiring plug on the underside. Set it into place and press down around the perimeter until you hear the clips engage. Re-install the (2) Phillips screws across the thin plastic bridge.
-
Install the Shift Knob. For this step we've created a separate installation guide
HERE
.
Installing the Shift Knob
-
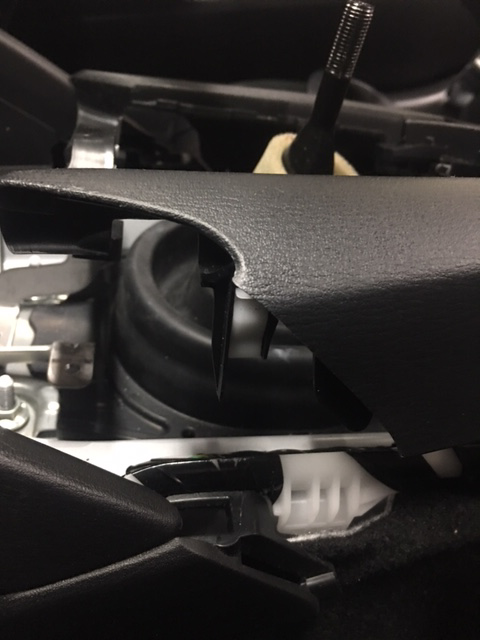
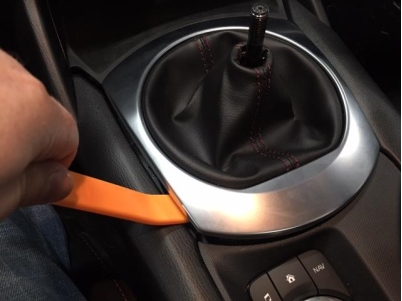
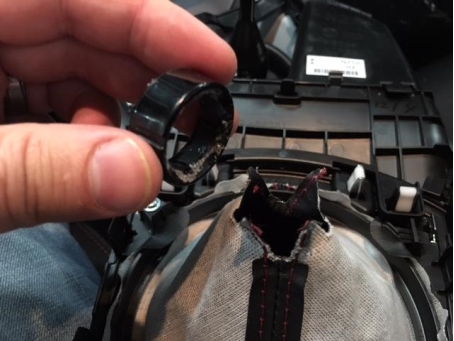
Remove the silver trim ring using a plastic trim panel tool.
-
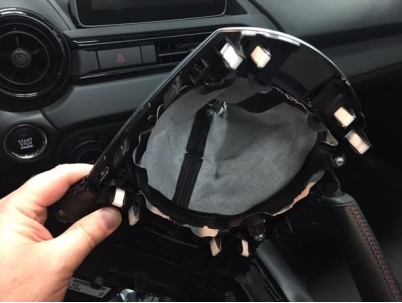
Flip the Shifter Trim Surround over and push the boot inside out so you can access the plastic ring glued to the end of the shift boot. Peel the triangle ends of the boot off the plastic ring.
-
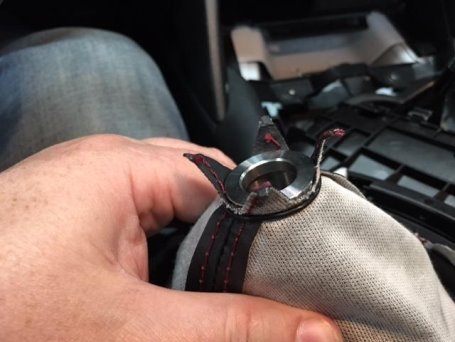
Place the Stainless Steel Core piece up through the inverted shift boot and utilizing the included o-ring, capture the tabs of the shift boot within the groove of the Stainless Steel Core piece.
-
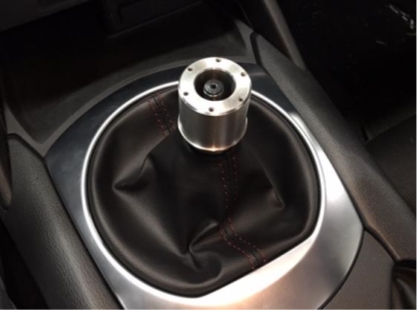
Flip the assembly over and place the Stainless Steel Core piece onto the shifter shaft. Insert the front tabs of the Shifter Trim Surround back onto the center console and then ensure all remaining tabs snap in and engage completely.
-
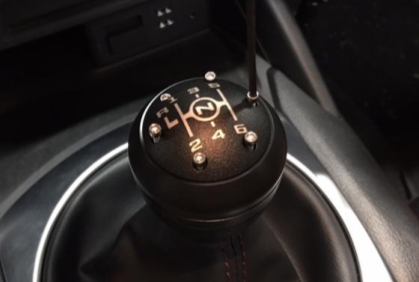
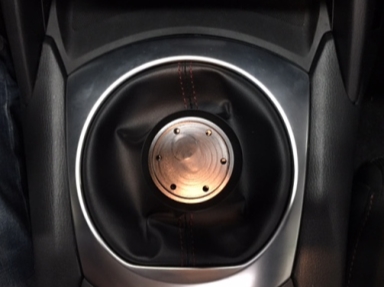
Place the acetal Knob Body over the Stainless Steel Core piece and begin threading it onto the shift rod and tighten until snug. You’ll want the hole pattern on the top of the Delrin Knob Body to mirror the orientation of the image below.
-
Align the holes of the inner Stainless Steel Core to the holes of the Delrin Knob Body and set the Knob Cap into place. Place each of the 6 Cap Head Screws into the Knob Cap and tighten with the included Hex Key. You’re done!