THANK YOU
for purchasing the Volkswagen Shift Knob by CravenSpeed. This product is made from the highest grade materials, and is guaranteed to be free from defects.
You can buy our
CravenSpeed Shift Knob for Volkswagen here
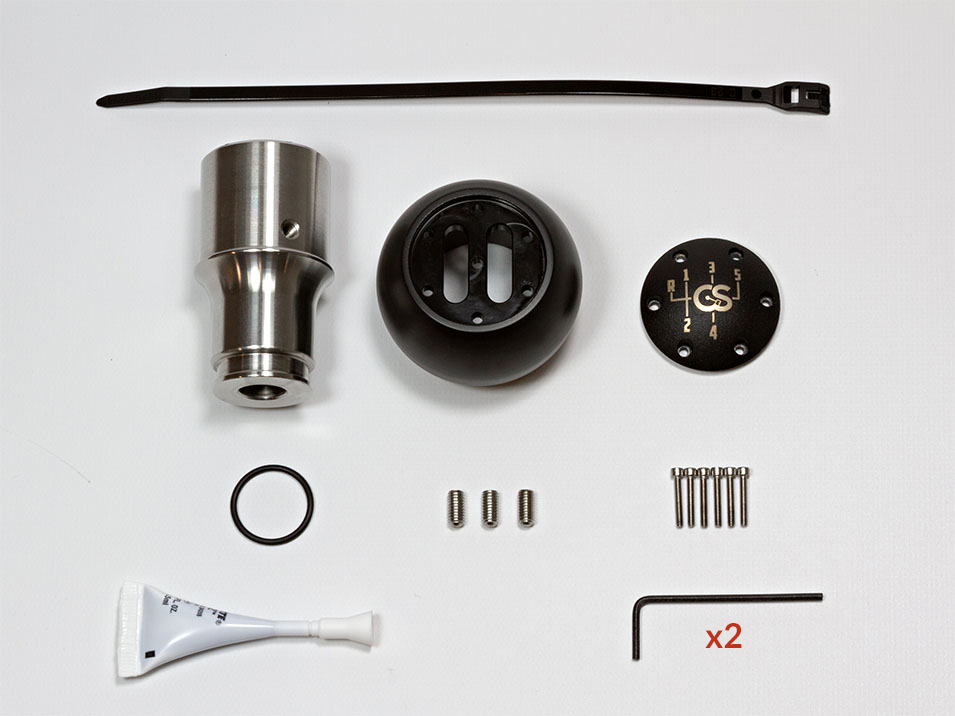
Parts Included:
-
1 x Stainless Steel Shift Knob Core
-
1 x Black Acetal Shift Knob Body
-
1 x Powder Coated & Laser Engraved Knob Cap
-
1 x O-Ring
-
6 x Stainless Steel 2-56 Socket Head Cap Screws
-
3 x Stainless Steel 10-32 Set Screws
Tools Required:
-
Trim Panel Removal Tool
-
Flat Head Screwdriver
-
3/32 Allen Key (included)
-
5/64 Allen Key (included)
-
Loctite (included)
NOTE:
The installation of this shift knob is very simple, but we always recommend reading through the entire instructions before you begin. It's good to have an understanding the the whole process while performing any installation.
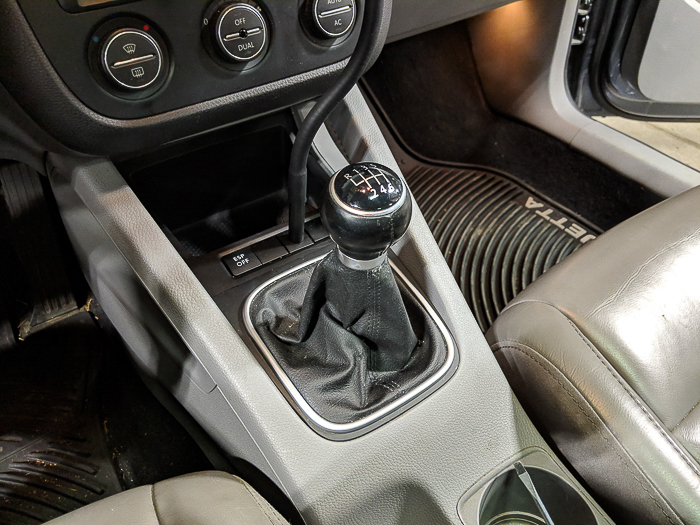
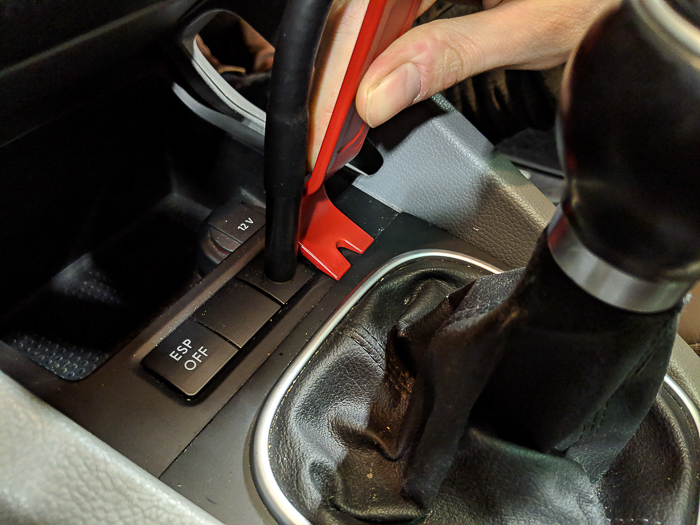
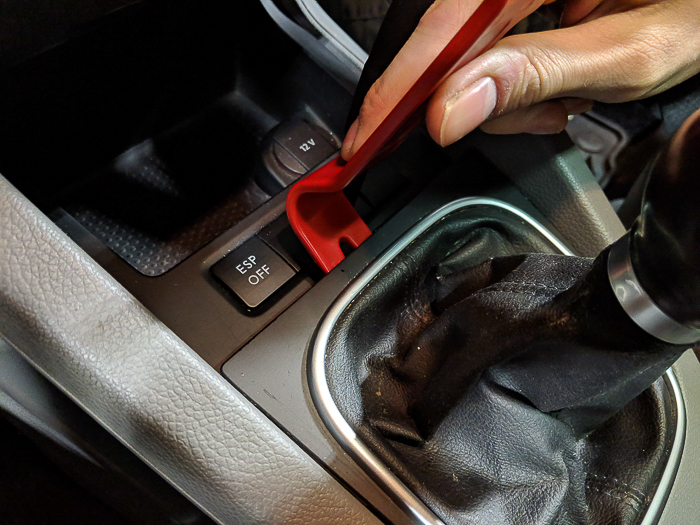
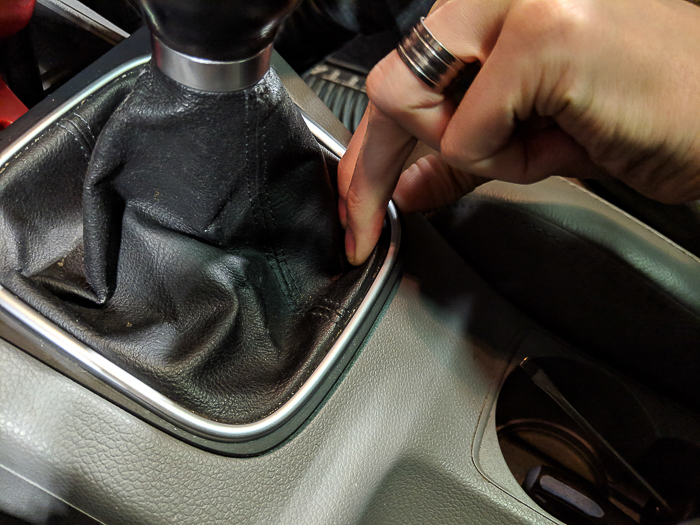
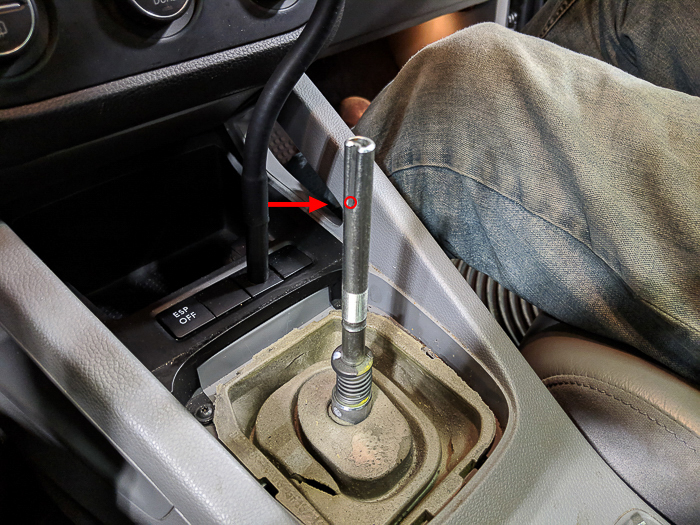
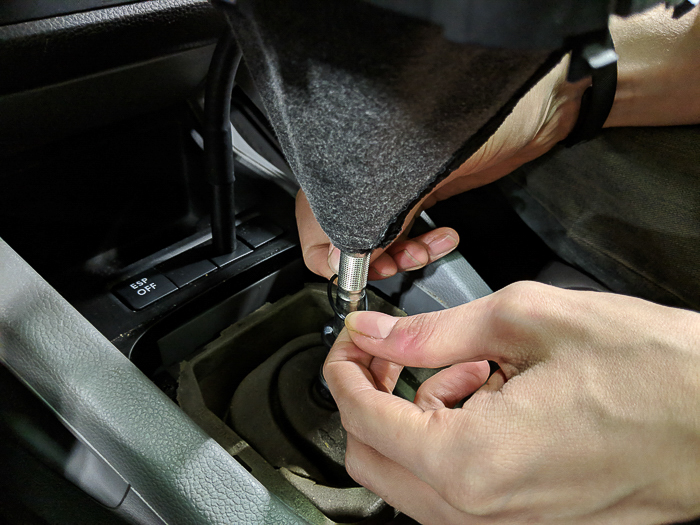
Removing the Shift Boot
-
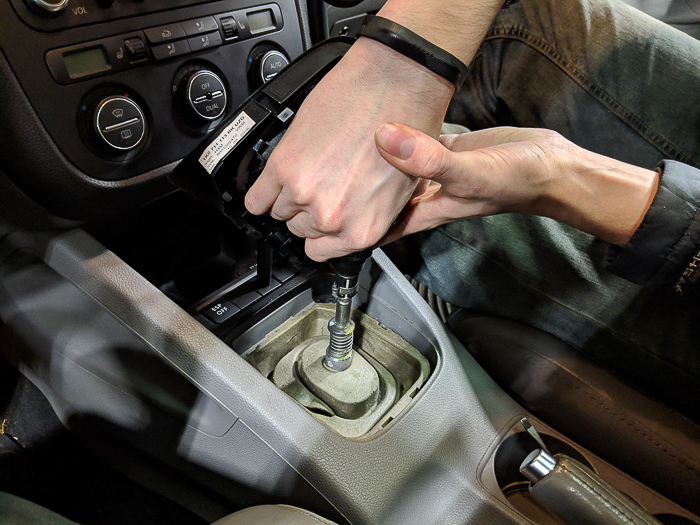
First up, we need to pop the trim piece that the bottom of the boot is attached to out of the center console. Start by prying up the trim with the trim panel tool. Work your way around the perimeter of the piece. Eventually you will be able to simply reach under the lip of the piece on the boot side and just pull it straight out.
-
Once it's out lift it all the way up and over the shift knob
-
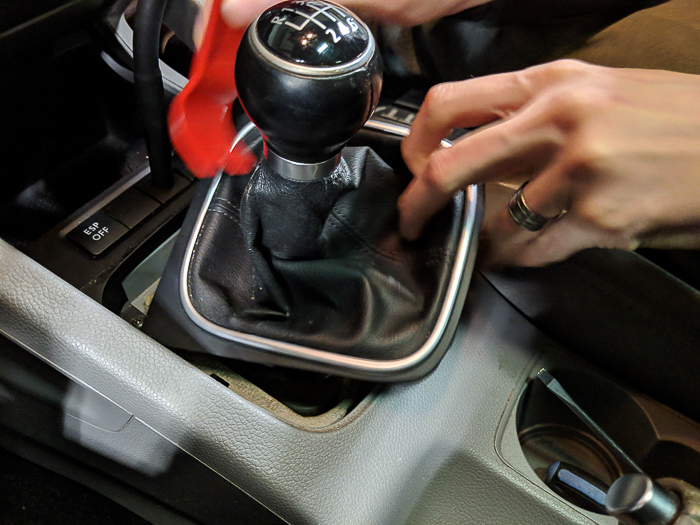
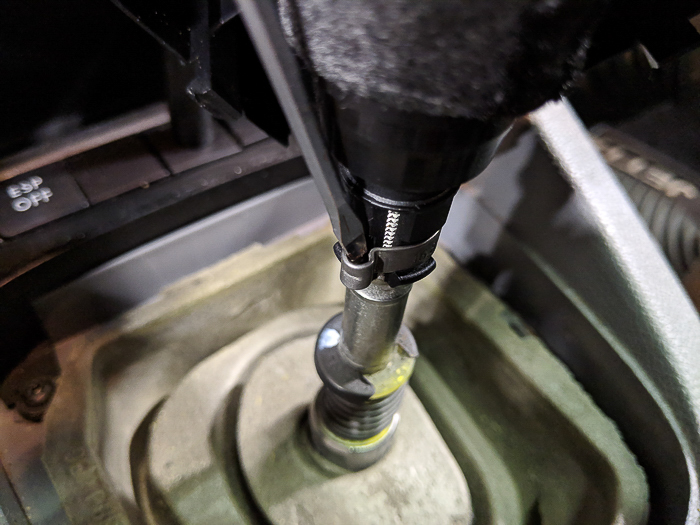
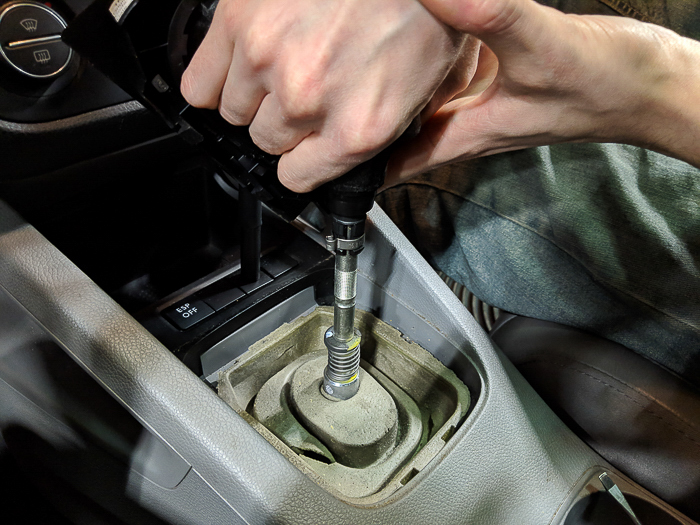
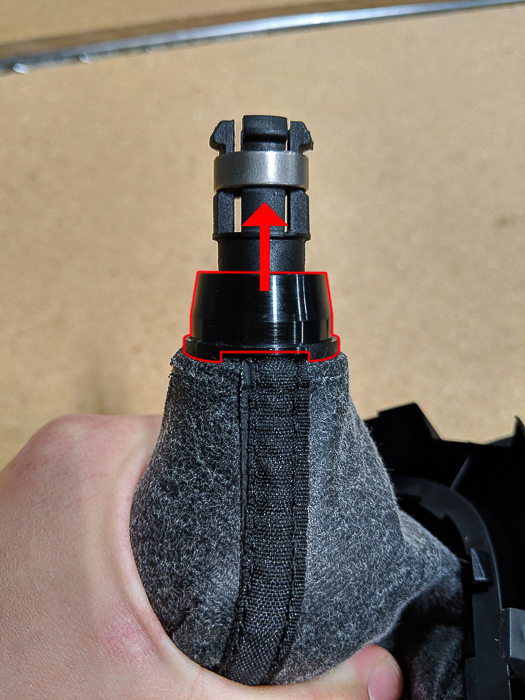
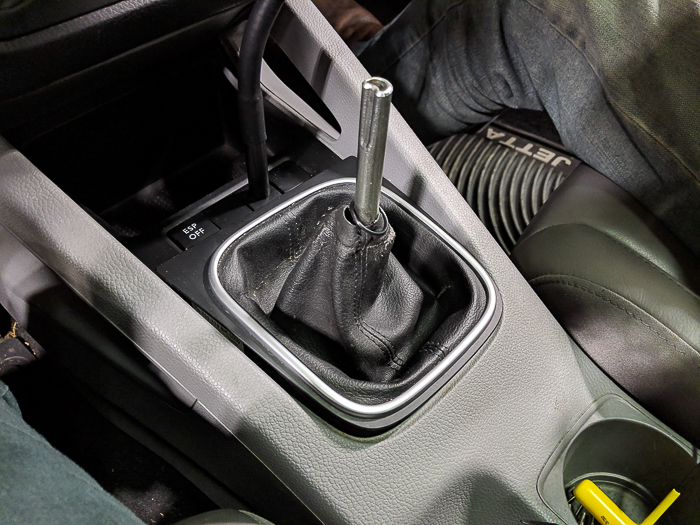
Next we need to loosen the steel ring that clamps the shift knob onto the shifter.
-
To do so, simply insert a flat head screwdriver into the loop and twist it to open up the clamp.
-
With the clamping ring loose, you can now pull the shift knob up and off of the shifter.

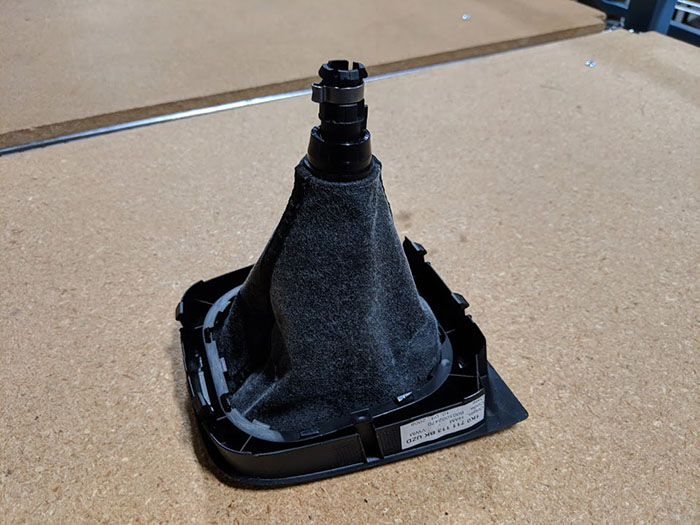
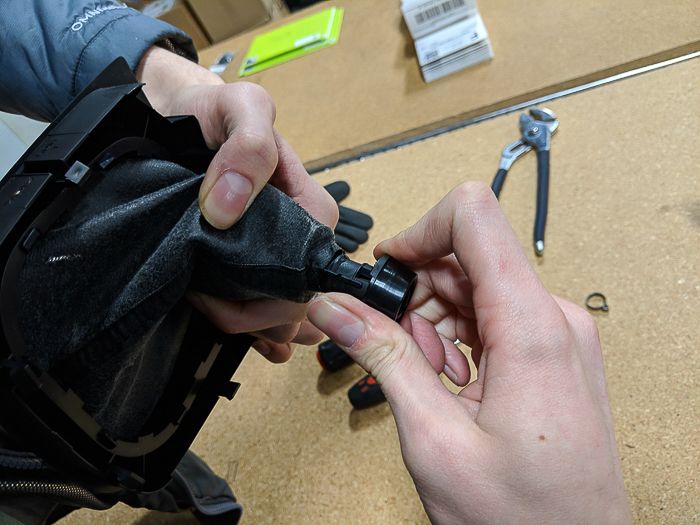
Detaching the boot from the stock knob
-
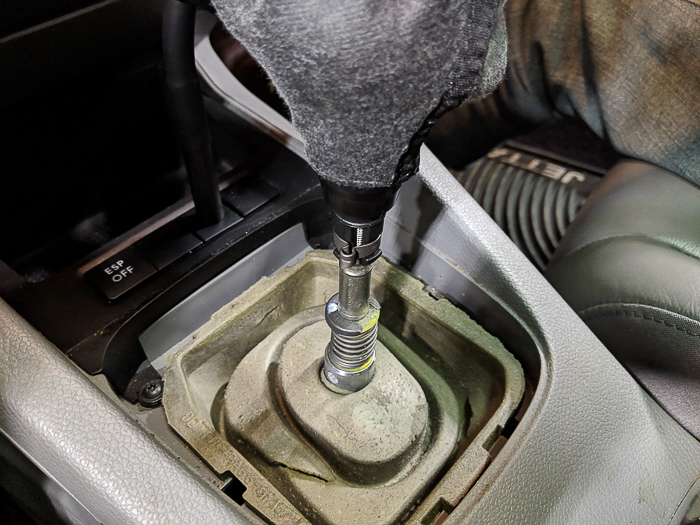
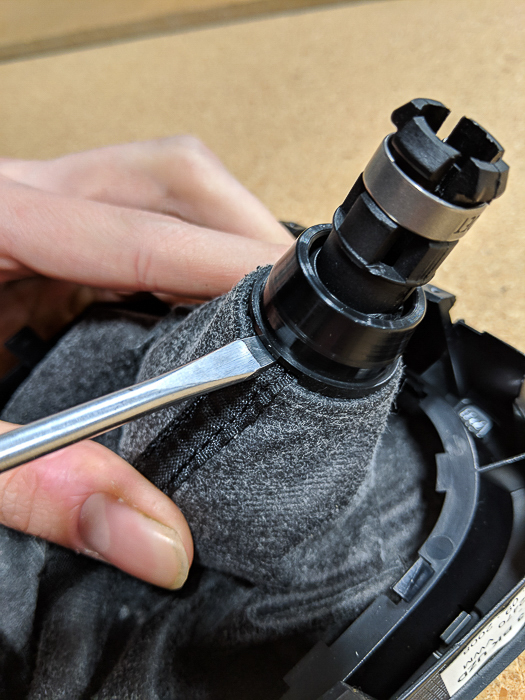
Bring the boot and shift knob to a nice work surface.
-
First you can remove the steel ring from the knob assembly. To do so, squeeze the tabs on the end of the knob and slide the ring down and off the end.
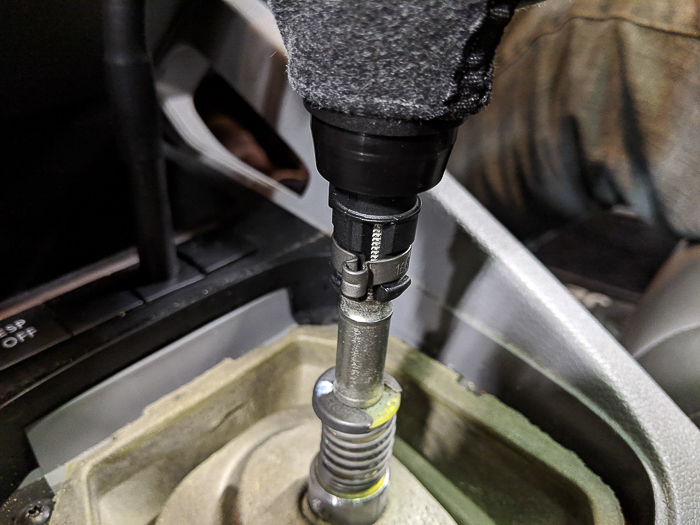
NOTE:
In the next few photos you will notice that the ring is still on. We got a little excited, but this next step will be easier with the steel ring off.
-
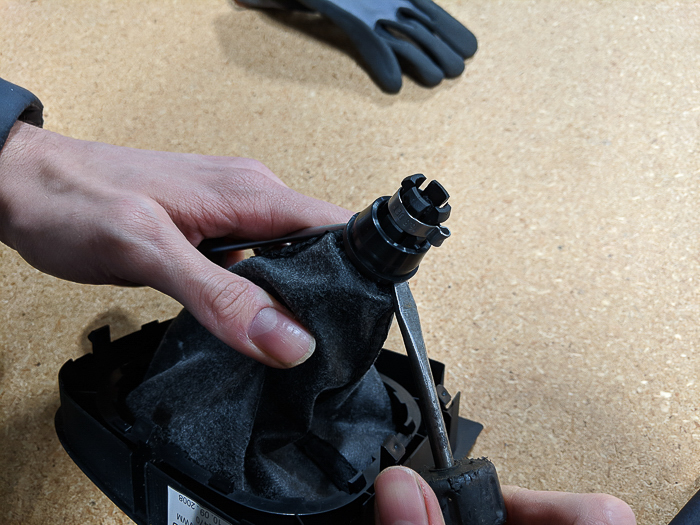
We need to separate the plastic ring from the rest of the knob.
-
It's job is to secure the leather boot to the knob. It's on pretty tight, but with patience, persistence, and perhaps a few choice words, it will come off. The method we chose will allow you to reuse the knob down the road. We used a couple flat head screwdrivers and worked our way around the ring, carefully prying up as we went, starting in the two slots on either side. Eventually we were able to just grab it by hand and pull it off. If you aren't concerned with maintaining the ability to reuse the stock knob, you can use more destructive methods.
-
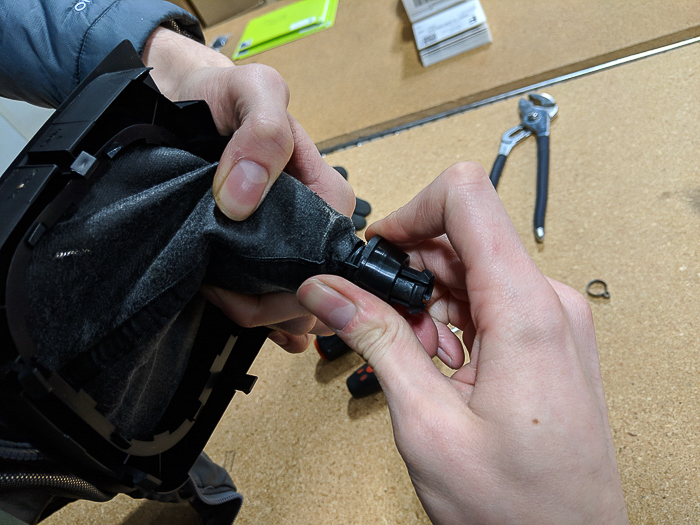
With the ring off, you can now separate the boot from the shift knob, and you're ready to install your new knob!
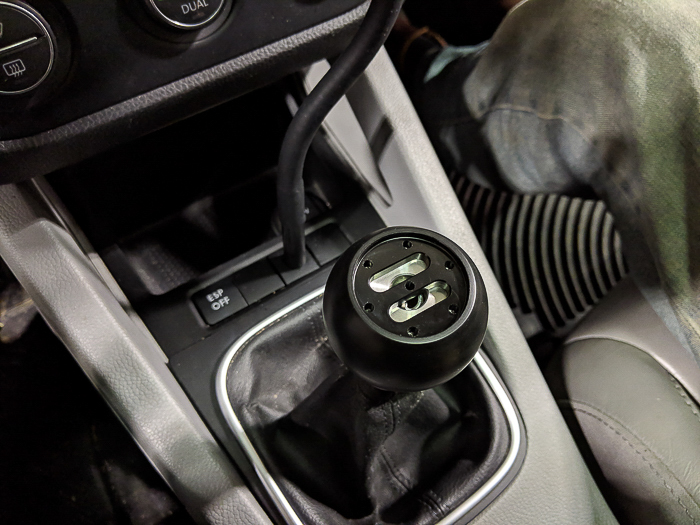
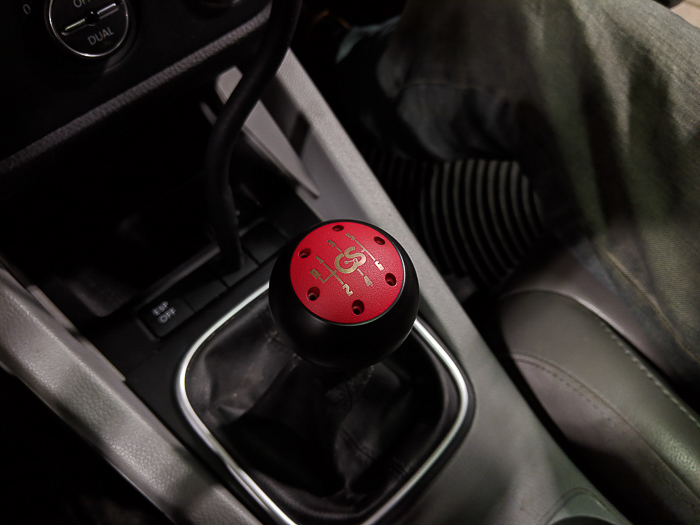
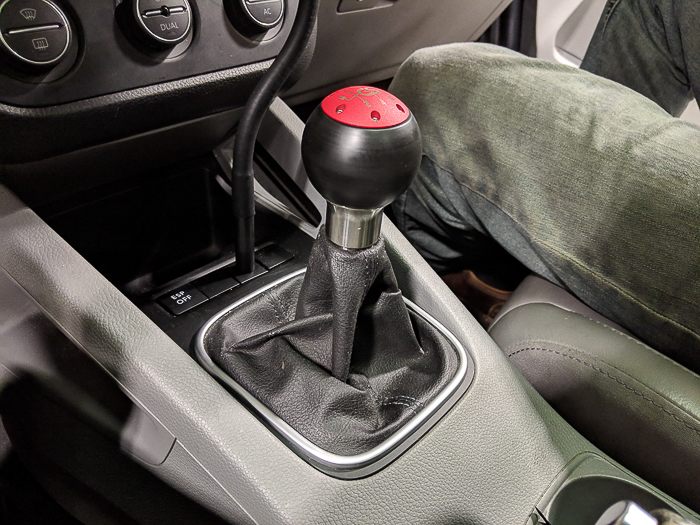
Install the CravenSpeed Shift Knob
-
First, slide the o-ring onto the shifter shaft. Later we'll use this to secure the boot to the new knob. Then slide the boot and trim piece back on. Don't pop it back in just yet.
-
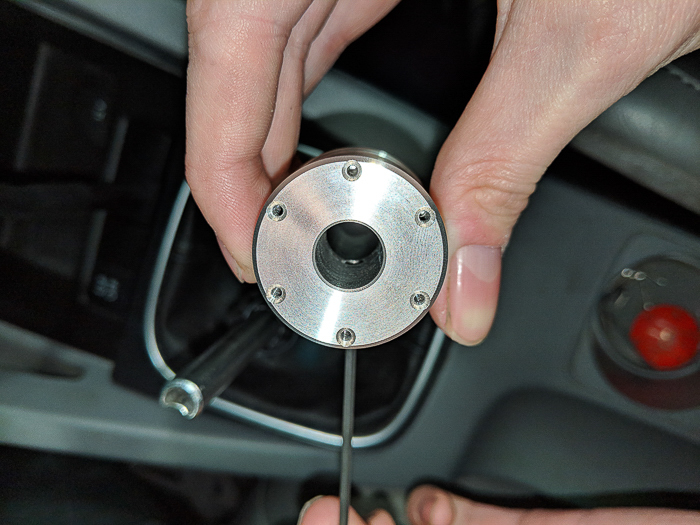
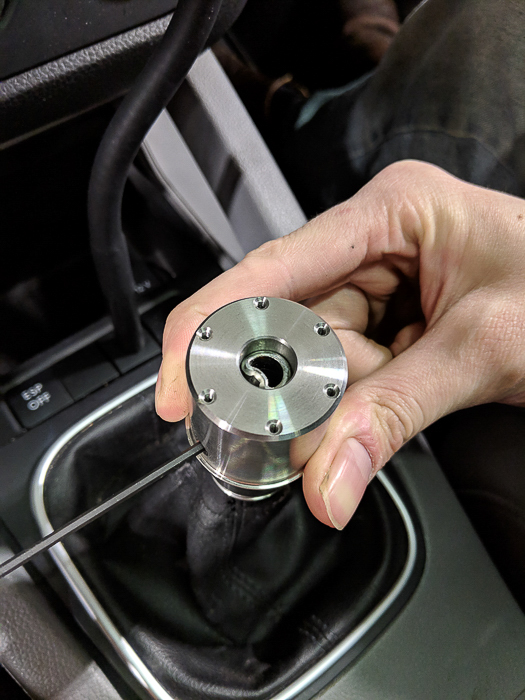
Now we'll prep the stainless steel core for installation by installing the 3 10-32 screws. To do so, apply a drop of loctite to each screw and screw it partially into the core. Make sure none of the screws protrude into the inside of the core.
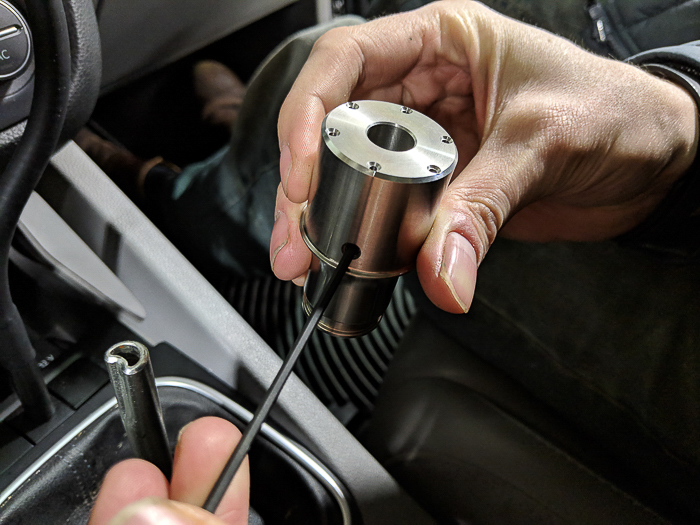
-
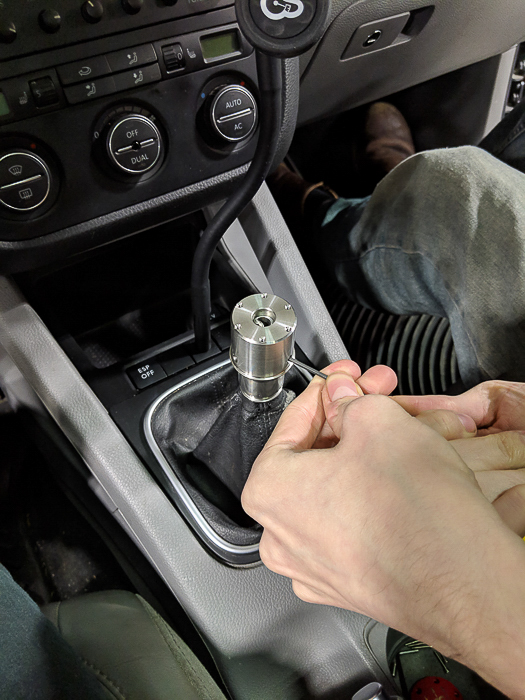
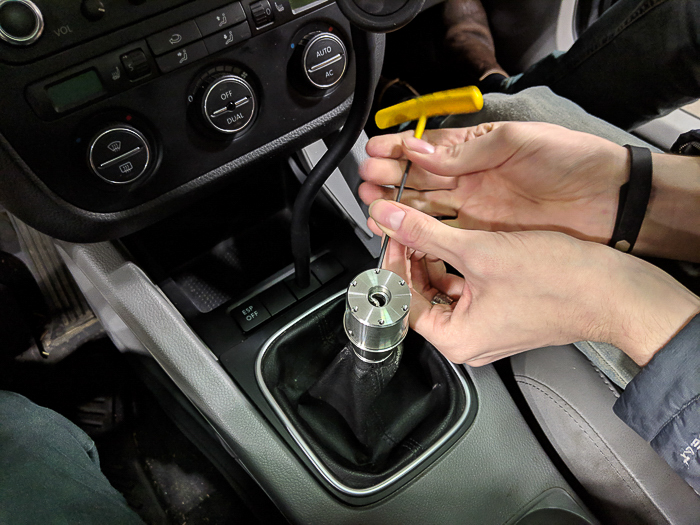
The three screws are going to secure the core to the shifter. You'll want to line up one of them with the slot in the end of the shifter. The screw should seat at the base of the slot. Tighten down that screw first, and then move on to the other two. No torque spec here, just tighten all three screws firmly.
-
Slide the acetal sleeve over the core making sure to align the 6 holes with the holes in the core. Orientation doesn't matter, as long as the holes are lined up.
-
Finally, place the powder coated cap on top and use the 6 2-56 screws to secure everything together. It's best to get all 6 screws most of the way in before tightening any of them completely. If one screw feels a bit stuck, back it out and continue loosening it once it is completely out of the core. You'll hear a faint click, and then you can try screwing it in again. This will start the screw on the next thread, and it should go in much easier.
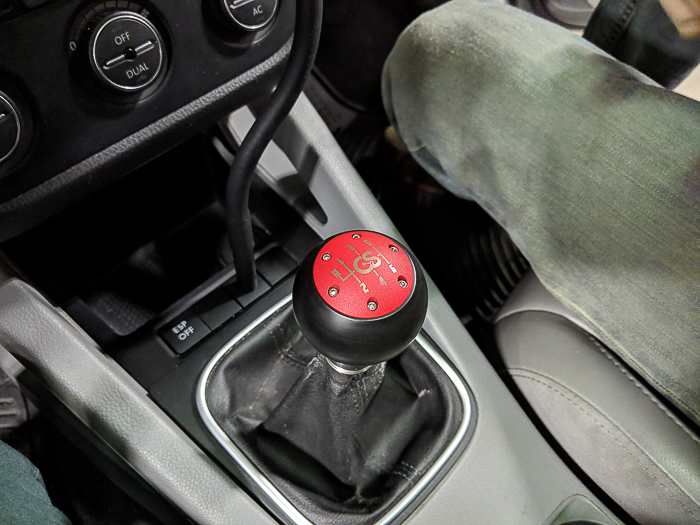
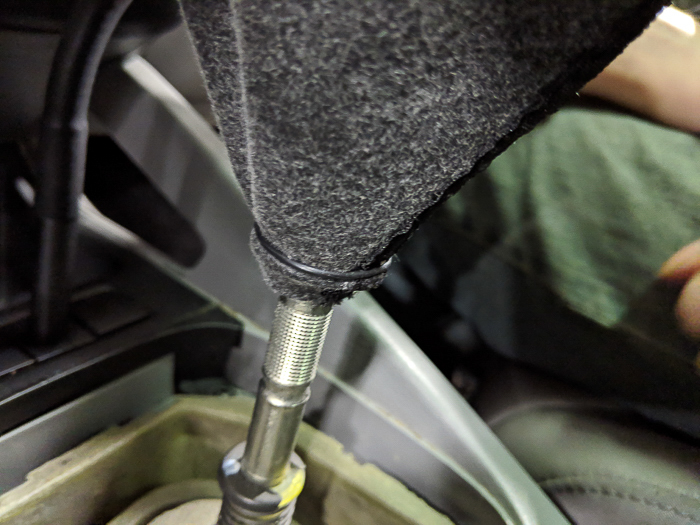
Reinstall the shift boot
-
Finally, we can attach the boot to the knob. Take note of the groove at the base of the stainless steel core. This is where the o-ring will rest with the leather boot between it and the core. Start by flipping the boot up and inside out. Then slide the o-ring up over the boot so that it rests in the groove.
-
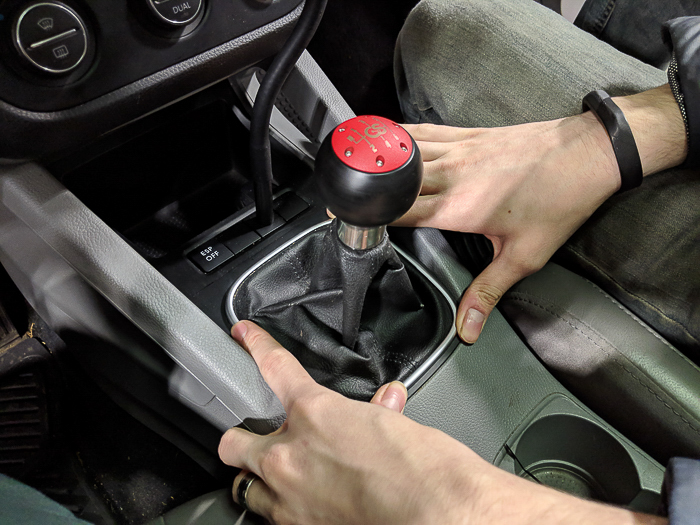
The last step is to snap the trim ring back into place.
If you ever want to spice up your knob with a new color of cap, check out our full range of caps
here.
