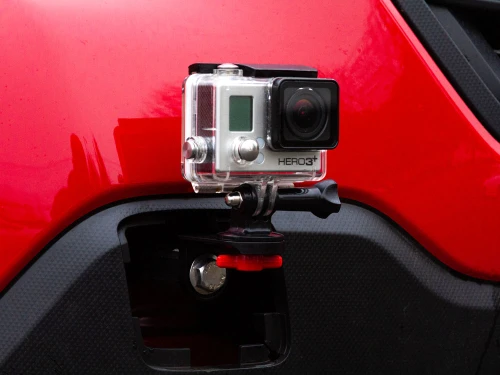


Steady as She Goes
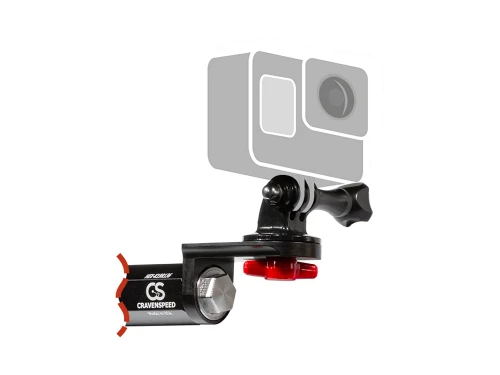
Whether you are shooting pov footage of a drive with an amazing sense of speed, or capturing beautiful rolling shots of your buddies, the CravenSpeed Bumper Camera Mounts are the most reliable camera mount solutions for your car. We've tested many methods of mounting an action camera on a vehicle and have developed two styles of mount which offer incredibly secure attachment of your camera. This means that you can depend on your camera staying put and your footage coming out smooth, even at high speeds. For an even more perfect fit, we've incorporated an adjustable mounting bracket that allows you to slide your camera closer or further away from your bumper as needed.
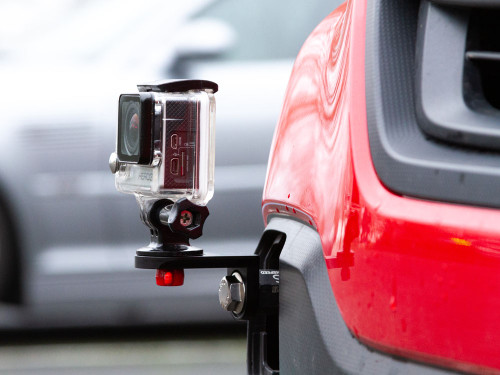
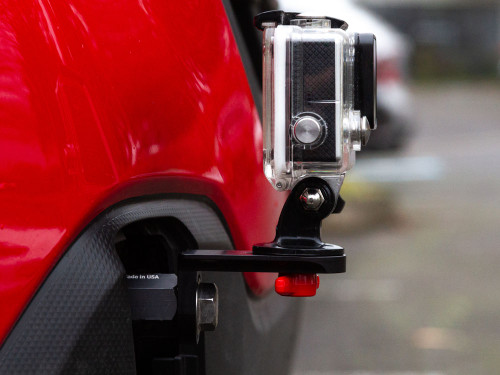
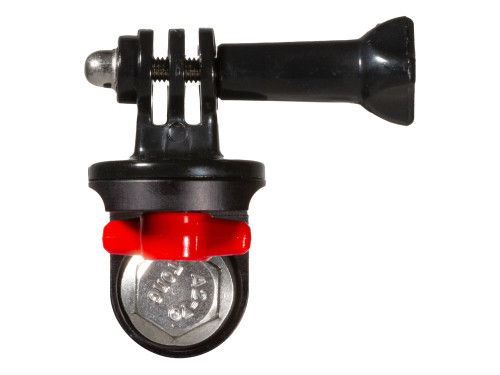
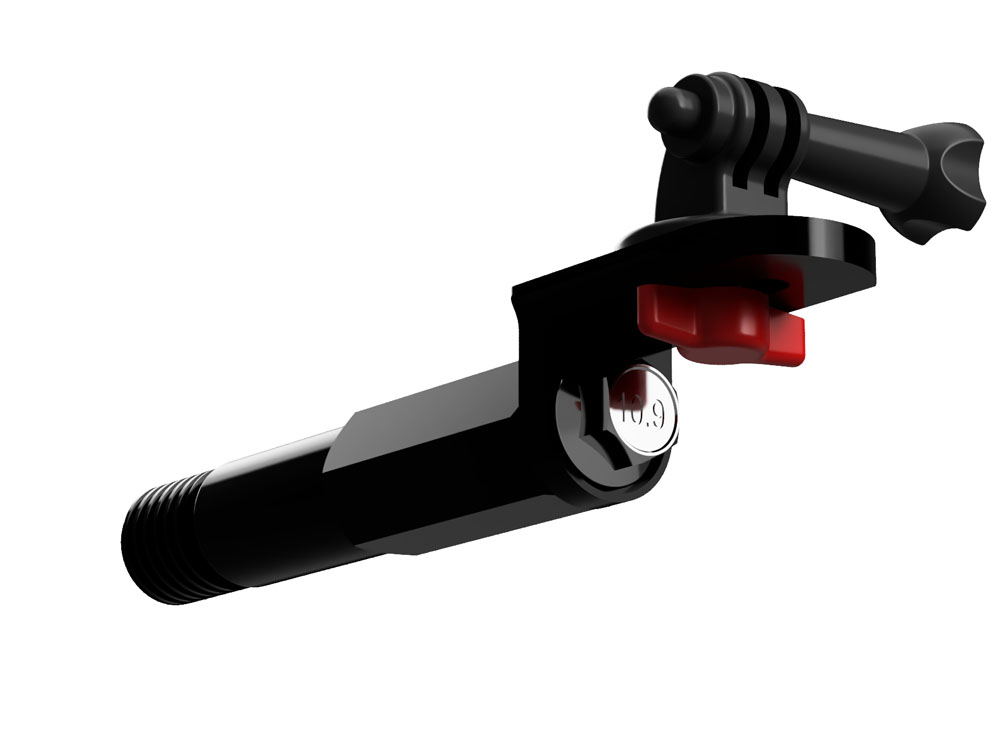
For many vehicles we utilize the same mounting method as our traditional Platypus License PLate mount, most cars that are shipped to the US are equipped with a threaded towing eye receiver in the front and rear of the vehicle. For vehicles which aren't equipped with the towing eye receiver, we have devloped a more universal design which can attach to most grilles. Bother versions offer a sturdy and safe solution.

Tow Hook Style
Grille Mount Style

Don't Settle for a Suction Cup Mount
Suction cups are likely the most popular method for mounting an action camera to your car, they're also the most unreliable. Take a look here , here, and here to see for yourself. Suction cup mounts are very convenient, but we knew there had to be a better way. The design we came up with screws tightly into your car's towing eye receiver, providing a solid and secure platform so you can focus on driving.
See for yourself.
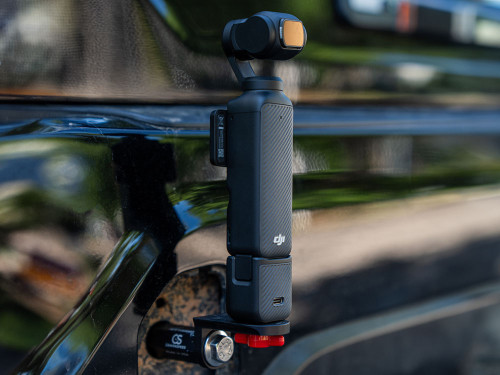
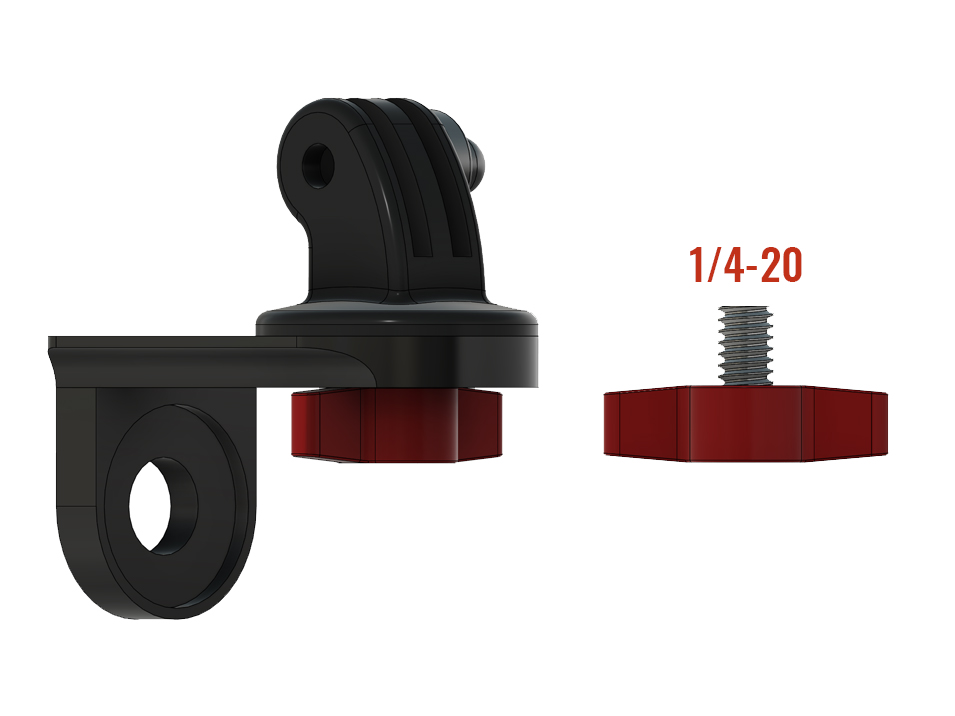
The video samples on this page were recorded with a Hero 9 Black and a DJI Osmo Pocket 3. Wer'e weren't breaking any records, but it's a good example of the quality of footage you can get with this mount. Both mounts feature a GoPro style fork base and can also utlize the standard 1/4-20 threaded hole for tri-pod mounting. This makes either compatible with just about any camera on the market including the GoPro Hero and DJI Osmo Pocket.
GoPro Hero 9 Black Sample Footage
DJI Osmo Pocket 3 Sample Footage
Free Domestic Shipping
We ship orders every weekday. All orders placed by 2:00 pm PT will ship the same day. You will receive a shipping notification when we print the label for your order. The tracking will not indicate that the order has been shipped until it is picked up and scanned in by the carrier. Orders placed after 2:00 pm PT on Friday will ship on Monday.
Our Team is comprised of a small group of dedicated individuals who each pride themselves on providing their best work to our customers every day. We are all willing to go above and beyond for our customers to make sure they are happy with their entire shopping experience. If you need anything, please drop us a line at support@cravenspeed.com and we'd be happy to help you out. Our customer service team will usually get back to you within the hour during business hours.
Click here to meet the team!