THANK YOU for purchasing the MINI Adjustable Shifter from CravenSpeed. This shifter will change the way you feel about shifting. This product is made from the highest grade materials, and is guaranteed to be free from defects.
You can buy our CravenSpeed Adjustable Short Shifter for MINI here
Parts Included:
- 1x Adjustable Shifter Assembly
- 4x Bushings
- 1x Replacement Push Ring (if needed)
- 1x Zip Tie
Tools Required:
- Body Kit Tools (or Flathead Screwdriver)
- T25 Torx driver
- T45 Torx Driver
- 10mm wrench
The installation time for this product is about 2.5 hours and can be done by anyone.
Procedure
NOTE: It is important to note that this CravenSpeed Adjustable Shifter is compatible only with 04-06 model R53, and R55, R56, R57, R58 and R59 MINI Cooper vehicles.
If you have any problems during installation, please contact the vendor you purchased from to work through the problem.
When contacting support, please have your order number and vehicle chassis number ready.
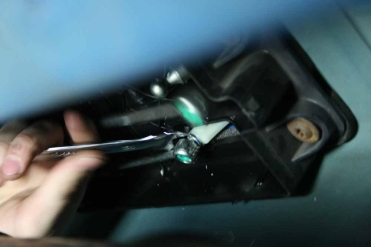
Remove the Knob and Boot
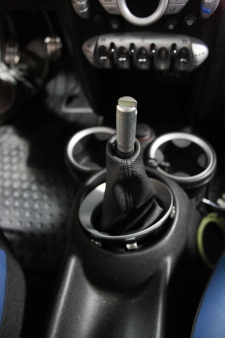
Start by pulling the shift knob directly up with both hands. Beware of objects around you (like the sunroof) because it will come free suddenly.
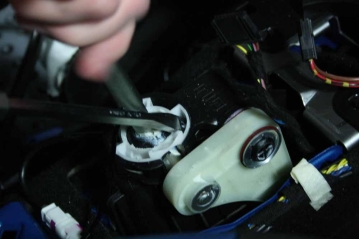
Remove plastic trim ring from around the shift boot using the body kit pry bar. You could also use a flathead screwdriver but the plastic body kit tools are much less likely to scratch the vehicle. If you can separate the rear of the ring from the console you should be able to pull out the the rest. A second plastic tool could be useful to create the necessary gap and release the tabs that hold the ring in place. We highly recommend the Shift Well Cover as a replacement for the boot which will allow easy access to the adjustment collar on the shifter.
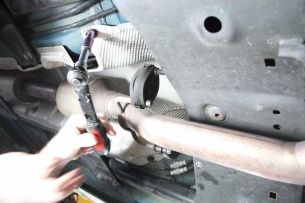
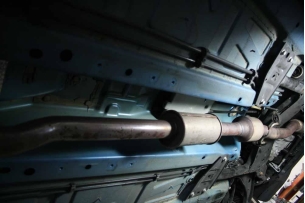
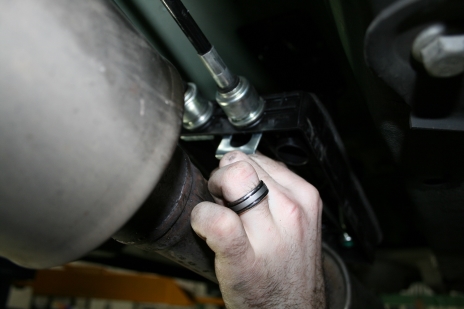
Drop The Exhaust
Time to lift the car onto jack stands or a lift if you have access to one. Be very careful, cars are heavy and will squash you if they fall. Unbolt the exhaust at the cat, and let it hang out of the way. If the clamp on the cat end is seized, drop the exhaust from the rear hangers, you won’t have as much room, but it will work.
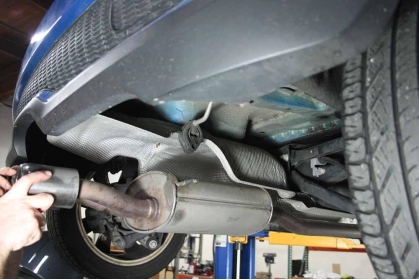
Remove the aluminum heat shield from above the exhaust. There are a series of 10mm nuts holding it in place.
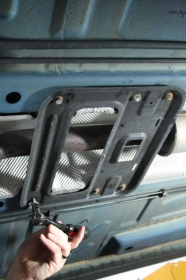
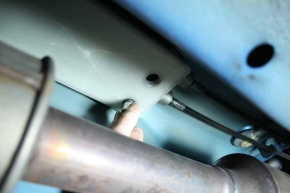
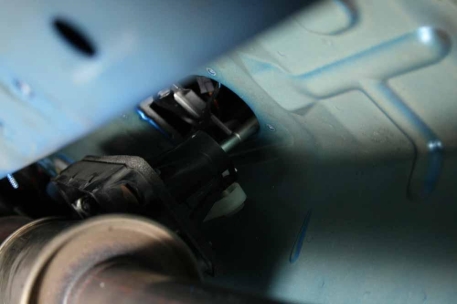
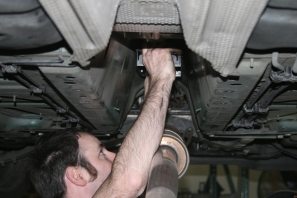
Remove the cover from the shifter housing. You will need to engage several clips at once to get it free. We do not call for the reinstallation of this cover so you may choose whether or not to damage it during this process. The easiest way to remove the cover is to remove the four Torx screws holding the box in place, undo the clip inside the car to release the box, take the cover off and replace the shift box with the screws to hold it in place.
Free the Shifter
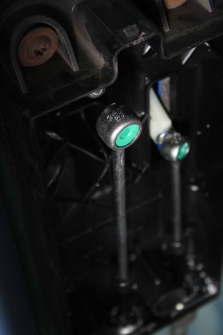
You should now be able to see the two cables that run into the shifter housing. The sockets at the end of those cables need to be removed from the balls on the shifter and housing. This can be done by placing a wrench around the shifter and pulling it down to pop the socket off the ball.
Once the cables have been removed you will be able to take the whole housing out of the MINI. There are four torx screws that keep it in place. Remove them, undo the clip inside and drop the housing out of the car.
If you wish to completely remove the shift box from your MINI there are two metal clips holding the shifter cables in place. These can be removed by using a pair of pliers to pull them out. The cables can then be pulled out of the box.
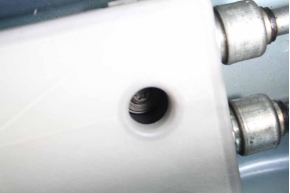
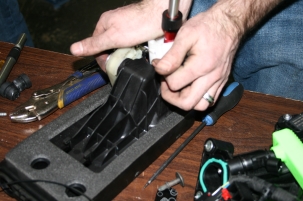
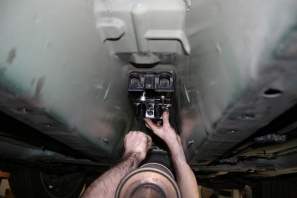
There are two parts of the housing that hold the shifter in place. The first component you will have to remove is the reverse arm. It is held in place by a push ring and a wave washer. You can carefully remove these two items with a flat-head screwdriver and that will allow you to reinstall them after you install the Adjustable Shifter. If you manage to mangle the push washer during removal, fret not! We’ve included an extra just in case!
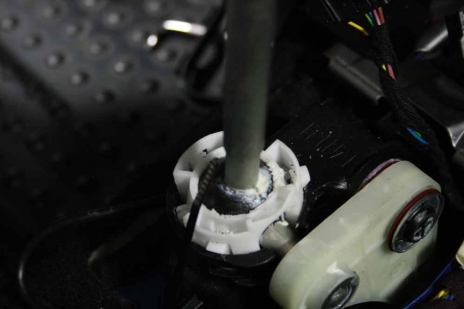
Here is the hardest part of the whole install: Disengage all three clips on the white retainer to free the shifter. Use a screwdriver to pry each clip open and then use a placeholder, like a thick toothpick, to keep the clips from locking back into their slots. Keeping an upward pressure on the shift lever will also help facilitate removal.
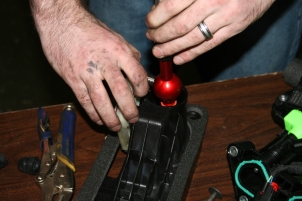
Take the orange rubber bumper o-ring off of the stock shifter. You will use this one on the Adjustable shifter for the same function.
Put it back together
Now that the old shifter is out, the new one should fit snugly in its place. Seat it in the housing and replace the reverse arm with the wave washer and push ring. The installation of the push ring can be a bugger sometimes. It may help to use a socket to apply even pressure around to install it. The ball end of the adjustable shifter should fit tightly in the reverse arm with no extra play.
Before sliding the white retaining clip over the Adjustable shifter you will need to take off both the knob adapter, and the adjustment collar. Then slide it on and clip it back into place.
Optional: Replace the Bushings
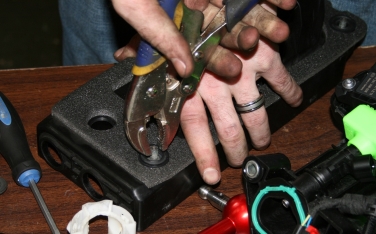
We include 4 aluminum bushings for you. These replace the rubber ones that go between the shifter housing and the MINI. Some of the play in each shift is due to this rubber slop and our bushings will help tighten that up. Push the screws down from the top of the shift box, then pull out the rubber bushings using a pair of pliers.
Secure the Housing
With or without the bushings you will now need to secure the housing back to the MINI. Then run the cables to the arm and the shifter and pop them back on. You will not be replacing the plastic cover from the housing. There is no need for concern, we have been leaving this cover off MINI’s since 2006 with no ill effects.
Mold the Heat Shield
You will need to bend the heat shield a bit in order to allow for the full adjustability of the shifter. It is very malleable and easy to create this space. Once you put it in place, immediately check the shifter through all gears at the lowest setting. If there is no rubbing, then you are good to go.
Bolt up the Exhaust
Just replace the bolts and your exhaust should be back to its original configuration. Congratulations, you are now done with the underside of the MINI!
Install Shift Well Cover
We really think you ought to consider the Shift Well Cover ; it would be so easy at this point.
The Final Details
You’ll need to put the adjustment collar and the knob adapter back onto the shifter now. Then replace the shift boot and secure it to the shifter with the included zip tie. Pop a Shift Knob onto the top and you are ready to go.