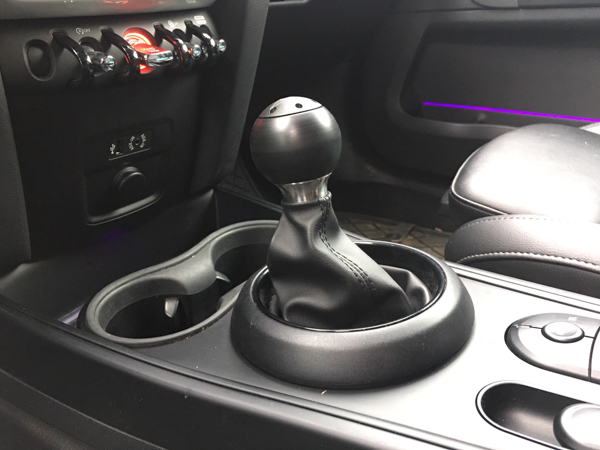
THANK YOU for purchasing the Automatic Shift Knob for MINI from CravenSpeed. This product is made from the highest grade materials, and is guaranteed to be free from defects.
You can buy our CravenSpeed Automatic Shift Knob for MINI Gen 3 here
Parts Included:
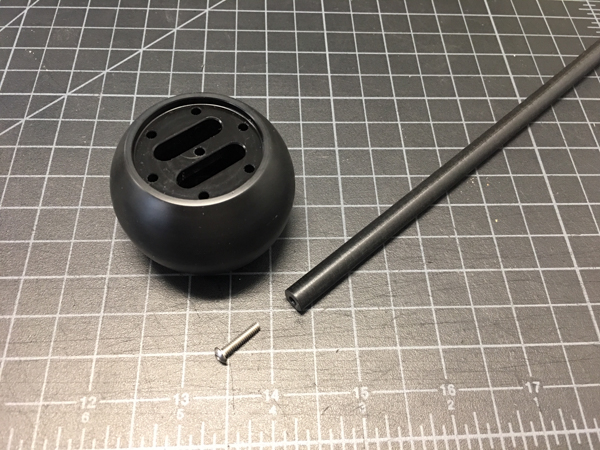
- 1 x Knob Cap
- 1 x Shift Knob Ball
- 1 x Stainless Shift Knob Core
- 1 x Knob Adapter Collar
- 1 x Lockout Rod
- 1 x 4-40 Stainless Button Head Screw
- 6 x 2-56 Stainless Hex Cap Screws
- 1 x Spring
- 1 x O-Ring
Tools Required:
- 1/16" Hex Key (included)
- 5/64" Hex Key (included)
- Plastic Trim Panel Tool
- Small Flat Head Screwdriver
NOTE: The installation of the knob is fairly straightforward, but we always recommend reading through the entire instructions before you begin. It's good to have an understanding of the whole process while performing any installation so that you may prepare and plan accordingly.
Procedure
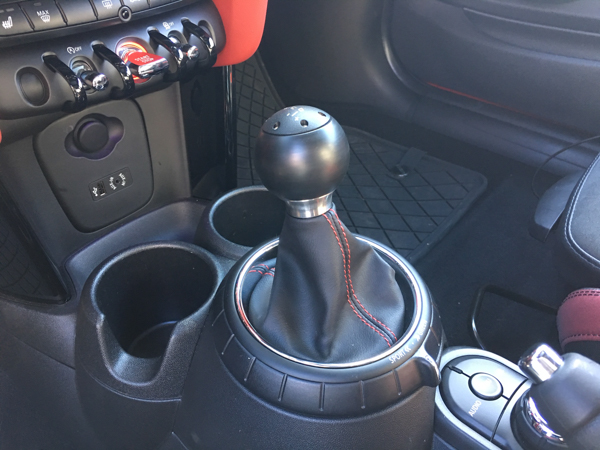
Remove the stock shift knob
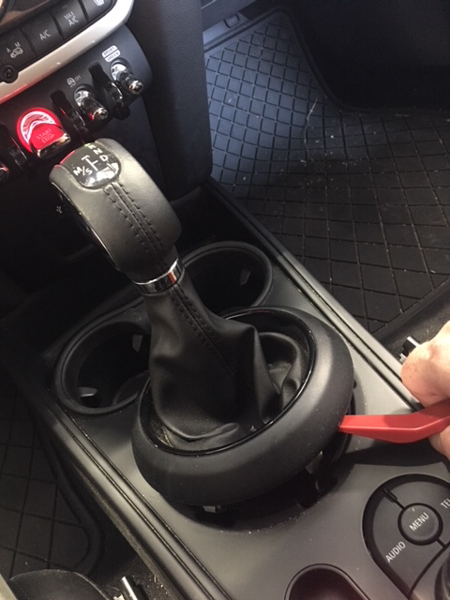
- Use a plastic trim panel tool to pop out the shift boot trim ring. Simply insert the tool between the ring and the center console and pry up. Work your way around the ring until you have released all of the clips.
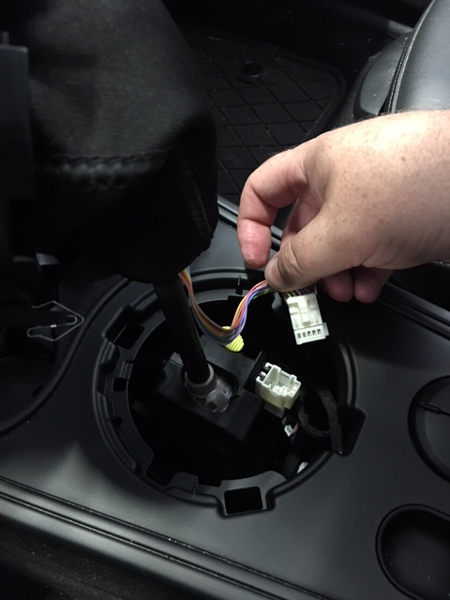
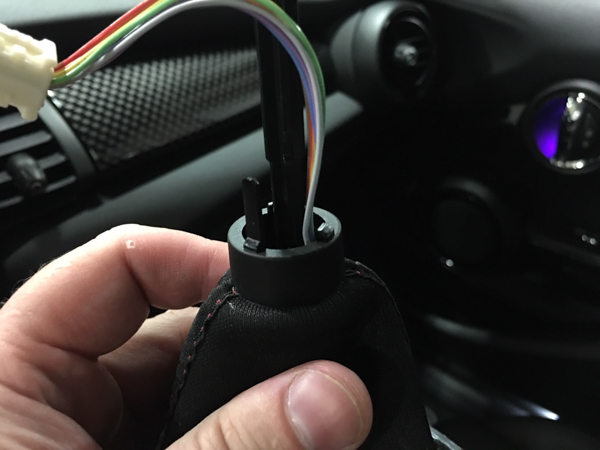
- Lift up the shift boot and locate/disconnect the shift knob wiring plug. If your surround ring also includes the driving modes ring/switch, unplug this as well.
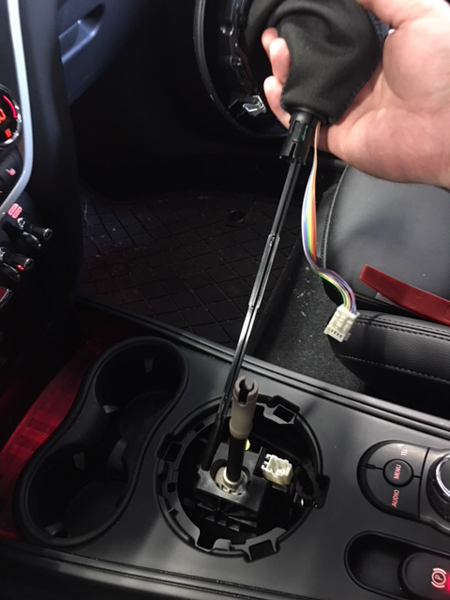
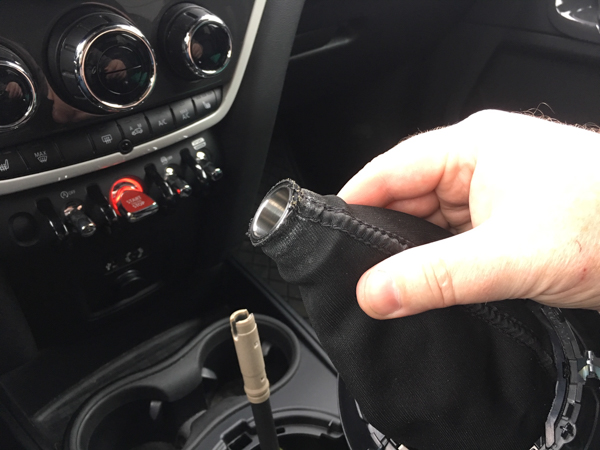
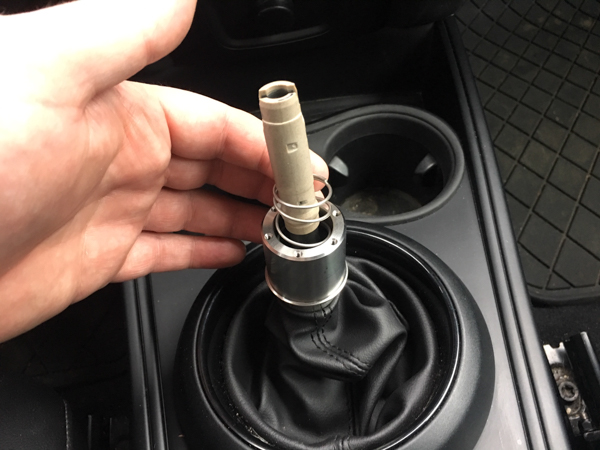
- To make removing the knob a bit easier, we need to shift the lever into drive (D). To do so, depress the brake pedal and push down on the yellow button to release the shift lock. Then, shift the transmission into drive. The stock knob is simply friction fit onto the shifter. To remove it, firmly grasp the knob with both hands and pull straight up. Do not twist the knob. It takes a bit of force to get the knob off, so keep the area above the knob clear! There will be a long lockout rod that comes out with the OEM knob, so be aware of this and try not to break it.
- Once the OEM shift knob is disconnected, we need to separate it from the shift boot. There are a few clips holding the boot collar onto the OEM knob. They’re kind of fragile so use a delicate touch and push them toward the middle of the collar until they disengage from the knob. The collar should now just slip up and off of the boot.
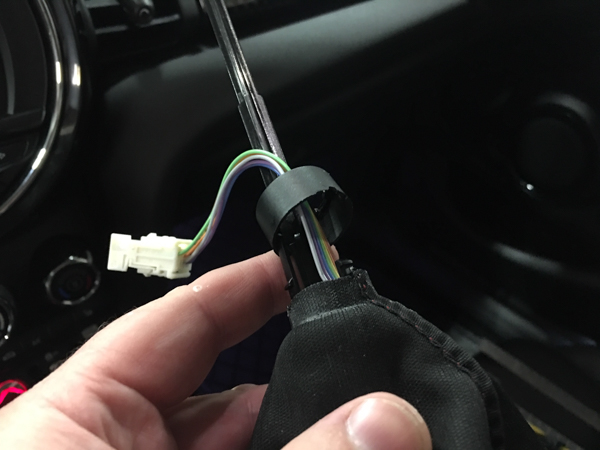
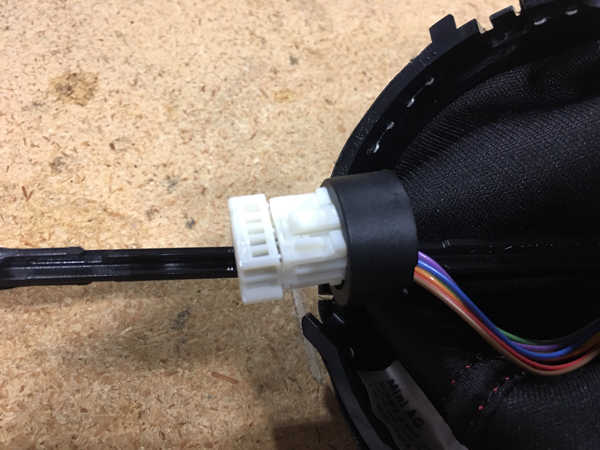
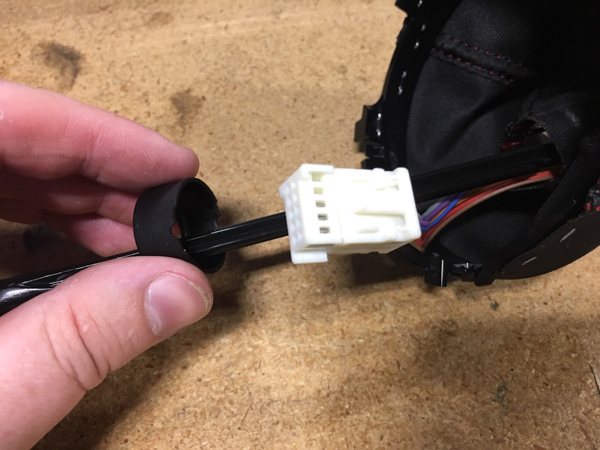
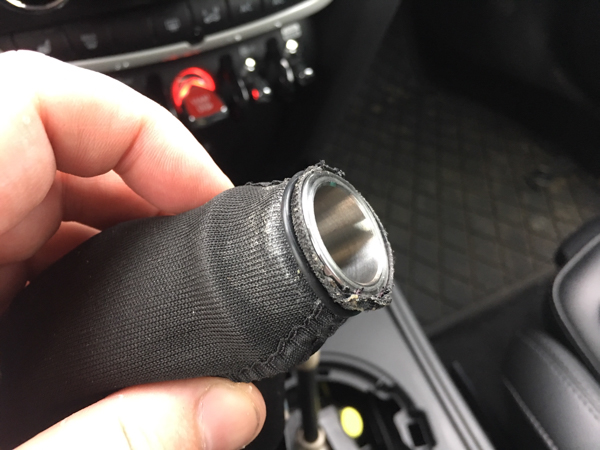
- The real trick is removing the shift boot connector ring off of the lockout rod and wiring plug that passes through it. You could technically just cut this ring off as it’s not used for this install, but if you ever want to revert back to stock, you’ll want to save it. Gently pry around the ring with your small screwdriver as you massage the plug through it and you should have it off in no time.
Install the CravenSpeed Shift Knob
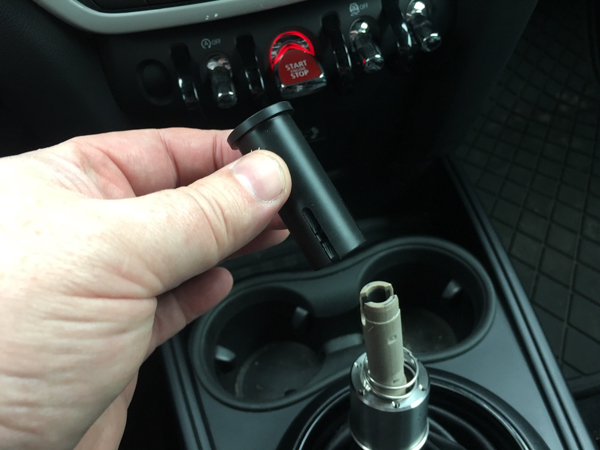
- Now that the OEM shift knob is completely removed from the shift lever and boot, take the stainless steel core from the CravenSpeed auto knob kit, place it through the topside of the shift boot, and push it even with the edge of the boot.
- Place the included o-ring over the boot and into the groove of the stainless core piece.
- Flip the shift boot right-side out again.
- At this point you may now reinstall the shift surround/boot/stainless core assembly back onto your center console. Don’t forget to plug the driving modes ring/switch surround back in if your MINI is so equipped.
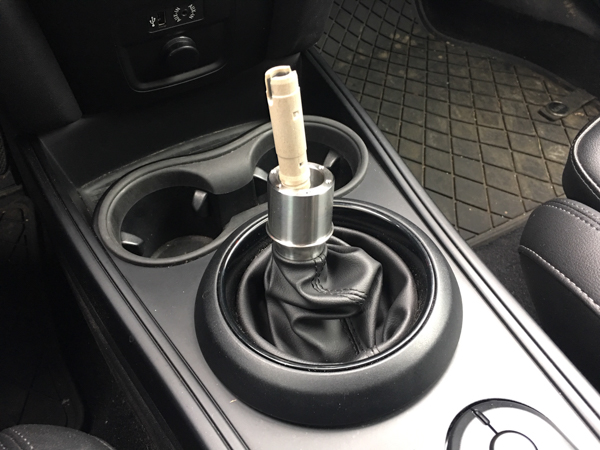
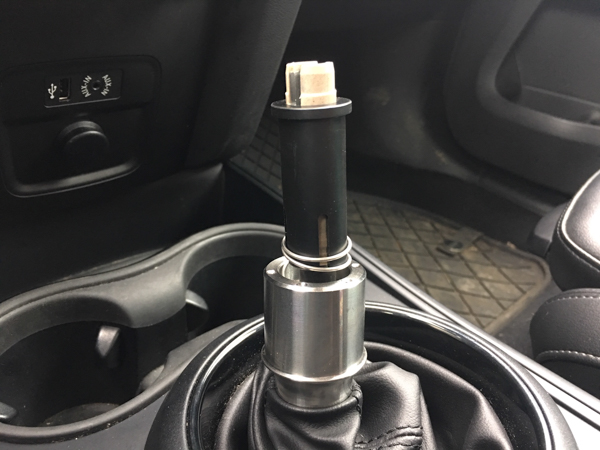
- Place the large spring onto the lever and down into the bore of the stainless core.
- Install the Knob Adapter Collar onto shift lever above the spring. You may notice small, internal clips on one end of the adapter... these clips are the bottom of the adapter and should be oriented down when you slide it over the shift lever and click it into the lowest grooved section on the shift lever
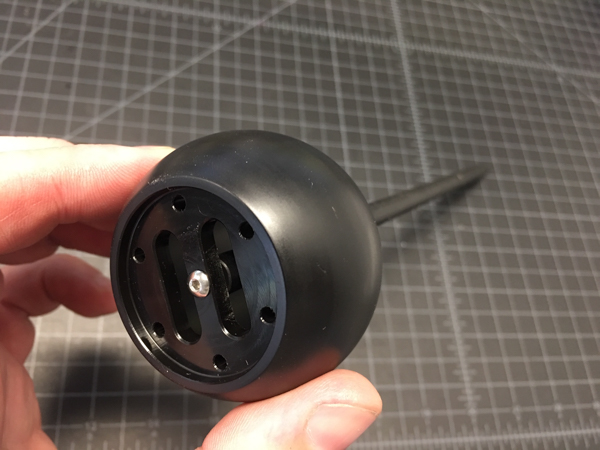
- Using your 1/16” Hex Driver, install the Lockout Rod to the inside of the Shift Knob Ball with the small, stainless button-head screw.
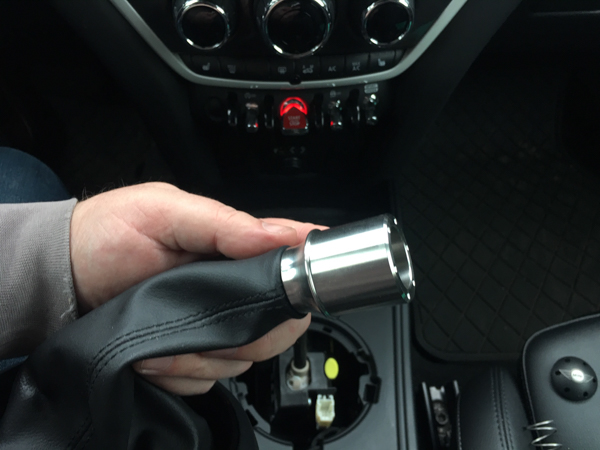
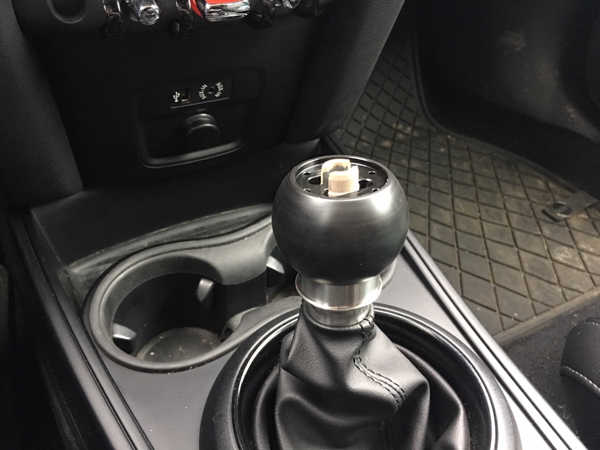
- Bring up the stainless core piece over the knob adapter collar so that the large spring is now inside the assembly. Place Shift Knob Ball over the Stainless Steel Shifter Core, passing the lockout rod down into the shift lever and lining up the slot on the shift lever with the cutouts on the knob body.
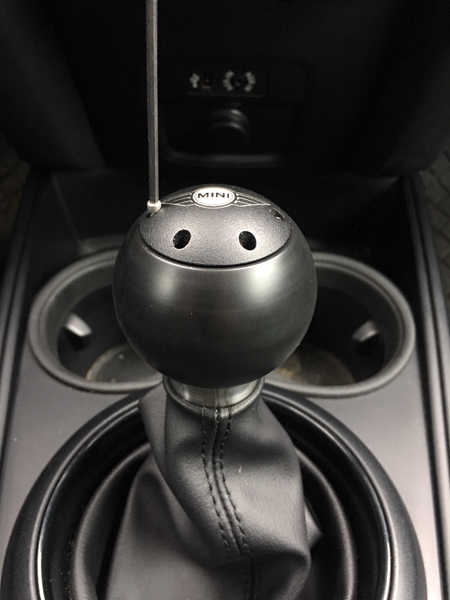
- Ensure that the (6) holes in the knob body and stainless core line up (you can grab the bottom of the core and spin it to accomplish this). Place Shift Knob Cap onto the Shift Knob Ball, line up the holes and install the (6) Hex Cap Screws with your 5/64” hex driver. Tighten the screws in a star pattern so that they’re evenly tensioned to ensure a proper, bind-free install.
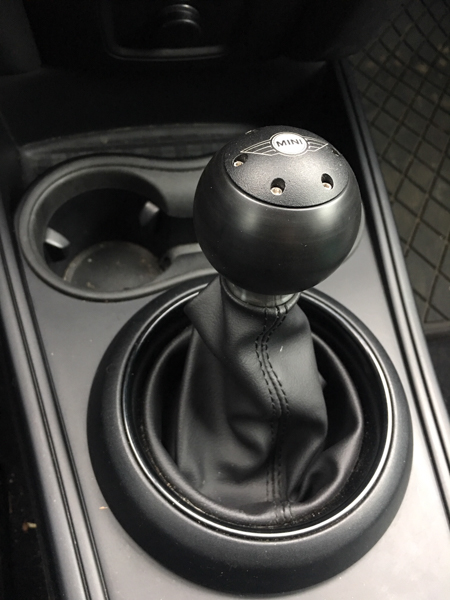
- Once the screws are set and tight, you’re finished with the install. Stand back and admire your handiwork!
This Auto Shift Knob Kit is also compatible with the shorter JCW shift boots.
To operate the shift lock release, simply lift up on the knob