THANK YOU for purchasing the The Platypus License Plate Mount For Tesla Model 3 from CravenSpeed. This product is made from the highest grade materials, and is guaranteed to be free from defects.
You can buy our CravenSpeed Platypus License Plate Mount for Tesla Model 3 here
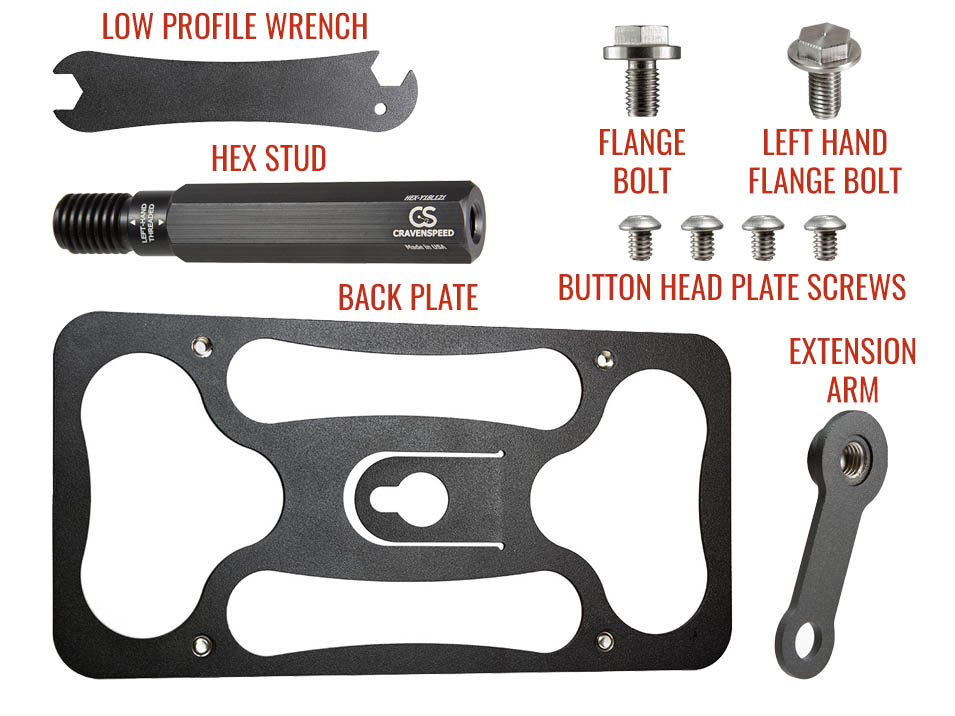
Parts Included:
- 1x Platypus Back Plate
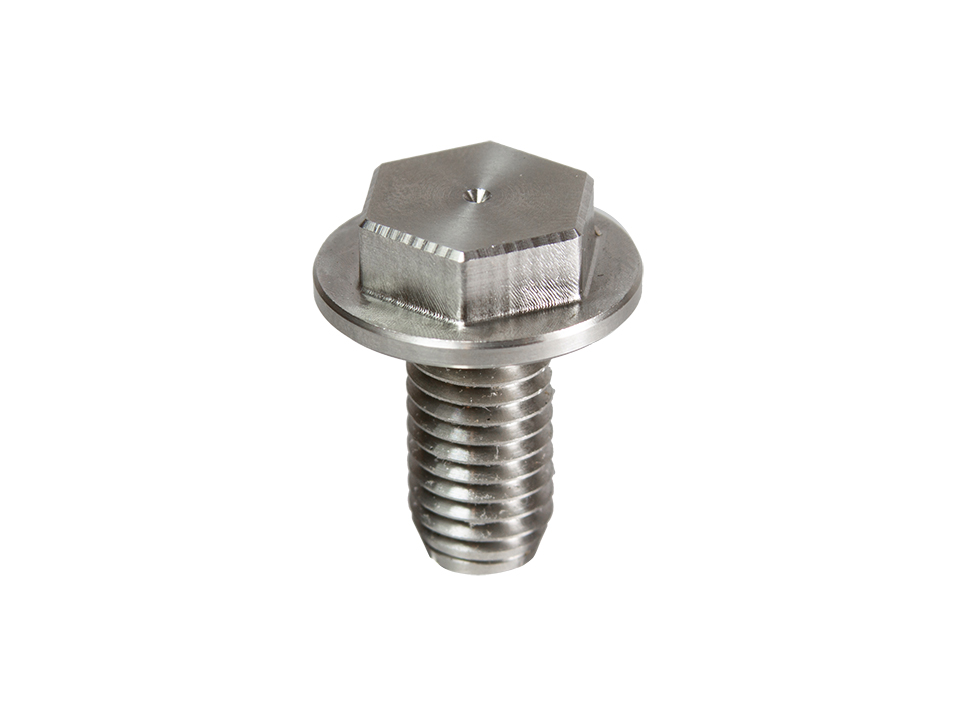
- 1x Hex Stud HEX-Y18L121
- 1x 2" Extension Arm
- 1x M10x1.5 Flange Bolt Right Hand Thread
- 1x M10x1.5 Flange Bolt Left Hand Thread
- 4x License Plate Mounting Screws
- 1x 15mm Low Profile Wrench
Tools Required:
- Trim Panel Removal Tool
- 5/32" Allen Wrench
- Socket Wrench
- 3/4" Socket
- 15mm Socket
Procedure
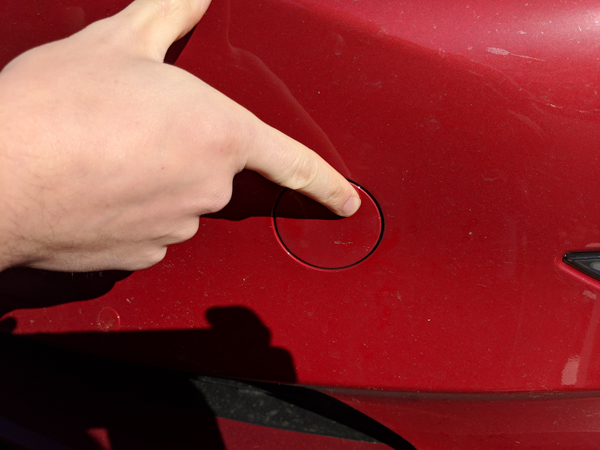
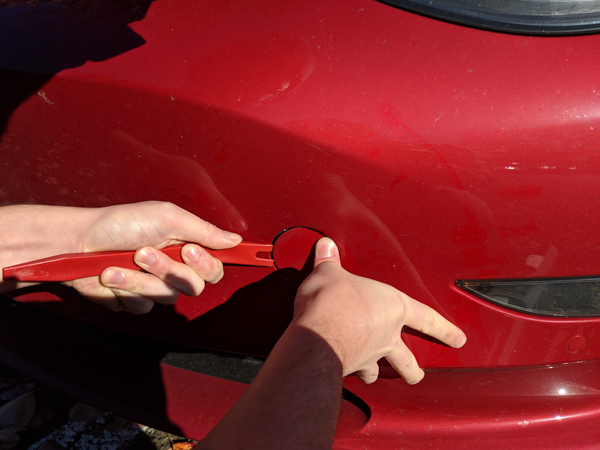
Remove the towing eye cover
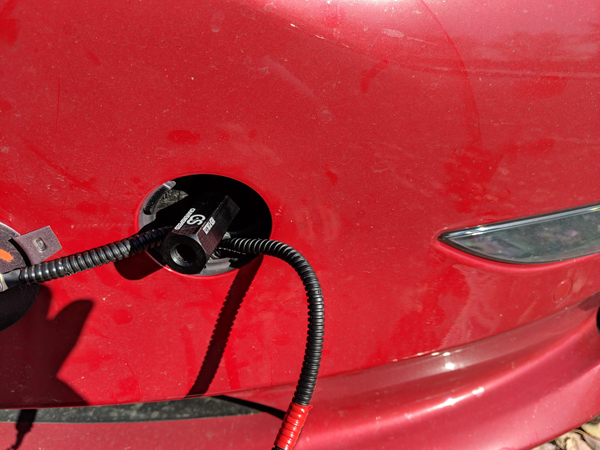
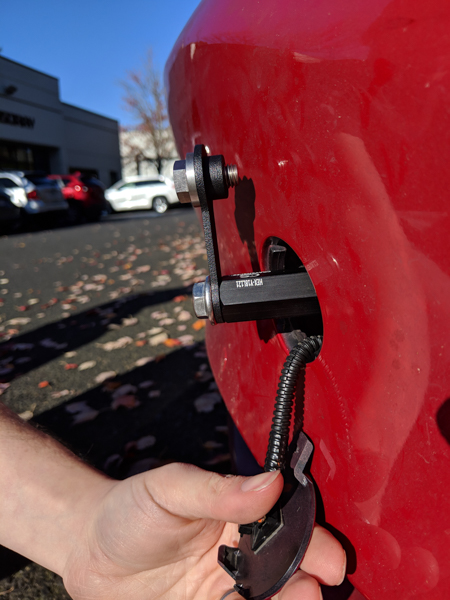
Using your thumb and a trim panel removal tool, remove the towing eye cover on the front bumper. Apply some pressure with your thumb on the right side of the cover while simultaneously prying the left side out. The cover will pivot along its vertical axis and release straight out. This process should also be outlined in your owner’s manual.

There will be two wires exposed when you release the cover and one of them is attached to the inside surface of the cover itself via a ziptie. These two wires are used for applying a power source to open your car should it suffer from a drained battery. You may either let the wires hang out of the hole as they’ll be hidden by the license plate once installed, or you could clip the ziptie from the cover attach the wires to the hex stud once installed and push the wires back into the tow bolt receptacle. If you choose the latter, place your tow bolt cover somewhere for safe keeping (glove box).
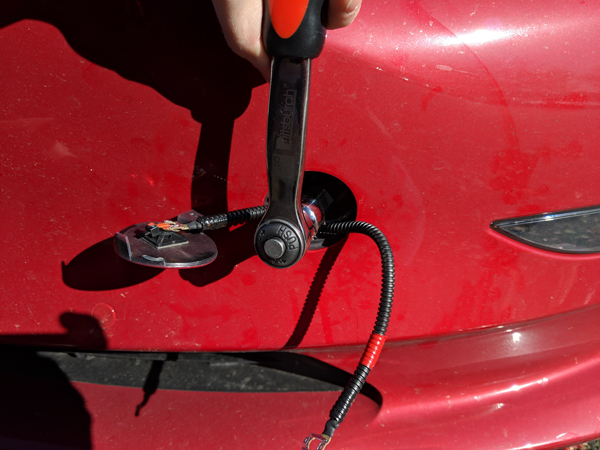
Install the hex stud into the towing eye receiver
The towing eye receiver on your Tesla Model 3 is Left-Hand Threaded , so when you spin the CravenSpeed hex stud into your car, you will be tightening it counter-clockwise . The part number engraved on the stud should be HEX-Y18L121.
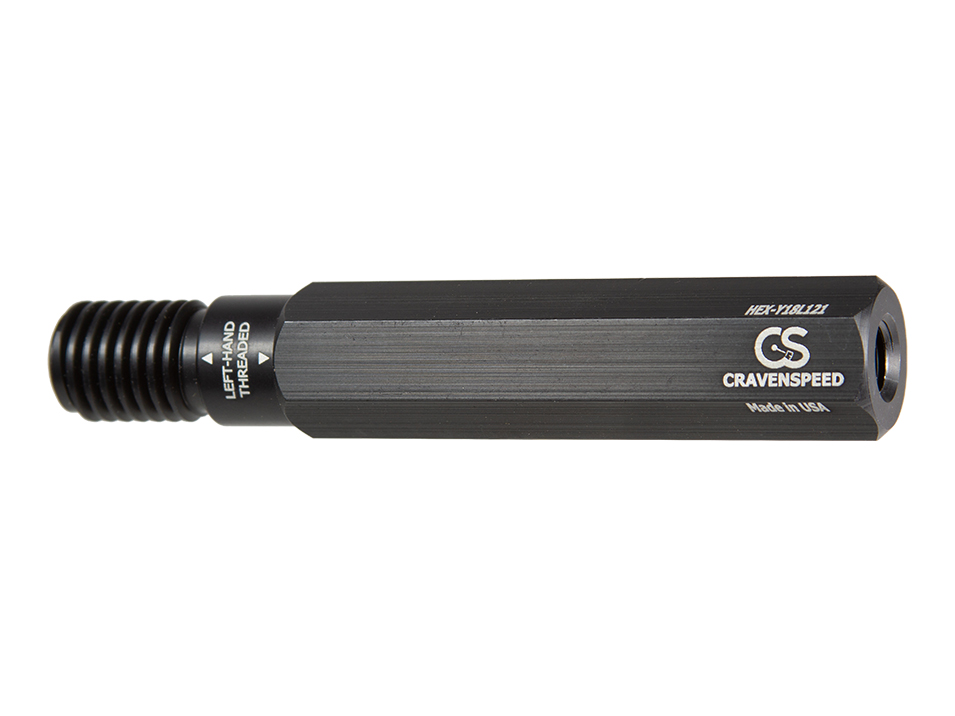
We intentionally machine these slightly oversized, so if it feels like it doesn’t want to go in easily, just put a socket wrench on the end of it and drive it into place. The studs are aluminum which is much softer than the material in the towing eye receiver of your car, so they won’t damage the threads and you’ll have a tight, solid fit. Use your socket wrench with a 3/4" socket to install the Platypus Mounting Stud as the included low-profile wrench is neither strong enough, nor intended to be used to install the stud mount. There is no torque spec for this stud, is just needs to be snug.
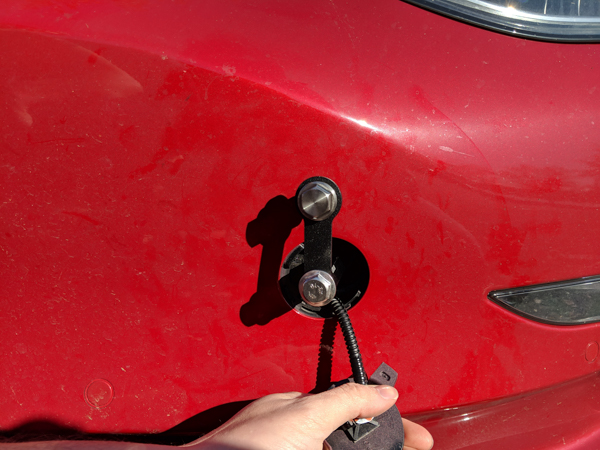
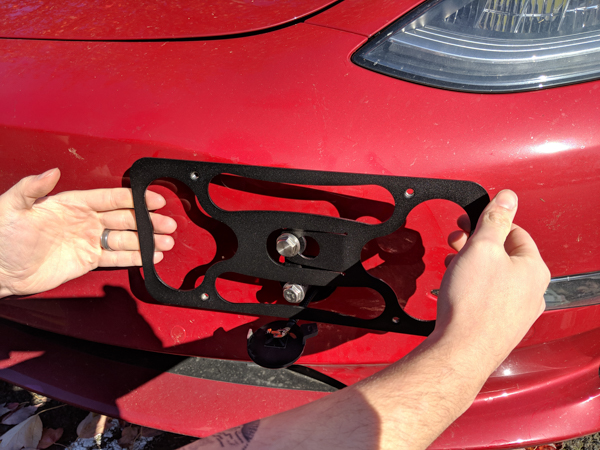
Install the 2" Extension Arm
To position the back plate in a manner that doesn't set off the parking sensors, the use of a two inch extension arm is required. Use the 15mm socket to install the left hand threaded flange bolt to attach the arm to the hex stud. The left hand bold is indicated by a dimple in the top of the bolt. Again, this bolt is tightened counter-clockwise. The extension should be oriented at about twelve o'clock with the threaded section pointing toward the bumper.
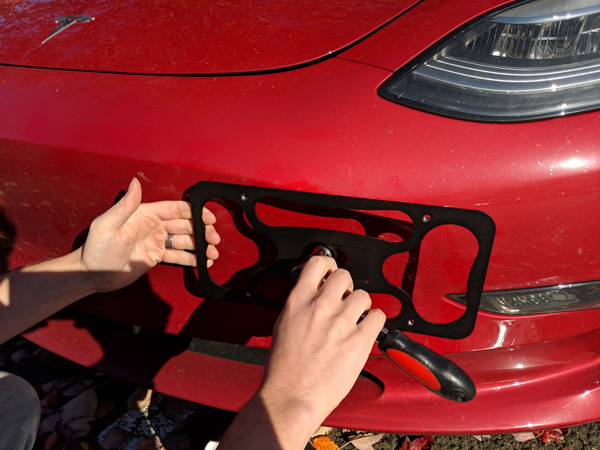
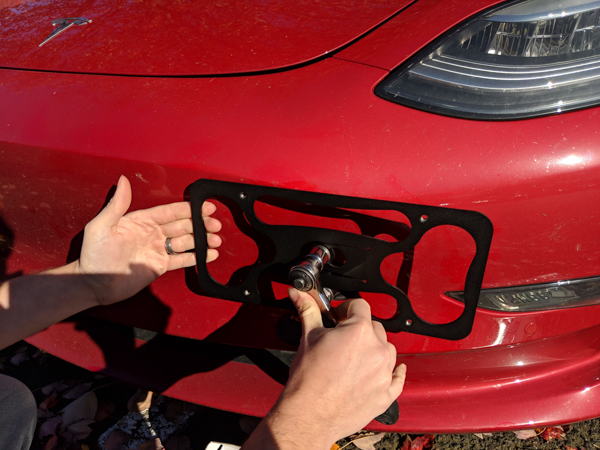
Install the Back Plate and License Plate
The extension should come with the correct flange bolt already installed, if not go ahead and install the right hand flange bolt now. Back the bolt out of the extension arm until the gap is slightly larger than the thickness of the back plate. Insert the head of the flange bolt through the hole in the center of the back plate, and then slide it over until the bolt is fully seated into the slot. Use the 15mm socket to tighten the bolt.
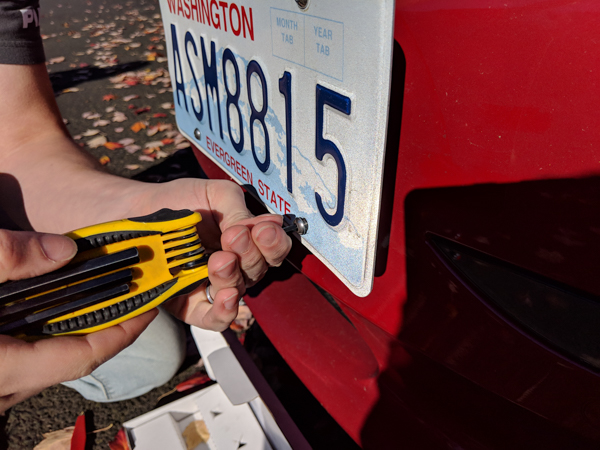
Finally, use the four 5/32" Allen screws to attach your license plate to the back plate.
If you have any issues with the parking sensors, give us a call and we'd be happy to guide you through the process of adjusting the plate.