THANK YOU for purchasing the ND MX-5 Miata Tapless Temp and Pressure Adapter from CravenSpeed. This product is made from the highest grade materials, and is guaranteed to be free from defects.
You can buy our CravenSpeed Tapless Sender Adapter for ND MX-5 Miata here
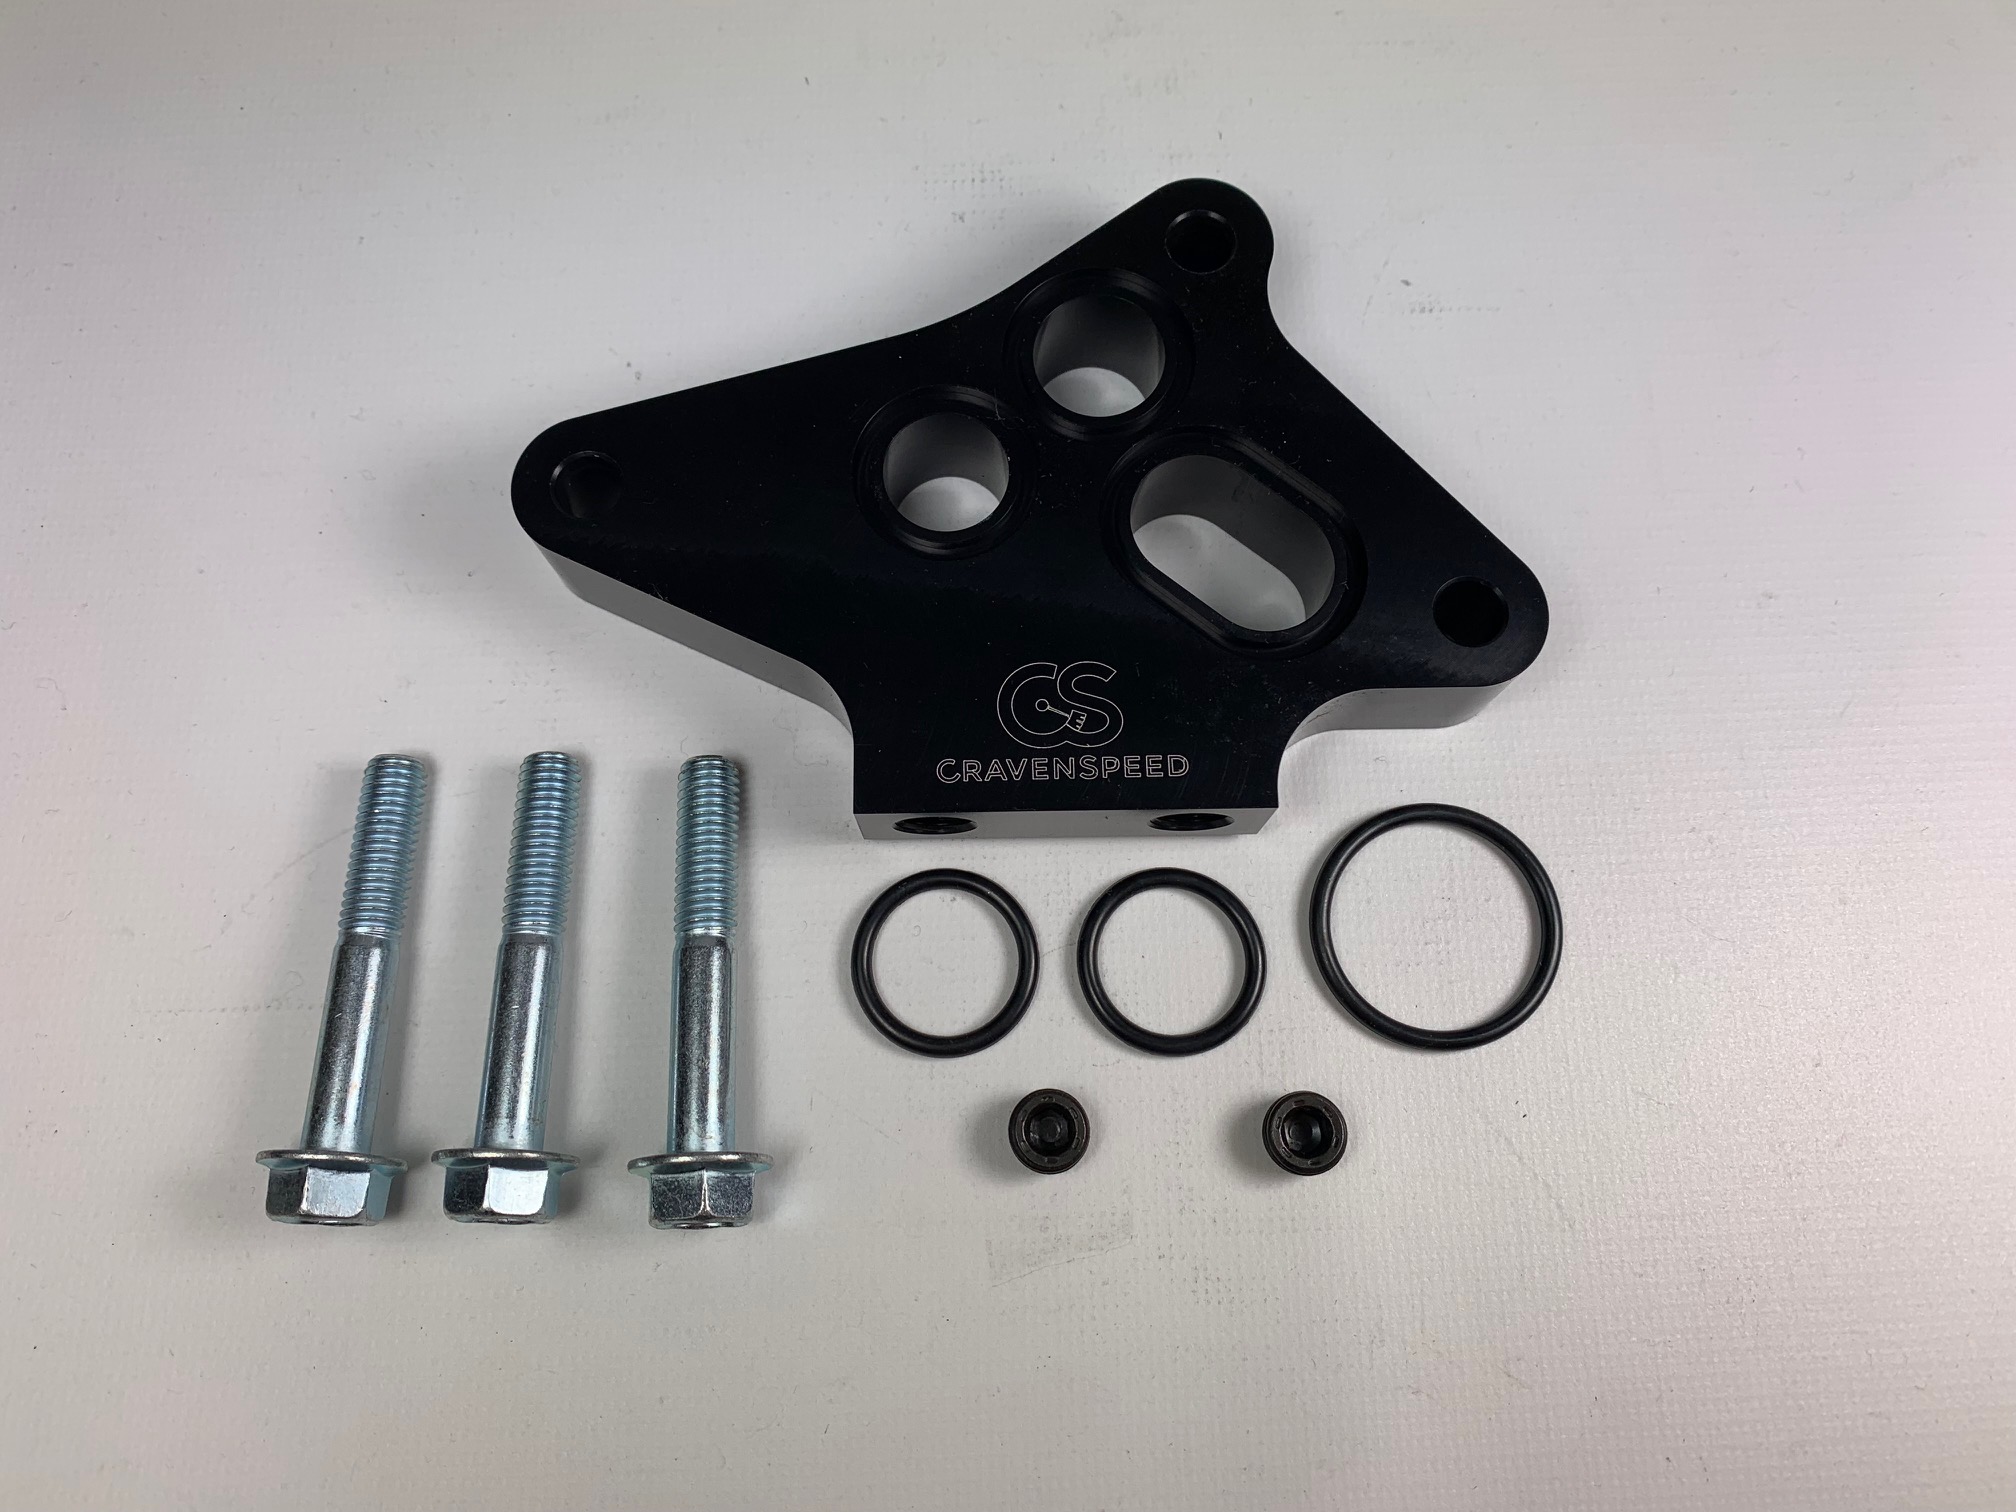
Parts Included:
- 1x Tapless Adapter Block
- 2x Small O-rings
- 1x Large O-ring
- 3x Stainless Steel Screws
- 2x 1/8" NPT Plugs
Tools Required:
- 10mm, 12mm Socket and Ratchet Wrench
- 8mm Hex Wrench
- 3/16" Hex Wrench
- Thread Sealant
- Floor Jack
- 2 Jack Stands
- Wheel Chocks
- Oil Drain Pan
- Shop Rags
NOTE: This install may seem a bit intimidating at first glance, but honestly it is fairly simple and straightforward. Just read through the instructions completely beforehand and take your time. If you are unsure of your mechanical abilities, please seek out a friend that can assist you or a professional shop that can complete this install for you. We recommend that you perform this upgrade when the vehicle is cool, as you’ll be in the vicinity of potentially hot engine components and will come into contact with engine oil. Lastly, this would be a great time to perform an oil change to your car as we will be opening up the oiling system. If you still have many miles left on your current oil service, utilize a new/clean drain pan so that you may put the drained oil back into your car after the install is complete.
Procedure
Let's get started
1. We will be going underneath the car for this installation, so let’s begin by placing wheel chocks behind the rear wheels and setting the vehicle up on jack stands. Your work surface should be solid and as level as possible. Do not perform this installation on uneven, soft ground or any surface where stability could potentially be an issue. Above all, stay safe!
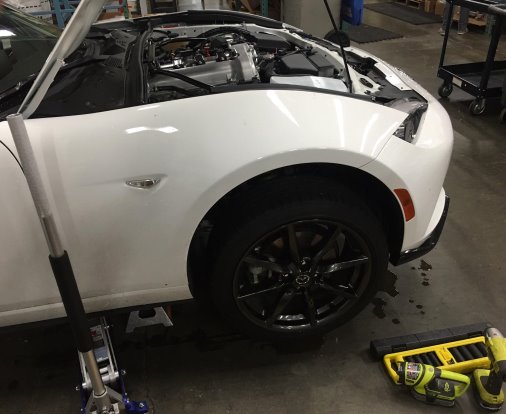
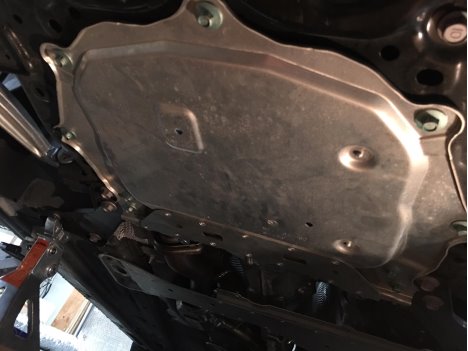
2. Once you have the car in the air and have determined that it is safe and stable, slide underneath the vehicle with your 12mm socket and ratchet wrench. We will need to remove the aluminum panel under the engine just aft of the front wheels. There should be (9), 12mm bolts around the perimeter of the panel attaching it to the car.
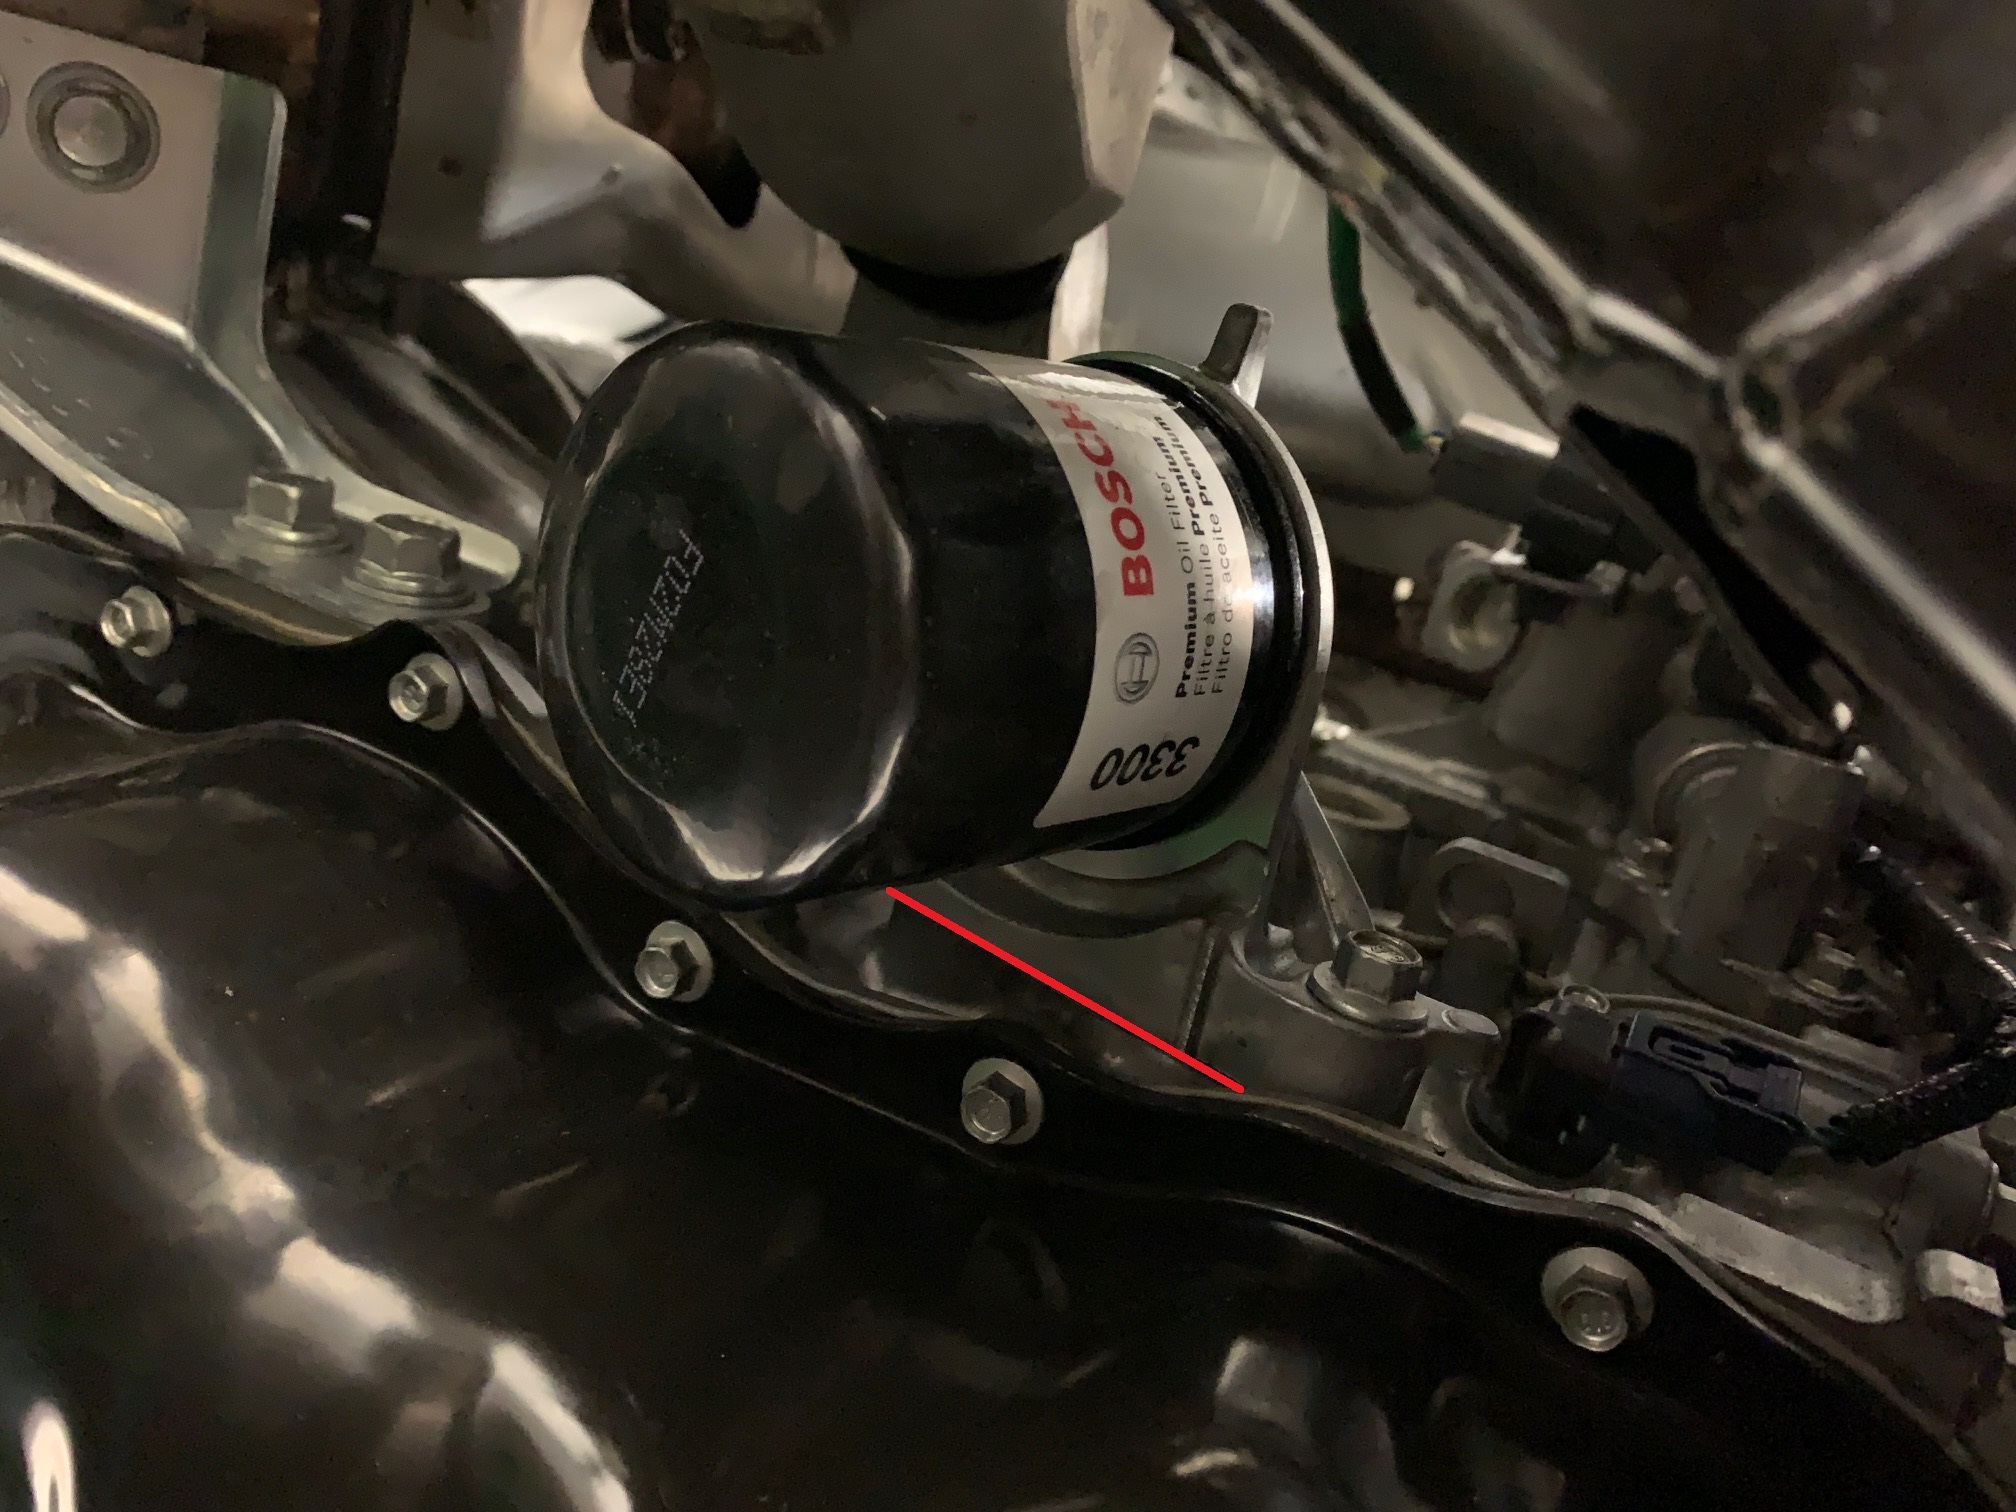
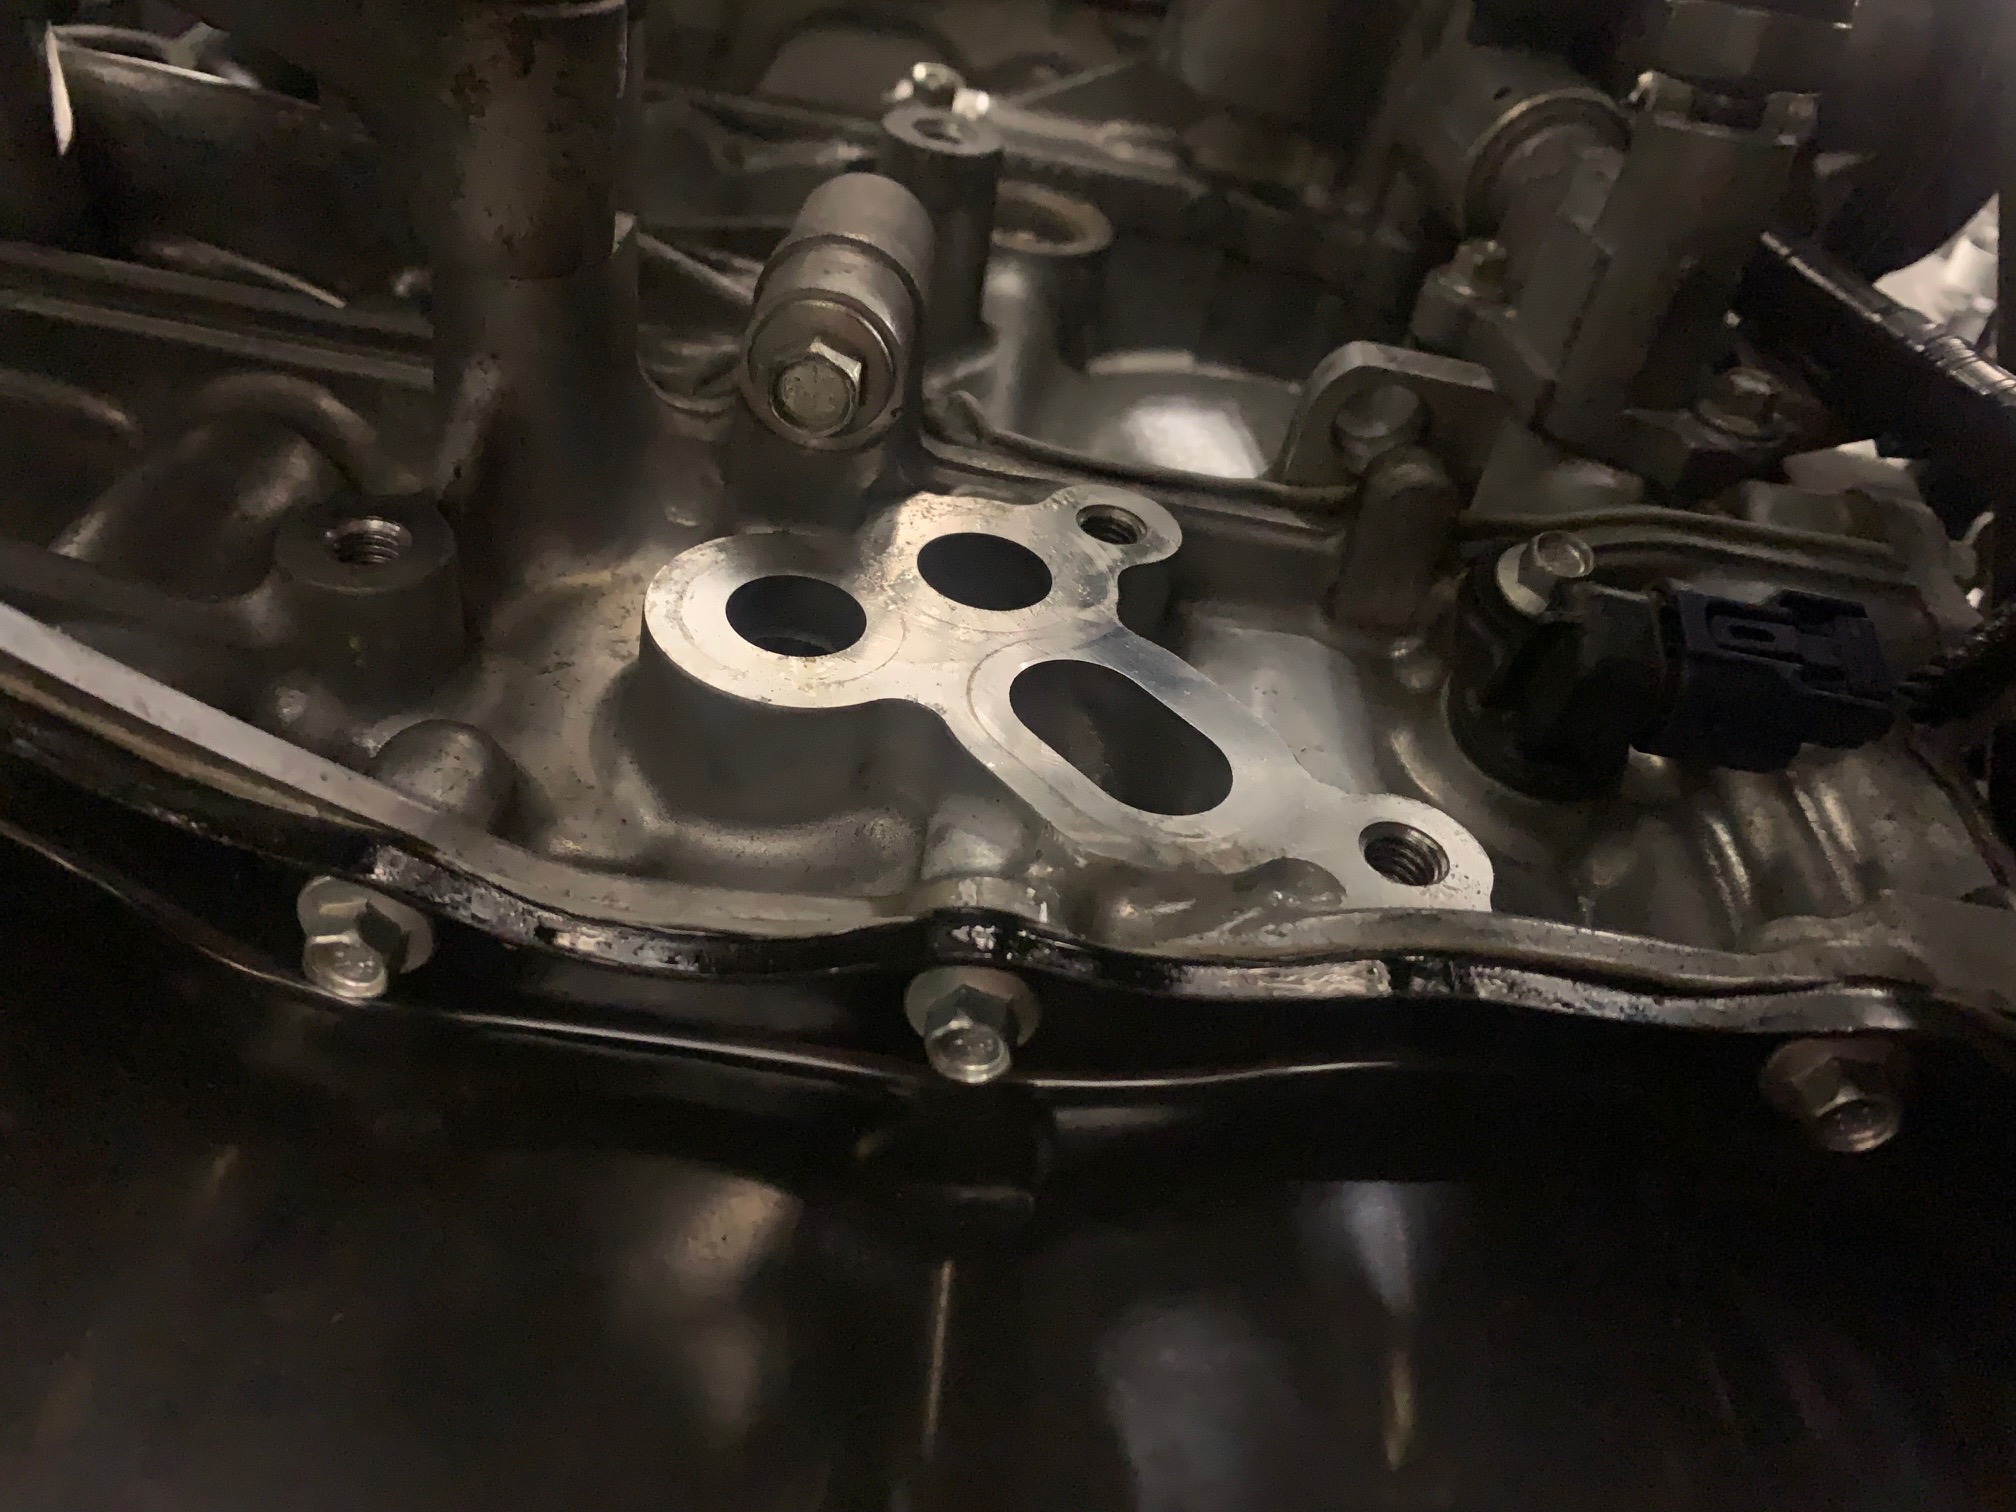
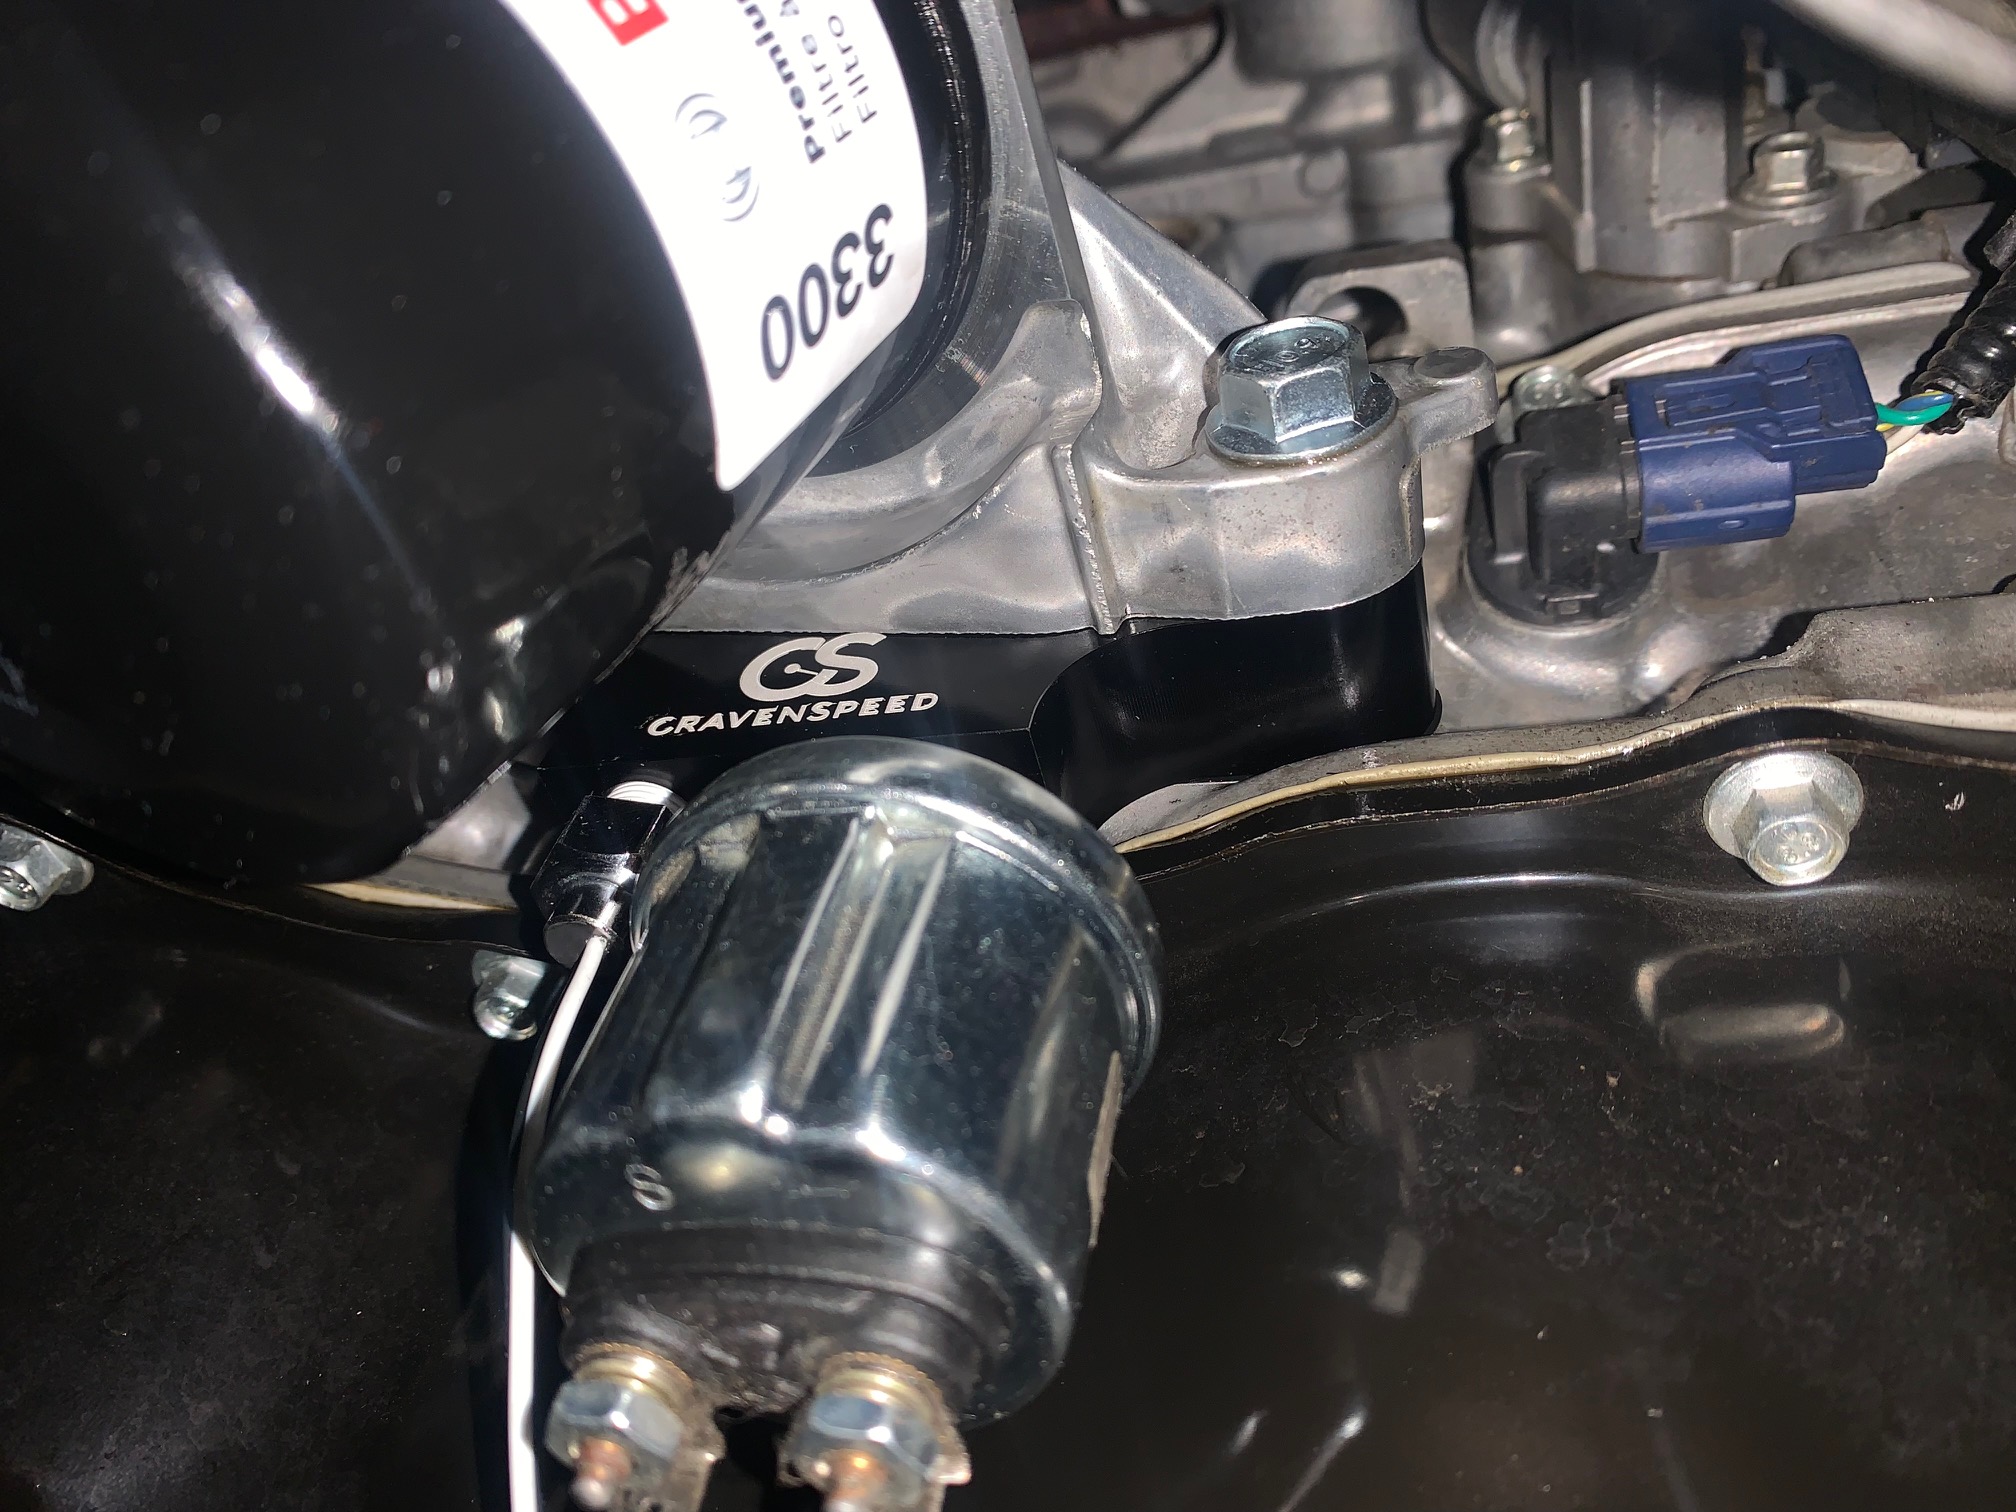
3. We will be installing the Tapless Adapter Block between the engine oil filter adapter and the engine block. Removing this oil filter adapter opens up the oiling system, so we're going to need to drain the oil out of the engine.
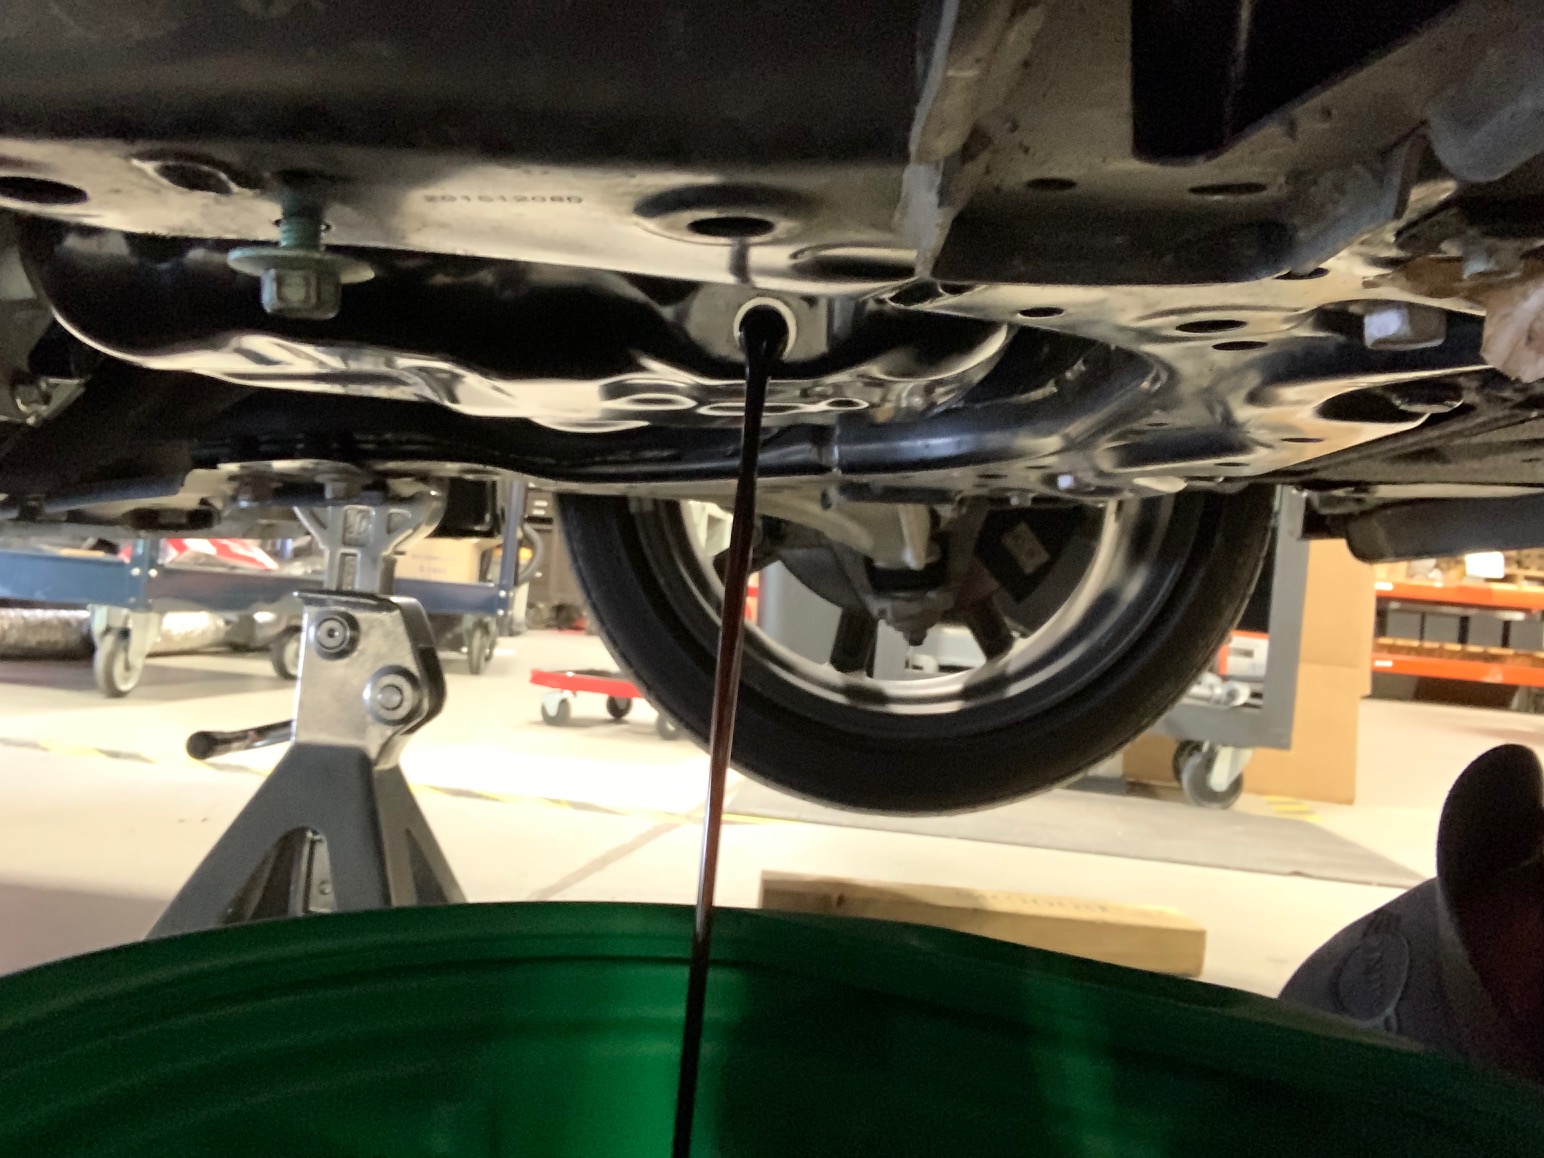
4. Slide out from under your car and pop open the hood. Remove the oil filler cap and set it next to the inlet. Go back under your car with your oil drain pan in tow and place it under the oil drain plug. Utilizing your 8mm hex wrench, remove the drain plug and drain the oil. Once the oil has drained out, replace the drain plug, tighten it and slide the oil drain pan out from under the car.

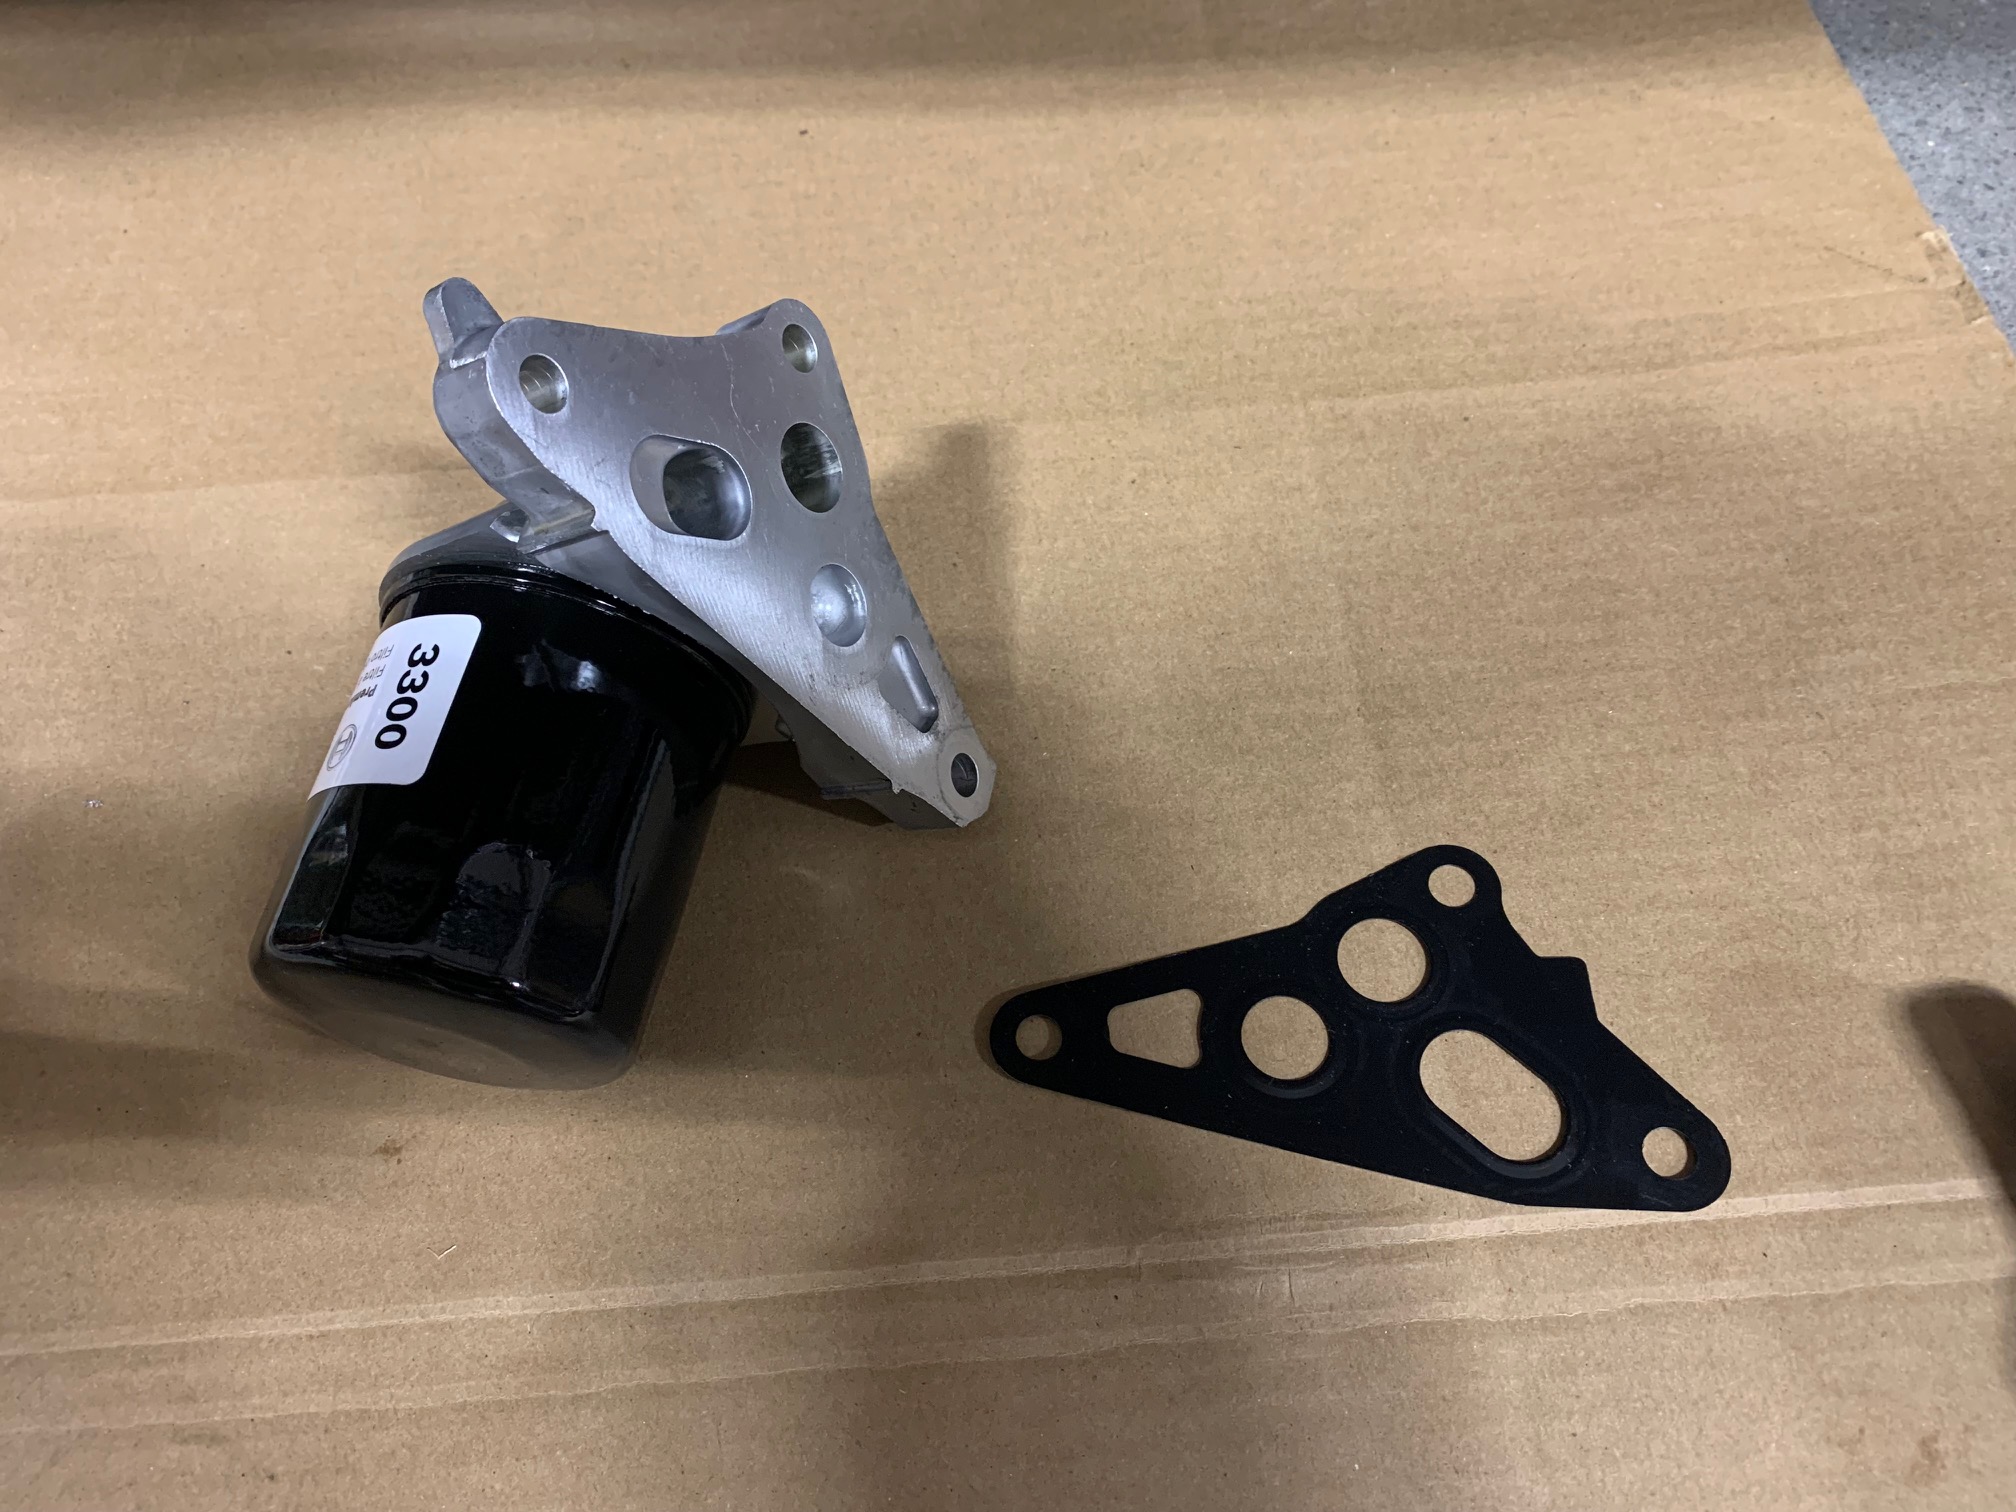
5. Locate the engine oil filter adapter and use a 10mm socket wrench to remove the three screws holding it to the side of the engine block. Have a couple shop towels handy so you may minimize the oil spillage.
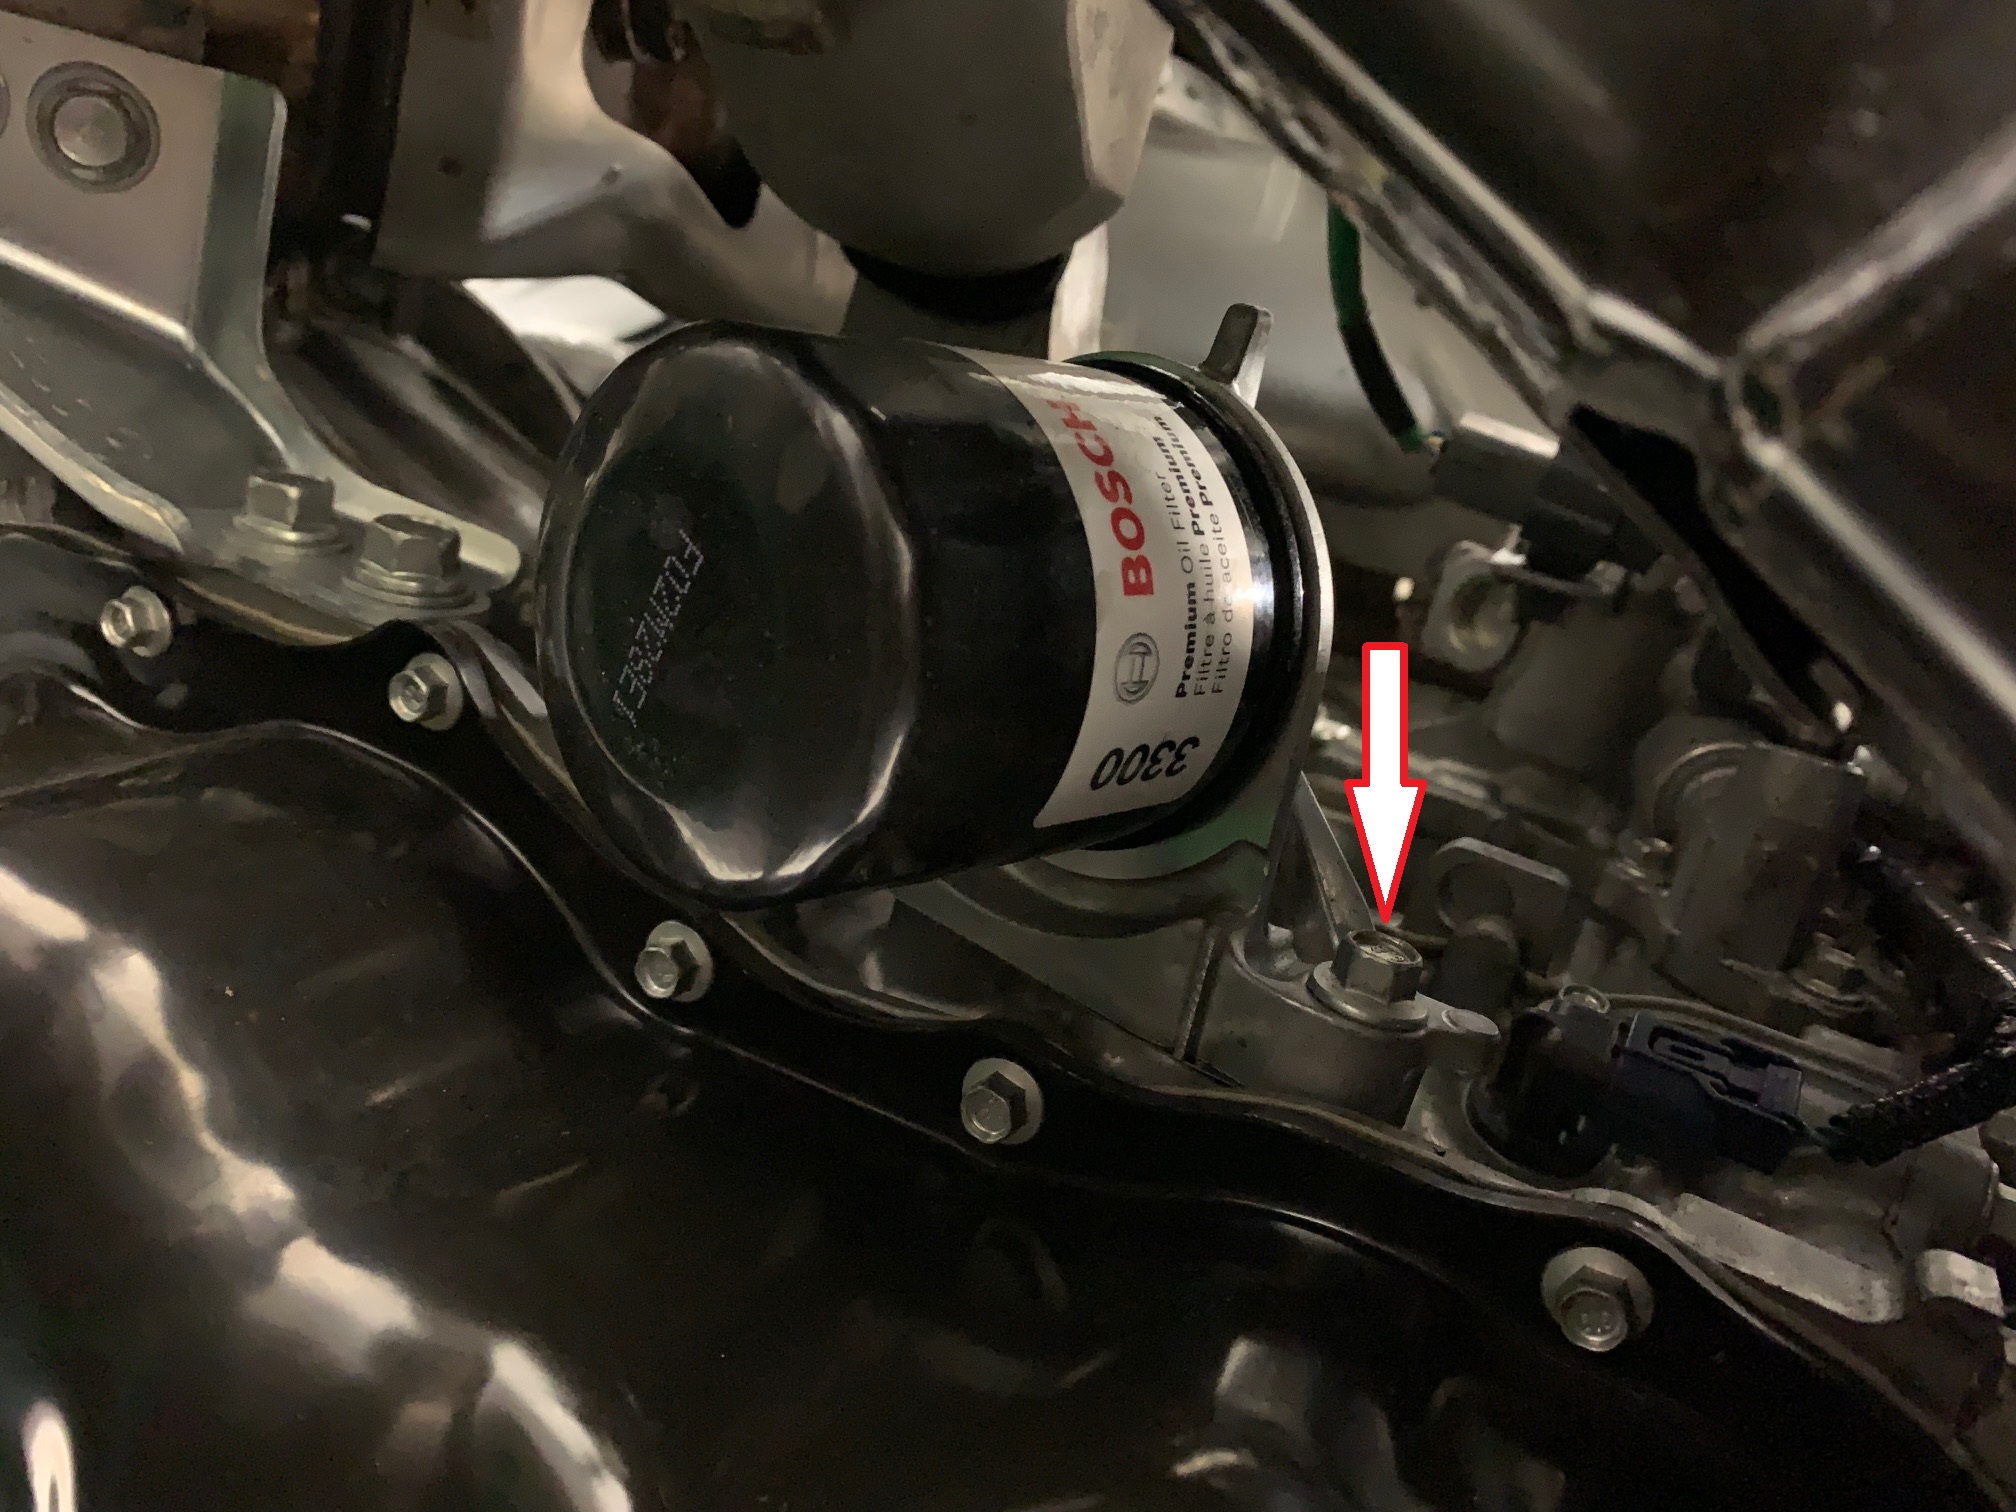
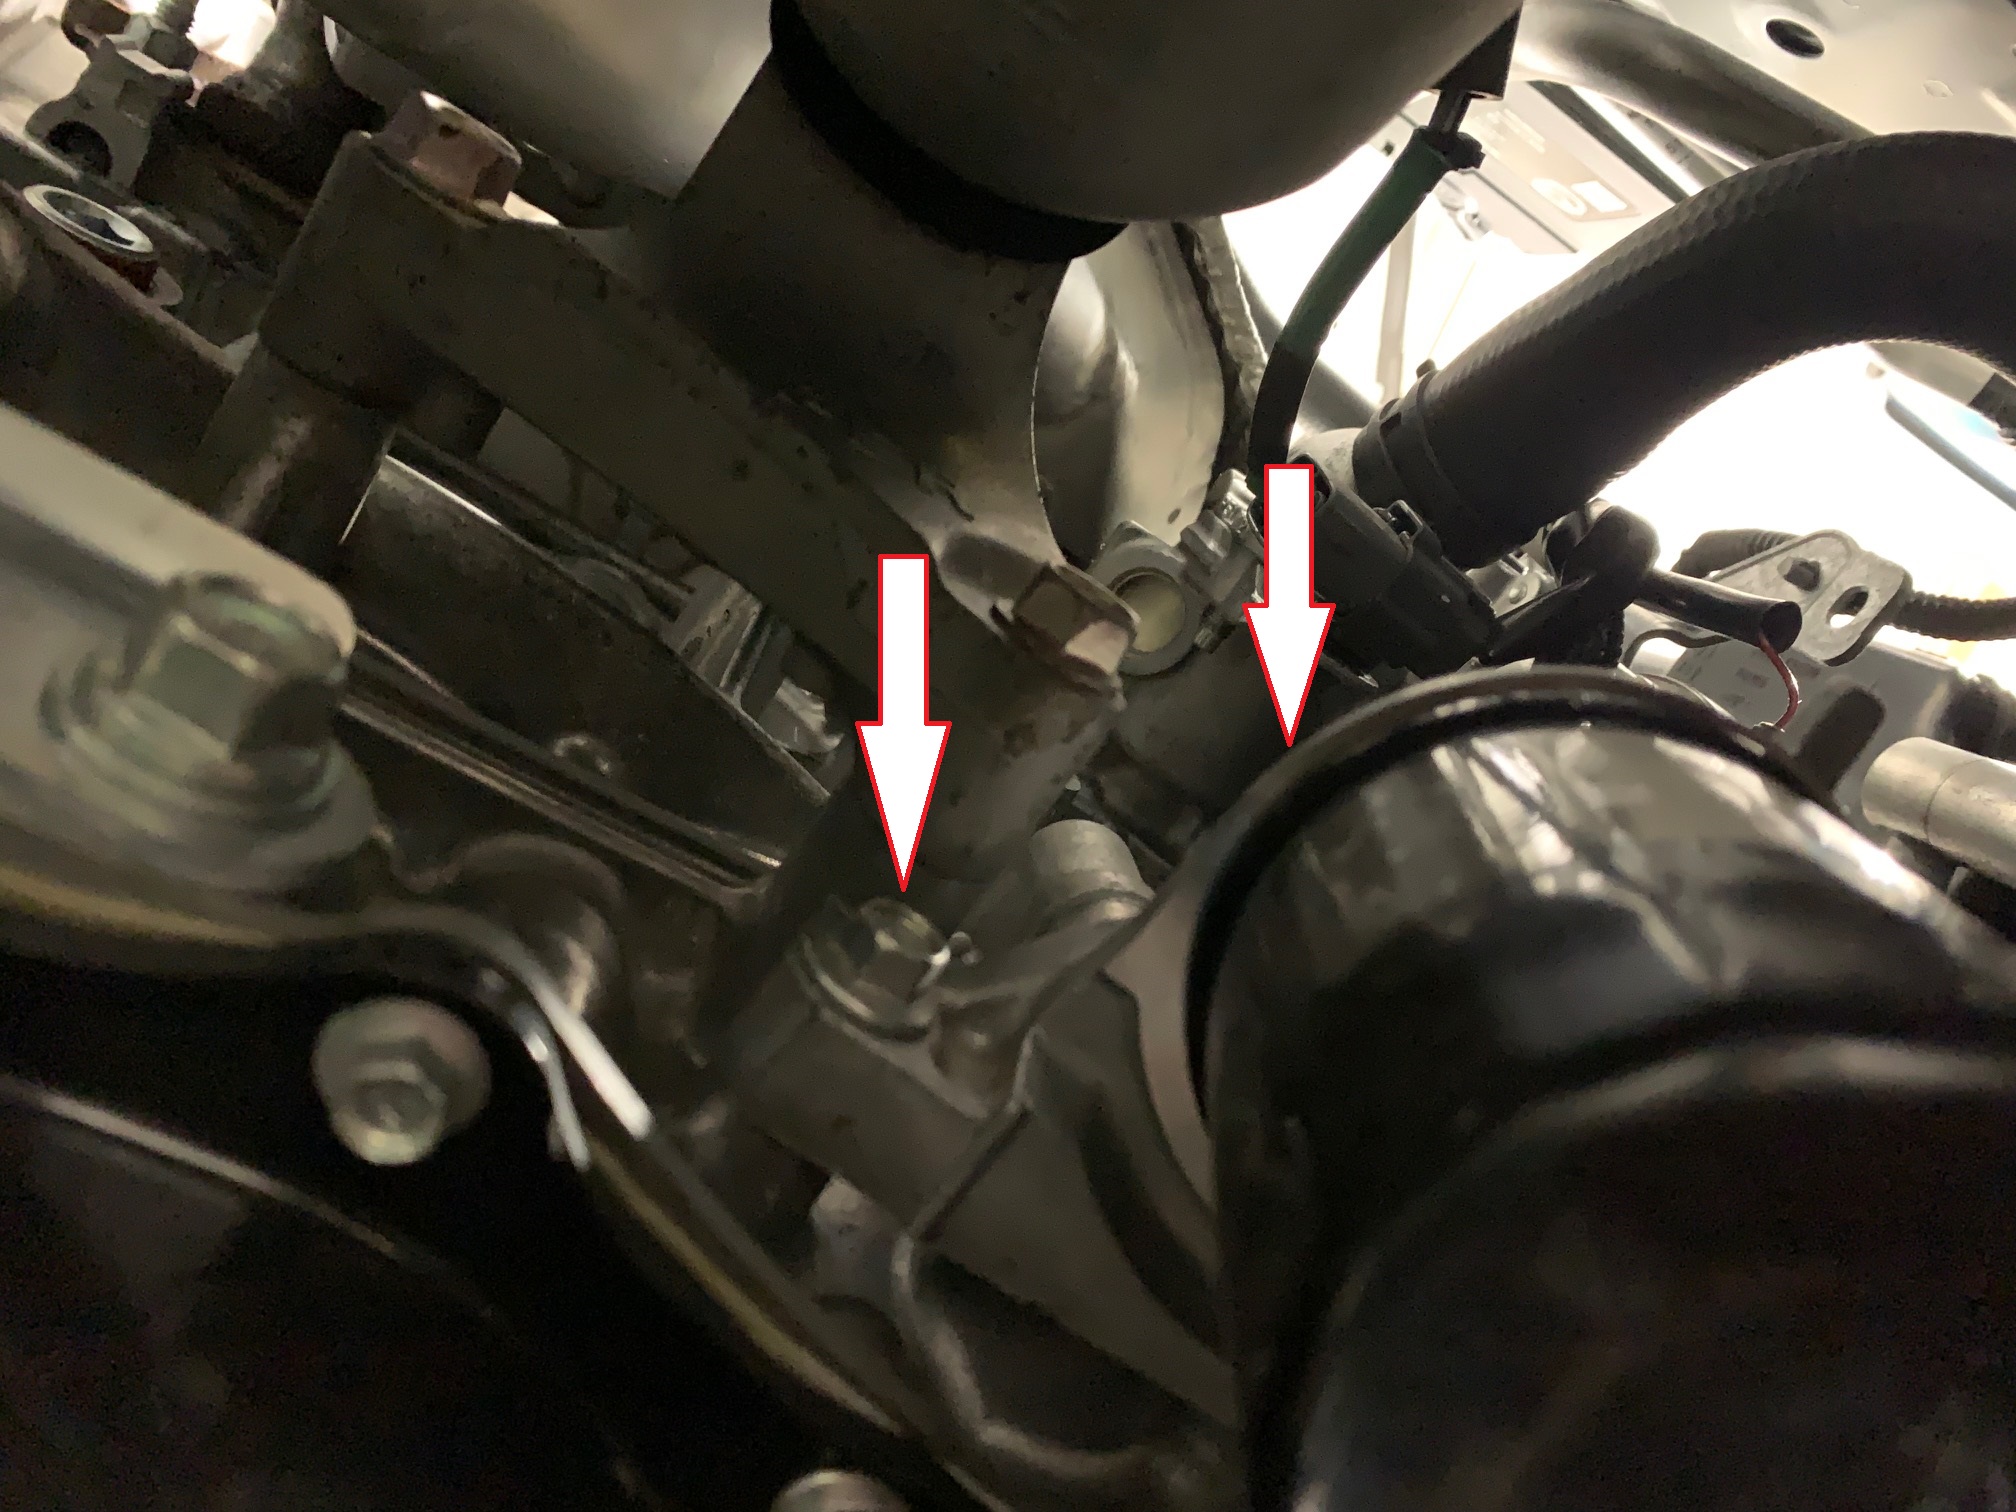
6. The factory gasket for the oil filter adapter is metal with no sealant, so it should come off with minimal effort. Do not damage or throw away this gasket as you will be reusing it for the install of this product.
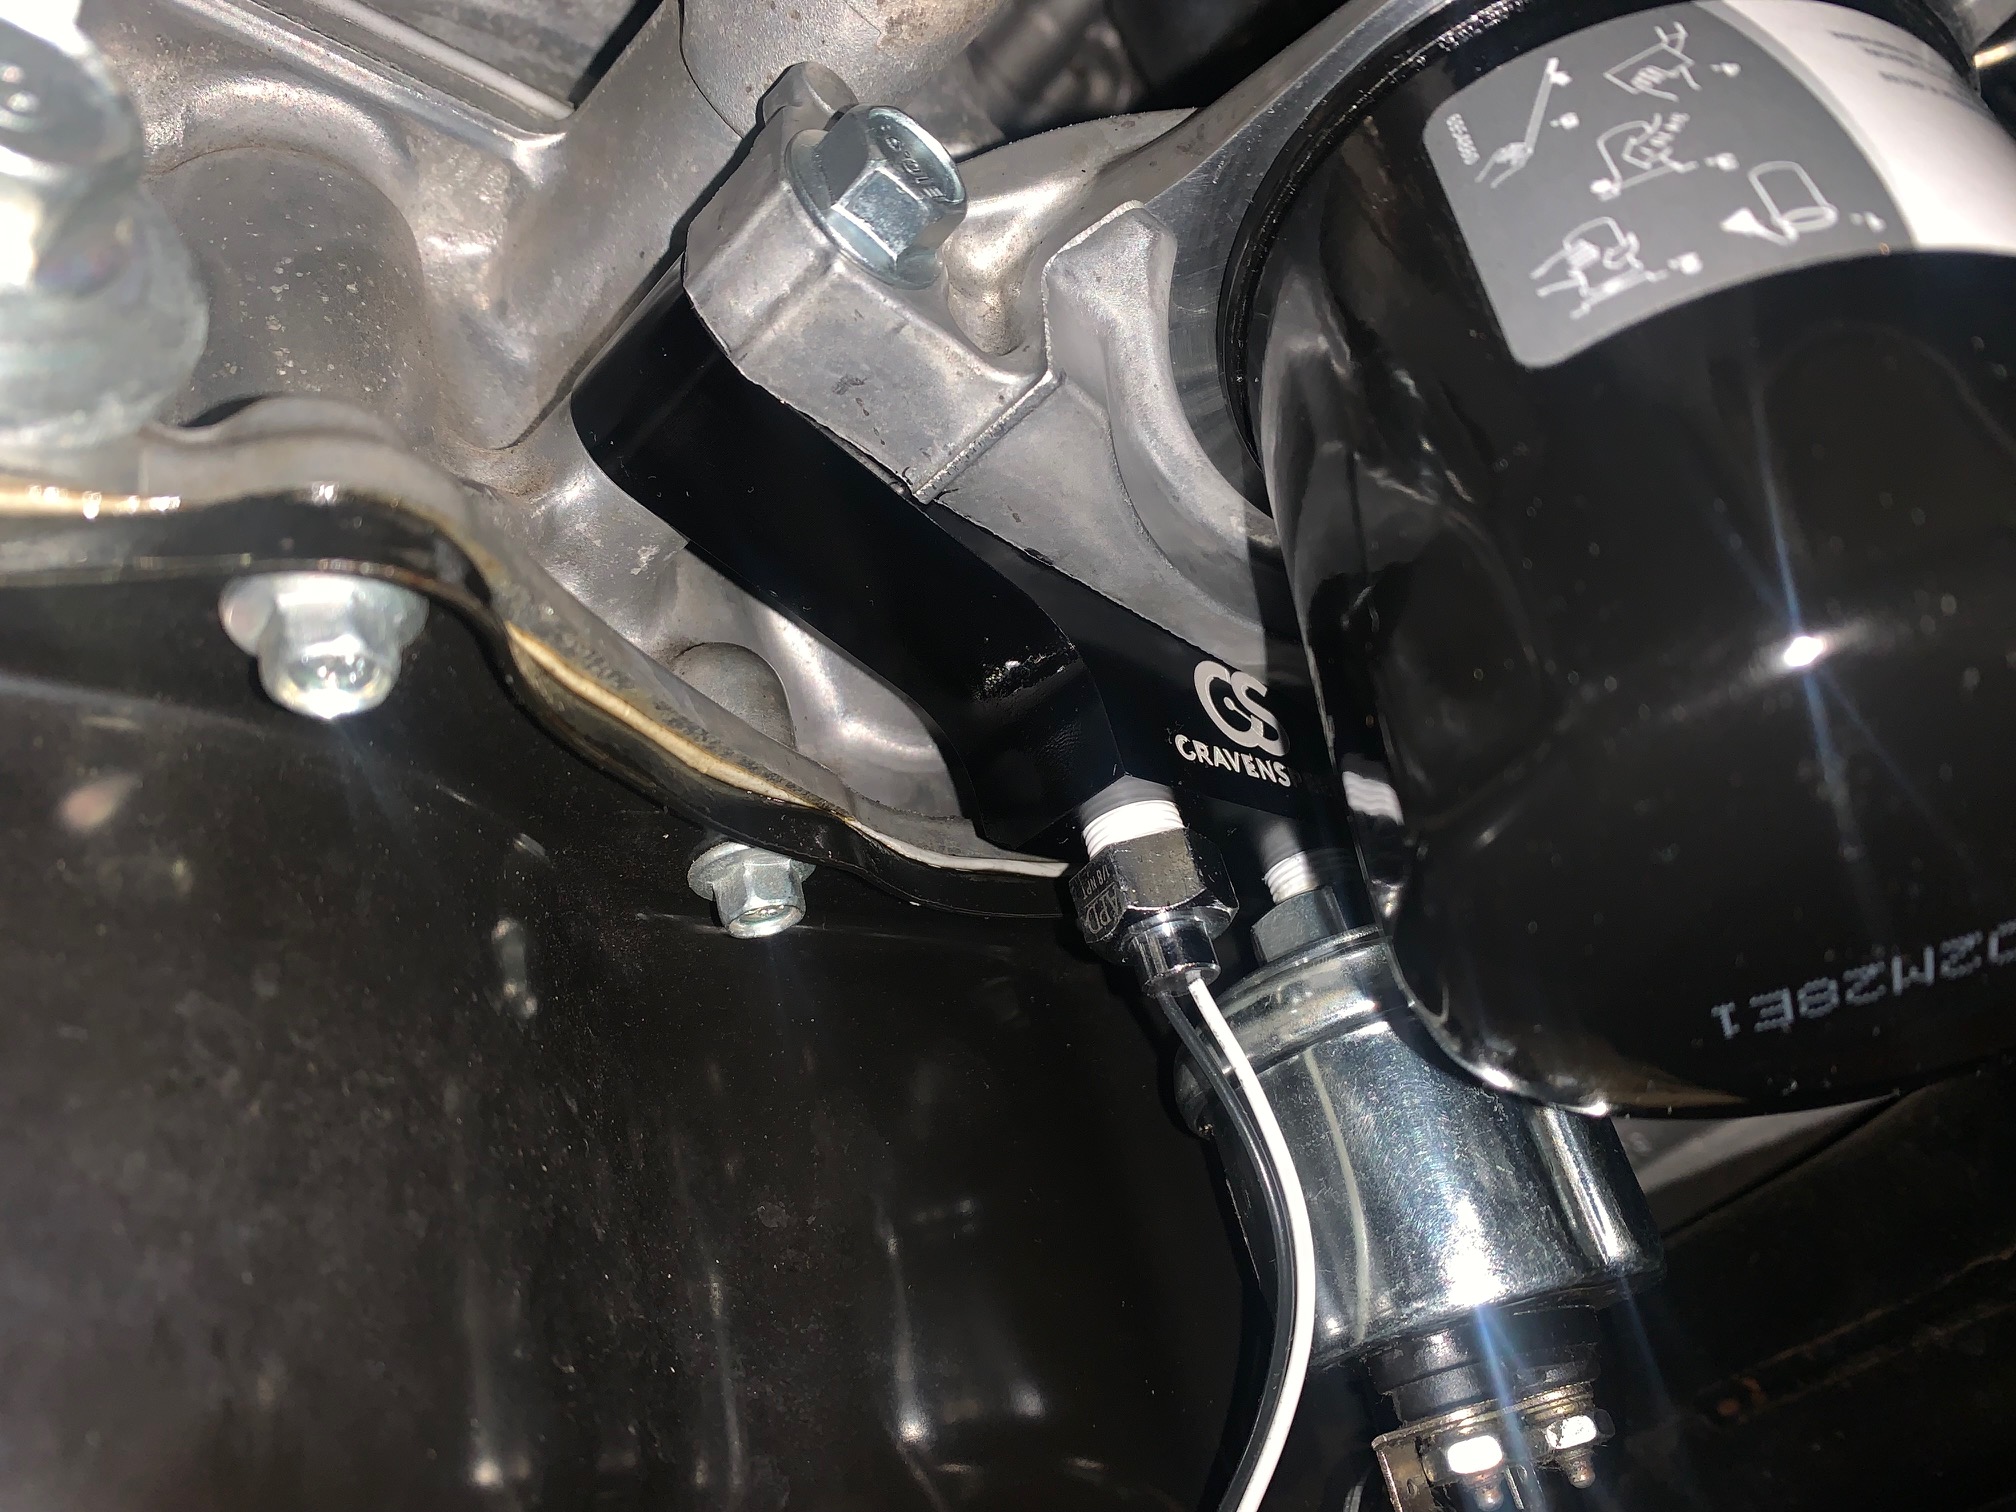
7. Take the CravenSpeed Tapless Temp and Pressure Adapter and install the o-rings into their respective locations. The two smaller ones go into the round grooves while the larger o-ring is placed into the oblong groove.
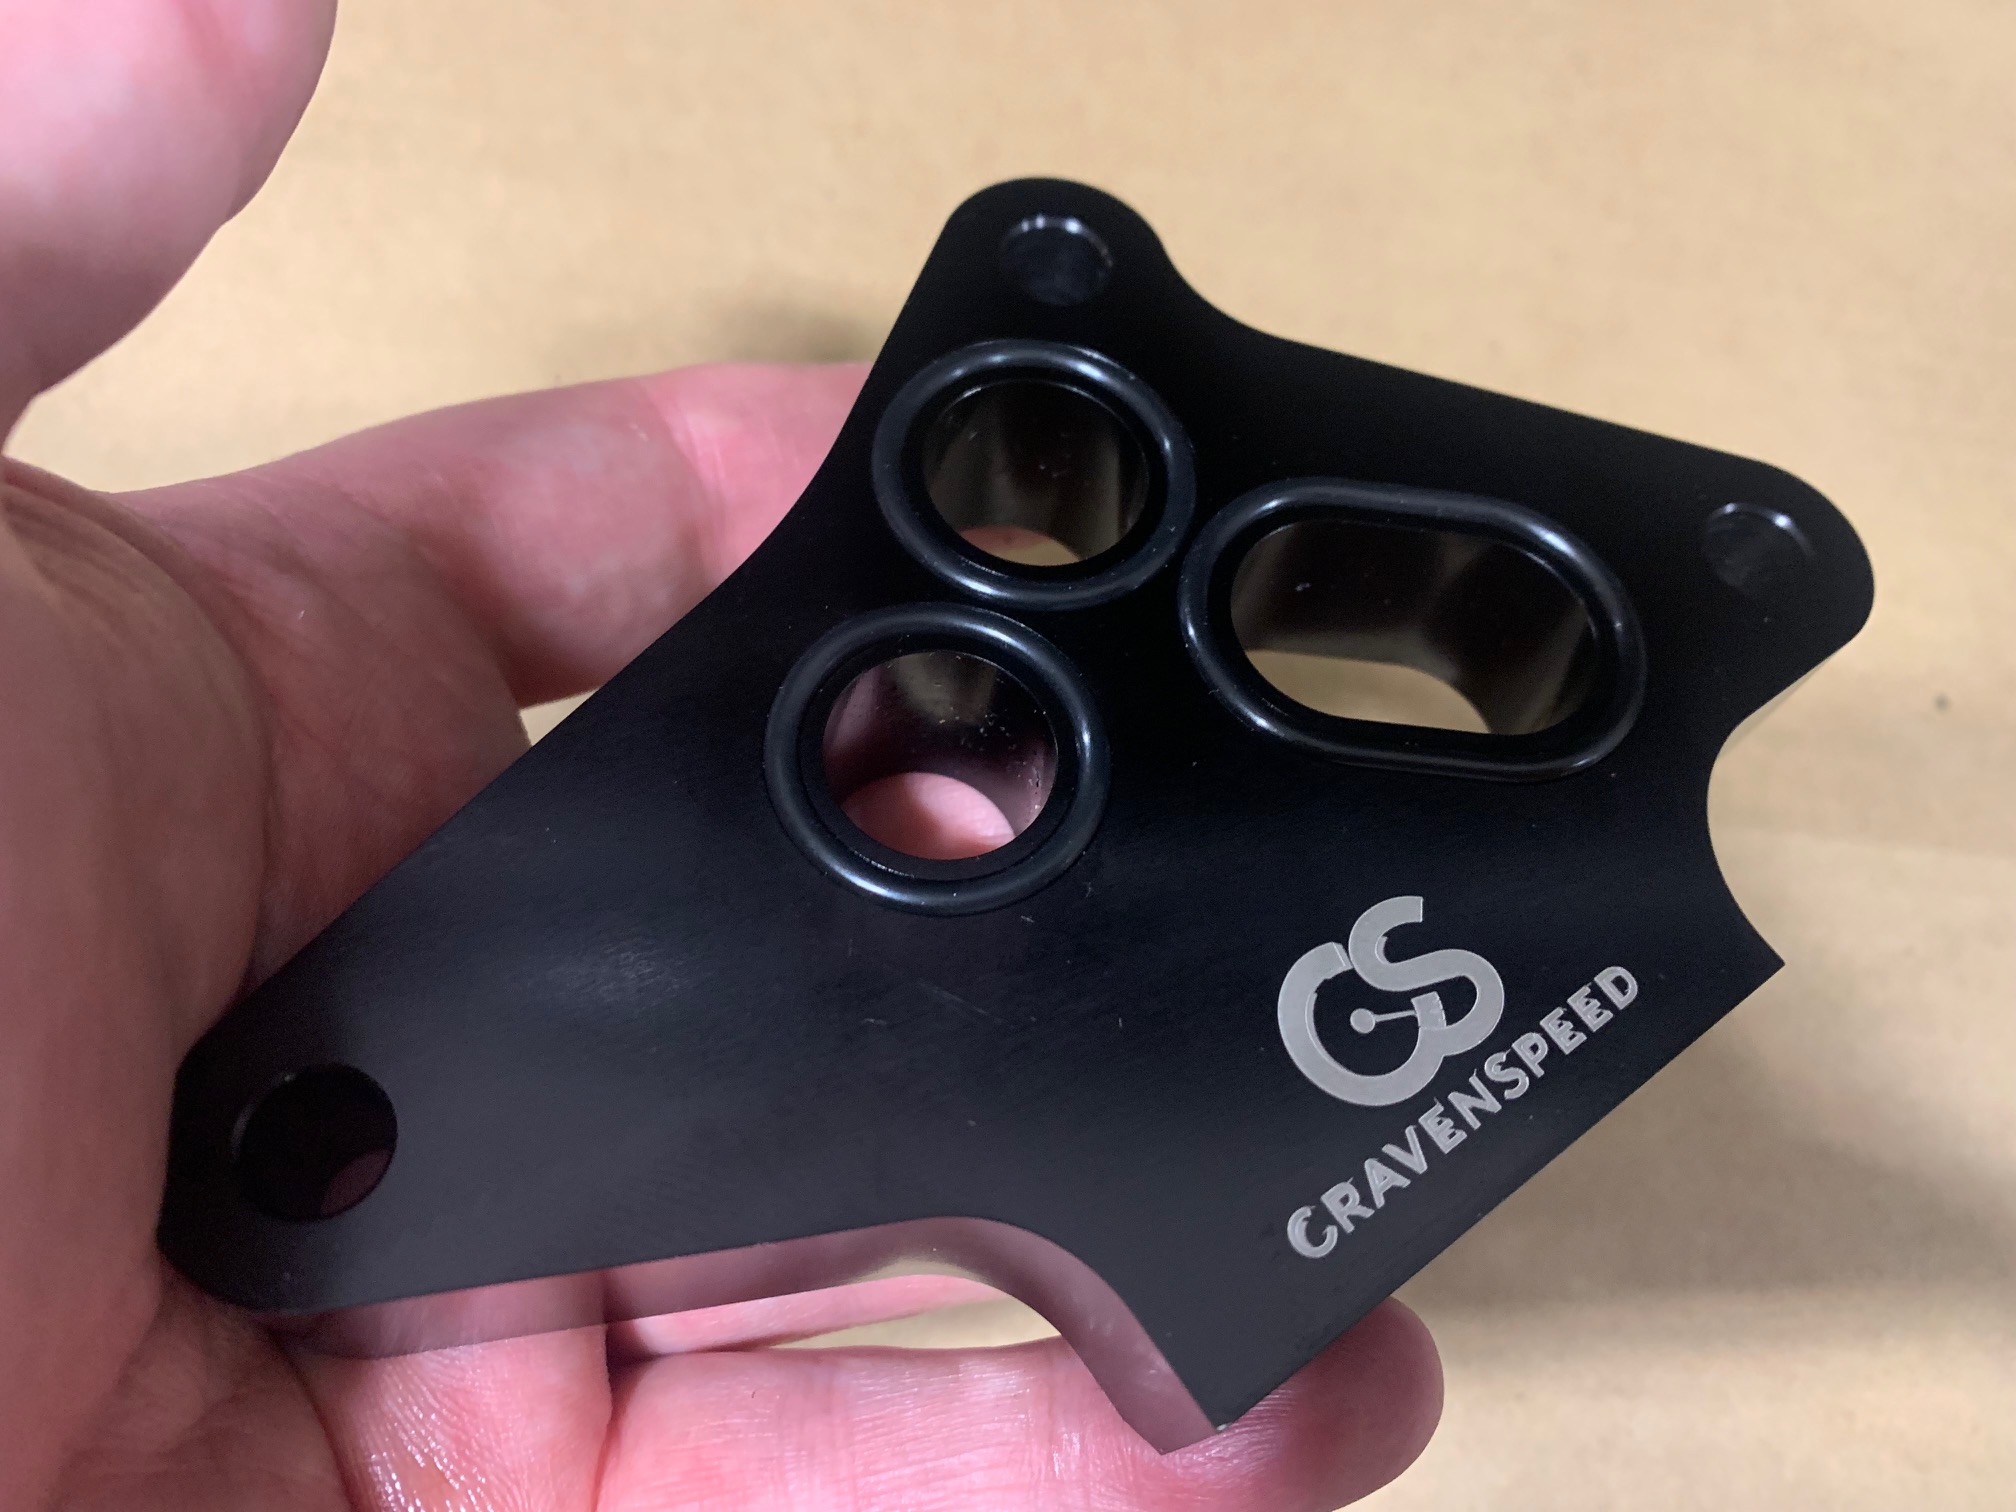
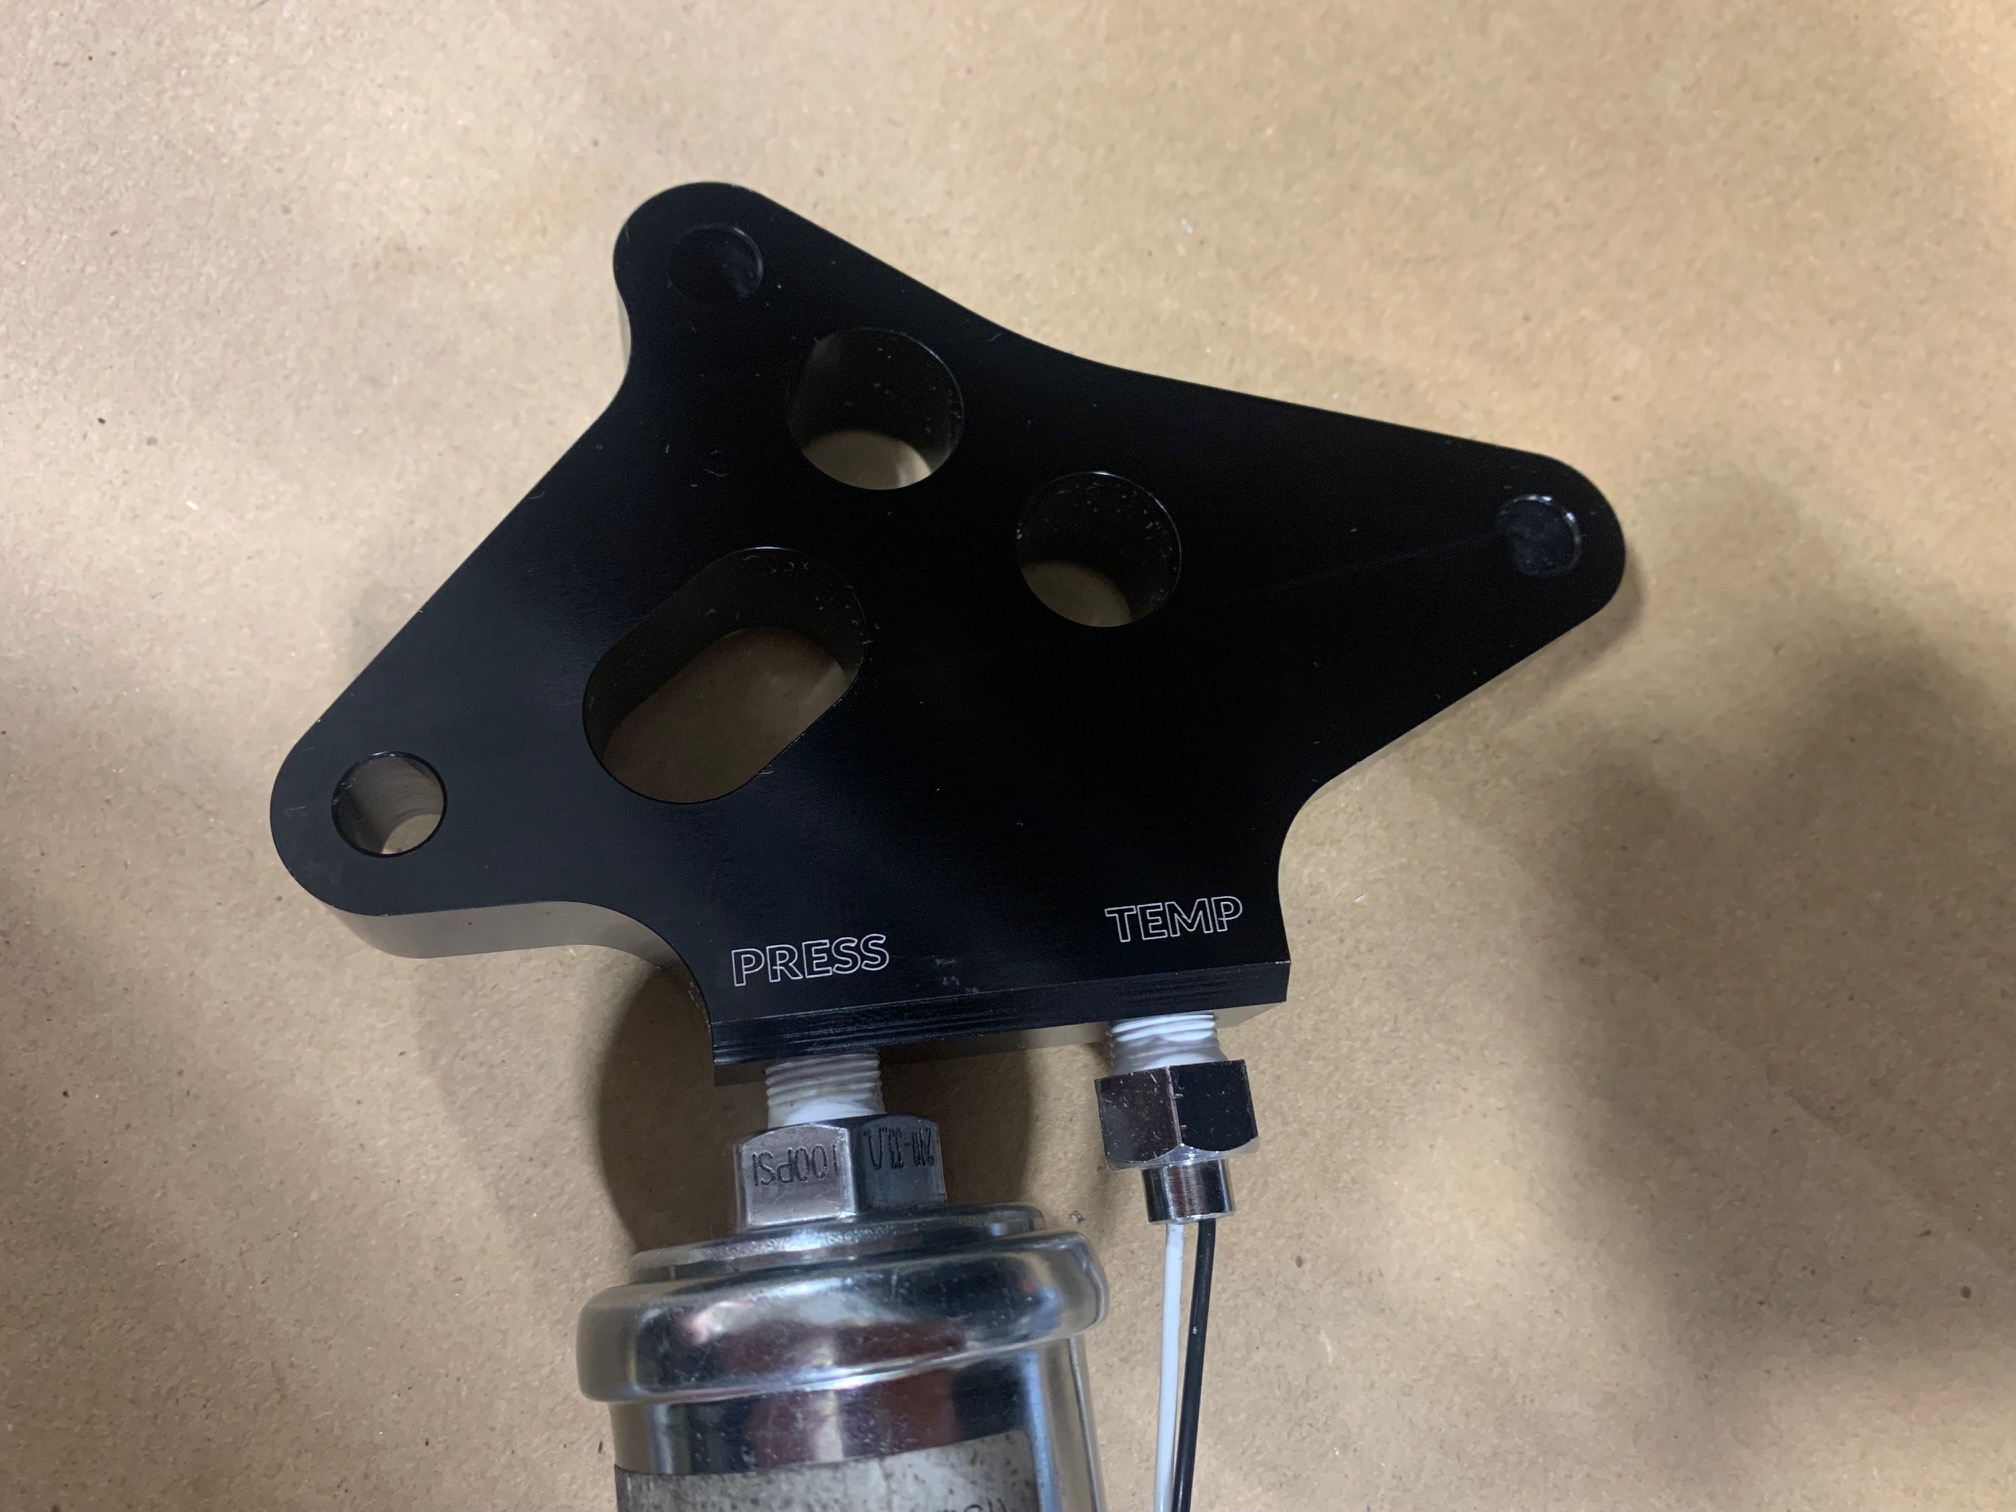
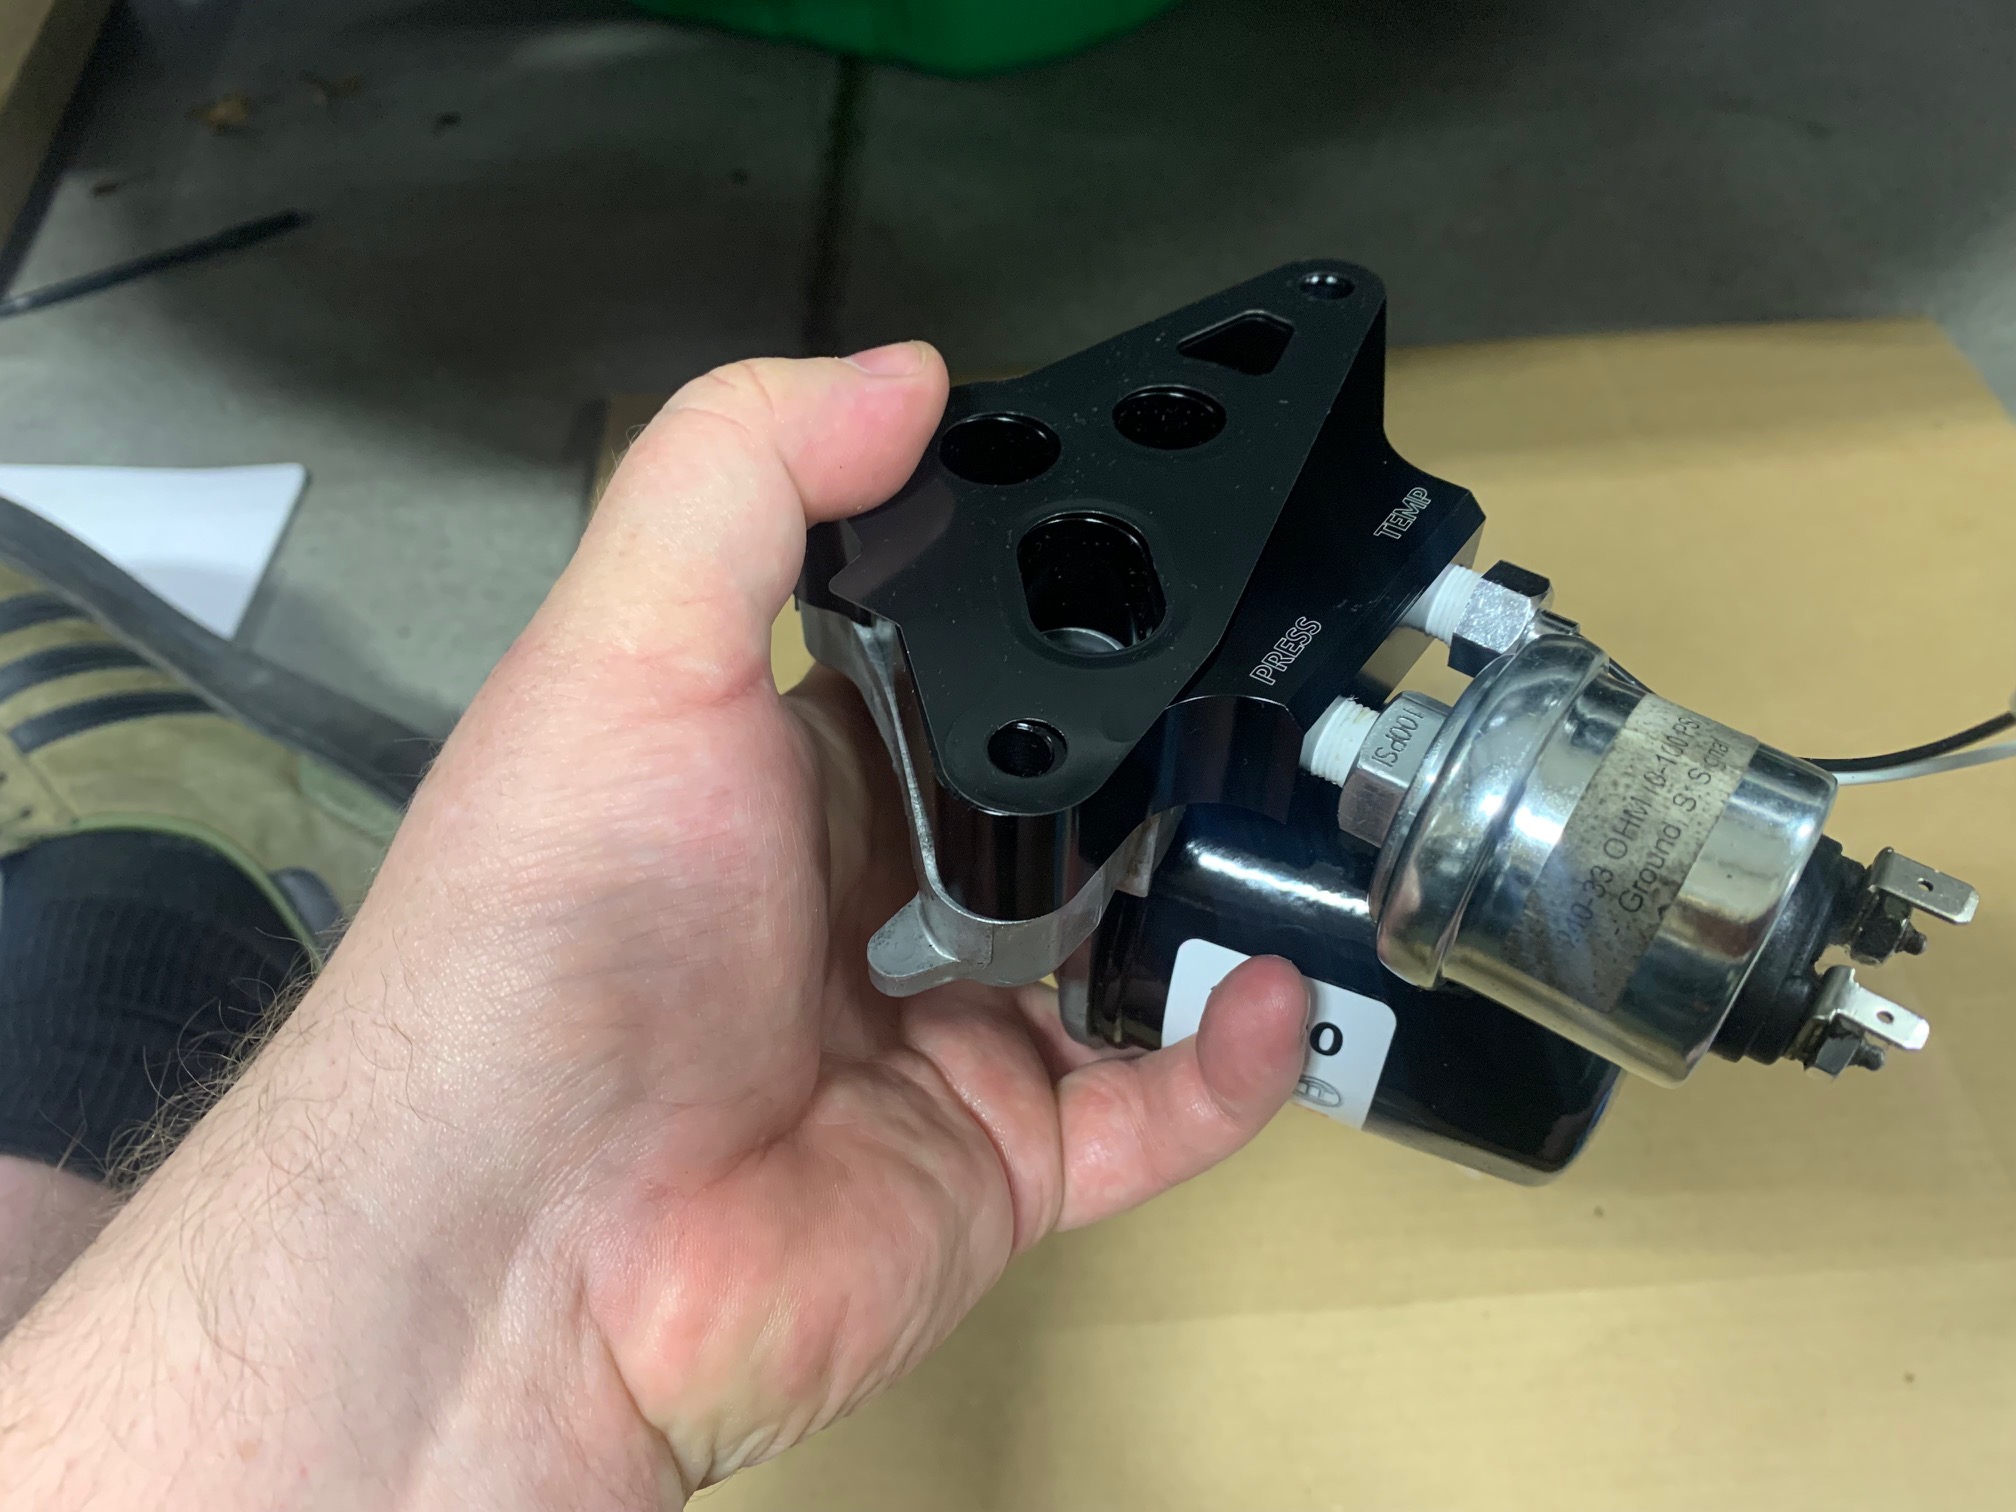
8. We recommend that you install your gauge sending units into the Tapless Adapter before you install it onto the engine. Take note of the port markings so that you install the senders into their proper locations. We have also provided two (2) 1/8" NPT plugs in case you decide to install your gauge sending units at a later date.
9. Insert the three included longer flange screws through the engine oil filter adapter and place the CS tapless adapter with the 'o-ring side' against it. The factory metal gasket then gets placed on before fitting the whole assembly against the engine block. Tighten these screws to 15-19 ft lbs with your 12mm socket wrench.

10. Refill your engine with factory specified motor oil and replace the filler cap.
11. Install and route any related gauge wiring taking care to ziptie them out of the way of any hot or moving engine components. Turn on the engine and run it for a minute or two to check for leaks and to ensure that the gauges are functioning properly. Make any adjustments if necessary.
12. Re-install the aluminum under engine panel, remove the jack stands, lower the car, and remove the wheel chocks. You’re done!