THANK YOU for purchasing the F56 Adjustable Short Shifter from CravenSpeed. This product is made from the highest grade materials, and is guaranteed to be free from defects.
You can buy our CravenSpeed Adjustable Short Shifter for MINI F56 here
Parts Included:
- Cravenspeed Adjustable Short Shifter
- Cravenspeed Shifter Retaining Clip Pro (if purchased)
Tools Required:
- Flat-Head Screwdriver
- 10mm Socket & Ratchet Wrench (shifter only)
- Trim Panel Removal Tool
- T20 Torx Driver
- 2.5mm Allen Wrench (retainer only)
- Drift
- Mallet
- COMMON SENSE :)
Procedure
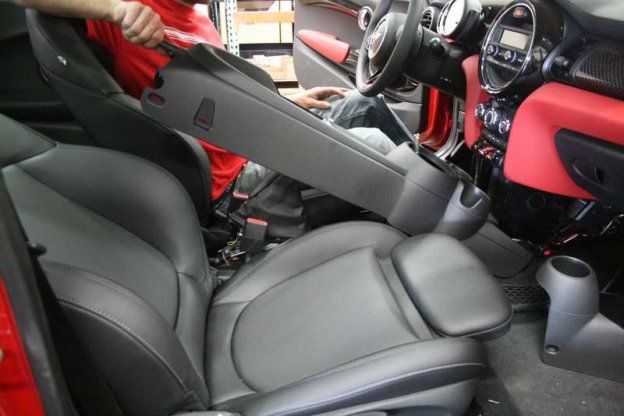
Step 1. Remove the Center Console
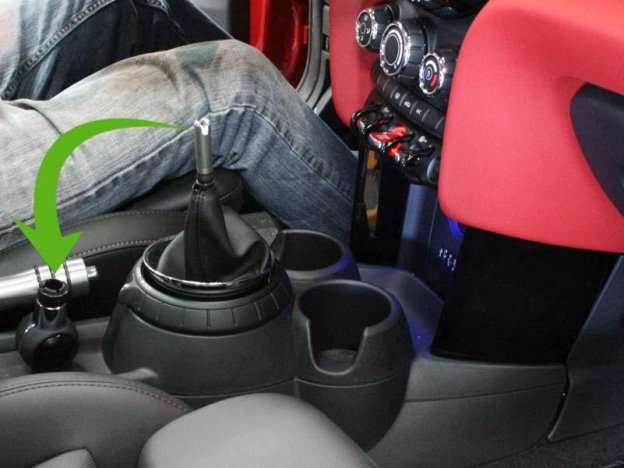
1a. Remove the stock knob. With a firm grip, pull up sharply and your knob should pop right off.

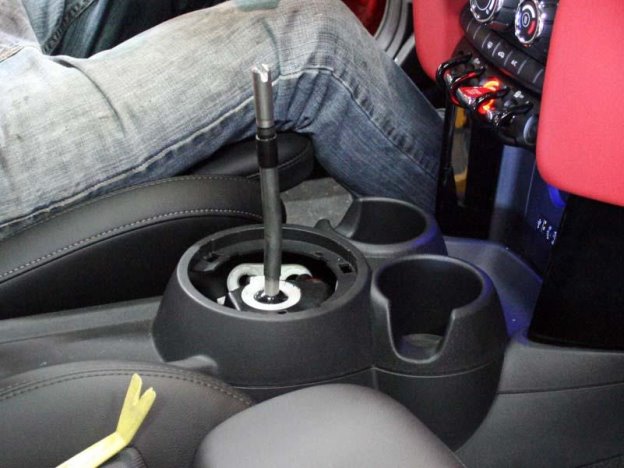
1b. Remove your shift boot. Utilizing a Trim Panel Removal Tool, pop the lower ring loose and unplug the Sport-Mode connecting wire before lifting it completely away.
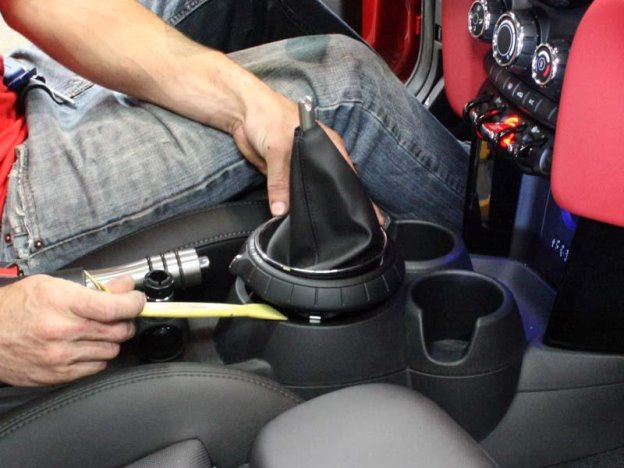

Don’t forget that Sport-Mode plug!!!
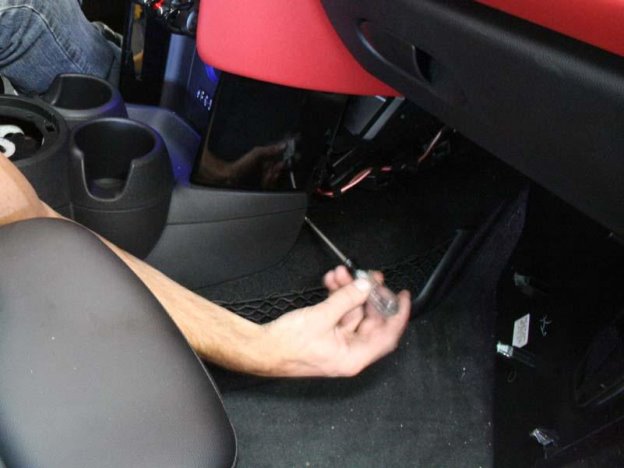
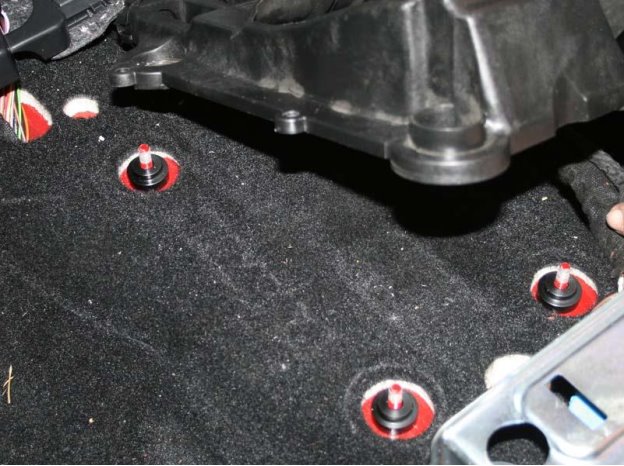
1c. Each kick panel has a Torx screw located up high about halfway to the foot well wall. Remove these screws and pop off both kick panels; one on each side of the center console.
1d. Remove the two Torx screws (one on each side of the center console) that are now exposed from removing the kick panels.
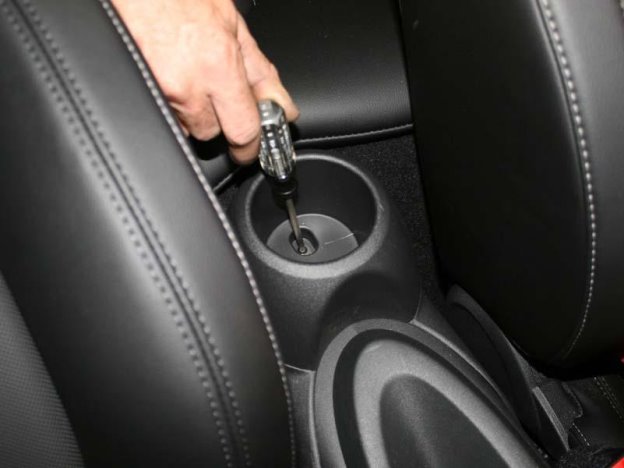
1e. Remove the Torx screw in the center of the rear cup holder and the two Torx screws on either side then lift out the rear section of the center console. Slide and flip your seats forward to access them from the rear passenger compartment.
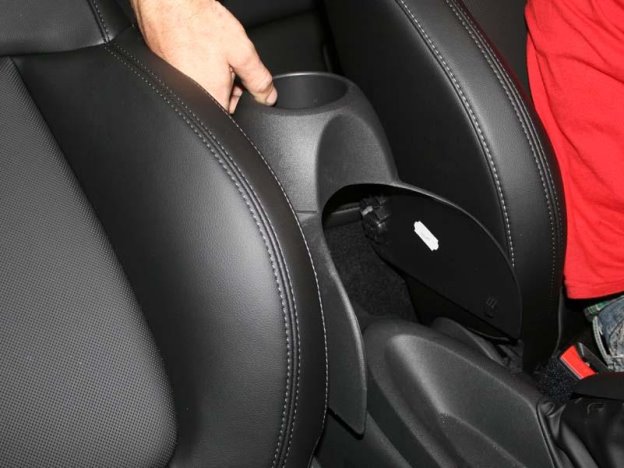
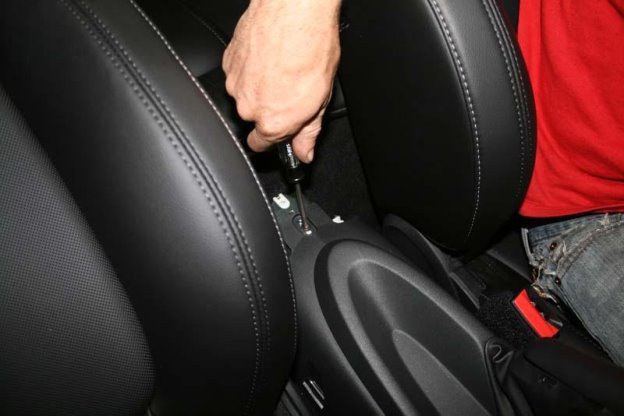
1f. Remove the Torx screw holding the rear of the center console. There is a single Torx screw on each side that will also need to be removed.
1g. Pull your parking brake up as far as it will go and pop loose the boot frame where it snaps into the center console.

1h. Starting at the rear, pivot/pull the center console up and out of the car. Feed the parking brake boot back through it’s mounting hole while you’re pulling up the center console.
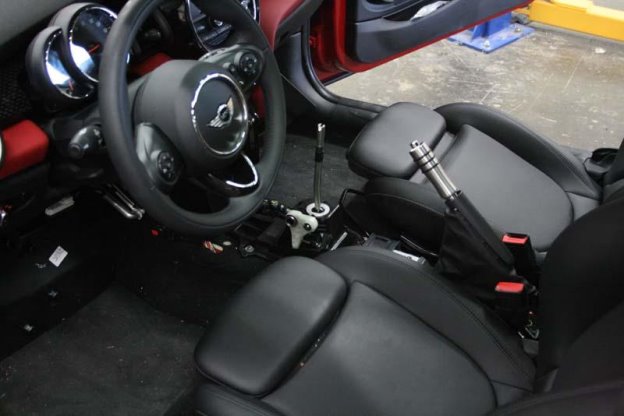
1i. You are now ready to proceed to the next step of the CravenSpeed Adjustable Short Shifter and/or MINI Shifter Retaining Clip Pro installation.
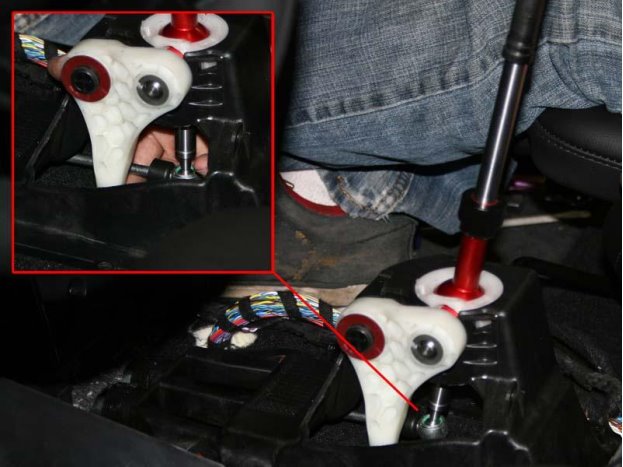
Step 2. Remove the Stock Shifter
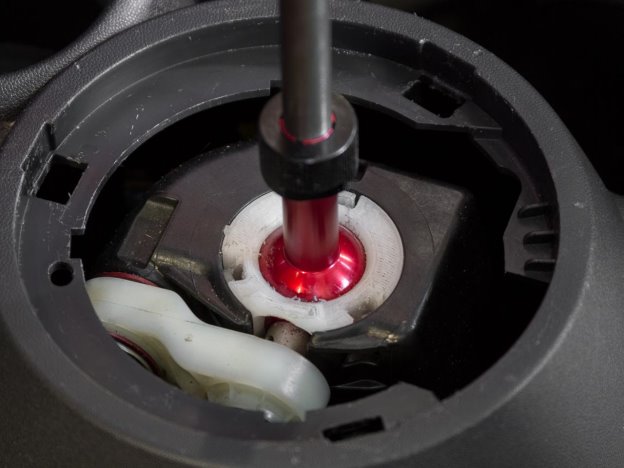
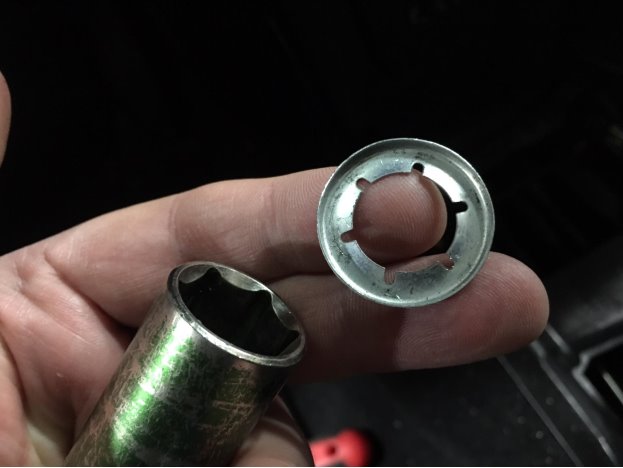
2a. Remove the push ring (washer with teeth) holding the reverse pivot assembly in place. Gently pry around it with a flat head screwdriver until it’s free. Don’t stress if you mangle this push ring because we’ve included a replacement if you need it. Take off the left-side, red bushing and the pivot assembly should just slip right off.
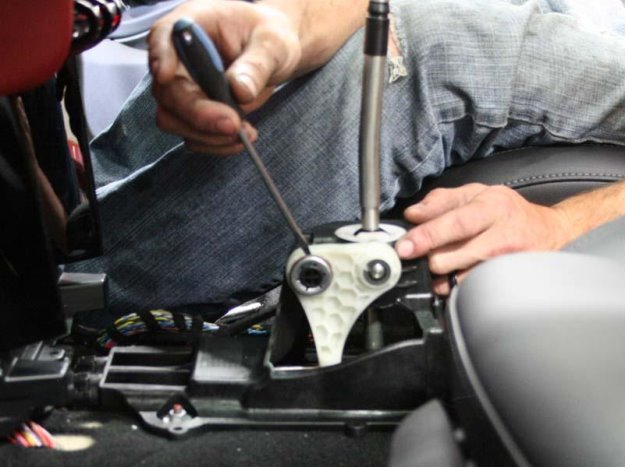
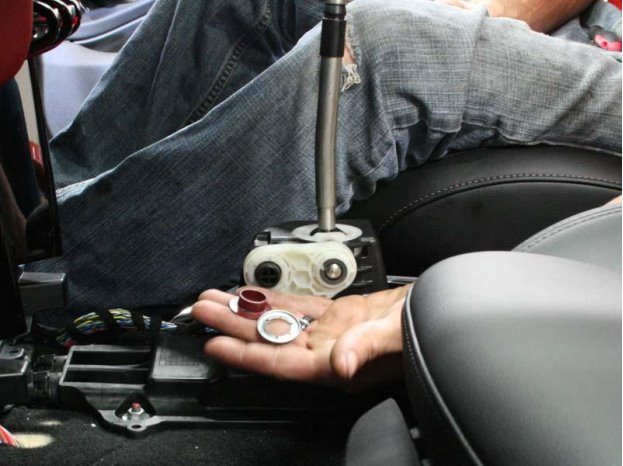
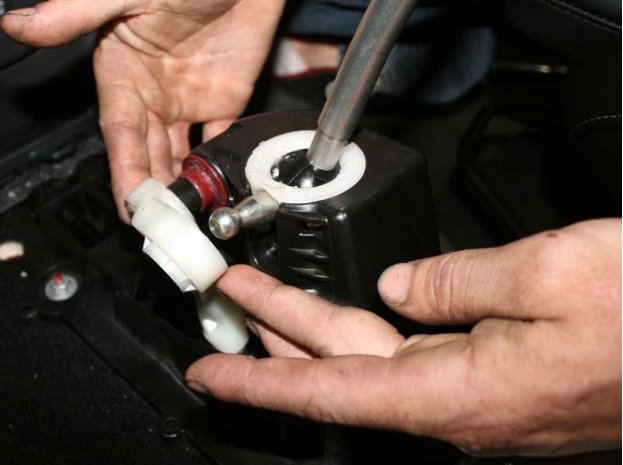
2b. Disconnect the shifting cables from the bottom of your stock shifter. Place a drift or flat-head screwdriver next to the pivot cup and give it a firm whack with a mallet. Use your wits and don’t overdo it and break anything. They should pop off without too much effort. NOTE: It may not be necessary to remove the shifter cable from the reverse pivot. If you think you can accomplish the install with it still attached, by all means leave it alone.
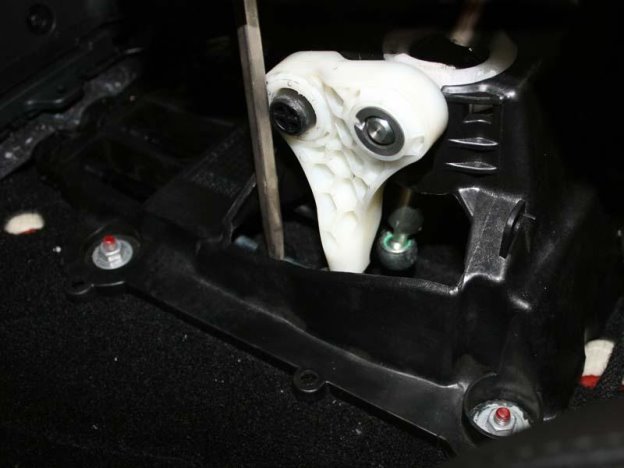
2c. Compress the three clips on the white shift retaining clip then pull your stock shifter up and out. (it may help to have a extra set of hands here)
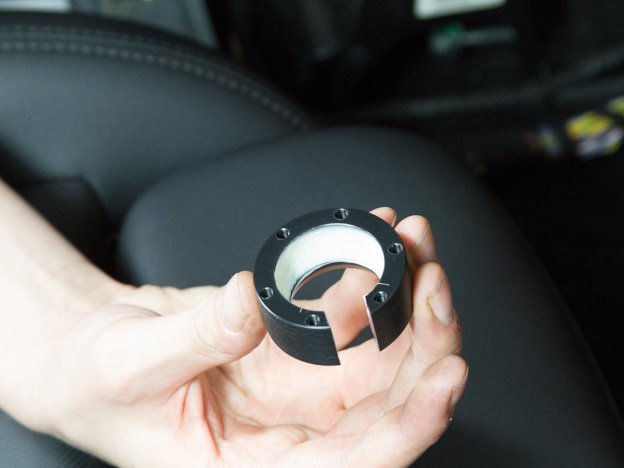
Step 3. Remove the Stock Shift Bushings
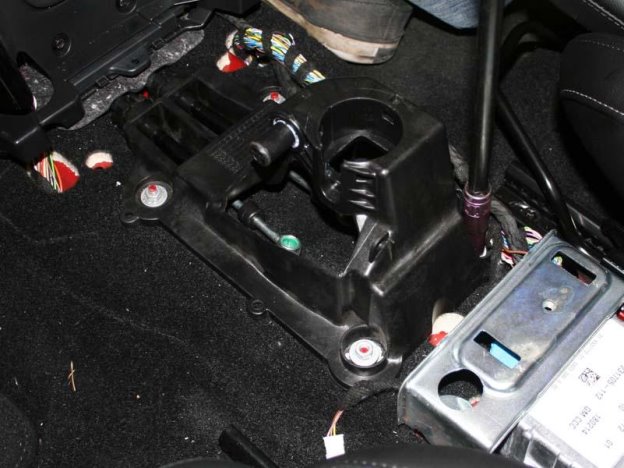
3a. Remove the four 10mm nuts holding the shift housing into place.
3b. Pull the stock bushings out from under the housing and replace them with the CravenSpeed bushings. Note the orientation of the bushings from the images below.
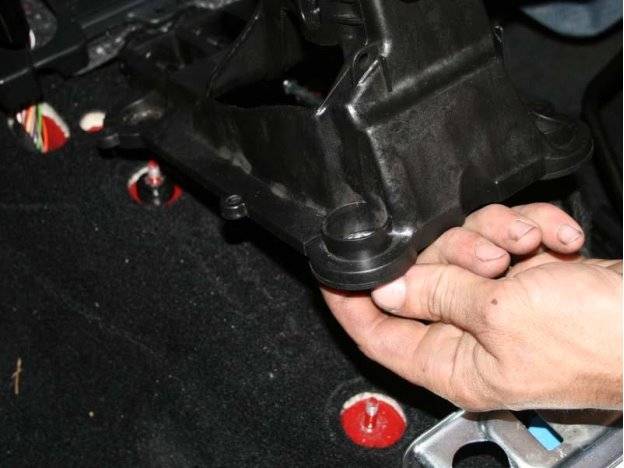
3c. Place the shifter housing back down over the newly installed CravenSpeed bushings and replace the four 10mm nuts.
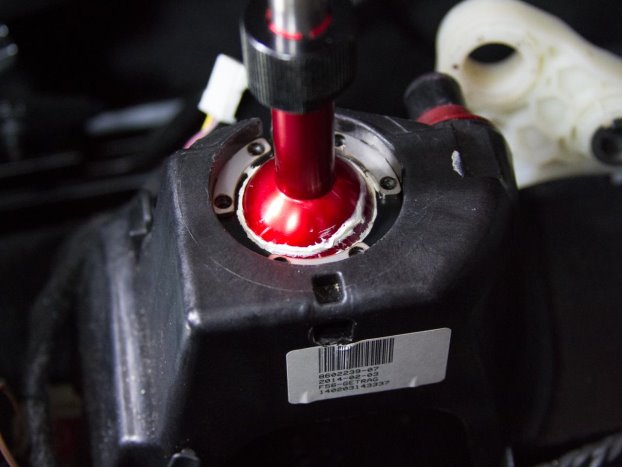
Step 4. Install the CravenSpeed Adjustable Short Shifter
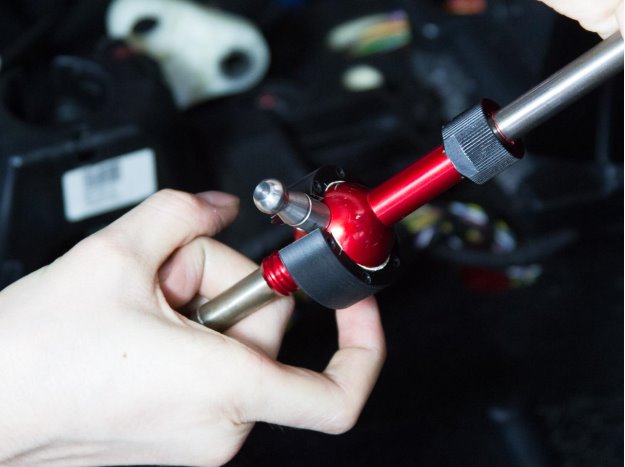
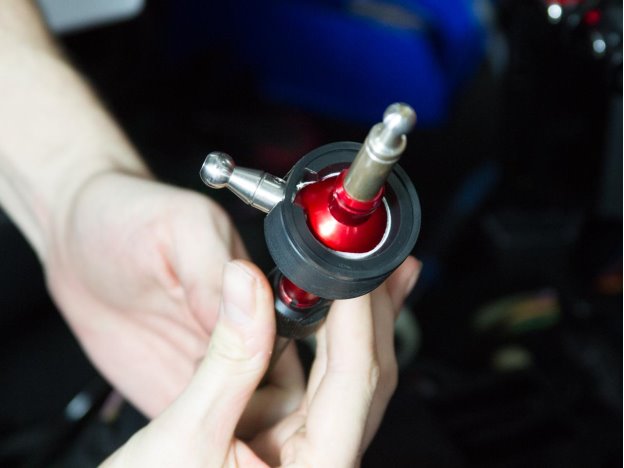
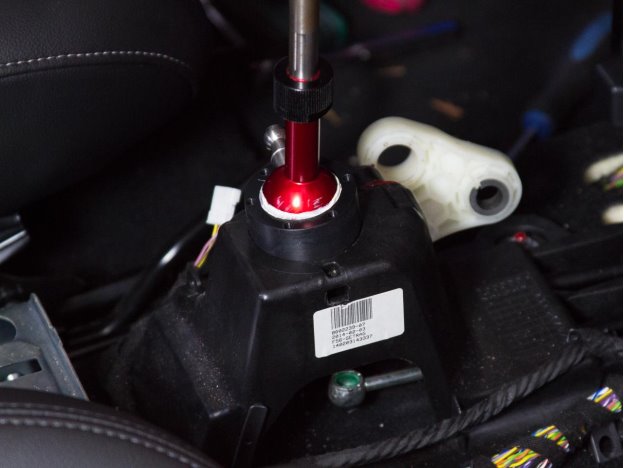
4a. If you do not have the awesome, new CravenSpeed Shifter Retainer Clip Pro, simply reinstall the OEM retainer clip onto your new Adjustable Short Shifter and reinstall the assembly back into the shift housing as shown below. Skip to step 4f and proceed with reinstalling the center console. If you are installing the Cravenspeed Shifter Retaining Clip Pro, carry on with the instructions from here.
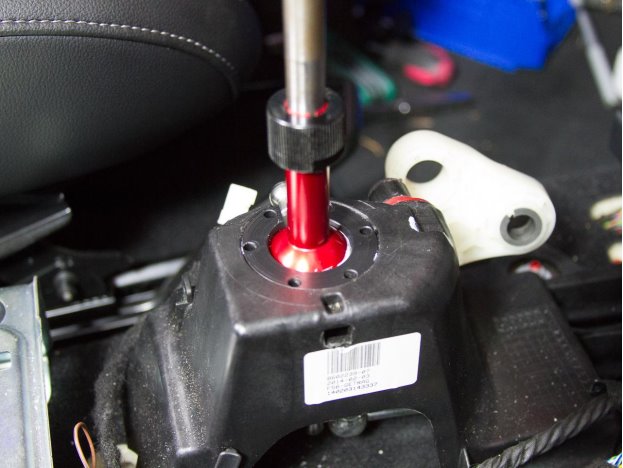
4b. Spread a small amount of the included grease into the ball feature of the lower retainer.
4c. Push the lower retainer onto the main shifter pivot of the CravenSpeed Adjustable Short Shifter, approaching from the bottom.
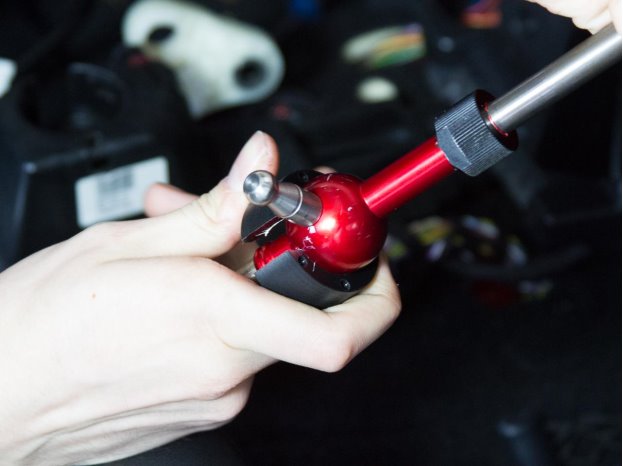
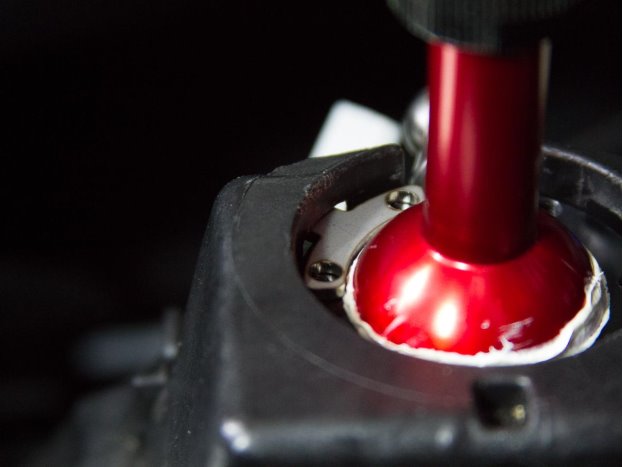
4d. Install the included o-ring into the the groove on the bottom of the lower retainer.
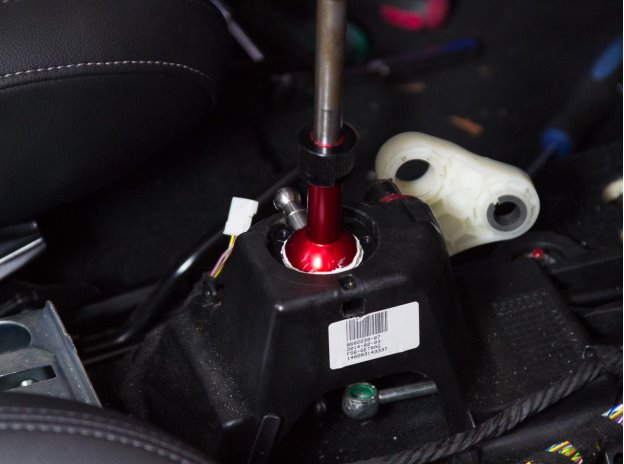
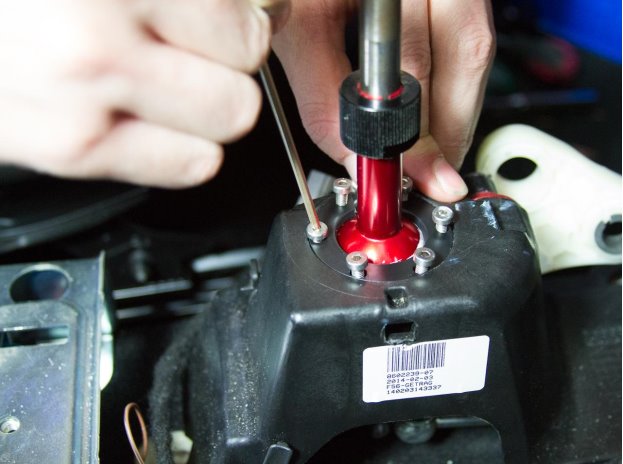
4e. Push the adjustable short shifter with the lower retainer into the shifter housing. Make sure that the o-ring stays in place in the groove until it’s all the way seated. Then, place the 3 metal pieces on top of the retainer, pushing each tab through the respective slit in the housing. Once they are inserted and aligned, place the top portion of the retainer over the tabs, and thread in the 6 provided bolts. *Be sure not to overtighten, as this will eliminate shifter neutral reset and increase the force necessary to shift. Run through a few mock shifts before you reinstalled the center cover so that you’re sure the shifter feels good.*
4f. Re-attach the shift linkage cable(s) from step 2b.
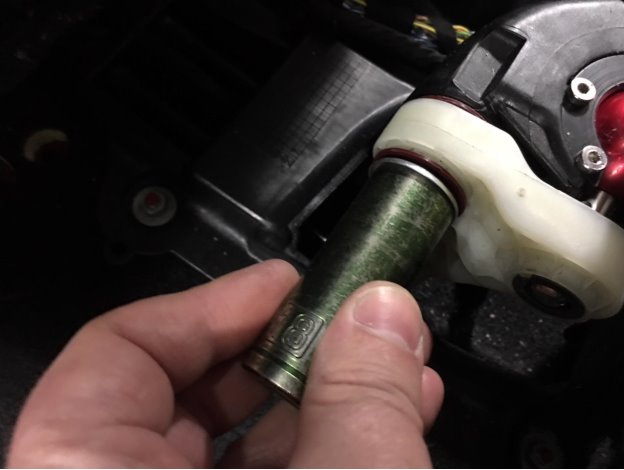
4g. Set the reverse pivot arm back onto the molded shaft on the shifter housing and press the red bushing back into place. If you managed to salvage the push ring from the disassembly process, press it back into place onto the molded shaft. If you damaged it, install the included replacement push ring. Use a socket and mallet to seat it.
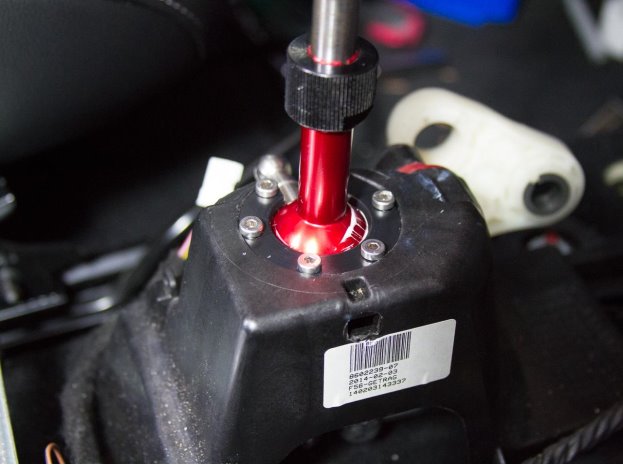
4h. Place the retainer locks onto the top of the lower retainer and push the tabs through the cutouts in the shifter housing.
NOTE: You may need to push down on the shifter assembly to compress the o-ring to allow the retainer locks to fit into the shifter housing.
4i. Place the retainer top over the main pivot. Ensure that the holes on the top retainer and the retainer locks line up with the tapped holes on the lower retainer to allow the fasteners to be installed.
4j. Install the fasteners with a 2.5mm hex key. Tighten down in a star pattern similar to lug nuts/bolts.
NOTE: Be sure not to tighten the screws too much as this may restrict shifter movements. In between tightening of the screws, move the shifter around to insure the top retainer is not binding the pivot ball and preventing the shift lever from returning to full neutral.
Step 5: Reassemble
5. With your CravenSpeed Adjustable Short Shifter in place, follow the steps in reverse order to reassemble your center console and related components.
...and don’t forget to reconnect the plug on the Sport-Mode ring!
If you have any questions about this installation, please give us a call at (503)505-6886 from Monday - Friday between 8am and 4:30pm Pacific Time and we will be glad to give you a hand.
We love pictures too! If you have some nice photos of our products that you would like to share with us you can email them to: support@cravenspeed.com .