THANK YOU for purchasing the Subaru Crosstrek Blackout Beltline Kit from CravenSpeed. This product is made from high-quality materials and is guaranteed to be free from defects.
You can buy our Blackout Beltline Trim Kit for 5th Gen Subaru Crosstrek here
Parts Included:
- 1 set of Blackout Beltline Trim
Tools Required:
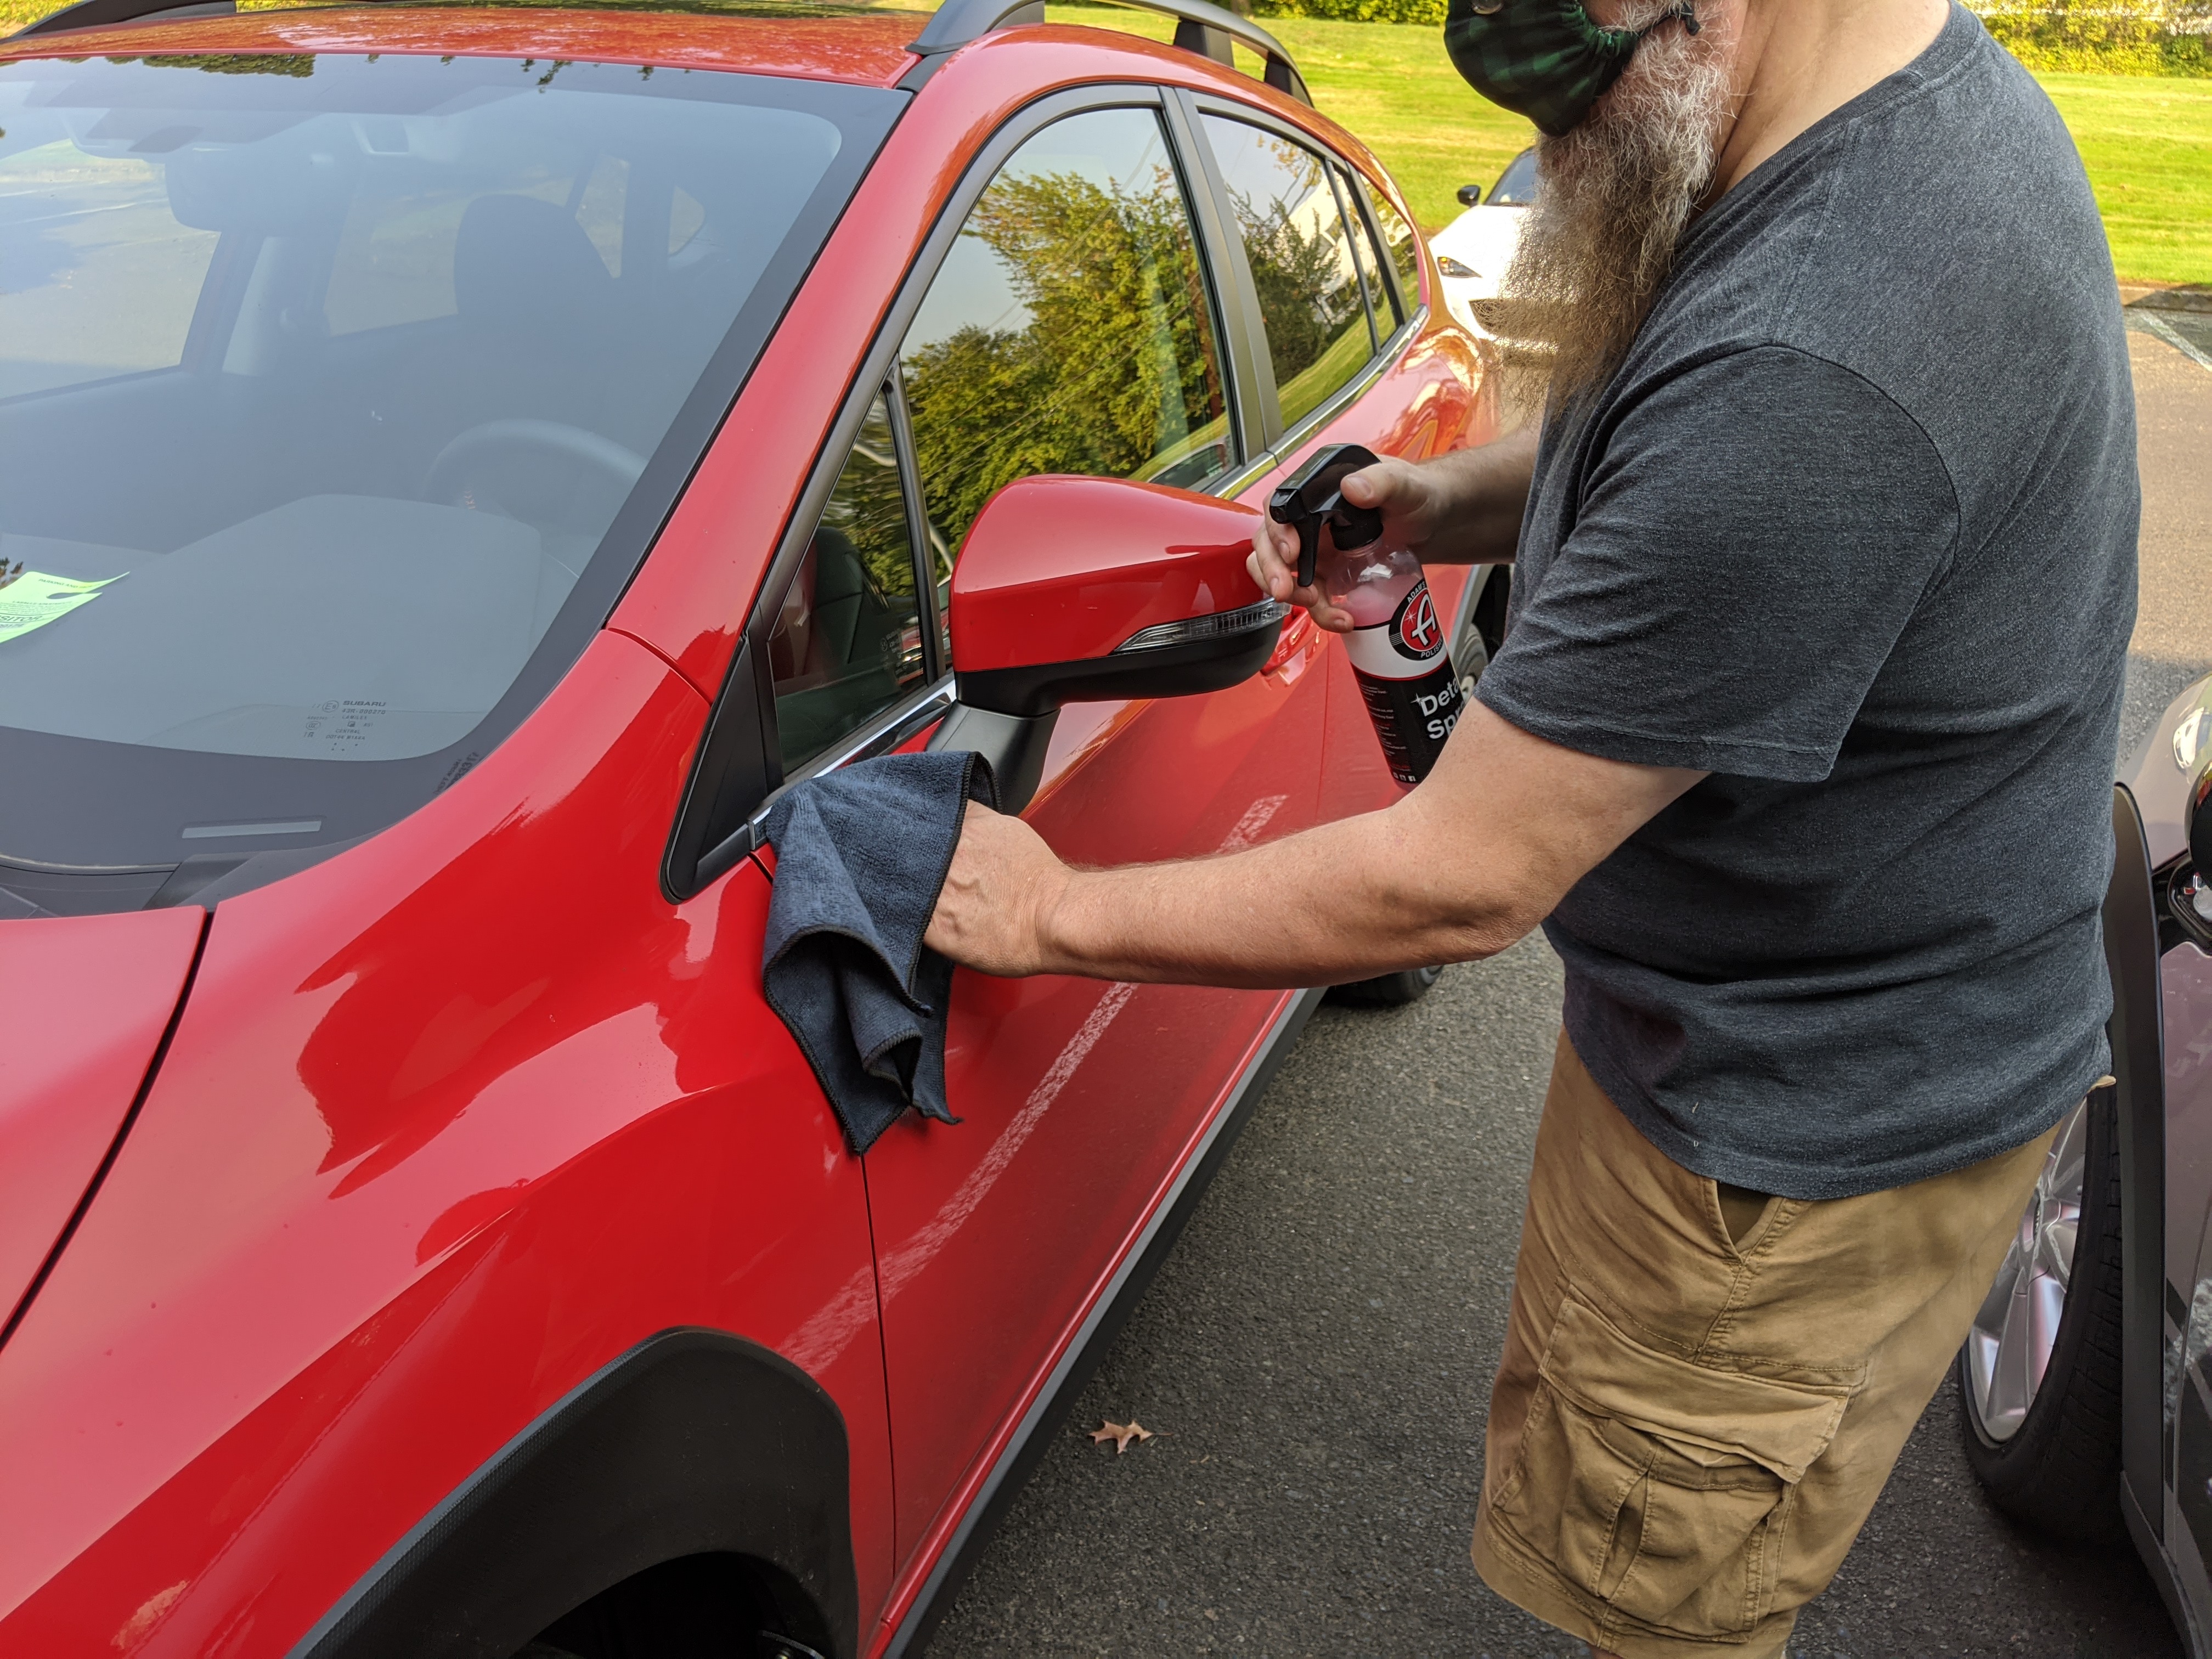
- Detail Spray (cleaner)
- Microfiber Cloth
- X-acto Knife
- Squeegee w/ Microfiber Edge (optional)
NOTE: This installation process is fairly easy, and should take around 30-45 minutes. Please read through the entire instructions before you begin.
Procedure
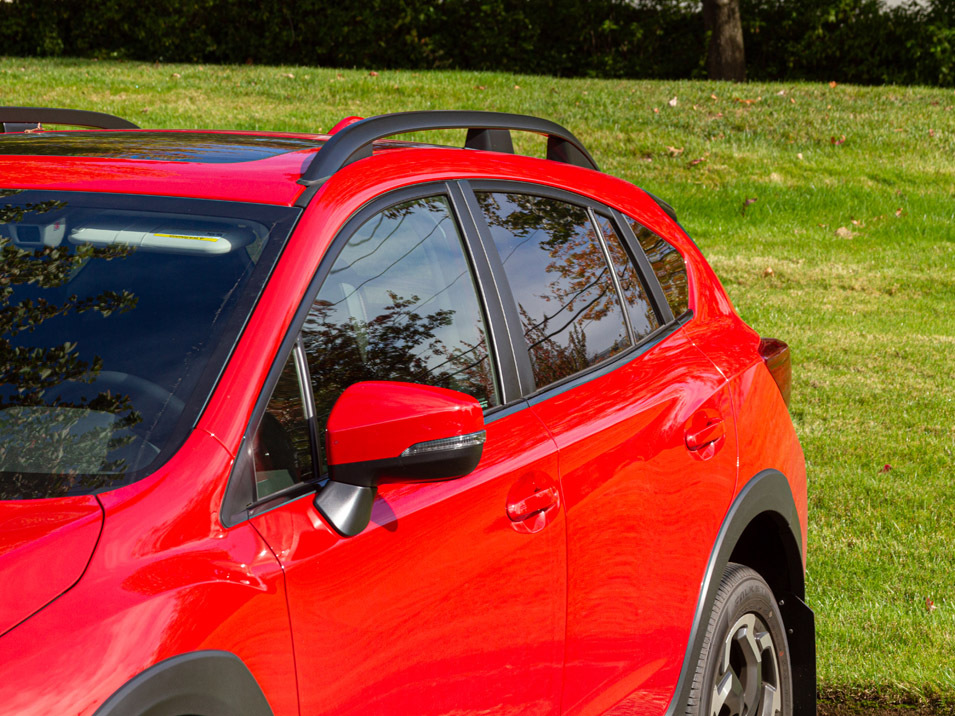
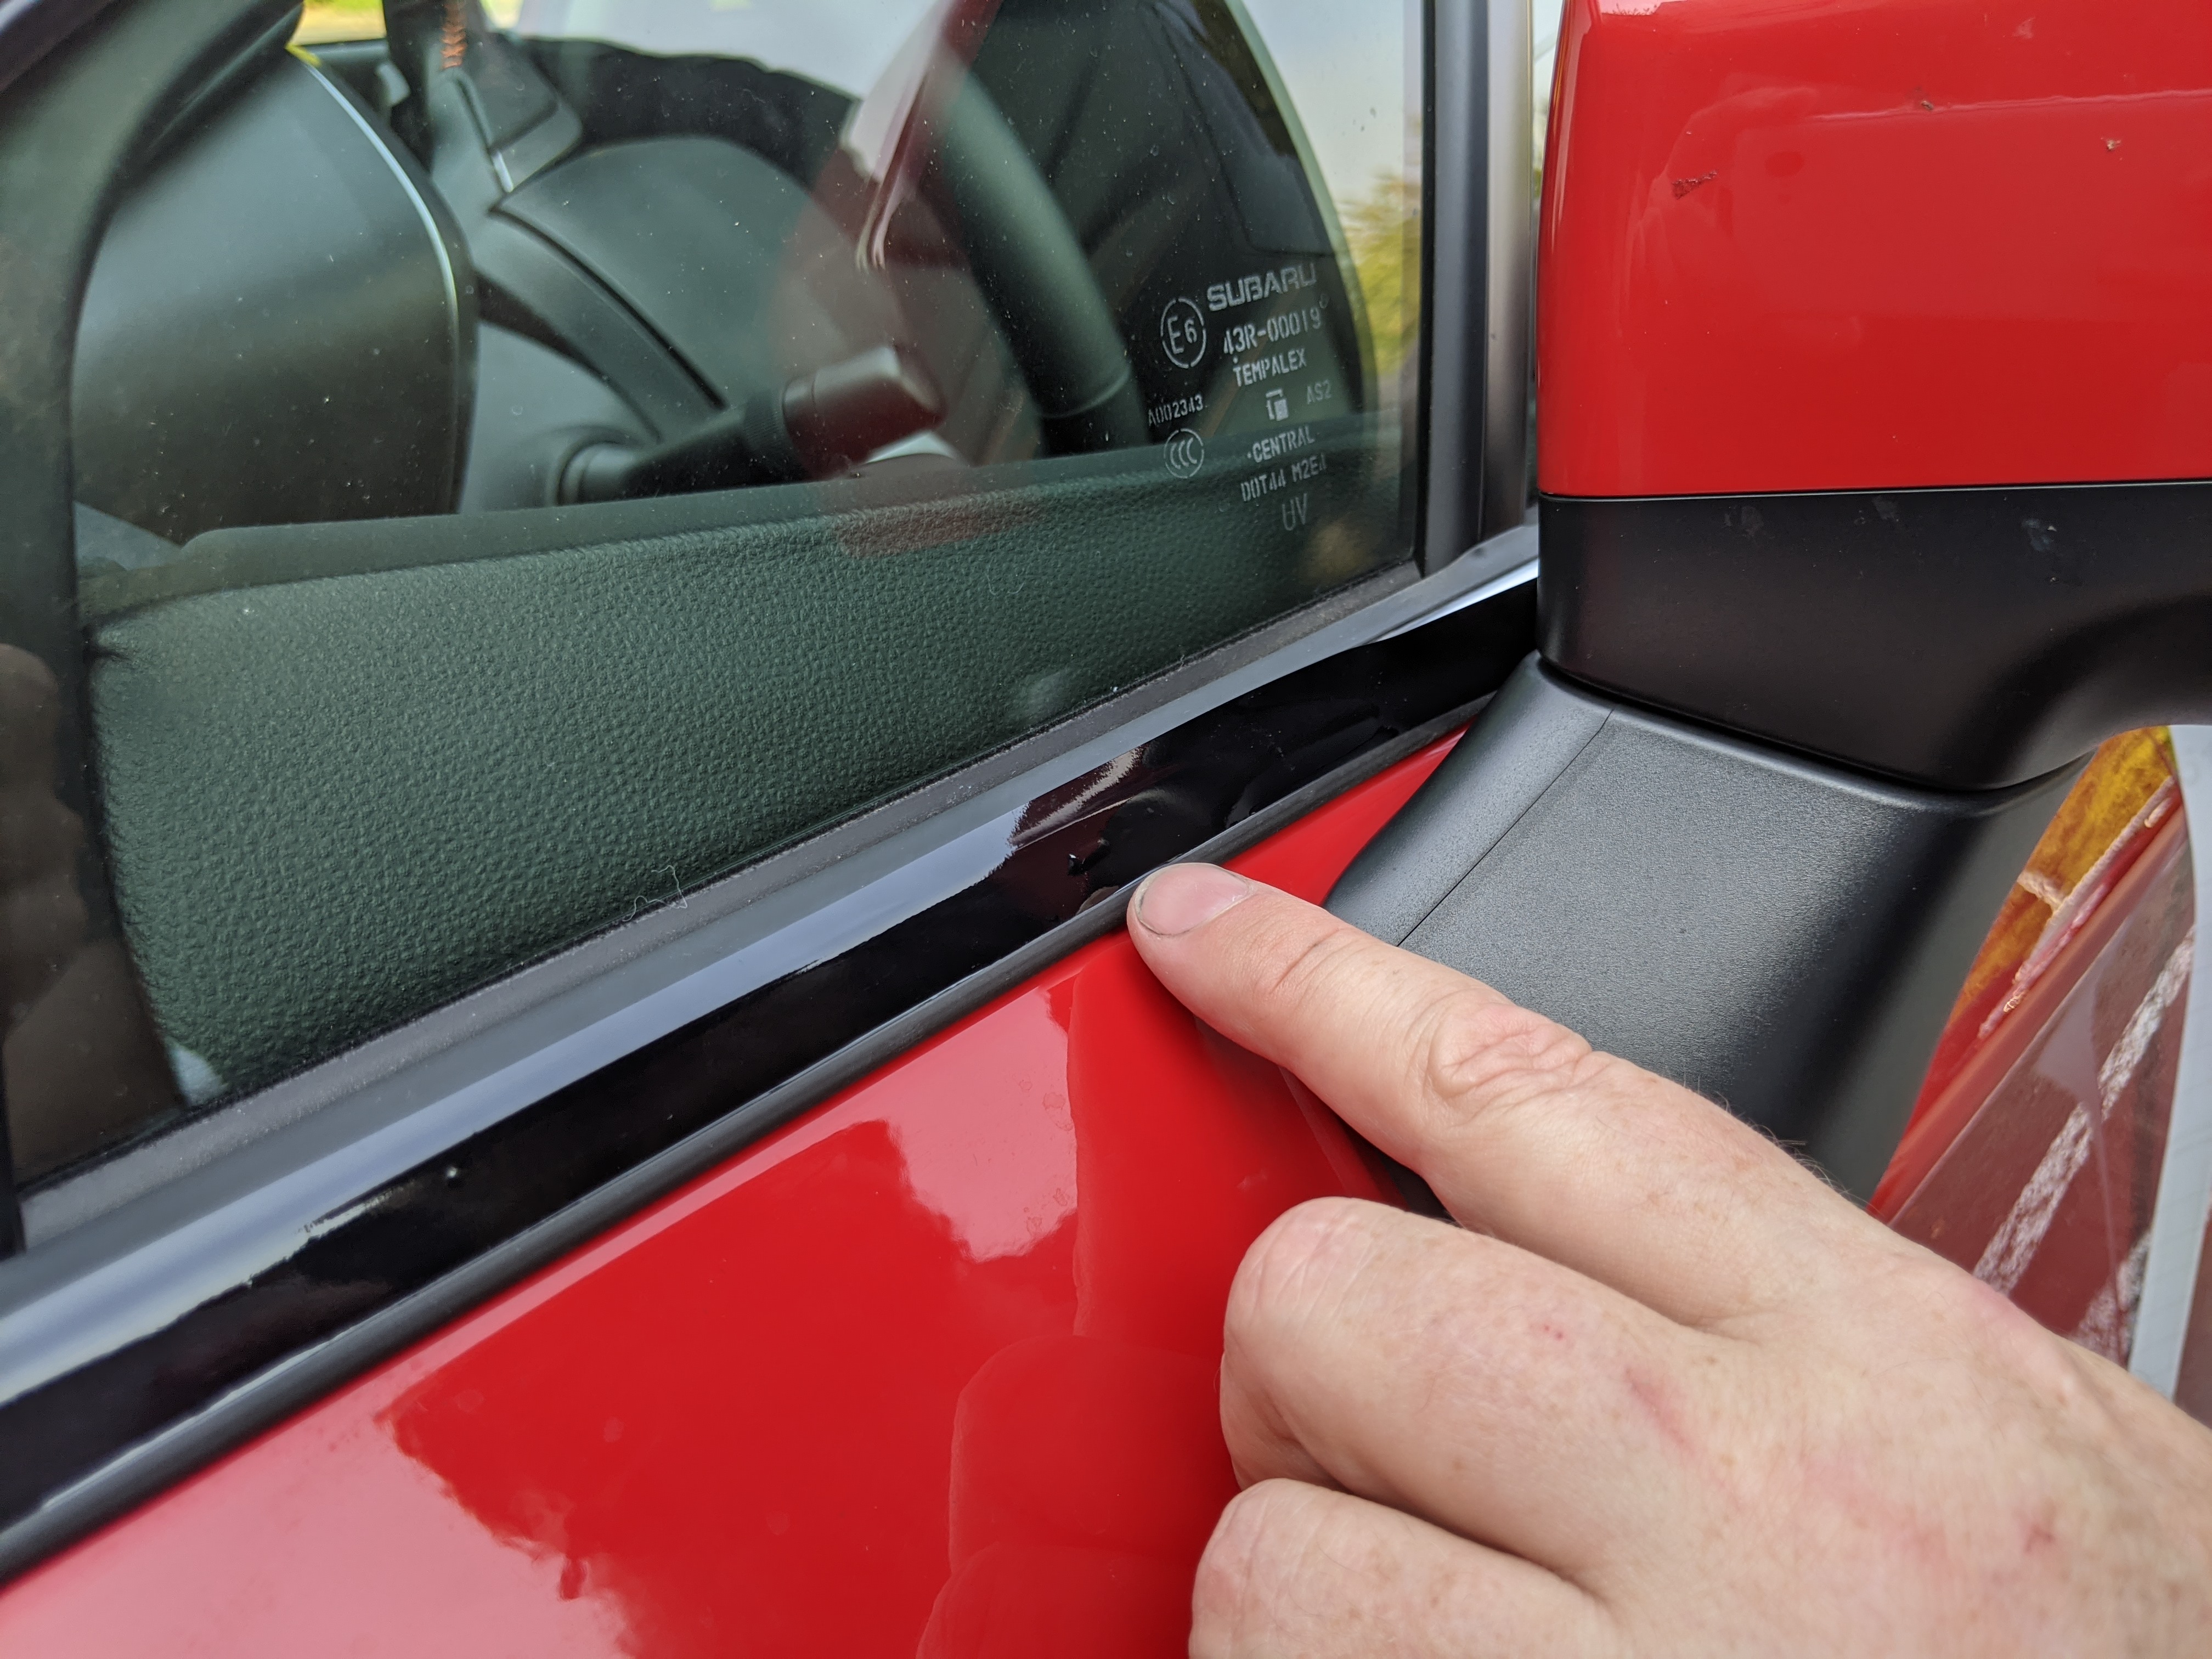
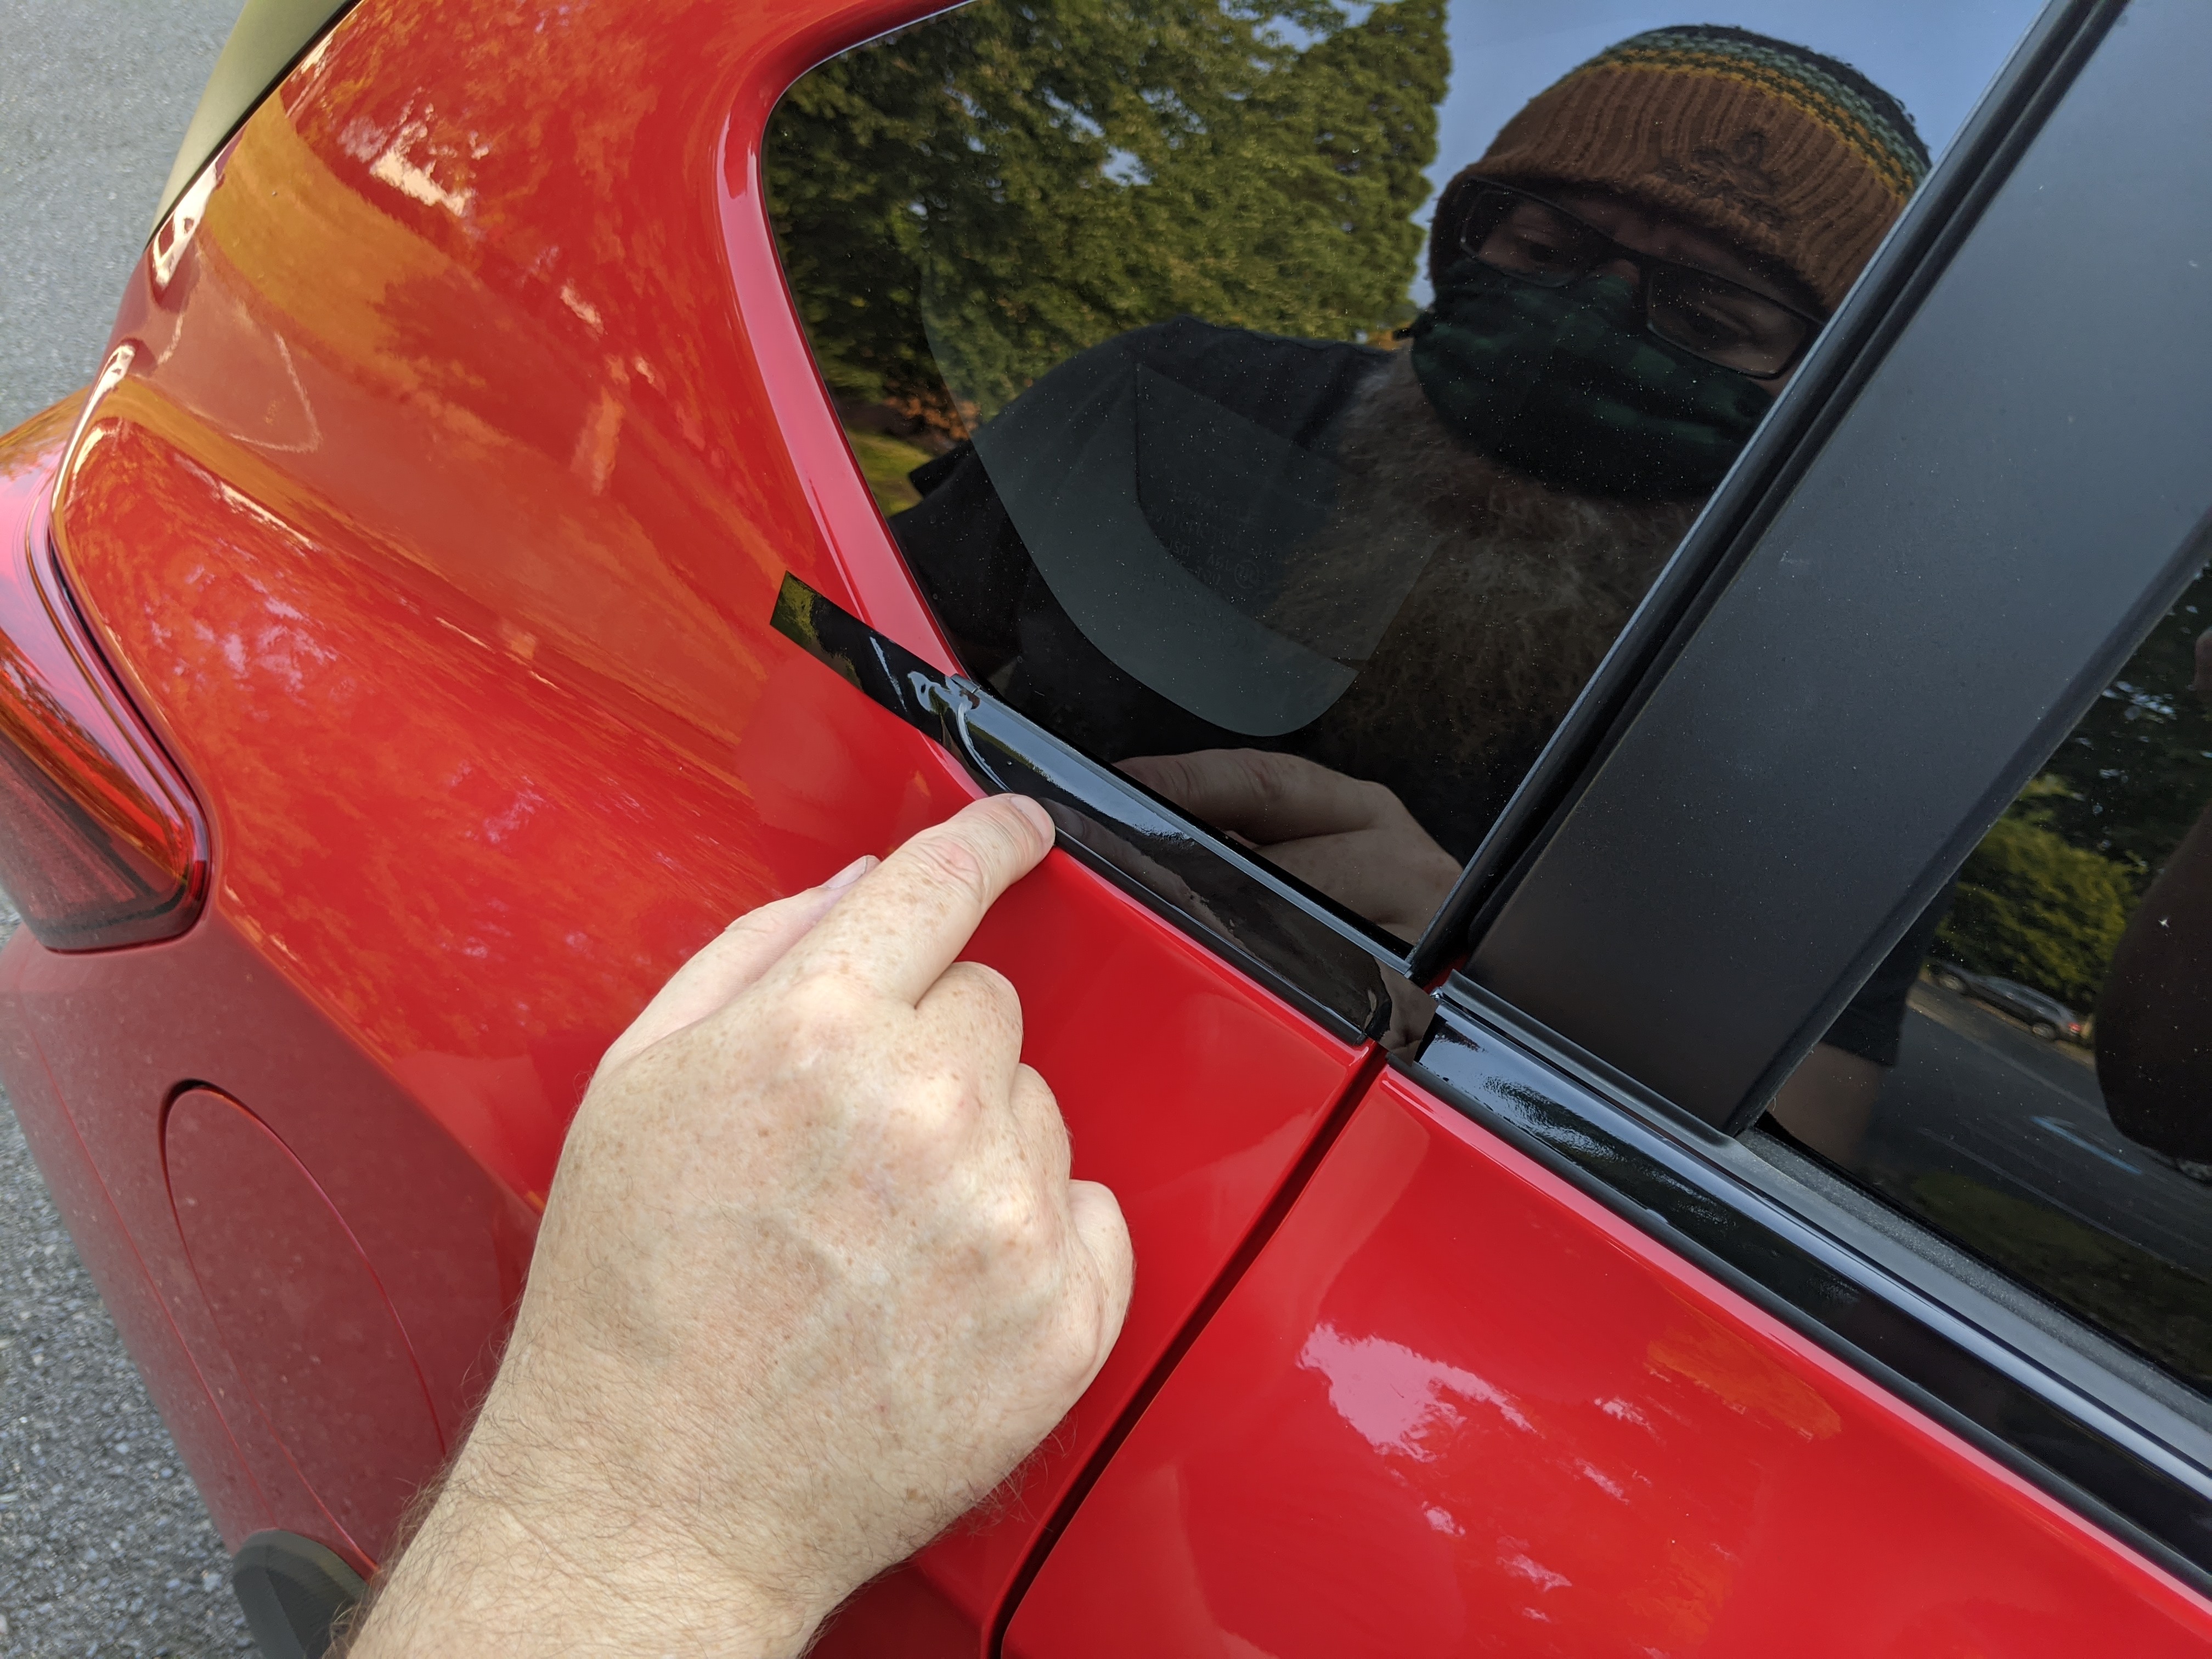
First off, let's make sure your Subaru's beltline trim is clean and ready for the application.
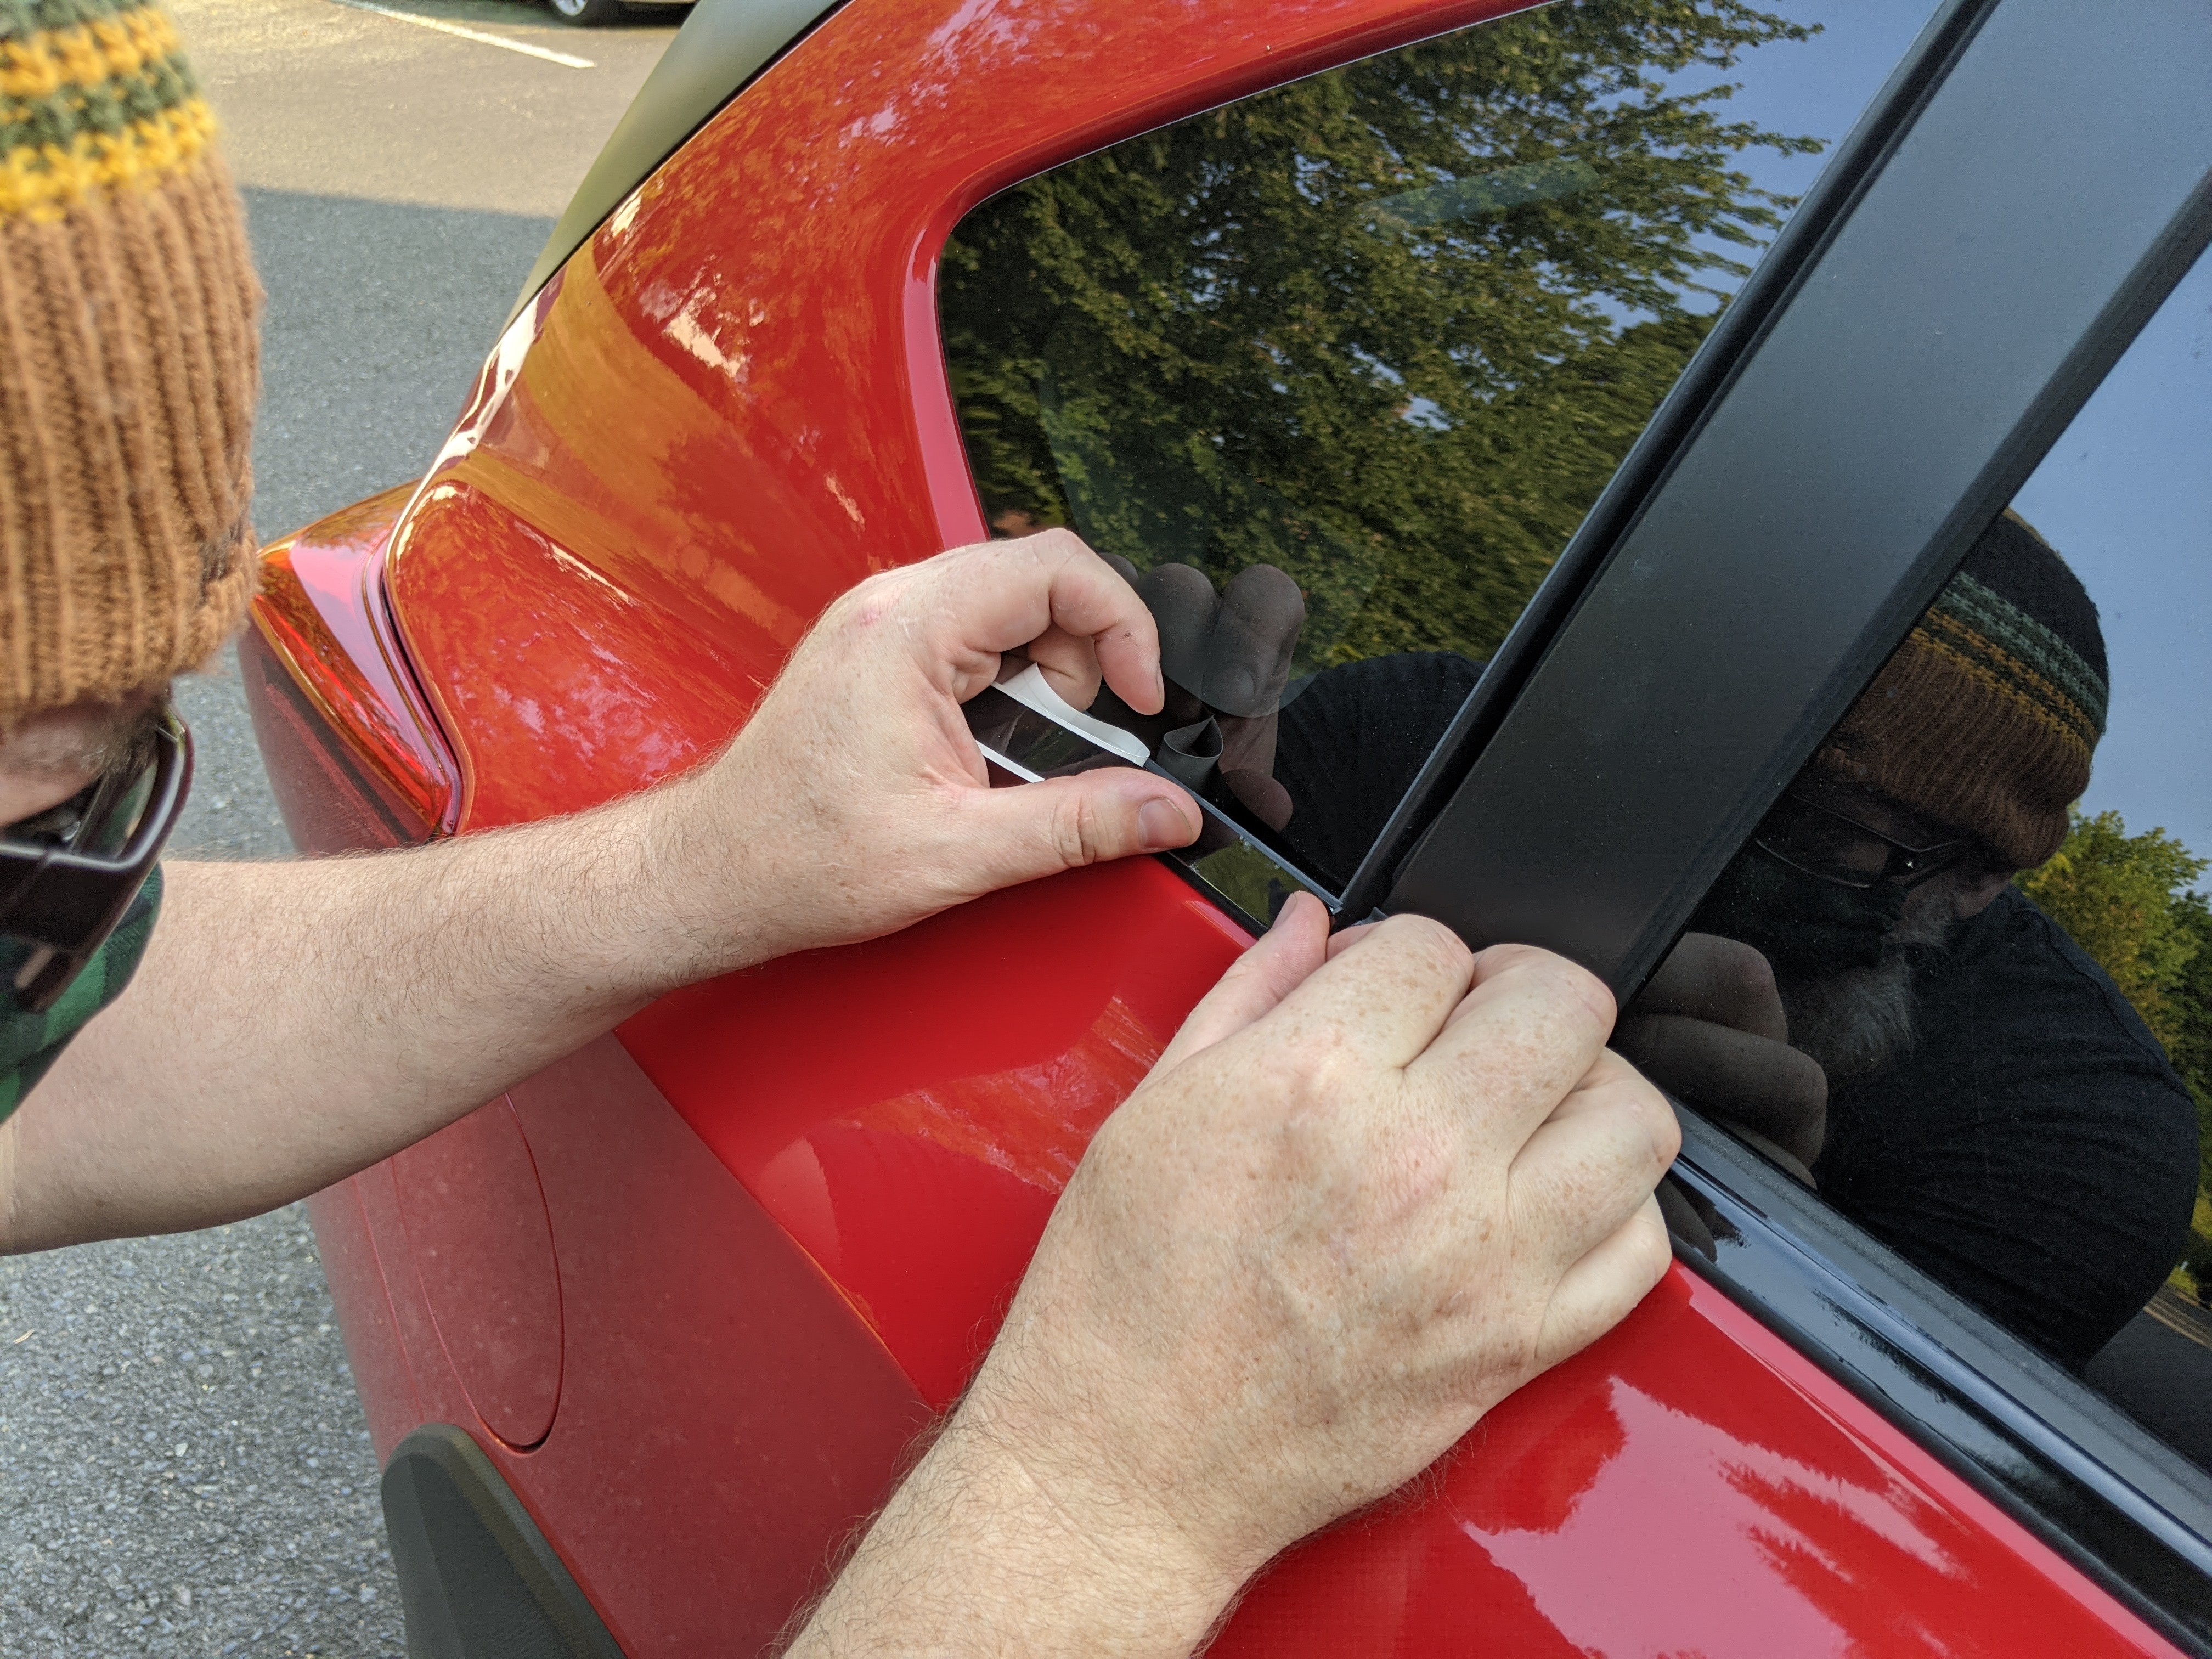
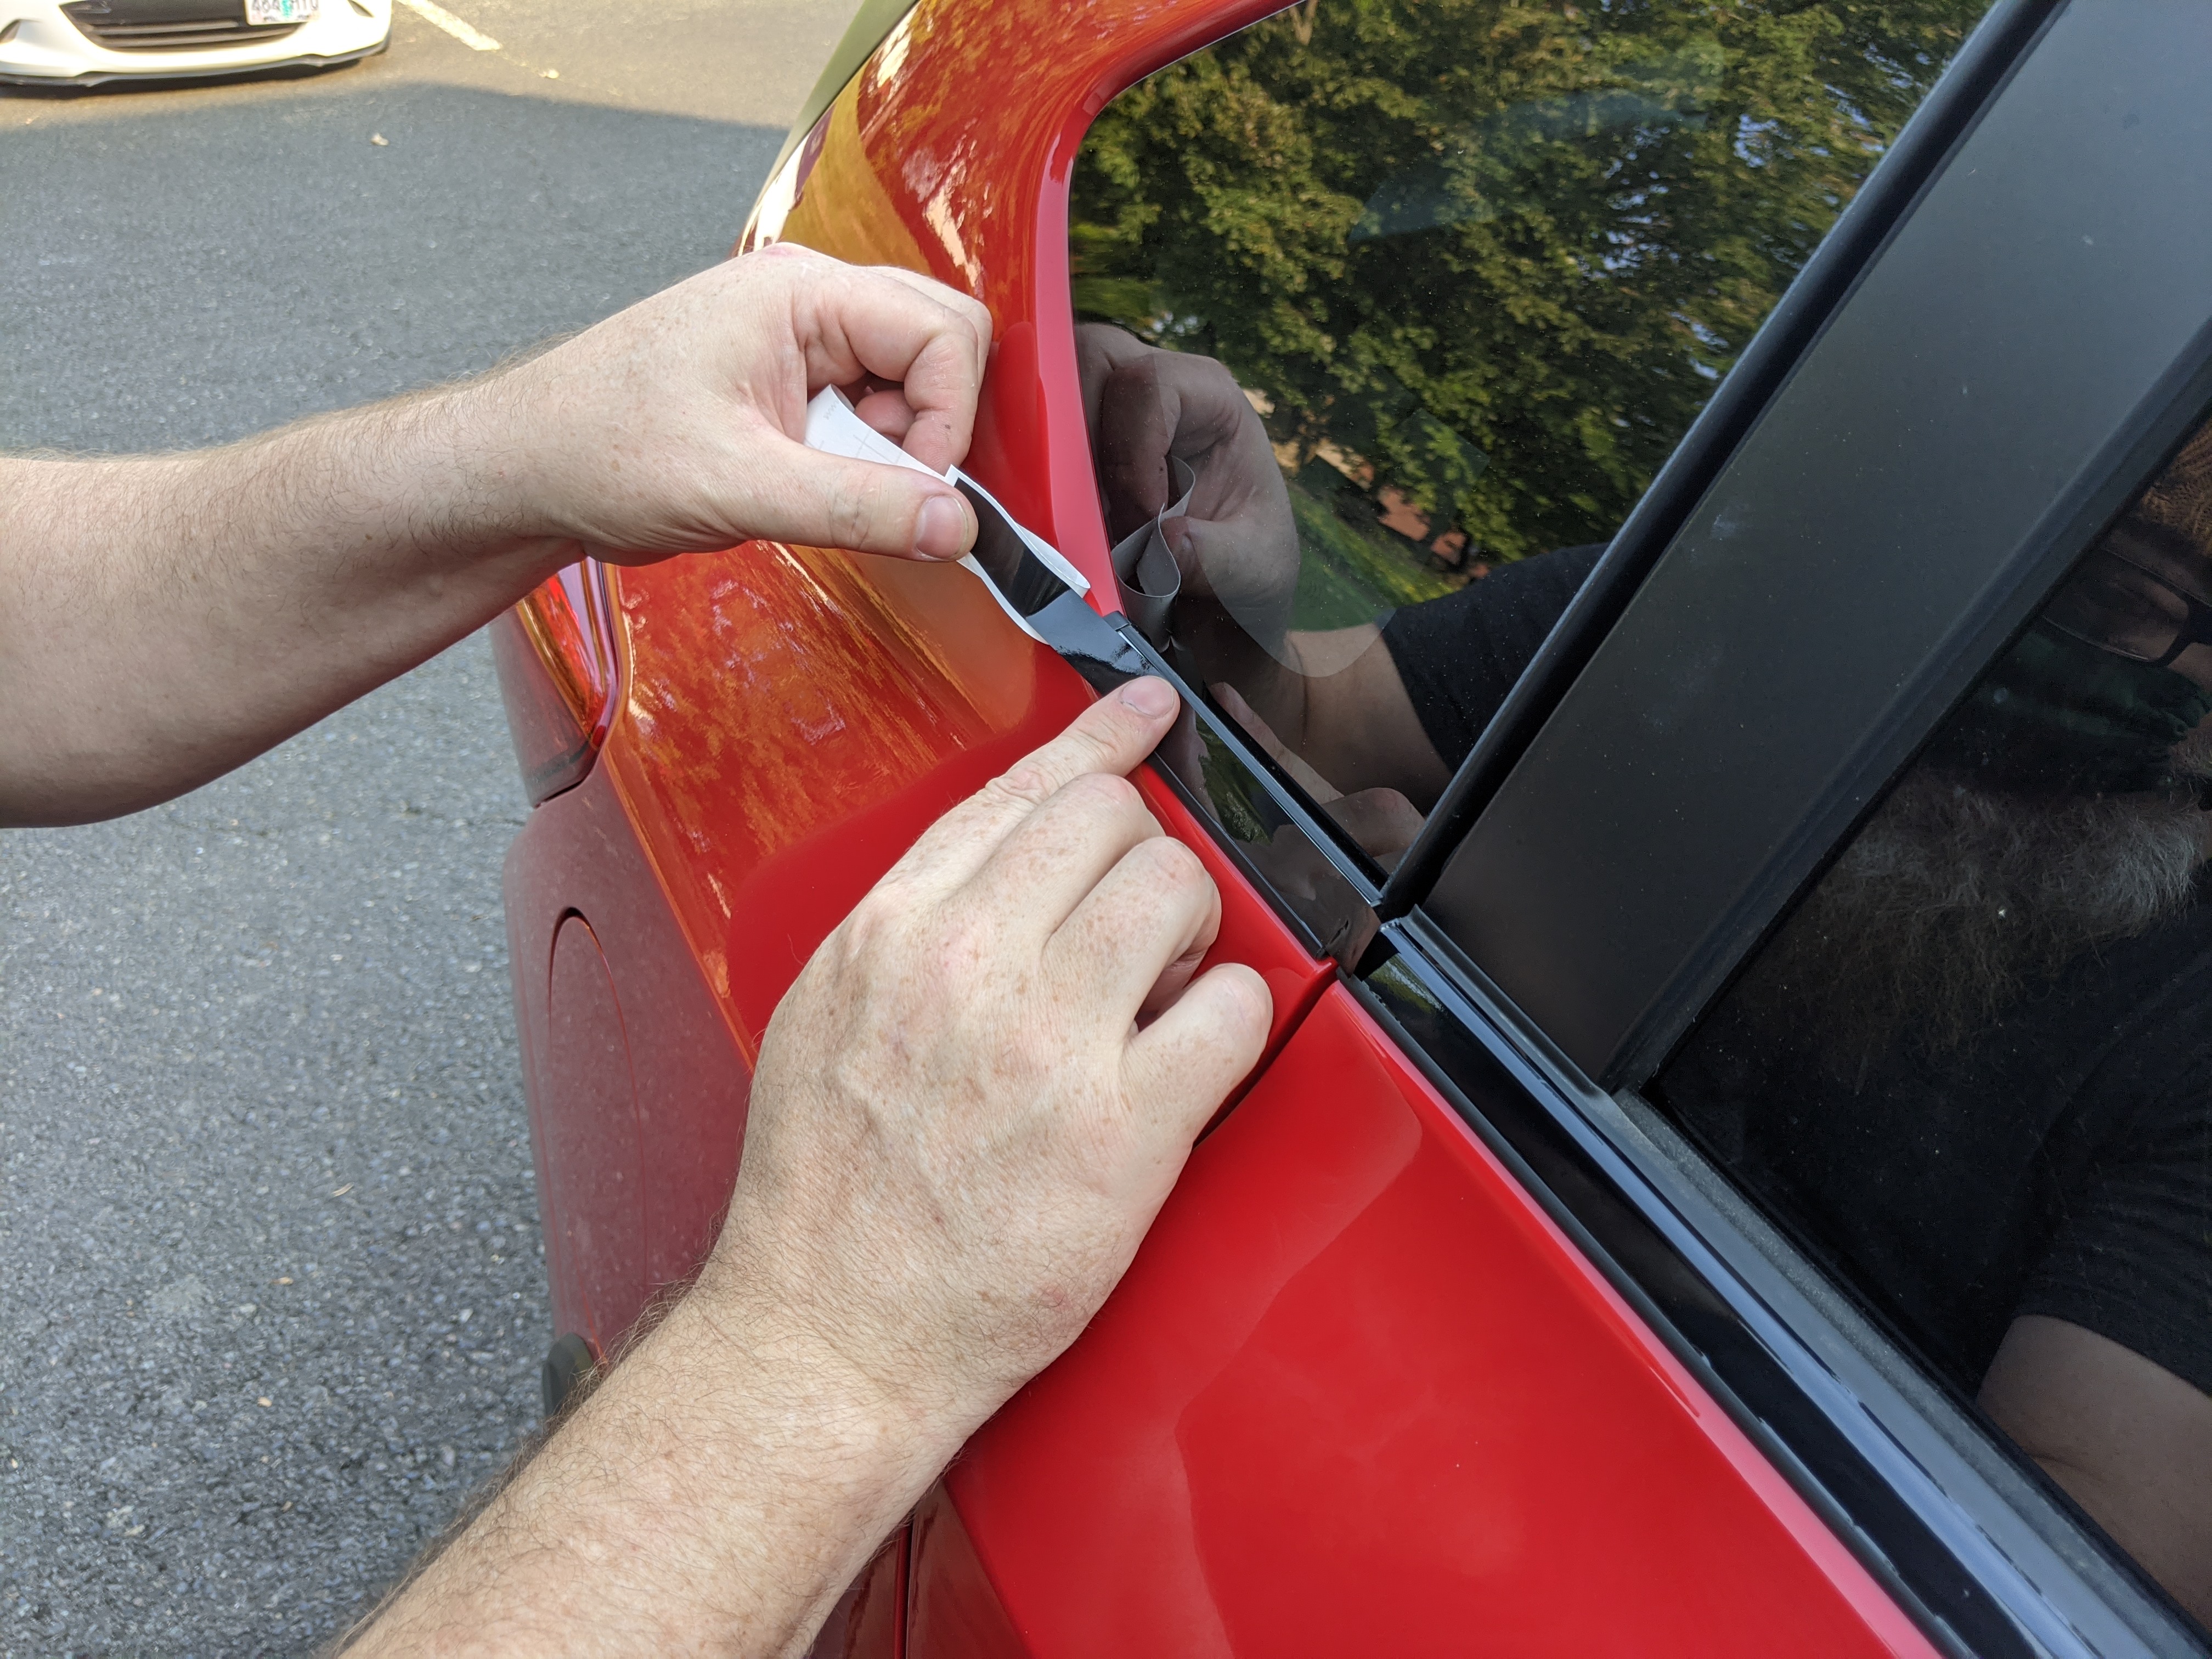
Decide where you want to start, take one of the blackout beltline strips in hand and peel a few inches of the backing off to expose the adhesive side of the vinyl.
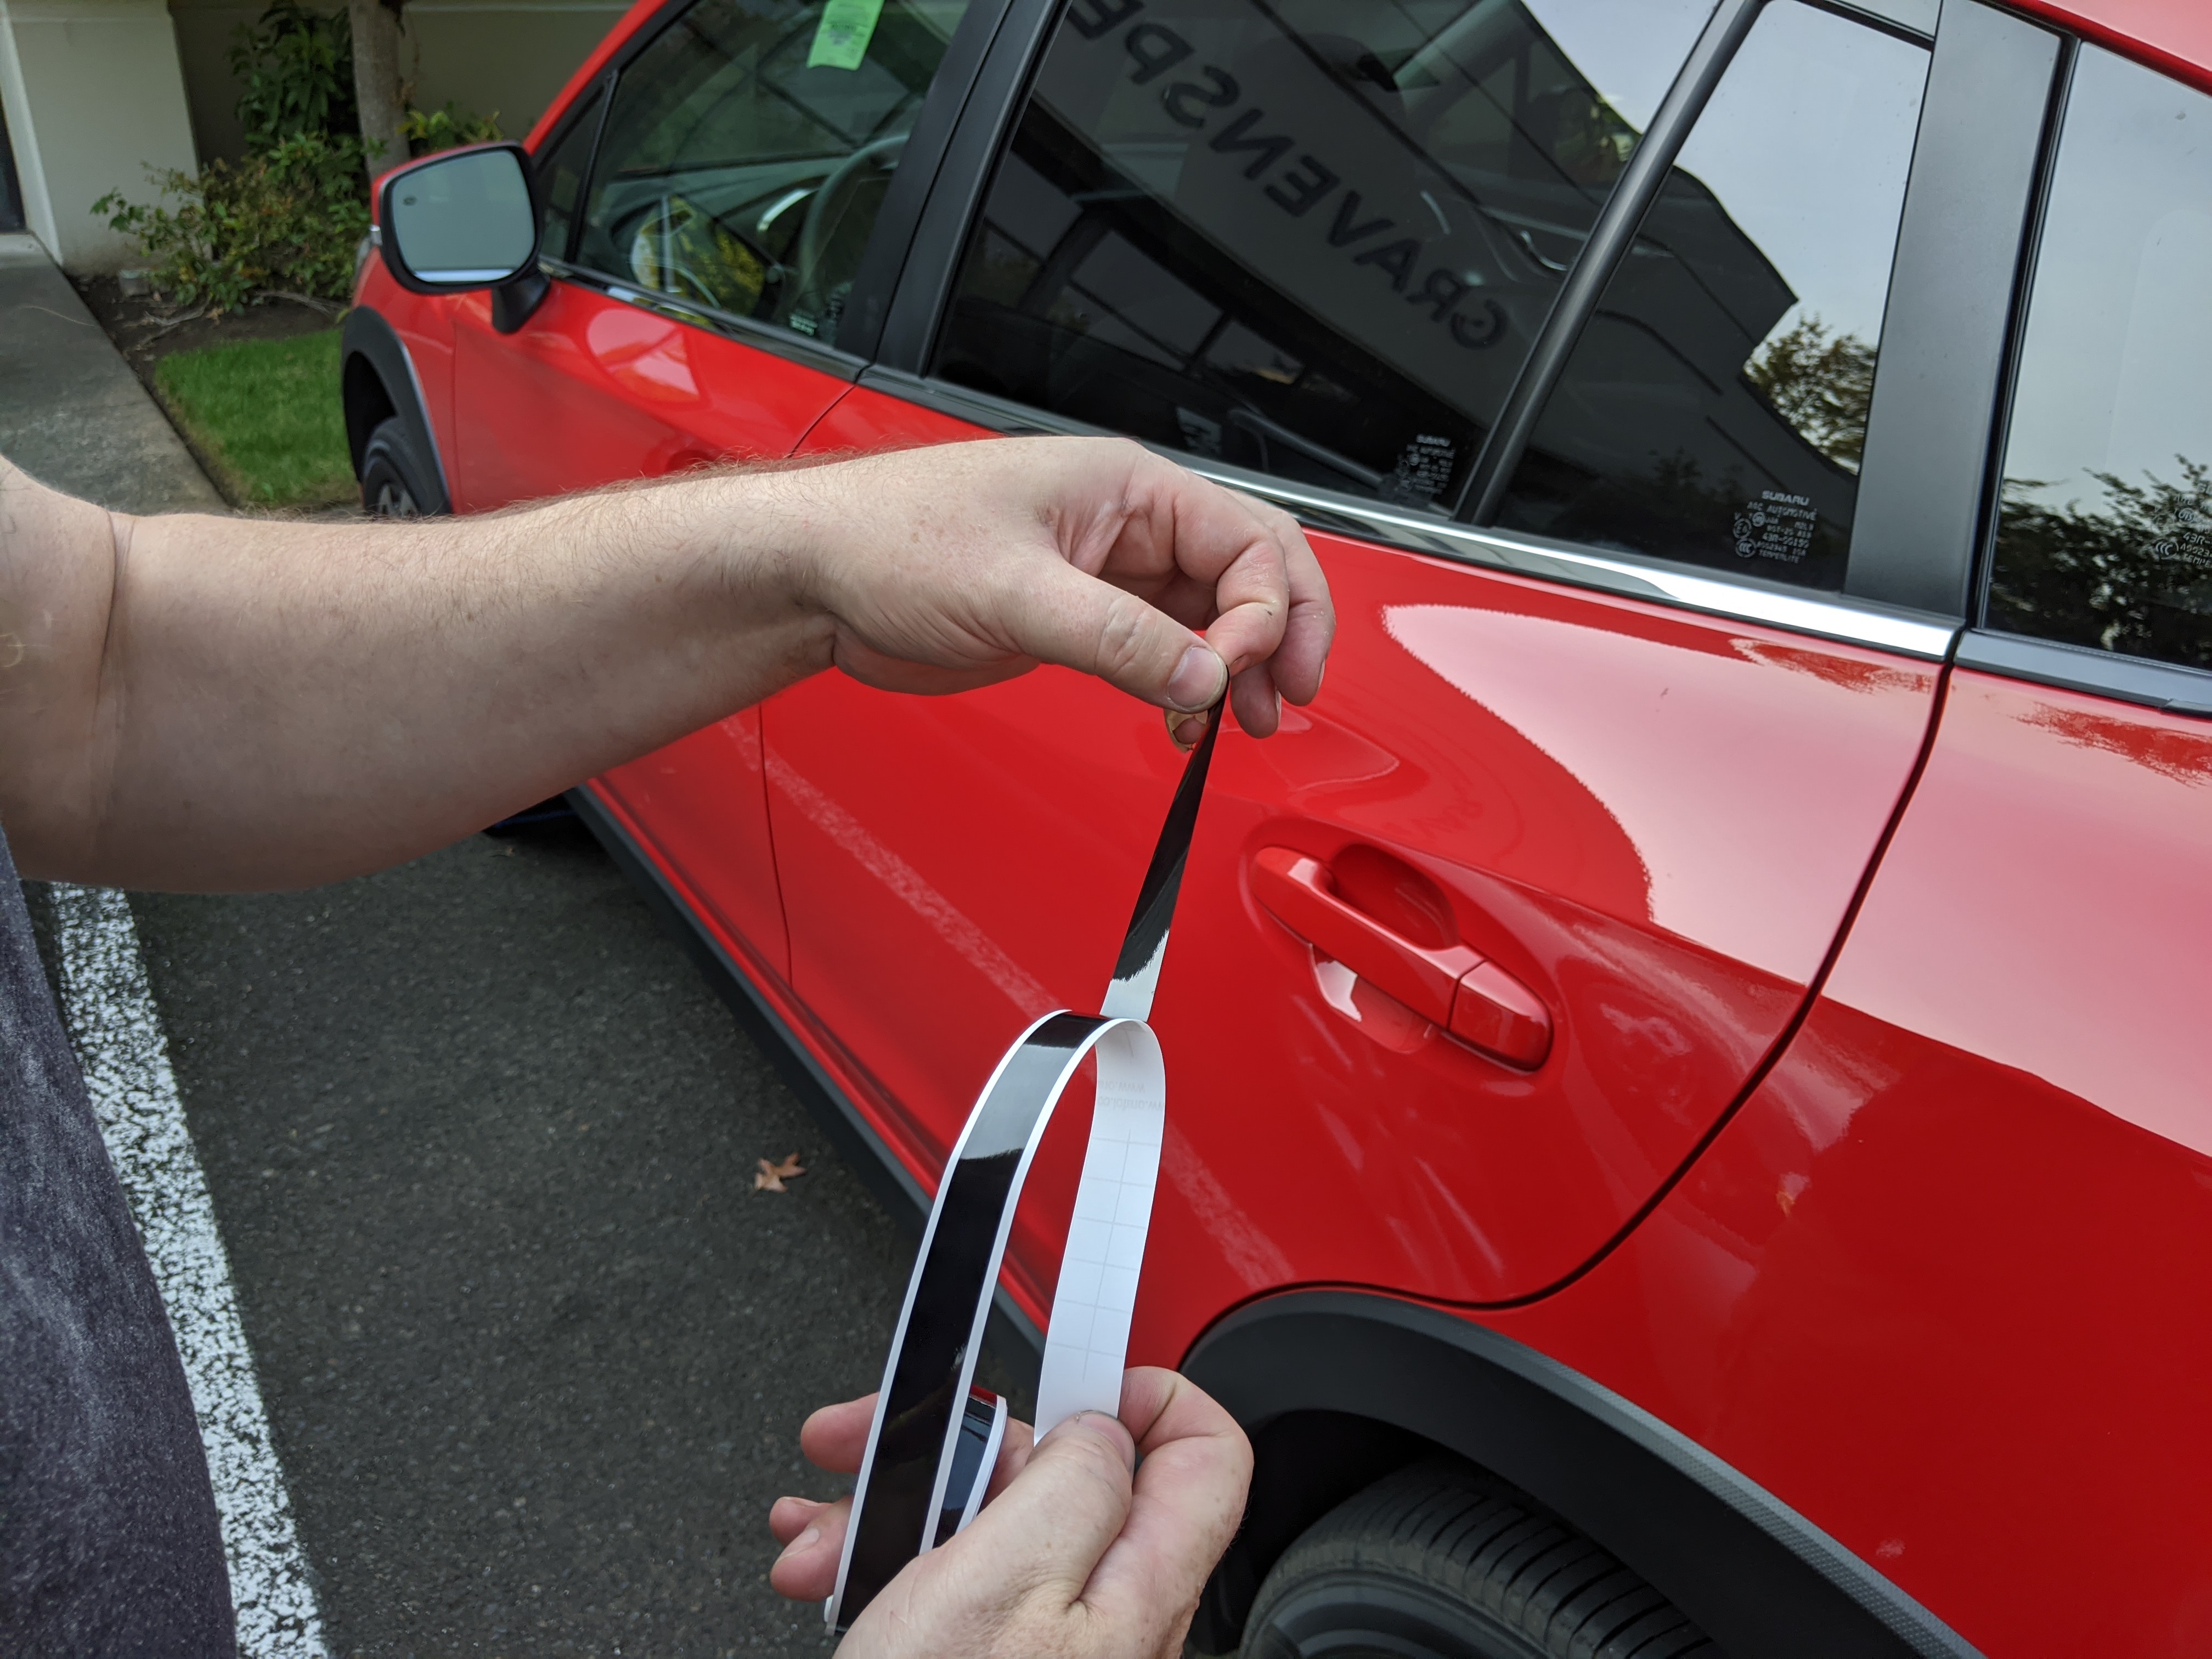
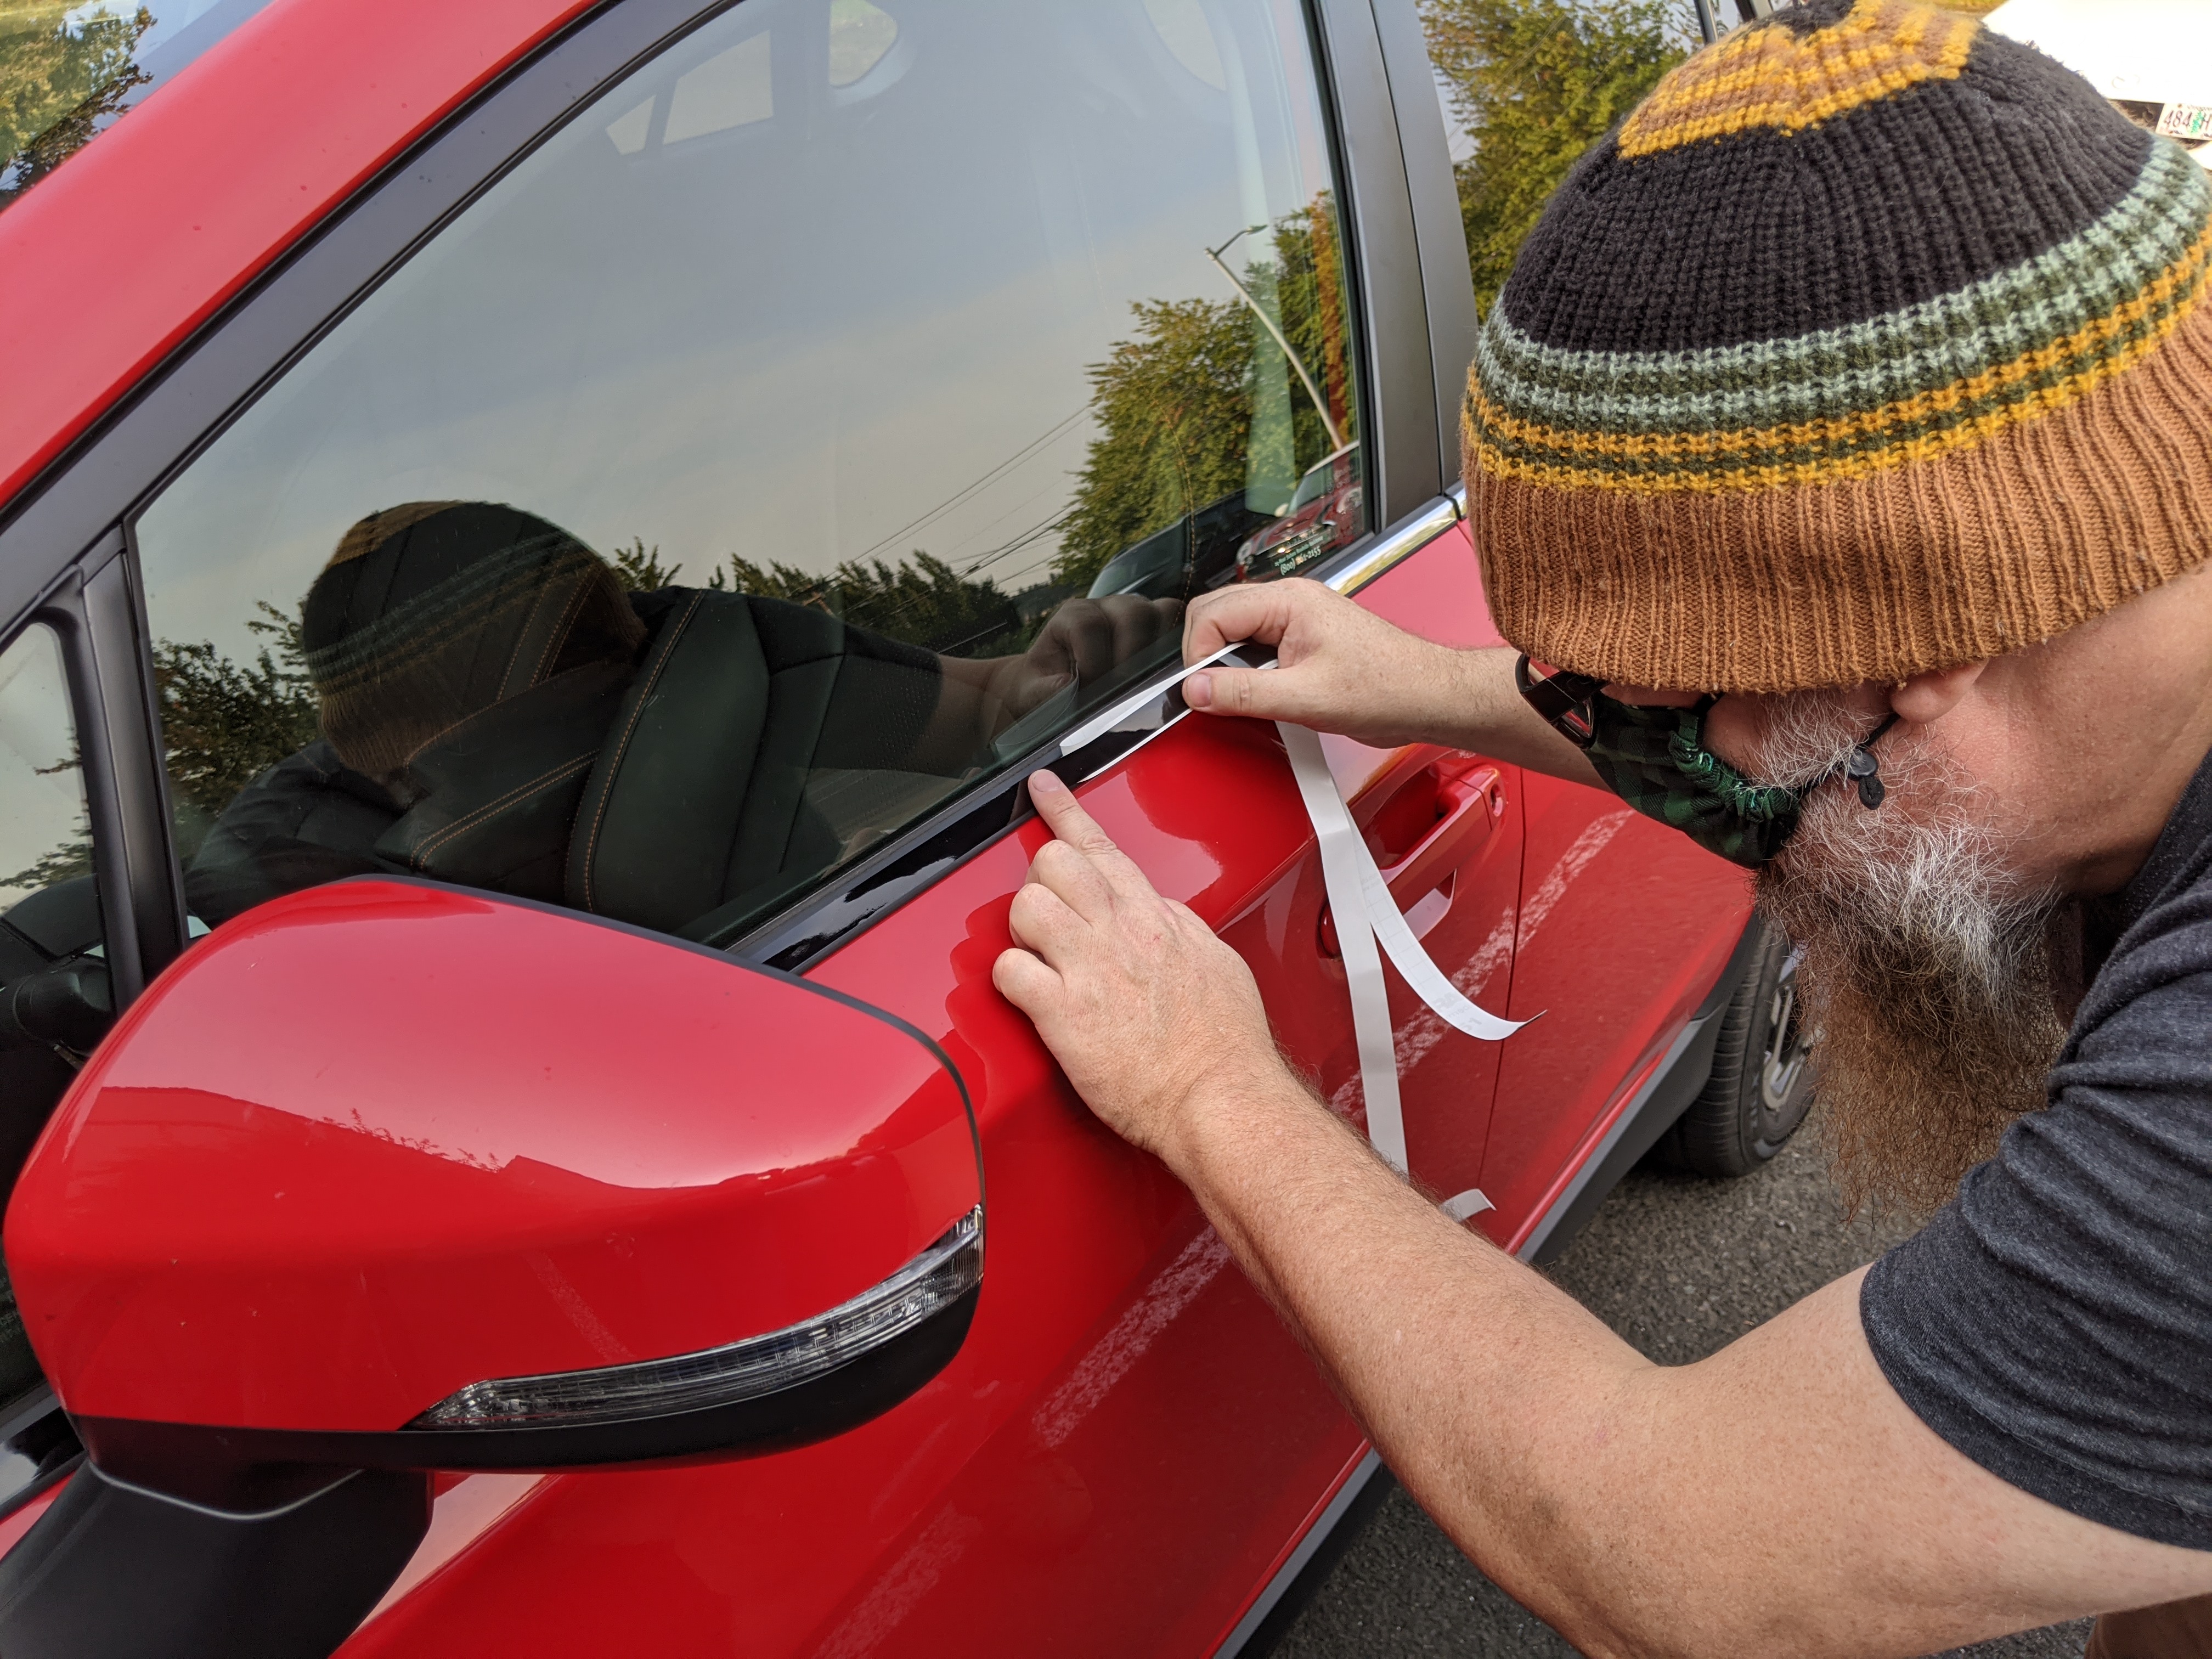
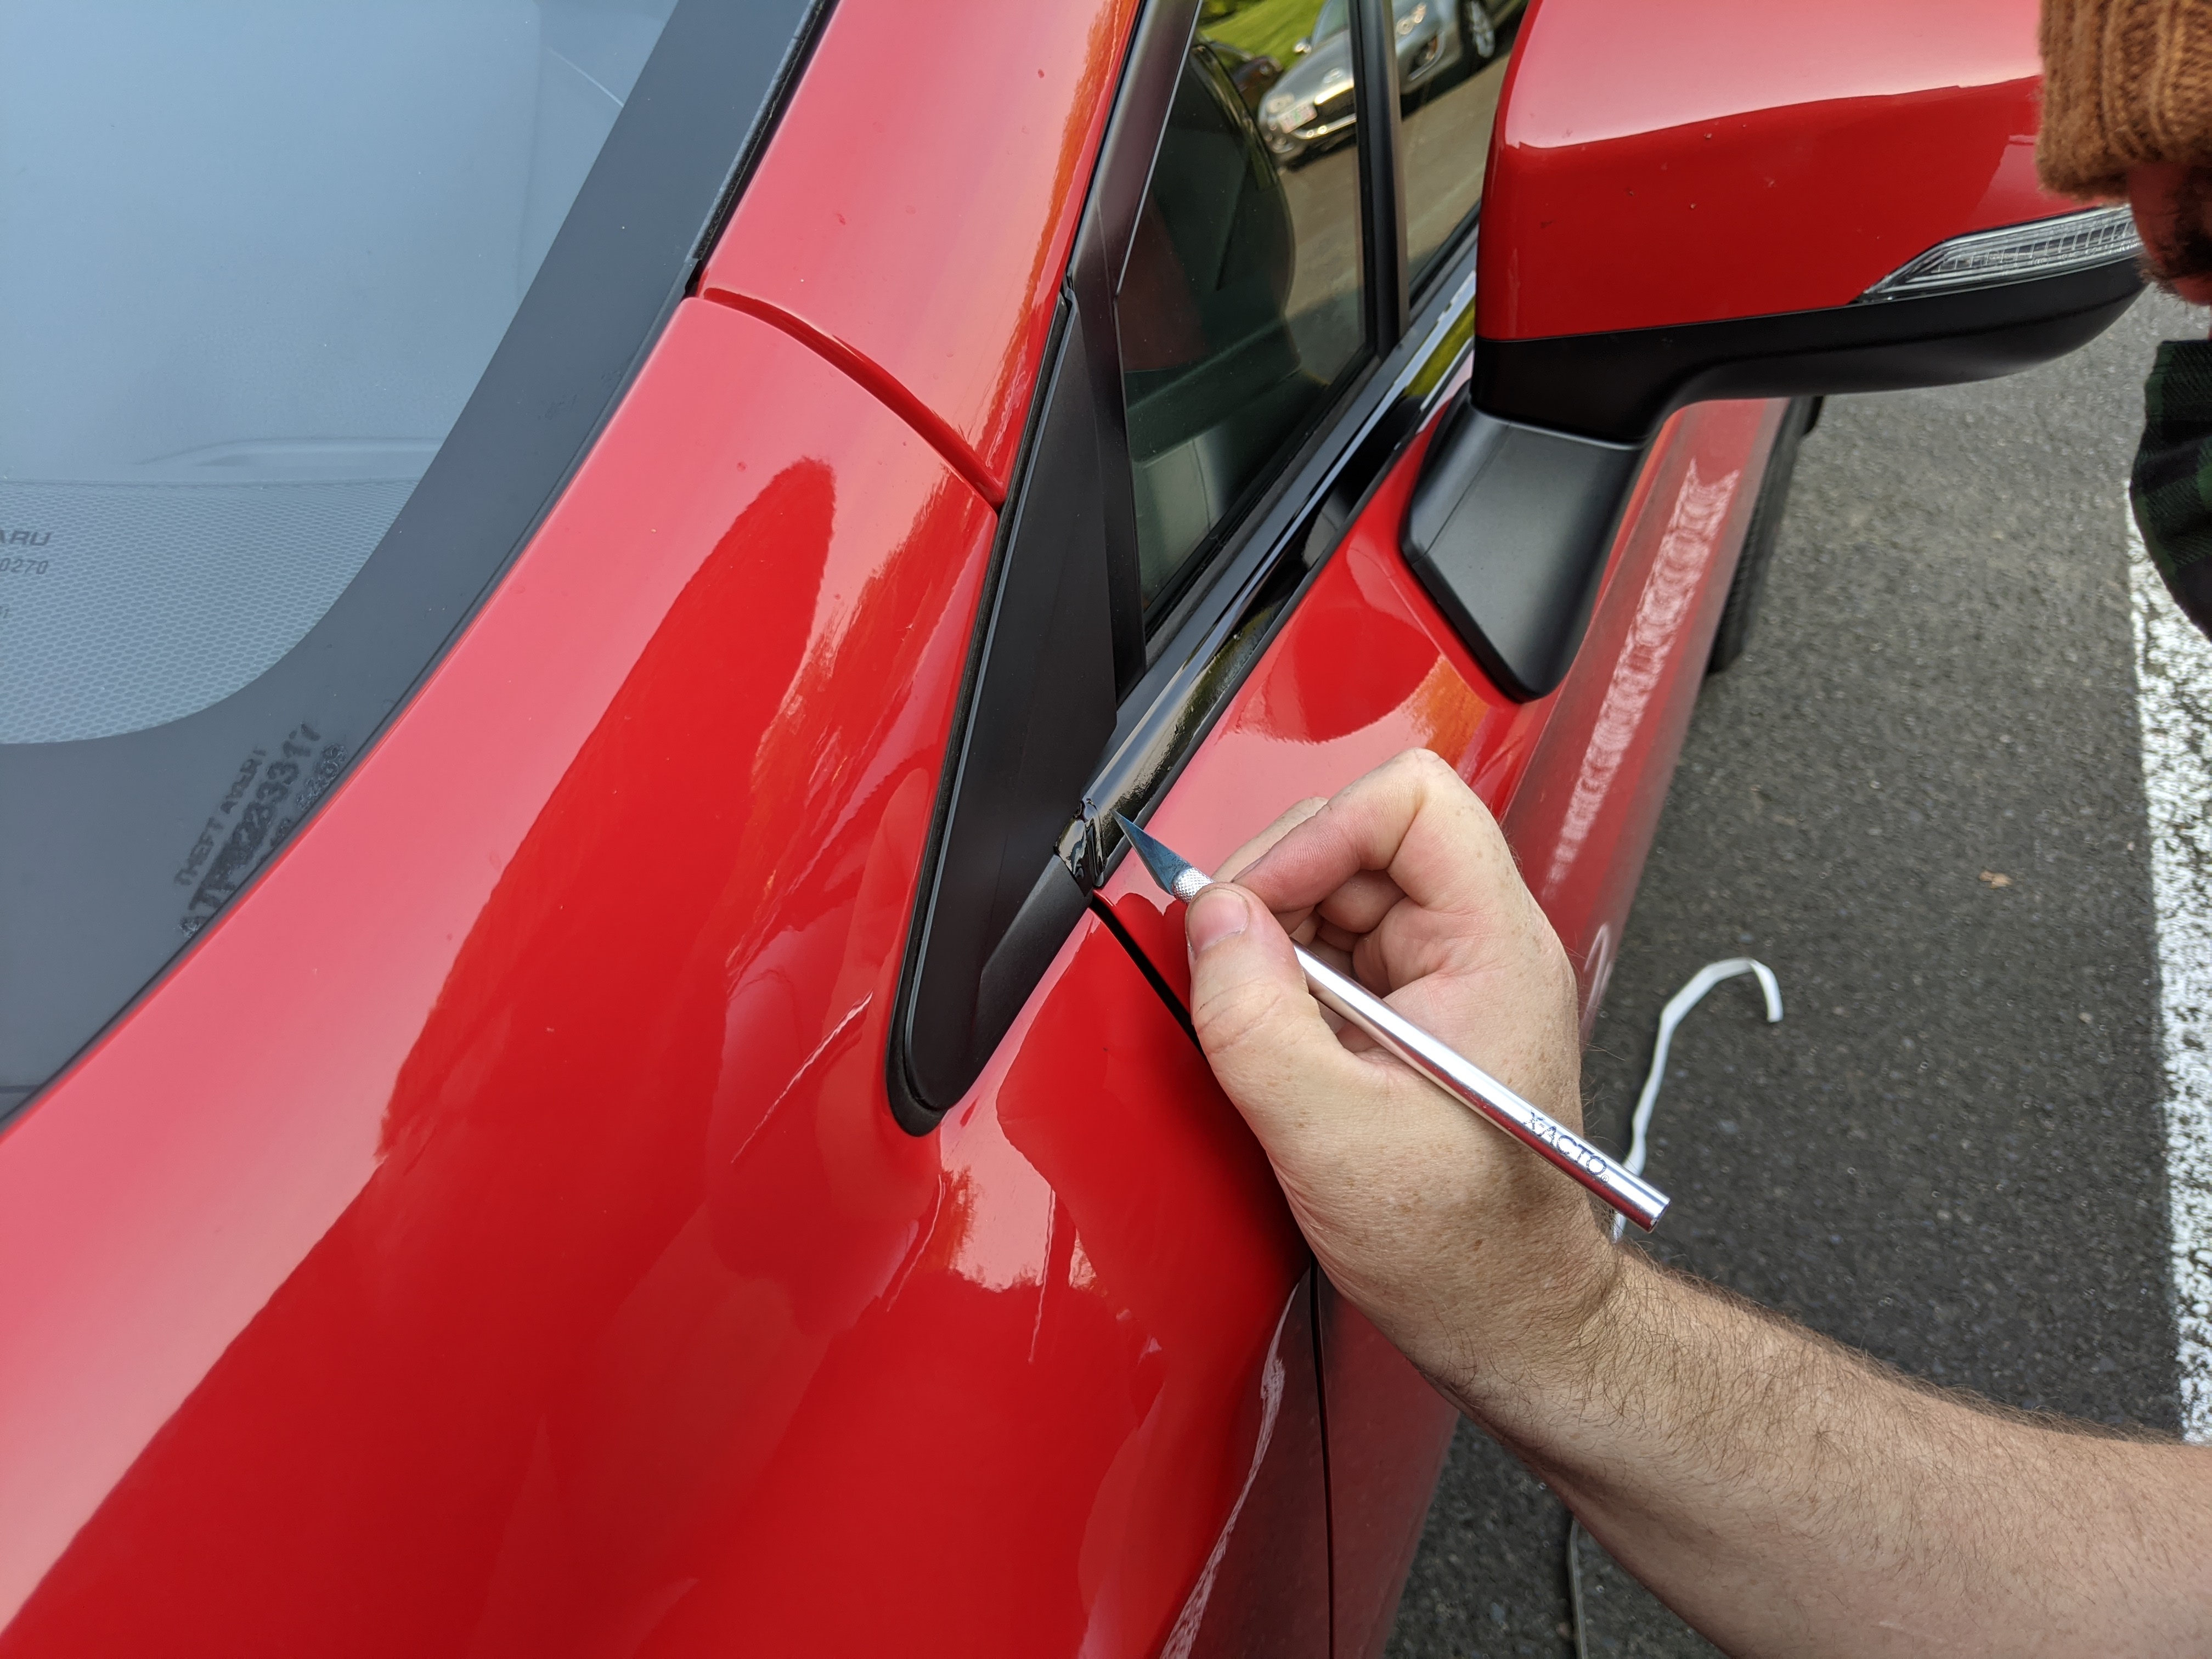
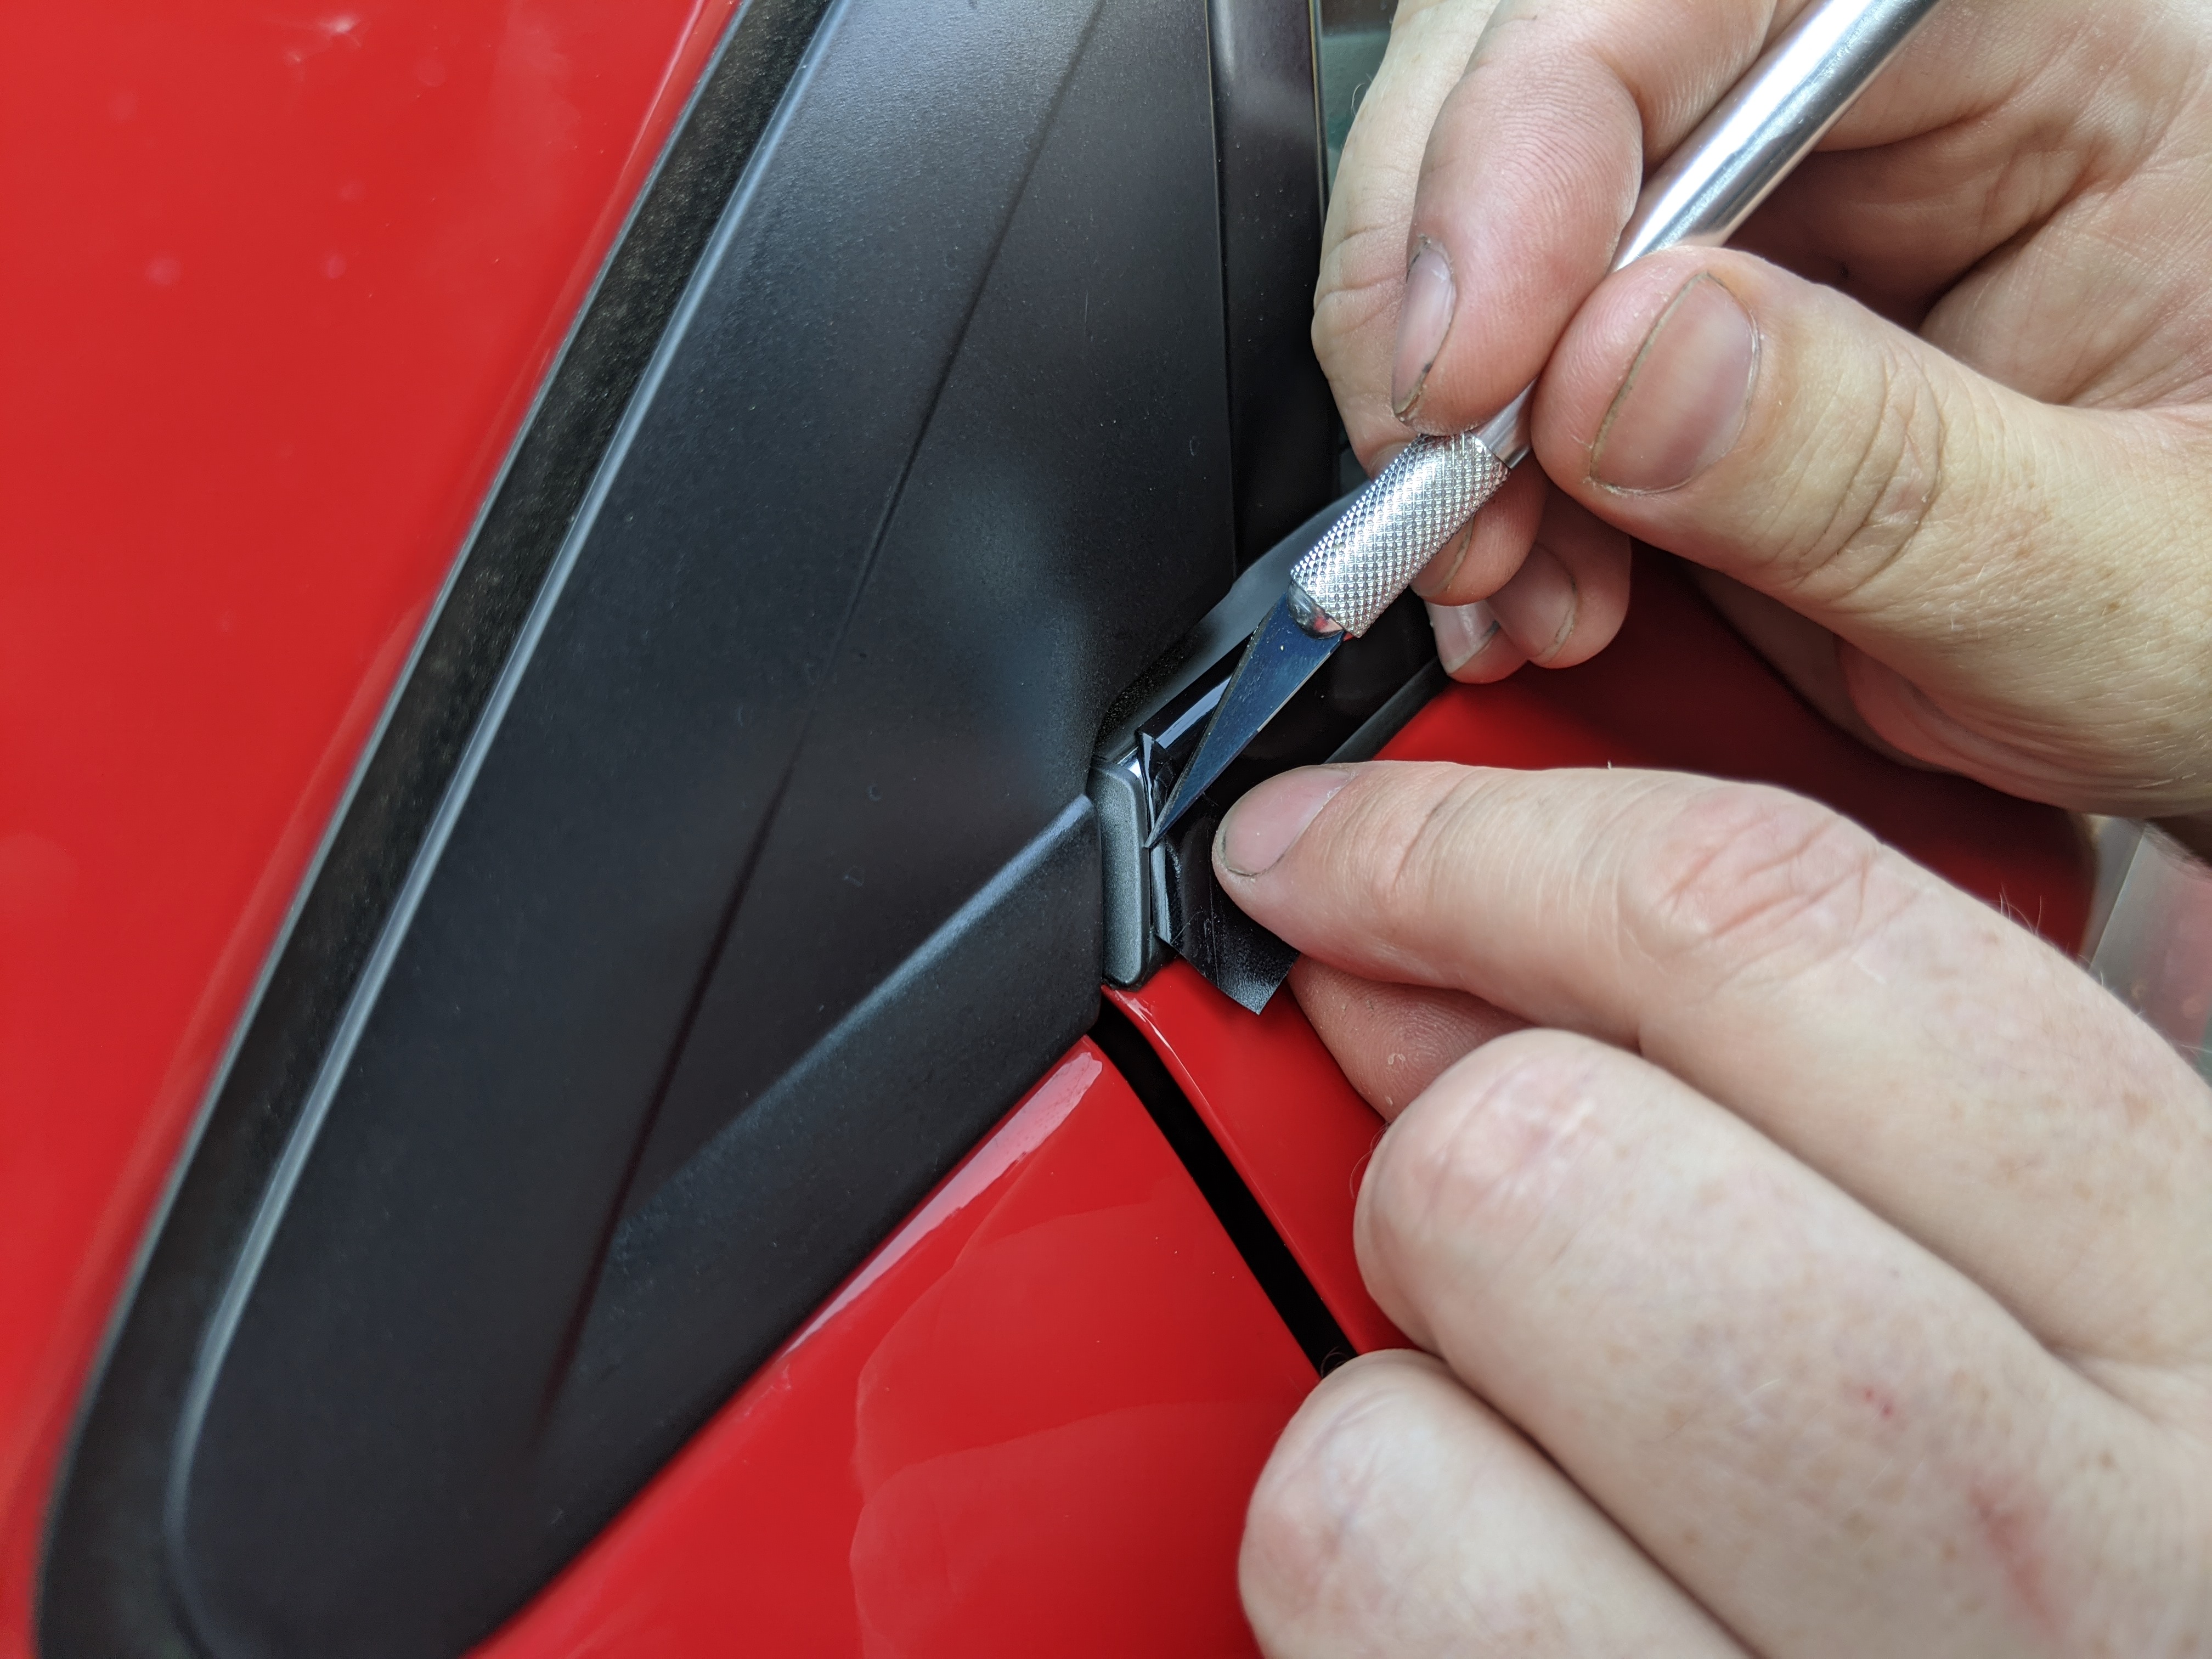
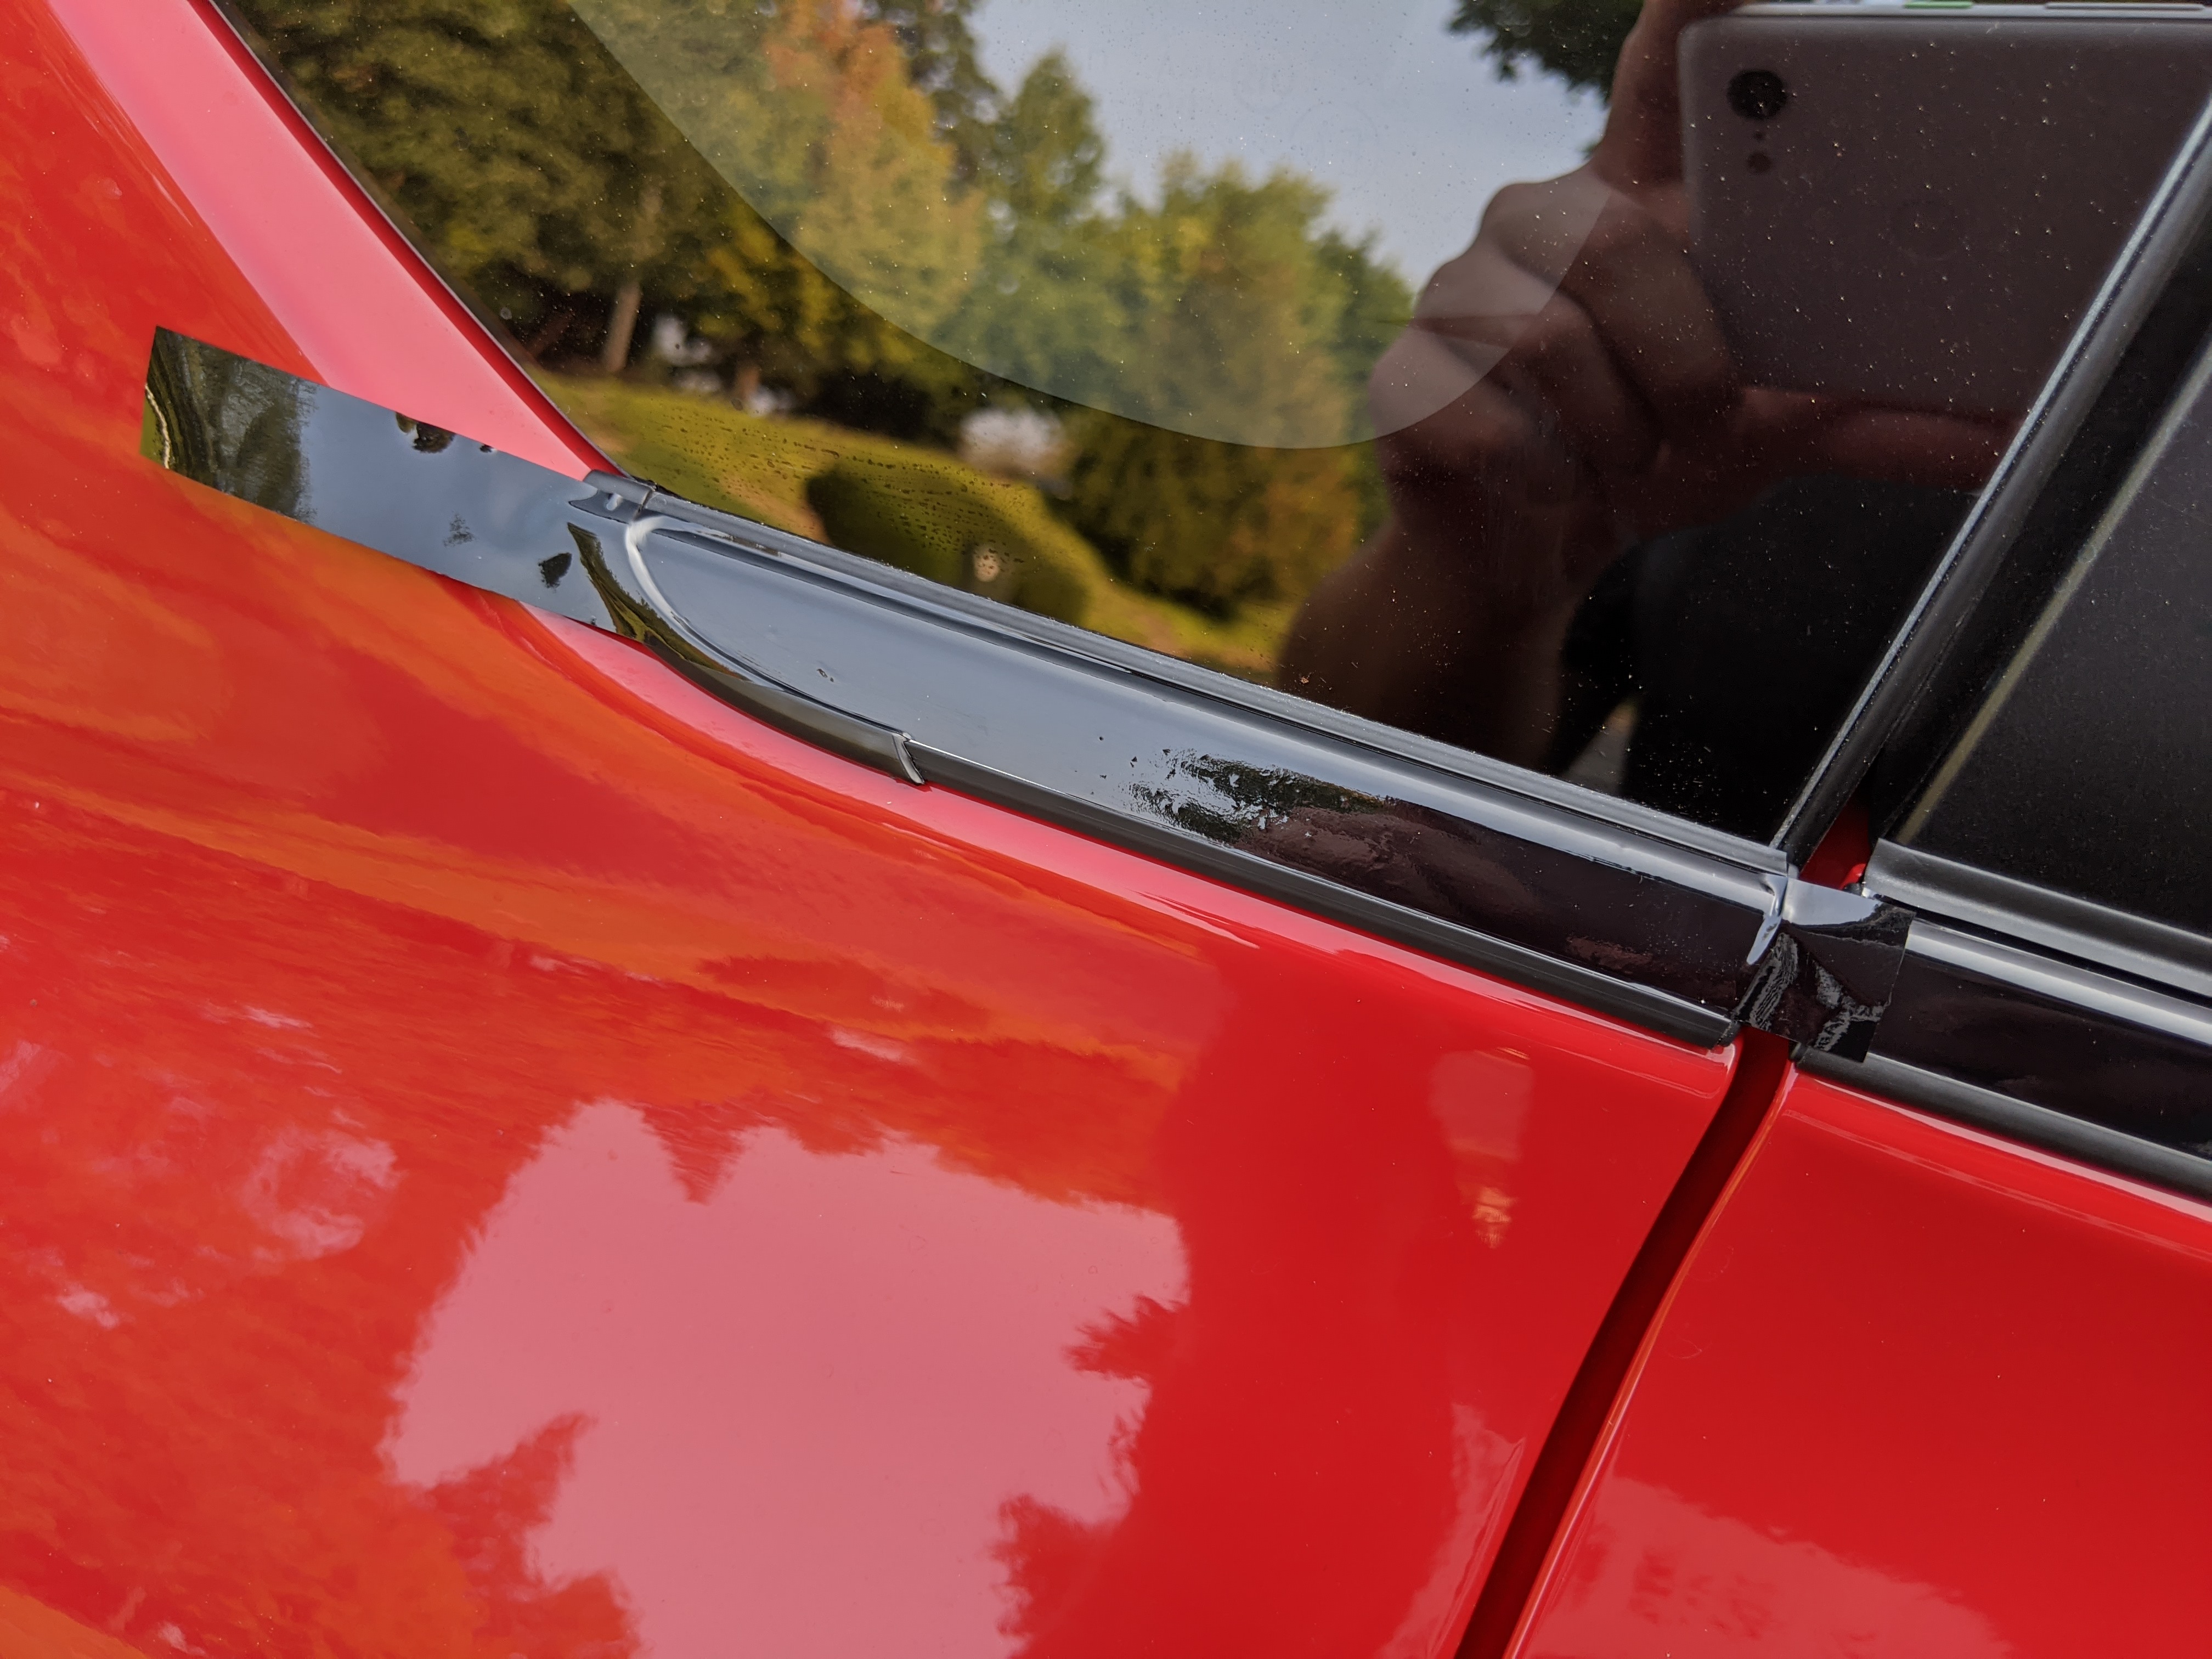
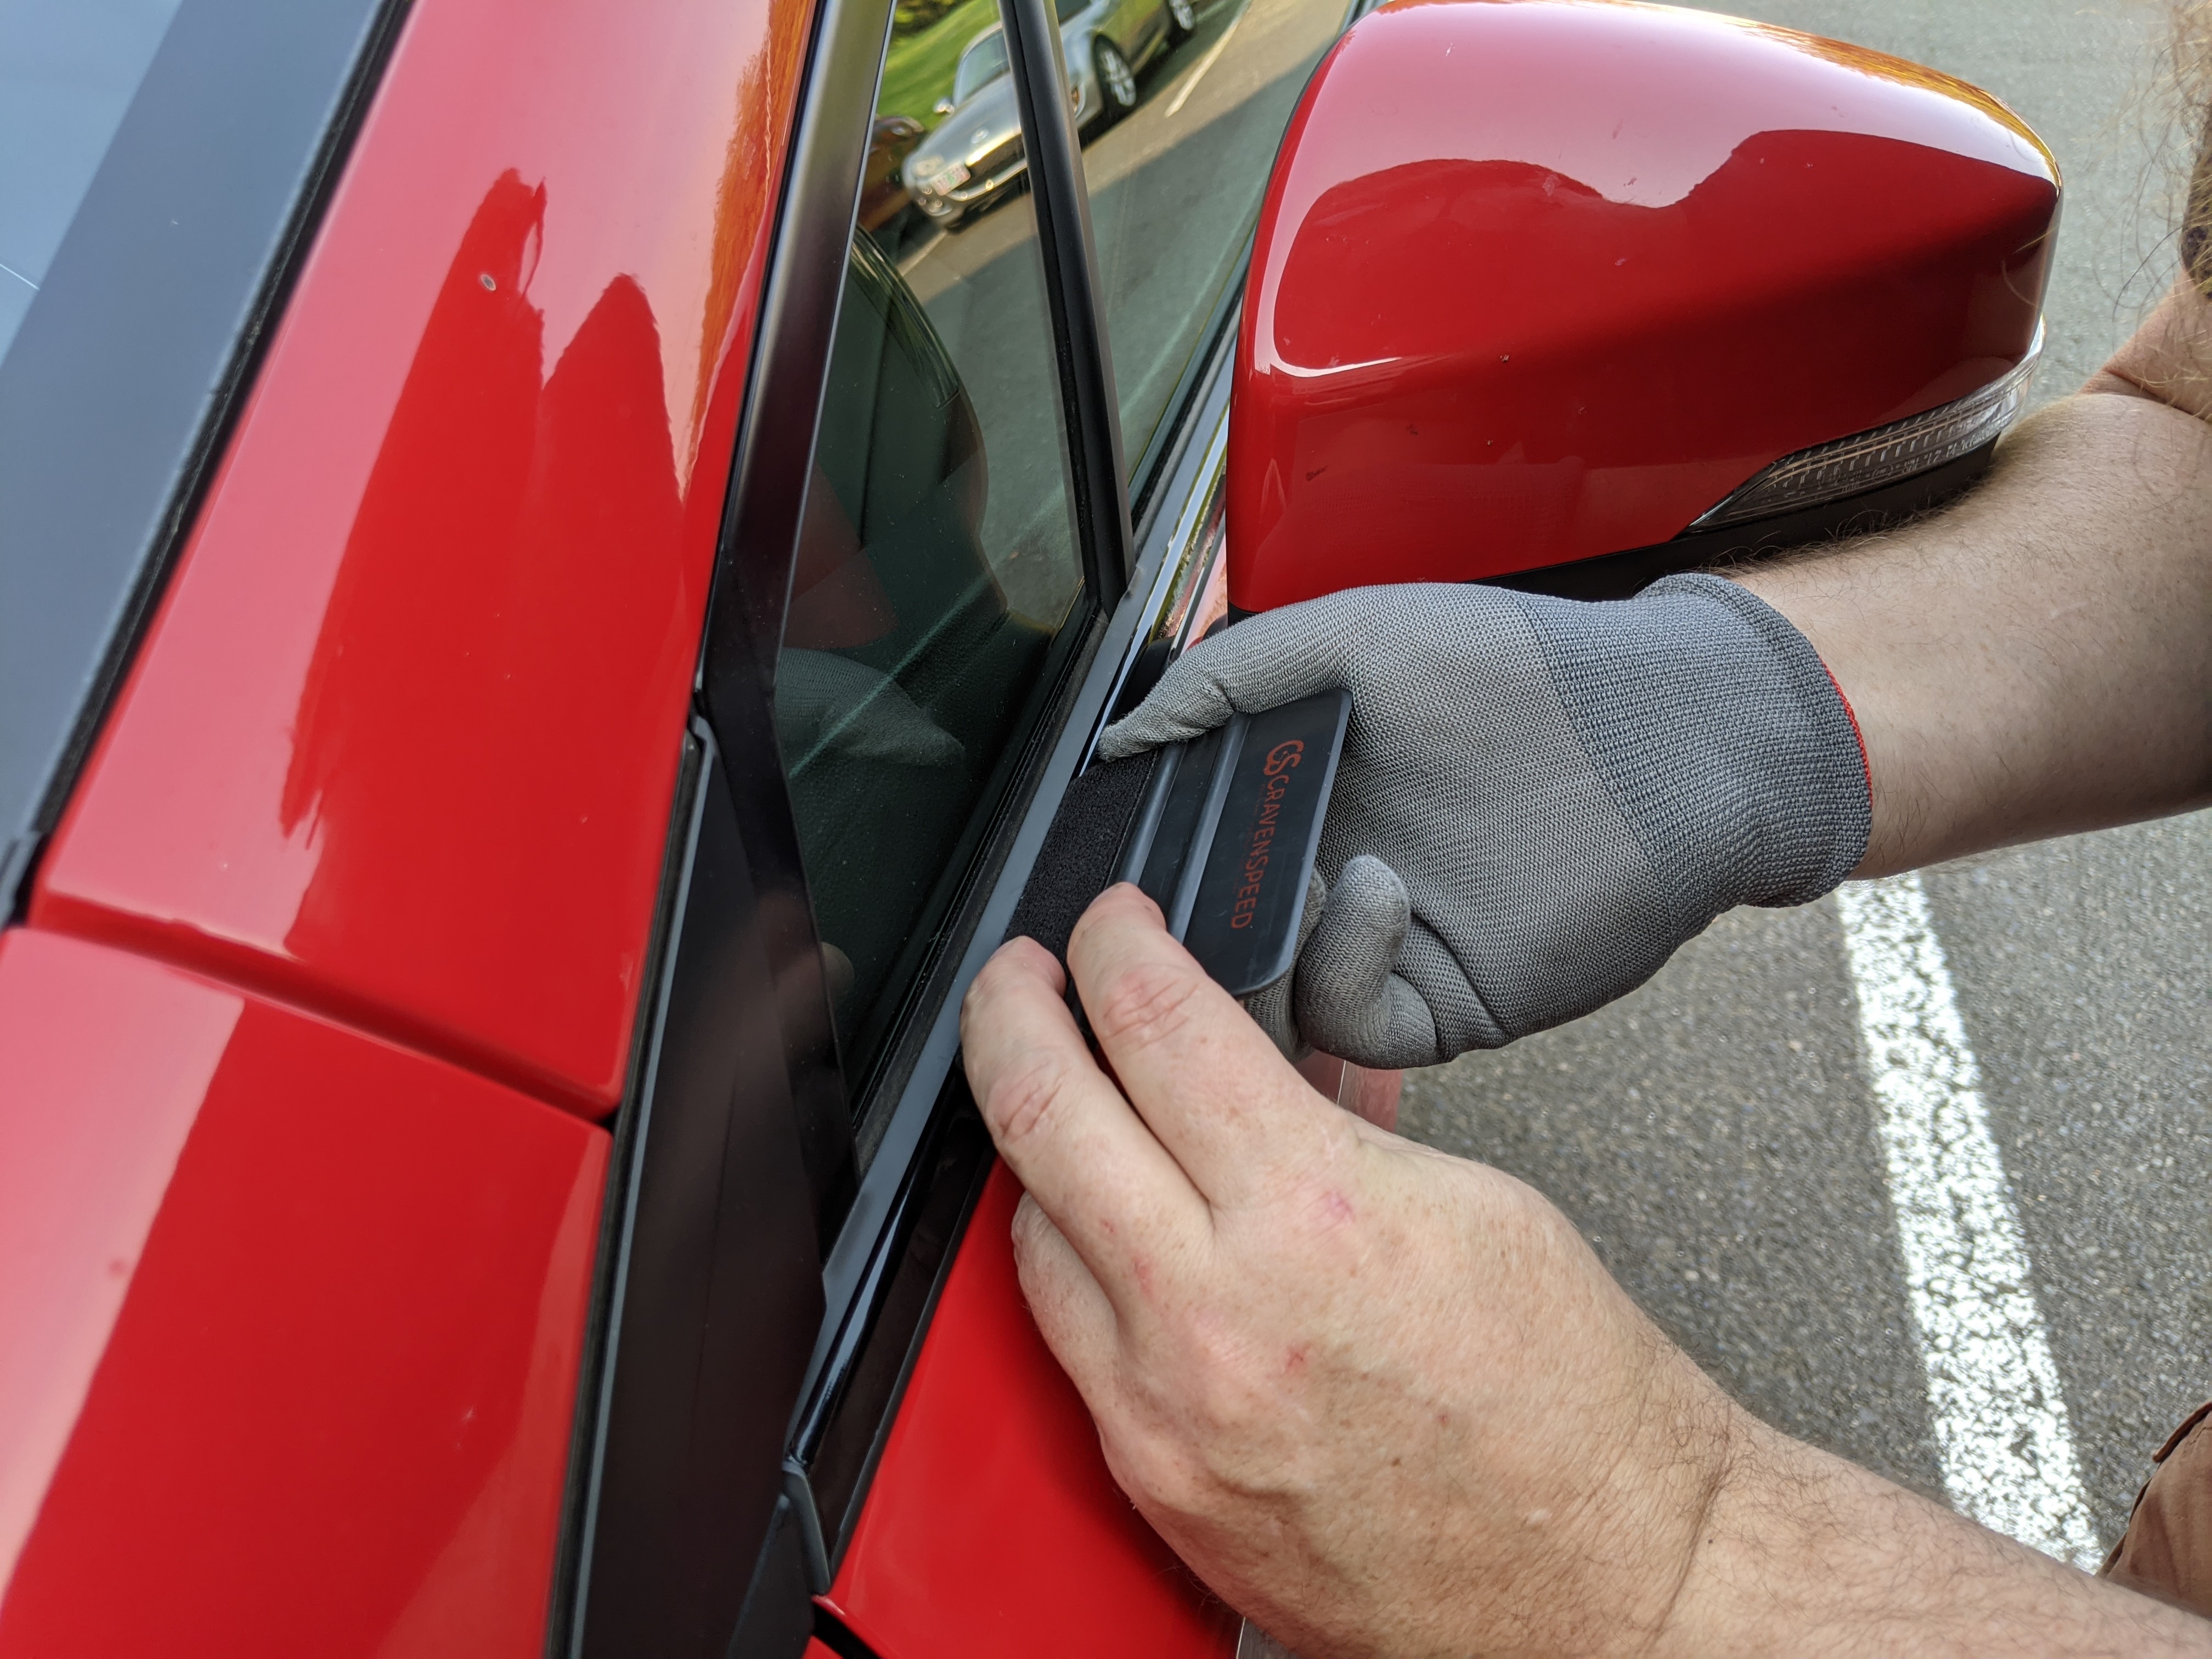
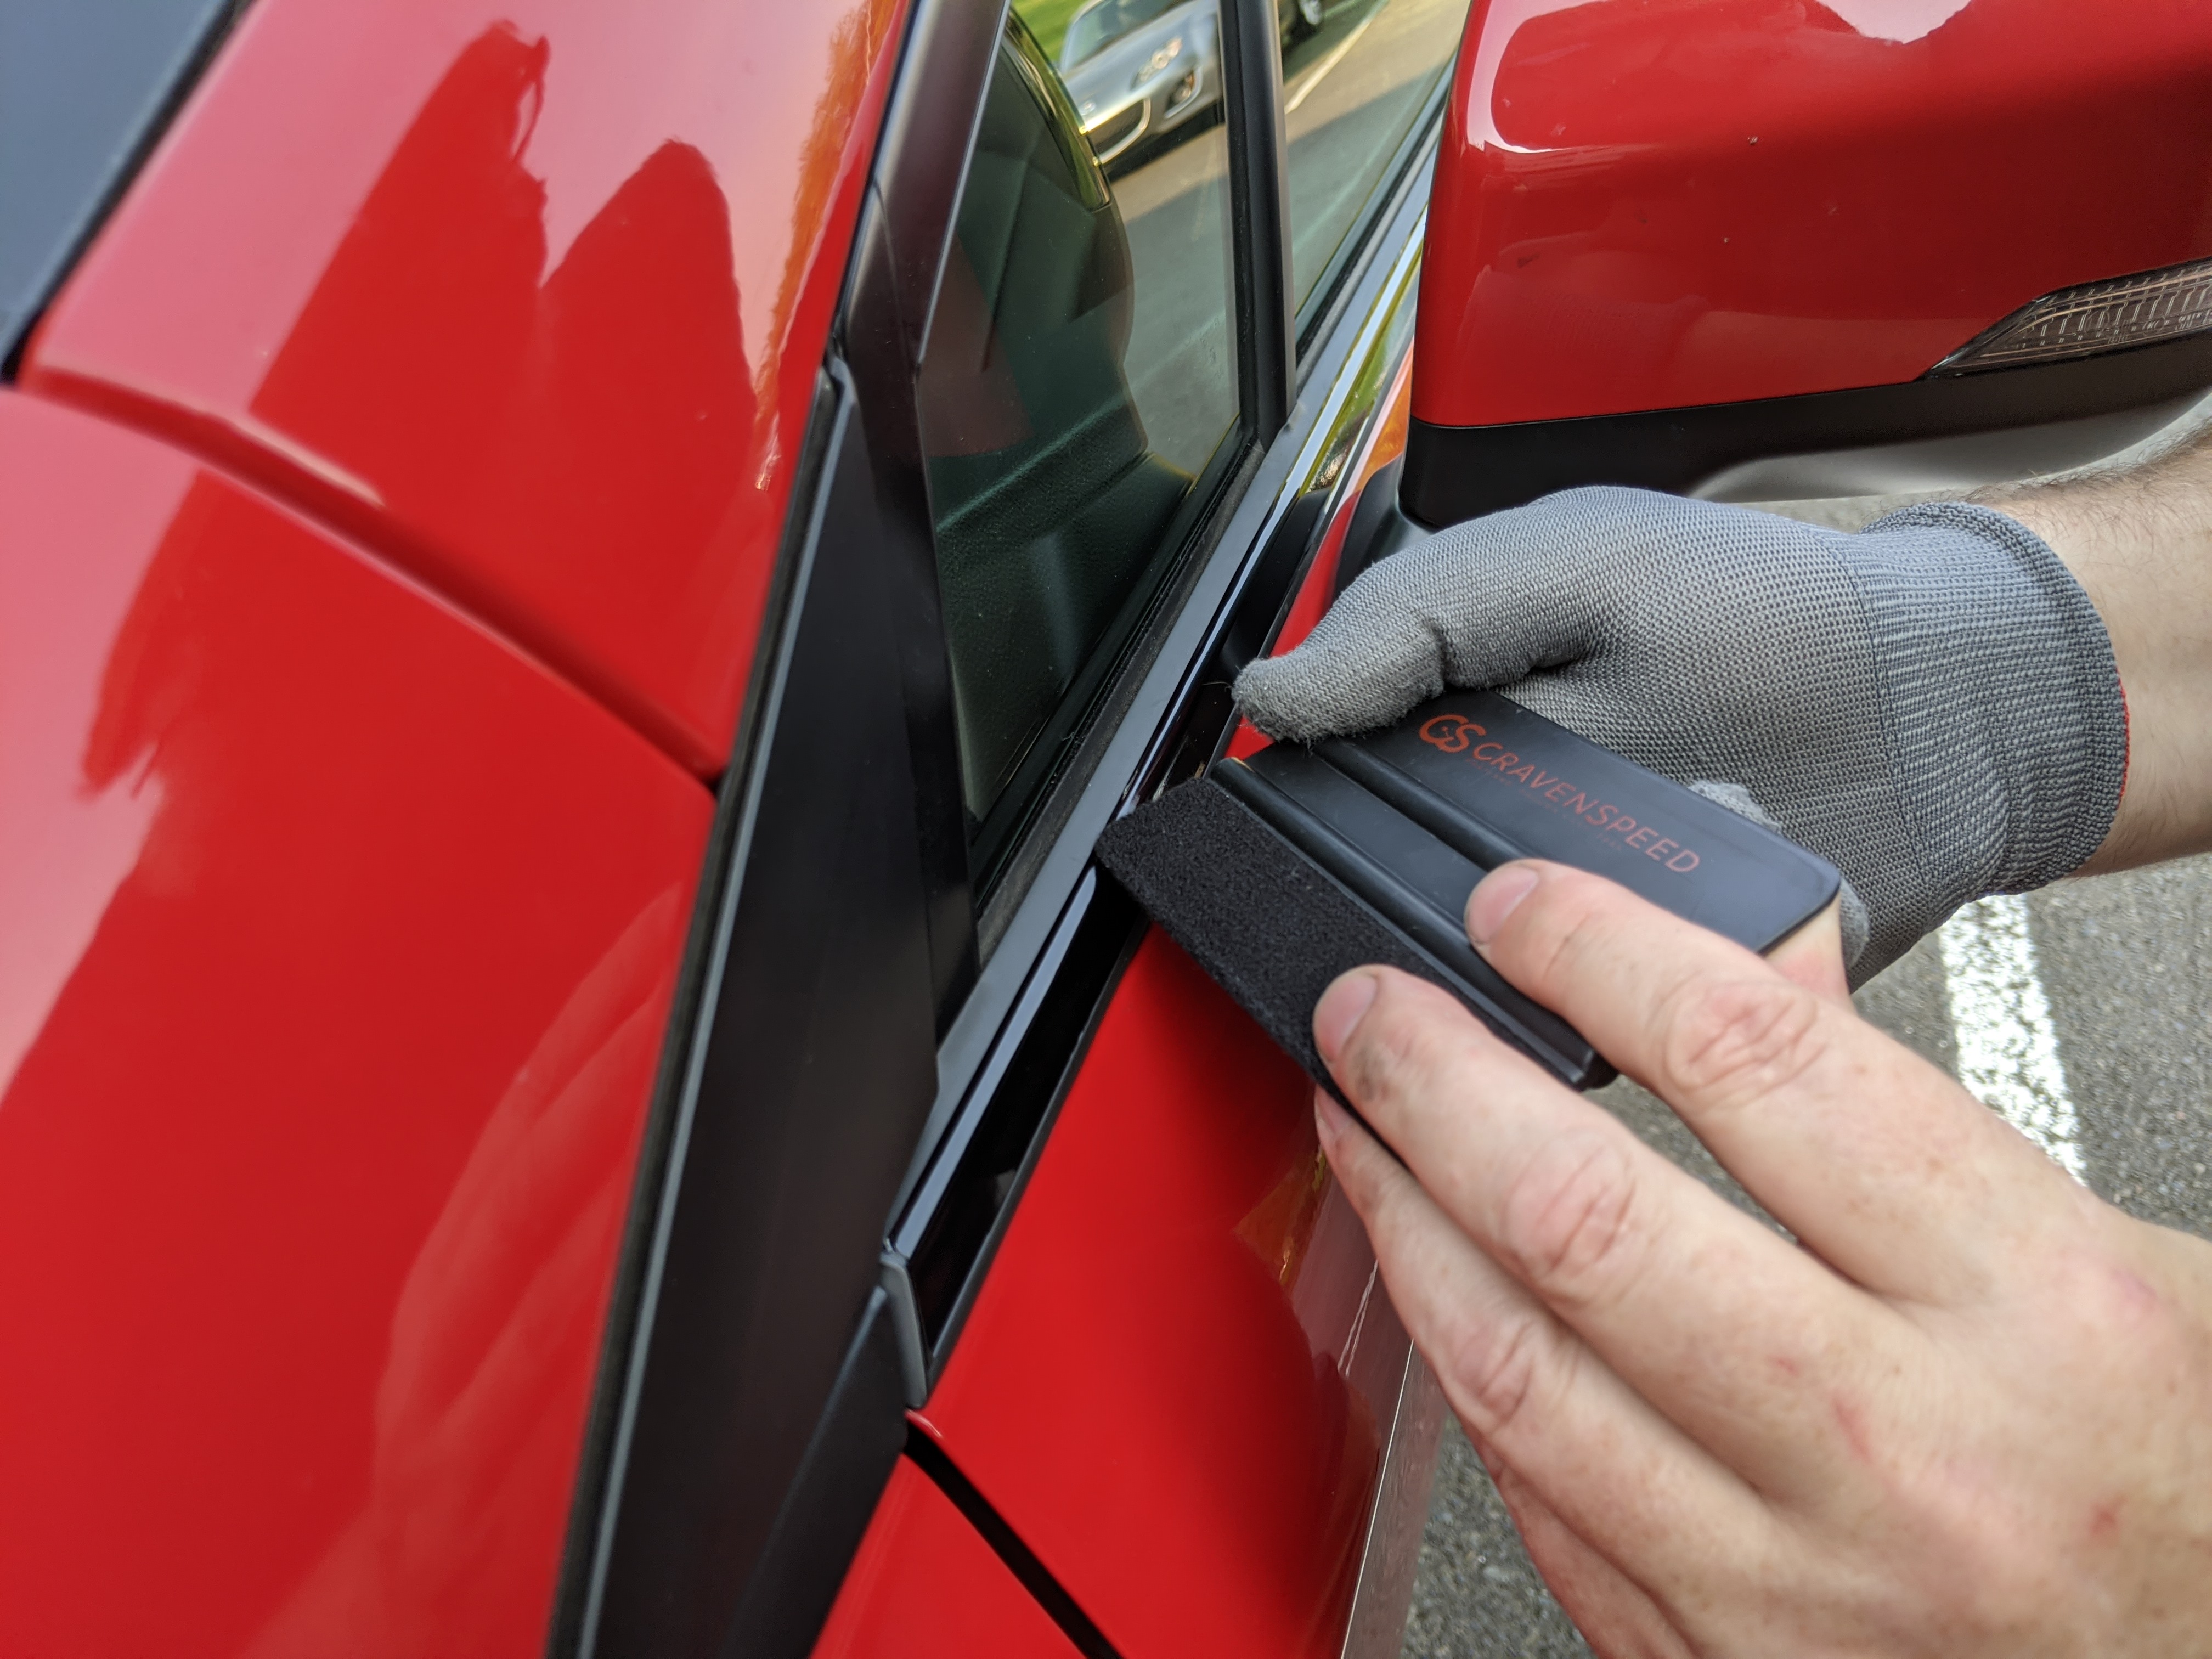
The width of the vinyl is slightly wider than the chrome trim around the beltline of your Subaru, so we'll be applying it right up against the bottom edge of the rubber where it meets the chrome. Start the vinyl a few millimeters before (and likewise, beyond) the section of the beltline you're working on. We'll trim them up with the x-acto knife as we go along. Applying the blackout strips around the backside of the side mirrors is a bit tricky, so take your time.
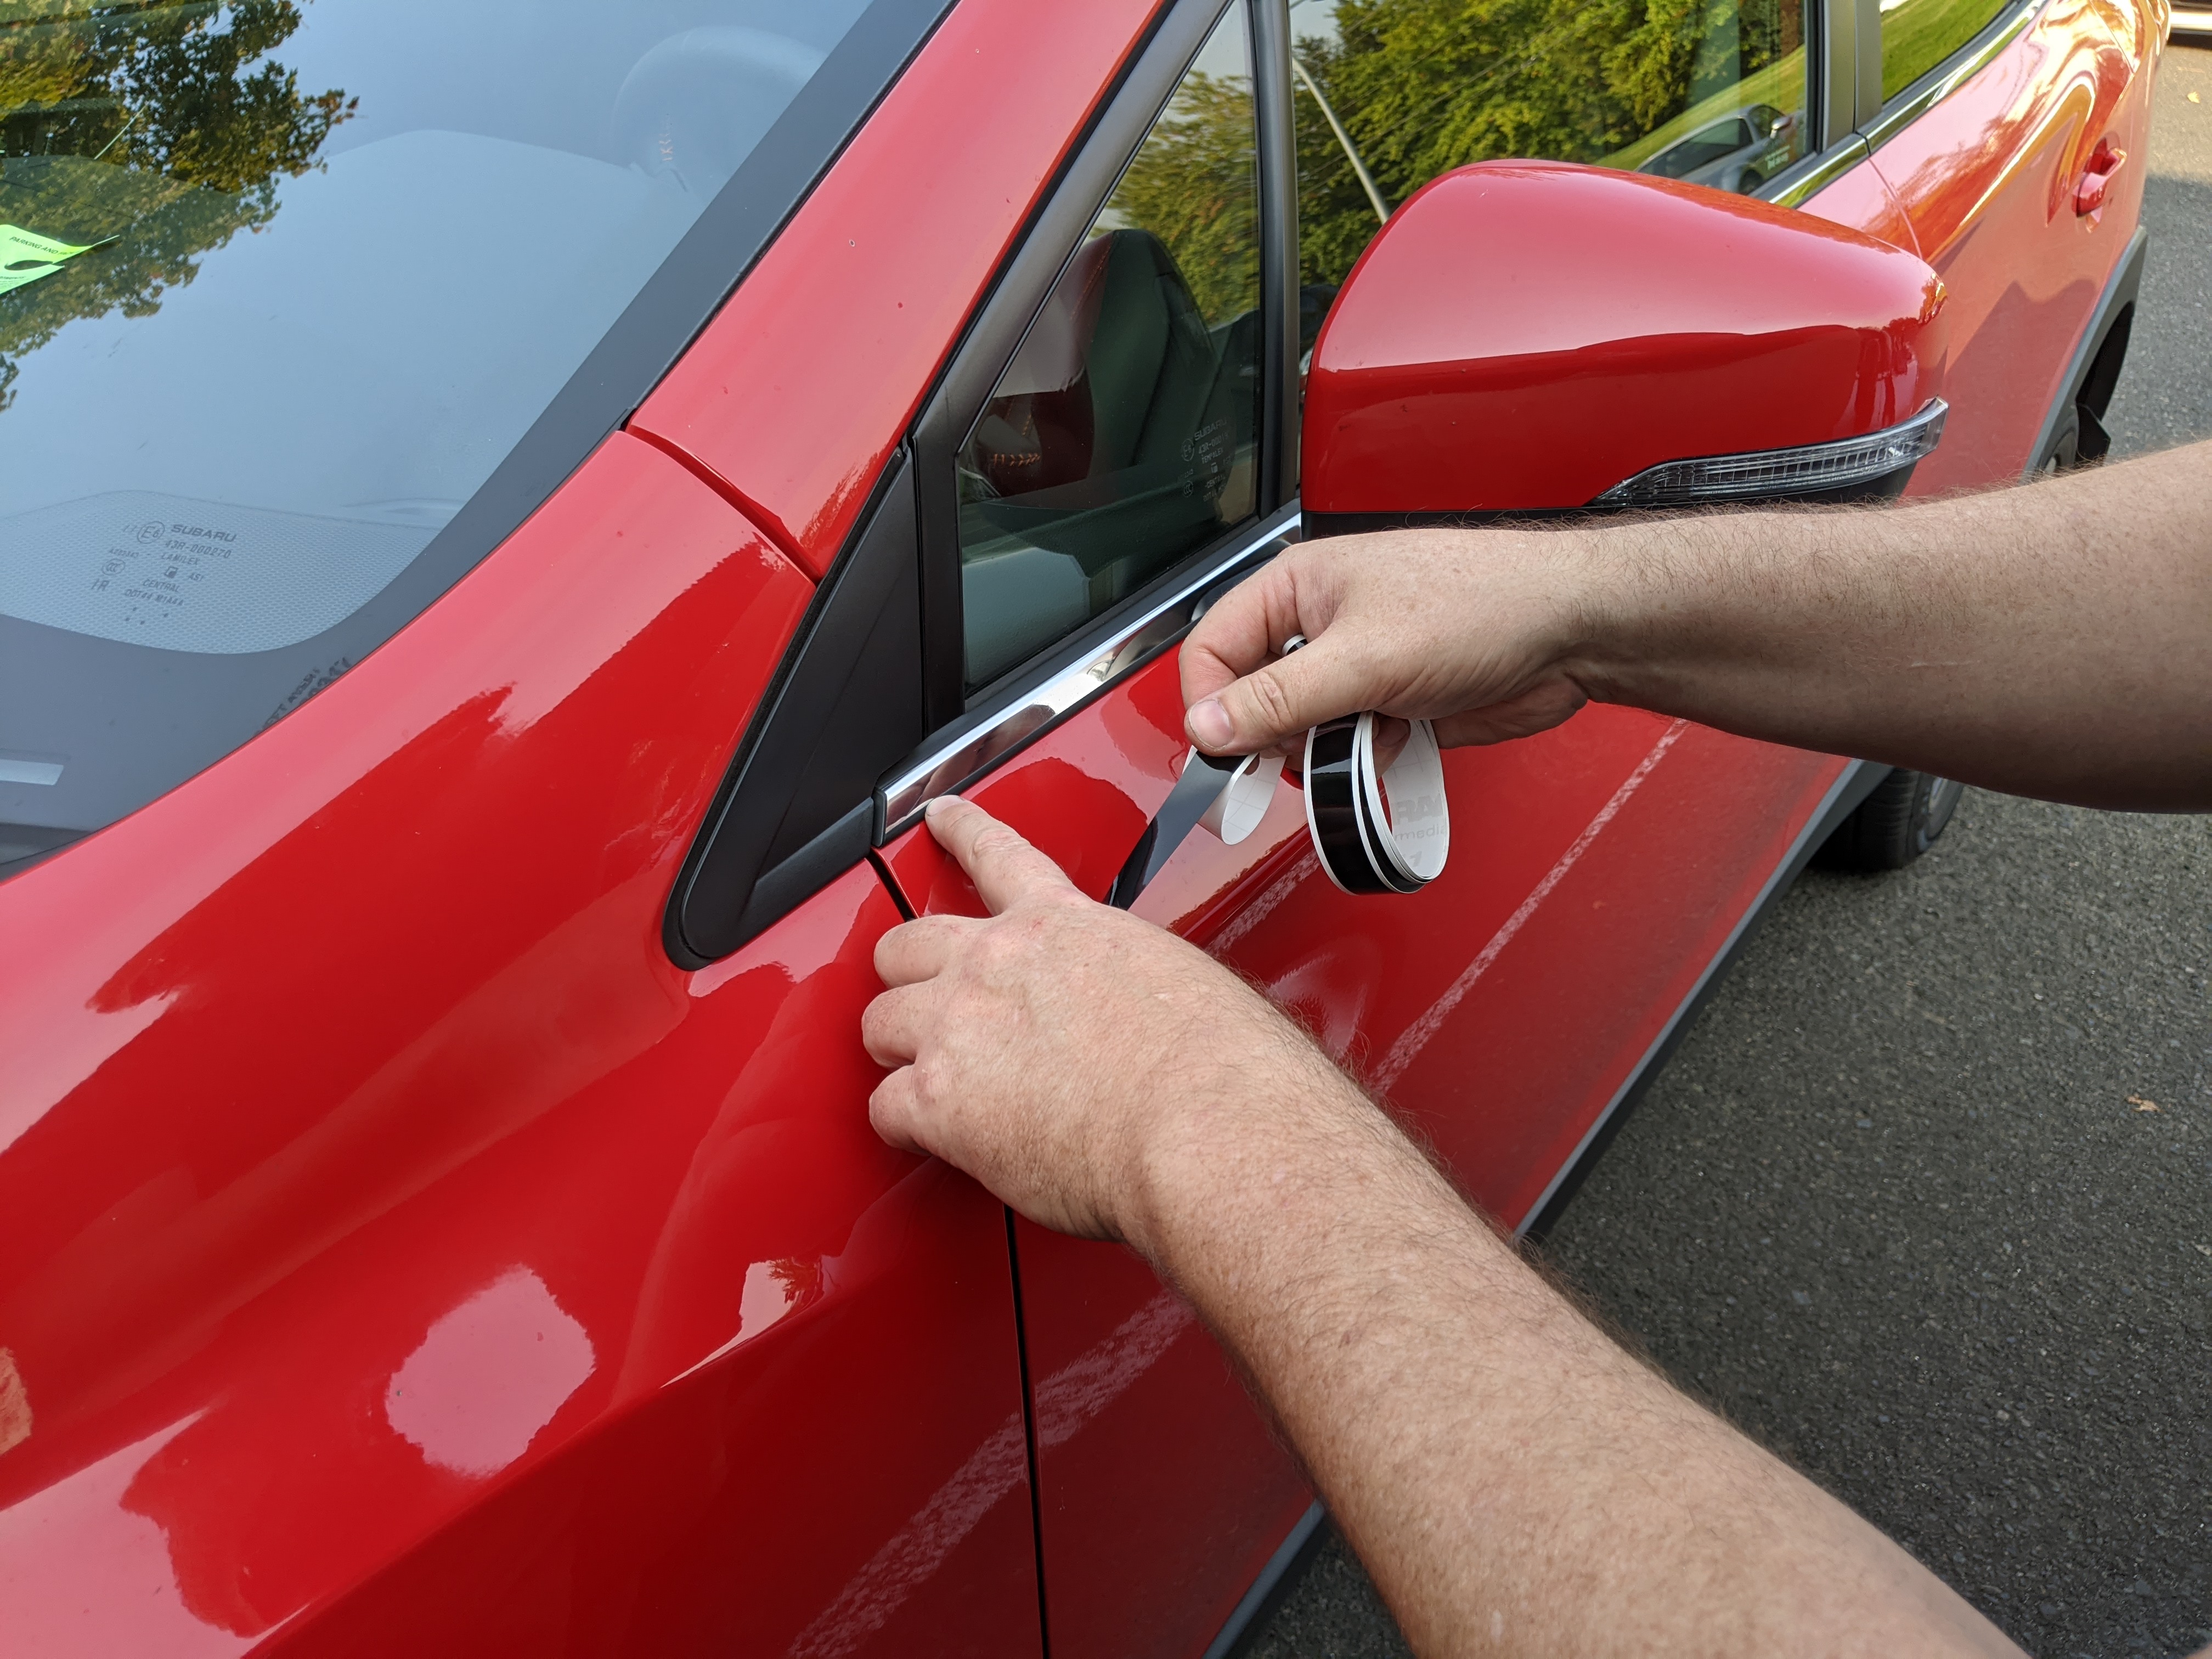

While applying the vinyl strip, some slight tension on the roll is fine, but take caution that you do not over-stretch the vinyl. If you do, a little warmth from a heat gun should bring it back to it's original size. Do your best to avoid wrinkles and minimize the air bubbles by pressing down the vinyl in sweeping motion with your fingers. Using a soft, microfiber cloth over your finger can also help to smoothly apply the trim. Don't stress if you mess up a section as there is plenty of material in the kit to re-do a few areas if necessary.
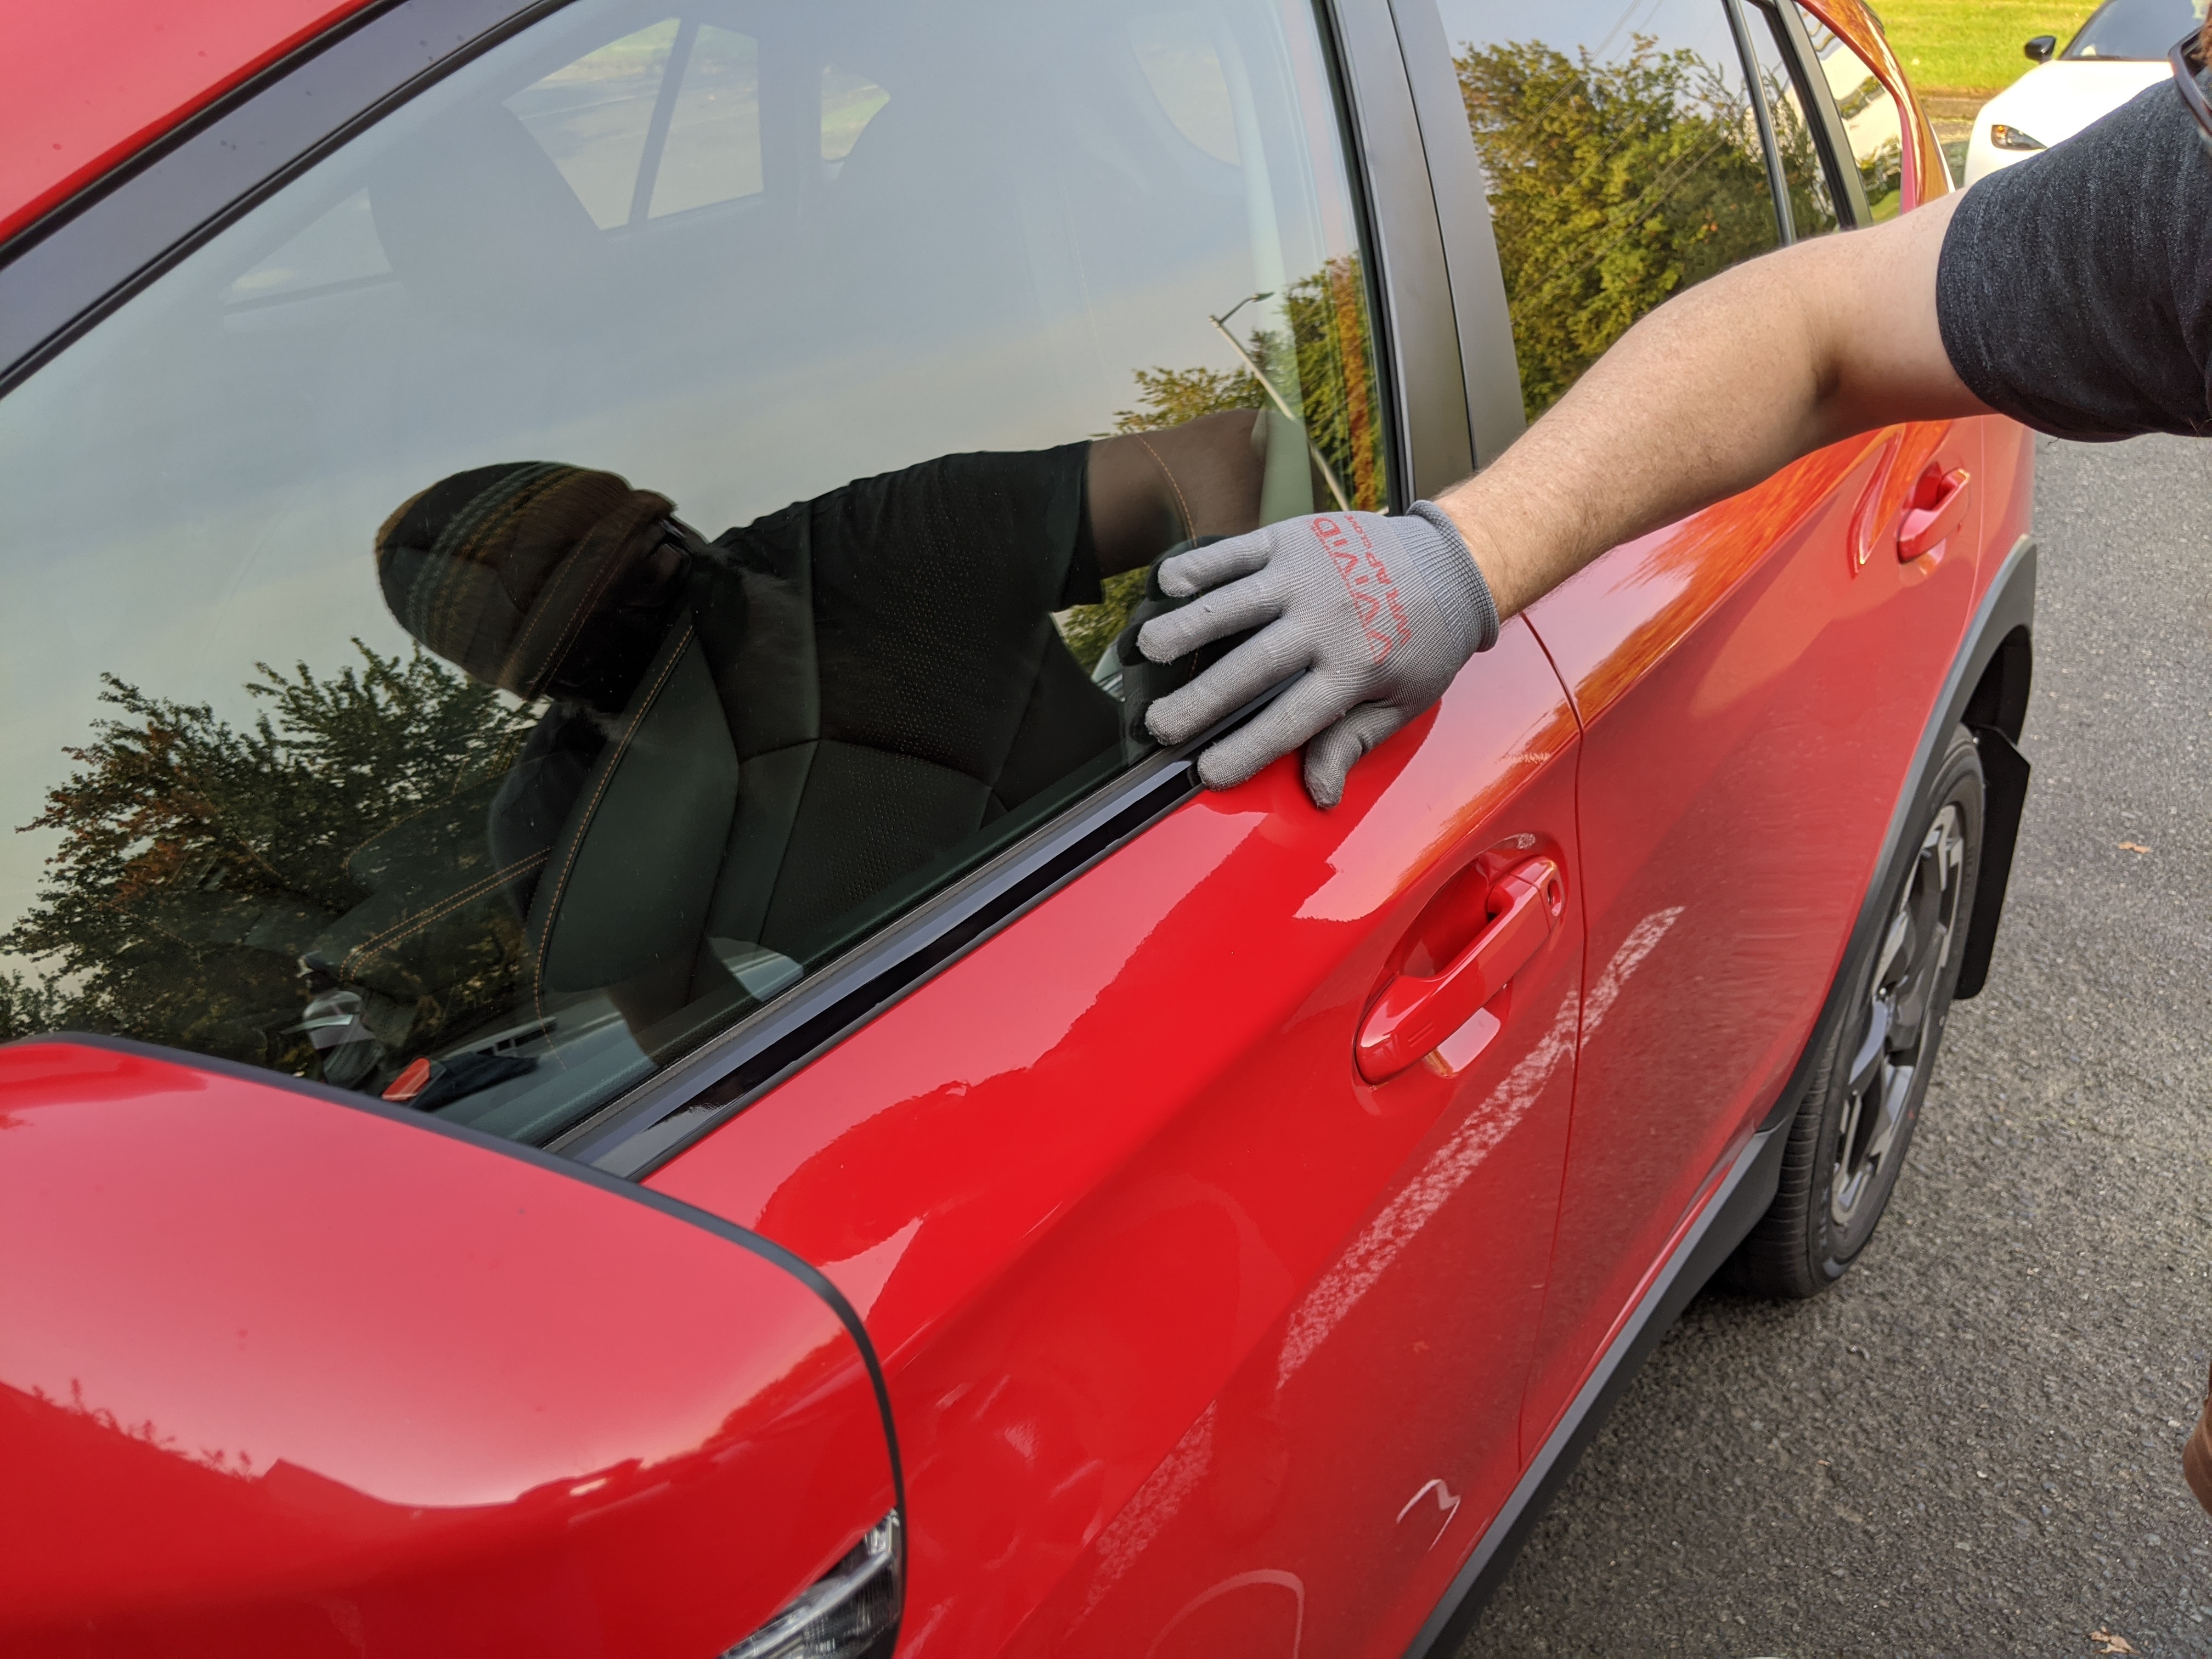
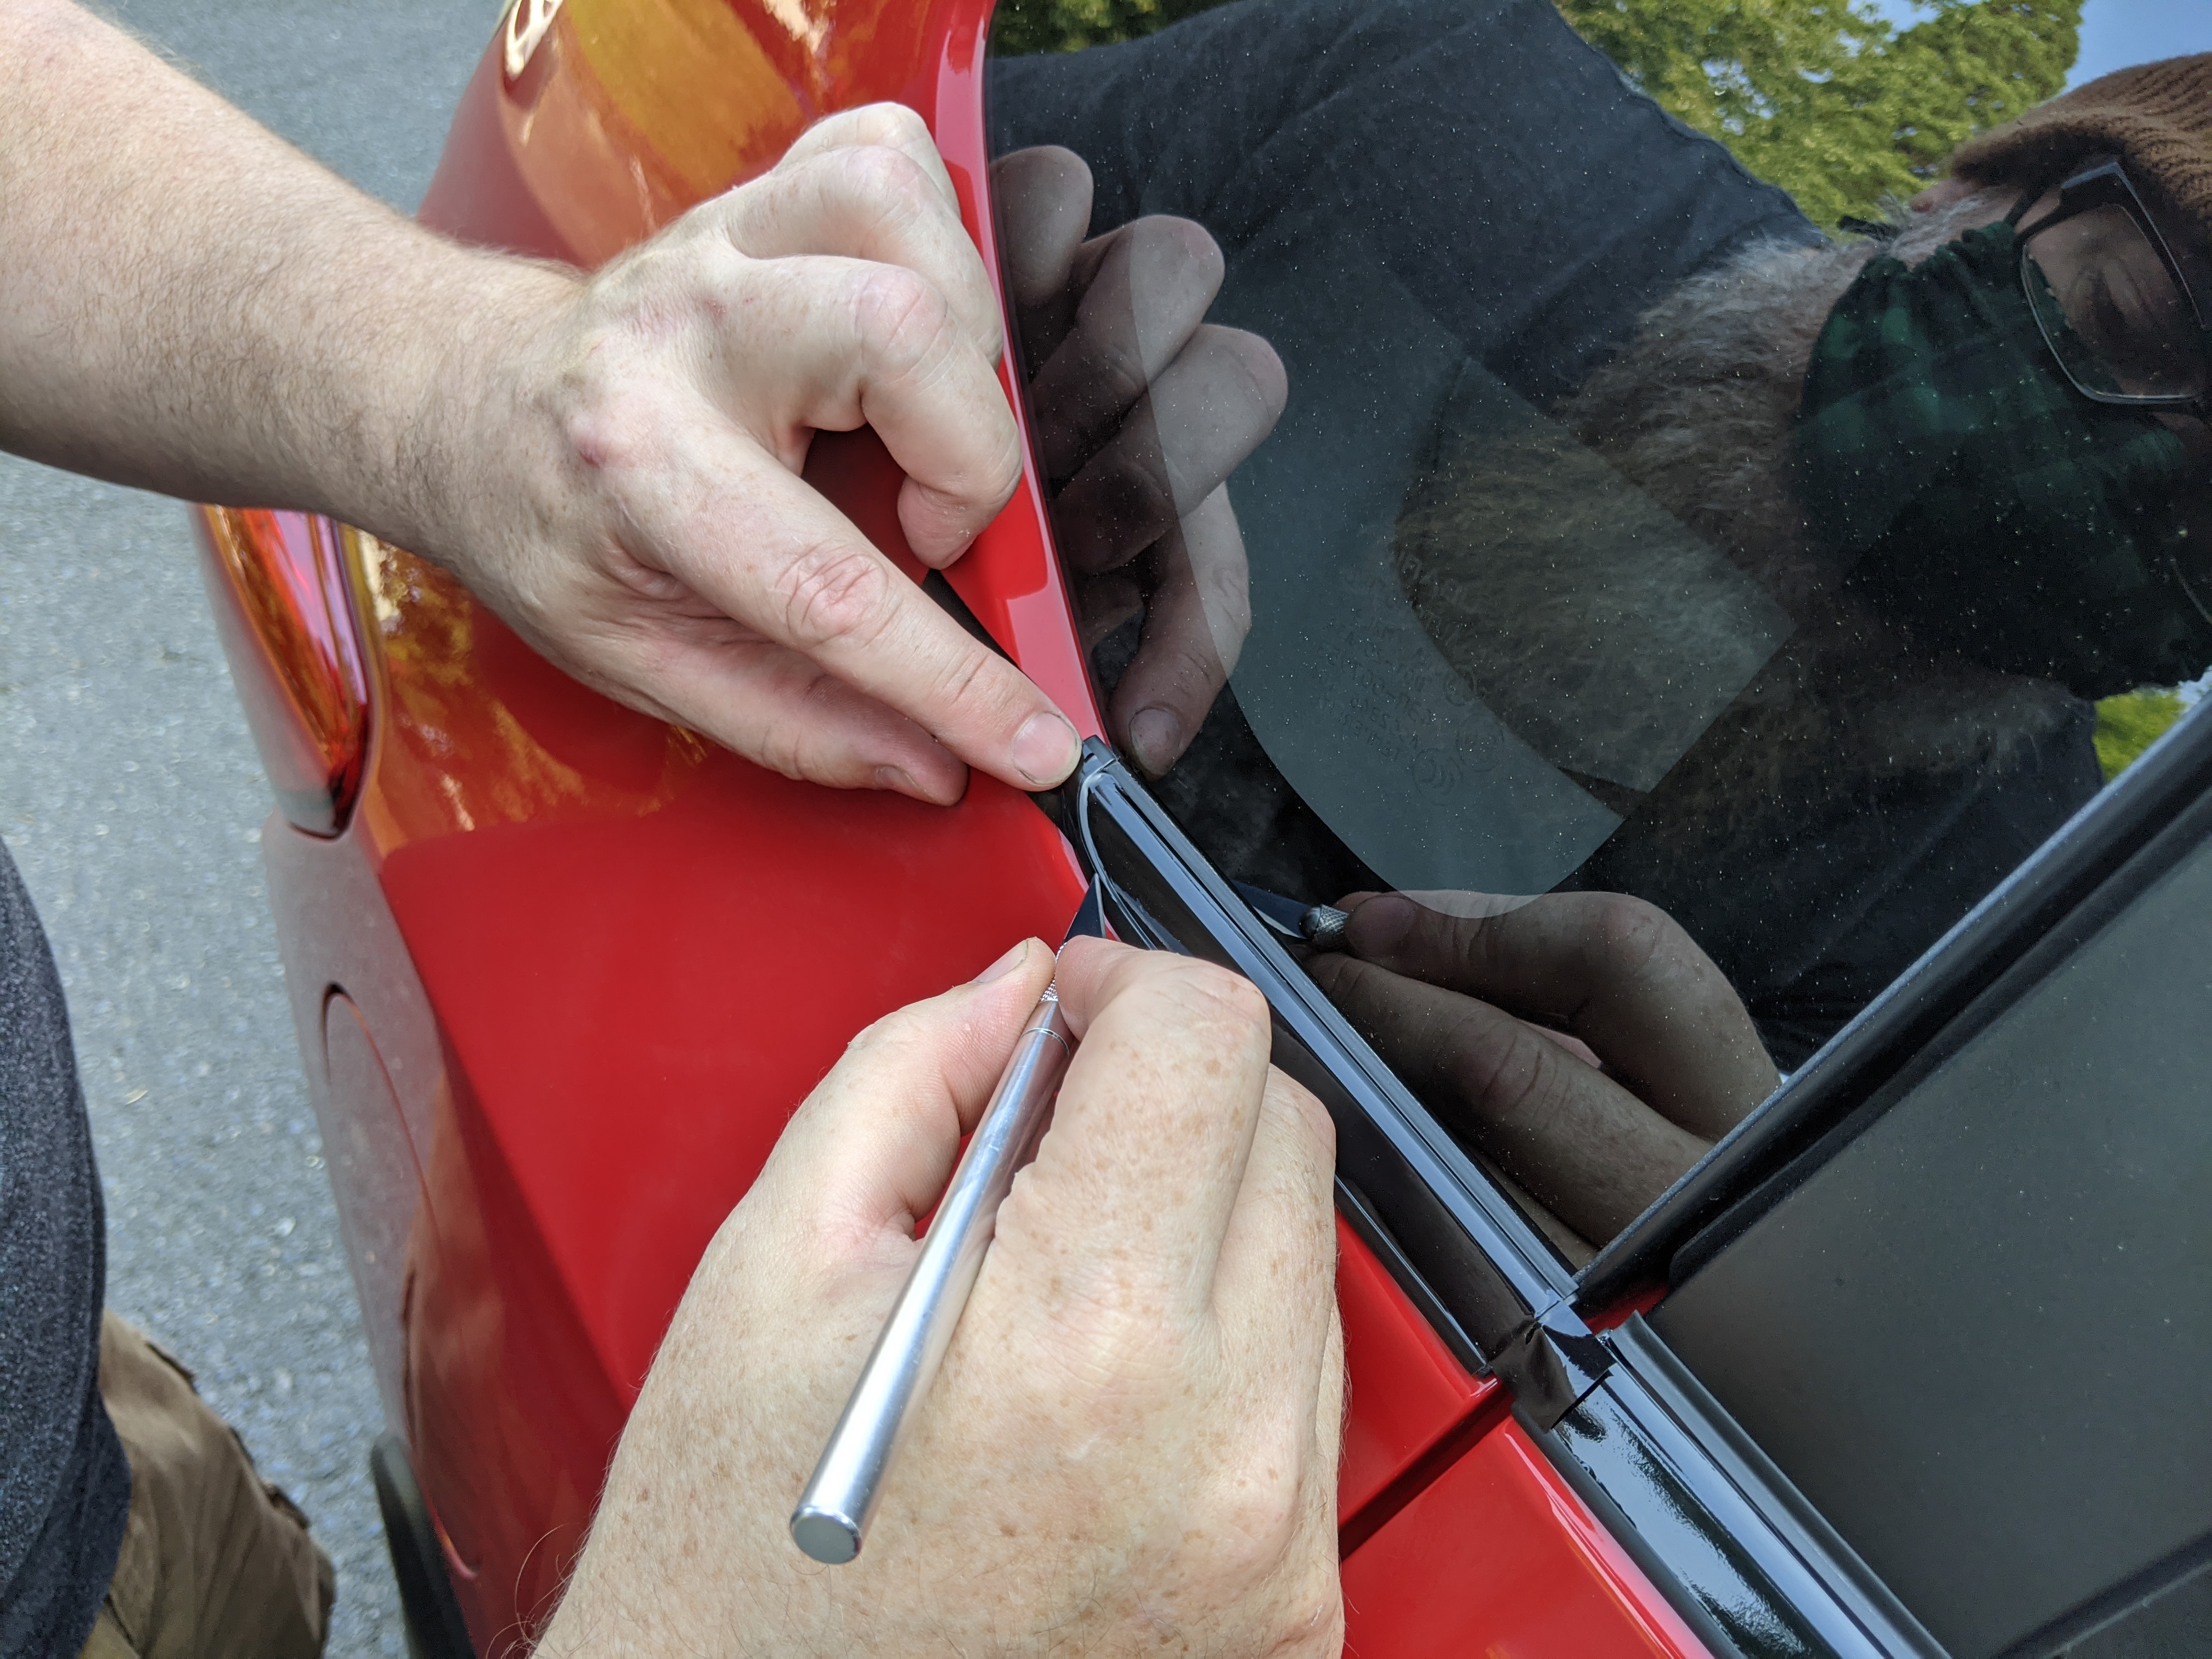
Go back to the beginning of the section you are working on and use your fingernail to press the trim tape against the end of the beltline trim so you have a reference line to cut along. Utilize your x-acto knife and carefully cut along this edge.
Continue around your Subaru until you've covered and trimmed each section of the beltline.
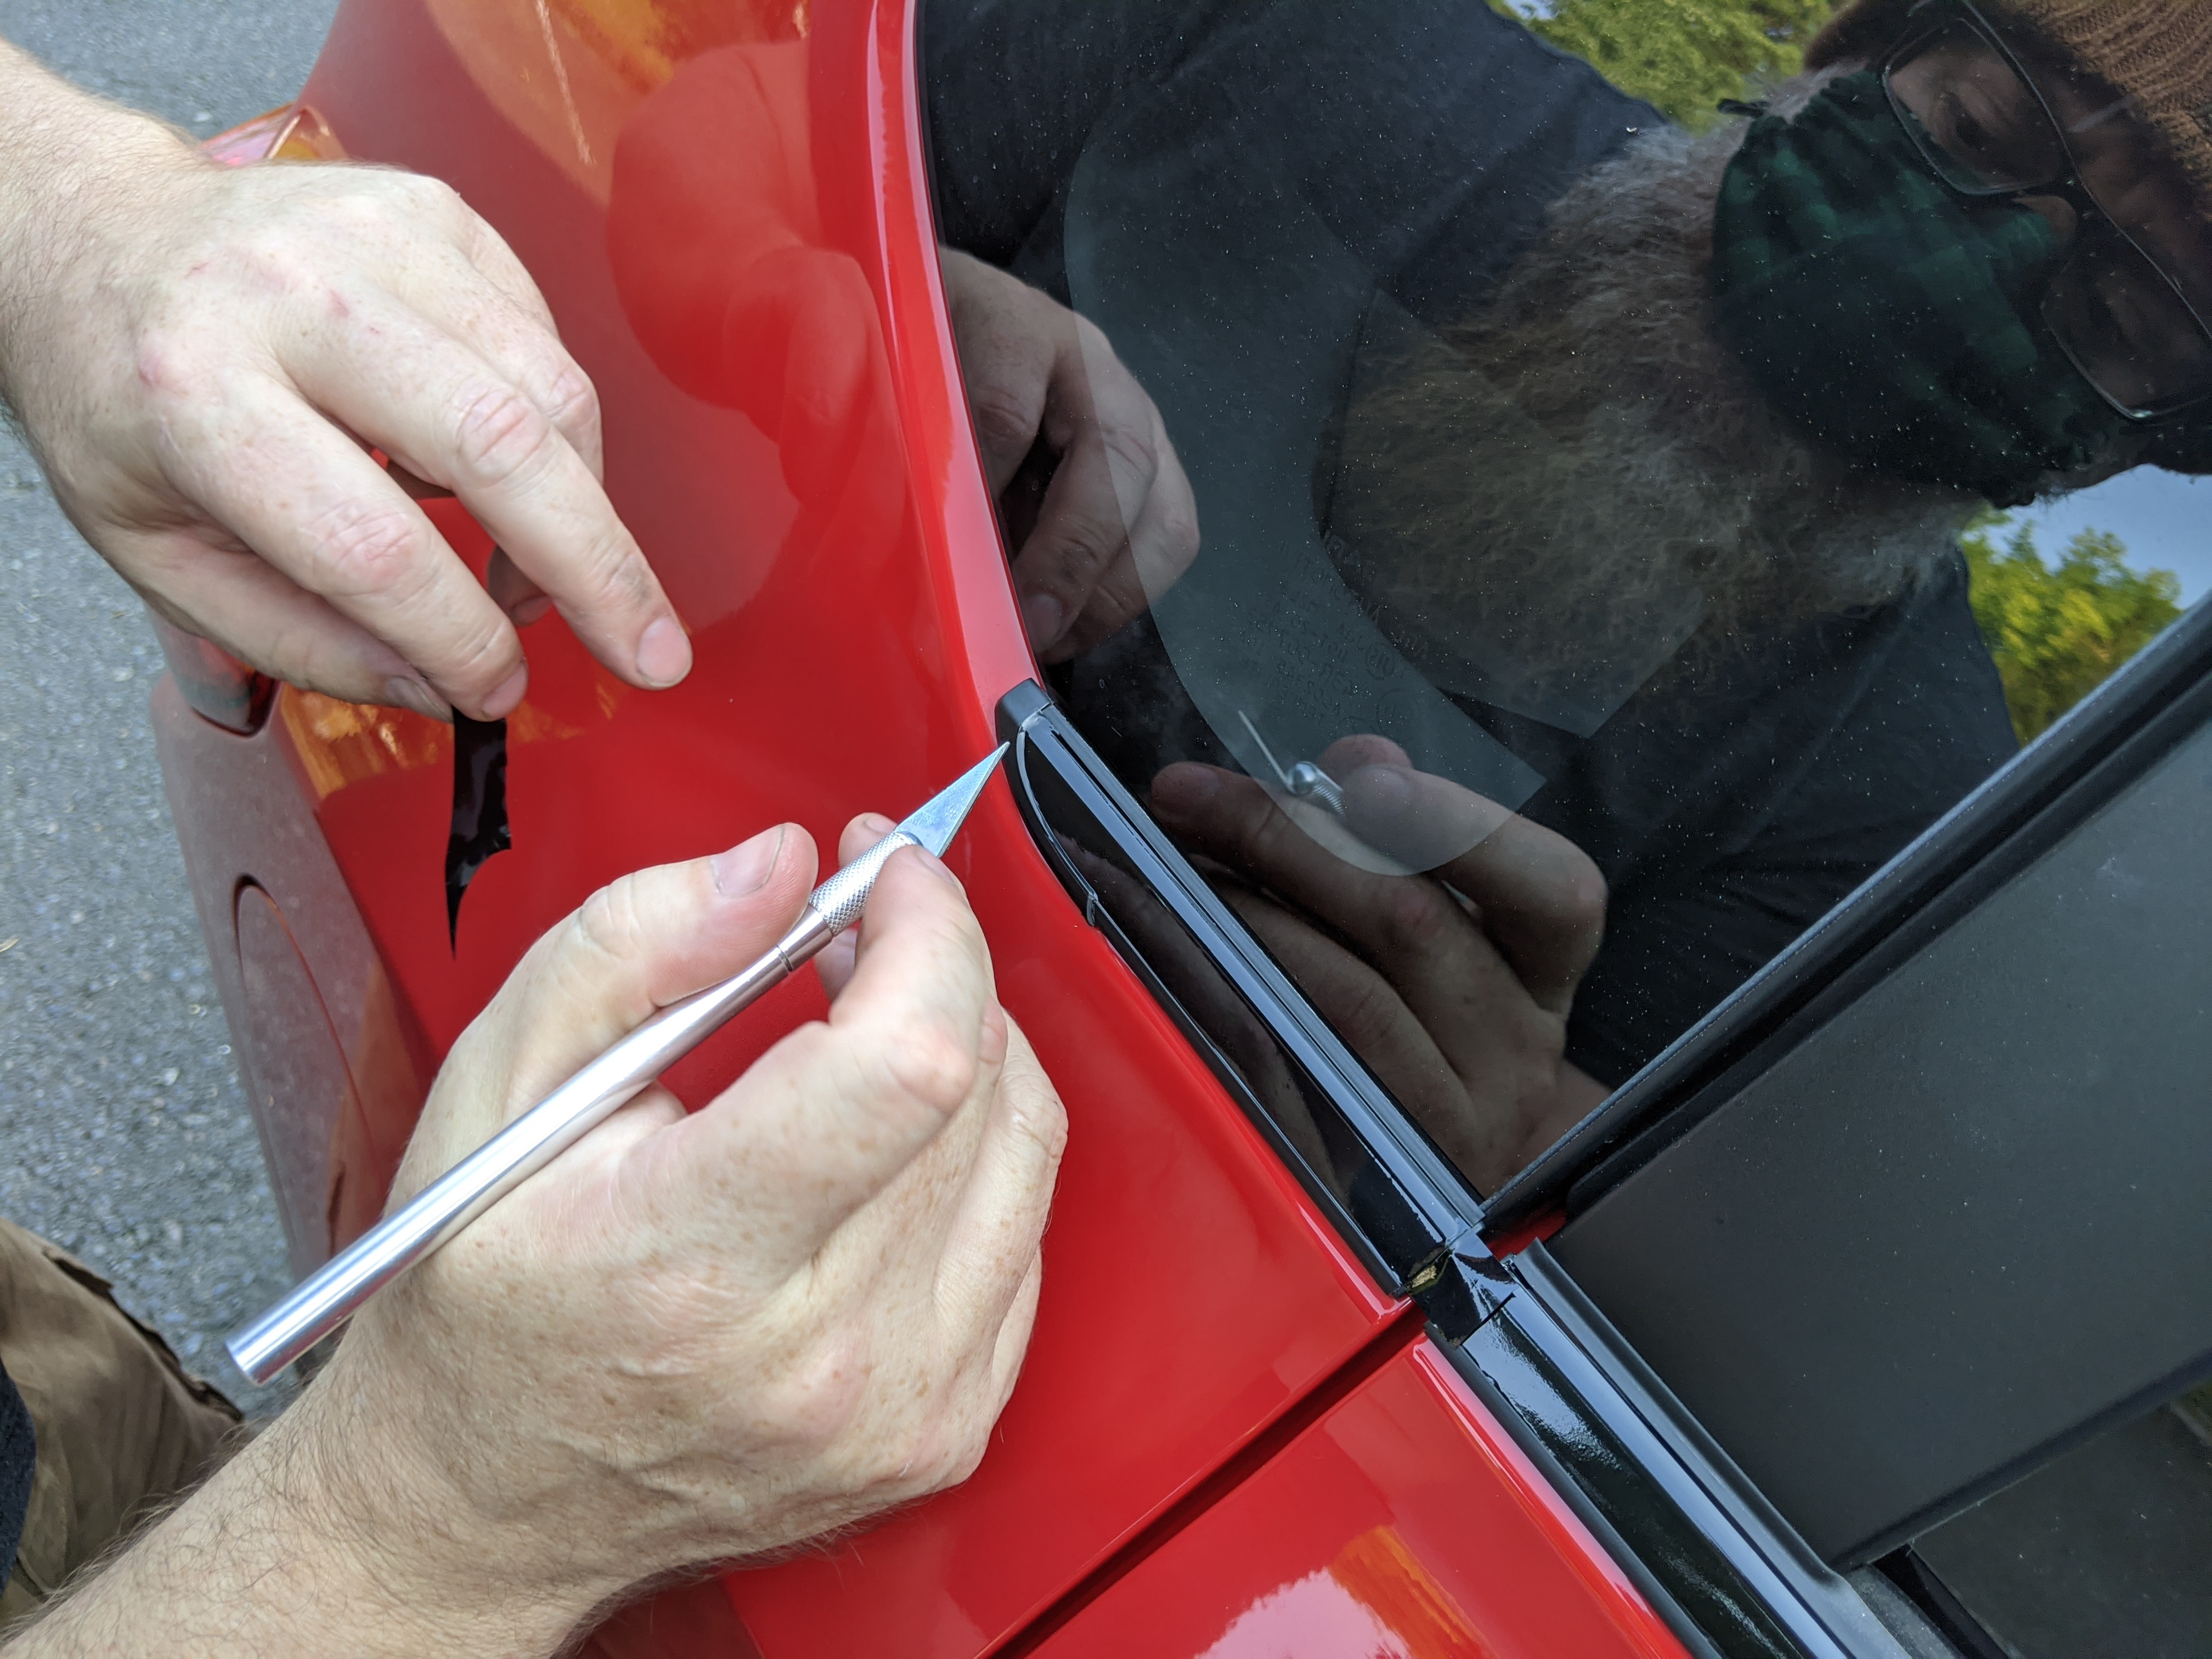
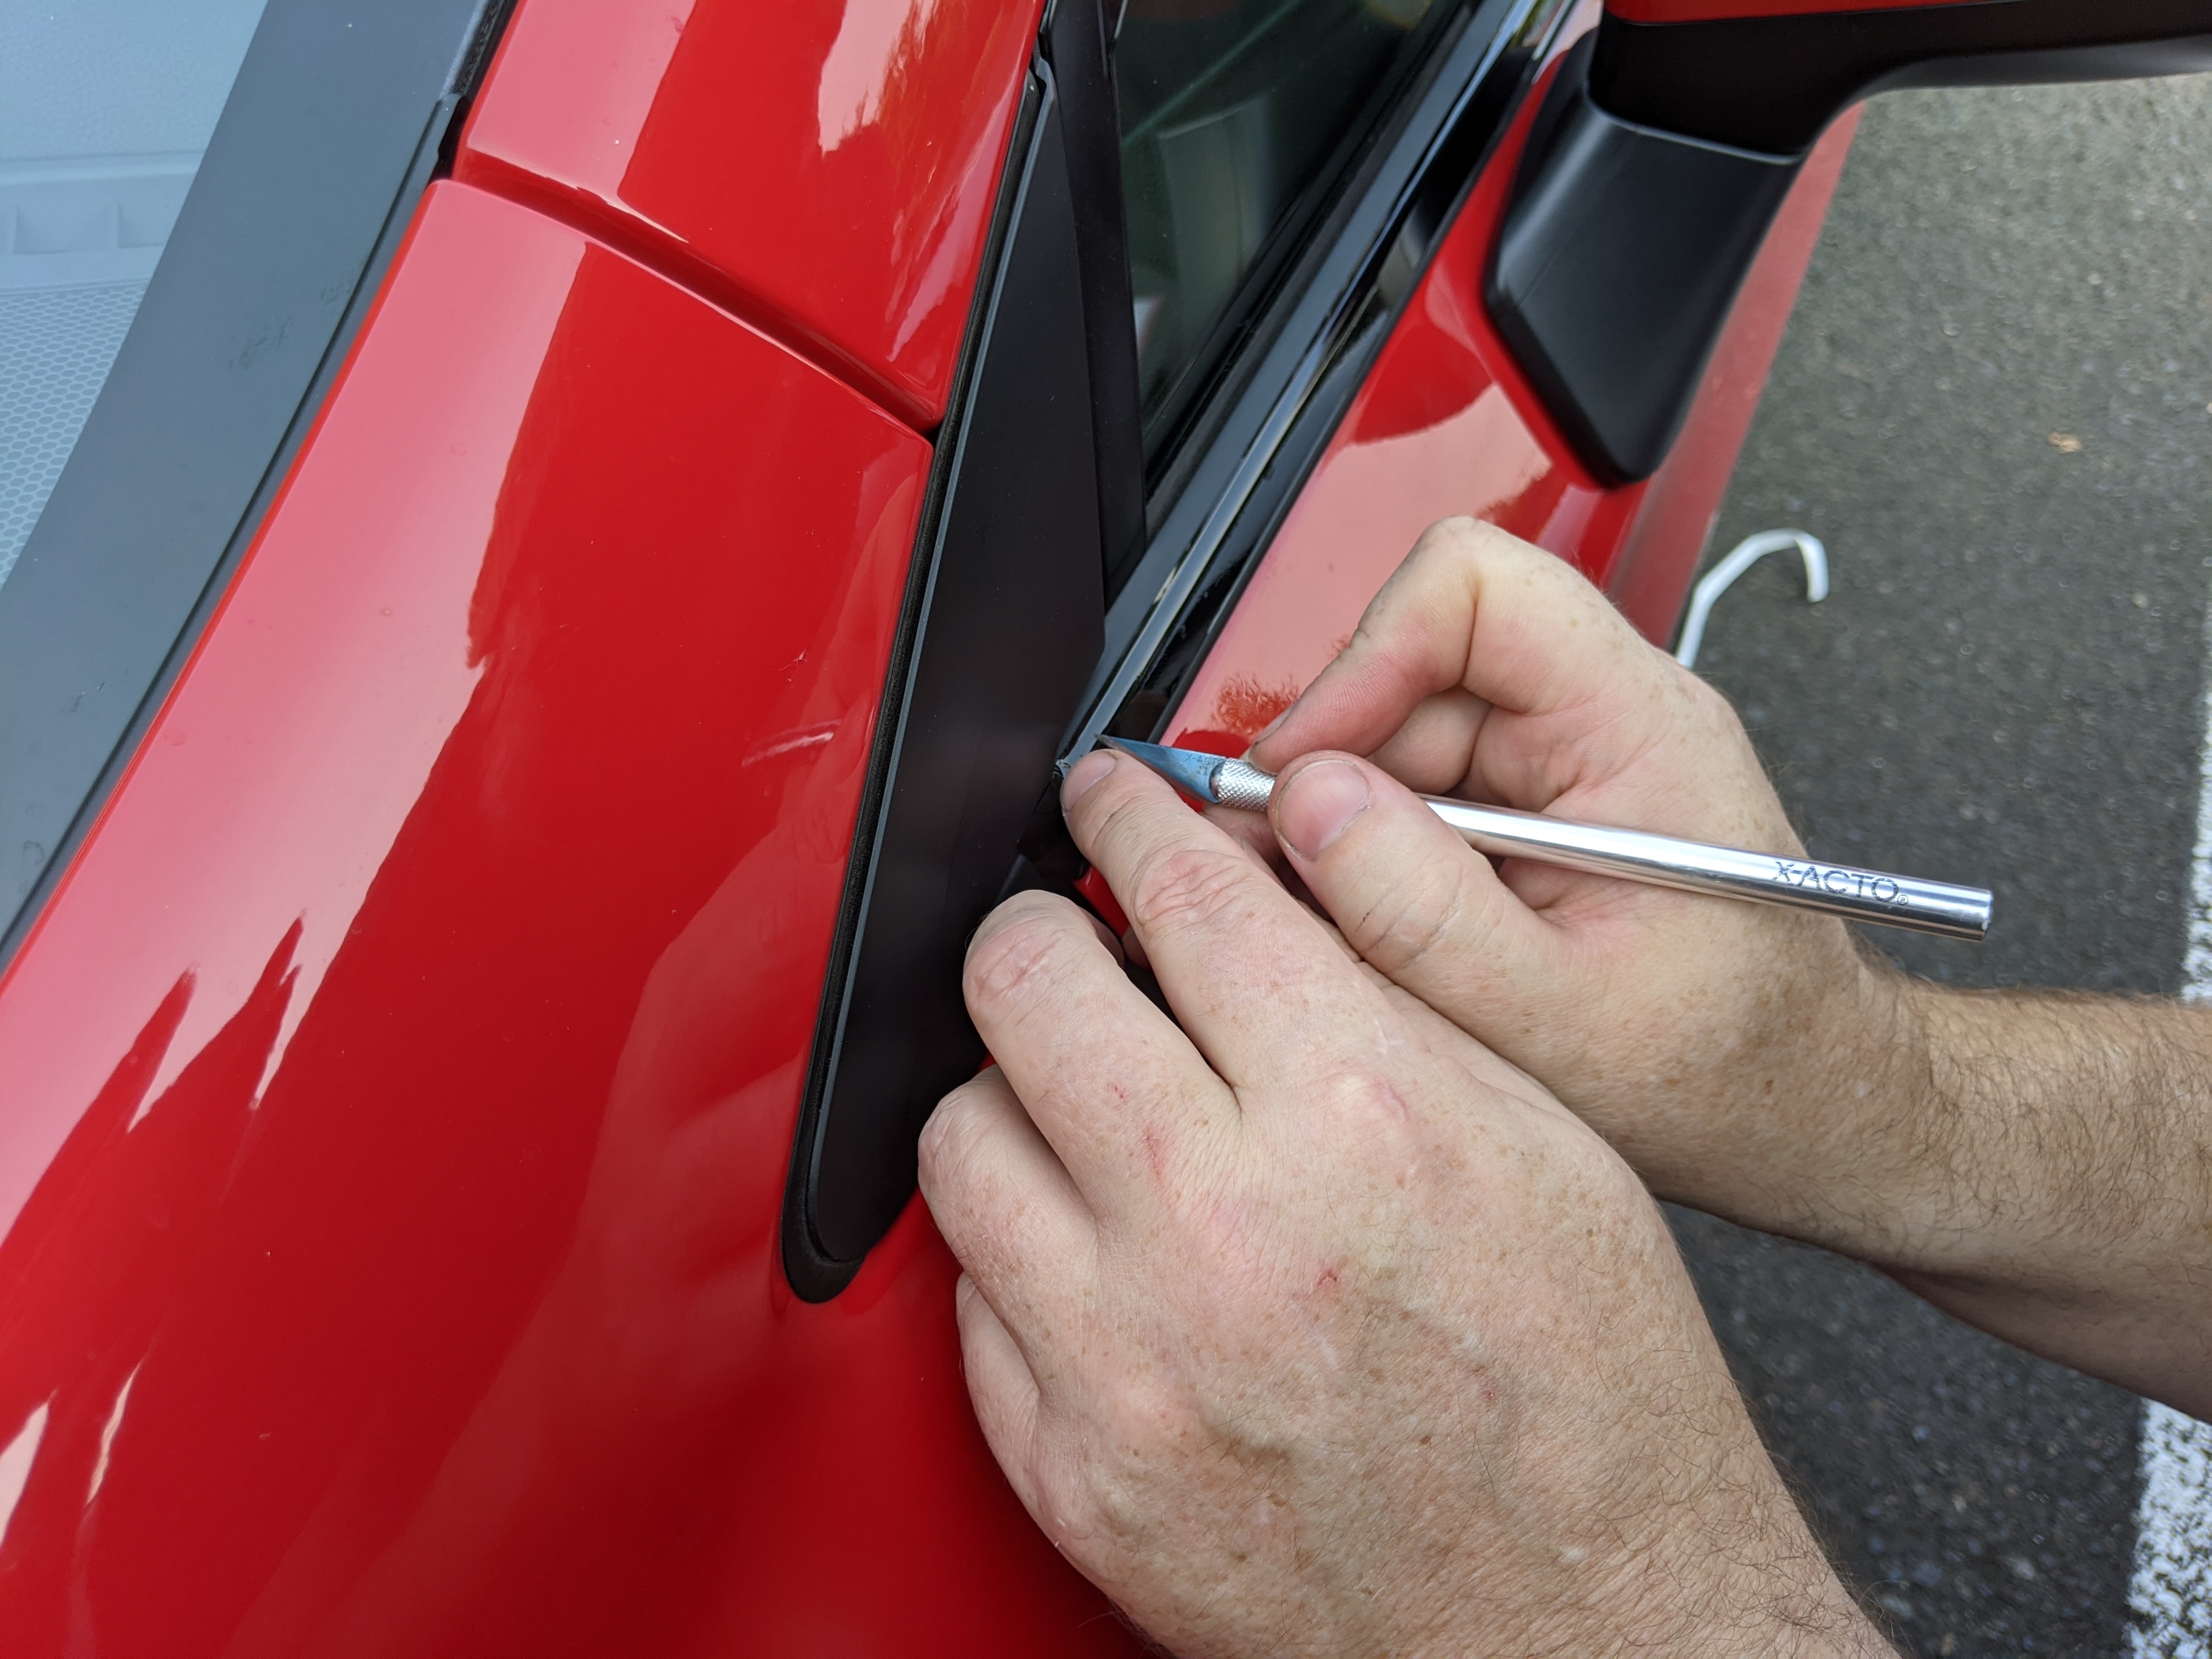
Once you've finished applying and trimming all the sections of the beltline, go back around and address any areas that may need extra attention. If you have a microfiber-edged squeegee, it is a great tool to help press down the blackout tape into any sharp edges and push air bubbles to the side. For pesky bubbles that won't squeegee out, use the tip of your x-acto blade and pierce the edge of the bubble. Then use your squeegee to gently push the air from the bubble toward the tiny hole and it should clear right up. As the car is more exposed to warm sunny weather, any small wrinkles and bubbles should clear up as the vinyl shrinks a bit from the heat.
Breathe a sigh of relief, step back and admire your handiwork!