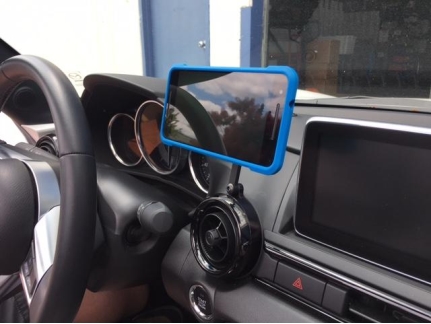
THANK YOU for purchasing the ND MX-5 Miata Vent Mount from CravenSpeed. This product is made from the highest grade materials, and is guaranteed to be free from defects.
You can buy our The Gemini Phone Mount Vent Version for Mazda MX5 Miata and Fiat 124 here
Parts Included:
- 1x Vent Mount
- 1x Tibia w/ Ball
- 1x Gemini Magnet w/ Adhesive Metal Plate
- 1x ¼-20 Button Head Cap Screw
- 1x Nylon Washer
Gemini Magnetic Phone Mount
Tools Required:
- 5/32 Allen Key
- Trim Panel Removal Tool
- Small Flat-bladed Screwdriver
Procedure
Disassembly Procedure
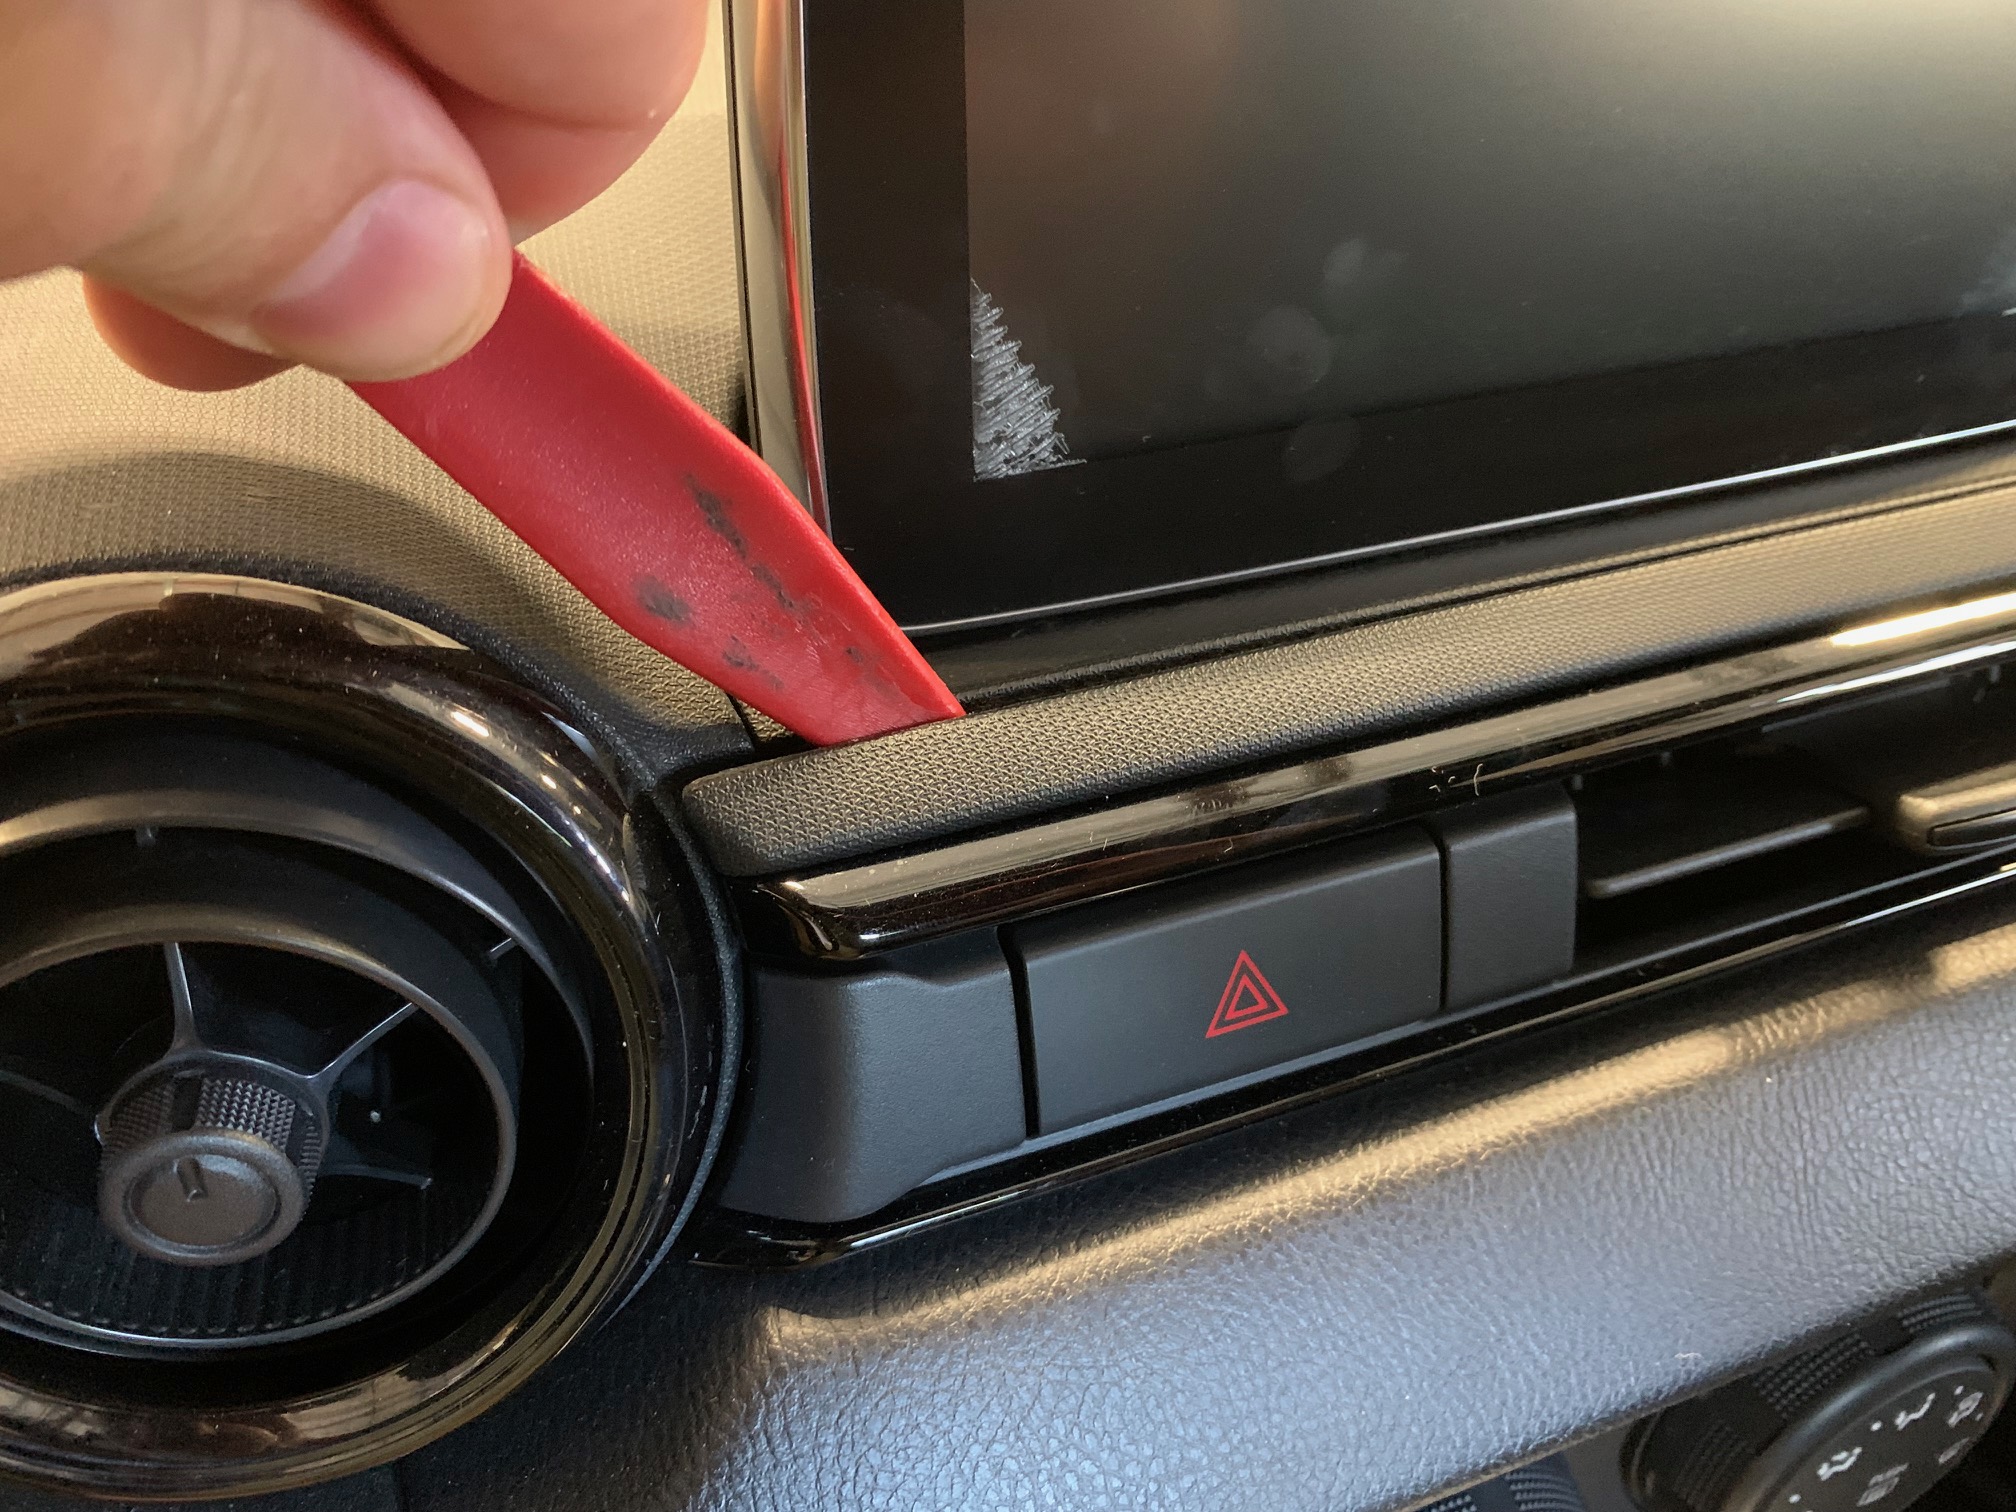
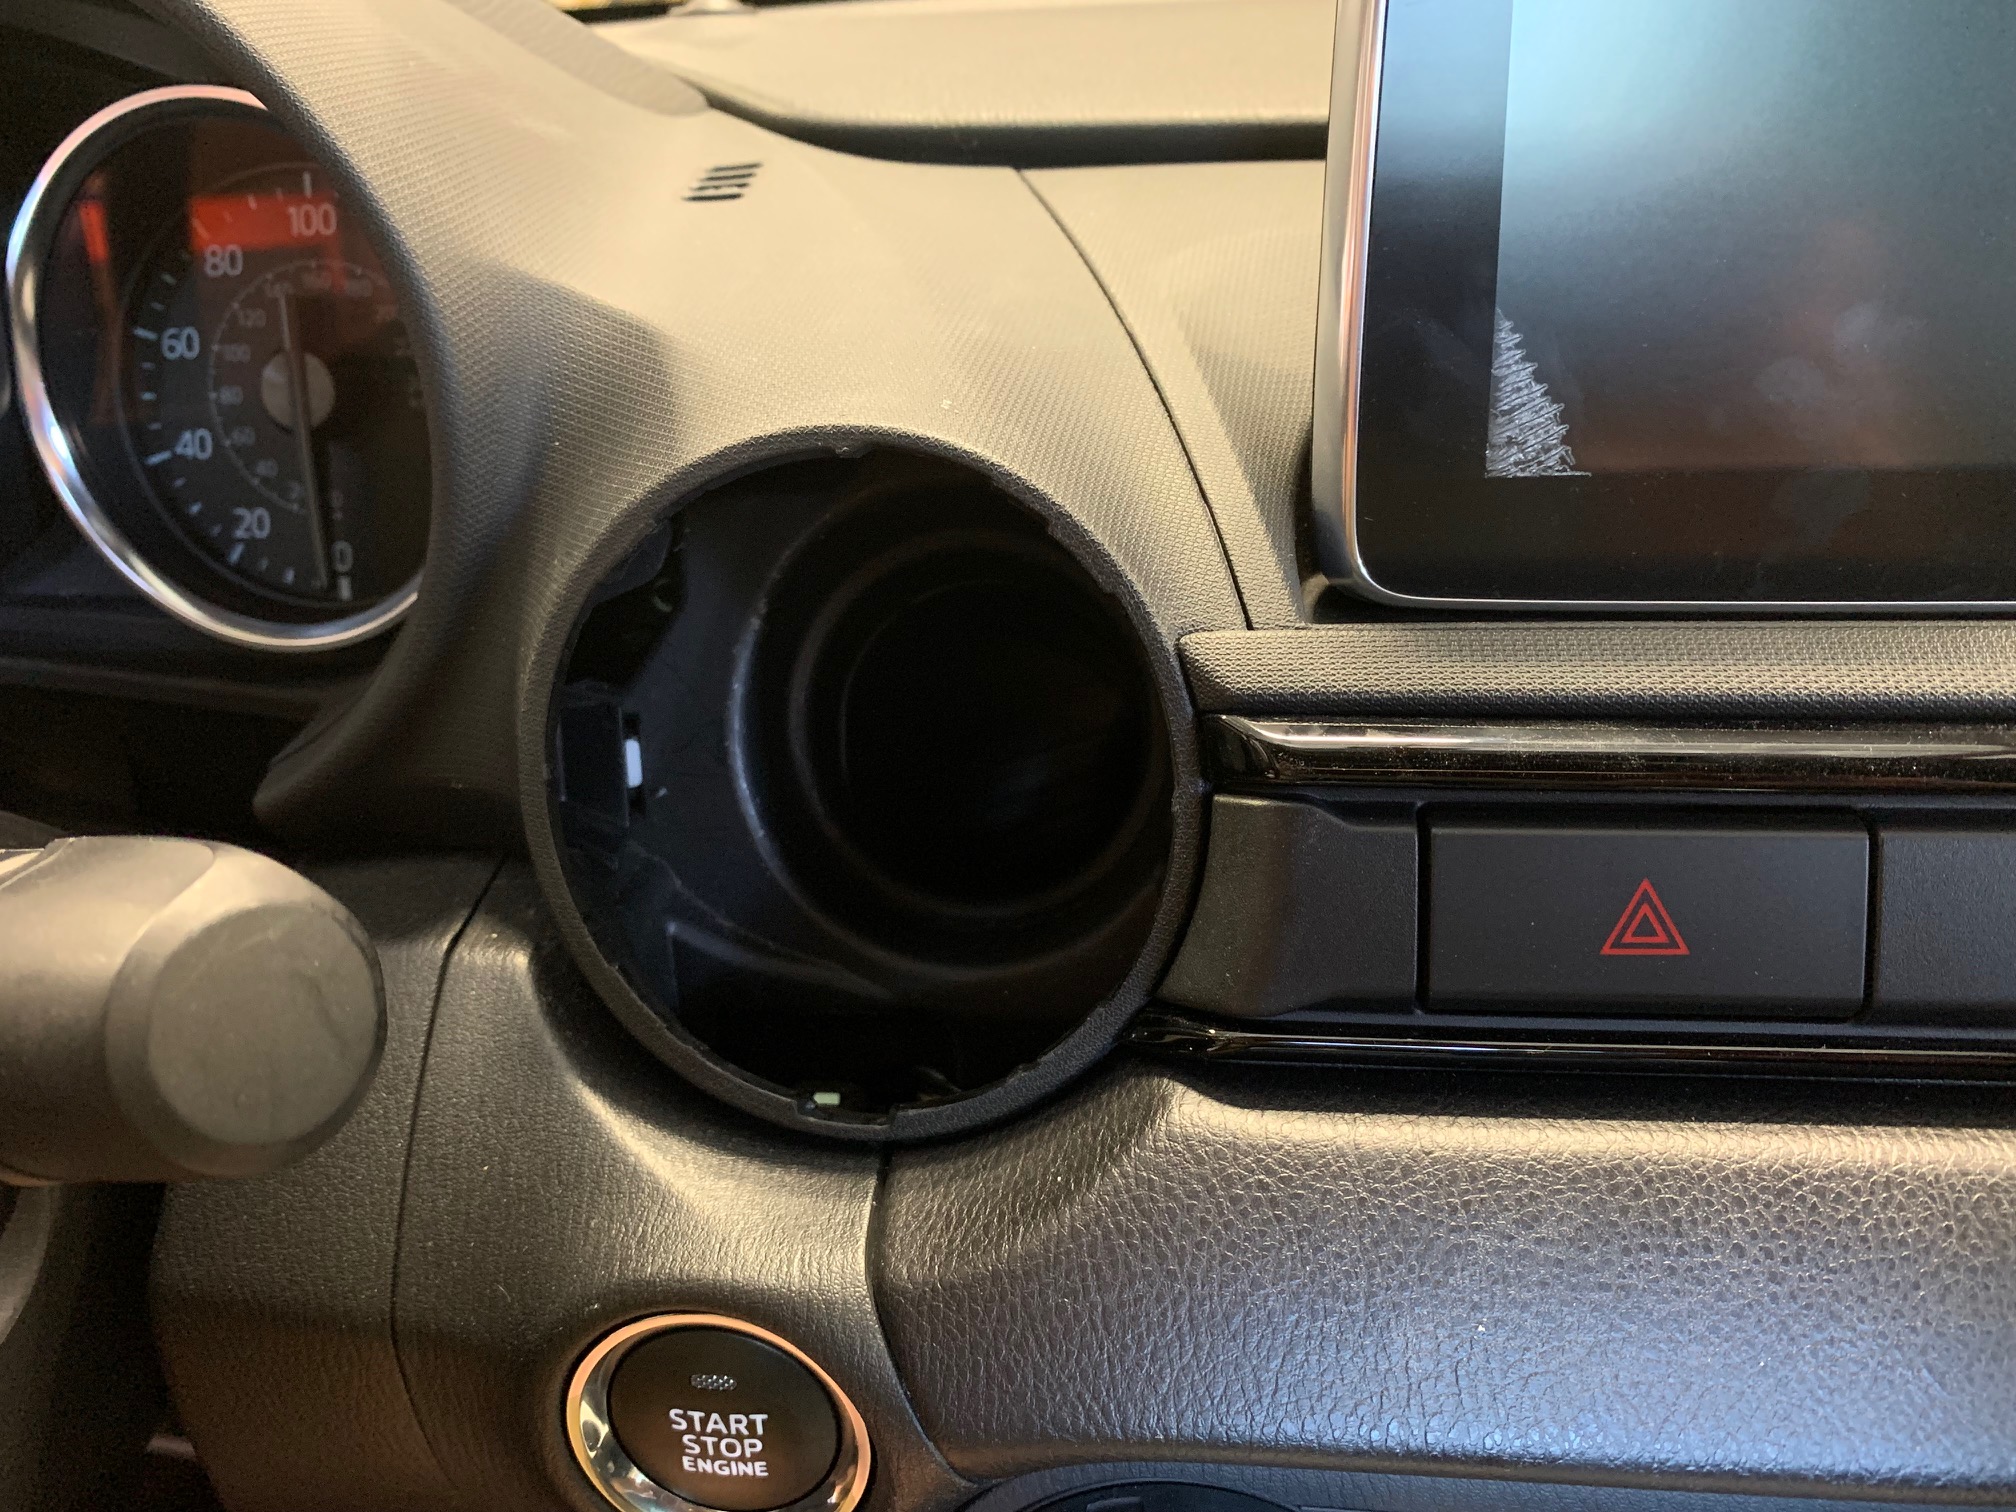
- Slip the trim panel removal tool between the horizontal seam between the center vent trim and the dash area just in front of the infotainment screen. Gently separate the left side and top edge of the vent surround.
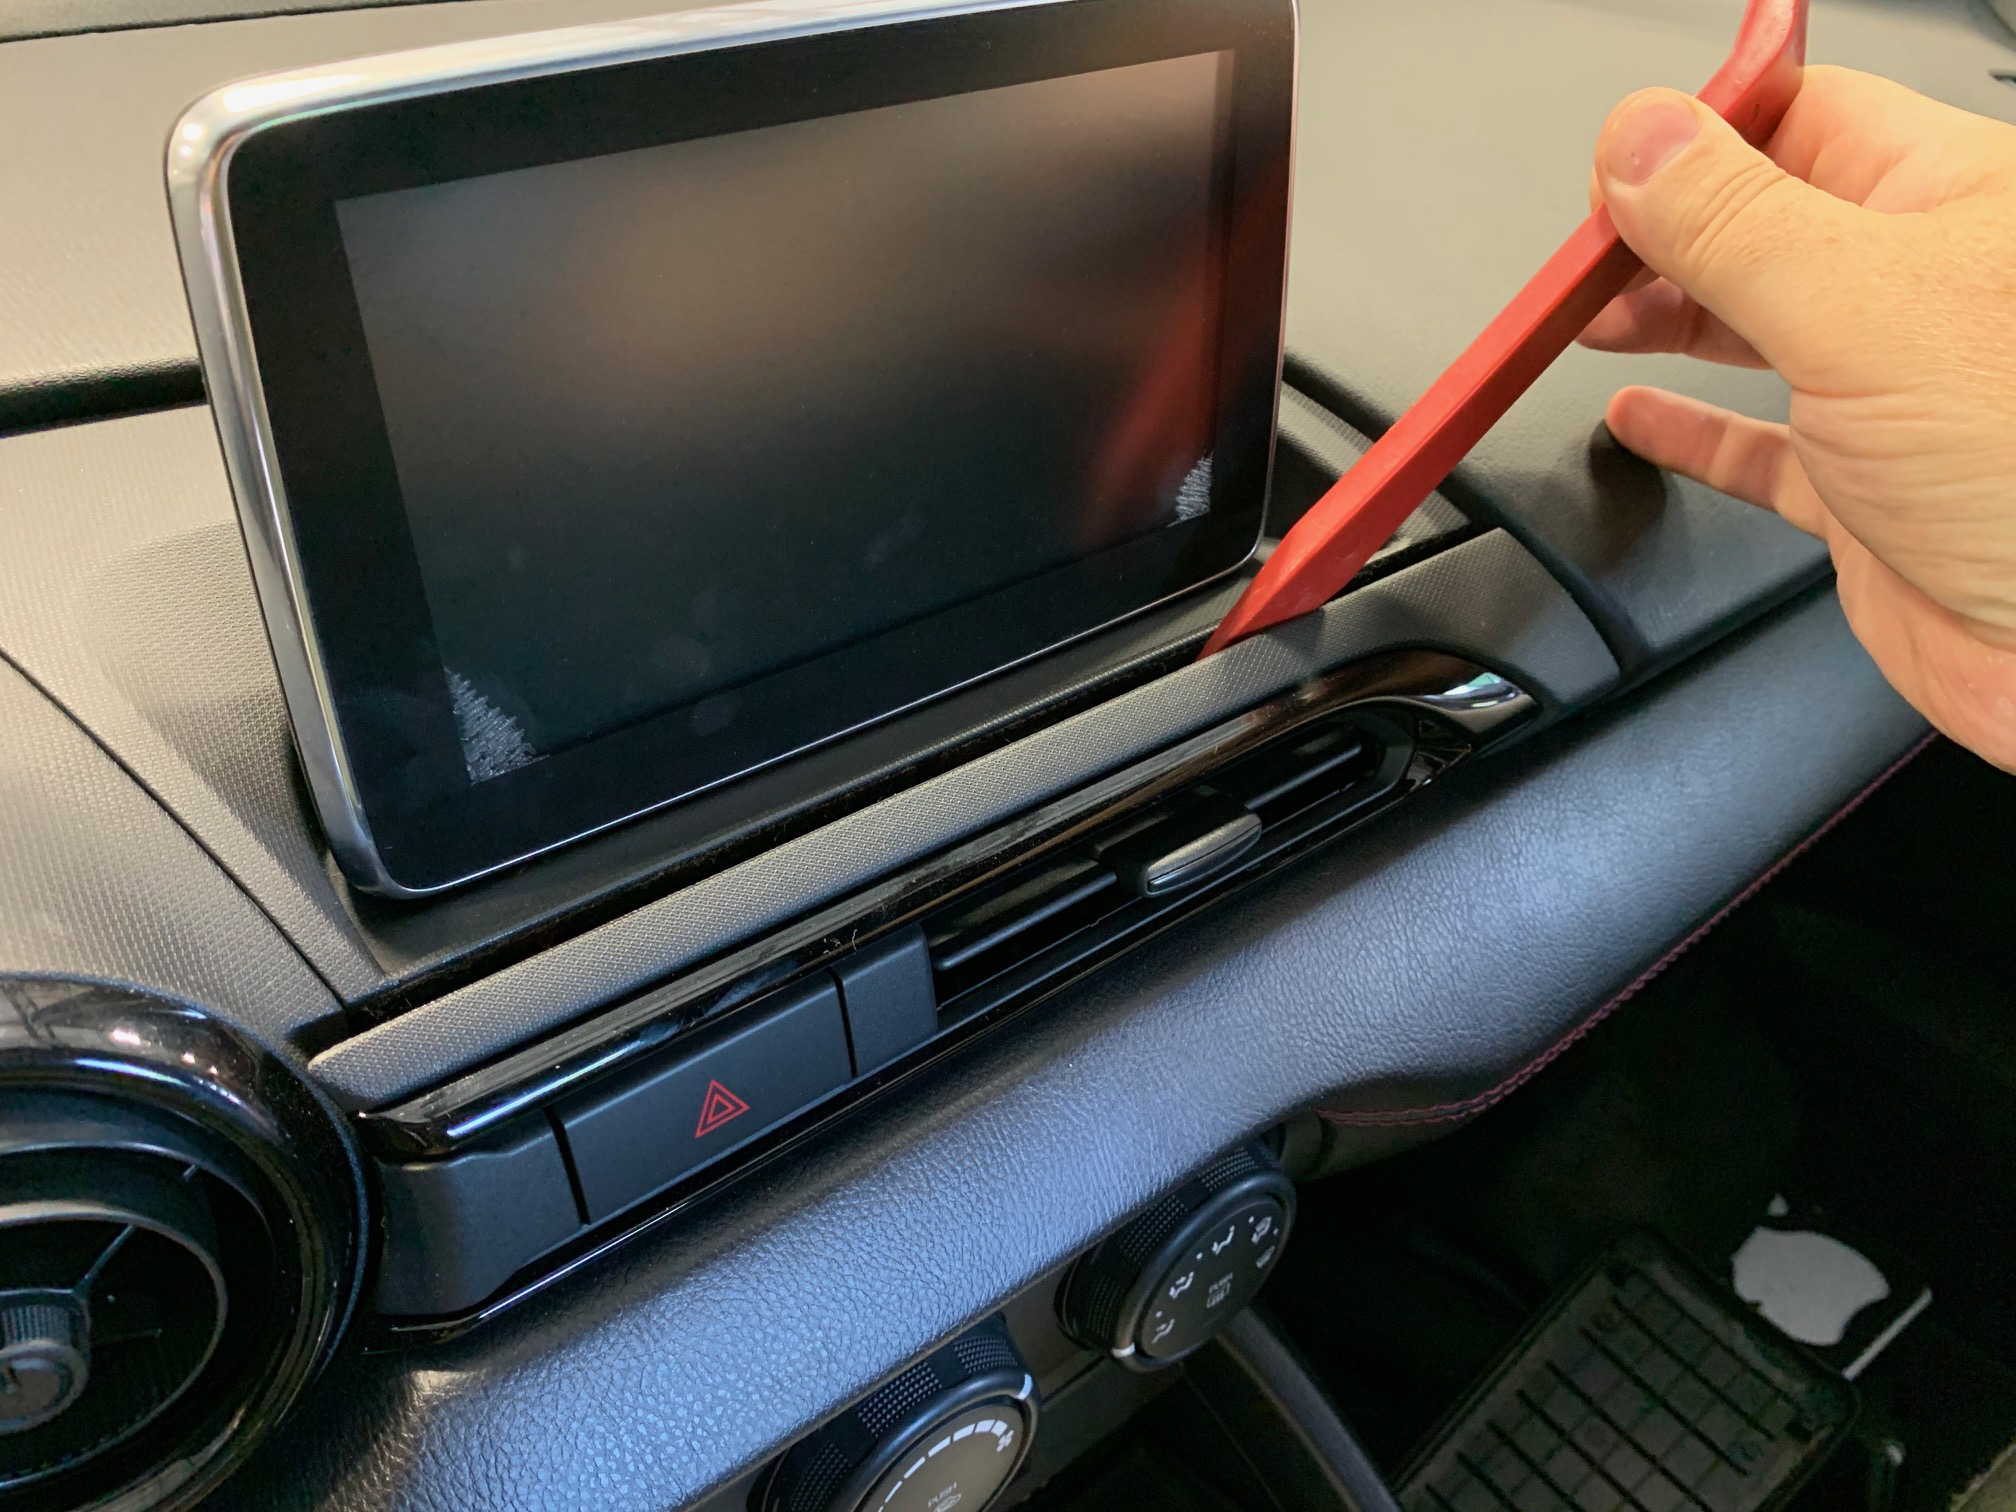
- With the center vent trim loosened, grasp both sides of the gauge cluster cowling and give it a good tug towards you. It should pop loose of the dash with minimal effort.
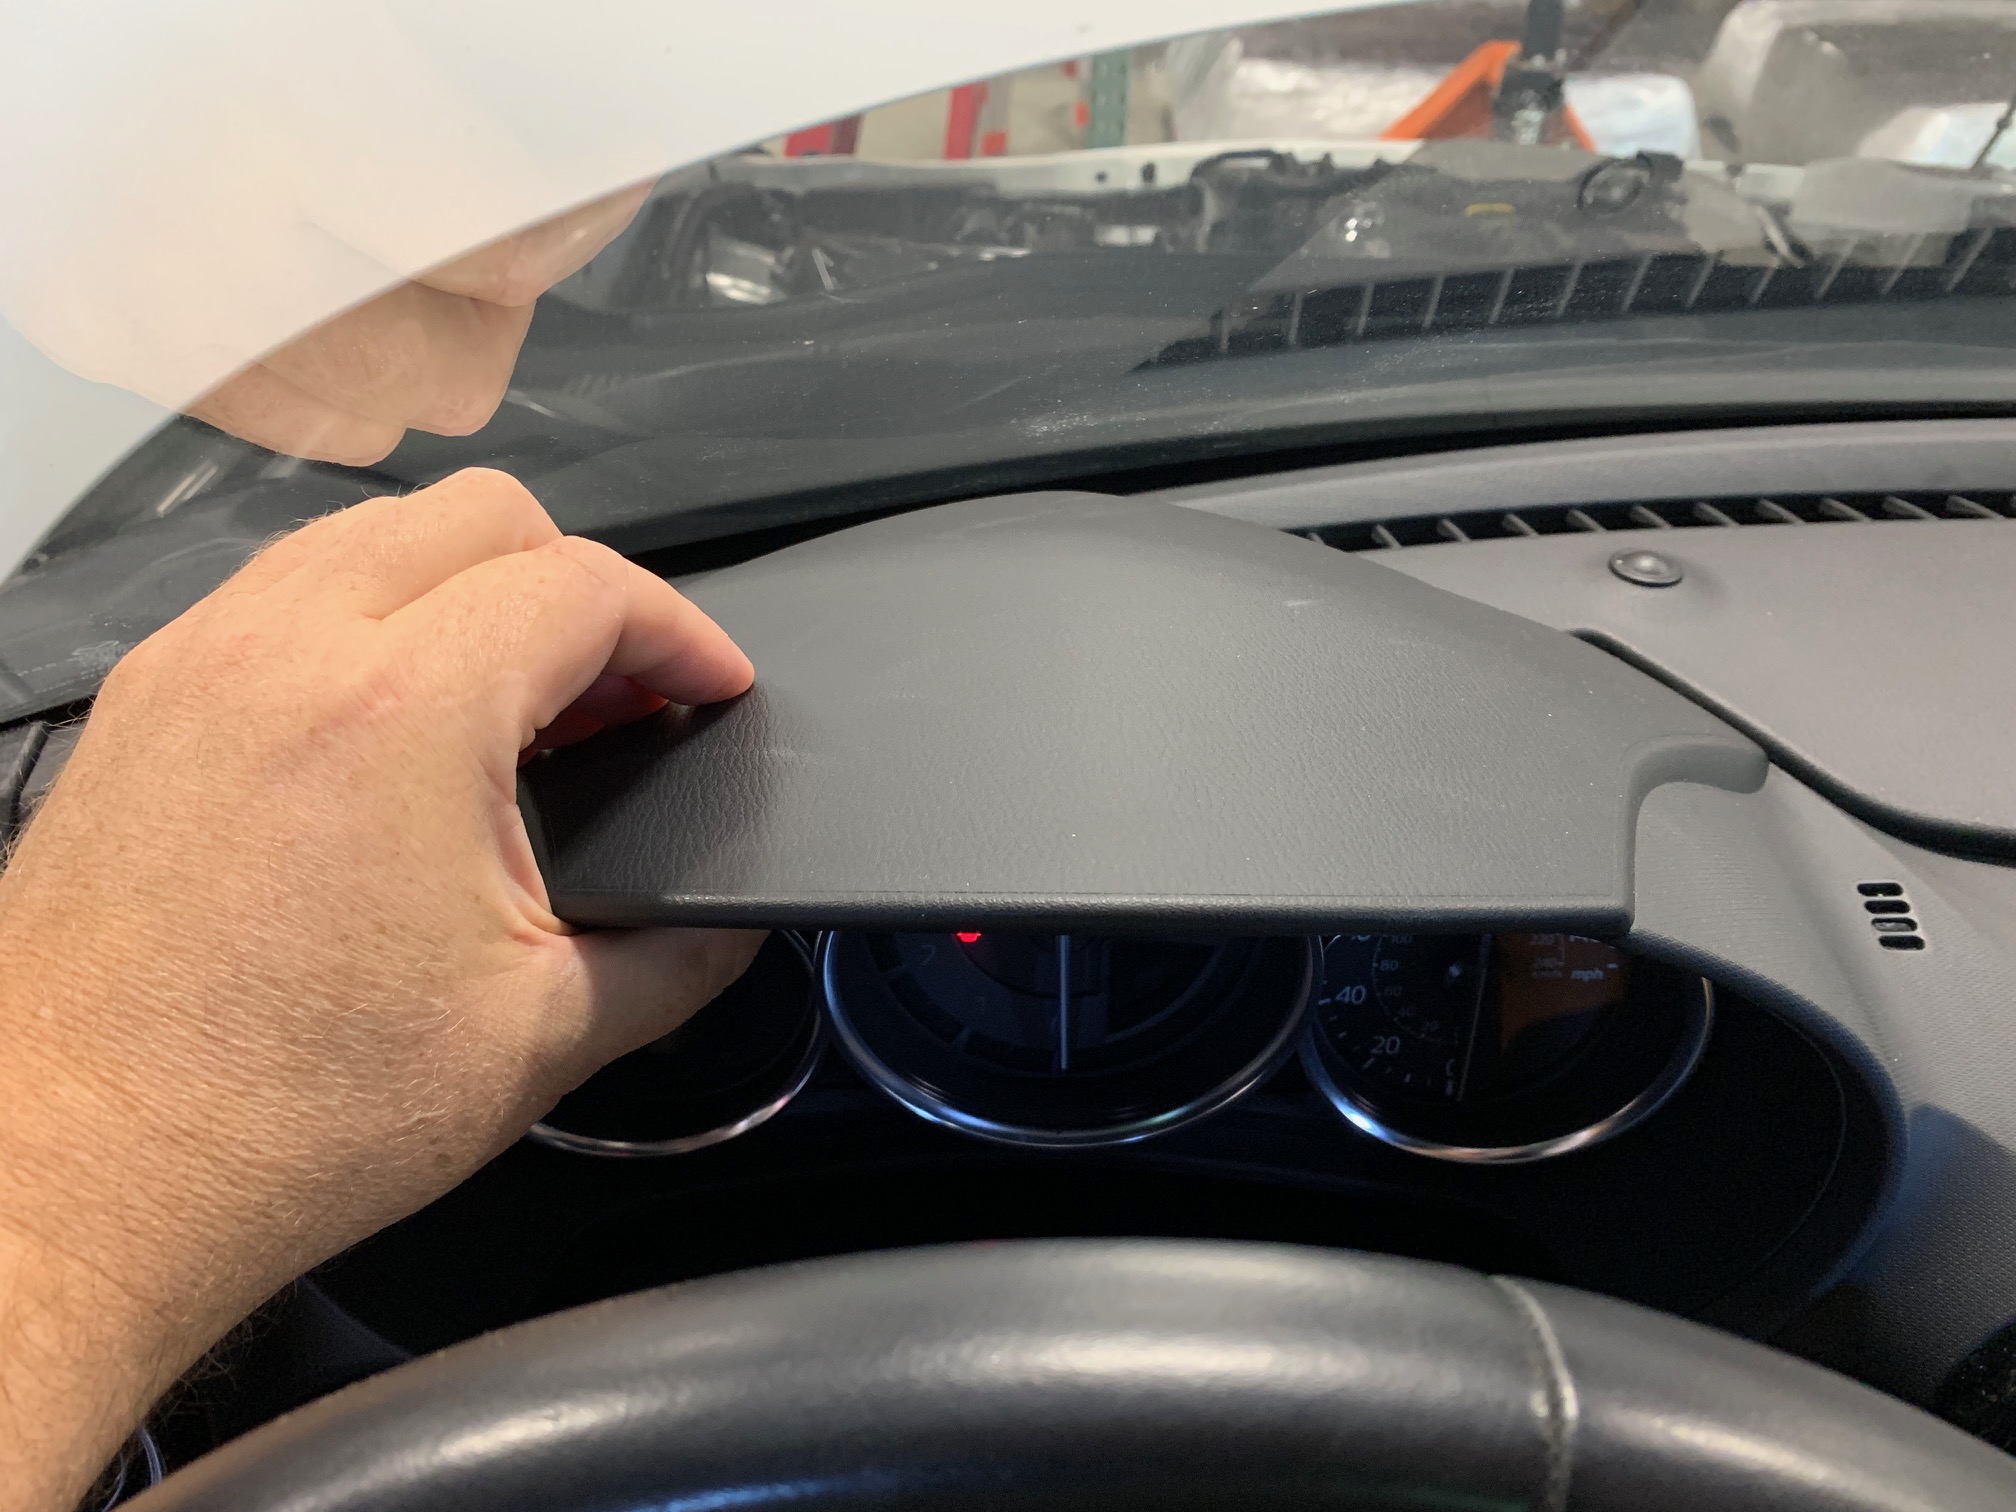
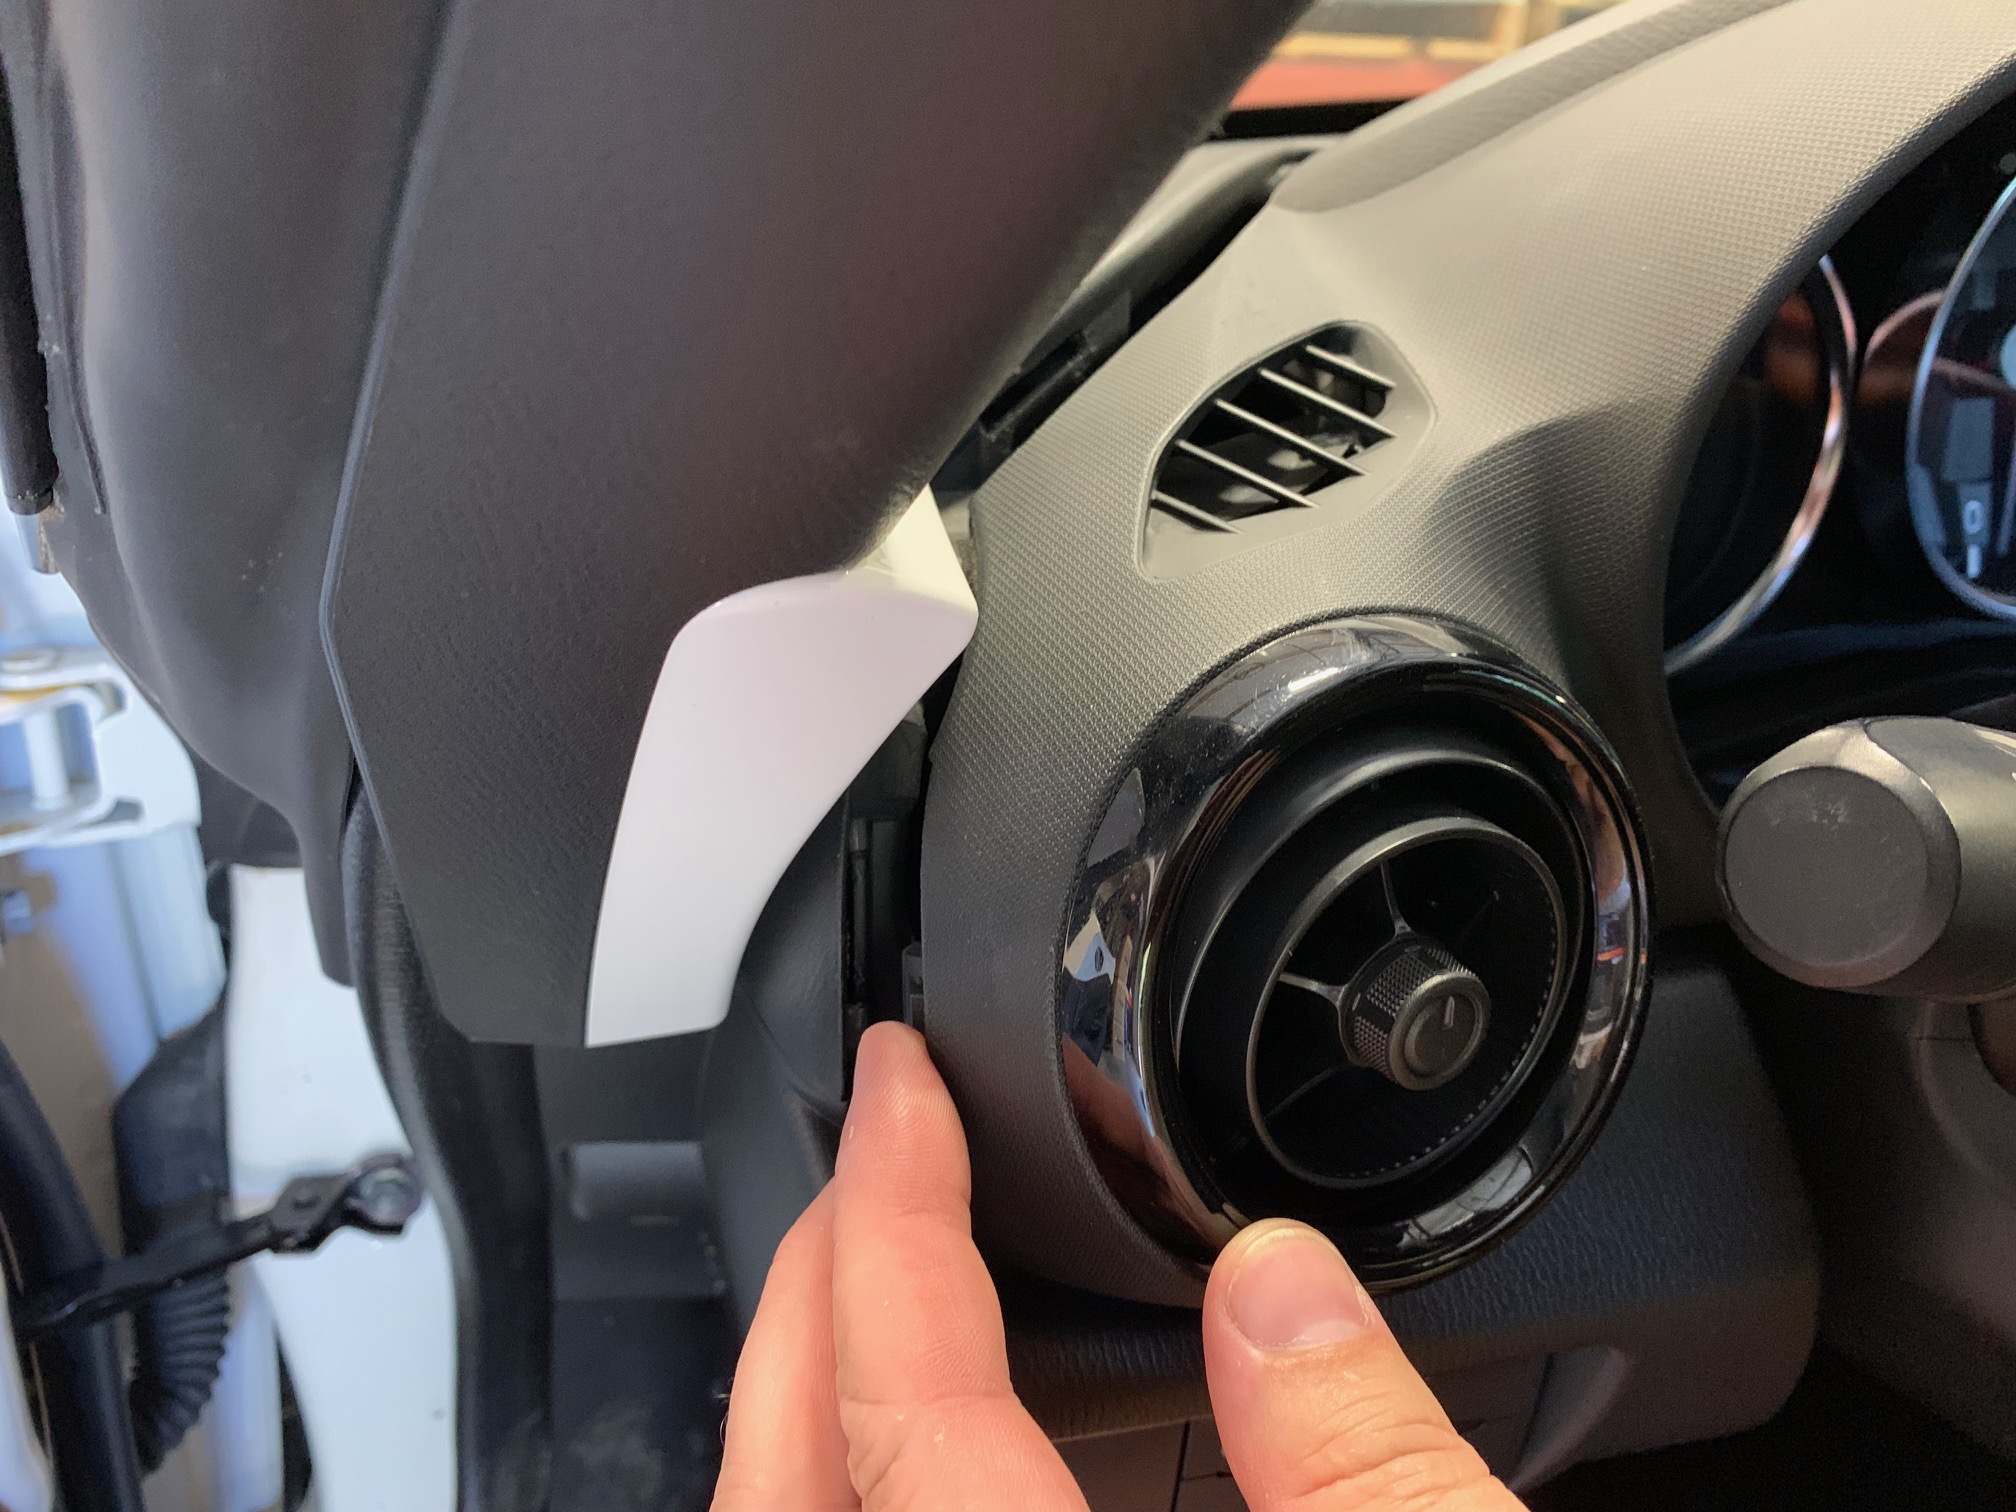
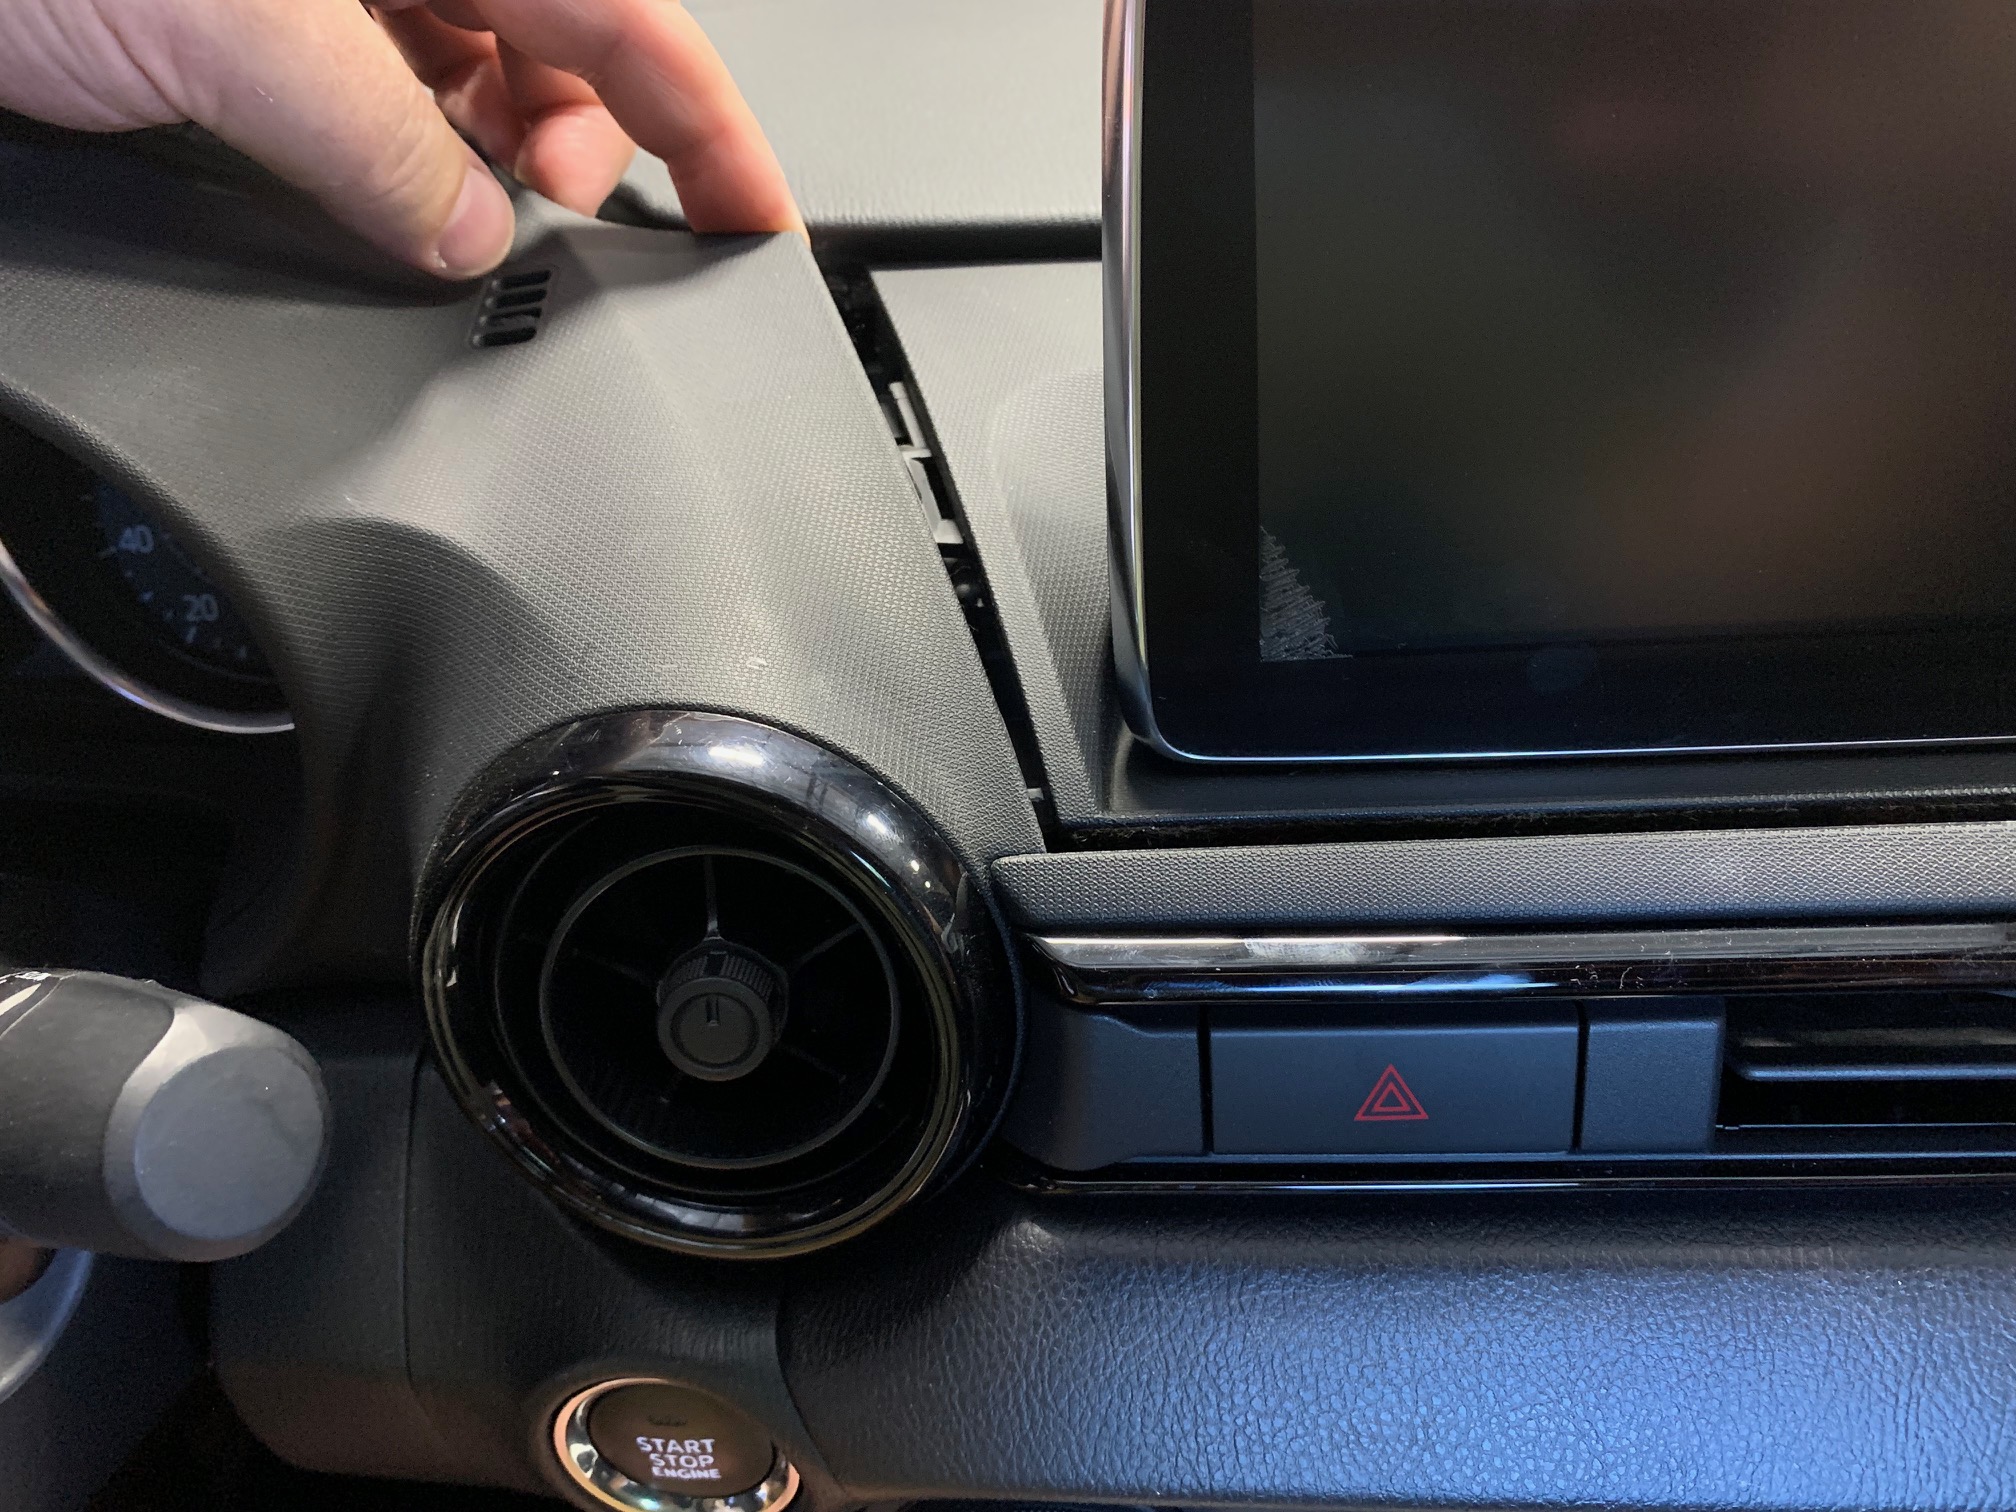
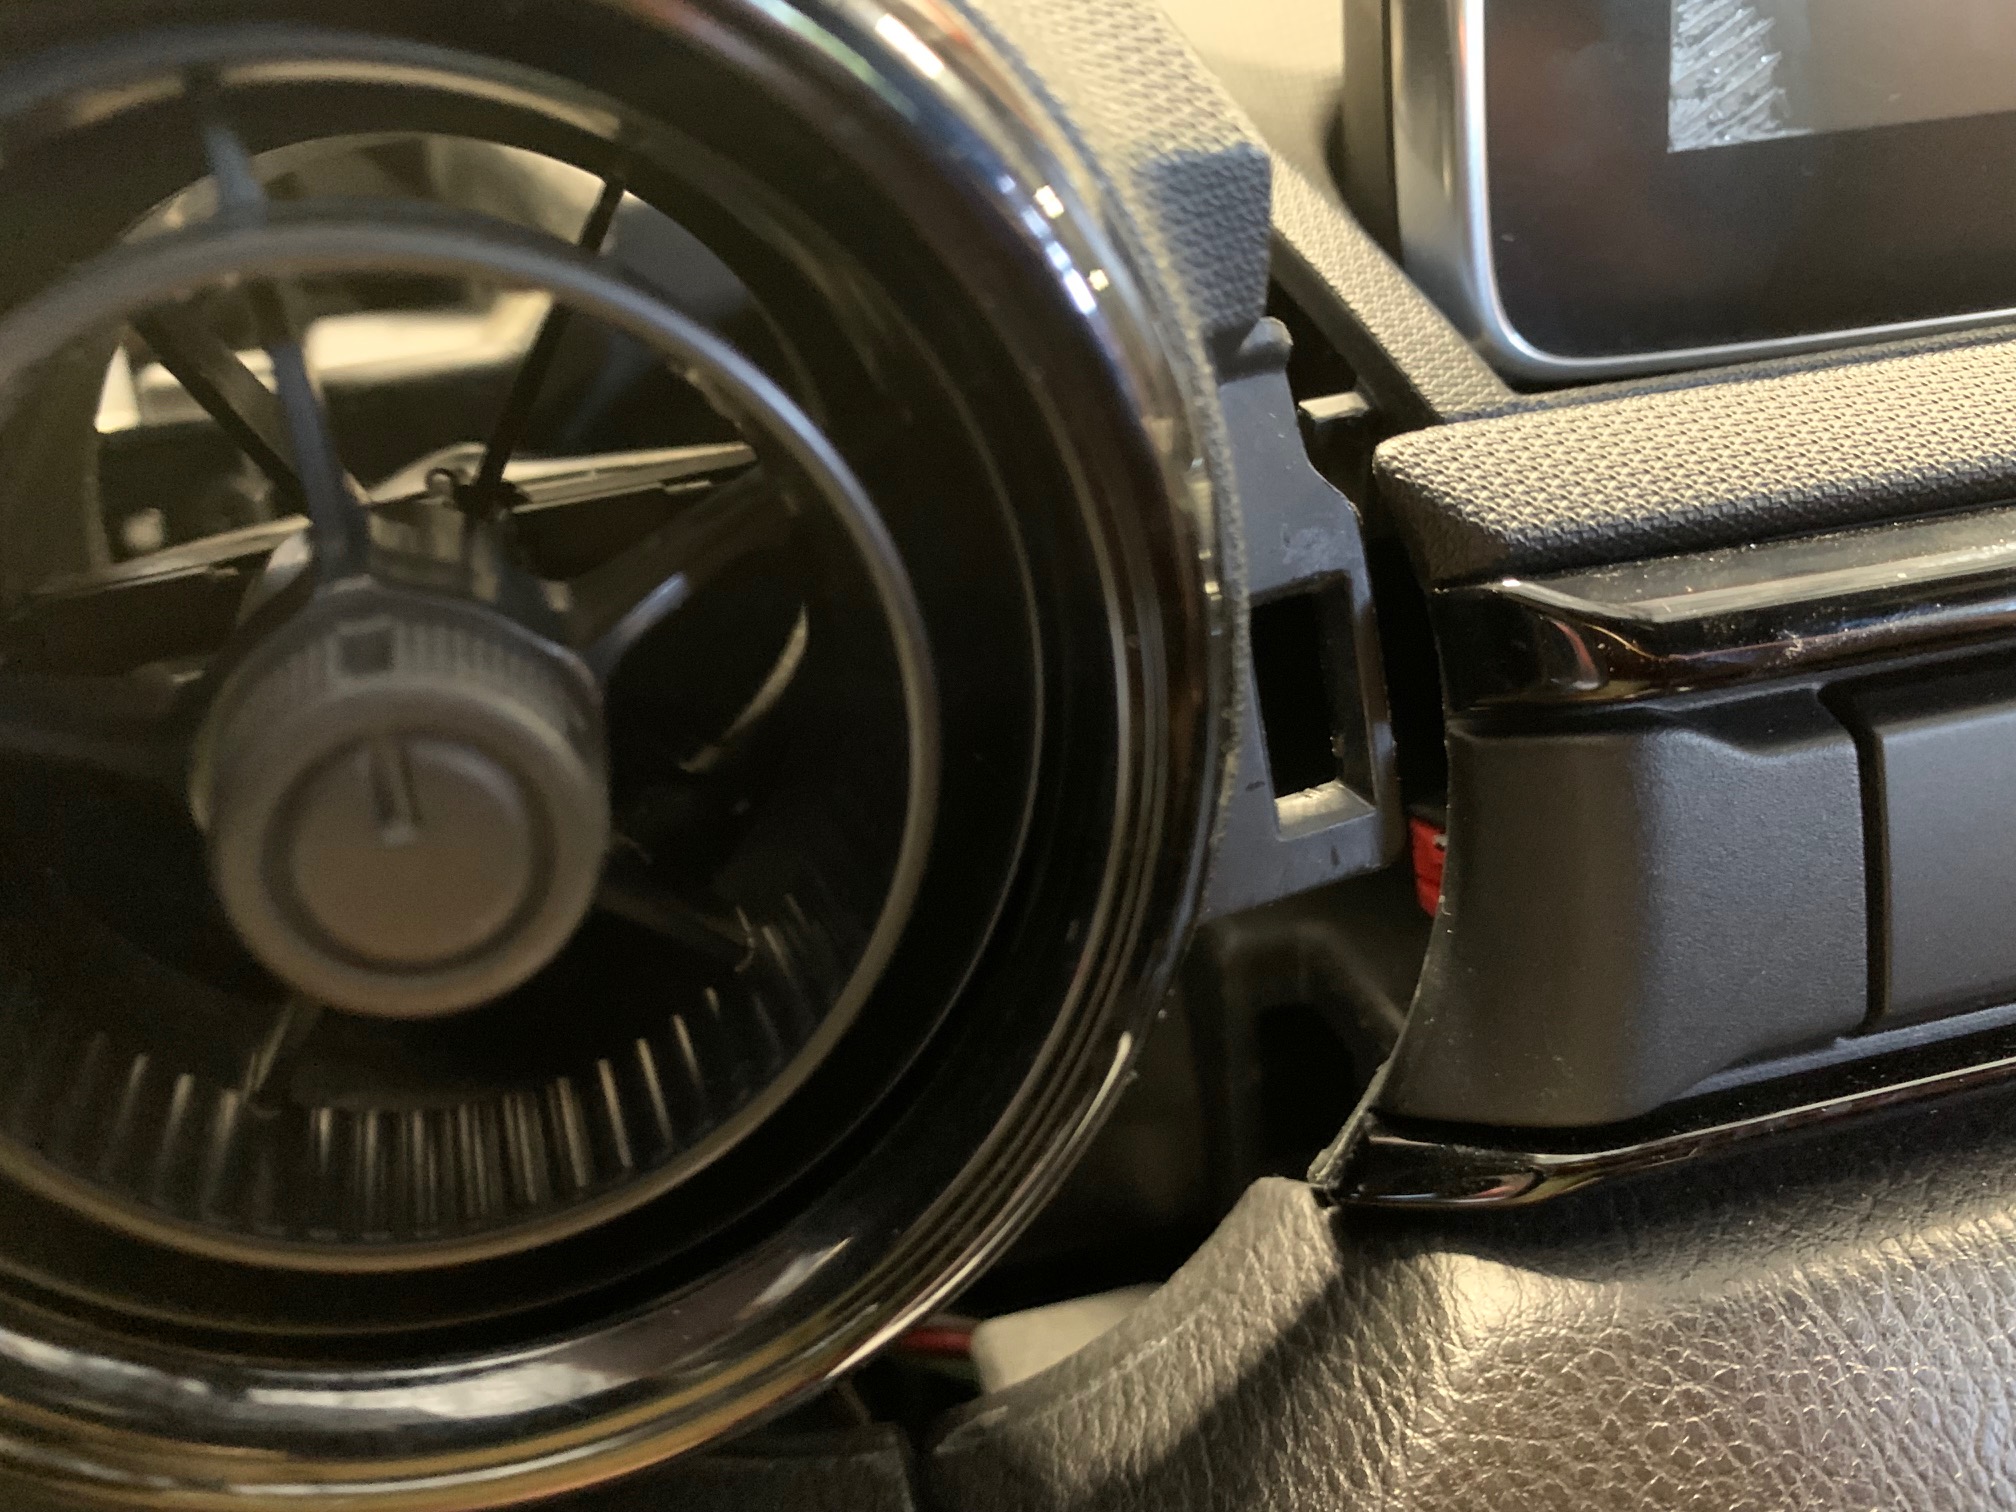
- Pull the left side of center air vent trim (next to the hazard flasher button) out just enough so that its red-colored tab can be free of the corresponding tab hole of the gauge cluster cowling.
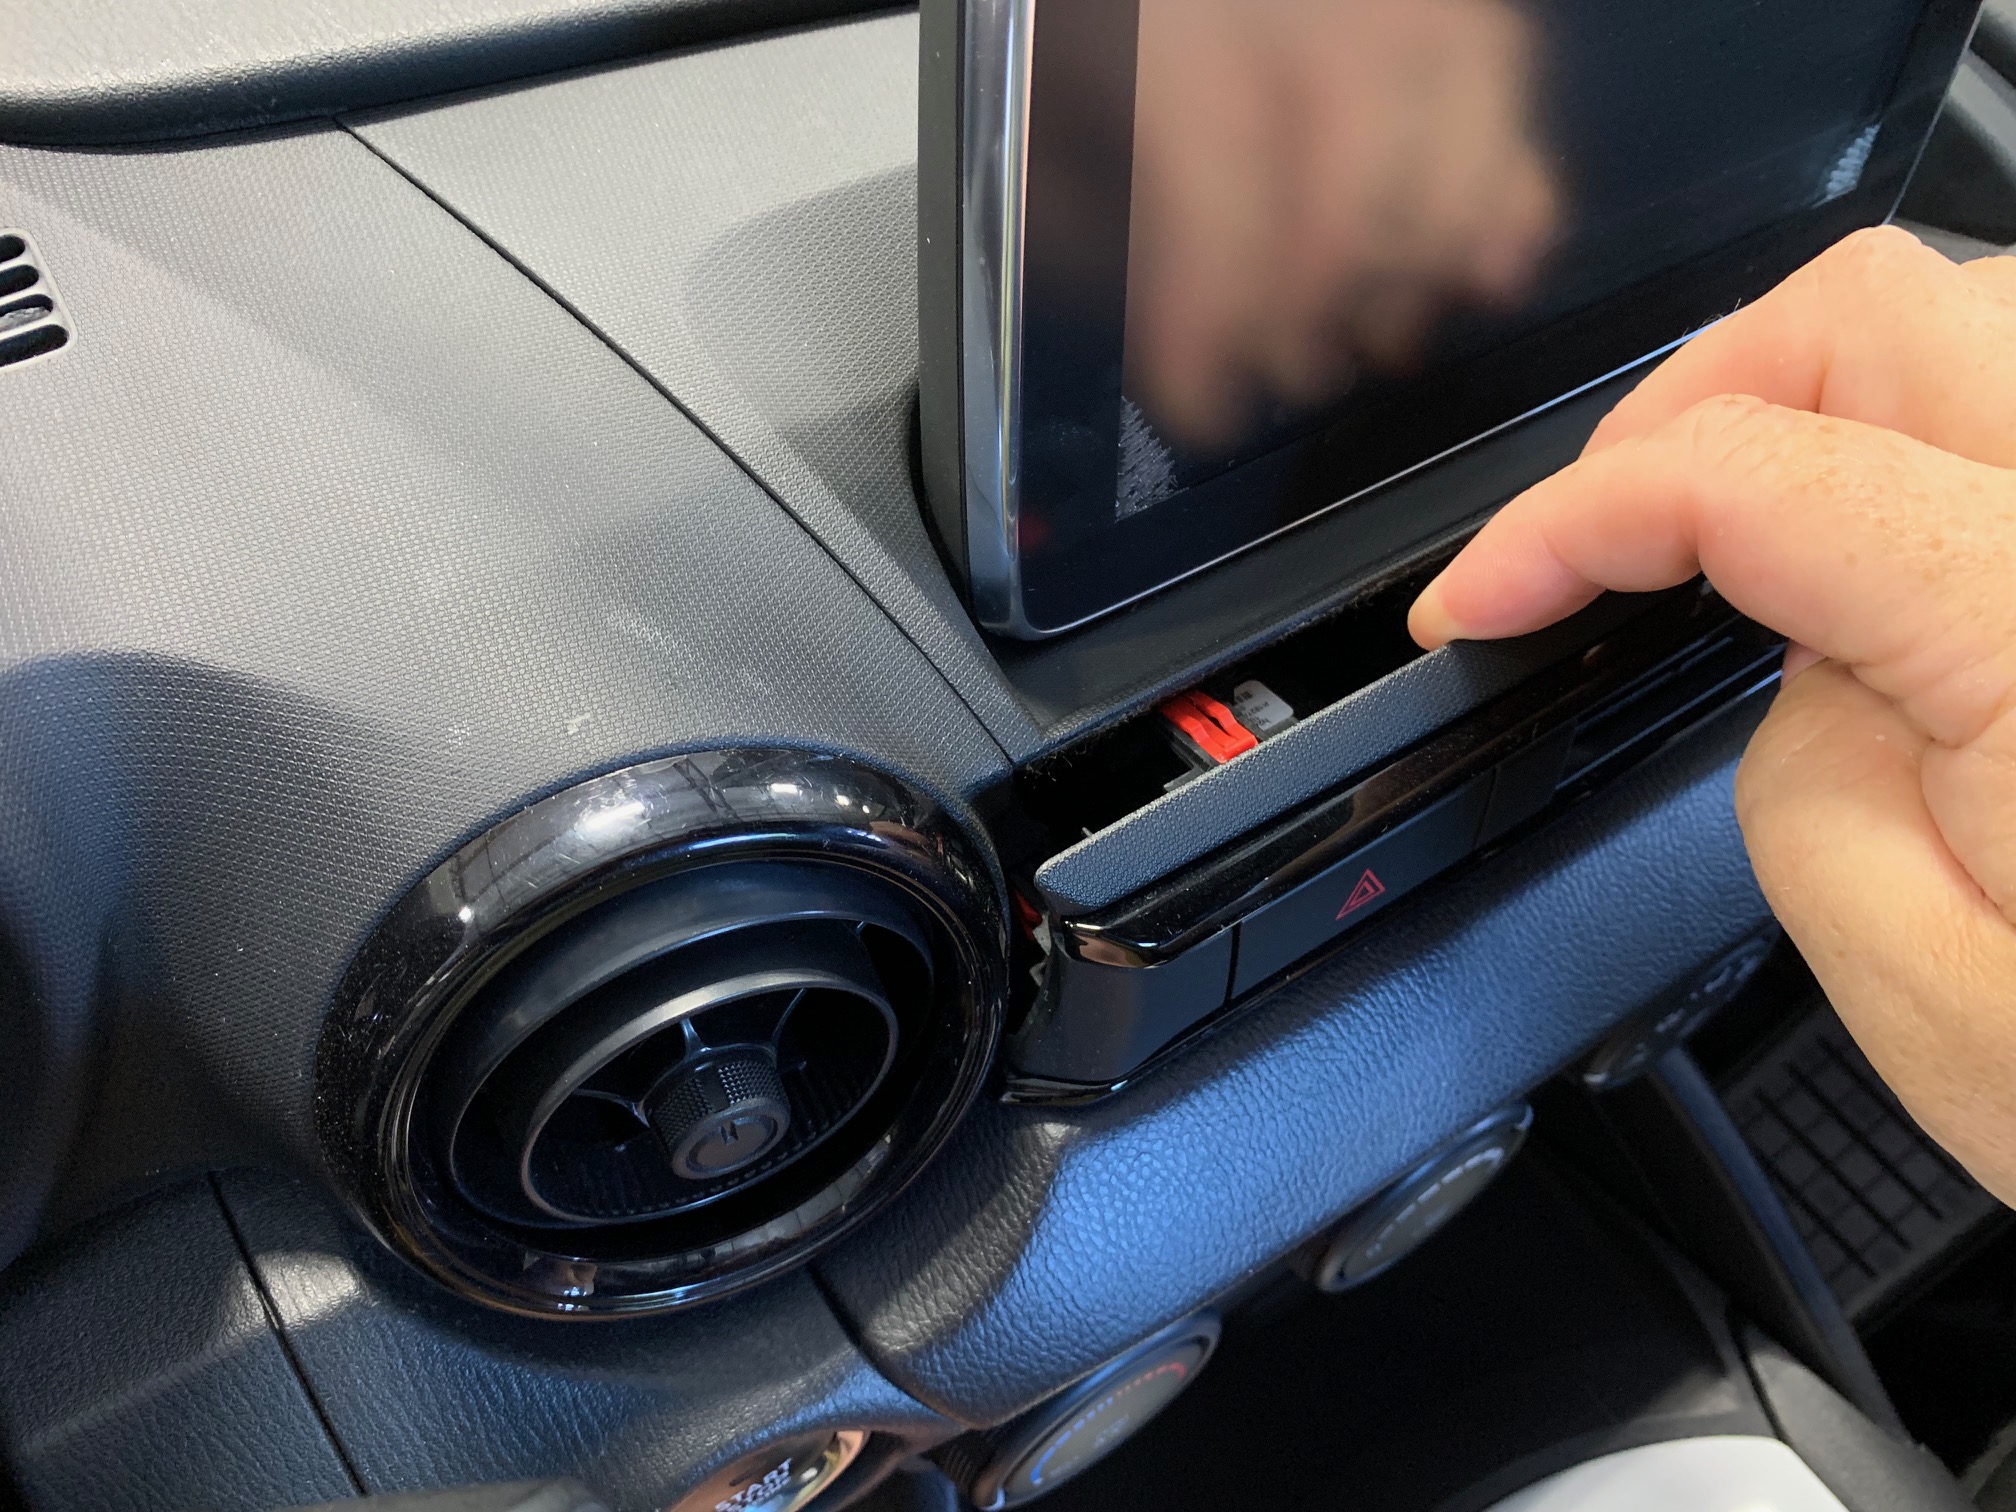
- Once this tab hole is free from the center trim, the gauge cowling will now lift off free of the dash. There is a wiring connector to address underneath on the right side, so disconnect it.
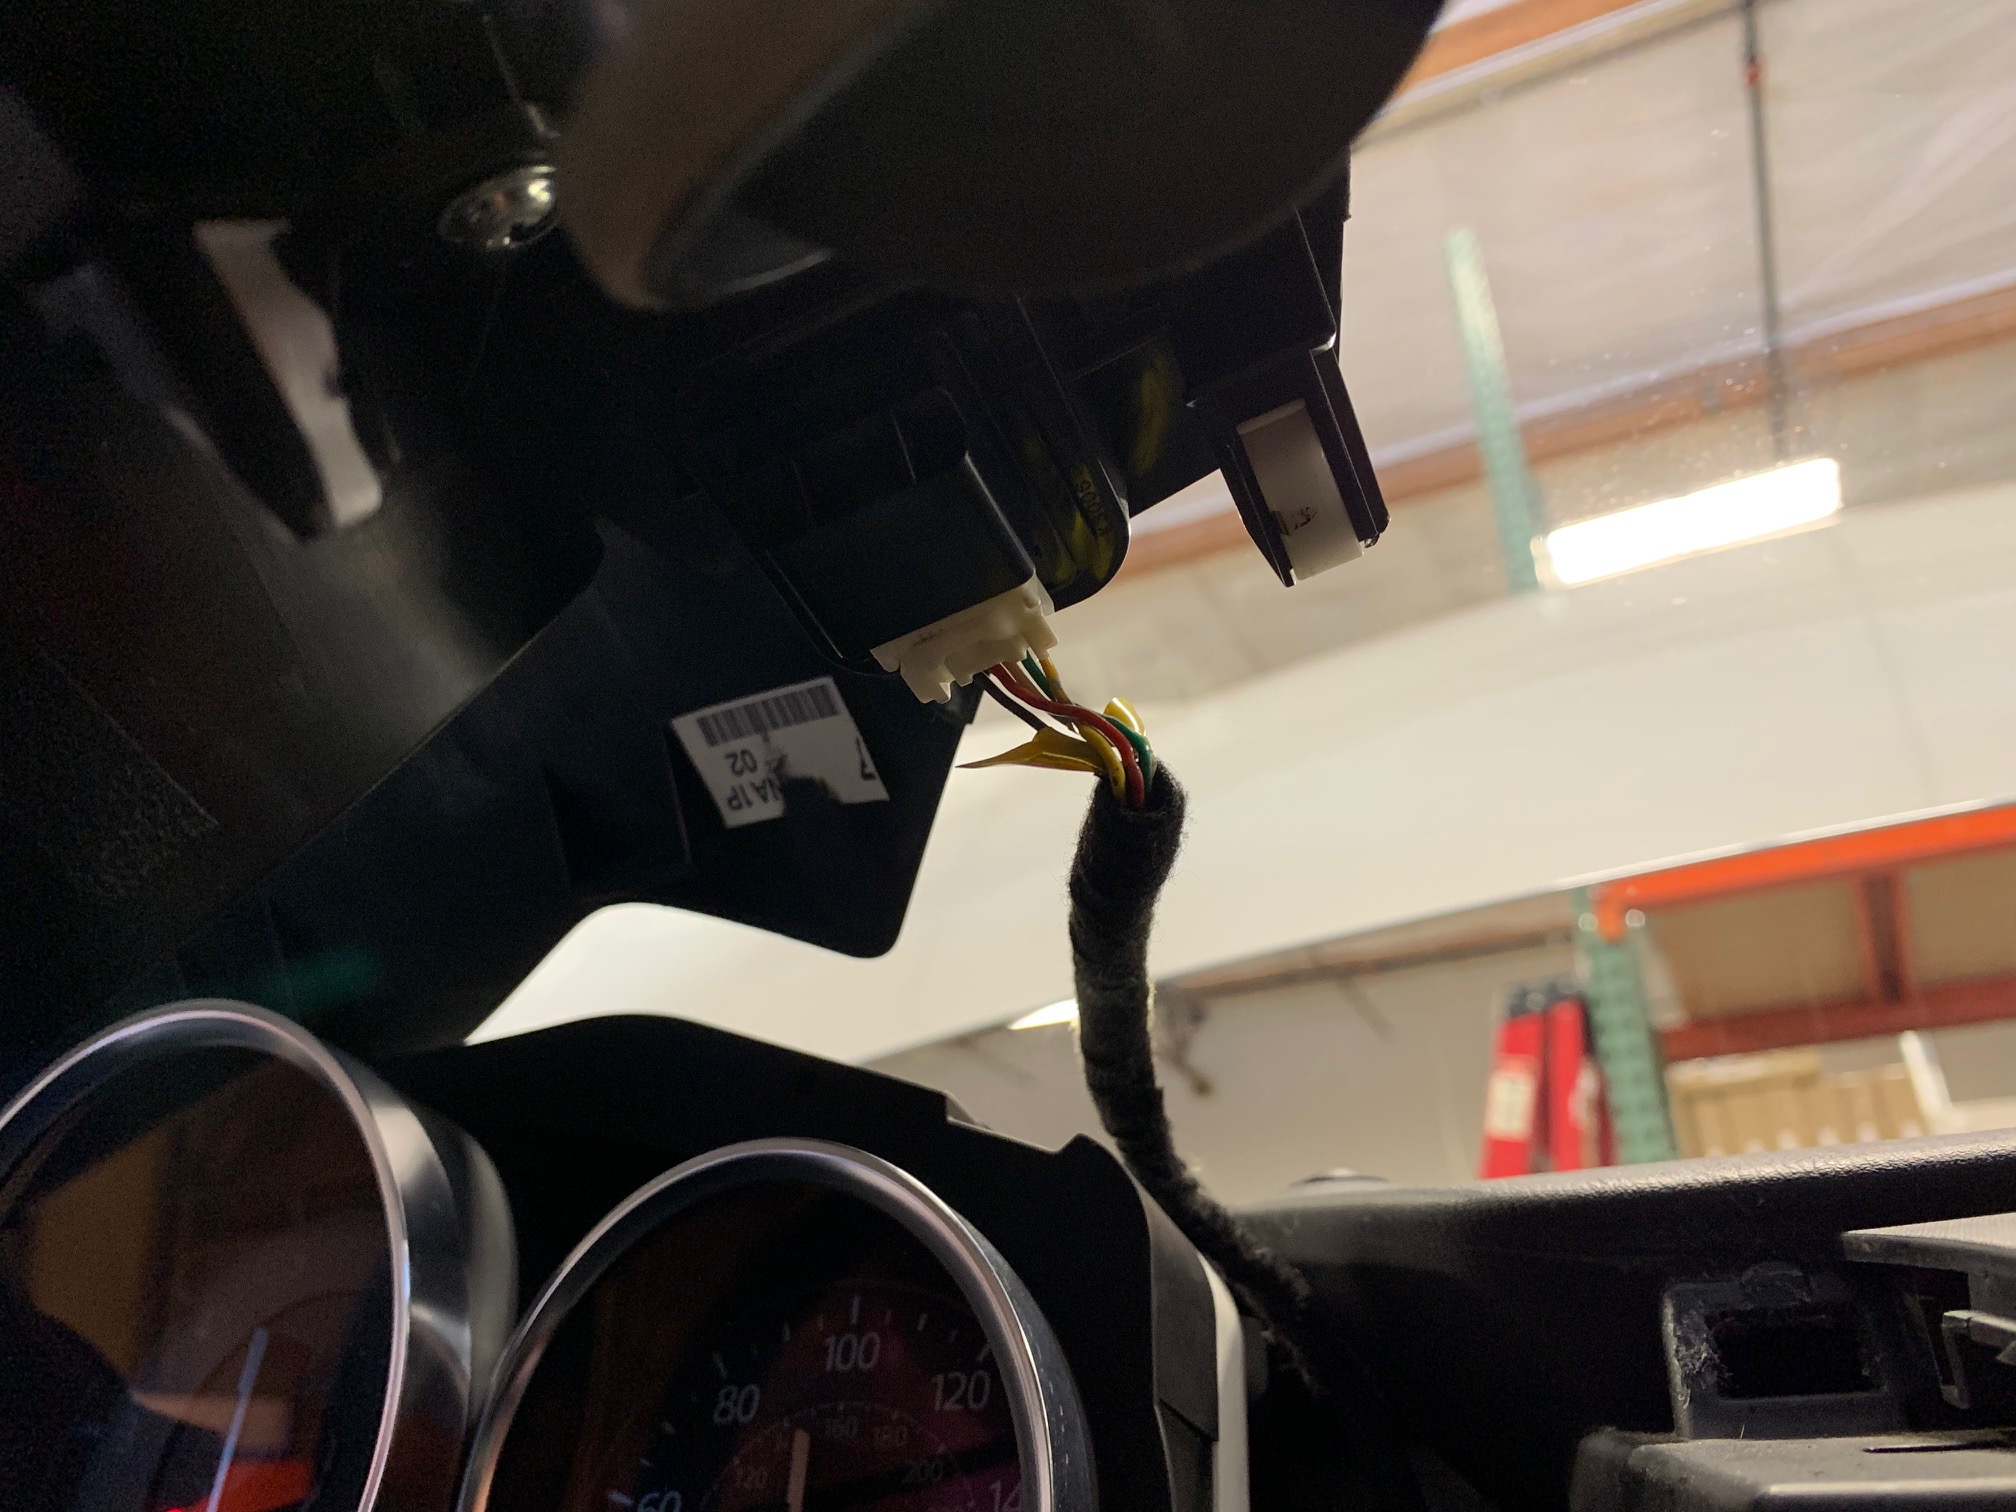
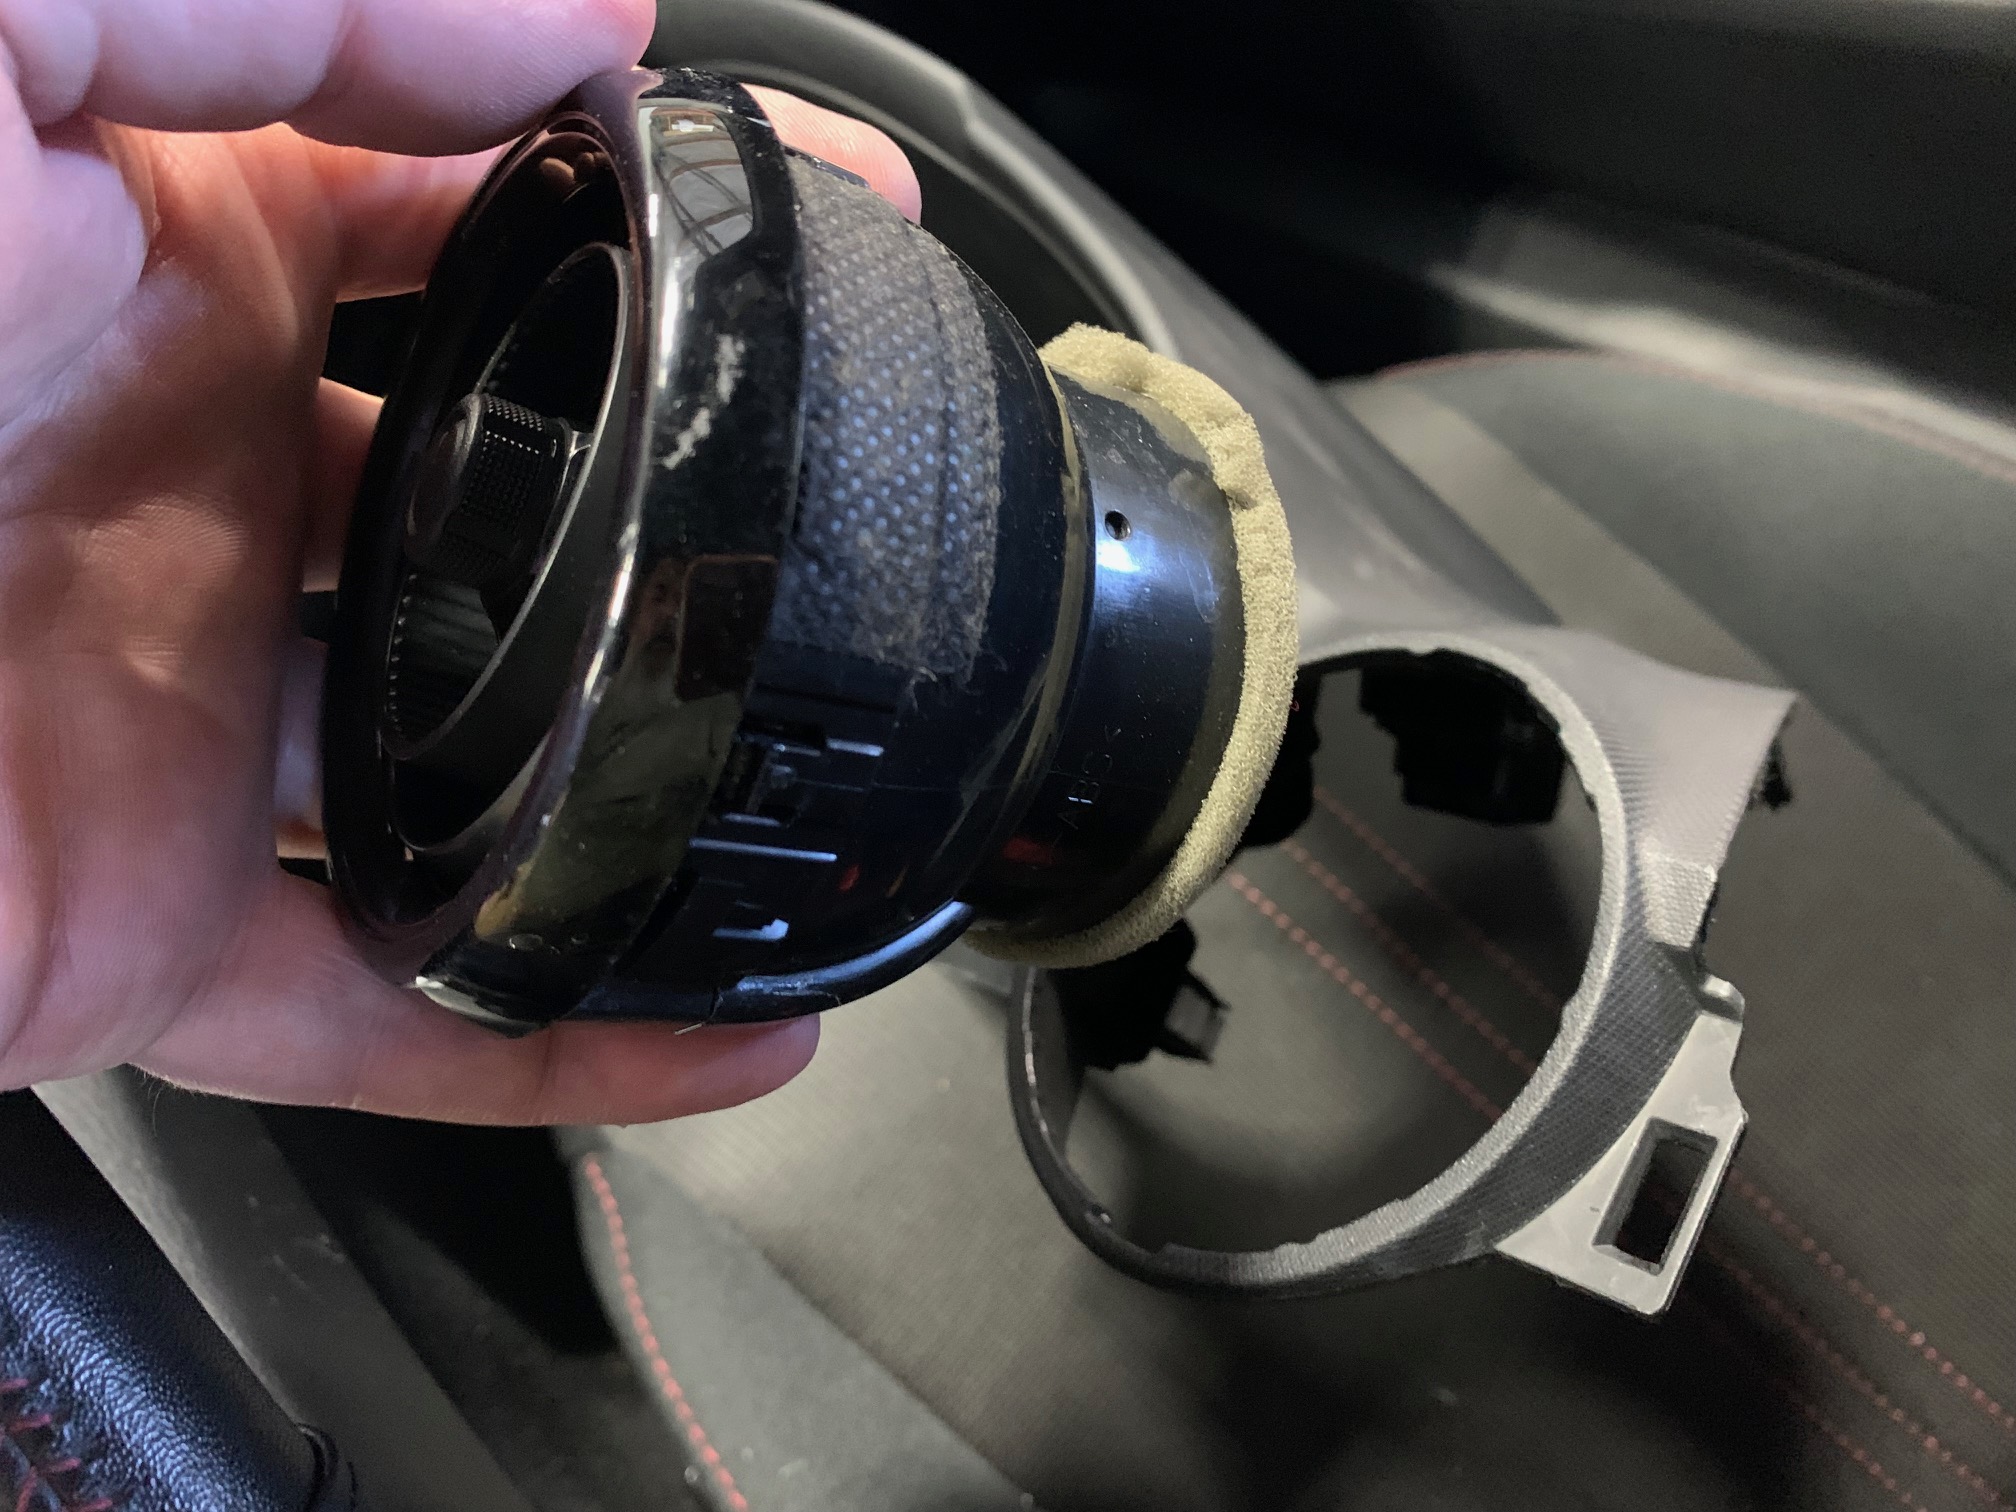
- Flip the gauge cluster cowling over to access the backside of the air vent assembly. There are four (4) anchor locations around the perimeter of the air vent that you need to pry loose with a small flat-bladed screwdriver while you push on the assembly from the backside. Utilize a flashlight if you're having difficulty locating them.

Assemble and Install Vent Mount
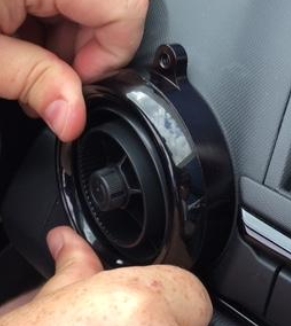
- Take the CravenSpeed Vent Mount and line up the gap in the ring with the raised ‘rib’ section on the outer surface of the vent assembly.
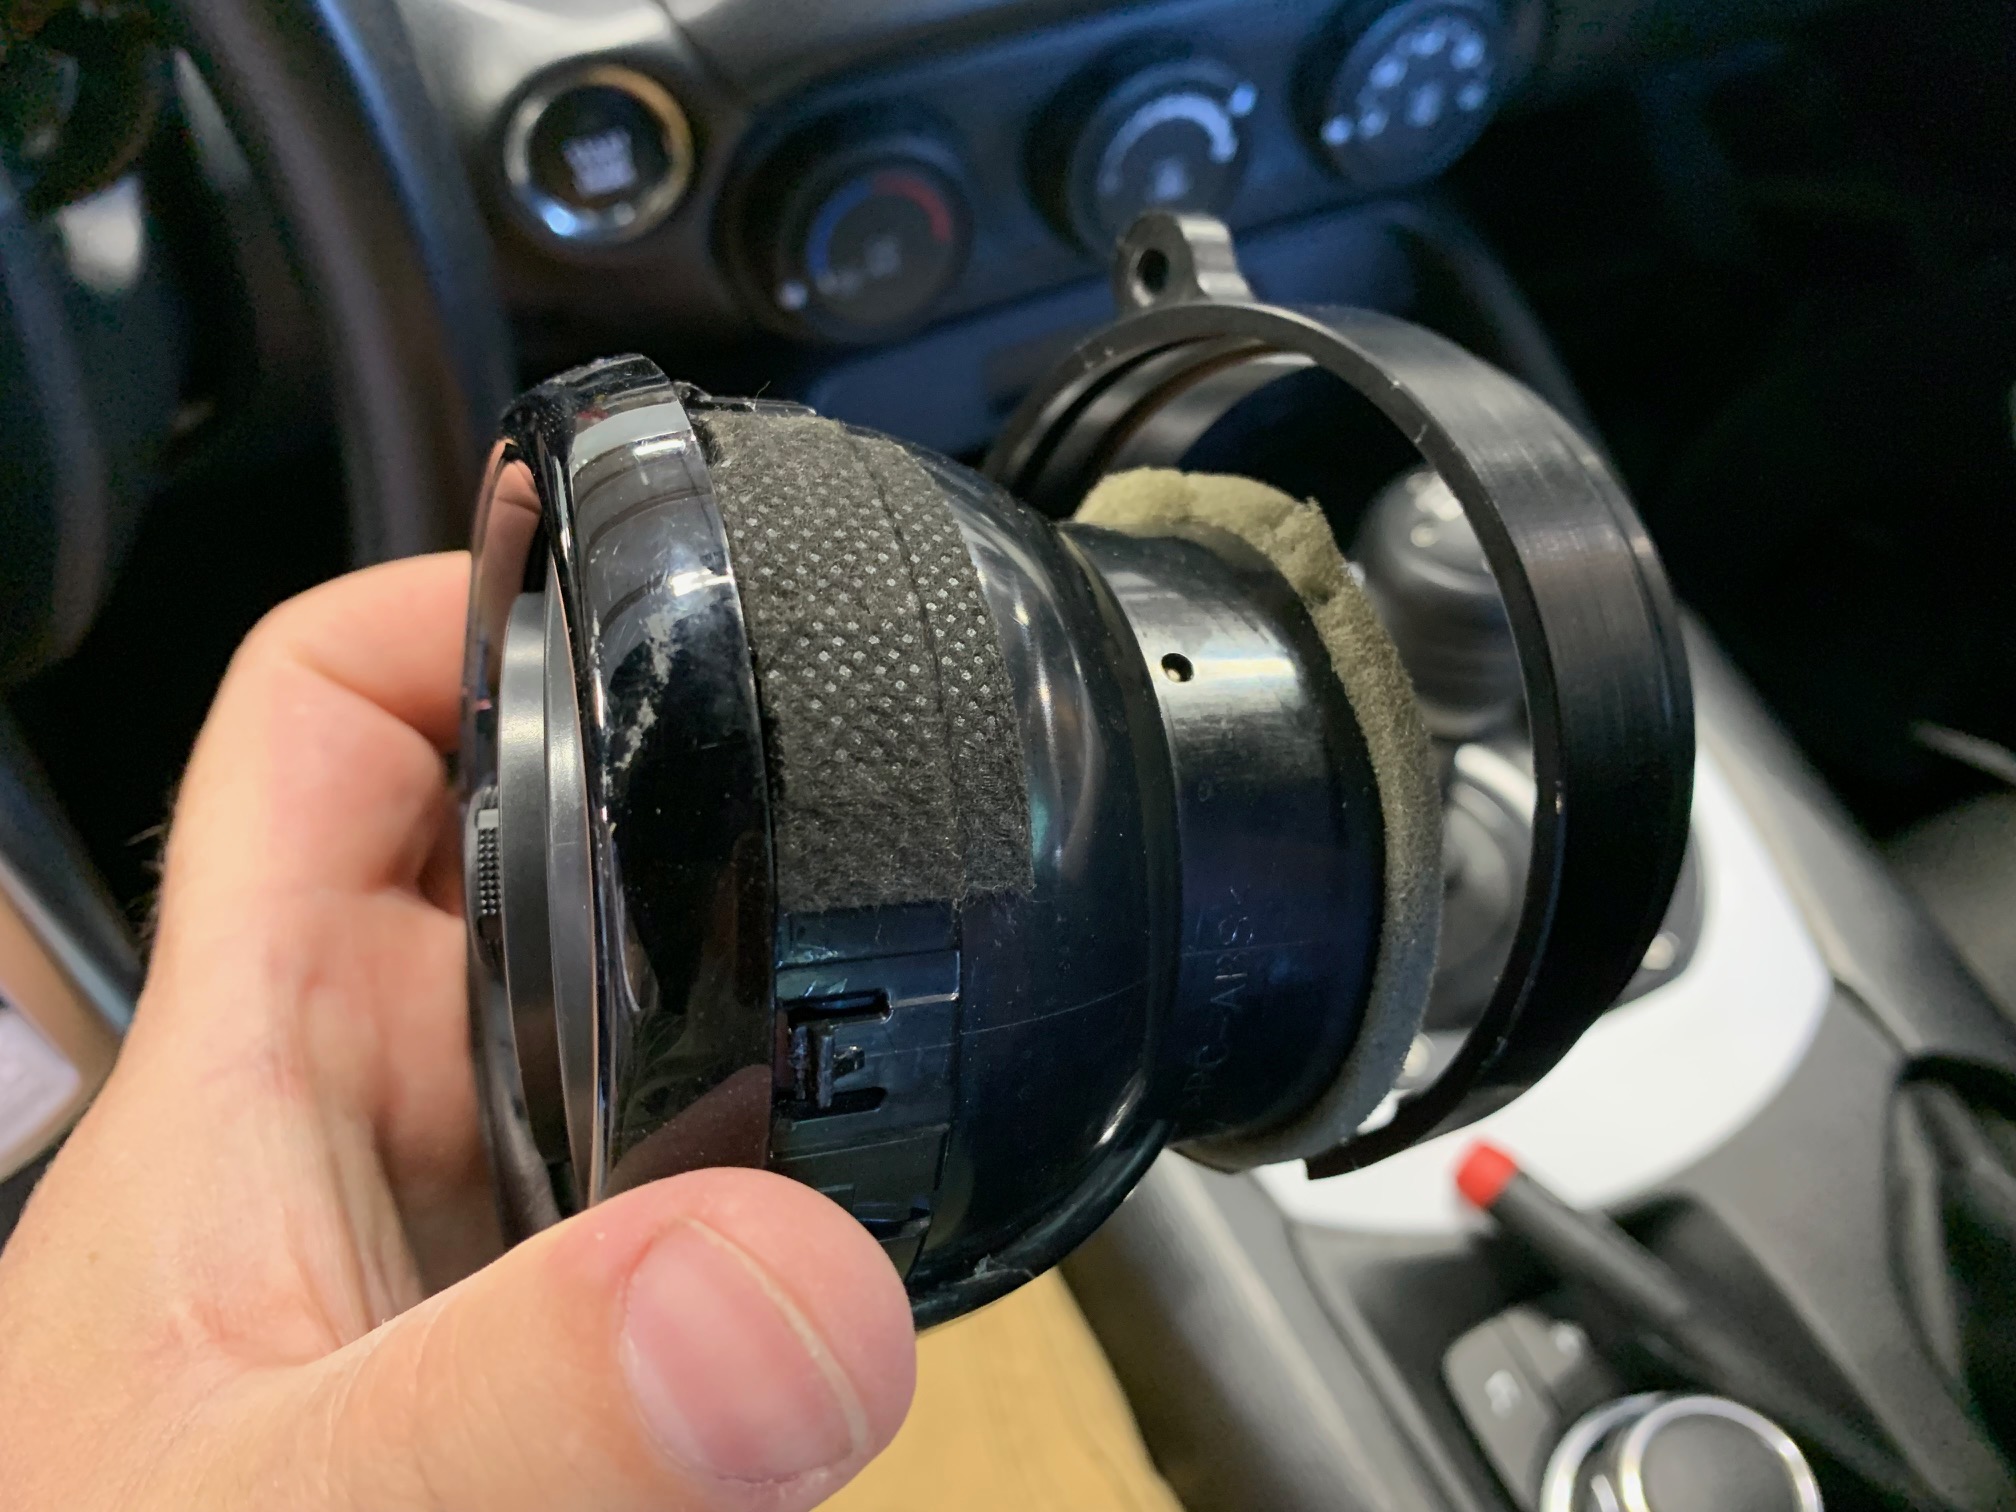

- Press the two pieces together until the (4) clips of the vent assembly fully engage the groove inside the Vent Mount. You should be able to hear or sense the clips as they snap into place.
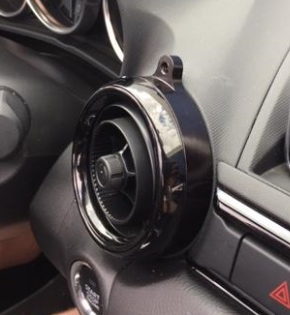
- Reinstall the gauge cluster cowling making sure you reconnect the wiring on the underside. Fit the tab hole of the cluster and the red mounting tab of the center trim ring properly.
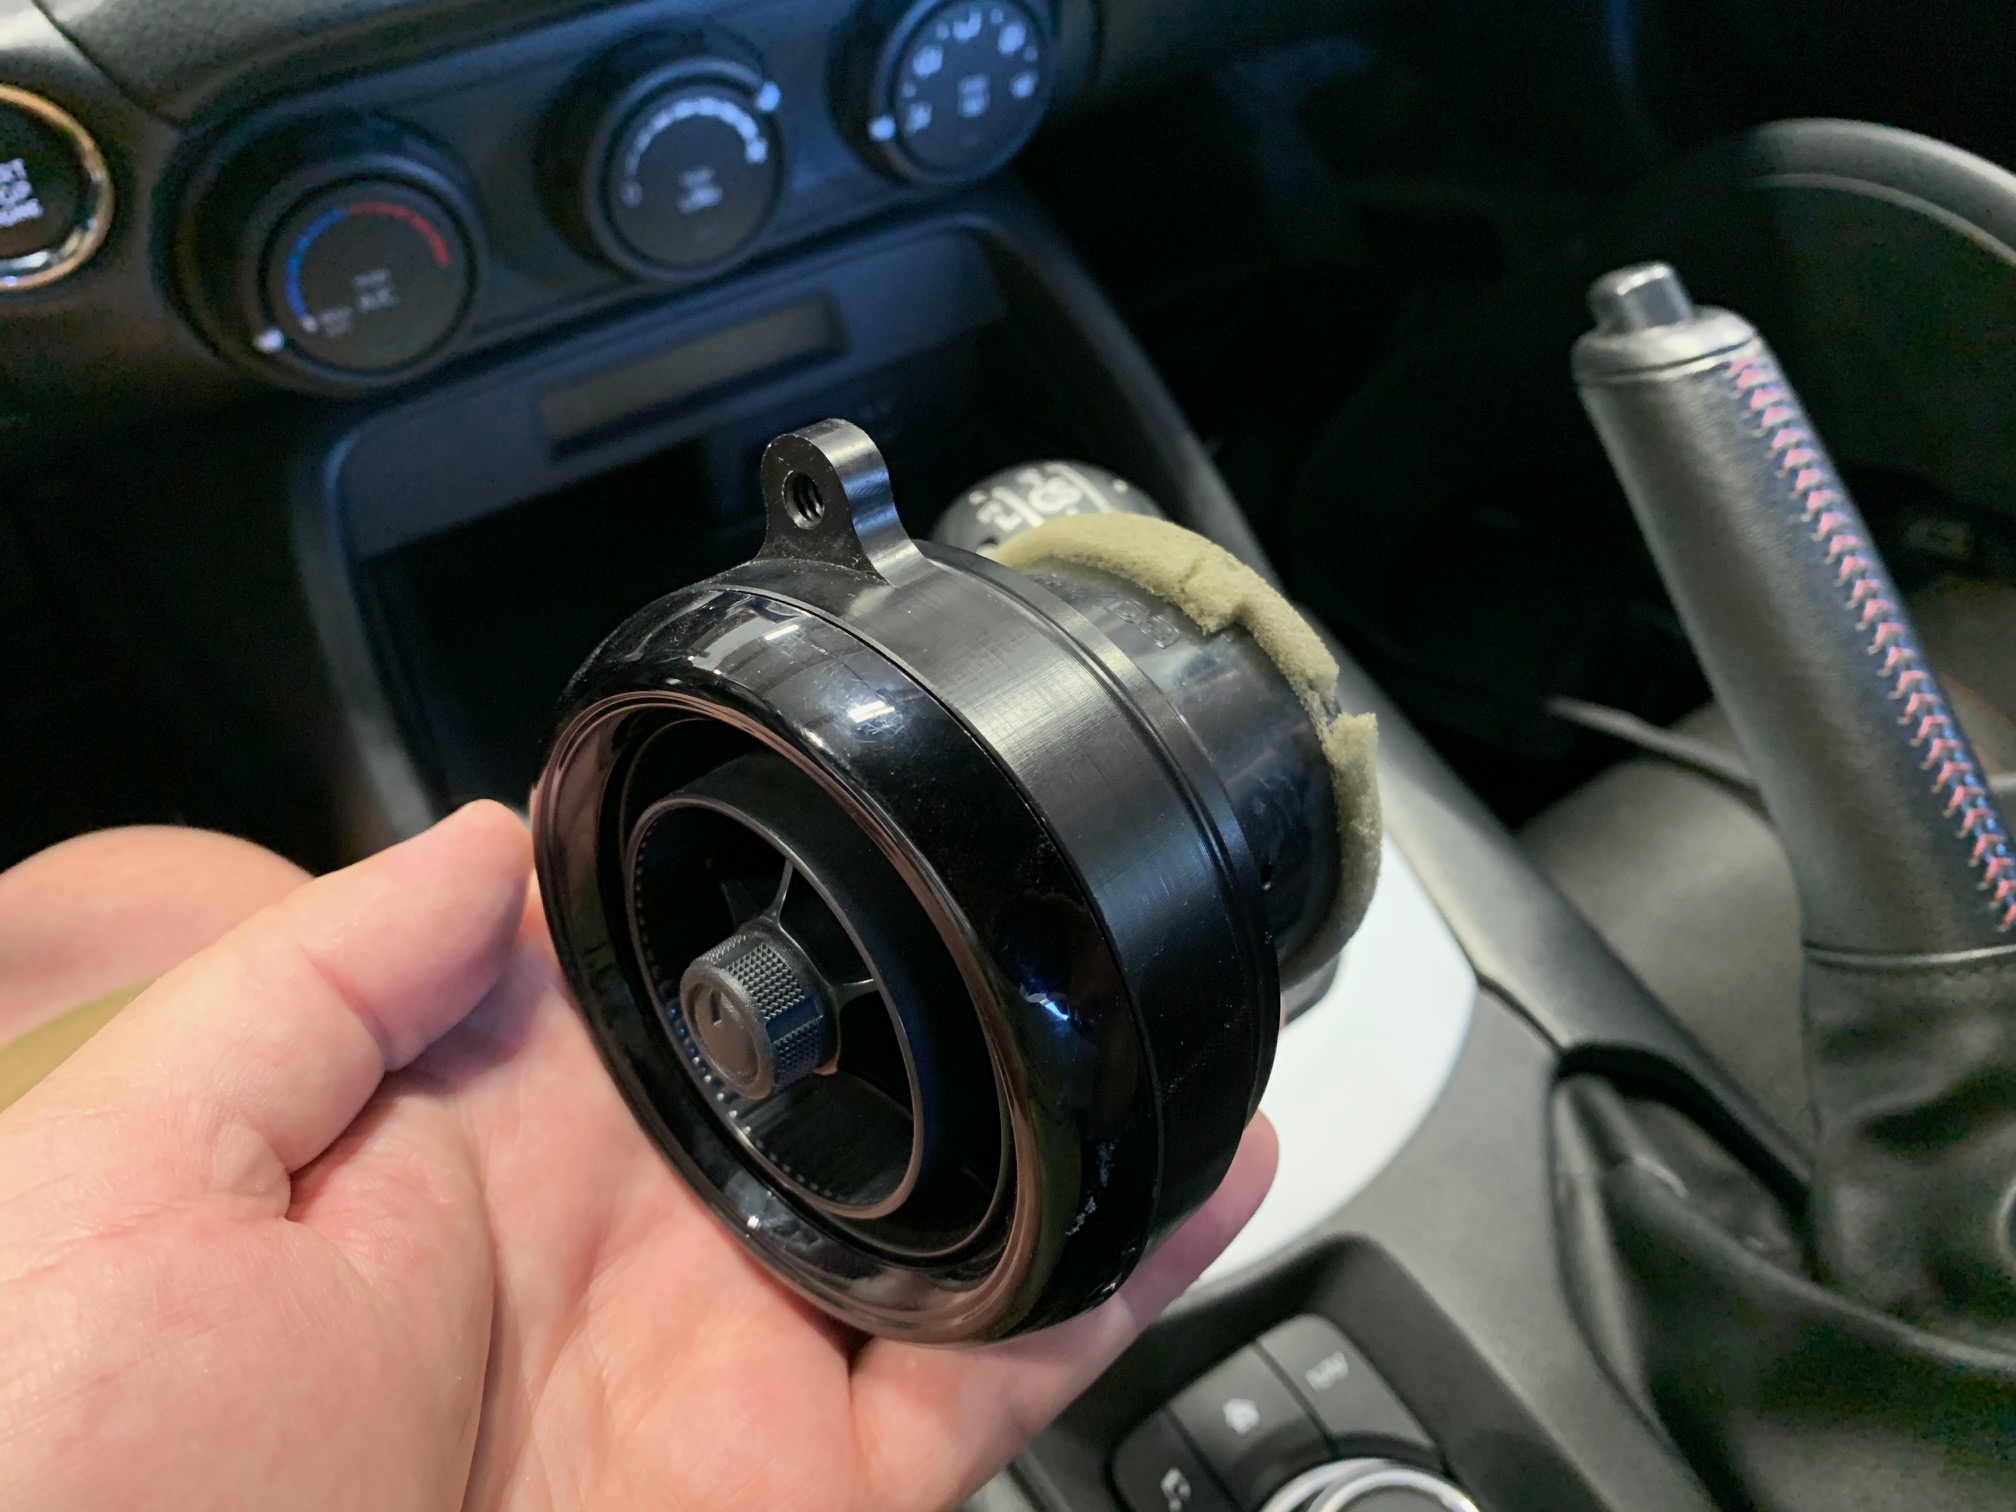
- With the threaded mounting tab on the CravenSpeed Vent Mount oriented straight up, place the assembly back into the receptacle on the dash and with gentle but firm pressure, push the assembly into the dash until it fully seats.
Accessory Mounting
Gemini Magnetic Phone Mount
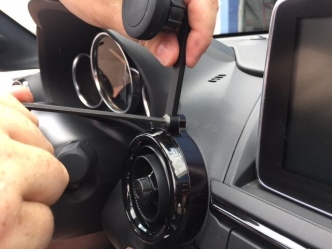
- Utilizing the included ¼-20 button head screw, place it through the open end of the Tibia Accessory Arm, followed by the black nylon washer over the screw, then tighten onto the Vent Mount threaded tab.
To install either magnet phone holder, loosen the collar on the holder, pop the ball on the mount into the socket, then re-tighten the collar.
- Gemini Magnetic Phone Mount: Apply the included adhesive-backed metal plate (or ring) to the backside of your phone or the inside of your phone protector case.
