THANK YOUfor purchasing the F56 Helix Short Shift Kit from CravenSpeed. This product is made from the highest grade materials, and is guaranteed to be free from defects.
You can buy our CravenSpeed Helix Short Shift Kit for MINI F56 here
While you're in there, now would be an excellent time to replace the sloppy OEM shifter bushing with one of our precision CravenSpeed Pro Shifter Retaining Clips here
Parts Included:
- Helix Adapter w/ set screw
Tools Required:
- T20 Torx Driver
- 3mm Hex Key Wrench
- Trim Panel Removal Tool (a screwdriver may also work if careful)
- Non-marring Punch (brass drift or similar)
- Mallet
- Loctite (Blue)
Procedure
Step 1. Remove the Center Console
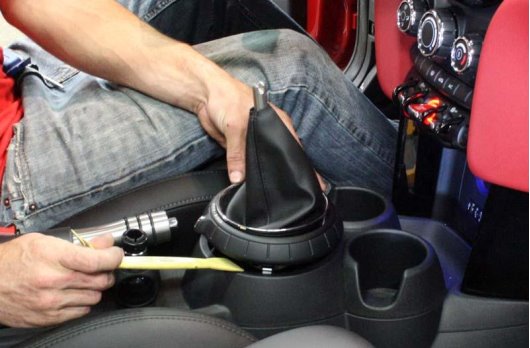
1a. Remove the Shift Knob. With a firm grip, grasp the shift knob and pull up. The shift knob should pop off without too much effort. If you’re reinstalling the OEM shift knob, do not concern yourself with separating the shift knob from the shift boot. Regardless of what the following images show, they will be removed and reinstalled together as a unit.

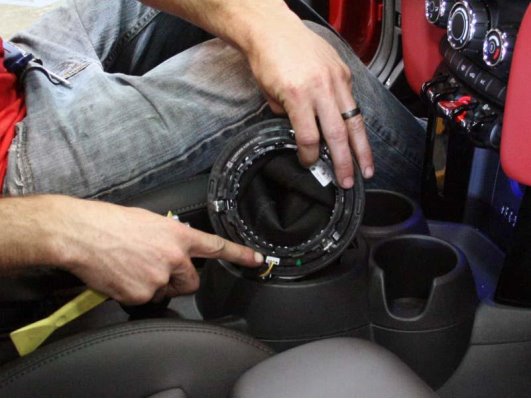
1b. Remove the Shift Ring/Boot. With a trim panel removal tool or flathead screwdriver, pry the shift ring loose and unplug the wiring before lifting away.
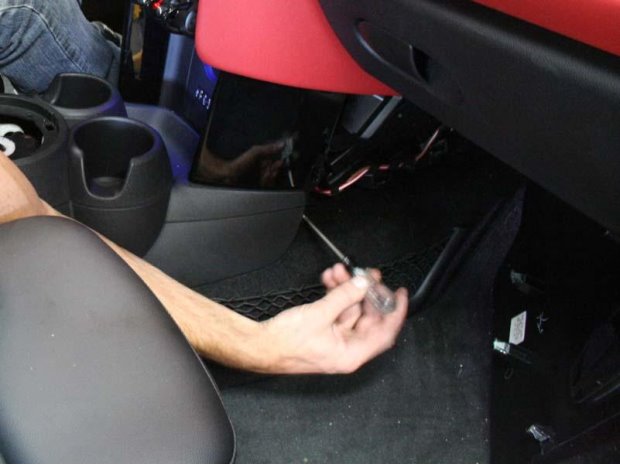
1c. Remove the Center Console. Begin by removing the kick panels on either side of the foot well. Each panel is held in place with a Torx screw and panel clips, and they should pull off without too much effort. Once the kick panels are removed, they will expose a single Torx screw on either side of the center console. Remove these two screws.
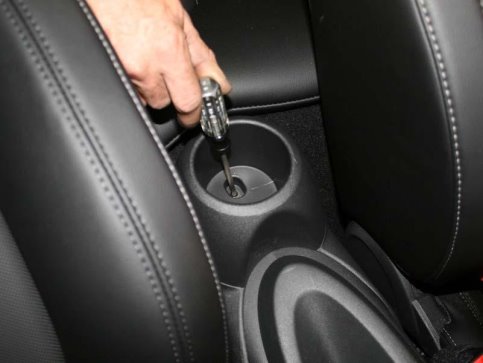
1d. Remove the rear cup holder. Pull the rubber insert from the center of the rear cup holder to expose the Torx screw. Remove it and the 2 Torx screws on either side of the cup holder and then lift it out and set aside.
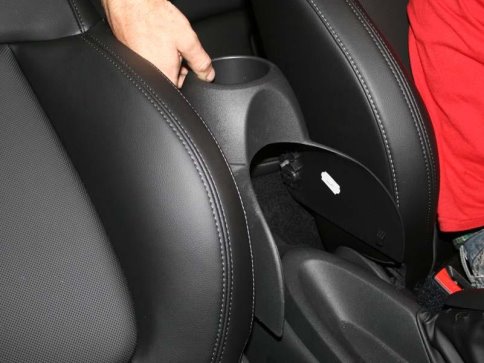
1e. Removing the Center Console Cont. Remove the Torx screw holding the rear of the center console.
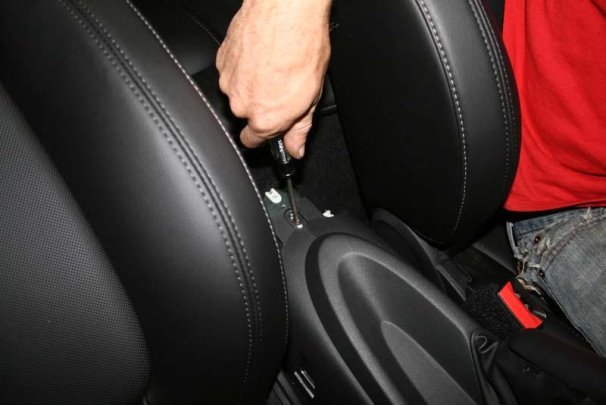
1f. Detaching the Parking Brake Boot. Pull your parking brake up as far as it will go and use the trim panel removal tool to pry loose the base of the parking brake boot. Do not attempt to remove the parking brake boot assembly from the vehicle as it’s not necessary to do so.
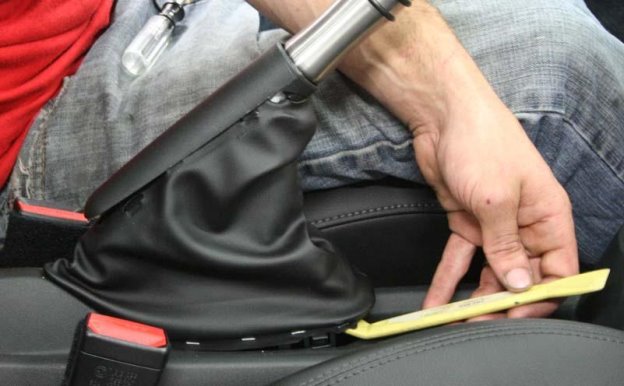
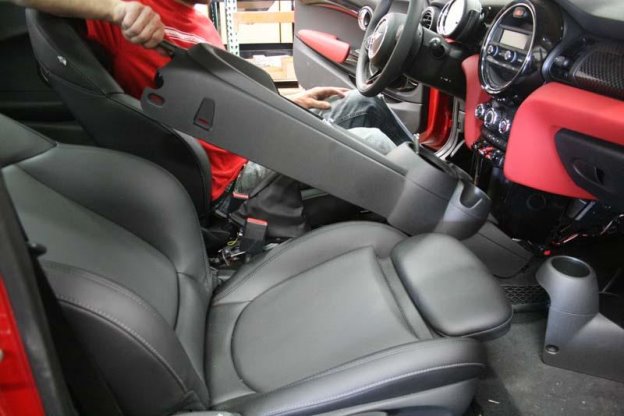
1g. Removing the Center Console Cont. Beginning with the rear, lift the center console up and out of the car. While you are doing so, you will need to maneuver the parking brake boot back through the opening of the center console. It can be a bit tricky, but it’s not unmanageable.
Step 2. Remove the Shifter Lever
2a. Detach the Reverse Pivot Assembly. Gently pry around the external push ring with a Flathead Screwdriver until it’s free. Do your best not to damage this ring as it will be reinstalled. If you do manage to mangle it and require a new one, just give us a call and we'll get you fixed up.
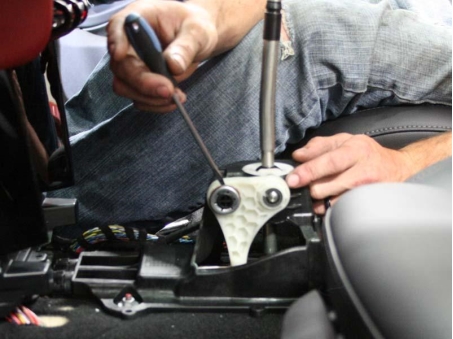
2a. Cont. The reverse pivot assembly only needs to be moved out of the way so that the shift lever can be removed. It is not necessary to disconnect it from the linkage.
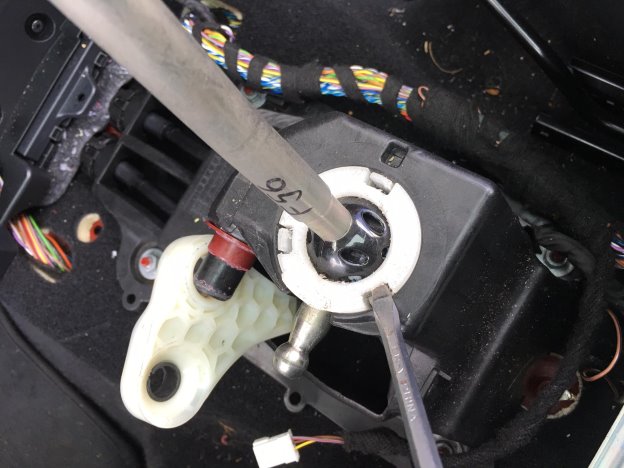
2b. Disconnect Shift Lever. The linkage connecting to the bottom of the shift lever will need to be disconnected. Using a non-marring punch and a mallet, place the punch on the rim of the ball cup and give it a sharp smack to separate the linkage ball cup from the shift lever ball end. (We used a piece of aluminum round stock wrapped in blue tape)
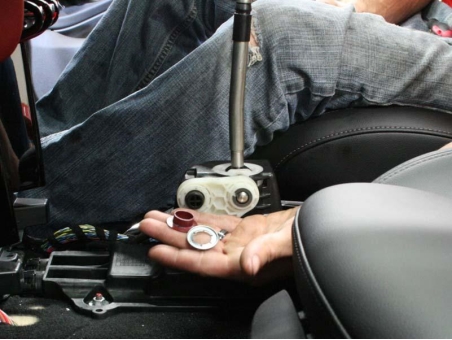
2c. Removing the Shift Lever. Compress the 3 clips on the white plastic OEM shift lever pivot retaining bushing and pull the shift lever up and out. It can be a bit of a juggle with one person, but not impossible. Pro Tip: Apply upward pressure on the shift lever while disengaging the three clips as this will help prevent them from clicking back into place while you're working around the perimeter.
Step 3. Install the Helix Adapter
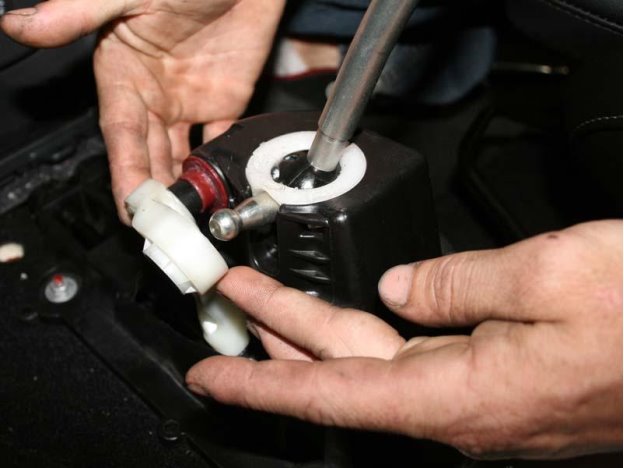
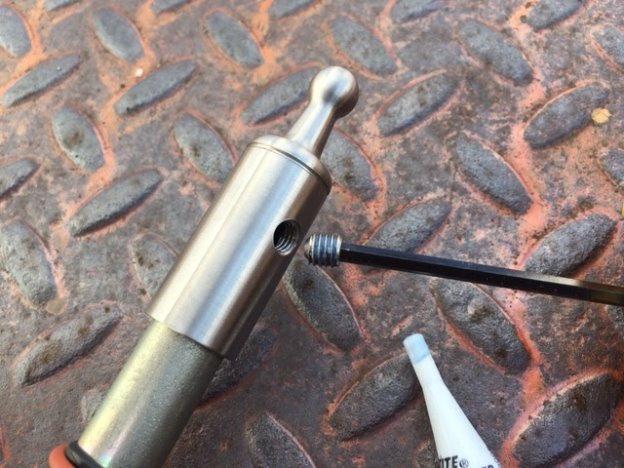
Install the Helix Adapter. Now that you have the shift lever removed from the vehicle, remove the set screw on the side of the Helix Adapter so you can see it fully seat past the lower pivot ball on the bottom of the shift lever. Apply a drop of blue Loctite to the set screw and thread it into the Helix Adapter. Tighten with the 3mm Hex Key Wrench. It's orientation on the shift lever is unimportant, so long as it is fully seated.
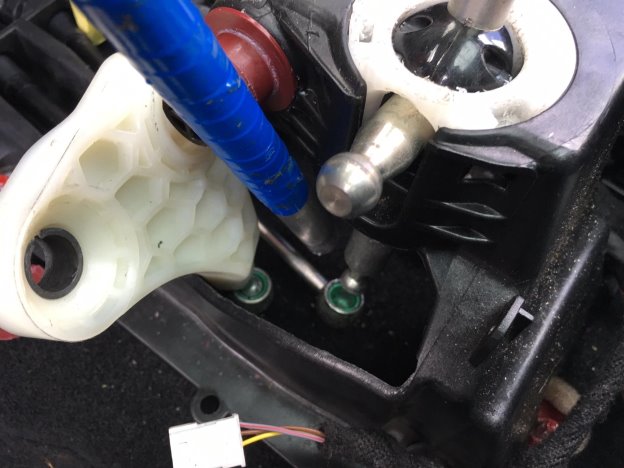
Reinstall the Helix-equipped shift lever back down into the shifter housing and reassemble the linkage points. Reconnecting the lower ball pivot can be a bit of a bear due to it's limited accessibility. Rocking the ball cup side-to-side as you're applying pressure can greatly assist with it's reengagement. If you find that the extended length of the Helix now causes the lower linkage cup to rub against the tunnel carpet, you may utilize a box knife and cut a section of the carpet out to allow the necessary clearance. Button everything else up in their reverse order and you're good to go.