THANK YOU for purchasing the Jeep CJ Dash Knobs Kit from CravenSpeed. This product is made from the highest grade materials and is guaranteed to be free from defects.
Parts Included:
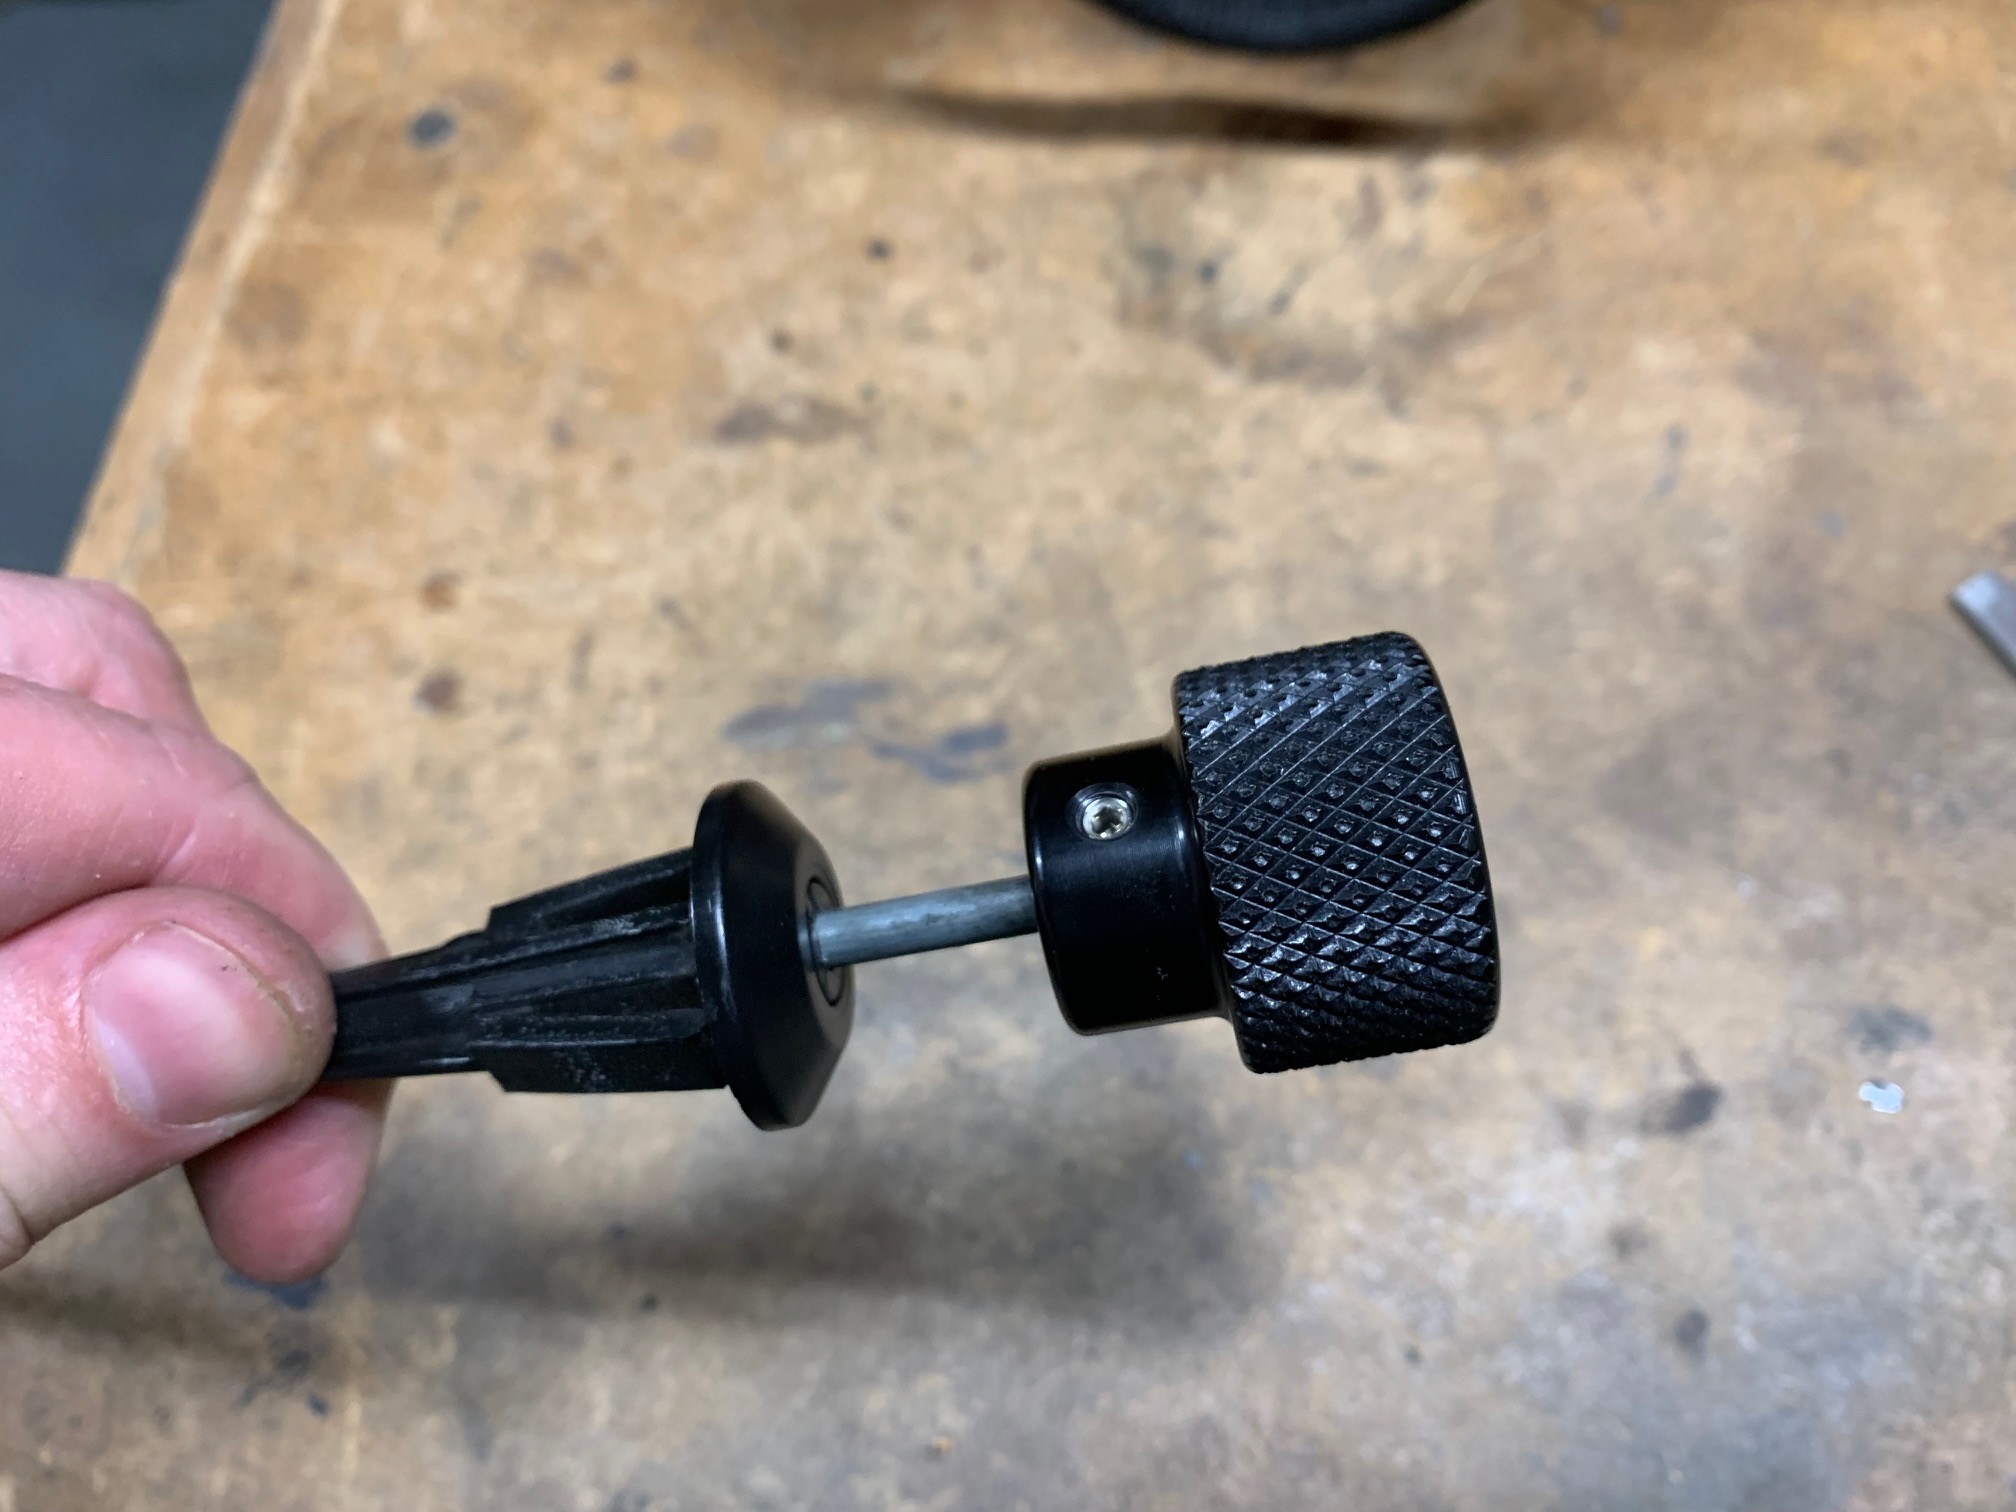
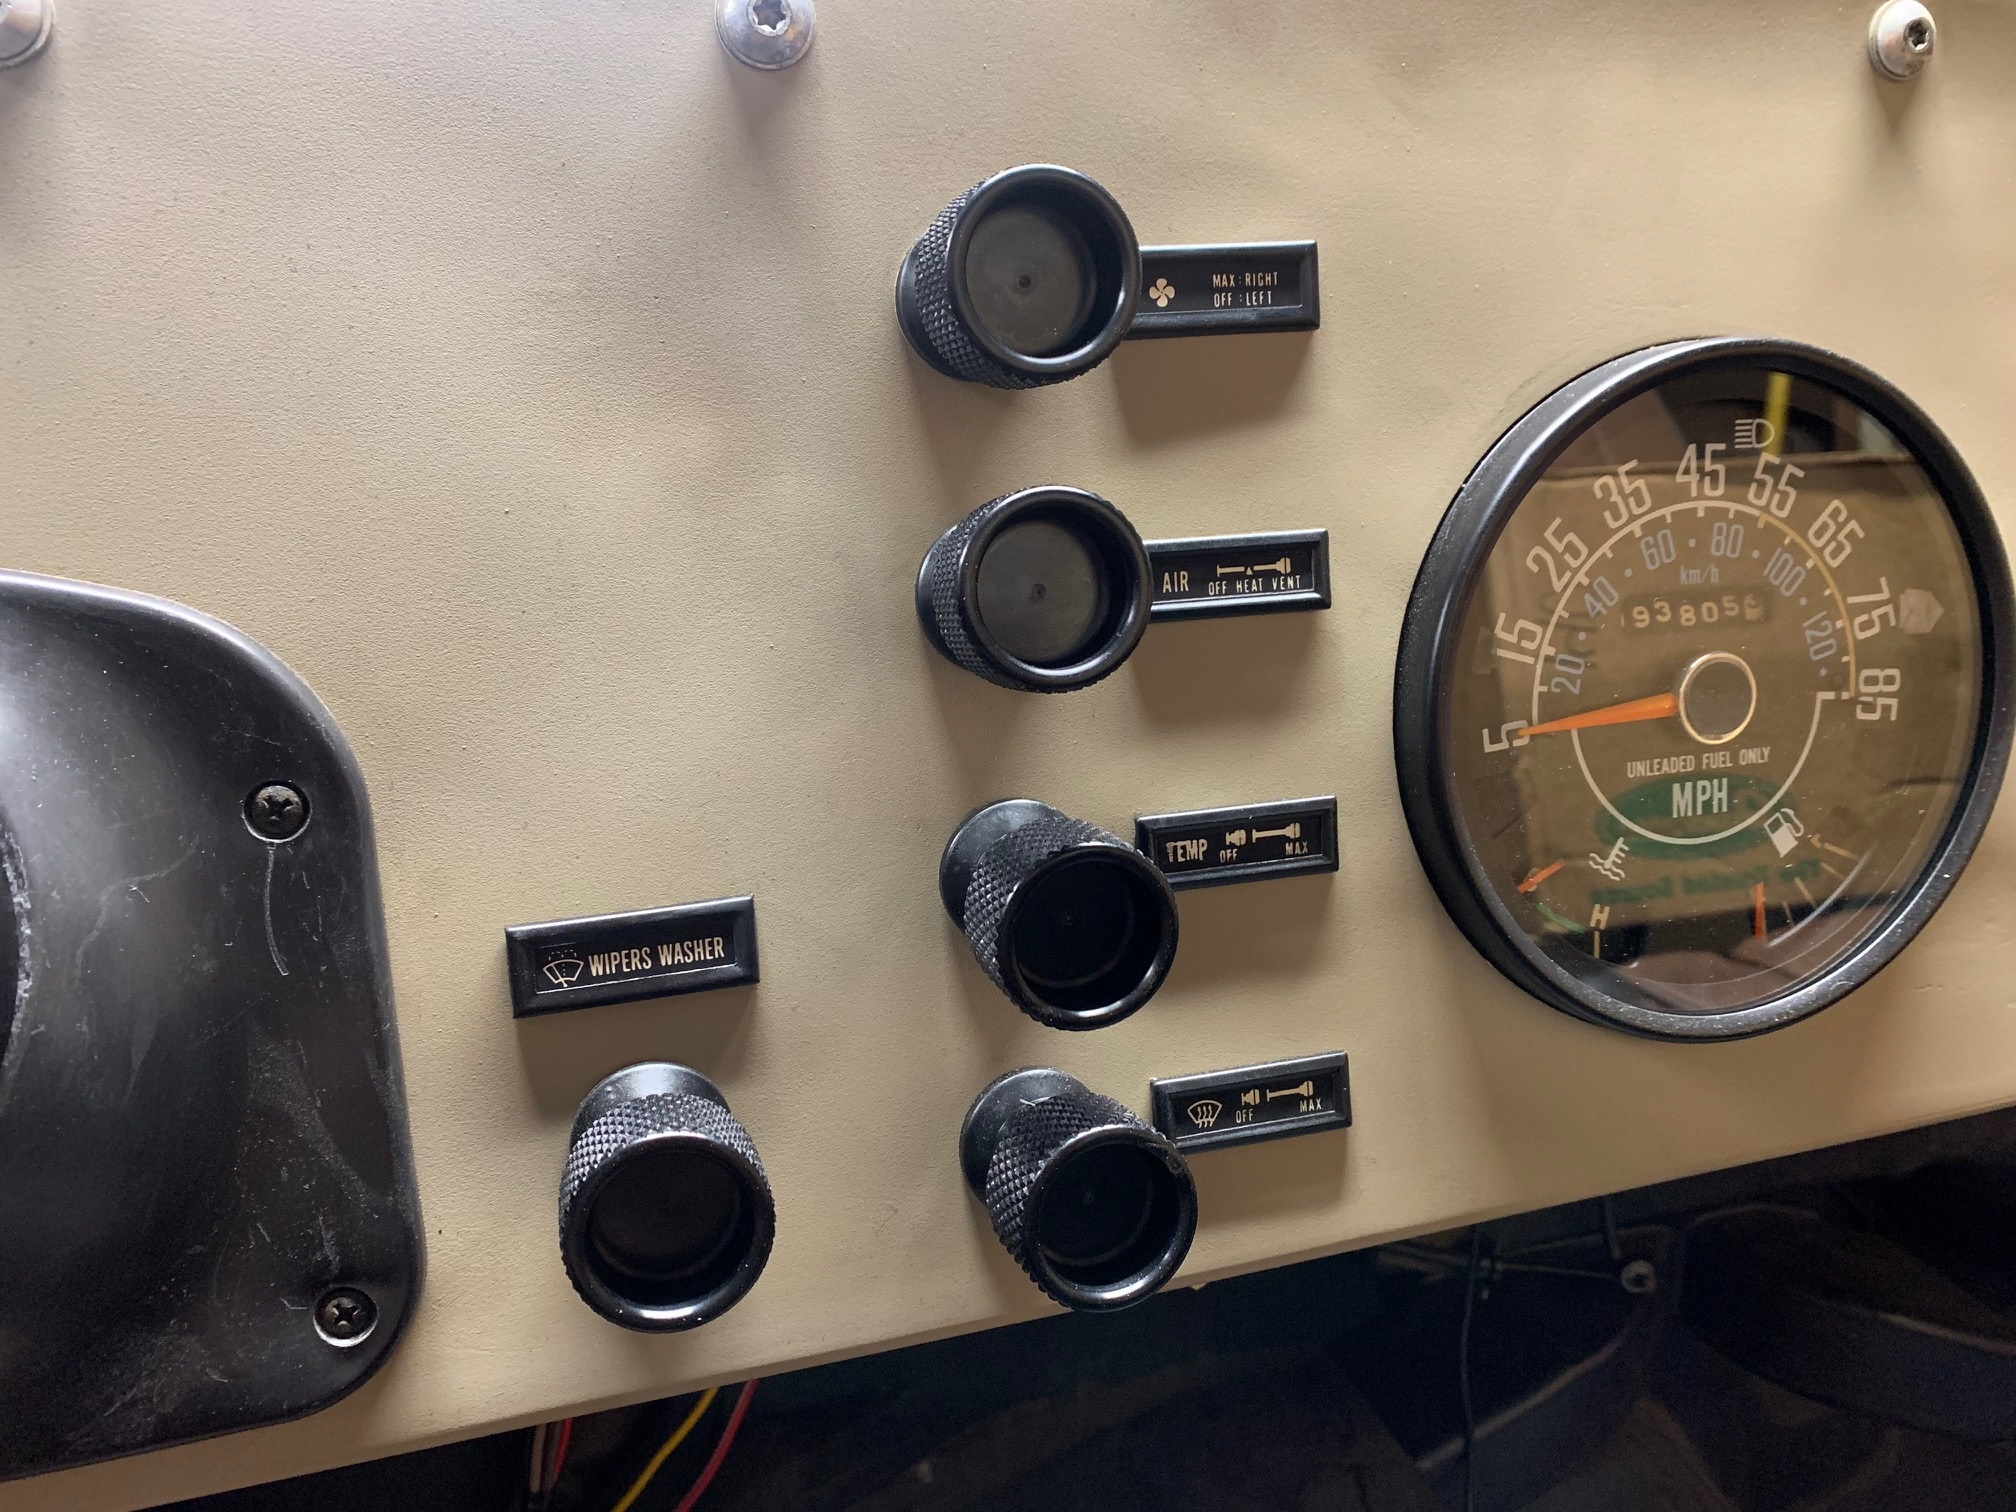
- 6x Anodized Aluminum Knurled Dash Knobs
- 6x Stainless Set Screws
- 1x 3/32 Hex Key
Procedure
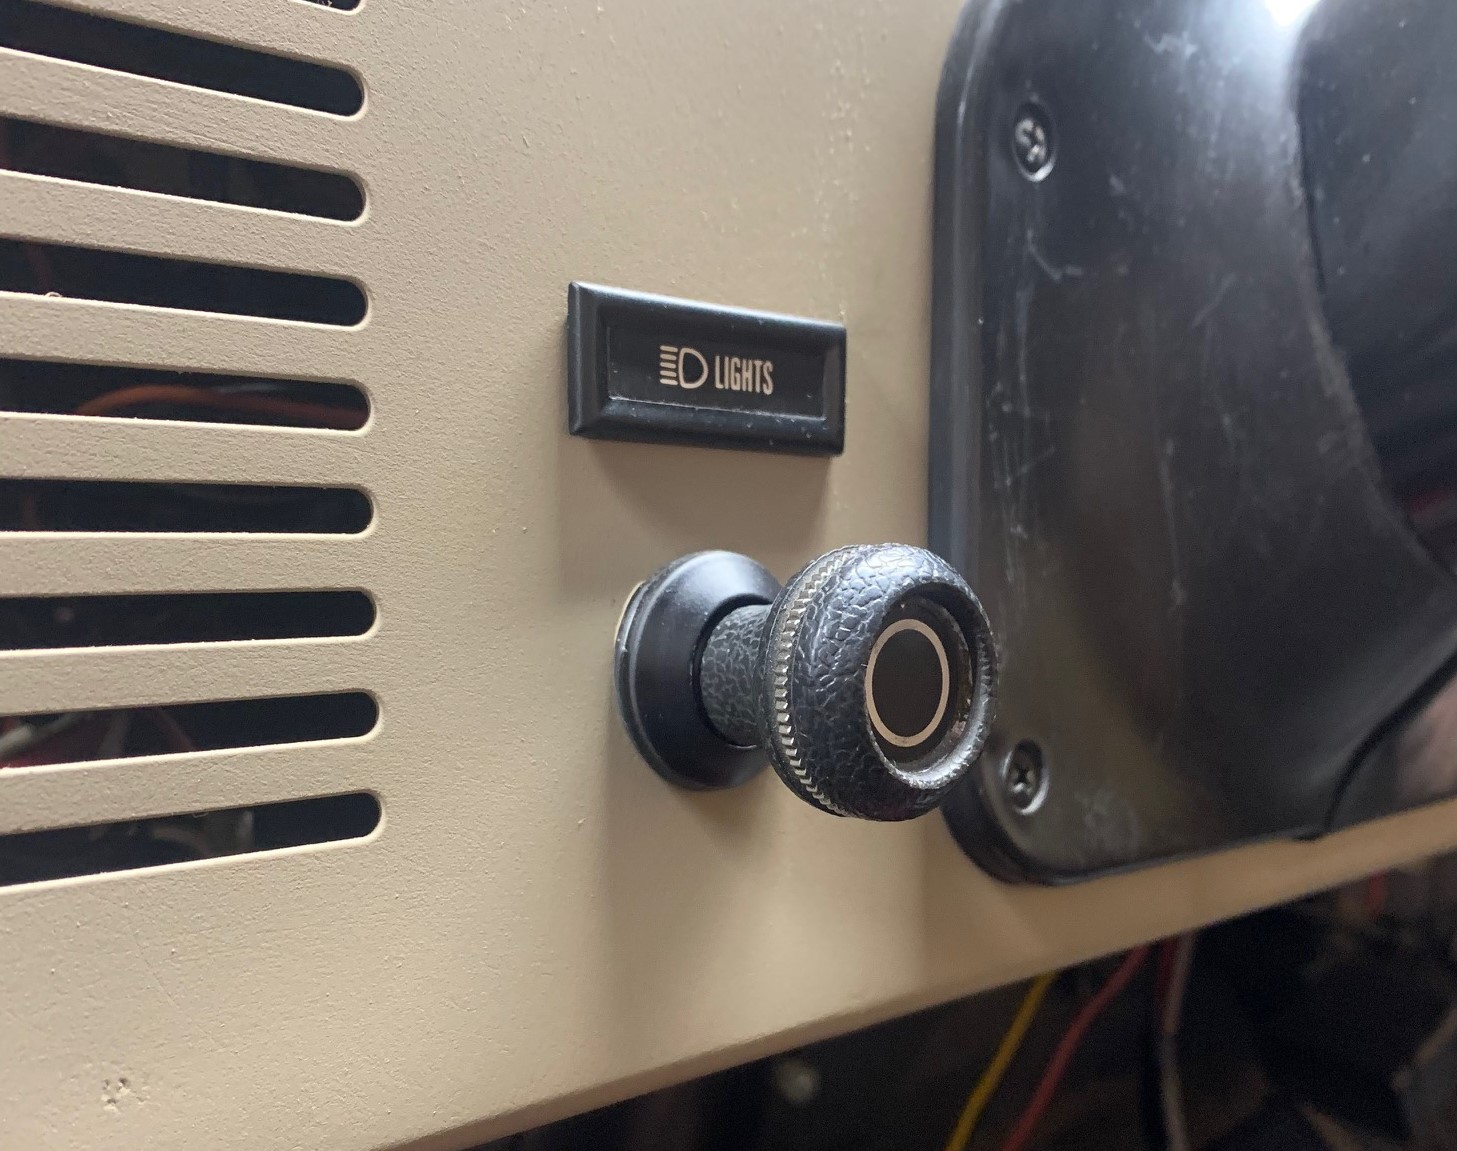
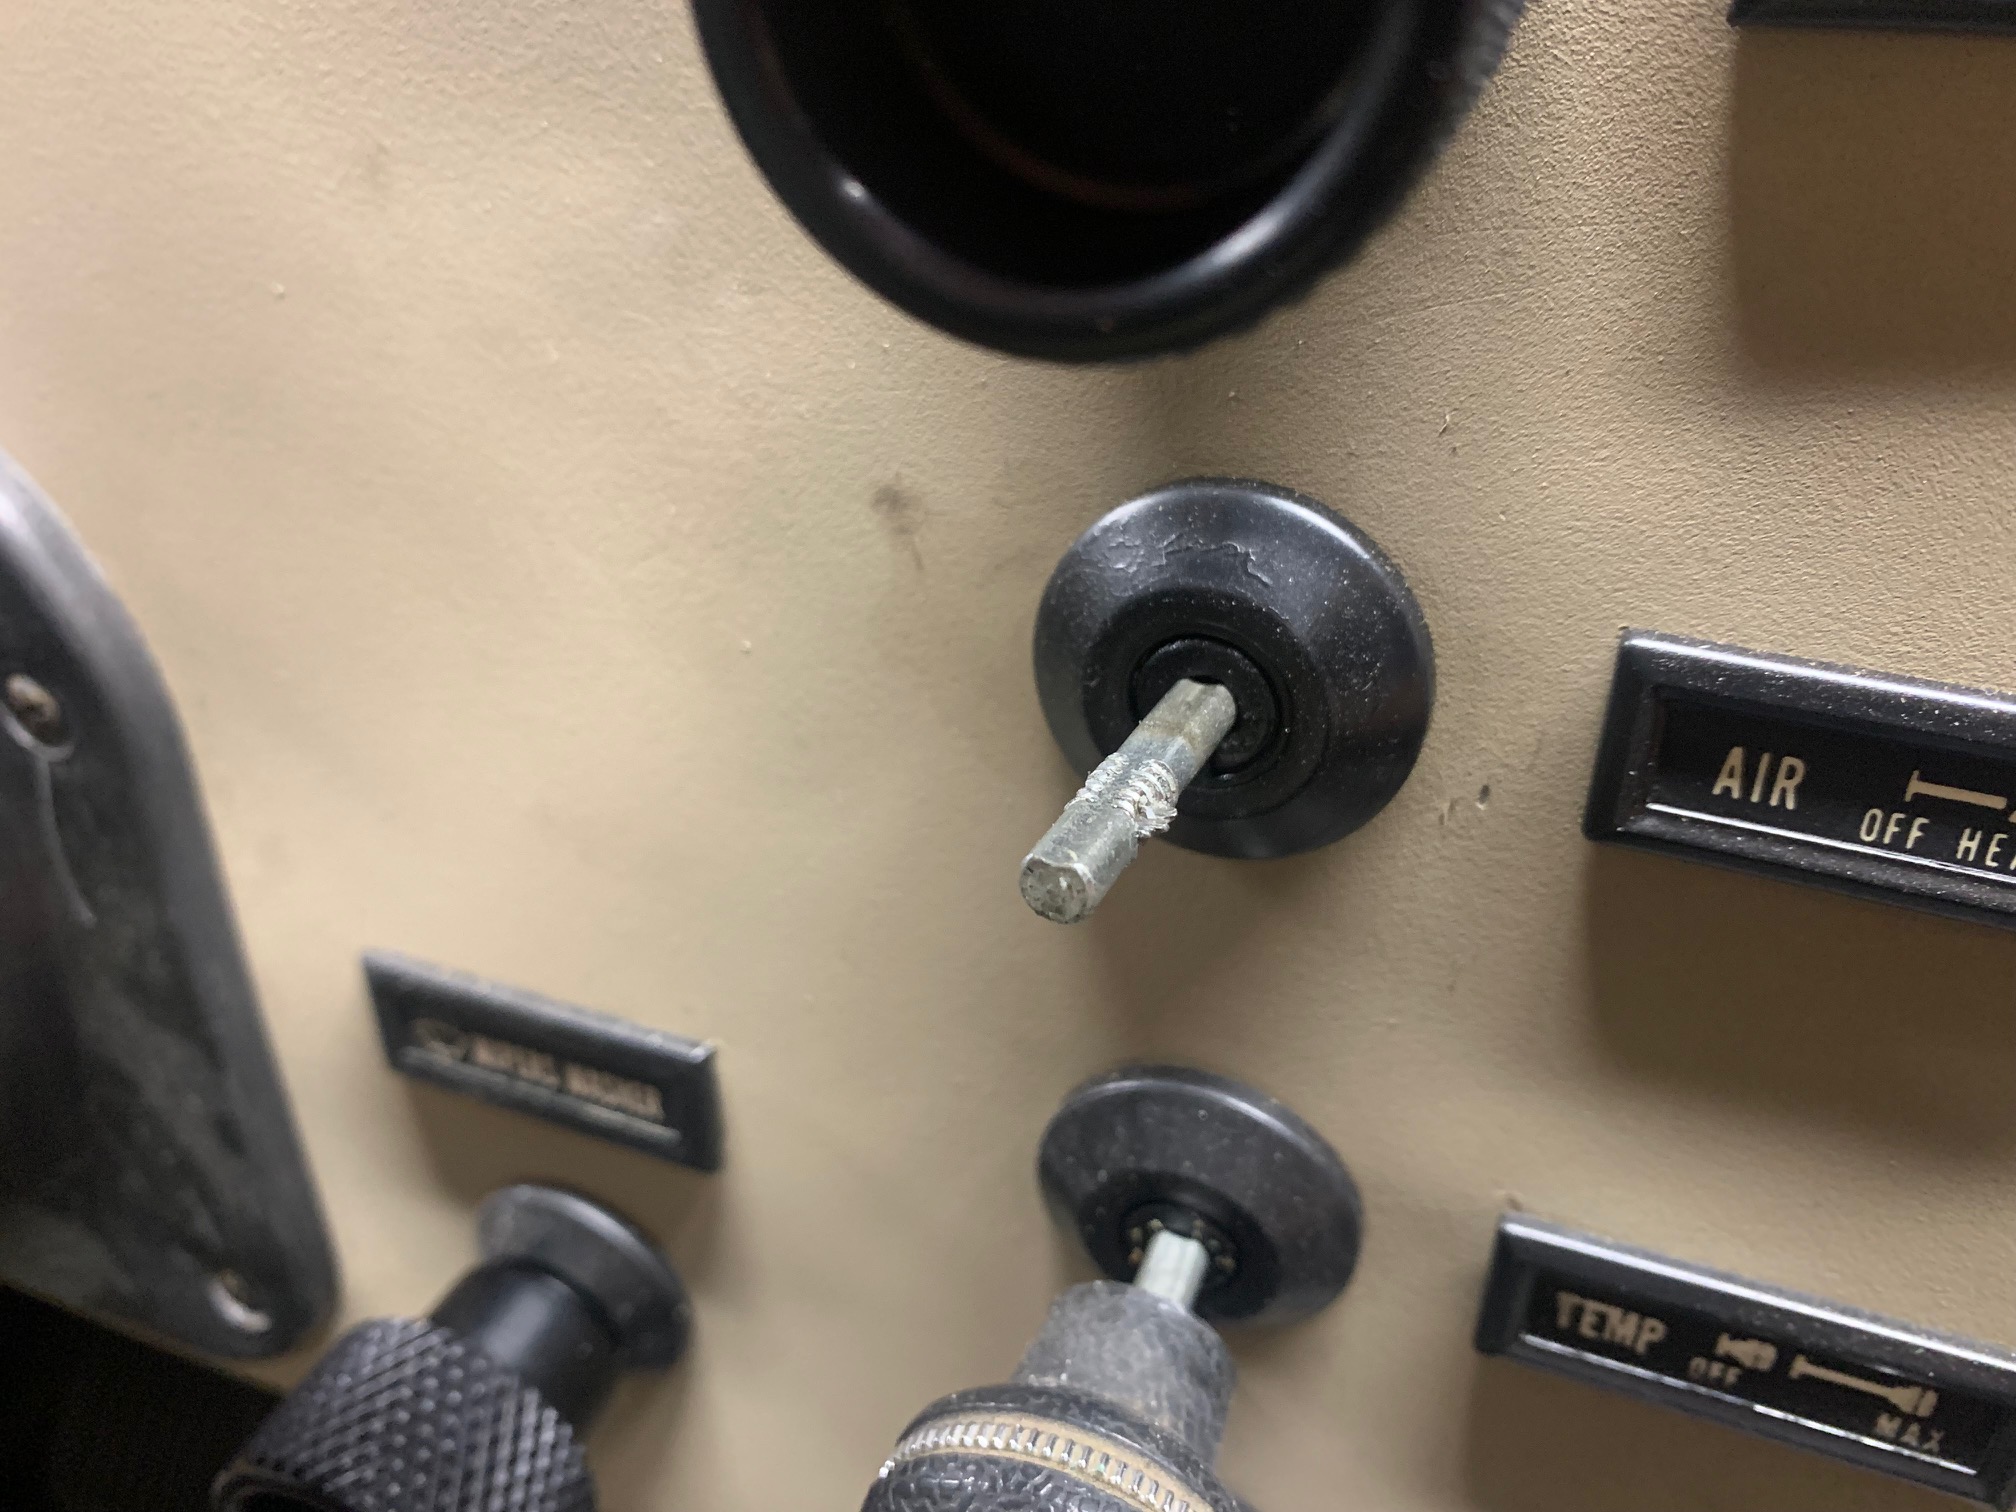
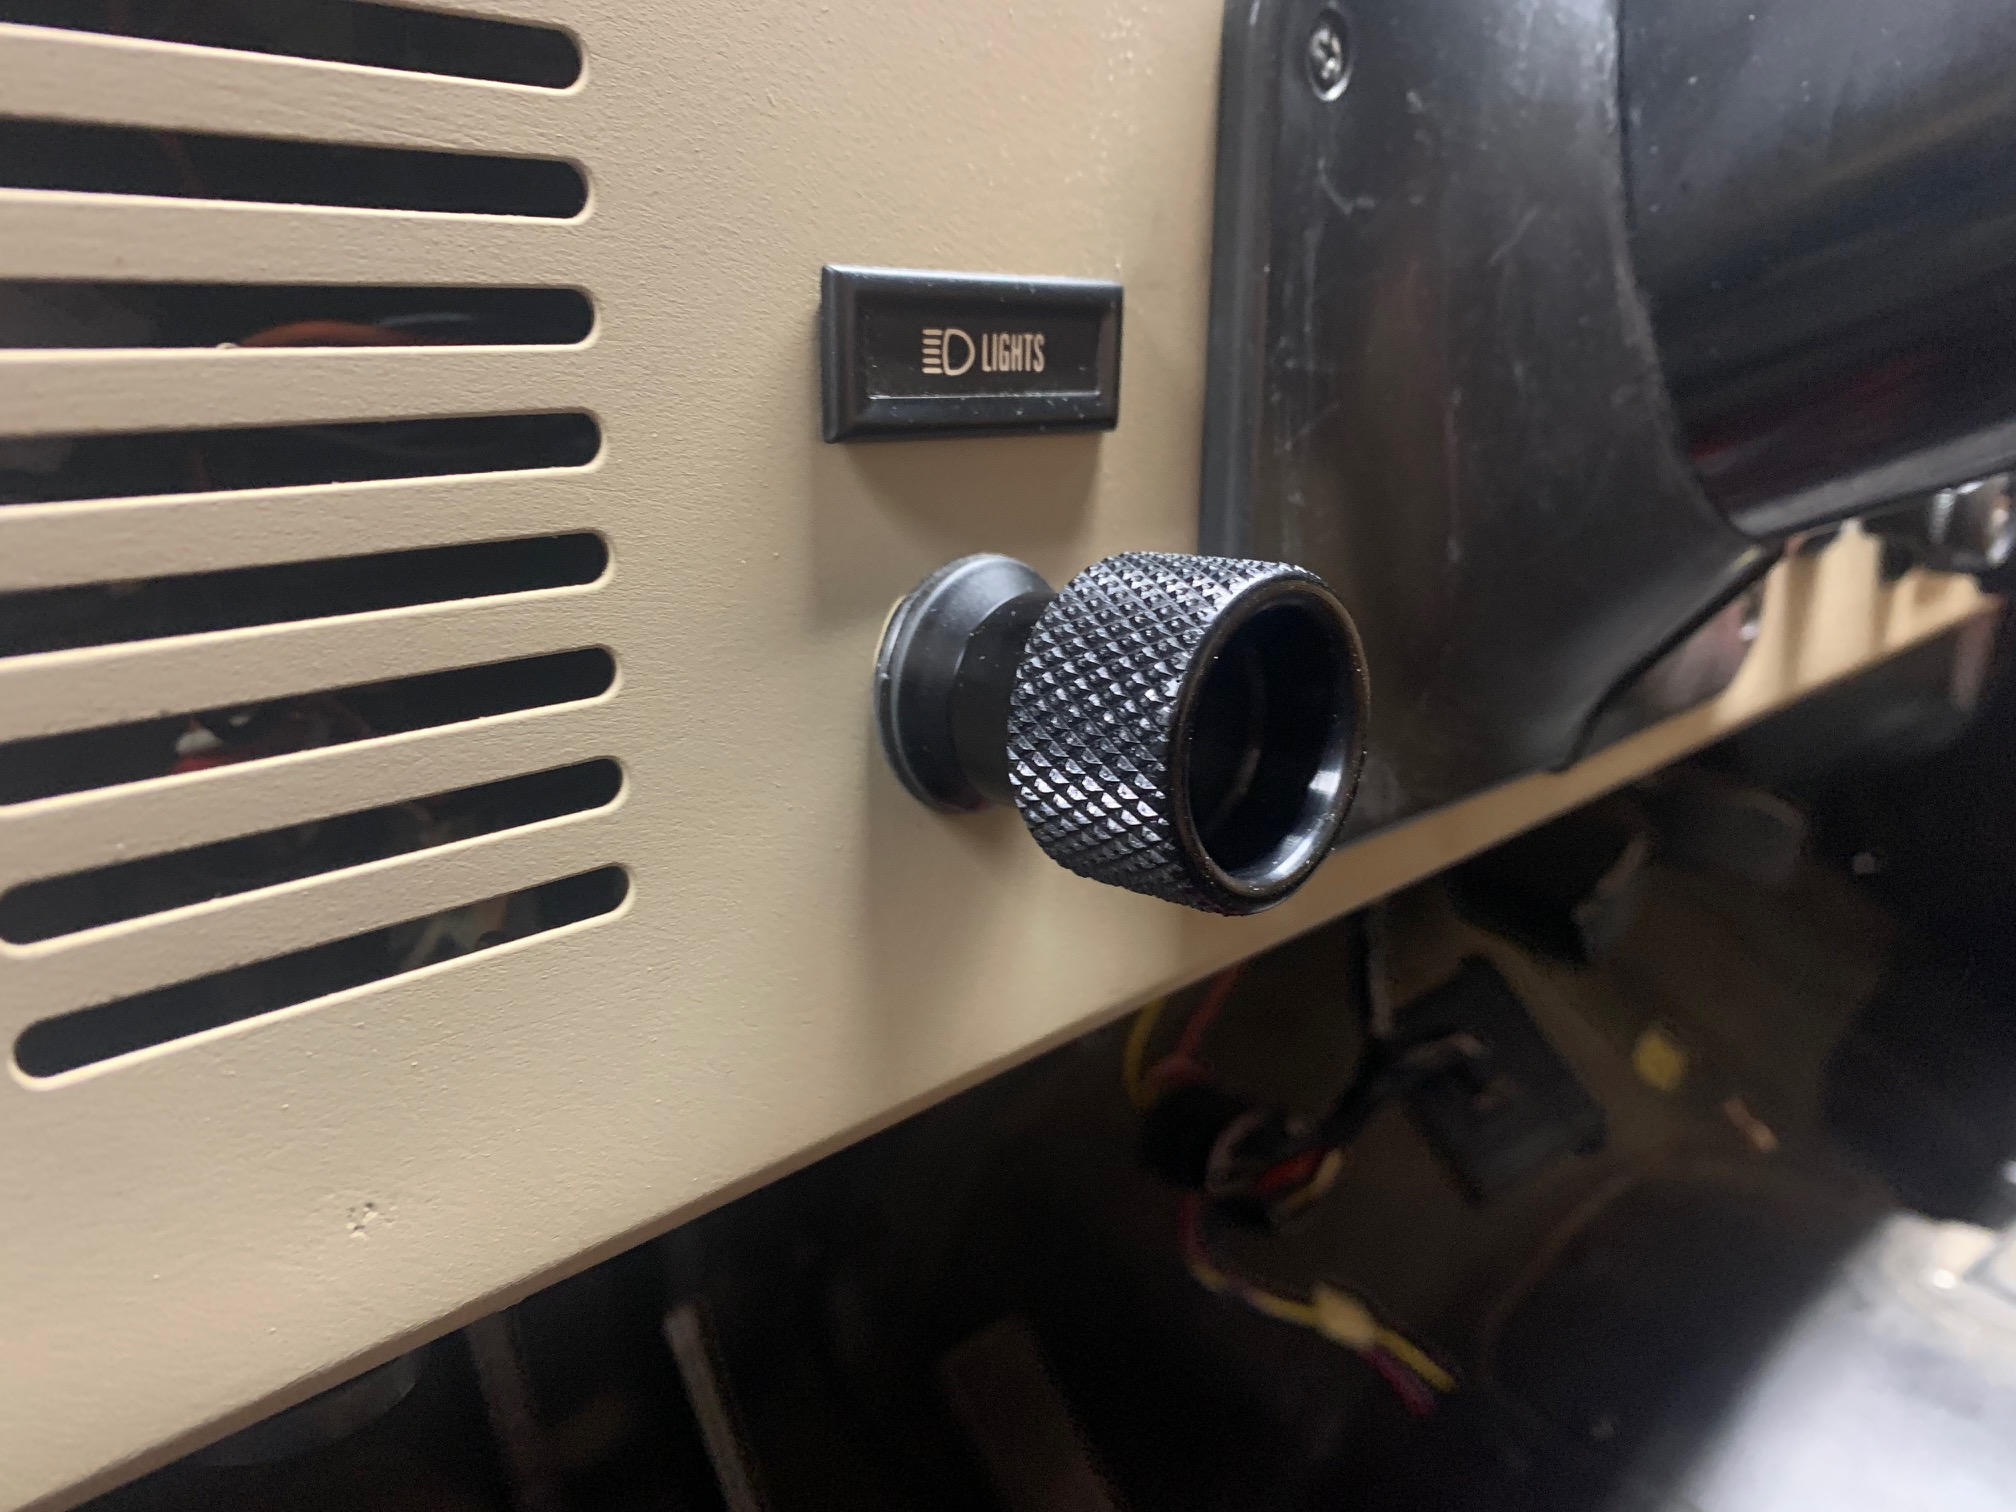
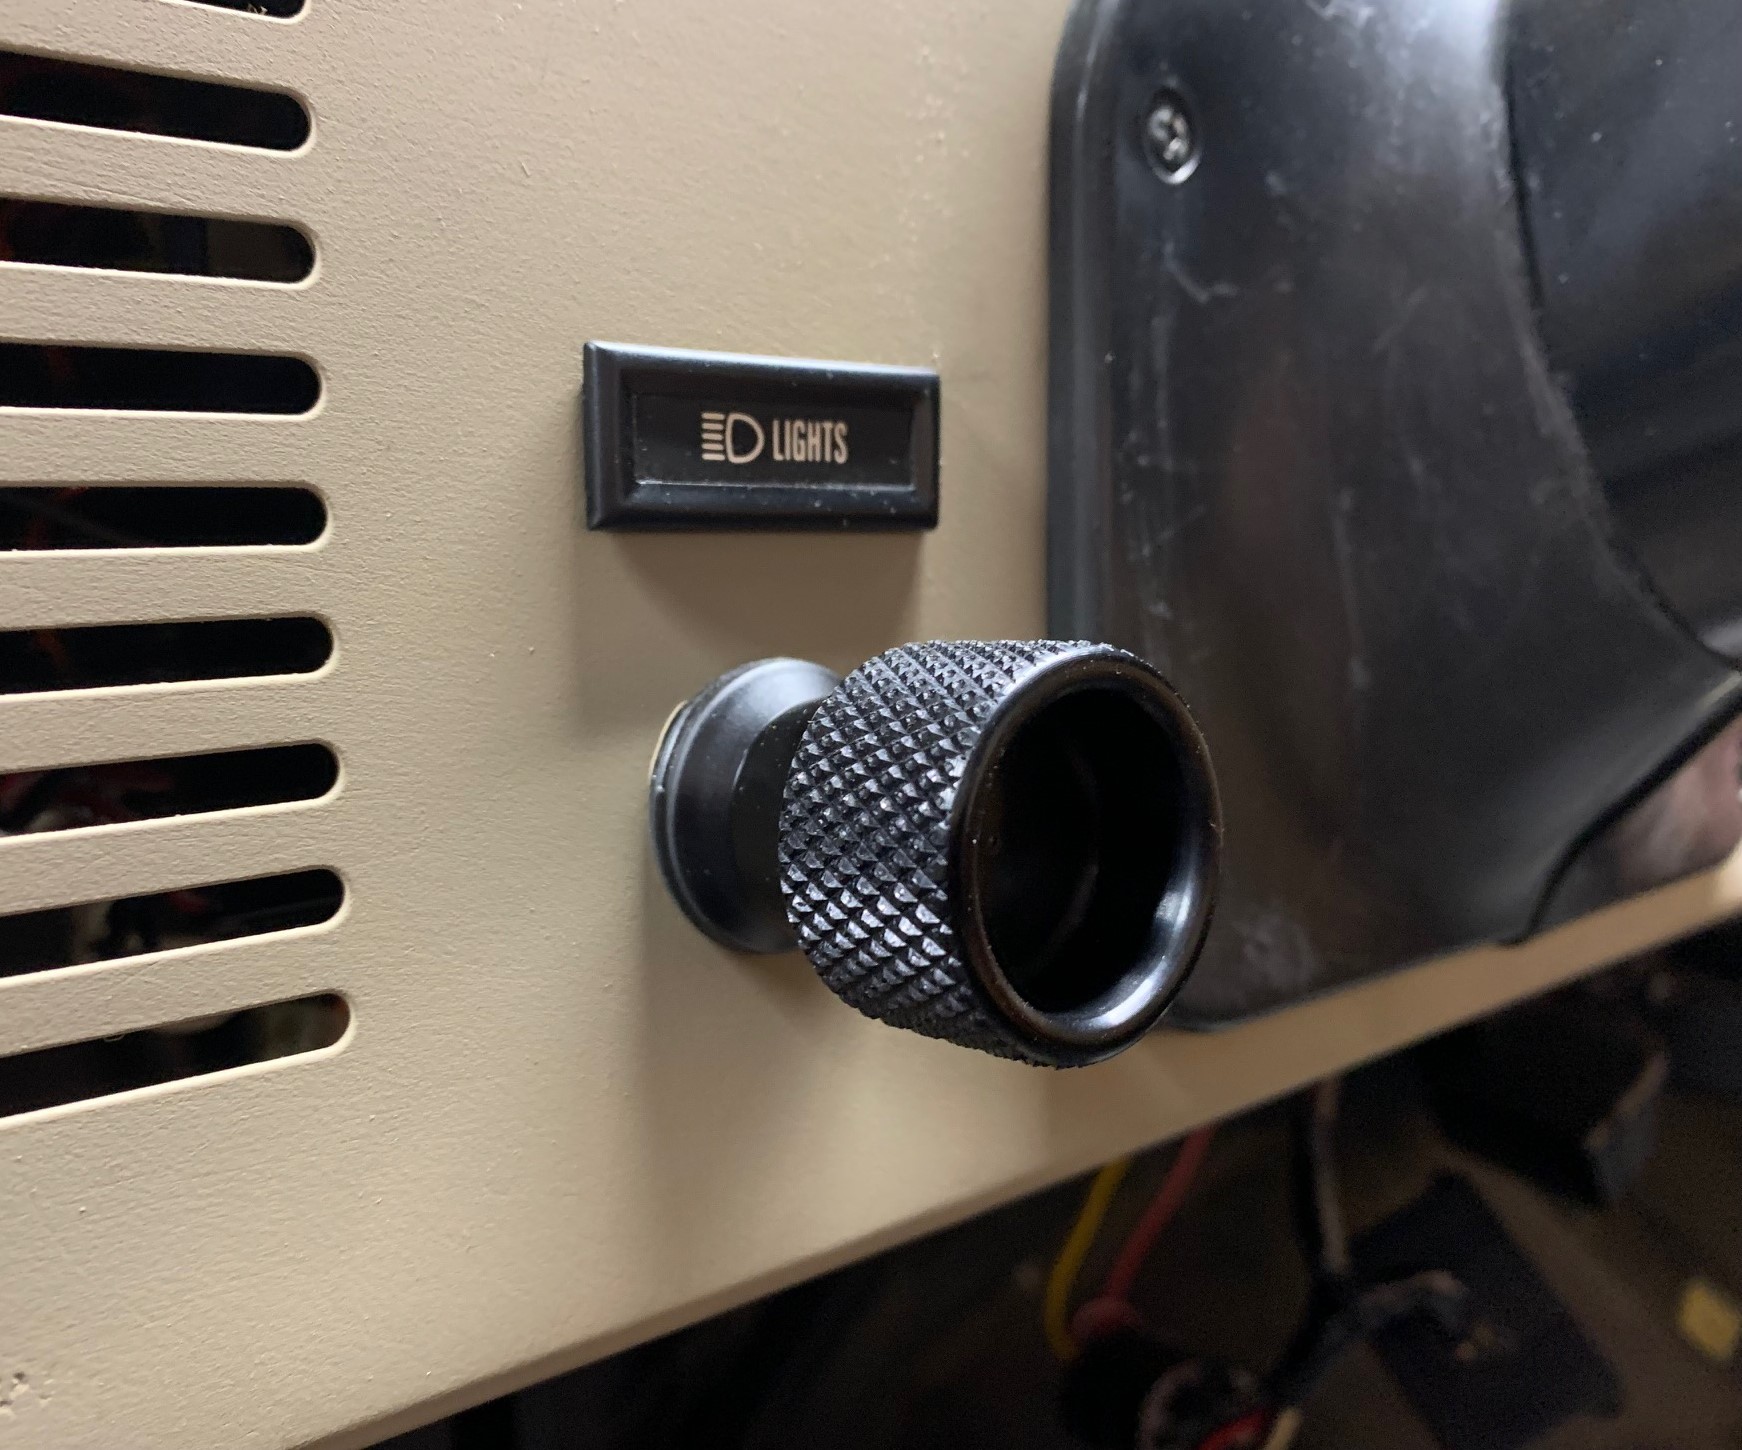
- First step in the process is to remove the factory dash knobs. Two of these are a friction fit and easily done by depressing a small lever on the backside of the knob (Fan and Wipers). The remaining knobs (Lights, Vent, Temp, and Defrost) are molded onto the shaft and unfortunately, the removal process pretty much ruins the collar section of the knob. If you have a set of original CJ dash controls, it is recommended to purchase a set of reproduction dash controls (Crown, OMIX) so you don't need to damage your originals.
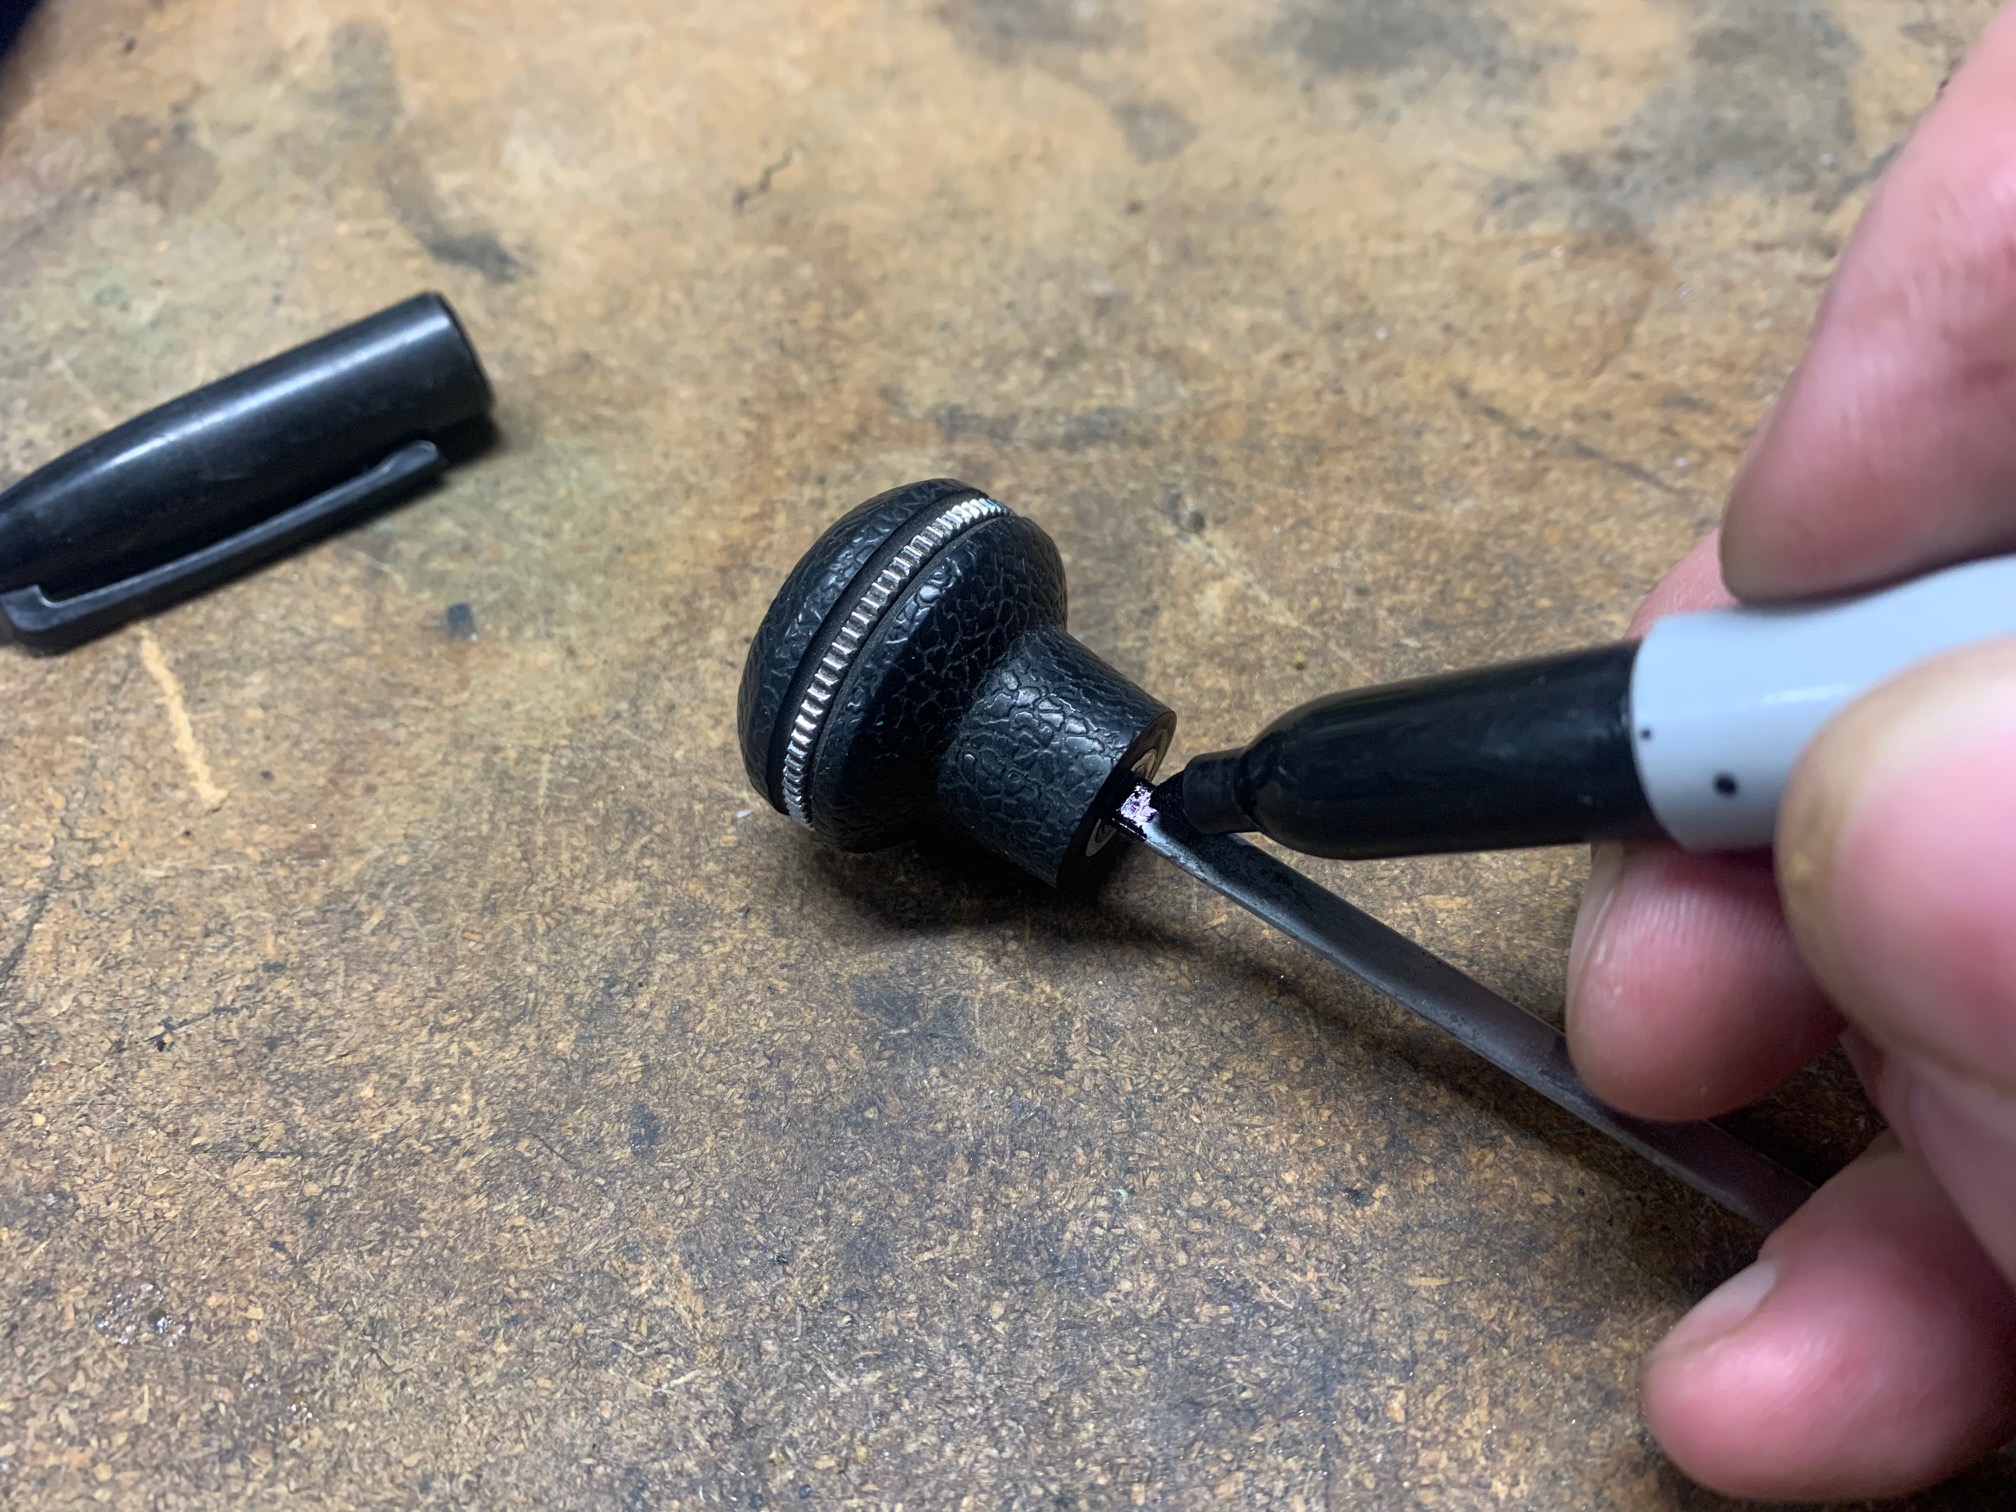
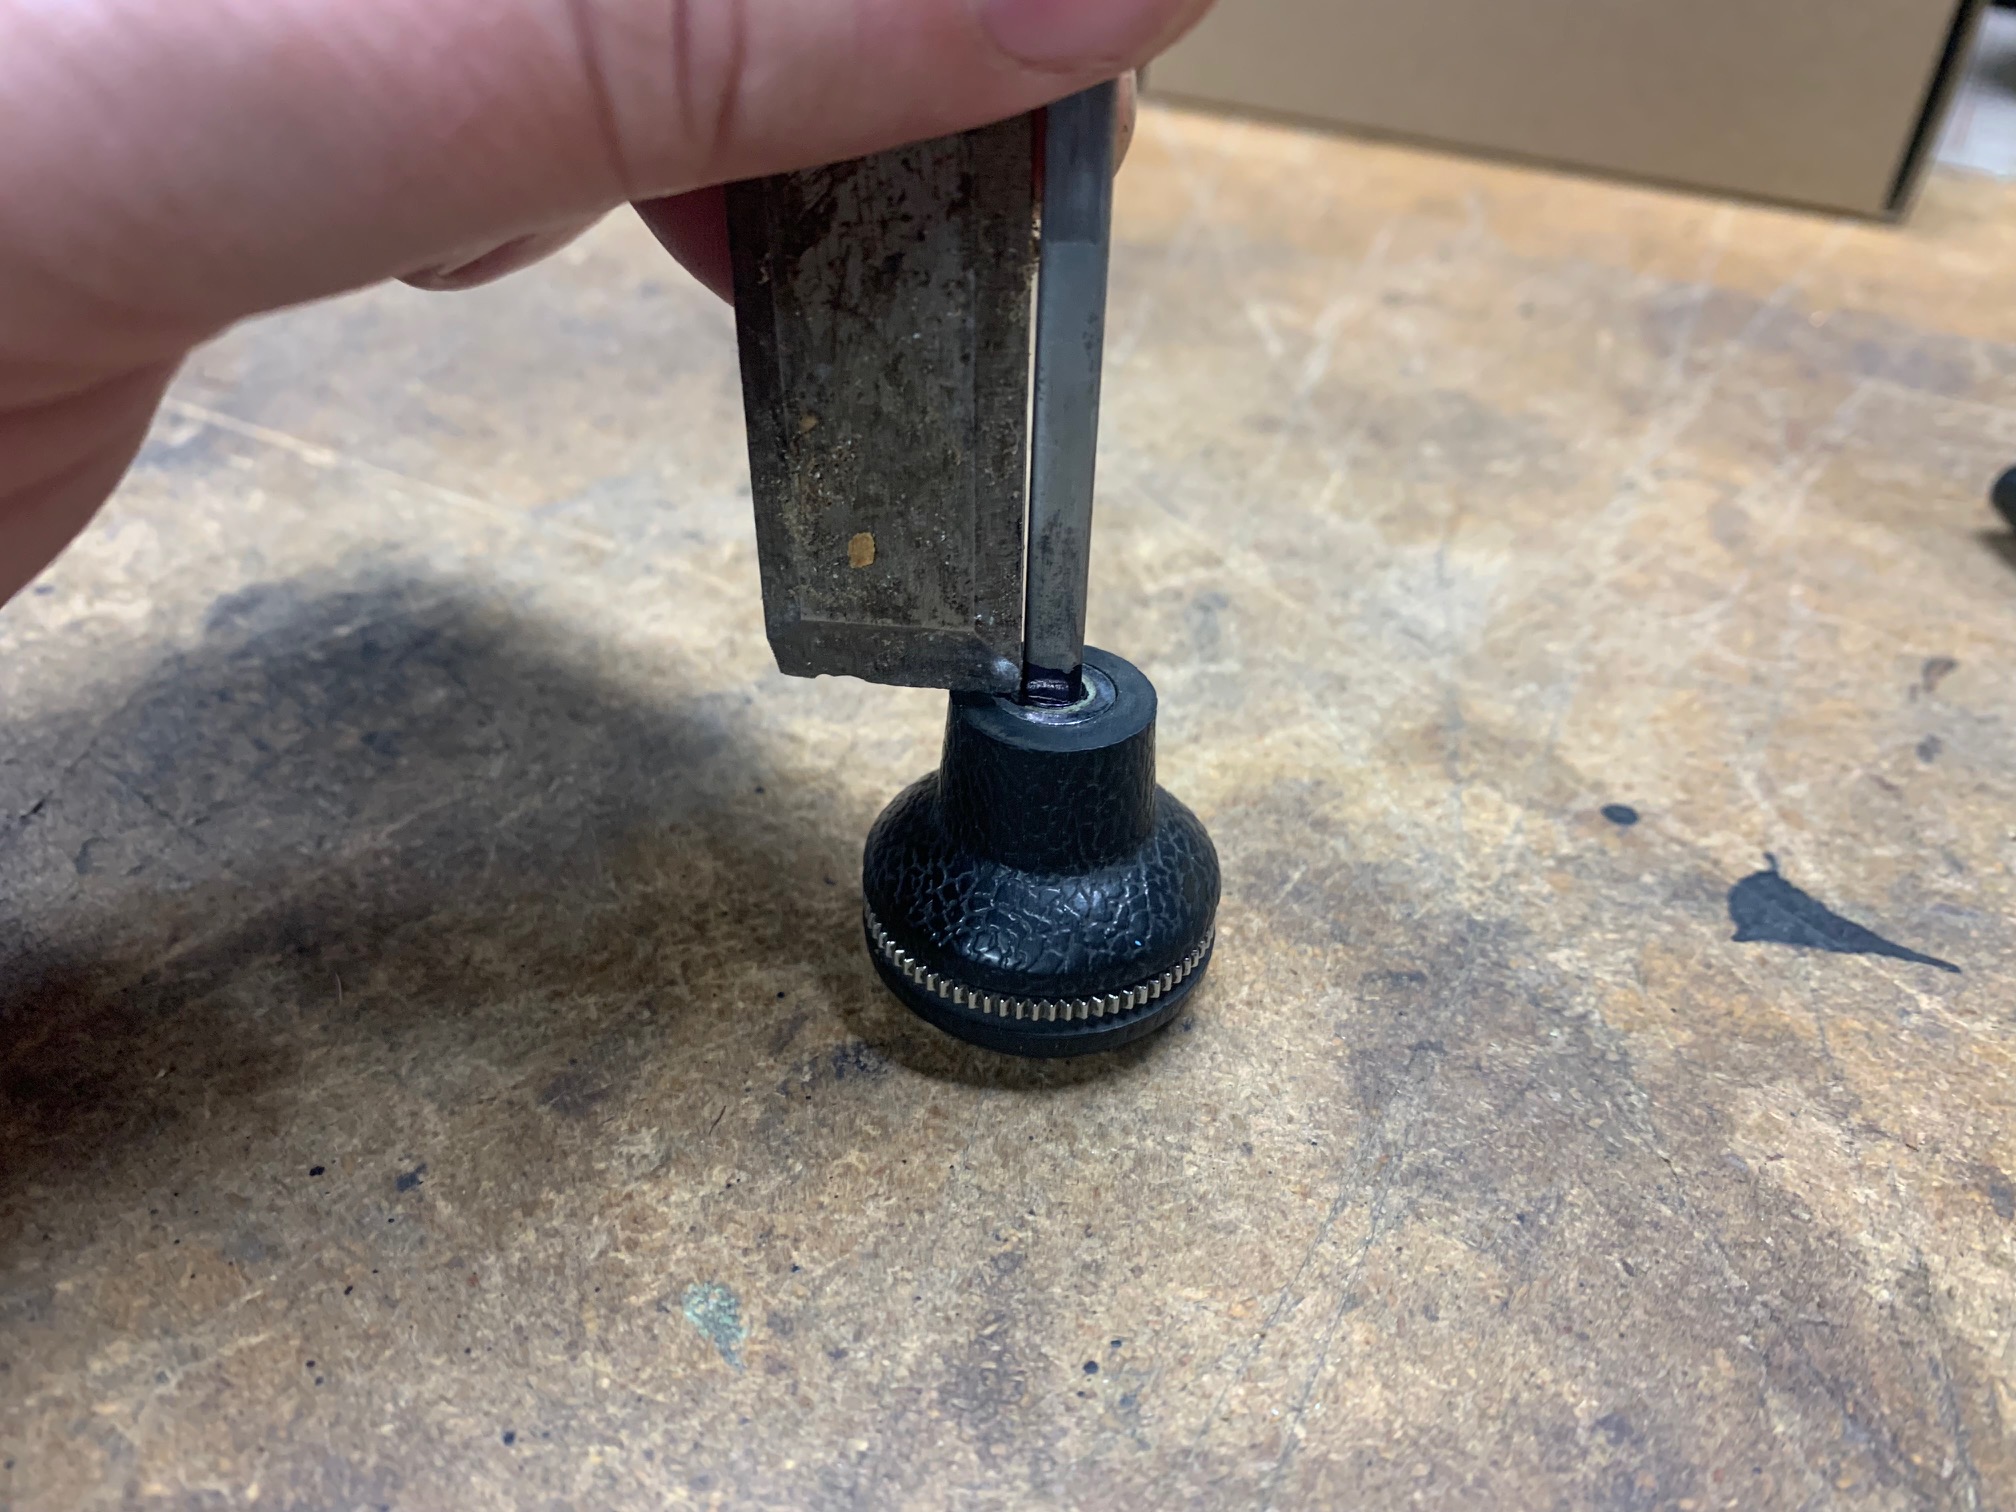
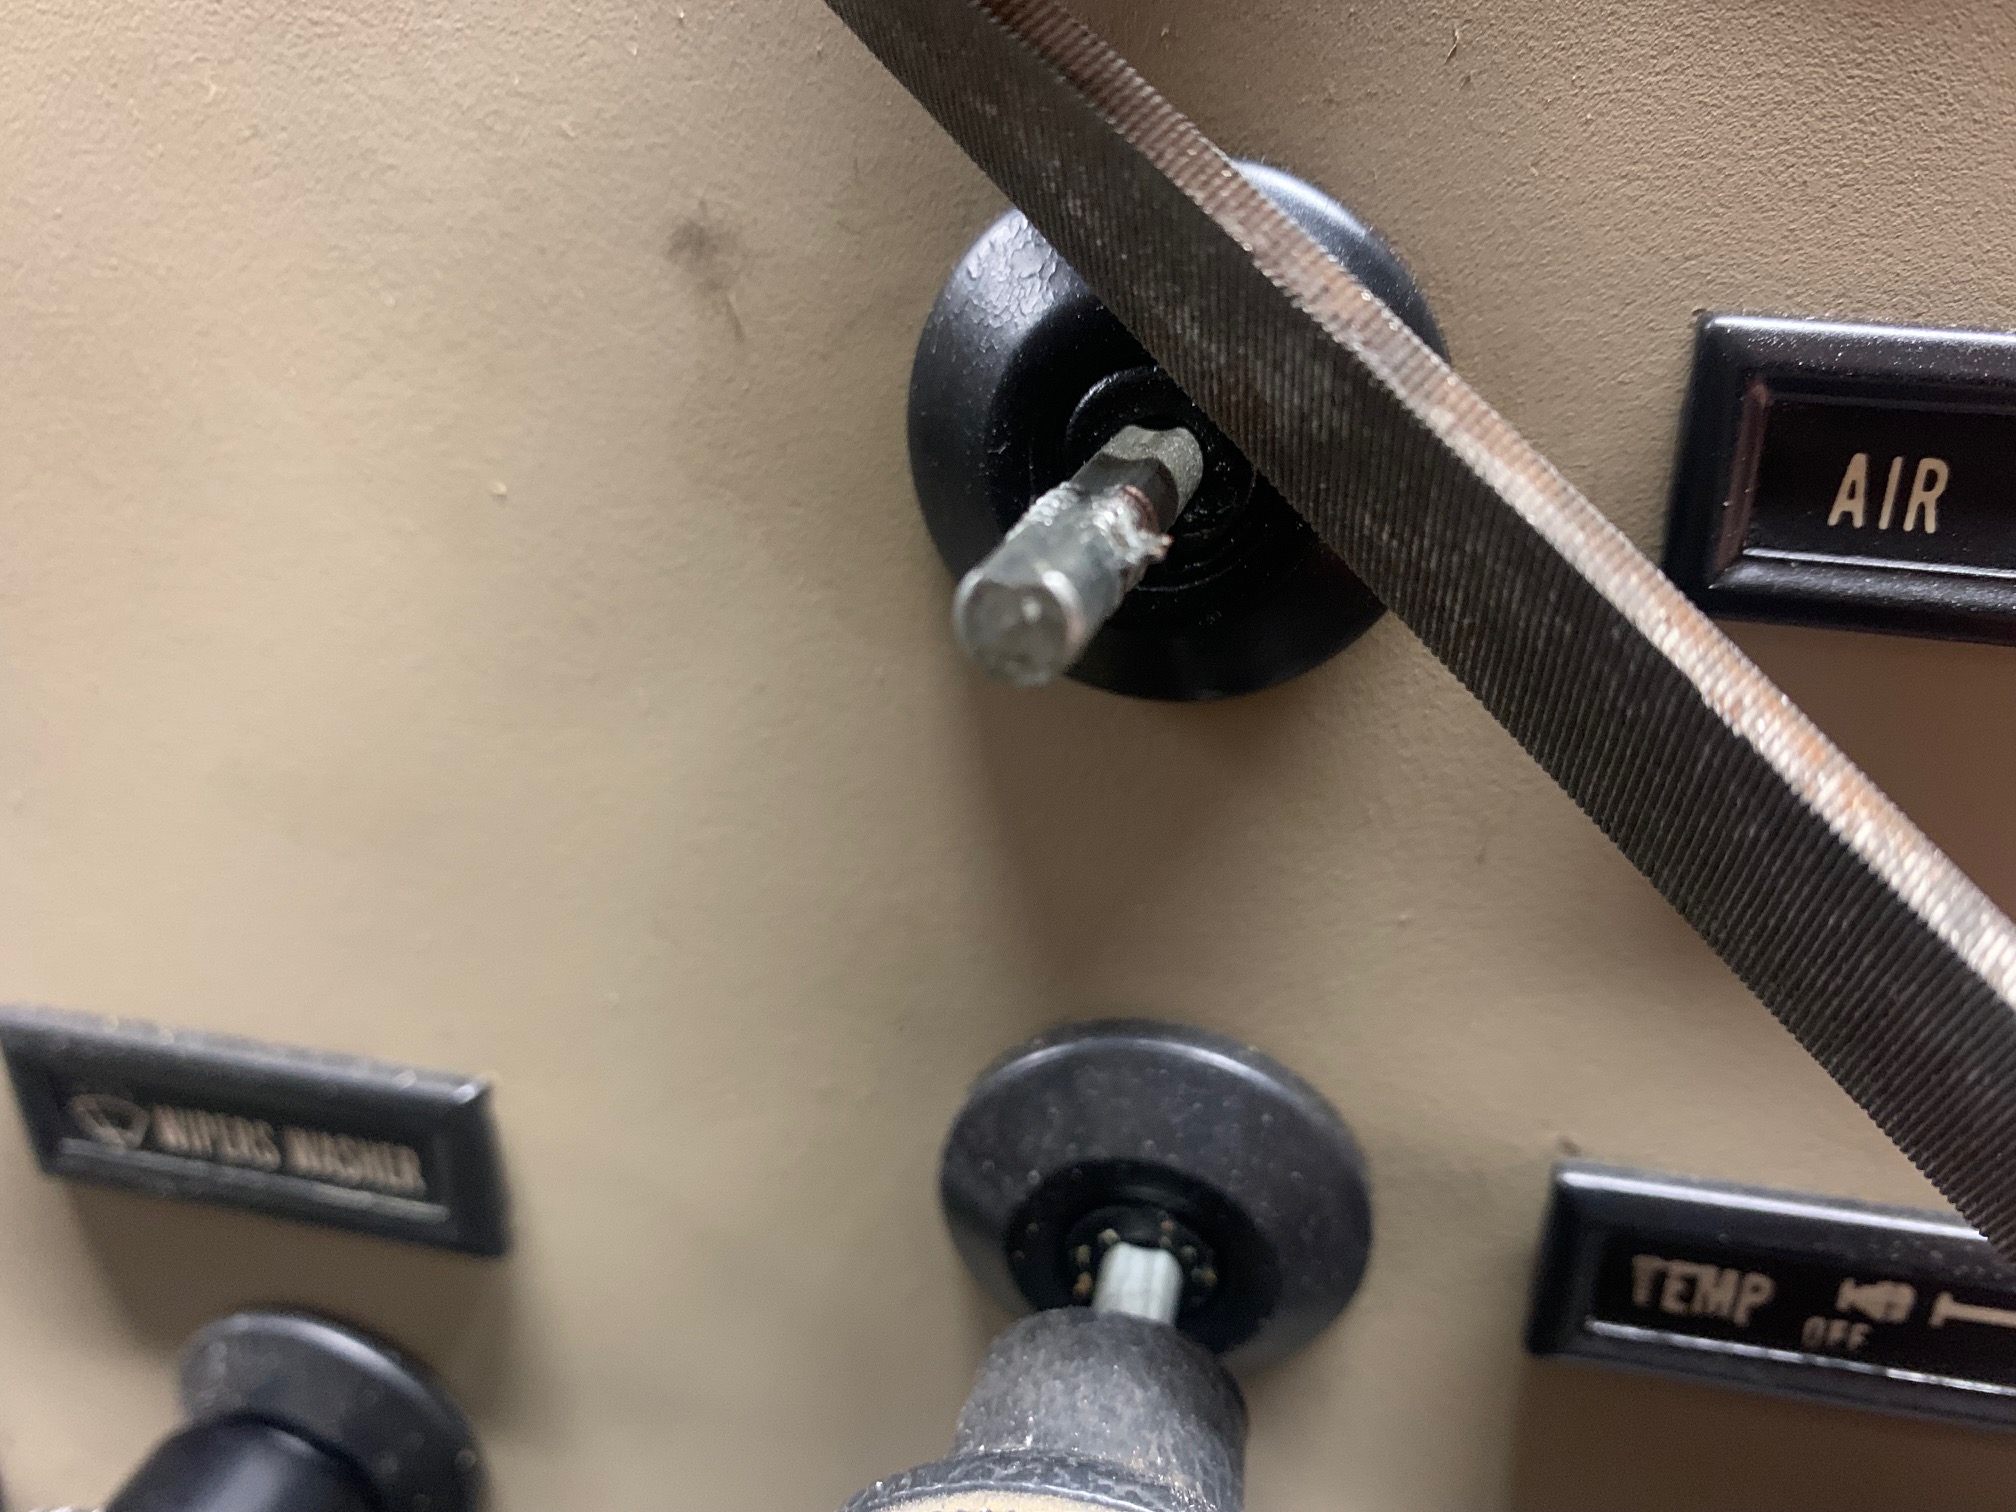
- Make a mark on the control shaft to indicate the depth when you install the new knobs. To remove the molded-on knobs, utilize a chisel and mallet and split the knob collar down the length of the shaft till the knob can be removed. This step will be eased by removing the controls from the dash and taking them to your work surface. The lights knob/shaft can be removed by depressing a small button on the side of the light switch behind the dash and pulling the shaft out.
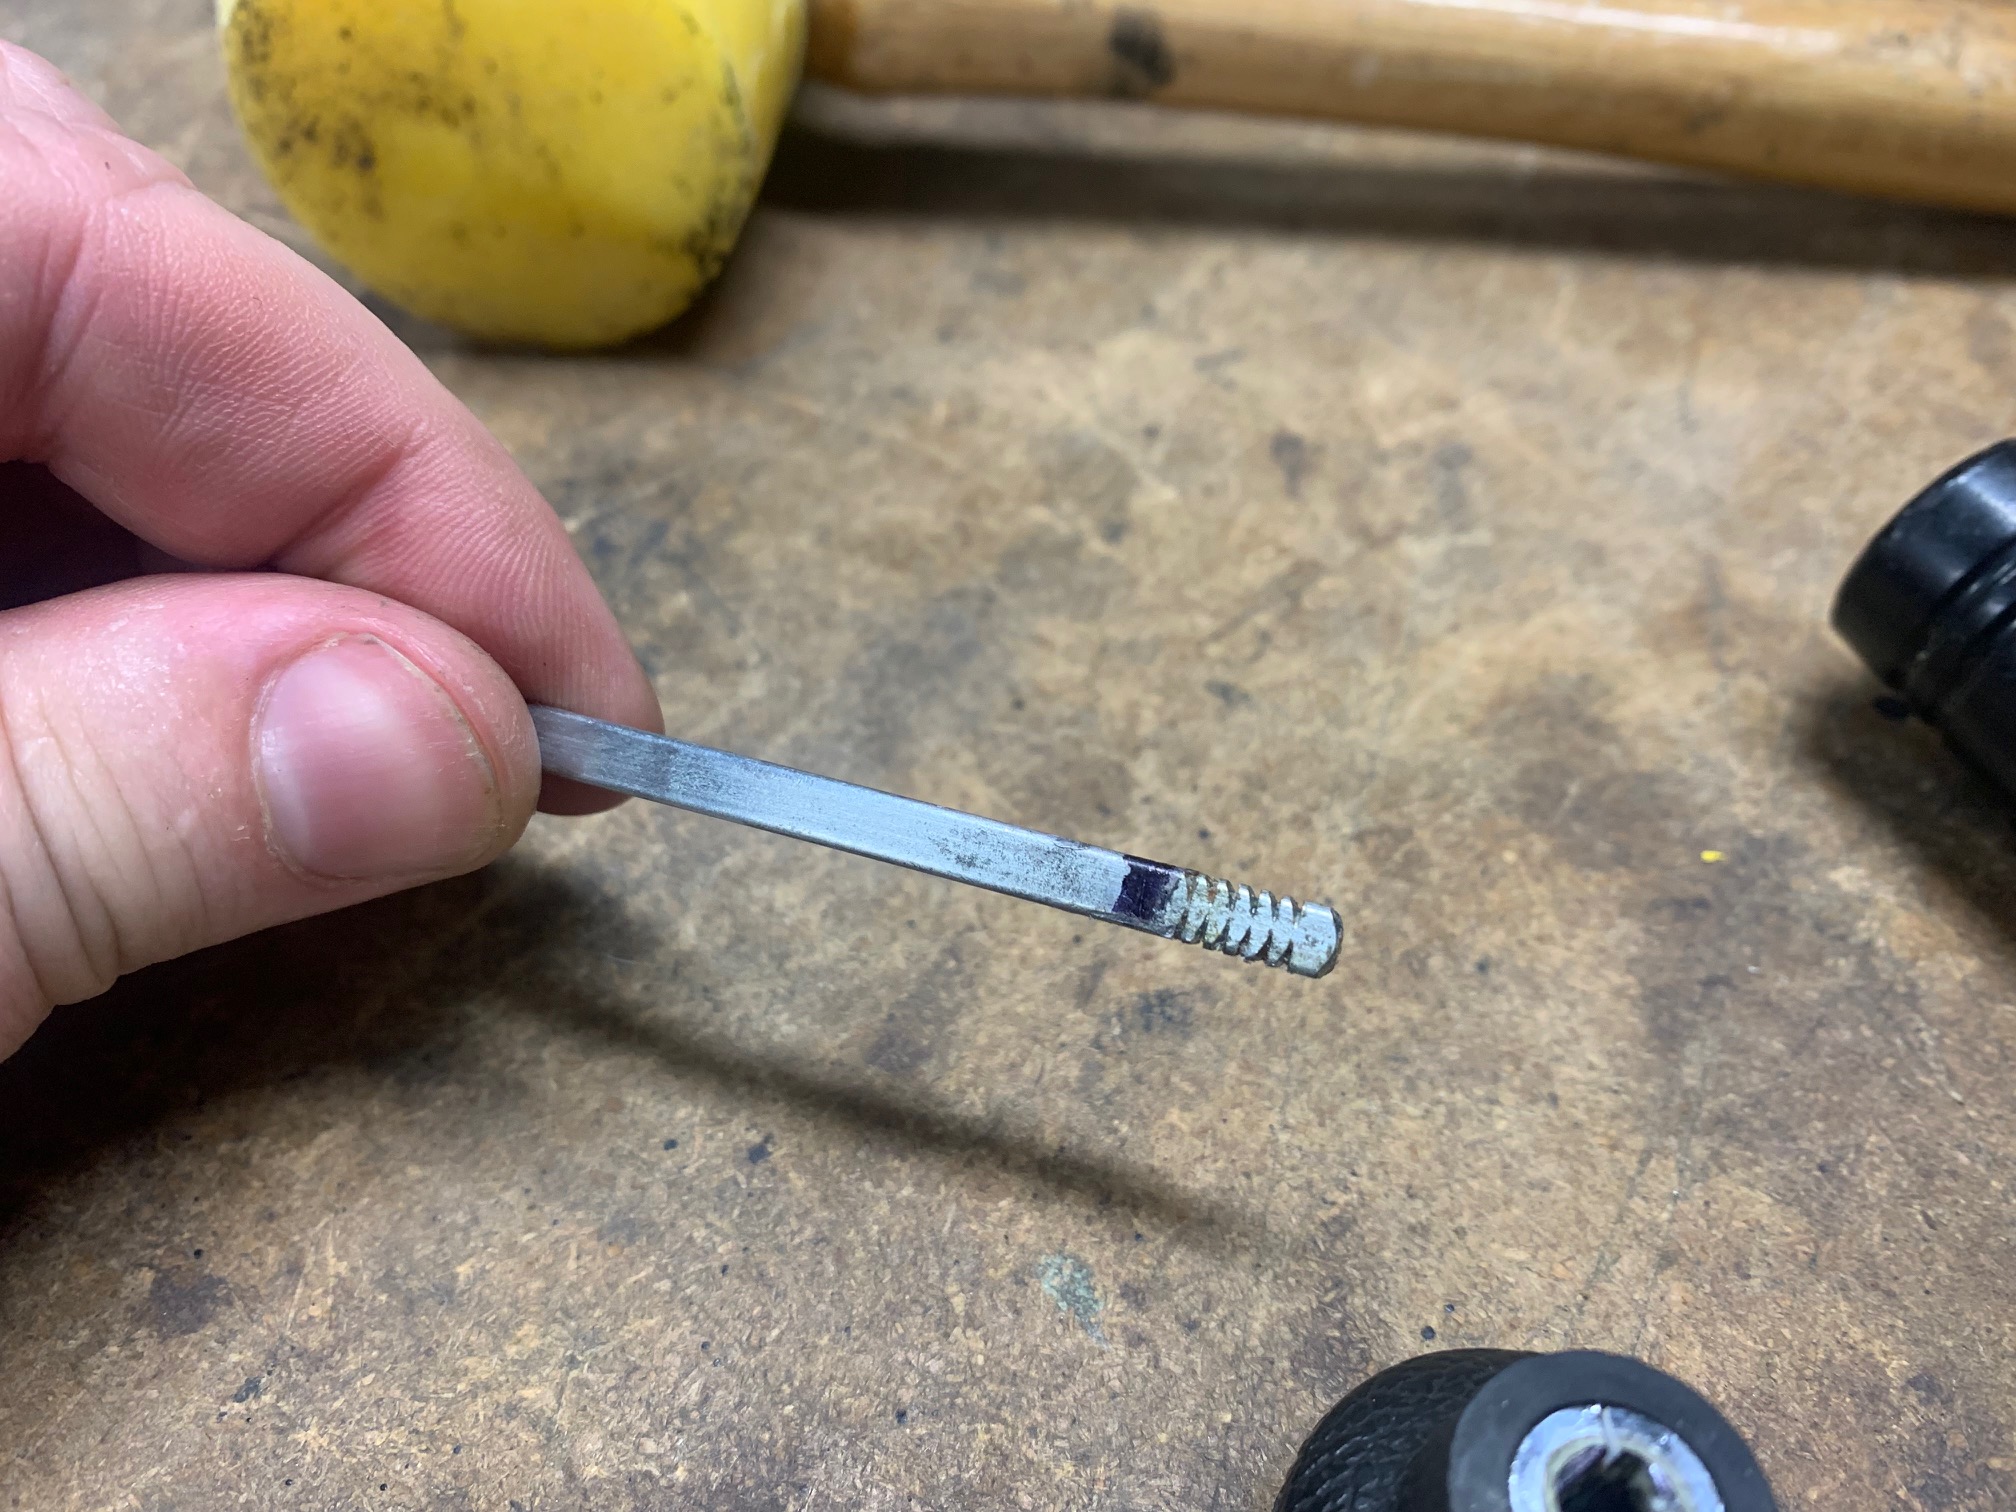
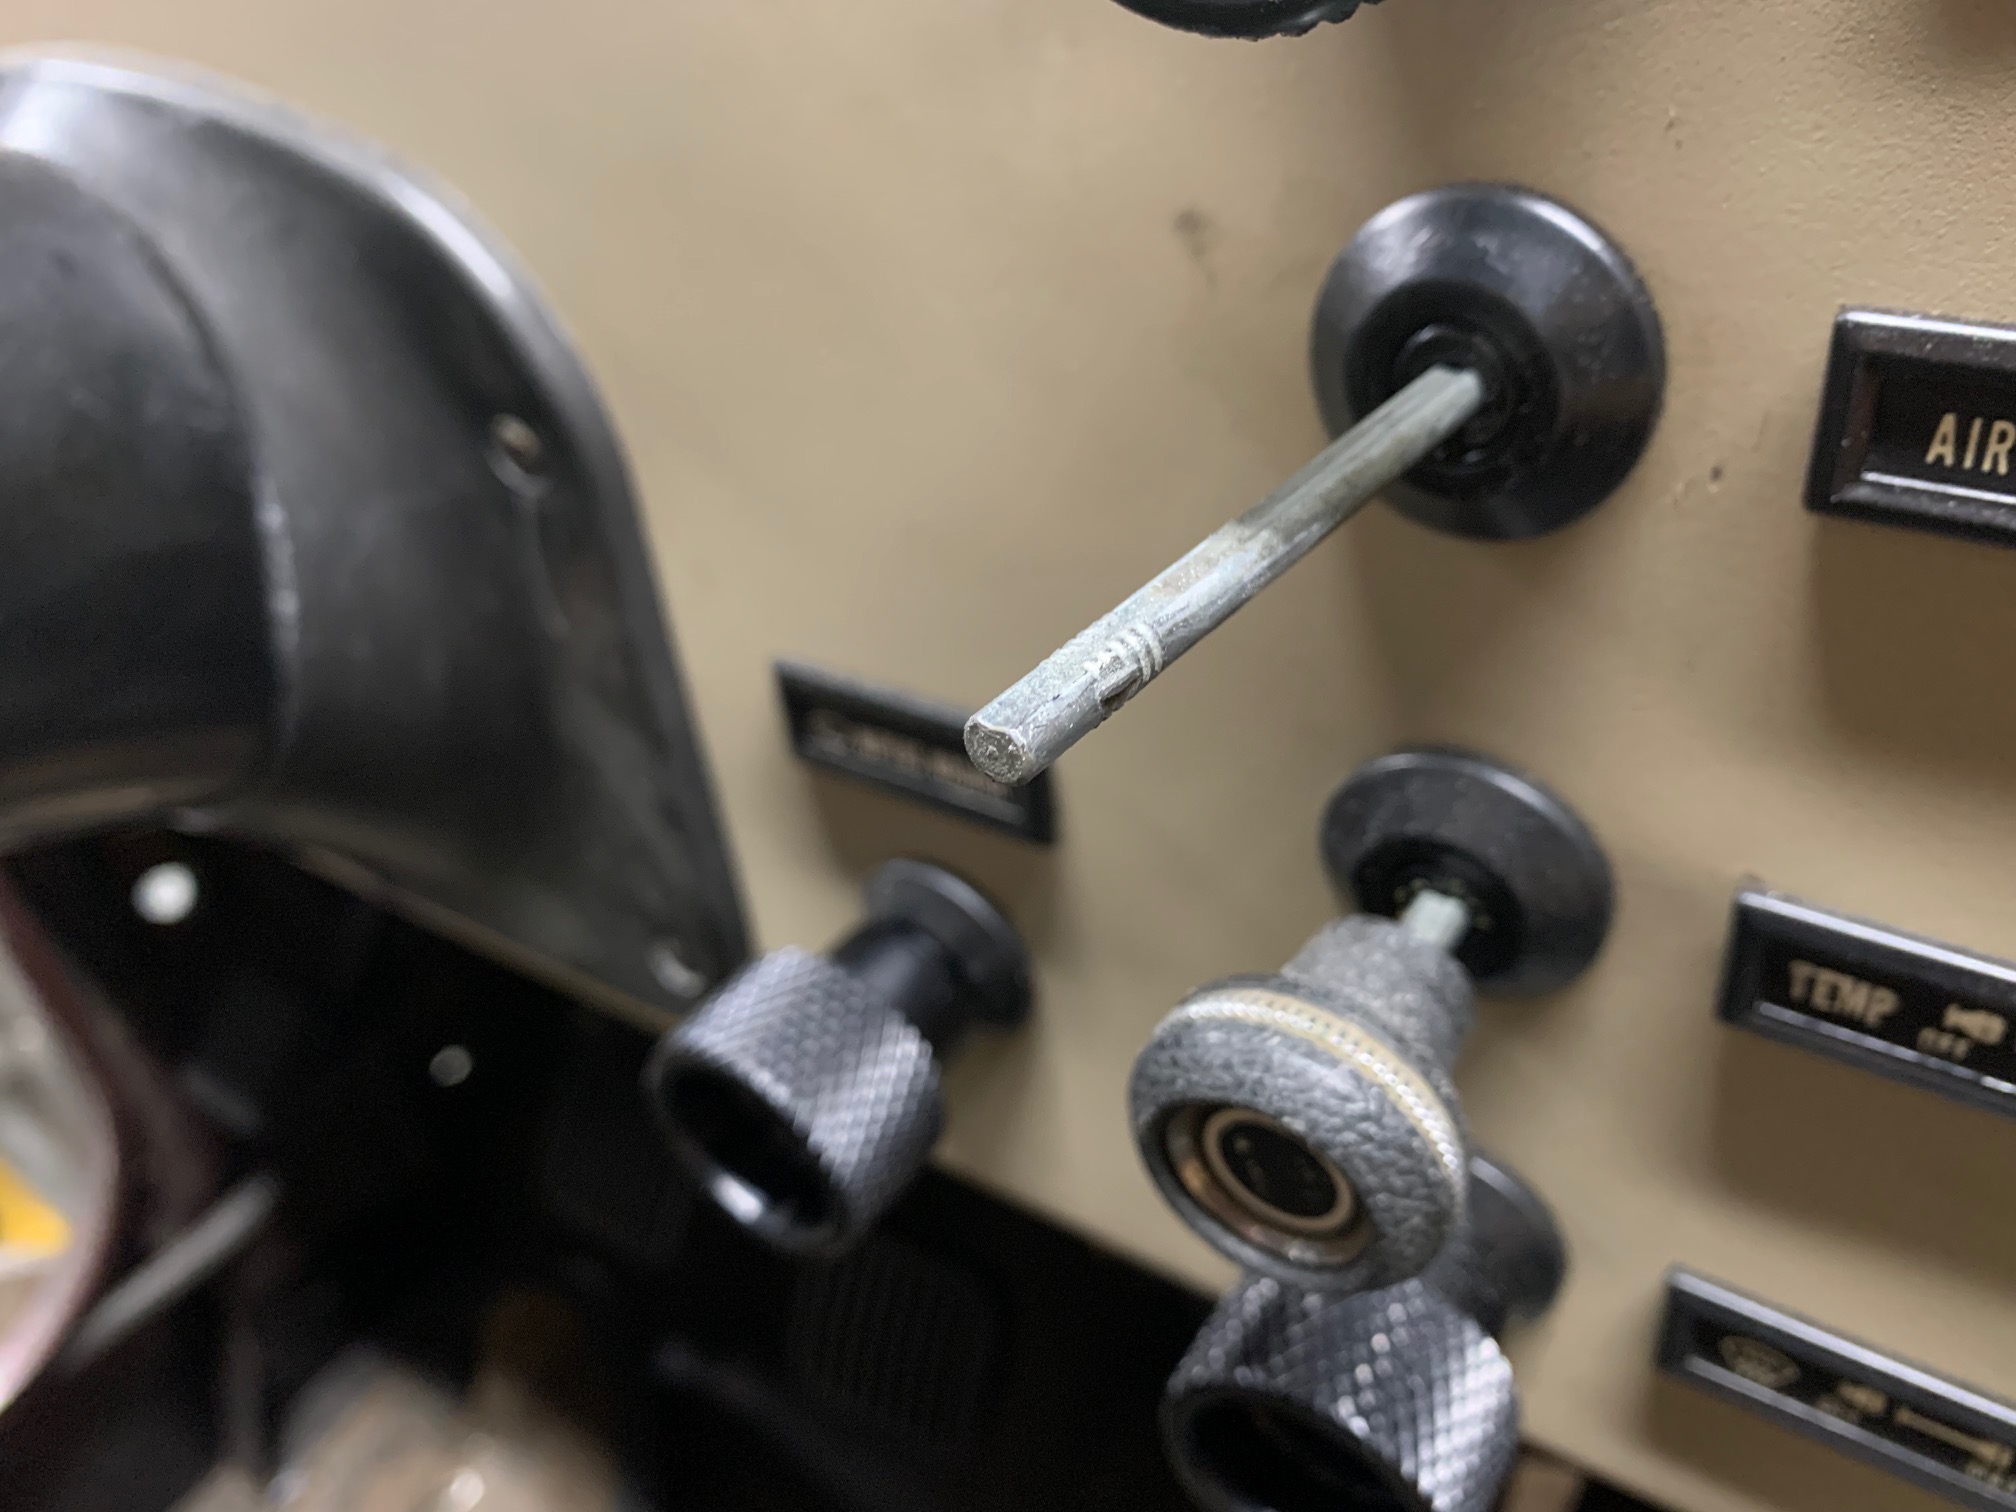
- There with be some 'teeth' left on the control shafts that help the molded-on knobs stay attached. You will need to file these 'teeth' off so the CravenSpeed knobs can slide on.
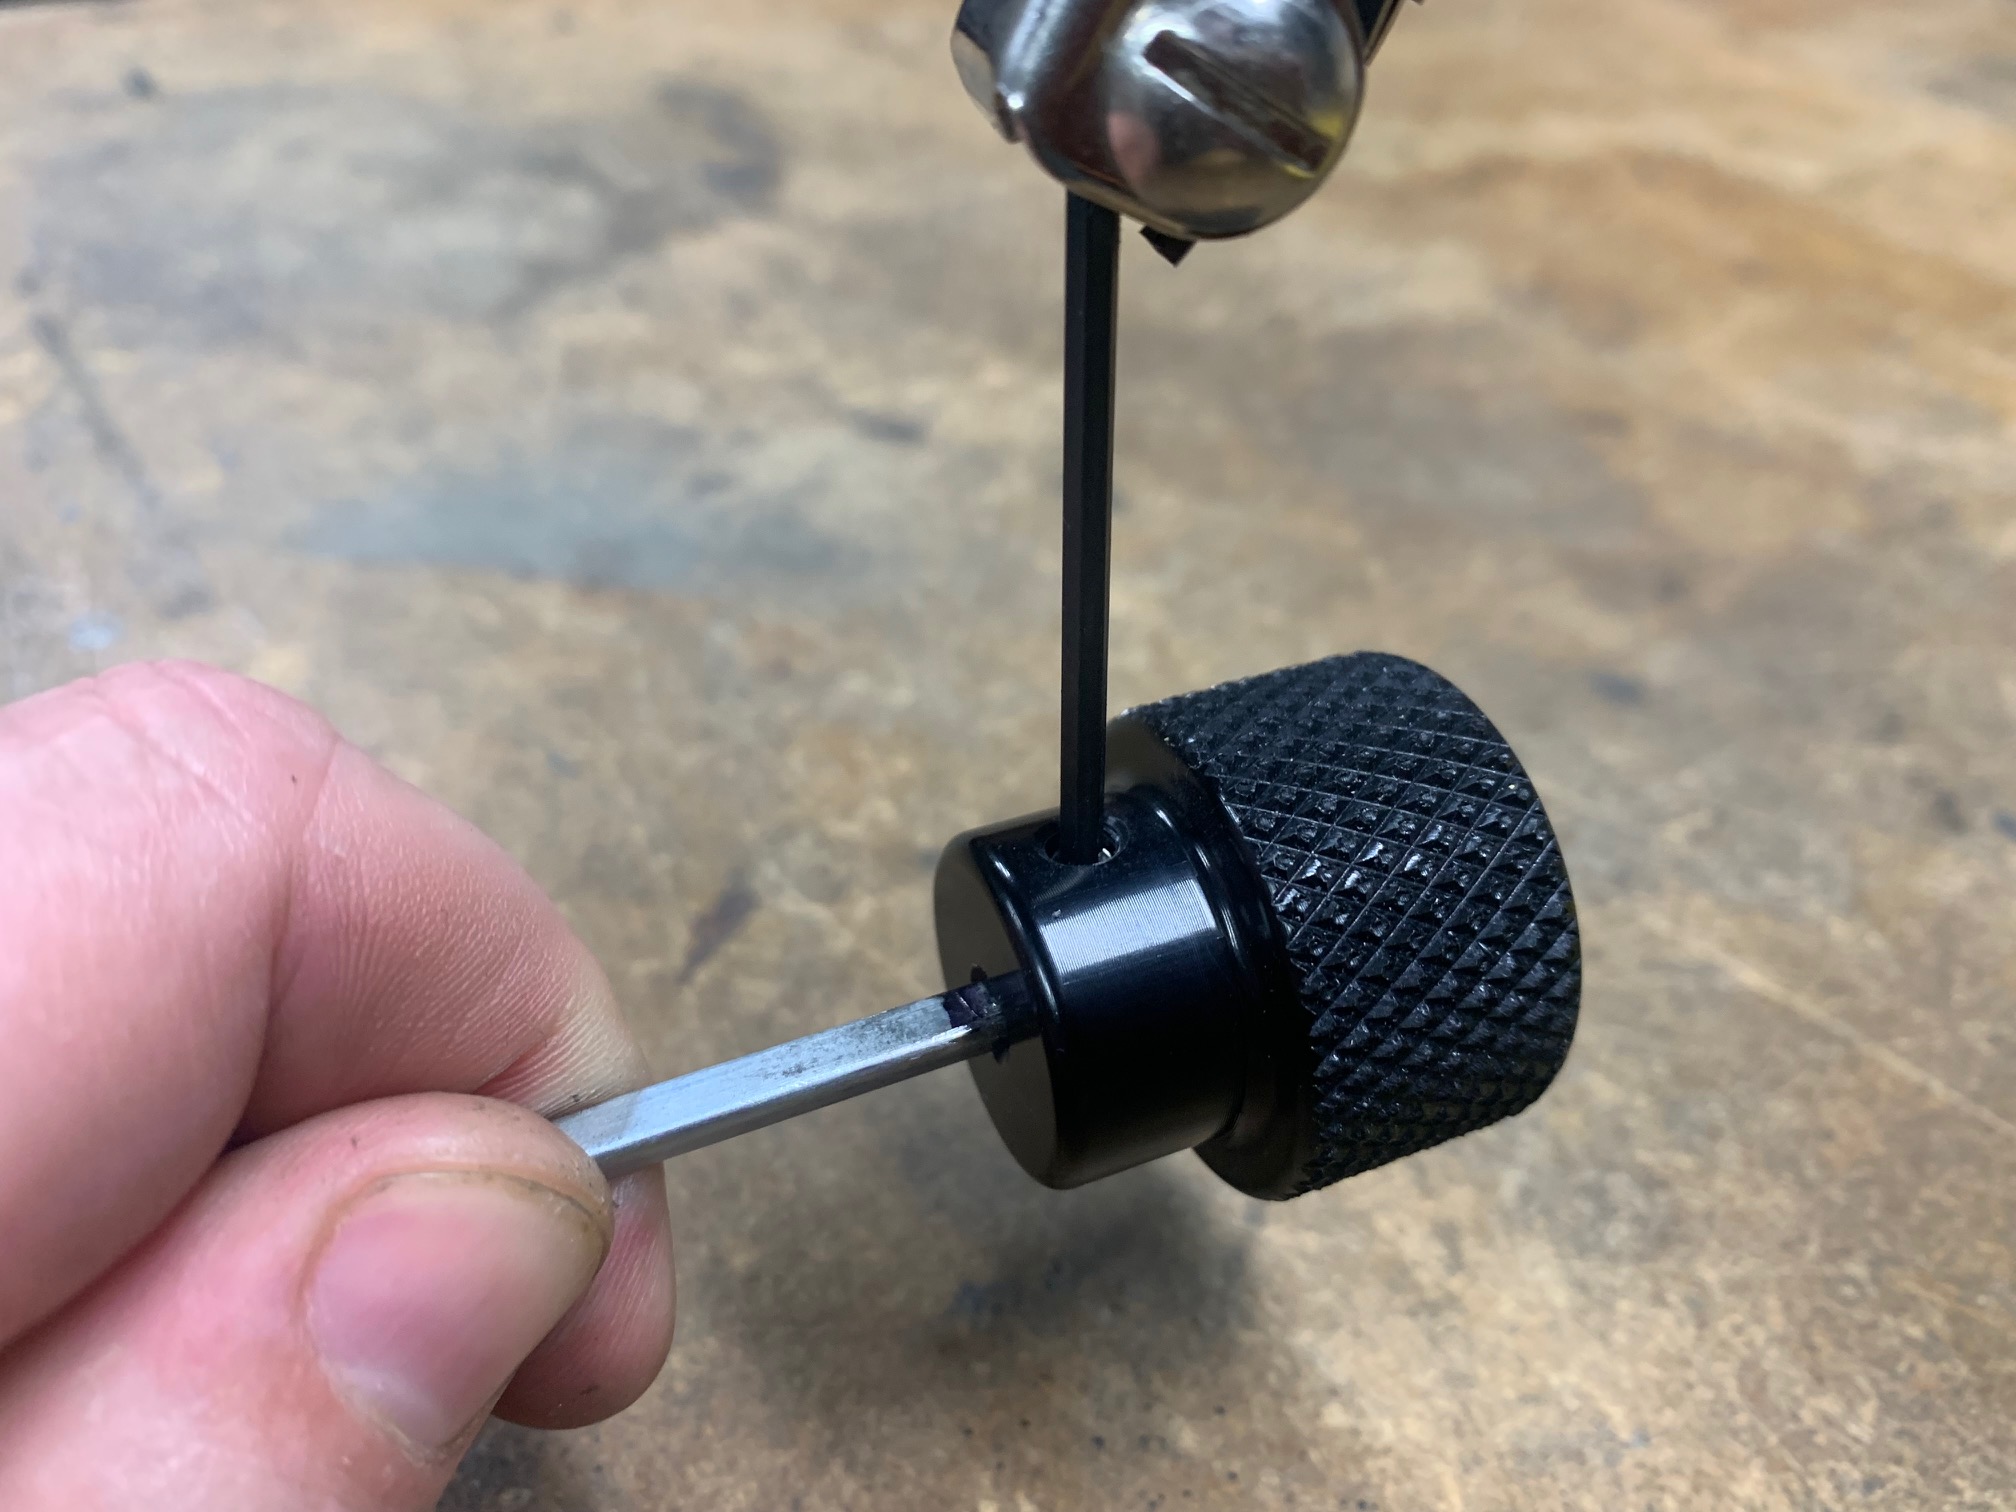
- Insert the set screws into the collars of the knobs.
- Finish the install by placing each dash knob onto it's proper control shaft and tightening with the included 3/32nd hex key. Maintain proper spacing from the dash so that the rotating controls do not bind against the dash.
- You’re finished! Marvel at your handiwork then go for a drive and enjoy your upgrades!