THANK YOU for purchasing the MINI Gen 2 (Refresh) Tapless Oil Adapter from CravenSpeed. This product is made from the highest grade materials, and is guaranteed to be free from defects.
***EXTREMELY IMPORTANT*** THE ENGINE MUST BE COLD PRIOR TO INSTALLATION OF THIS PRODUCT.
1. Park your MINI in a level, well-lit area and pop your hood. It’s a good habit to disconnect the negative (-) battery terminal anytime you’re working around your MINI, so grab your trusty 10mm socket and do this now.
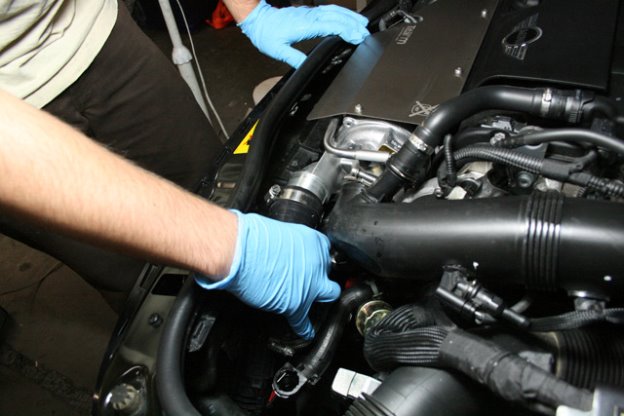
2. Use a flathead screwdriver to loosen the hose clamps on the hose connecting the air box to the intake on the turbo. Pull the hose back from the air box.
3. Loosen the hose clamp around the intake hose connected to the air filter box.
4. Unplug the MAF sensor and move the intake tube to the side.
5. Loosen the hose clamp around the intake hose connecting the turbo to the intercooler at the turbo.
6. Now loosen the hose clamp that is down the hose near the intercooler. Remove the hose and set aside.
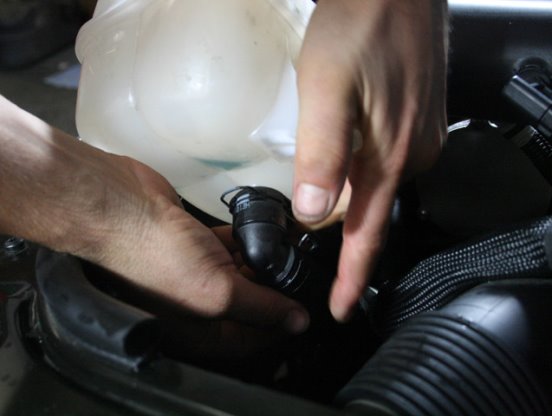
7. Drain the coolant expansion tank using a transfer pump or by siphoning. Alternatively, the coolant can be drained into a pan placed below the car by disconnecting the hose on the bottom of the tank (this method can get a bit messy).
8. Once the coolant expansion tank and tubes connected to it are empty, go ahead and remove the tank itself by removing the 2 screws and disconnecting all tubing.
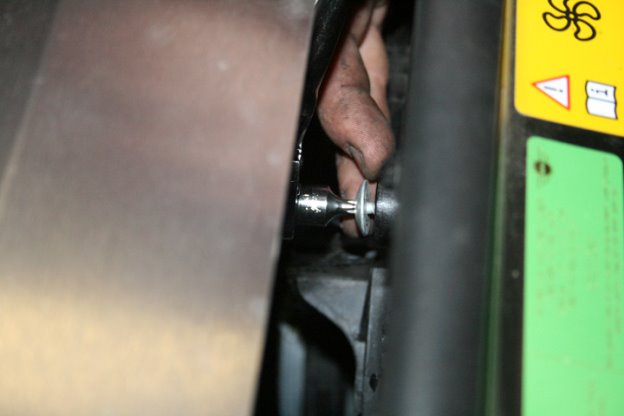
9. Detach the engine cooling fan for the oil pressure gauge installation. Do this by first disconnecting the wiring harness attached to the fan. Next remove the 2 retainer screws. One is located on the top of the fan and the second is located on the bottom. You may have to access the bottom screw from underneath the car. Move the fan to the side.
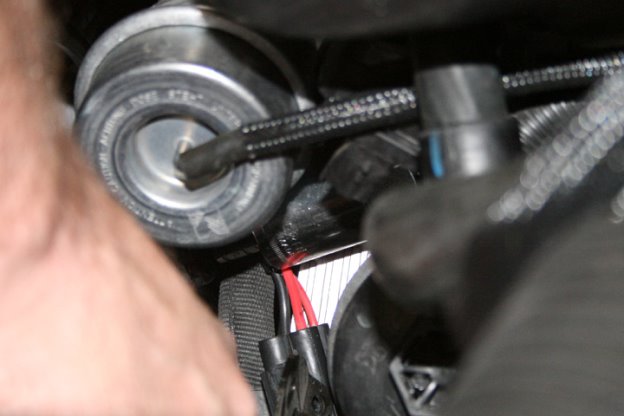
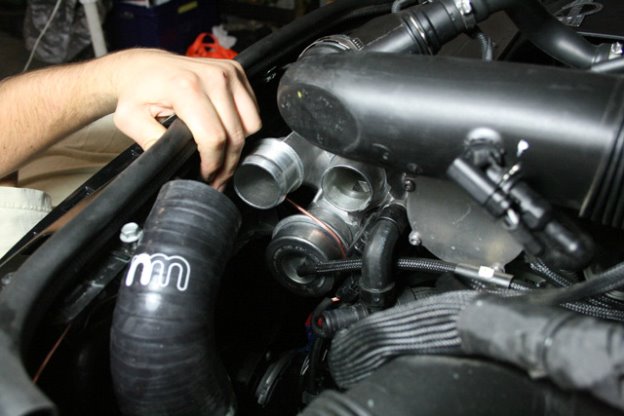
10. Locate the factory Oil Pressure Sensor – it is behind the plastic oil filter cover on the oil filter housing. It is brass with a black plastic connector on the end.
11. Remove the wiring connector by pushing on the plastic lock tab and gently pulling it off the factory oil pressure sensor.
12. Remove the factory sensor by using a long, 24mm socket wrench.
13. It is a good idea to keep this sensor clean after removal by wrapping it in a rag or placing it into a clean plastic bag.
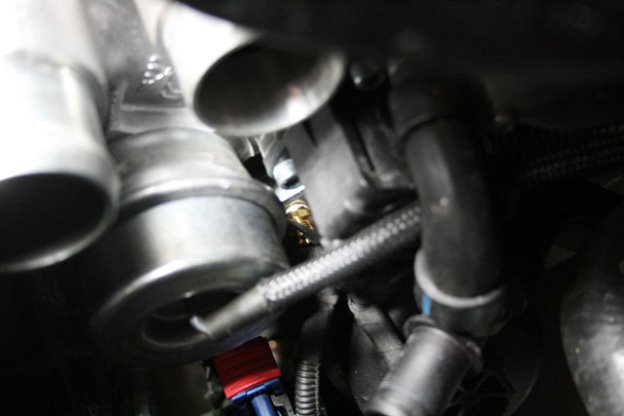
14. Place the O-ring onto the male end of the adapter and thread it tightly into the factory Oil Pressure Sensor cavity.
15. Observe the orientation of the Tapless Adapter and decide which of the side threaded ports give you the best clearance for the compression line fitting. Use your marking pen (Sharpie) and make a mark designating your decision.
16. Remove the Tapless Adapter and using your thread sealant, install an ⅛ NPT plug into the 5 remaining holes NOT designated as your compression fitting hole.
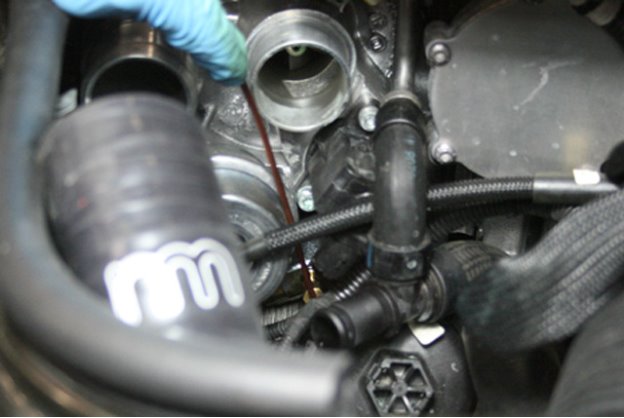
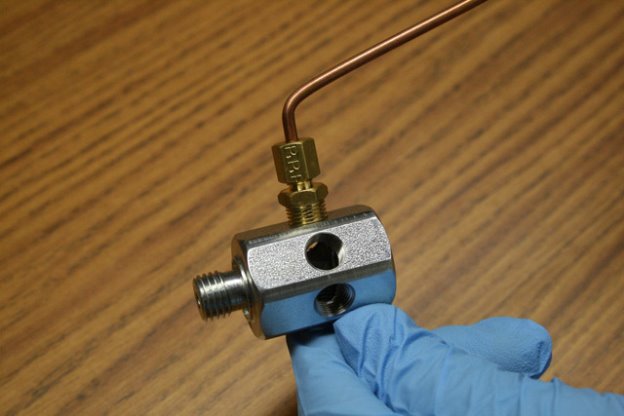
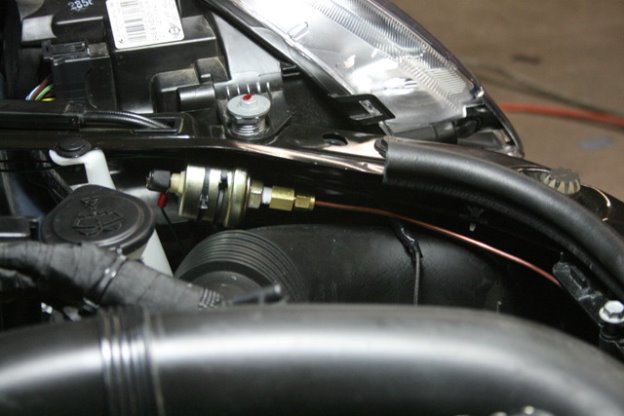
17. Ensure the O-ring is still in place and thread the Tapless Adapter back onto your engine. Install the male ⅛ npt compression fitting to the open side port on the Tapless Adapter. Again, use your thread sealant here. Add your factory Oil Pressure Sensor back onto the end of the Tapless Adapter.
18. Straighten out the included copper tubing and insert one end into the compression fitting on your Tapless Adapter. Ensure that the collar on the compression fitting is loose enough to allow the copper tubing to be fully inserted. It may also be necessary to bend the end of the copper tubing at up to a 45 degree angle before attaching in order to avoid obstruction with the oil filter cover. NOTE: Unlike the image shown below, install the copper tubing after the tapless adapter has already been installed as you can’t thread it onto the engine with a long length of copper tubing attached. Be very careful when bending the copper tubing - always do it slowly and do not overbend or kink it.
19. Route the copper tubing up between the turbo inlets and toward the front of the car. Be careful to avoid the hood latch.
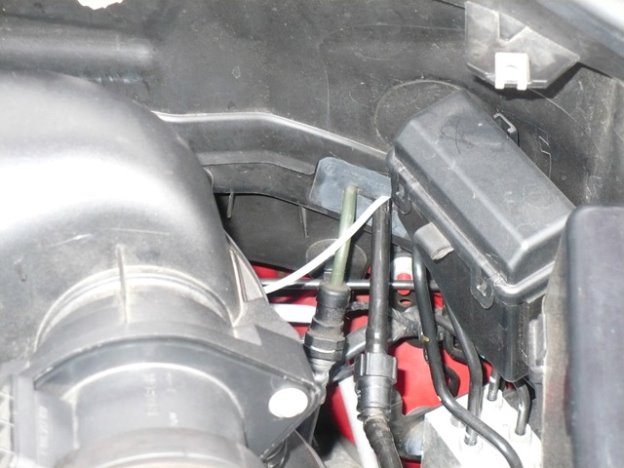
20. Using your thread sealant, attach the female compression fitting onto the end of the sending unit from your gauge kit. Locate a suitable location for this assembly and affix it into place using some zip-ties. We attached ours to the driver side of the engine bay just in front of the wiper fluid reservoir. Wherever you decide, just make sure the copper tubing can reach it.
21. Reconnect the factory Oil Pressure Sensor wiring harness.
22. Proceed with the wiring installation instructions enclosed with your gauges. Run the sender wires through the existing breakline slot in the cowl, and then through the hole in the firewall. We find that it is fairly easy to share the firewall hole that the hood latch cable uses.
23. Make sure to secure the wiring with some zip-ties to prevent damage from sharp edges, moving parts, or hot engine components.
24. Reinstall engine cooling fan, air intake hoses and coolant expansion tank.
25. Reconnect the negative (-) battery terminal and check the functionality of the gauges. While running the engine, use a flashlight and peek down to the installation area of the CravenSpeed Tapless Oil Adapter and along all the copper tubing to the pressure sender to ensure there are no oil leaks. If you’re good to go, tidy up and take it for a spin. You’re done!
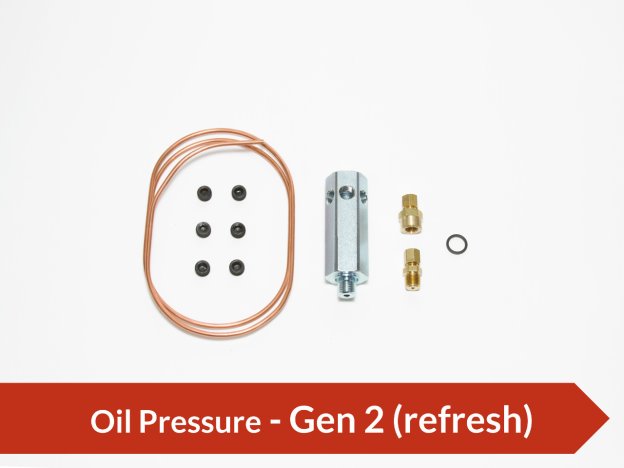
Parts Included:
Tools Required:
Procedure