THANK YOU for purchasing The Volkswagen Golf Mk7 Platypus License Plate Mount from CravenSpeed. This product is made from the highest grade materials and is guaranteed to be free from defects.
You can buy our CravenSpeed Platypus License Plate Mount for MK7 Golf here
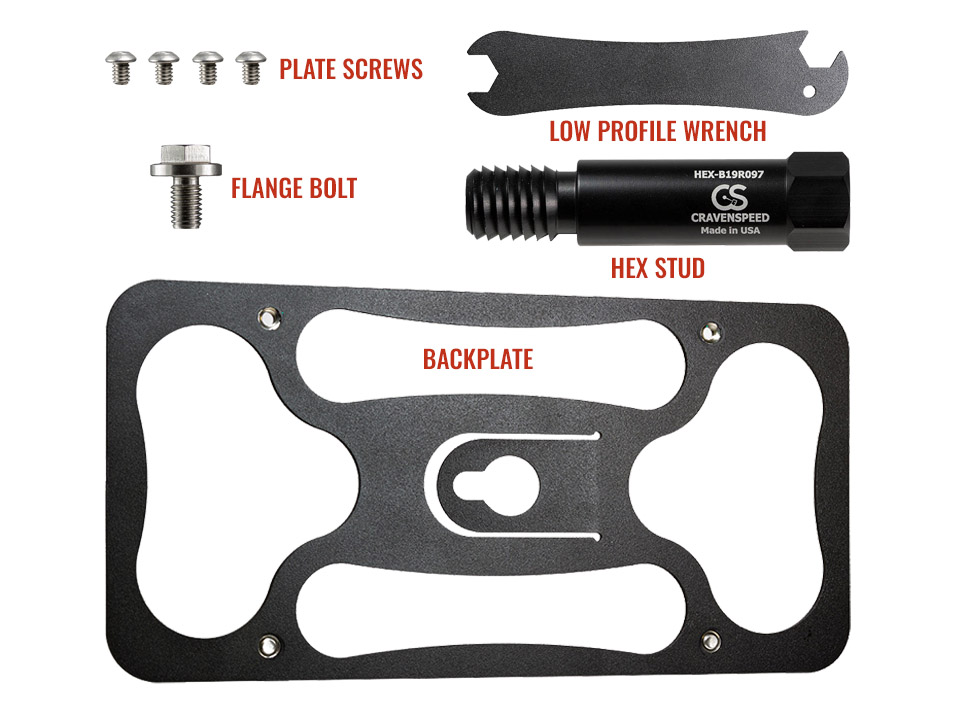
Parts Included:
- Back Plate
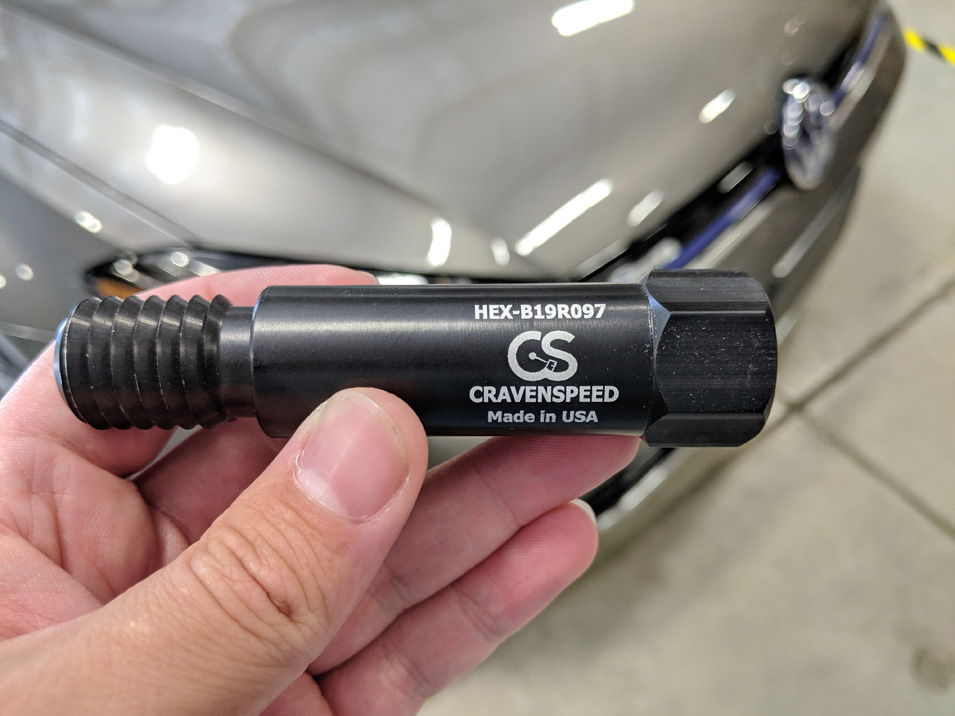
- Hex Stud (HEX-B19R097
- M10 Flanged Bolt
- 4 1/4-20 Button Head Plate Screws
- Low Profile Wrench
Tools Required:
- 7/8" socket
- 15mm socket
- Socket Wrench
- 5/32" Allen Wrench
- Plastic Trim Panel Tool
NOTE: This installation process is very easy, and should take around 15 minutes. Please read through the entire instructions before you begin.
Procedure
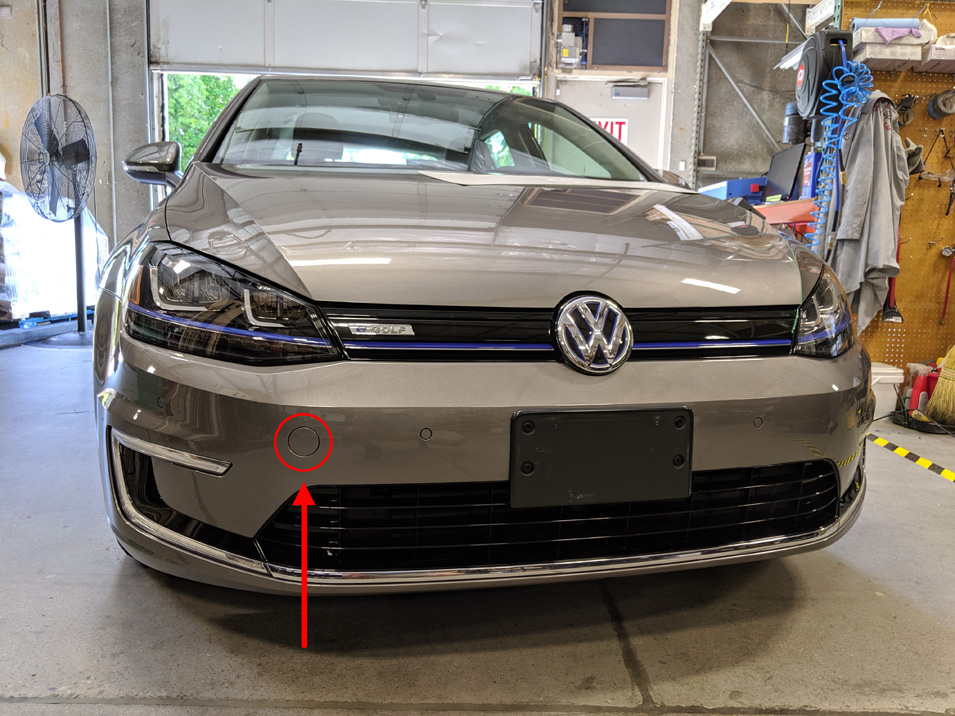
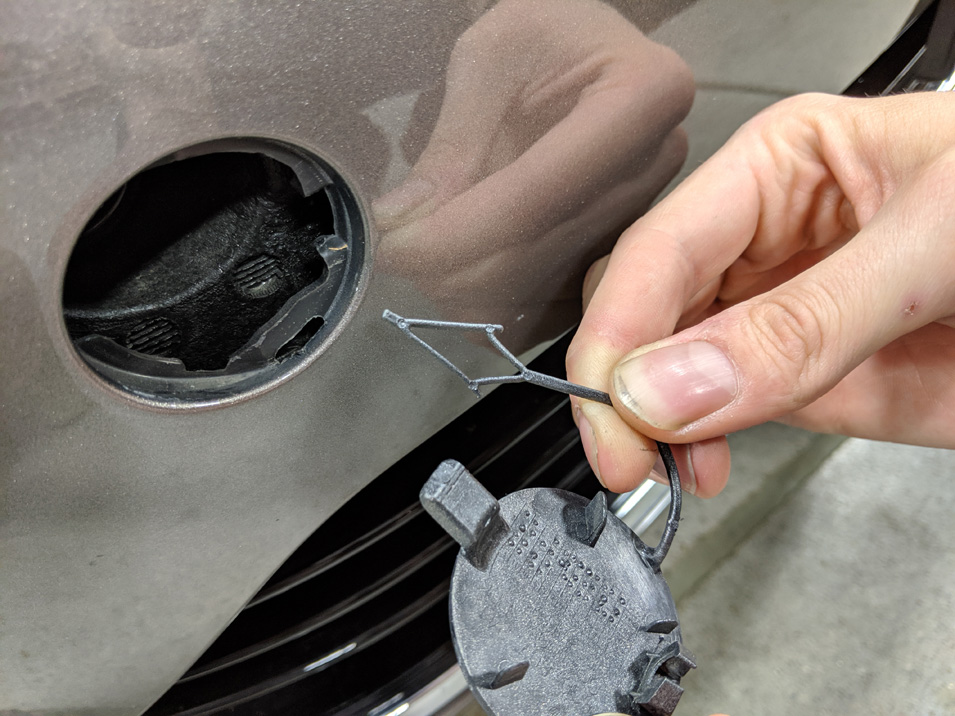
Remove the towing eye cover.
- Locate the circular towing eye cover on the passenger side of the front bumper.
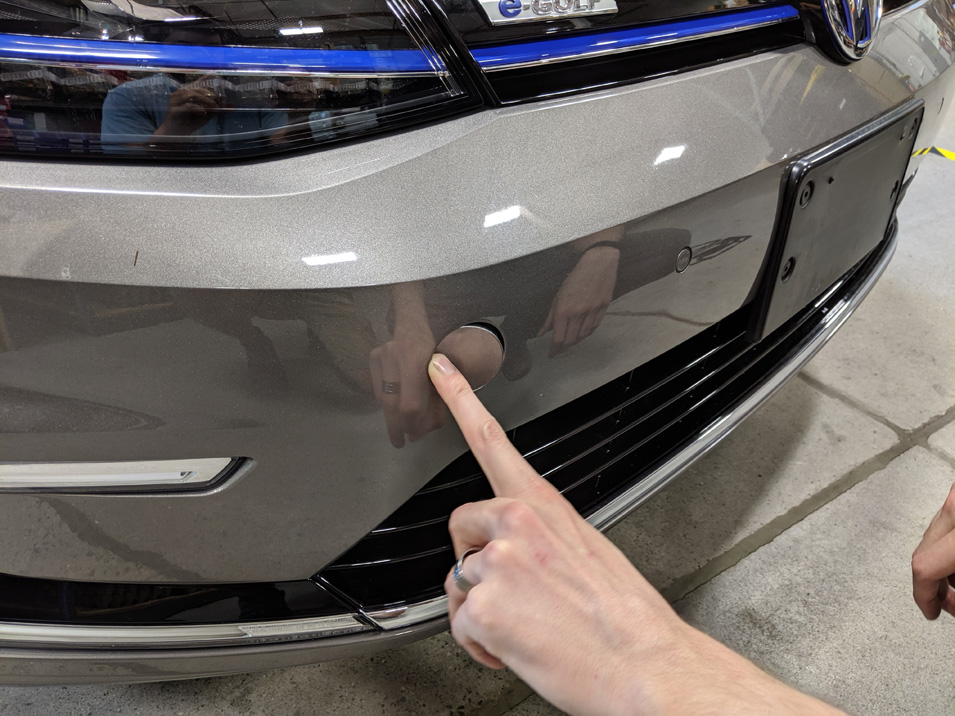
- Push on the left side of the cover and it will pop out of the bumper.
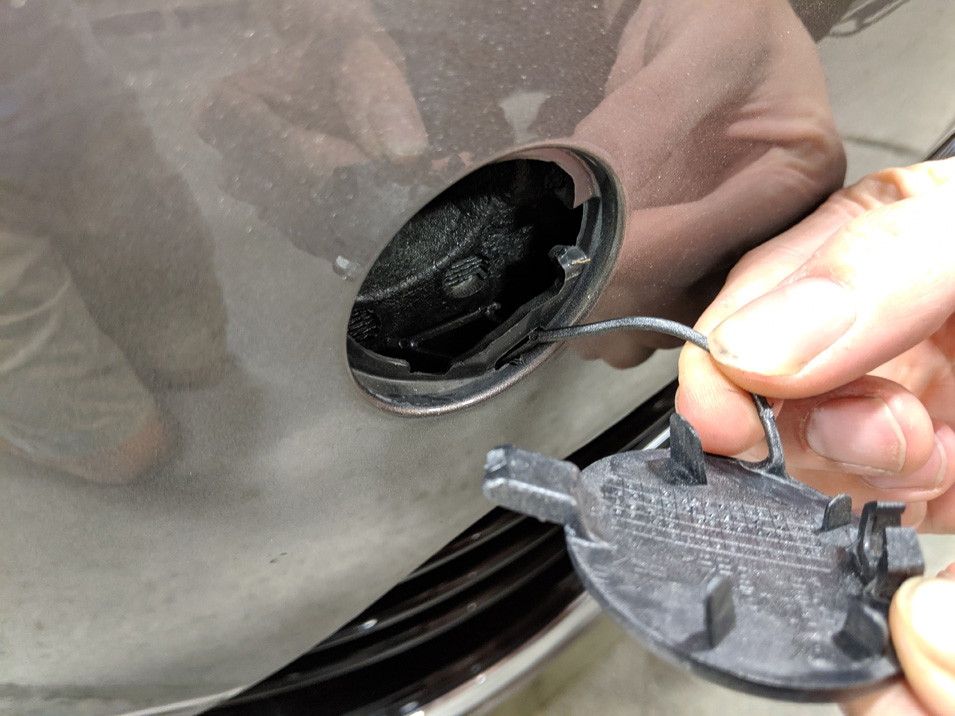
- The cover has a little tail that keeps it attached to the bumper skin. Give it a light tug and it should come out of the slot. You may need to squeeze the end together to make it fit through.
- Keep the painted cover in a safe place in case you need to put it back in down the road.
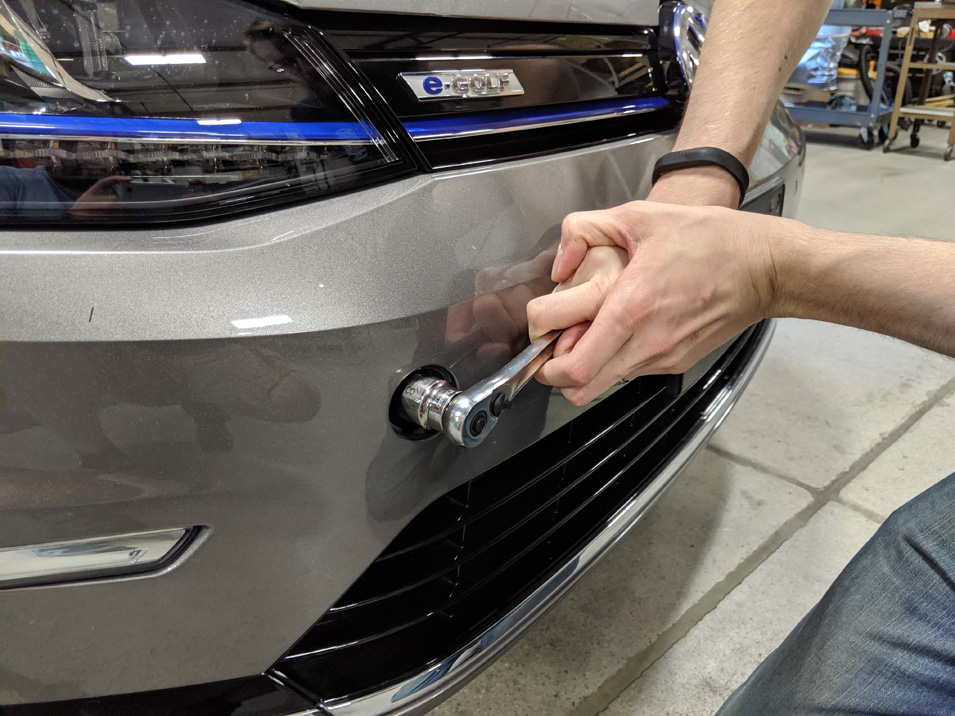
Install the hex stud.
- Screw the hex stud into the threaded towing eye receiver behind the cover, just hand tight at first! Righty tighty (Clockwise)
- Grab a ratchet and ⅞” socket to finish it off. We do not have a torque spec for this stud, good and snug is all you need.
The hex stud included with this kit should have the part number “HEX-B19R097” or “CRVW-0069-21,” engraved on it. If the one you received doesn’t match, send an email to support@cravenspeed.com and we’ll get you set up with the correct kit.

A Note About Our Parts: We machine the threads on these studs to the higher end of their specification. This means they may be a tight fit in your vehicle. You may get the feeling that it is taking more effort than it should to screw the stud in. Our advice in this scenario is always to just go ahead and drive it in. In most cases once the stud gets a few threads deep, it starts to go in much easier.
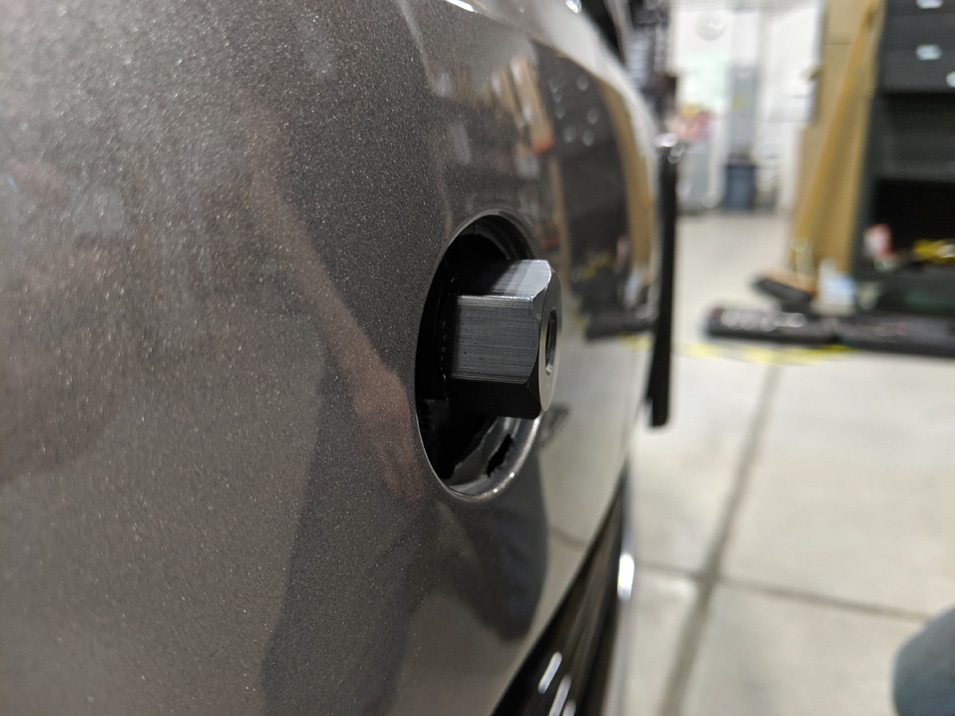
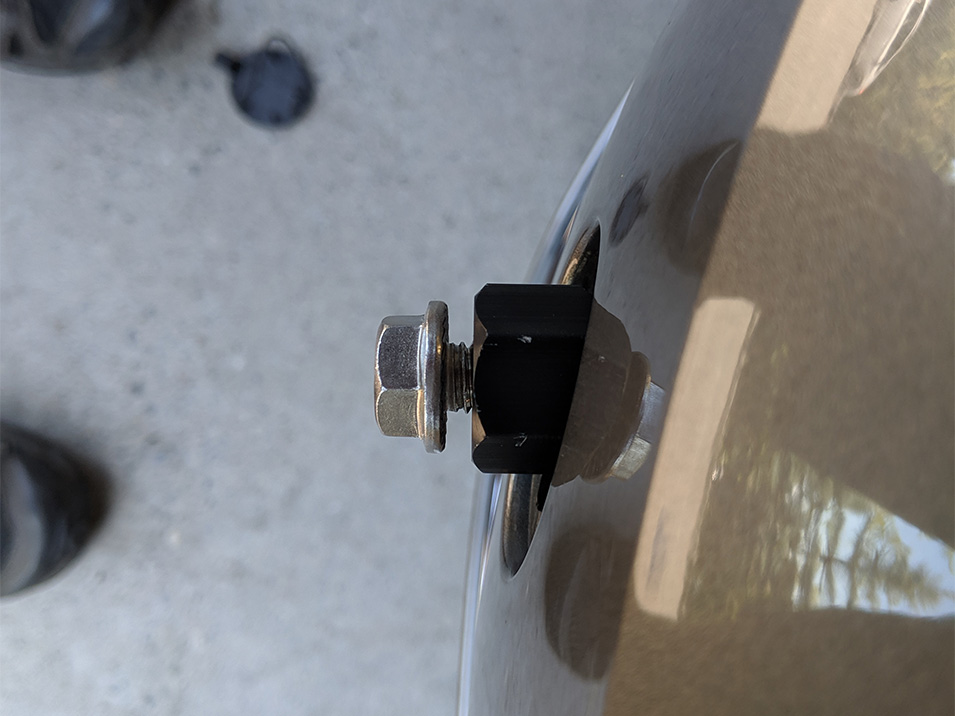
Once the stud is all the way in, you should have the end sticking out like so:
Install the back plate.
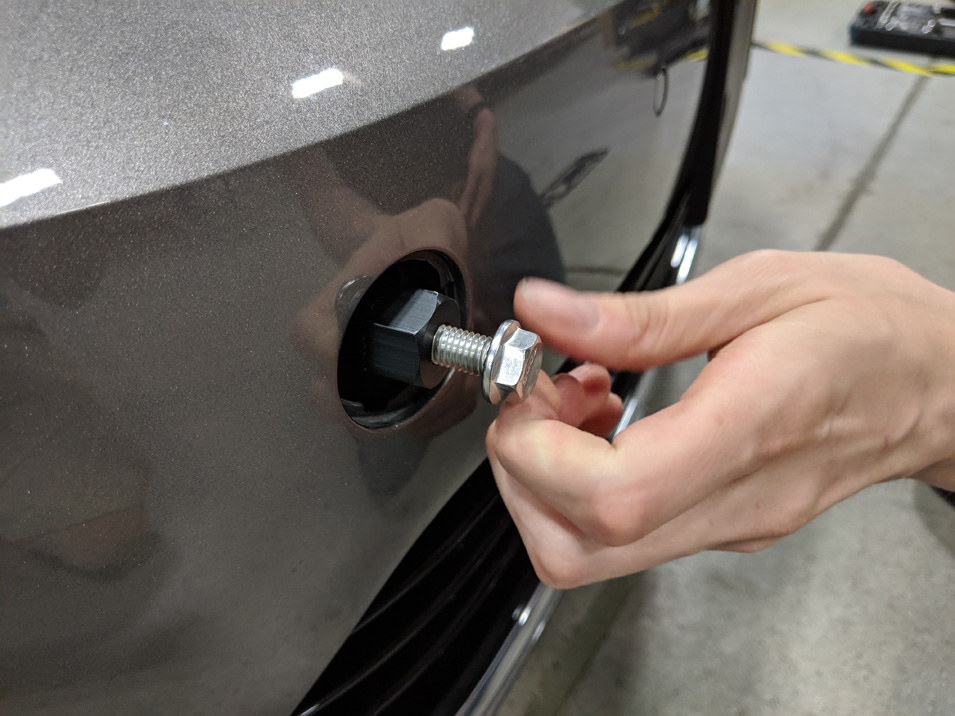
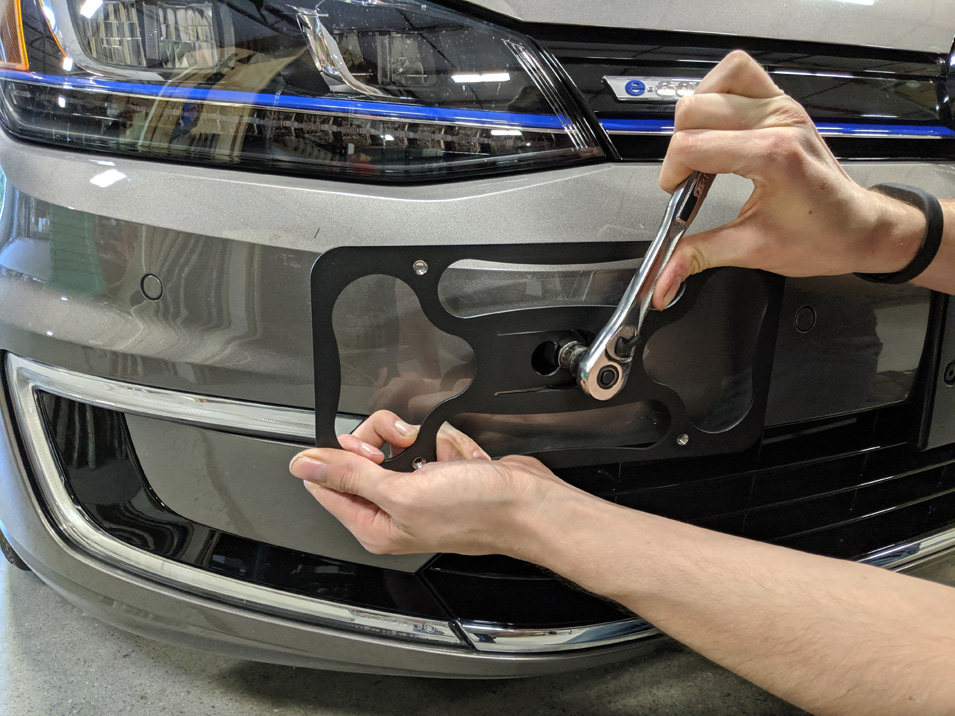
- To install the backplate, we’re first going to install the 15mm flange bolt into the end of the hex stud. You want to leave a gap between the flange and the end of the stud that is slightly bigger than the thickness of the back plate.
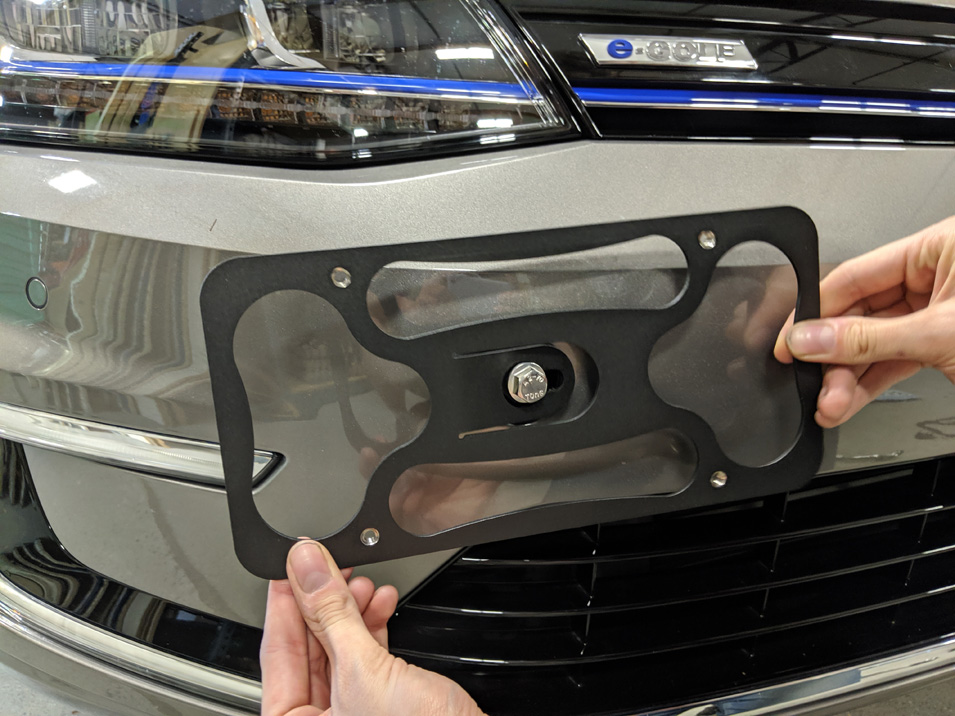
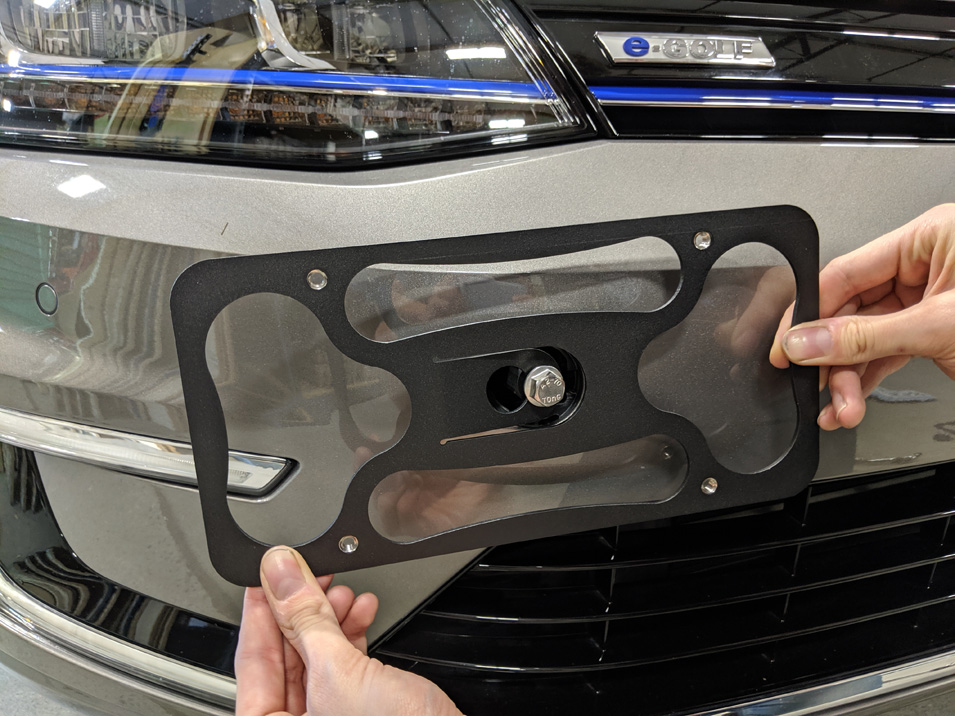
- Next, grab the back plate and insert the head of the bolt through the hole in the tab. Then, slide the plate over so that the bolt rests fully seated into the slot. Hand tighten the bolt to keep it in place. While holding the back plate level with one hand, use a 15mm socket to tighten the bolt securely with your other hand.


Install the your license plate.
- Use a 5/32” Allen wrench to install the 4 ¼-20 button head screws that attach your license plate to the back plate.
Adjust for the parking sensors.
If your car has parking sensors, you may need to adjust the plate to accommodate them. It is helpful to have a 2nd person help you with this step.
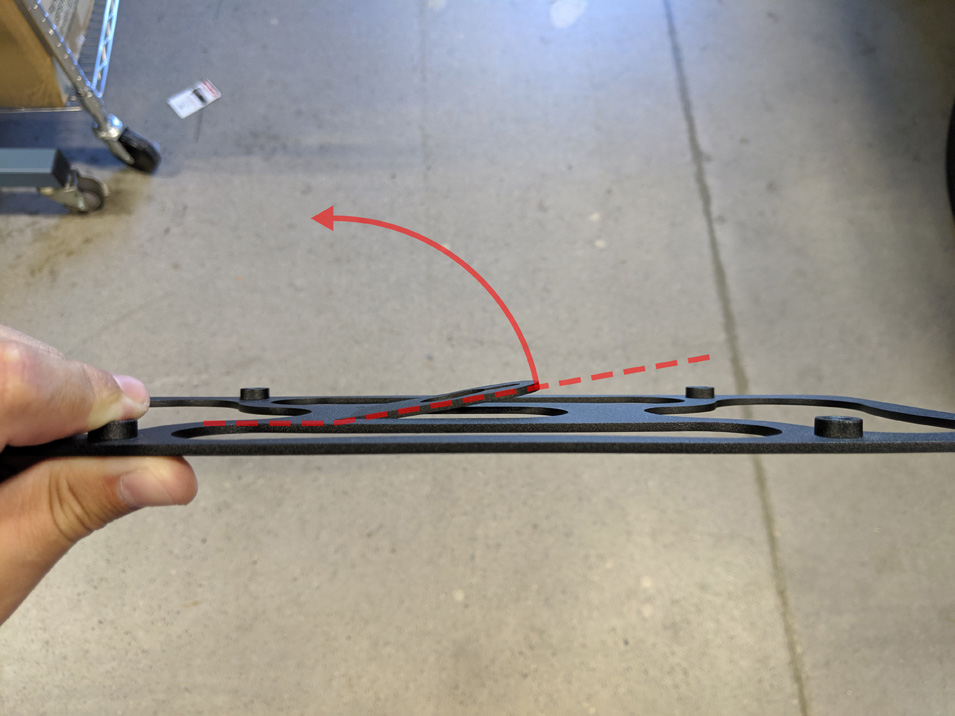
To accomodate for parking sensors, the back plate is designed so that the angle of the plate in relation to the bumper can be adjusted. The bend at the base of the mounting tab can be adjusted by pushing or pulling on either side of the back plate.
Before making any adjustments test drive the car to check if any sensors are being triggered. Most often, the default setting works out of the box! If you don’t get any beeps driving around, you are good to go.
The two sensors that could be triggered are shown below:
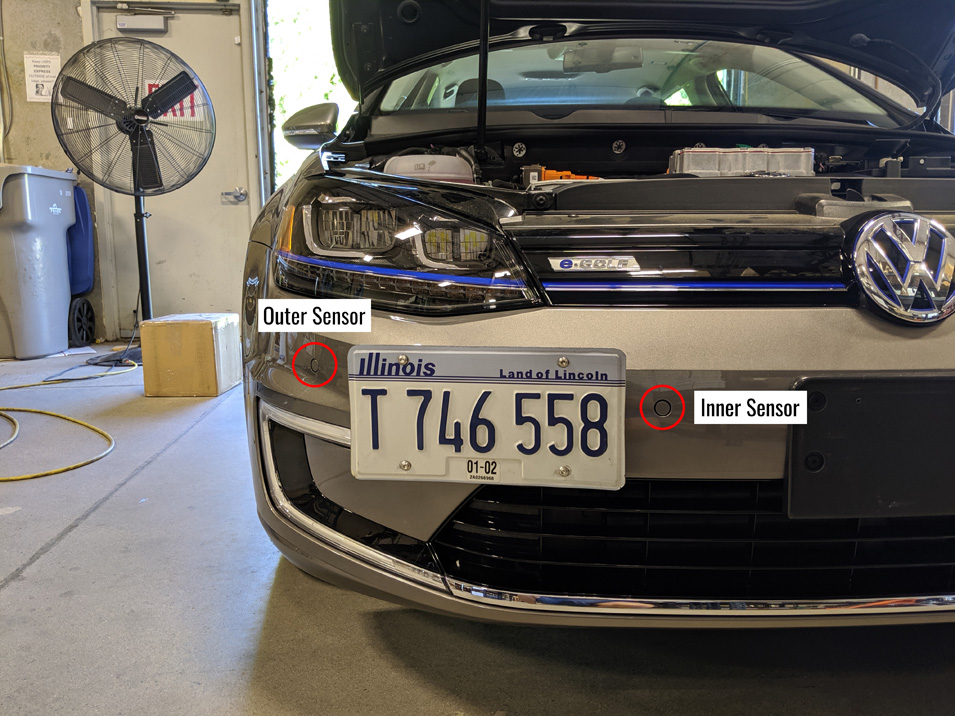
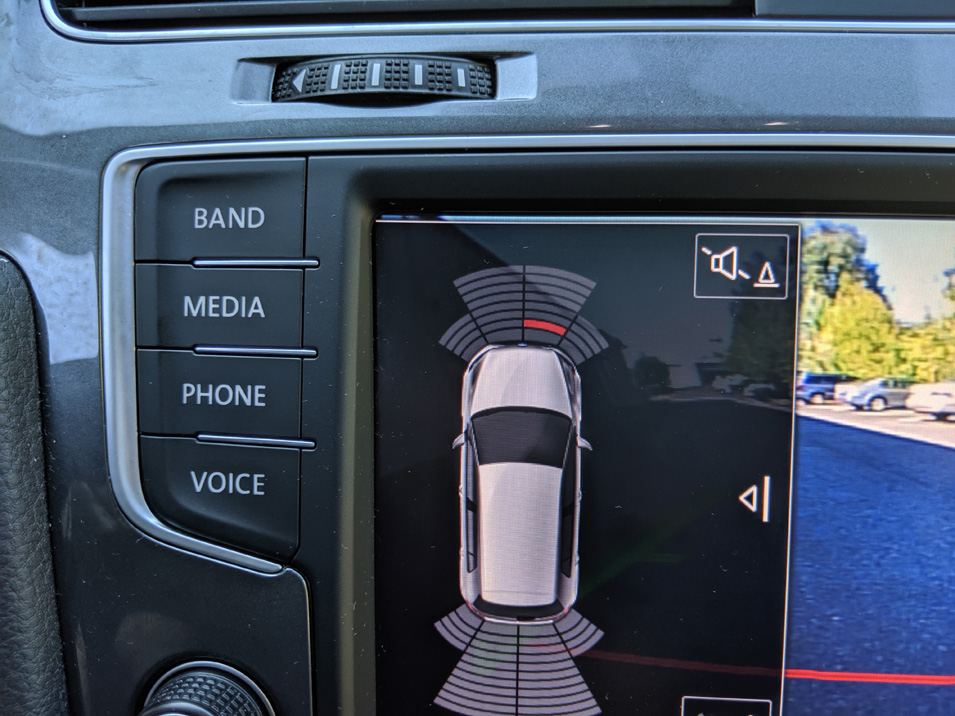
If the outermost passenger side sensor is triggered, you will see the following indications on the screen:
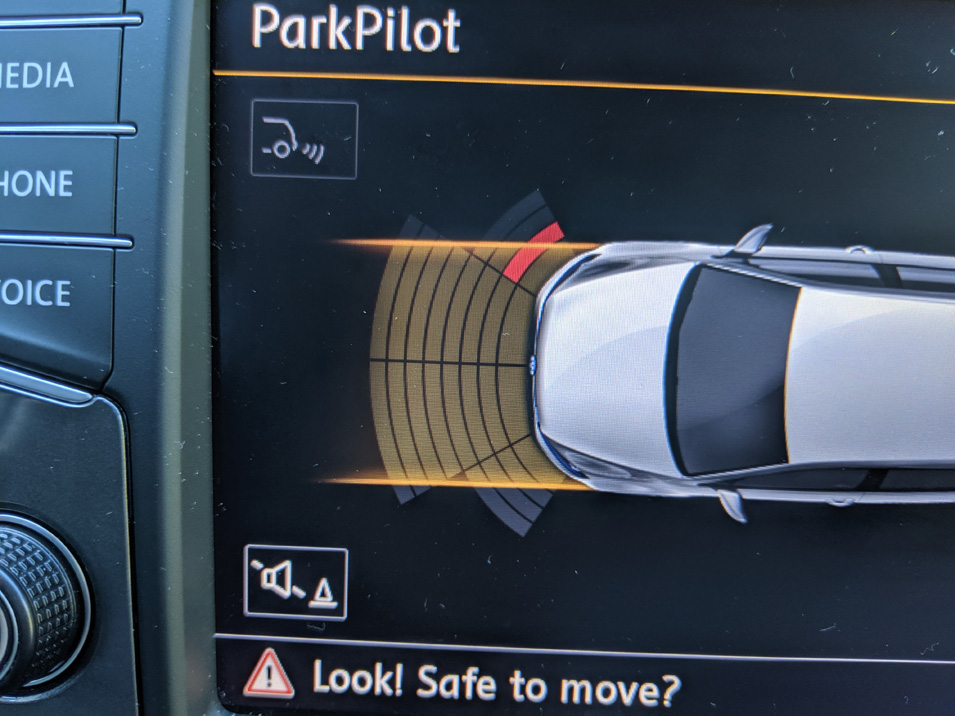
This sensor is triggered when the driver’s side of the back plate is too close to the bumper like so:
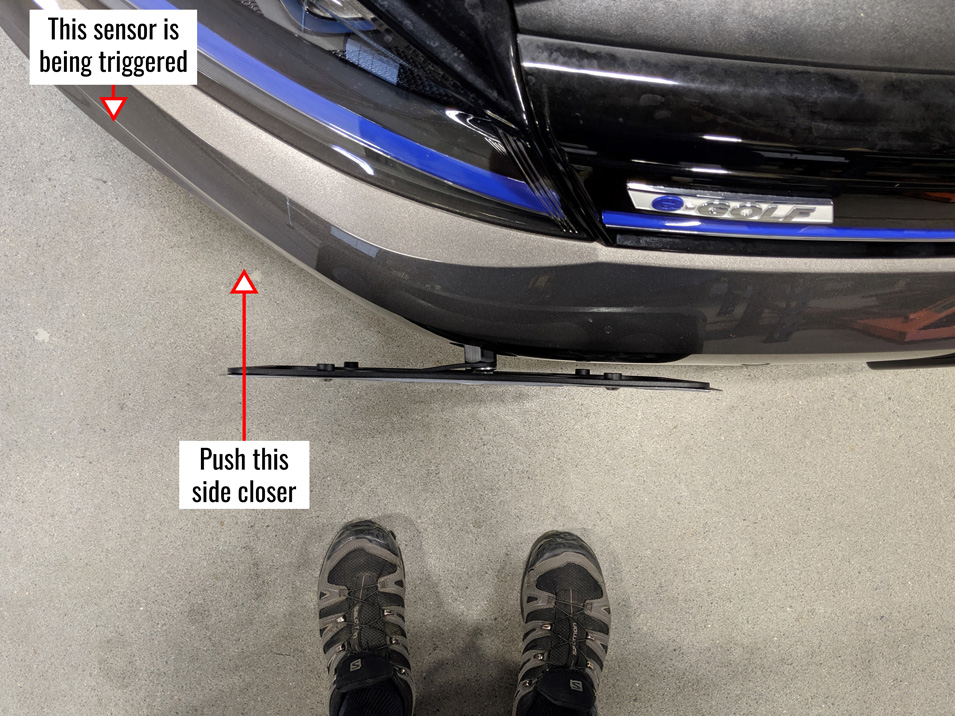
In this case you would want to push the passenger side of the plate closer to the bumper.
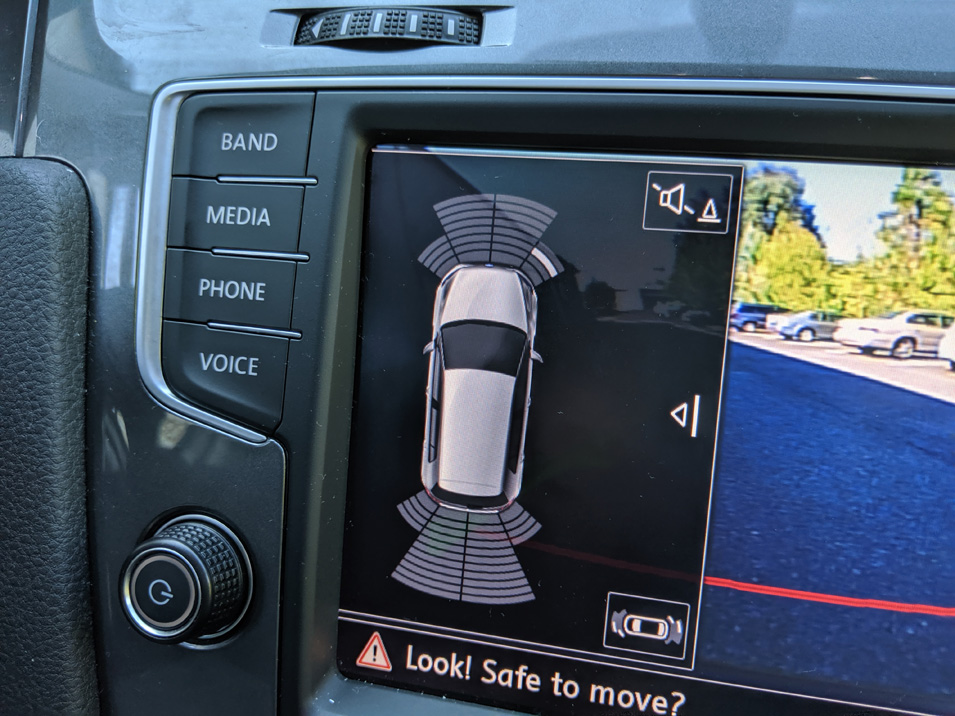
If the inner passenger side sensor is being triggered, you will see the following indications on the screen:
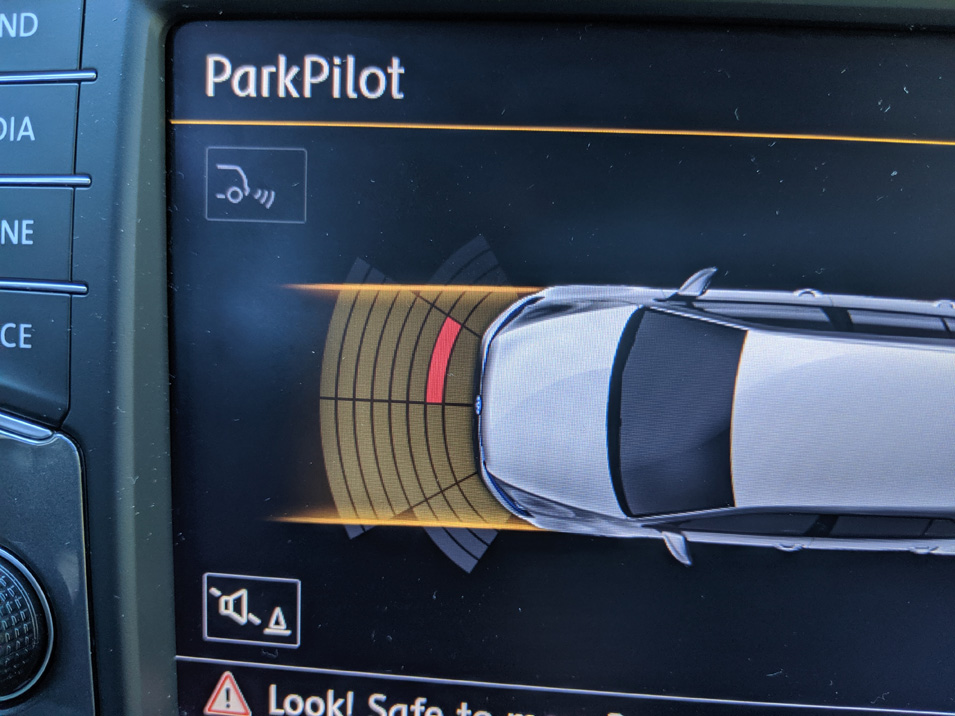
This sensor is triggered when the passenger’s side of the back plate is too close to the bumper like so:
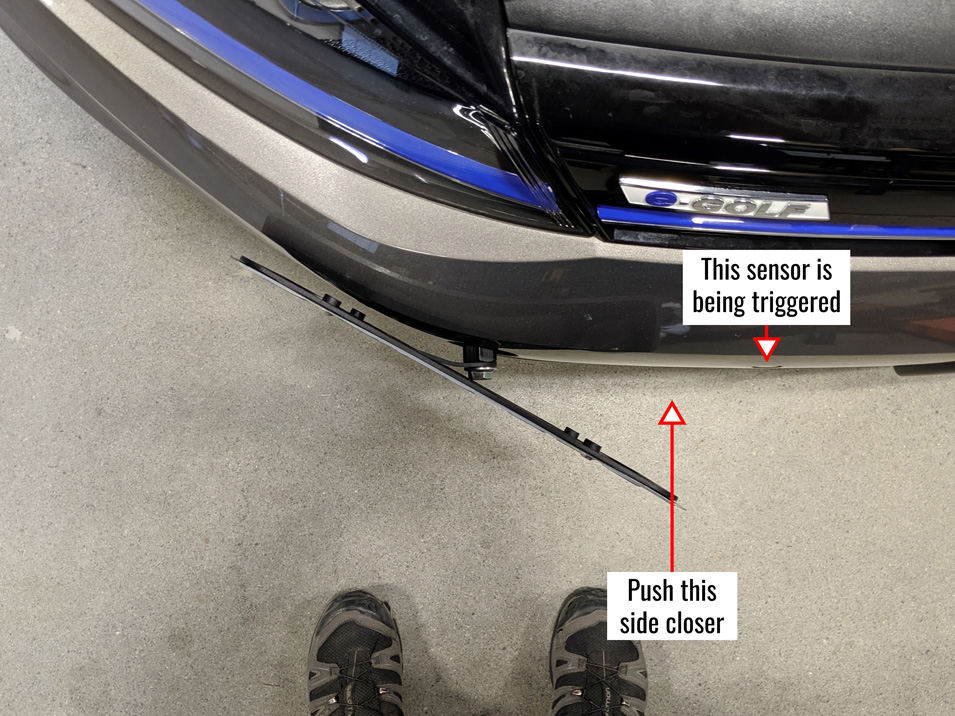
In this case, you would want to push the driver’s side of the plate closer to the bumper.
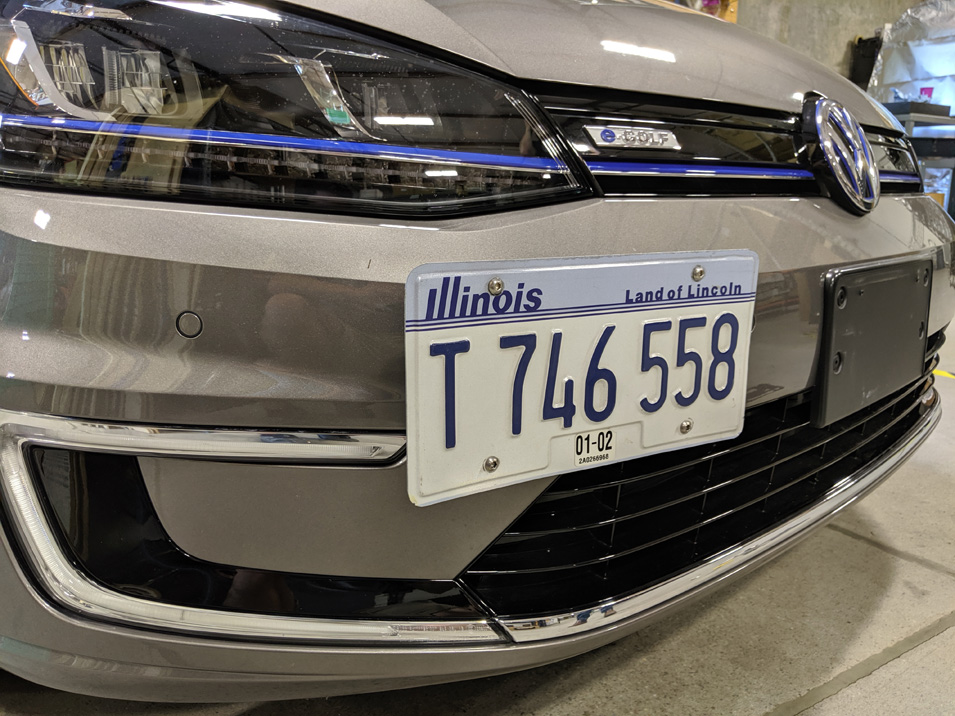
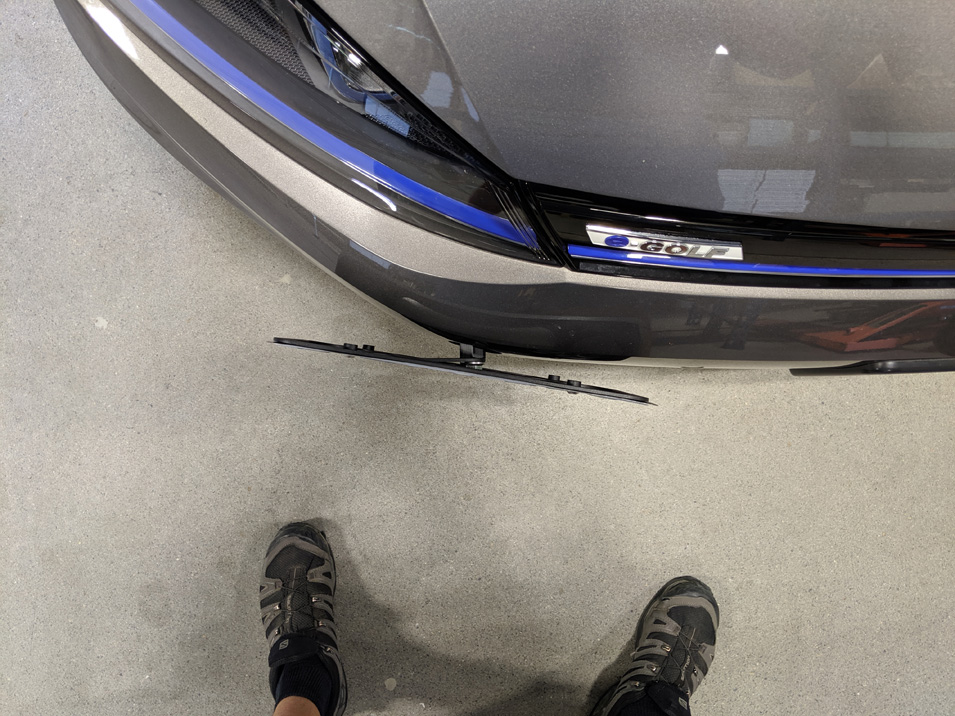
Here’s the angle that we found worked with this car:
And here is a video demonstrating how we adjust the angle:
In summary, if the outer sensor is being triggered push that side of the plate closer to the bumper. If the inner sensor is being triggered, push that side of the plate closer. Even if the sensors aren’t triggered once you make an adjustment, they may still trigger while driving. It’s best to make small adjustments, and then do a quick test drive by pulling backward and forward a little bit.
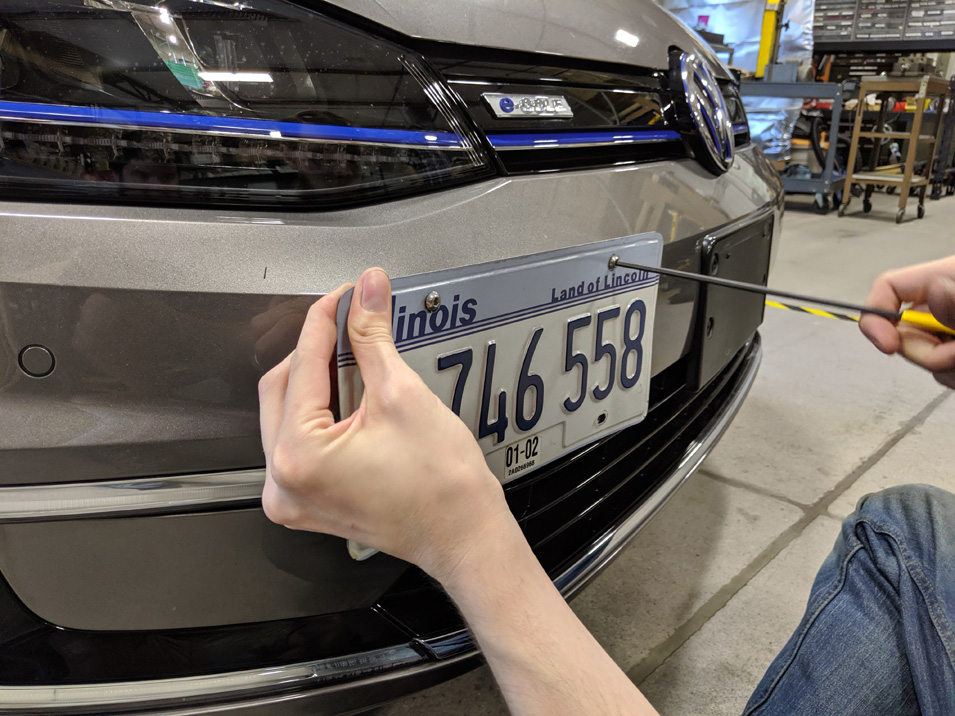
Quick release feature.
Included with the kit is a black low profile wrench. This wrench allows you to reach behind the plate and loosen the 15mm bolt. Once the bolt is loose, you can slide the plate to the right and take it off of the hex stud without having to separate your license plate and the back plate. Perform the opposite procedure to reinstall the plate.