THANK YOU for purchasing the MX-5 things ND Rear LED Running Light Kit from CravenSpeed. This product is made from the highest grade materials and is guaranteed to be free from defects.
You can buy our CravenSpeed Rear LED Running Light Kit for ND MX-5 Miata here
Parts Included:
- Inline Y-Wire Connector
- LED Strip Spool
- 2x Cable Ties
- 2x Adhesive Cable Tie Mounts
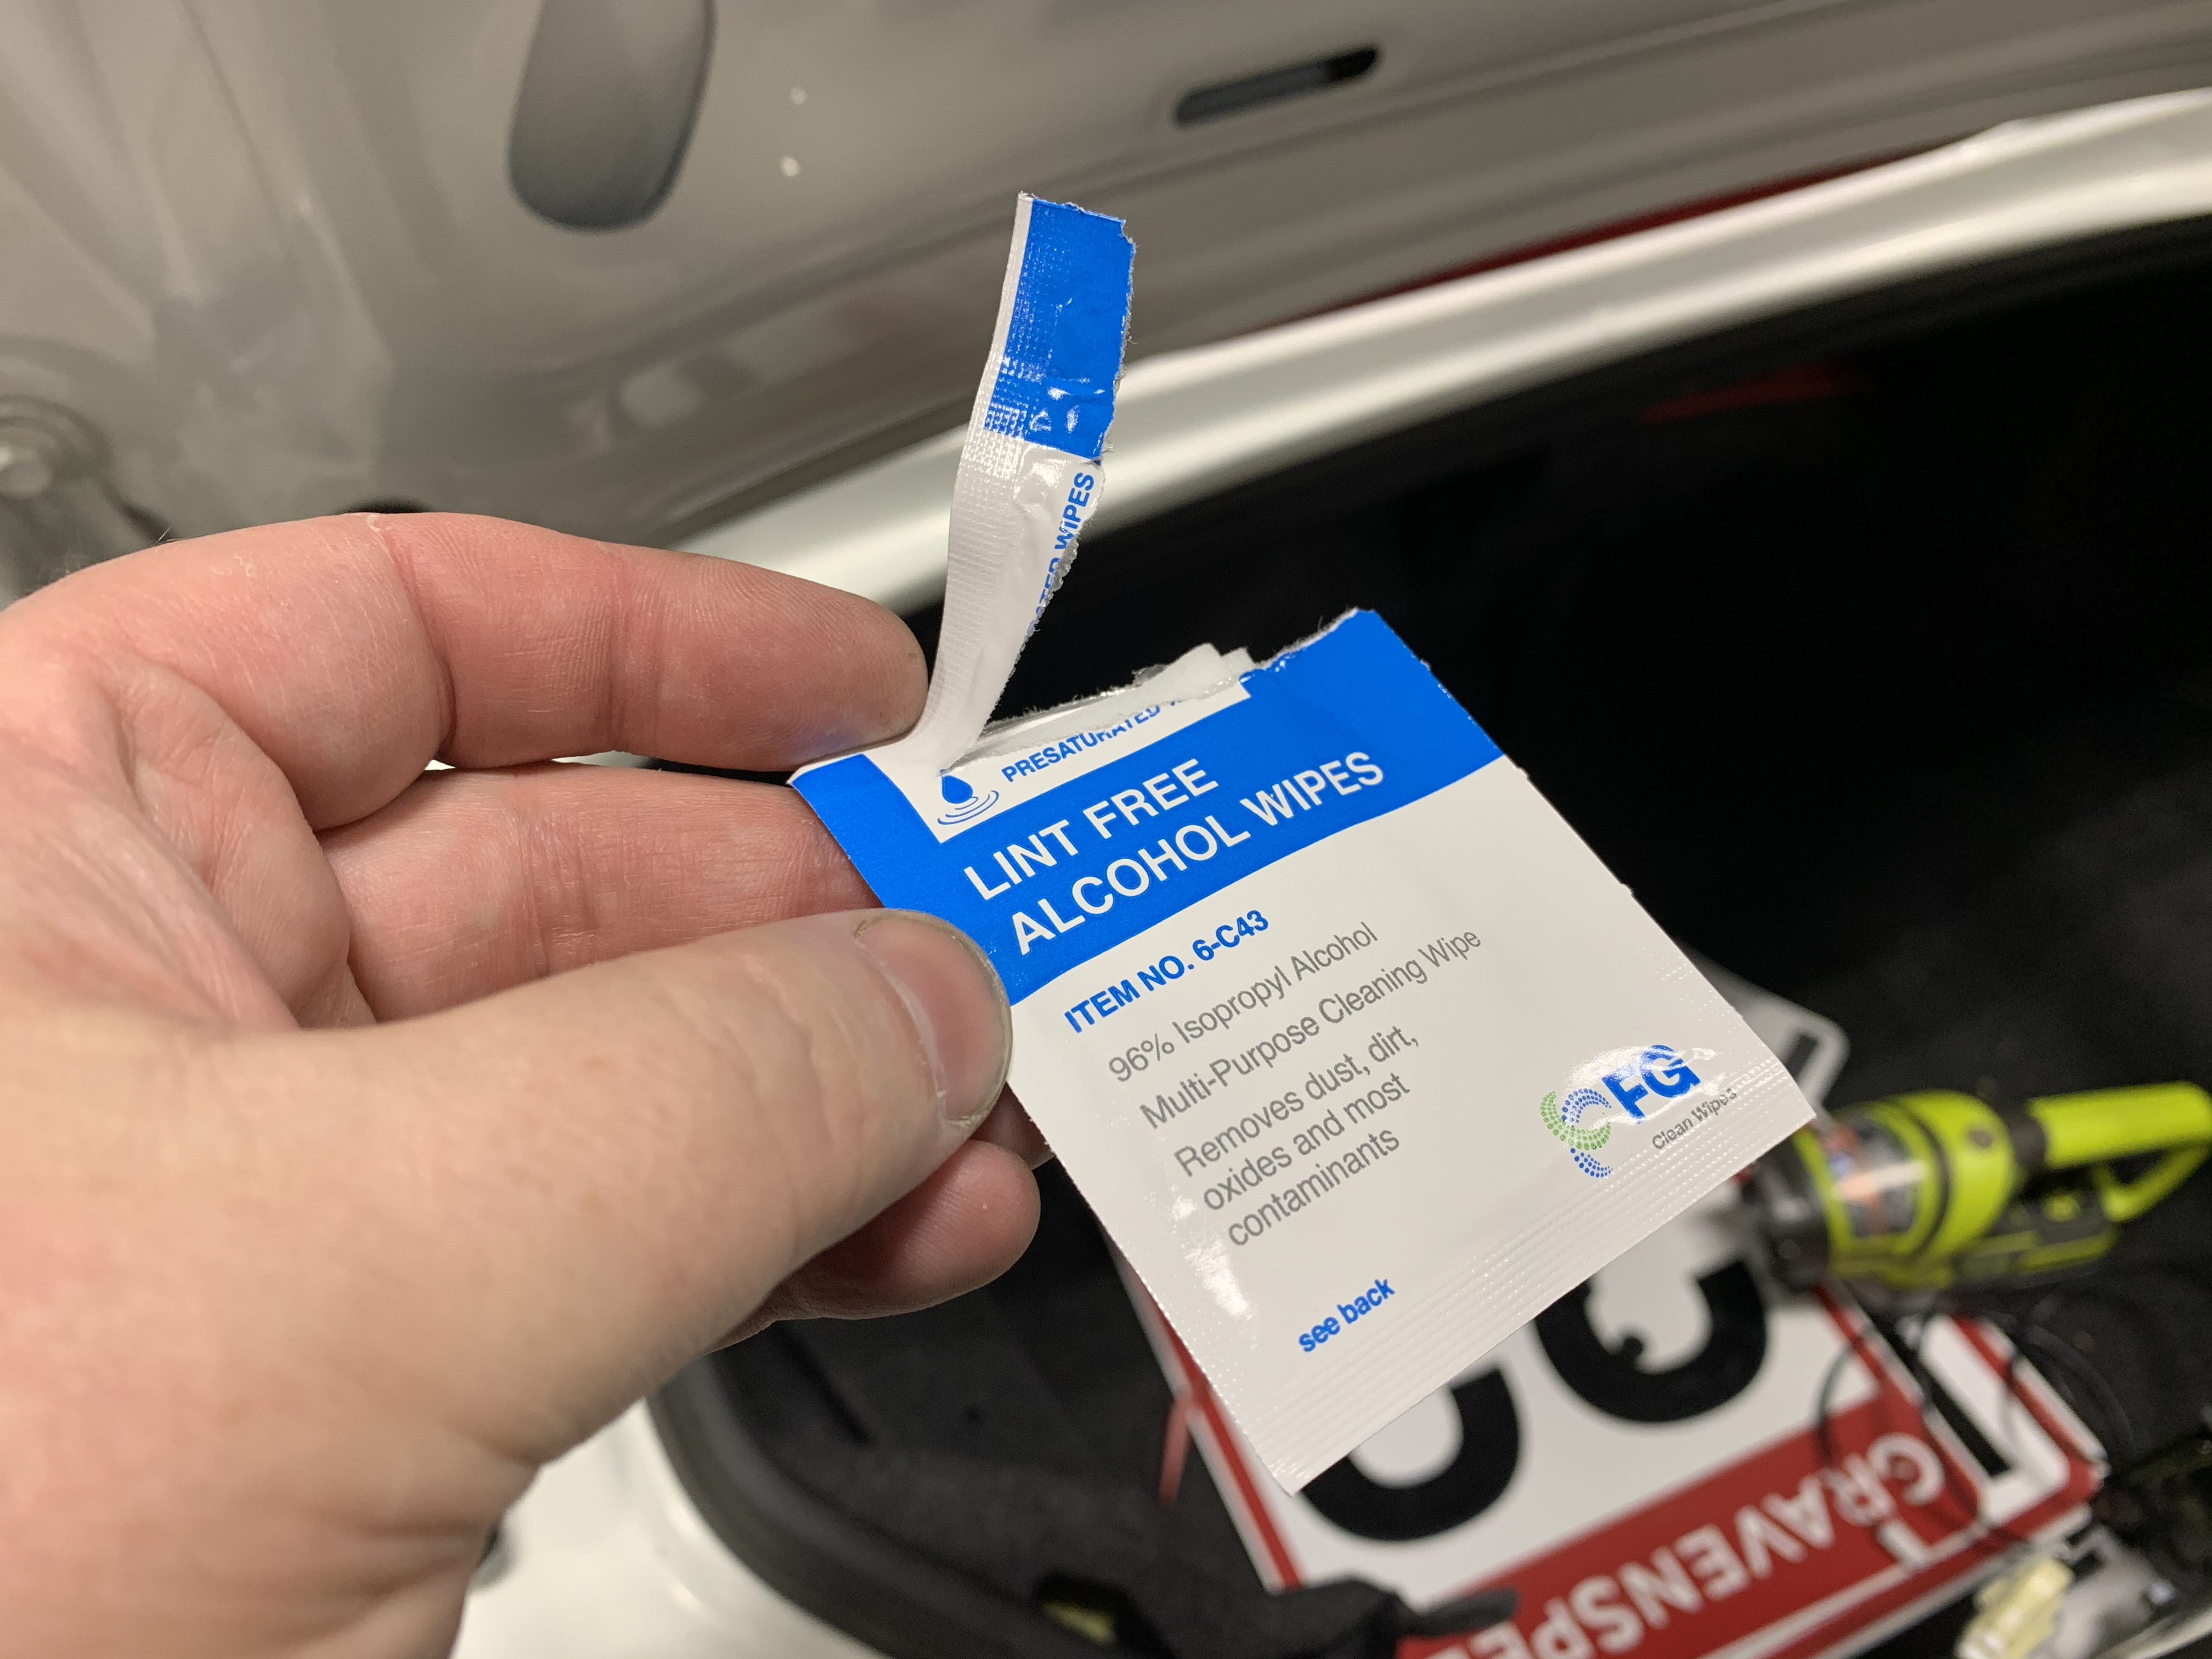
- Alcohol Wipe Packet
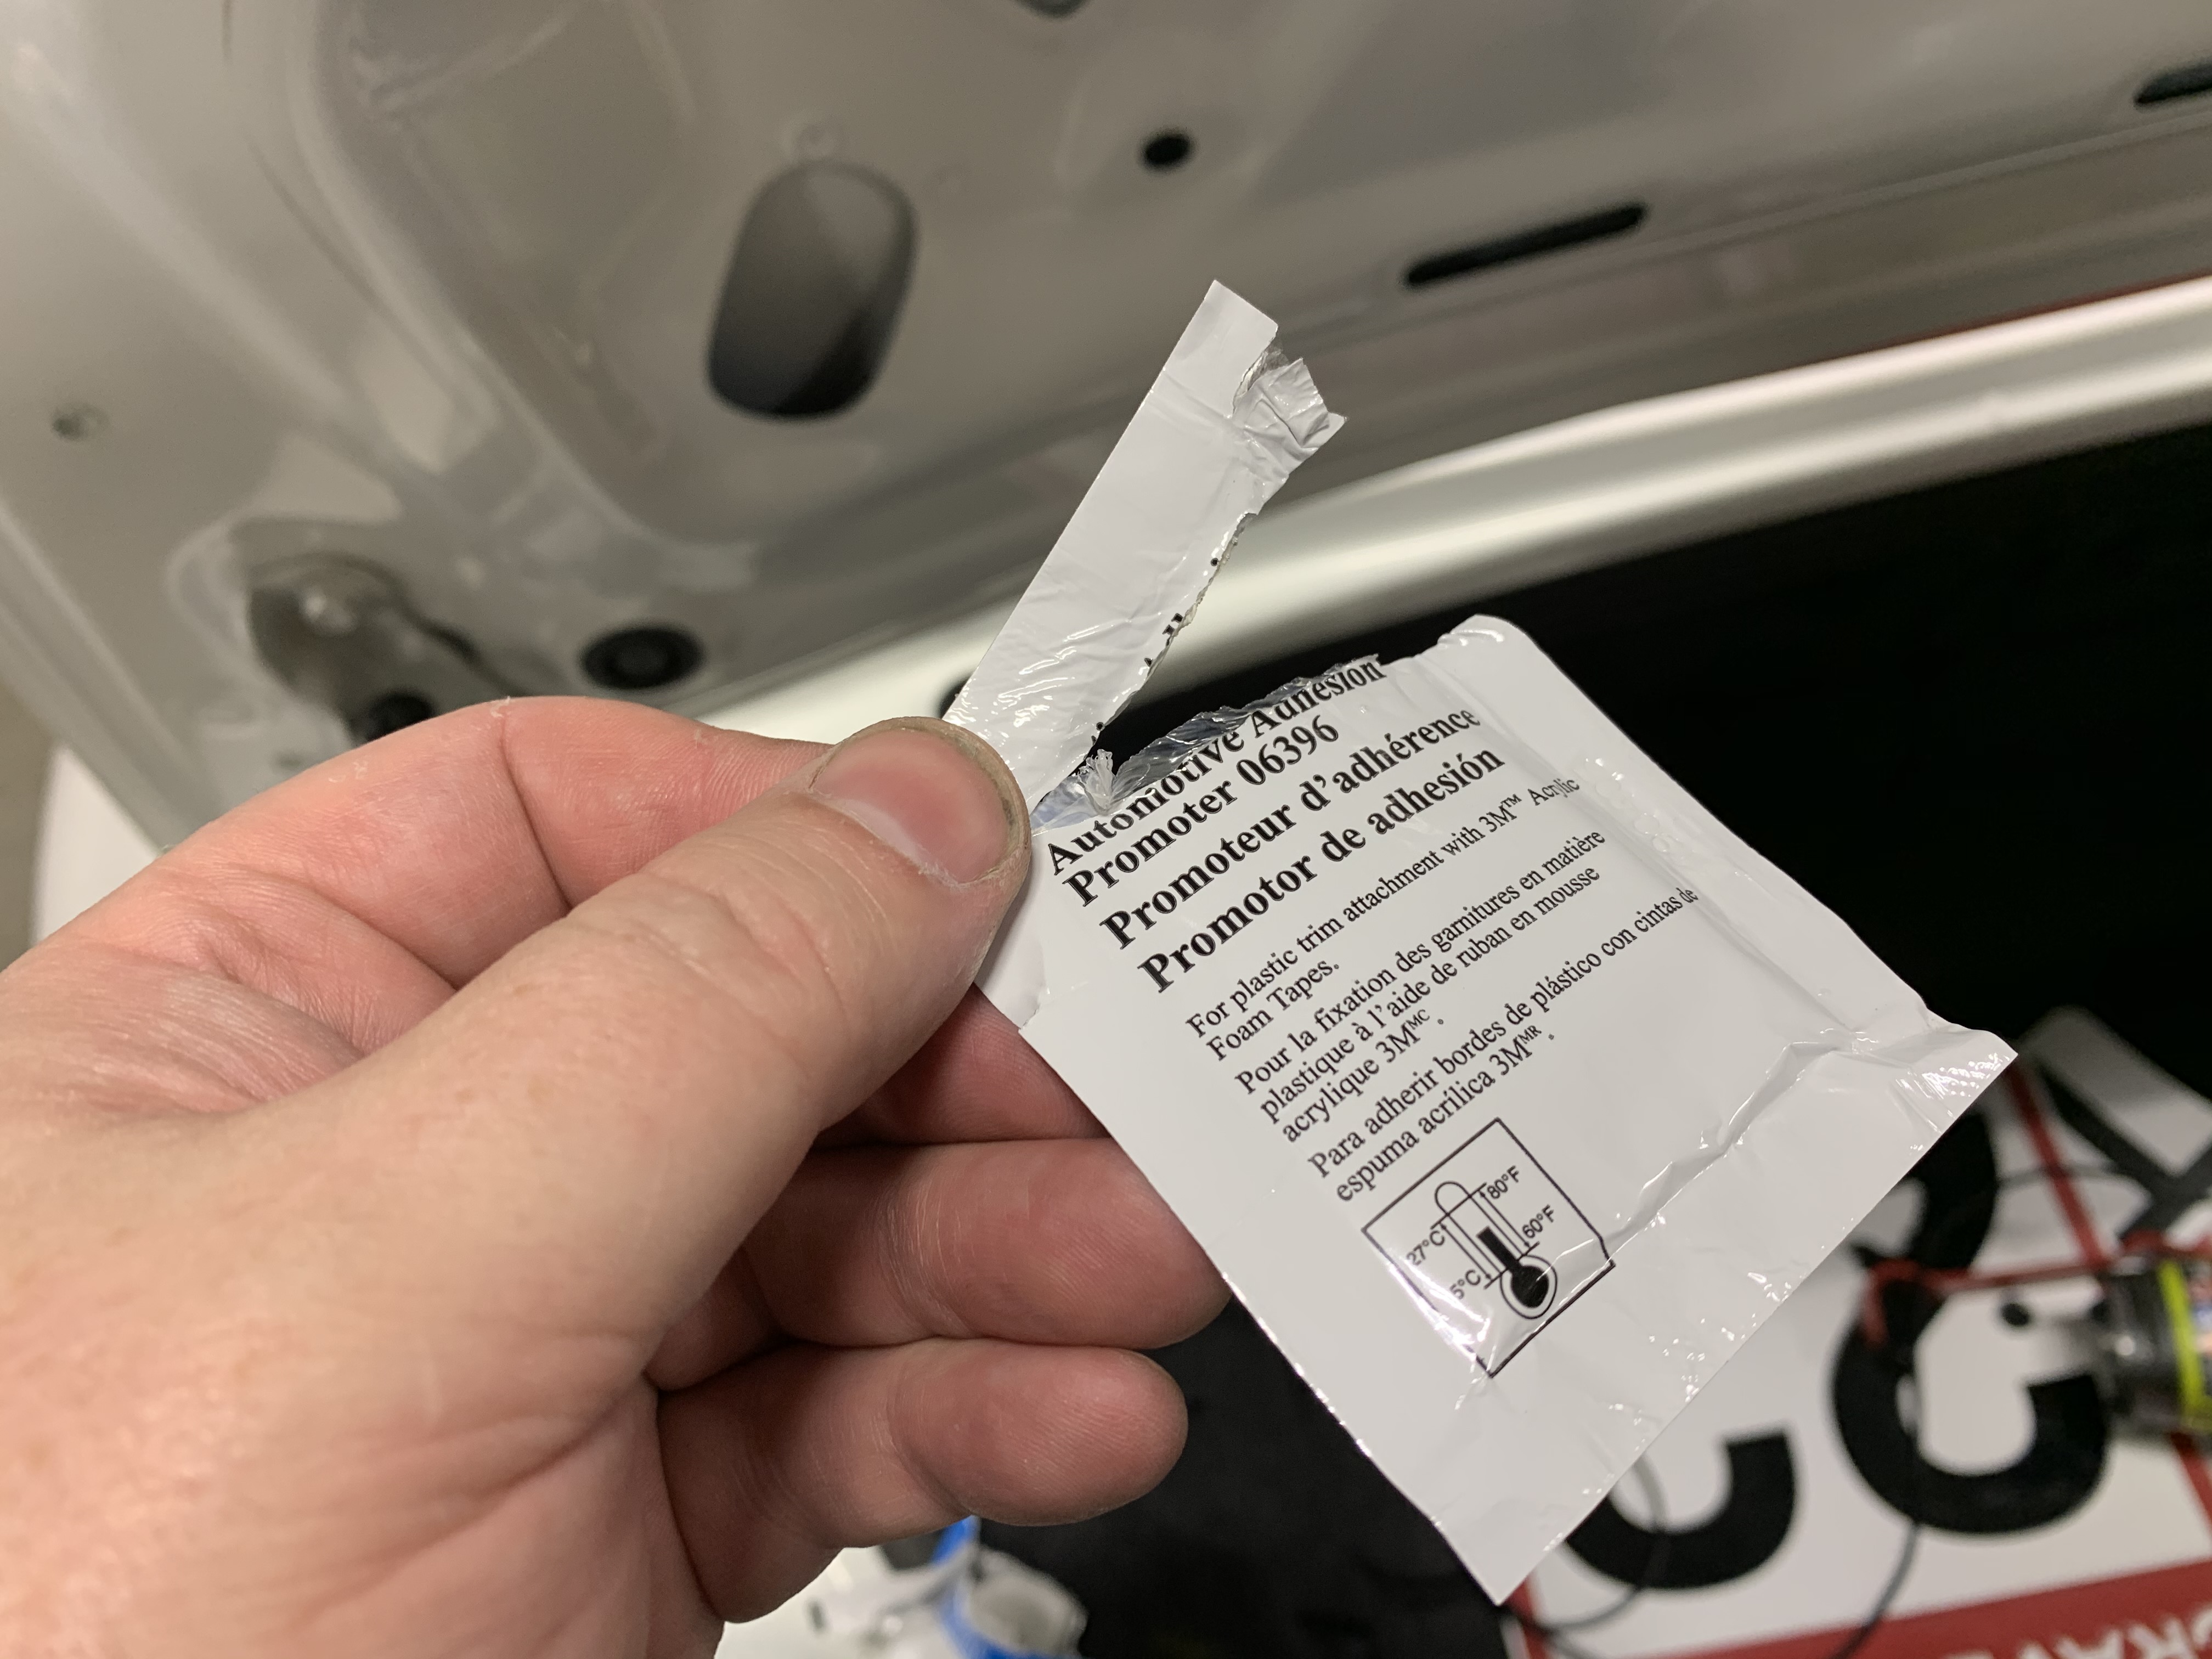
- Adhesion Promoter Packet
Tools Required:
- Small Flat Head Jewelers Screwdriver (optional)
- Utility Knife
- Cordless Drill
- 3/16" Drill Bit
NOTE: This installation process is fairly easy, and should take around 30-45 minutes. Please read through the entire instructions before you begin.
Procedure
First off, let's pop the trunk and empty it of anything that may get in the way.
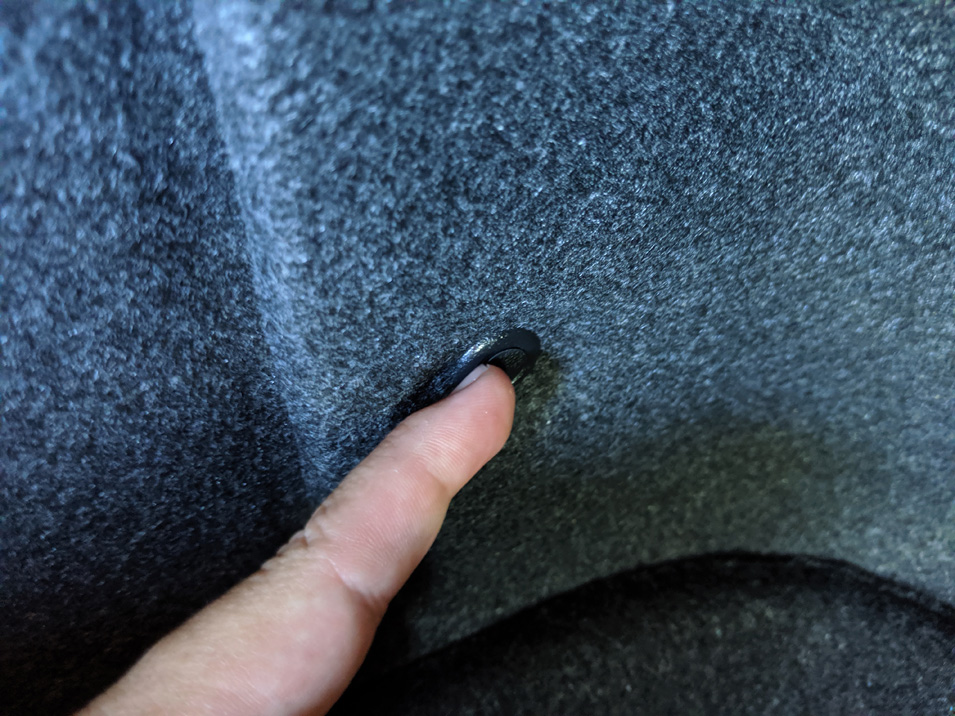
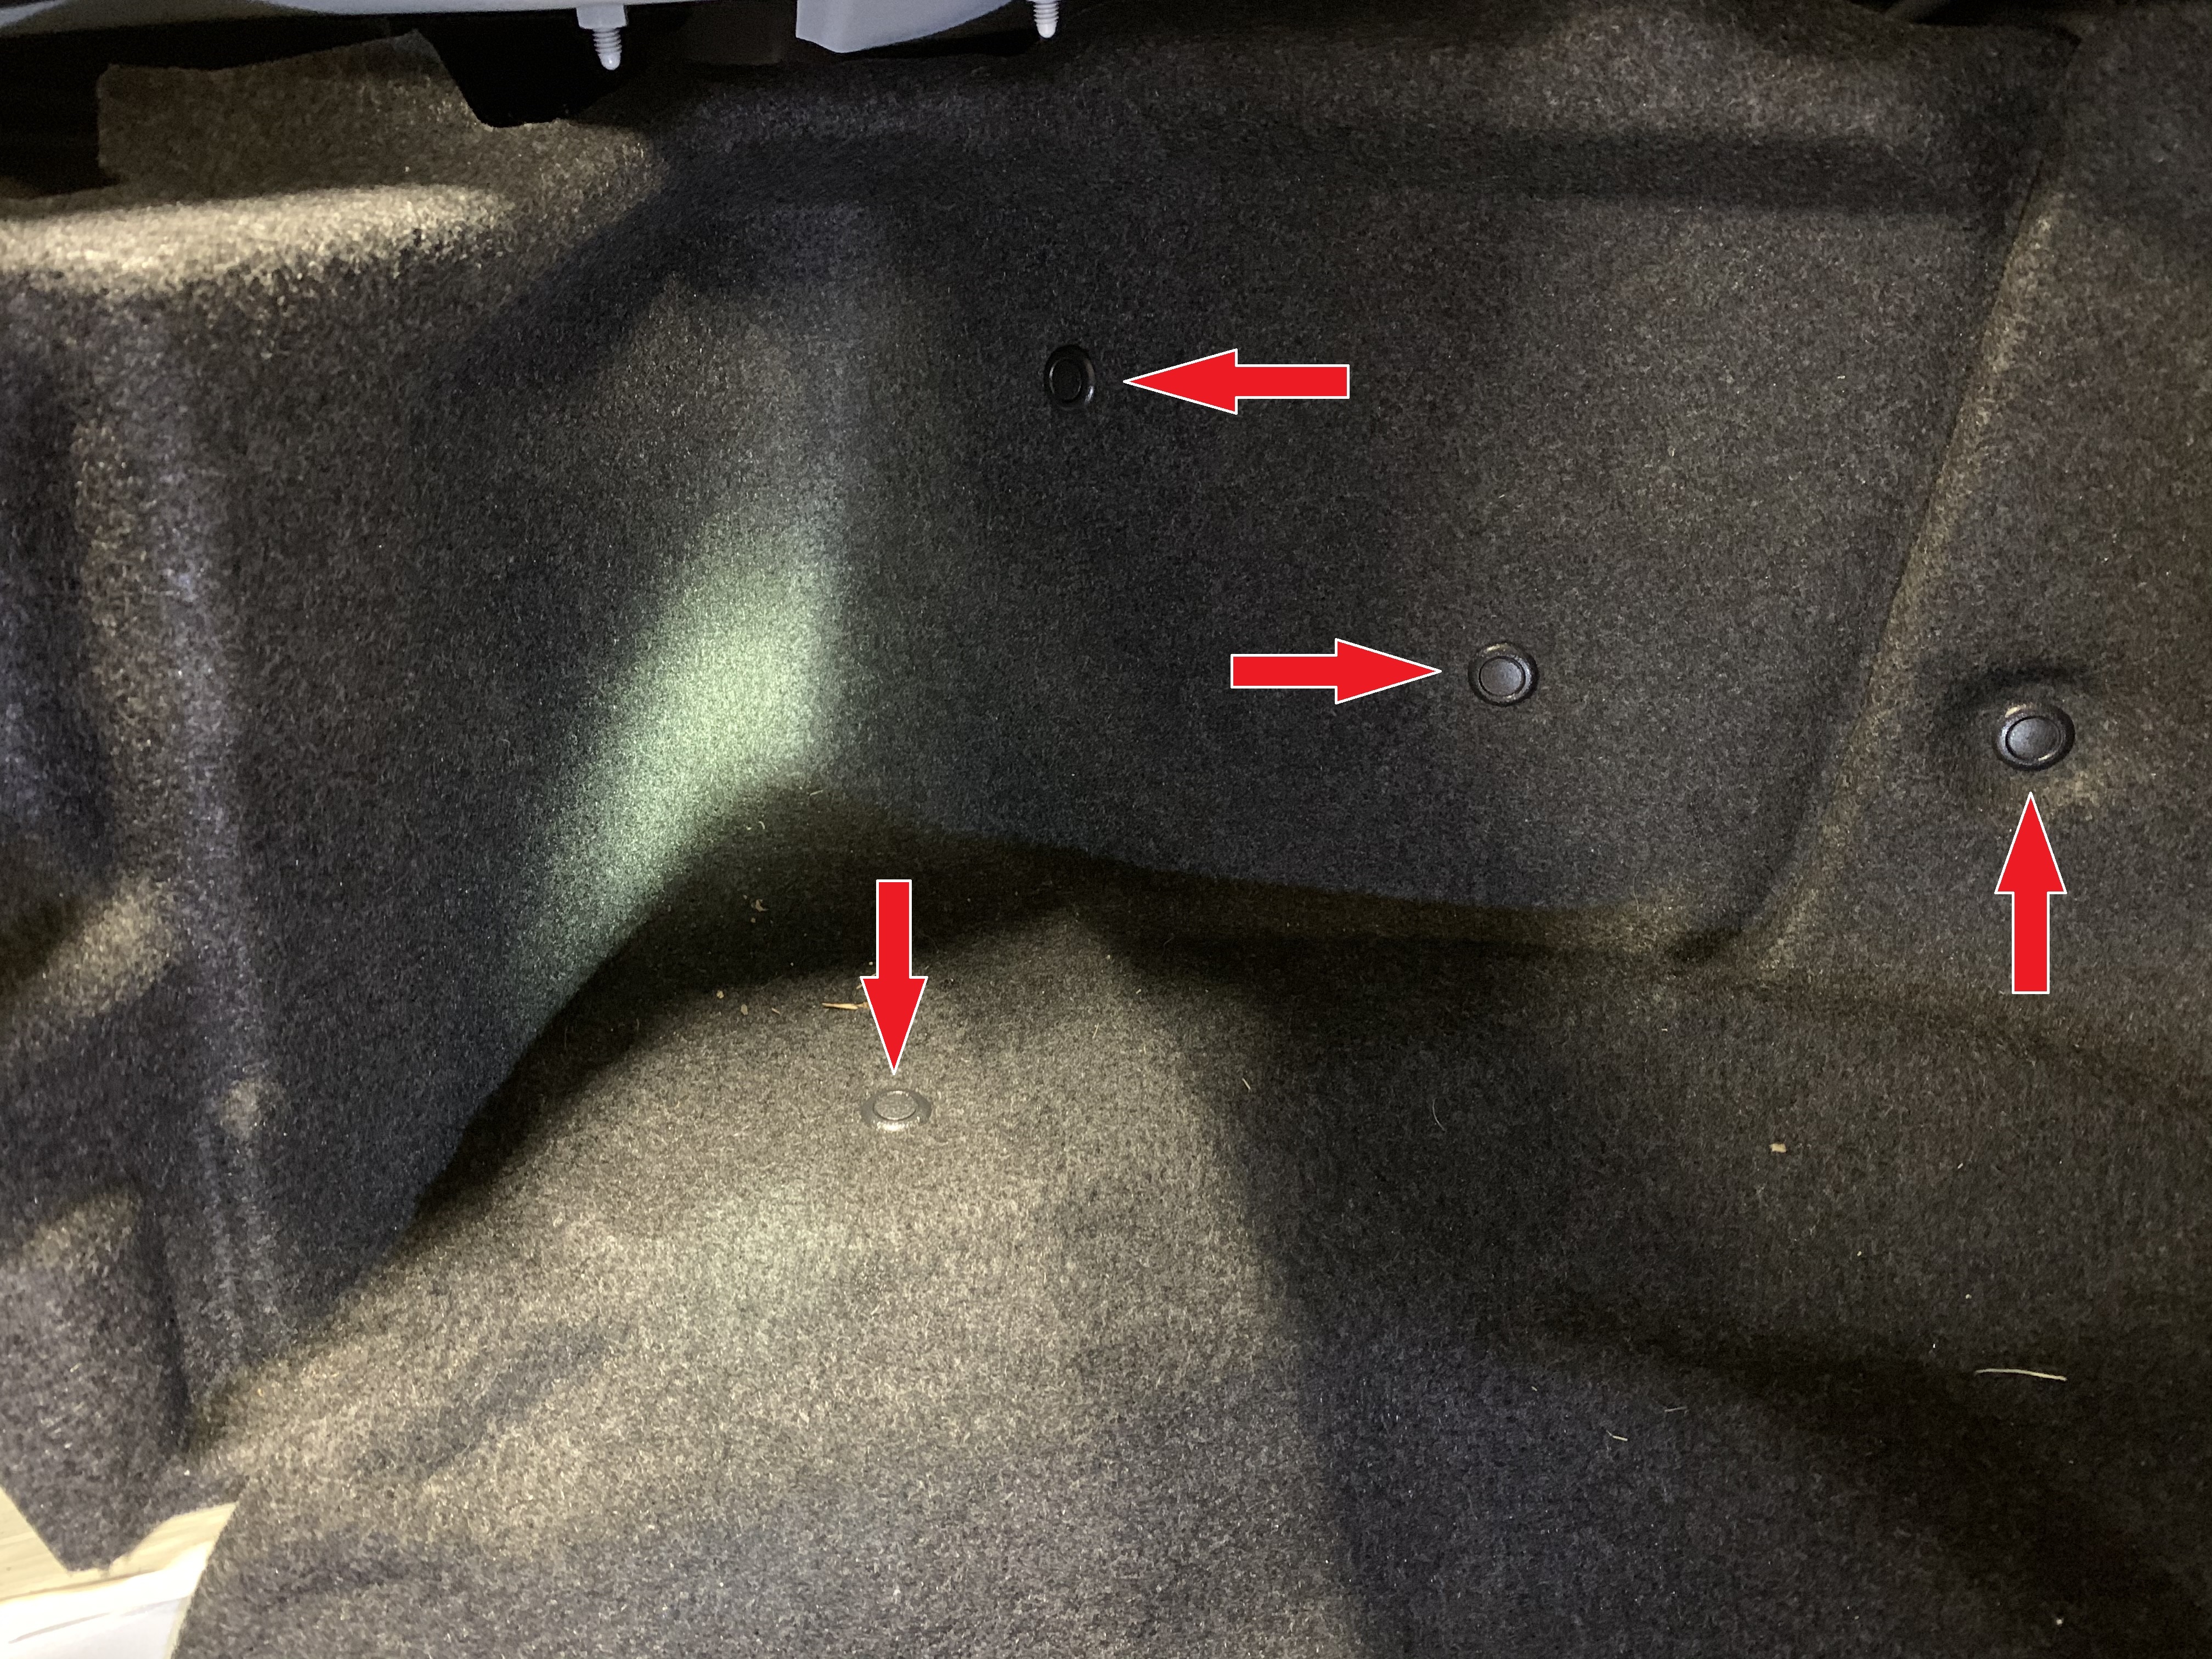
To install the Y-wire connector for the LED parking light strip, we’ll need to remove some panel clips in the trunk area so we can access the wiring behind the drivers side carpet. To remove these clips, pop up the center section and then pull the clip out of the panel.
First, you'll need to remove the rearmost plastic panel held on by 4 of the plastic clips. Once loose, disconnect the trunk light and set the panel aside
Next, pull the four drivers side trunk clips so you can peel the carpet back and see the wiring we're going to install the Y-wire connector into.
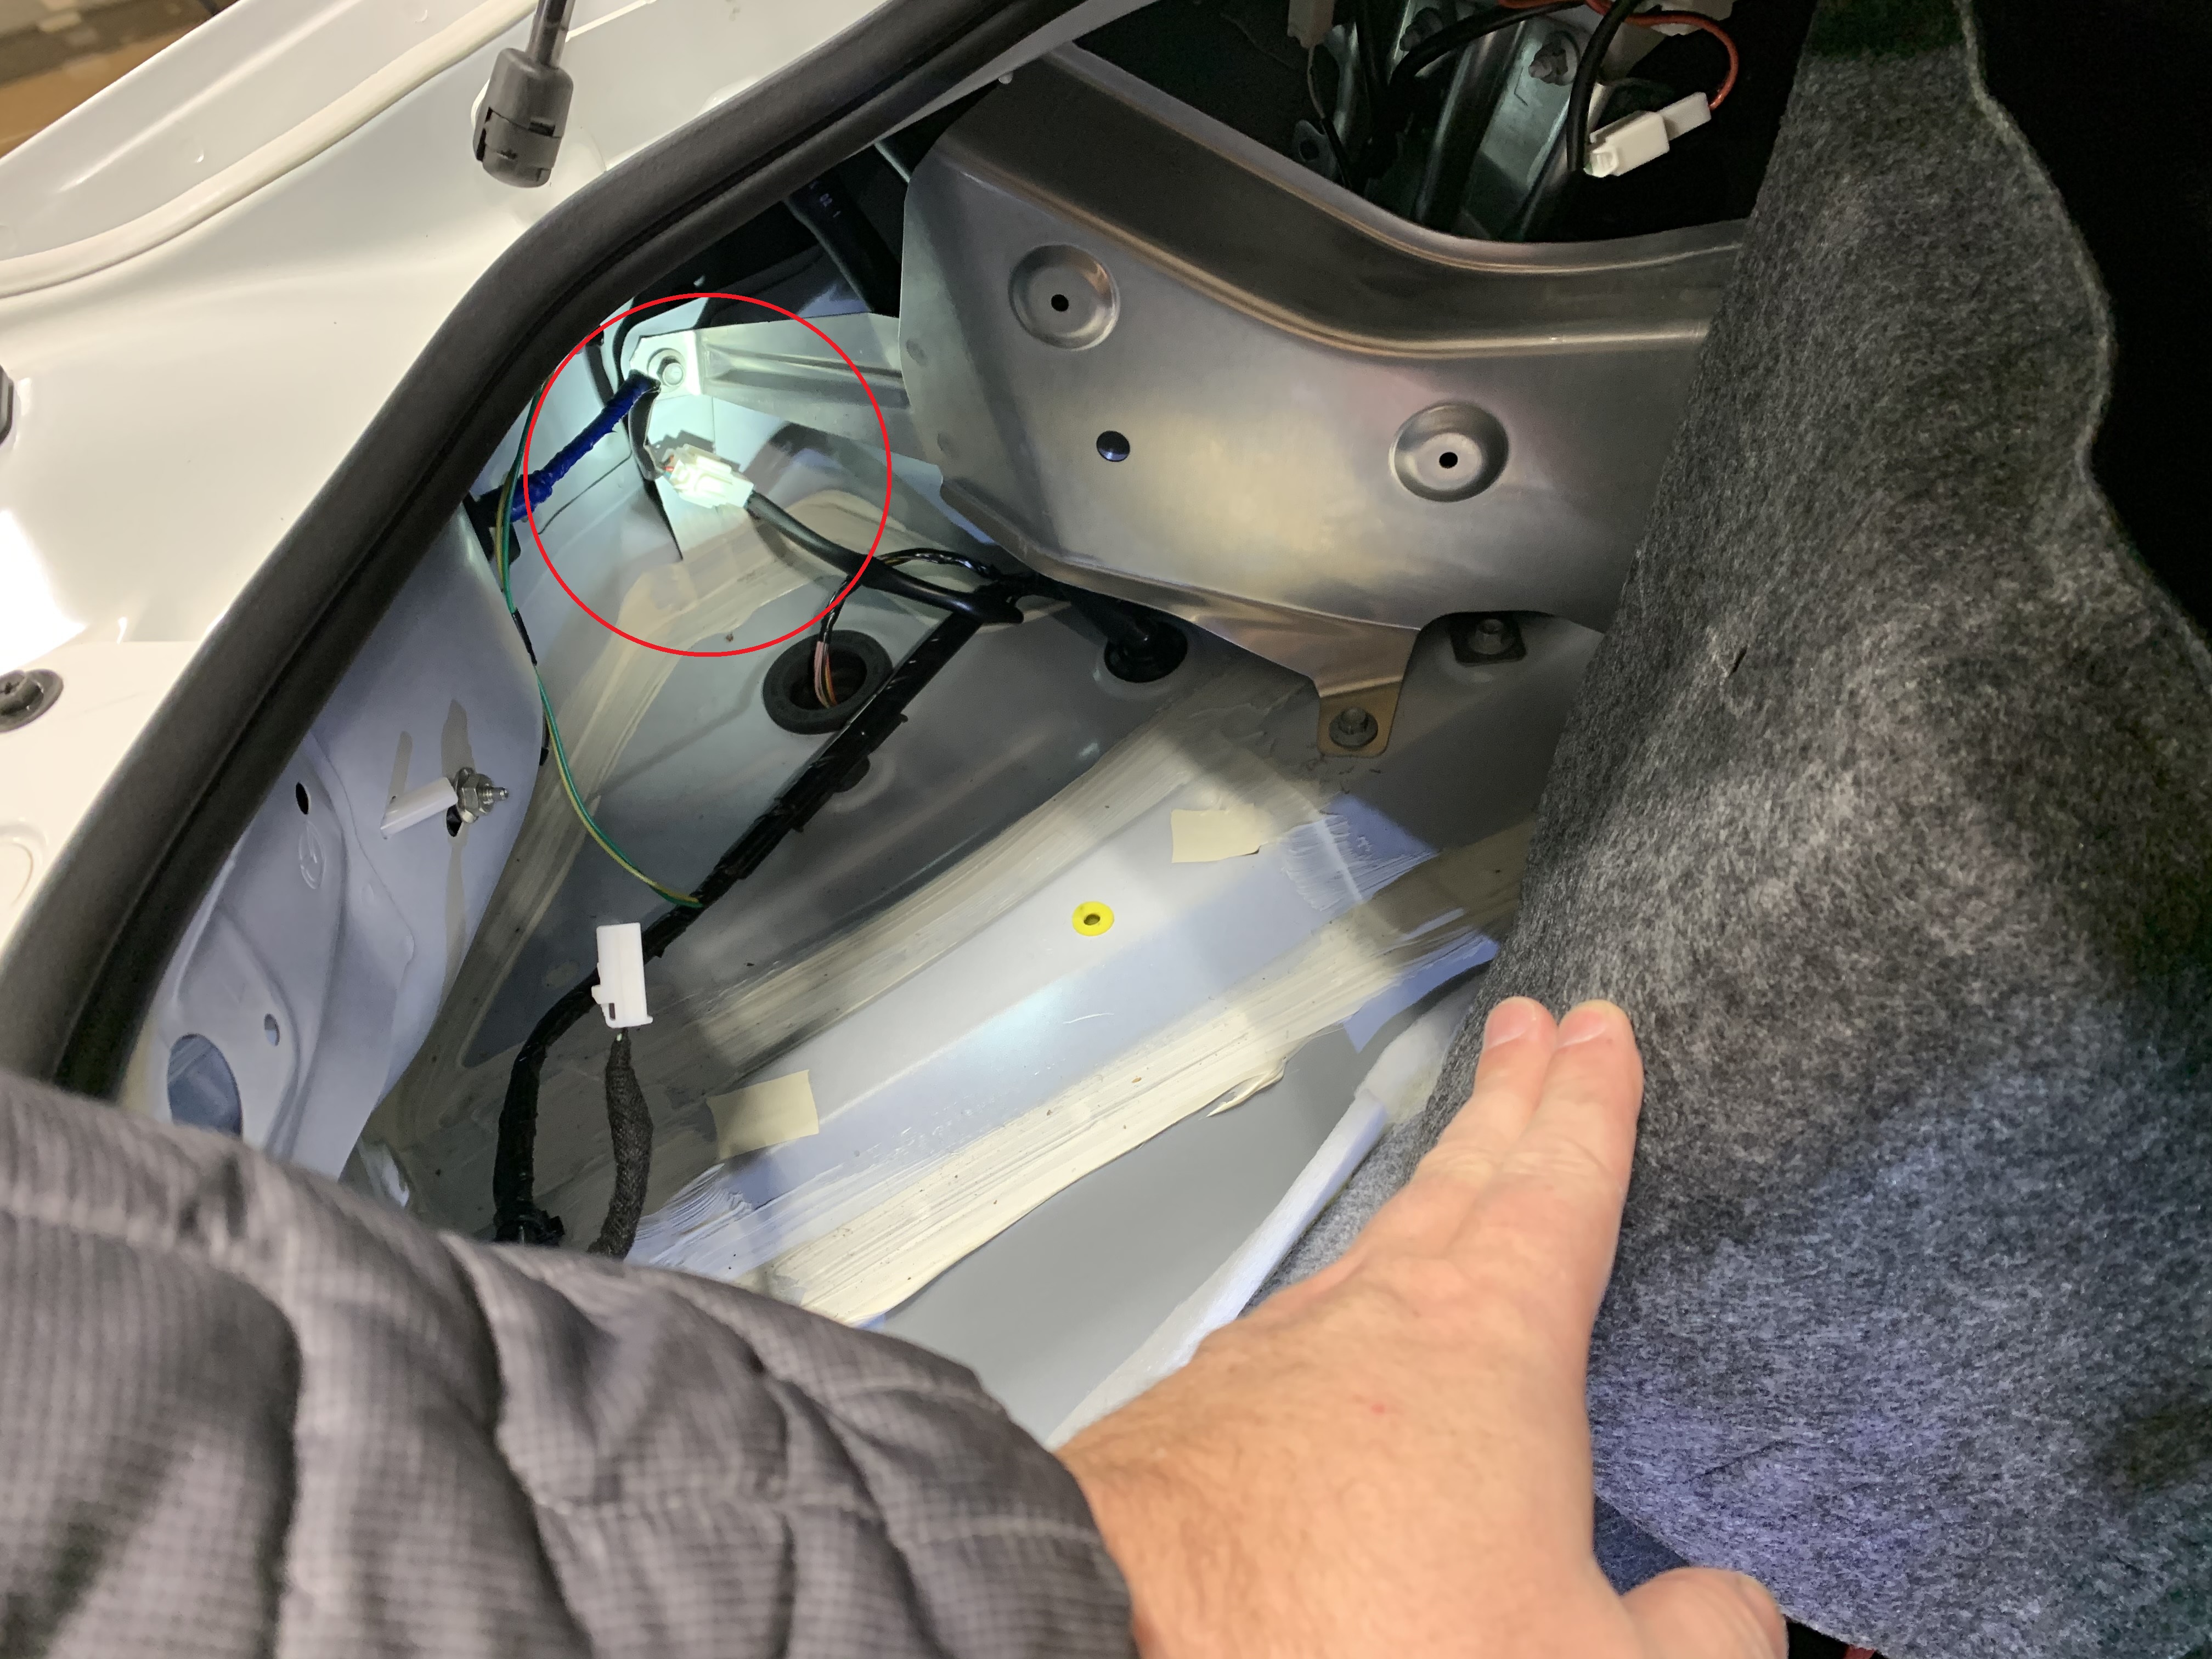
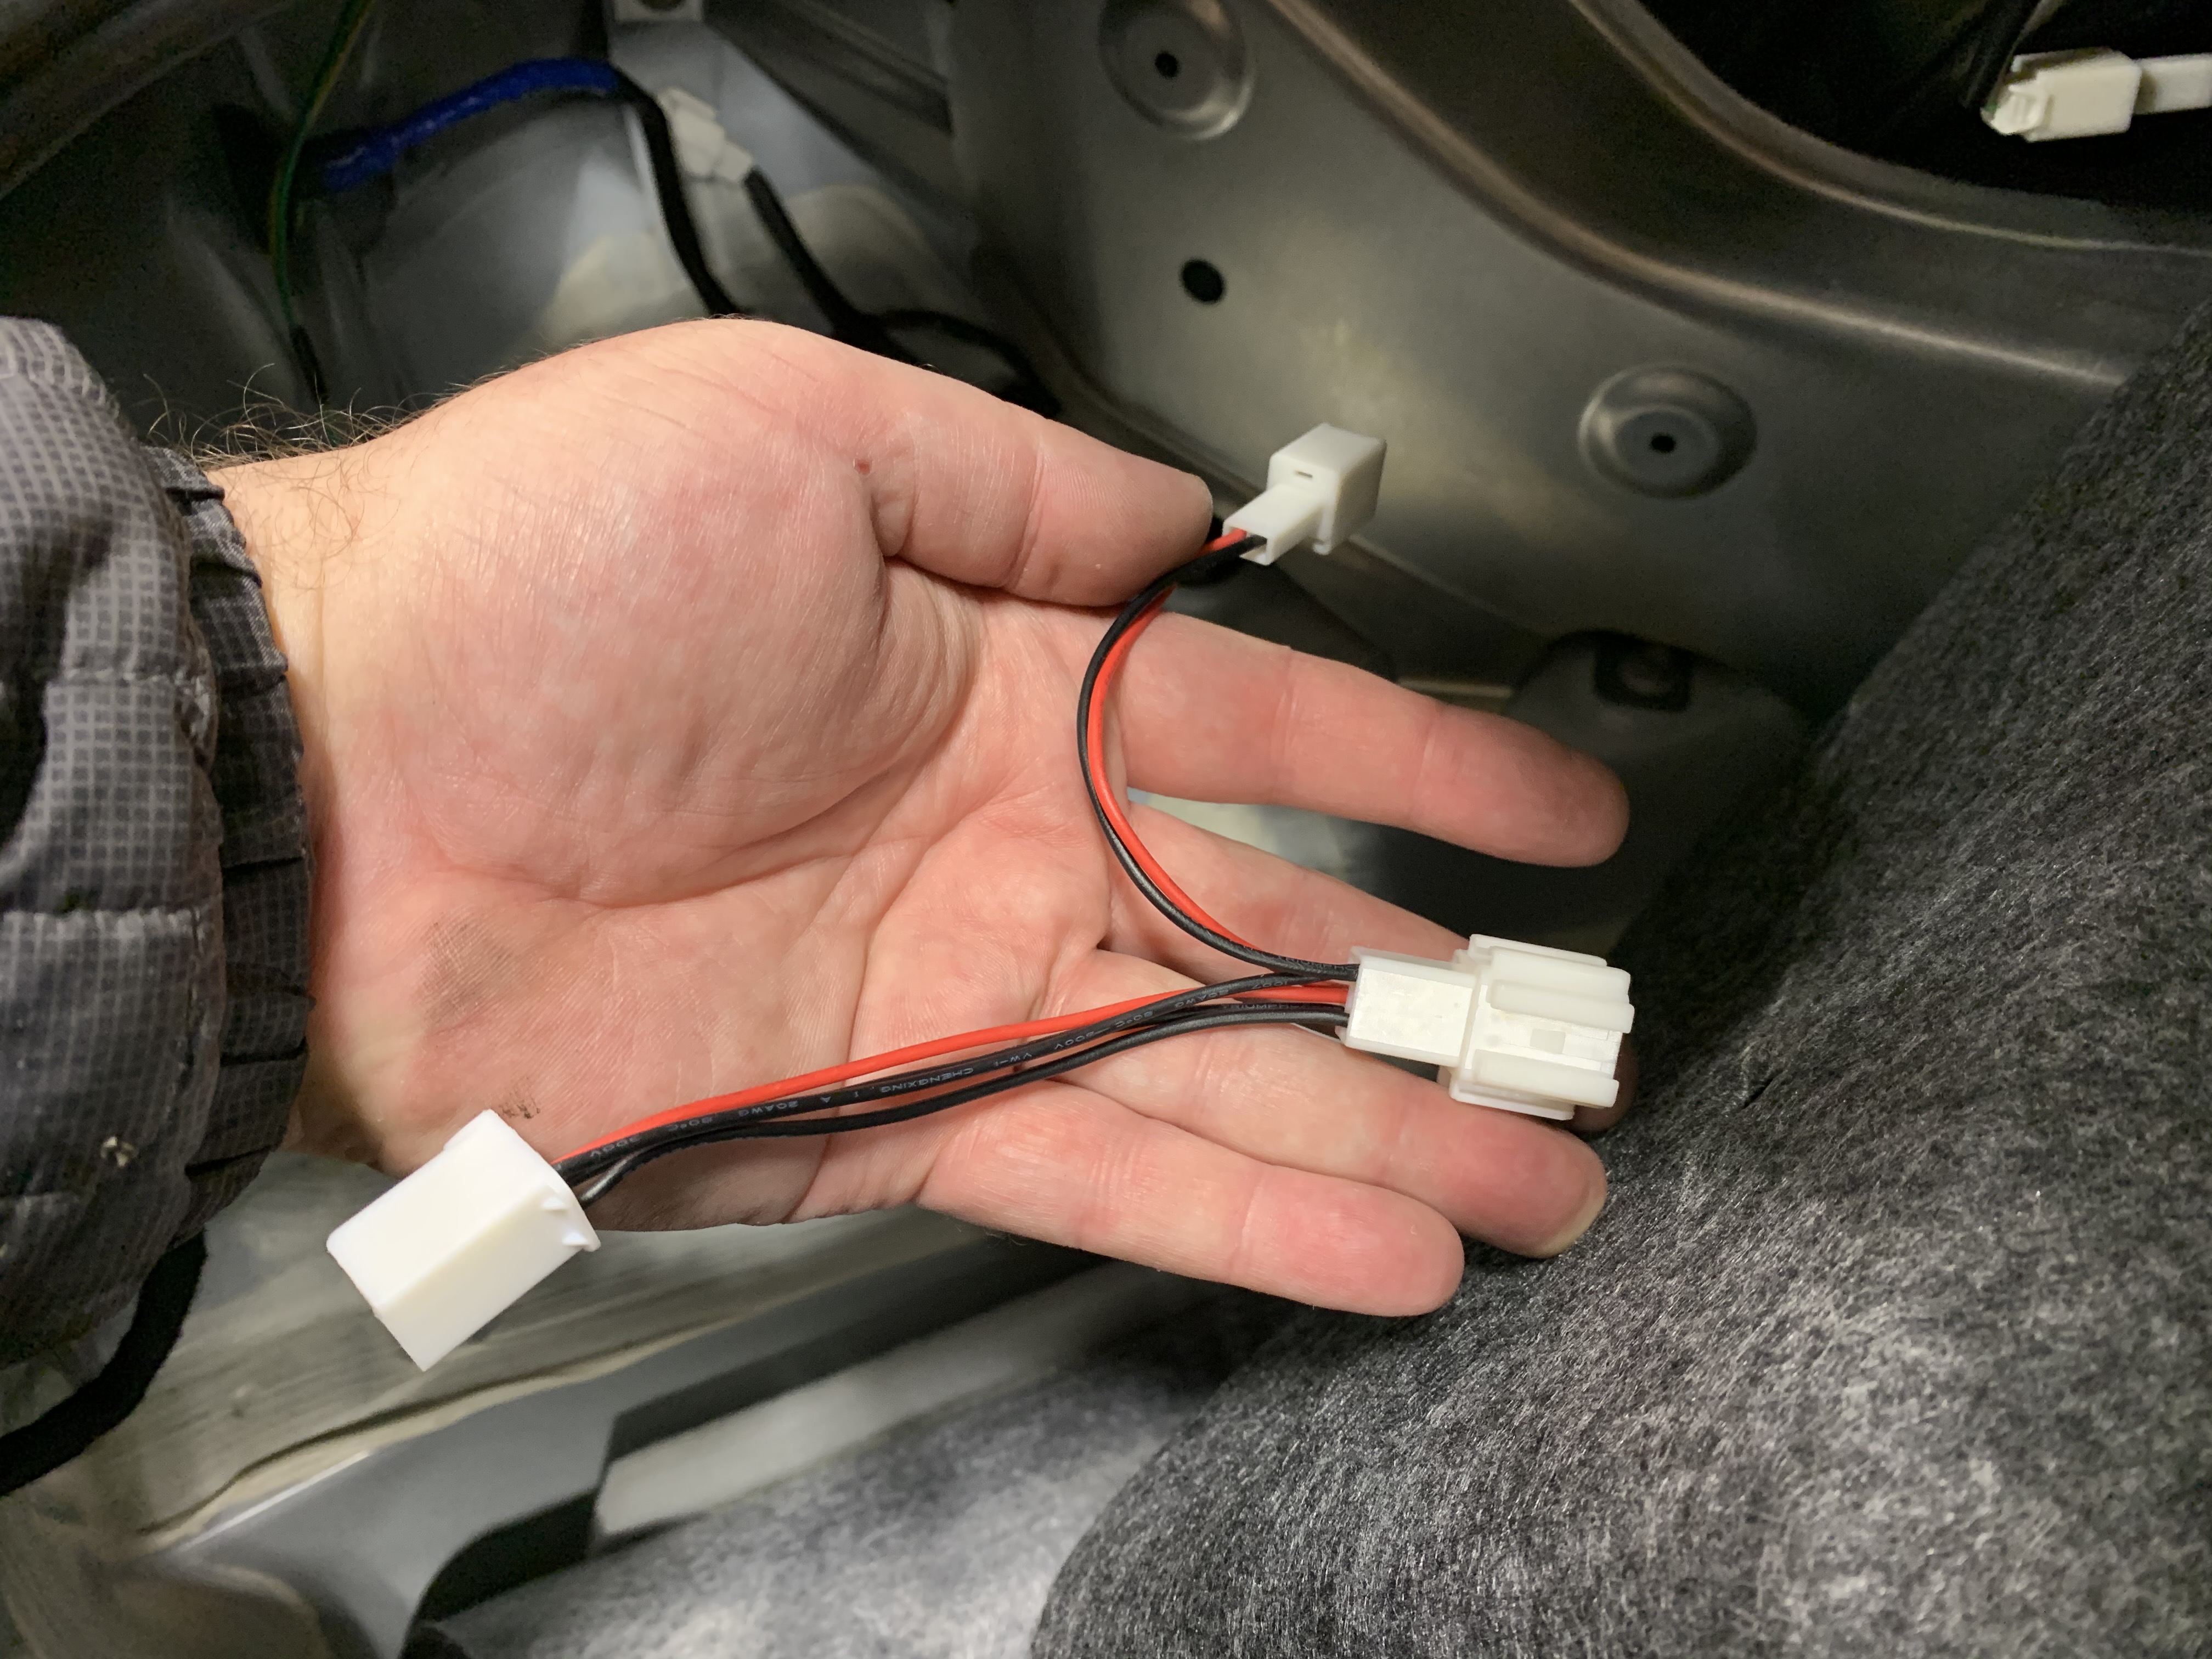
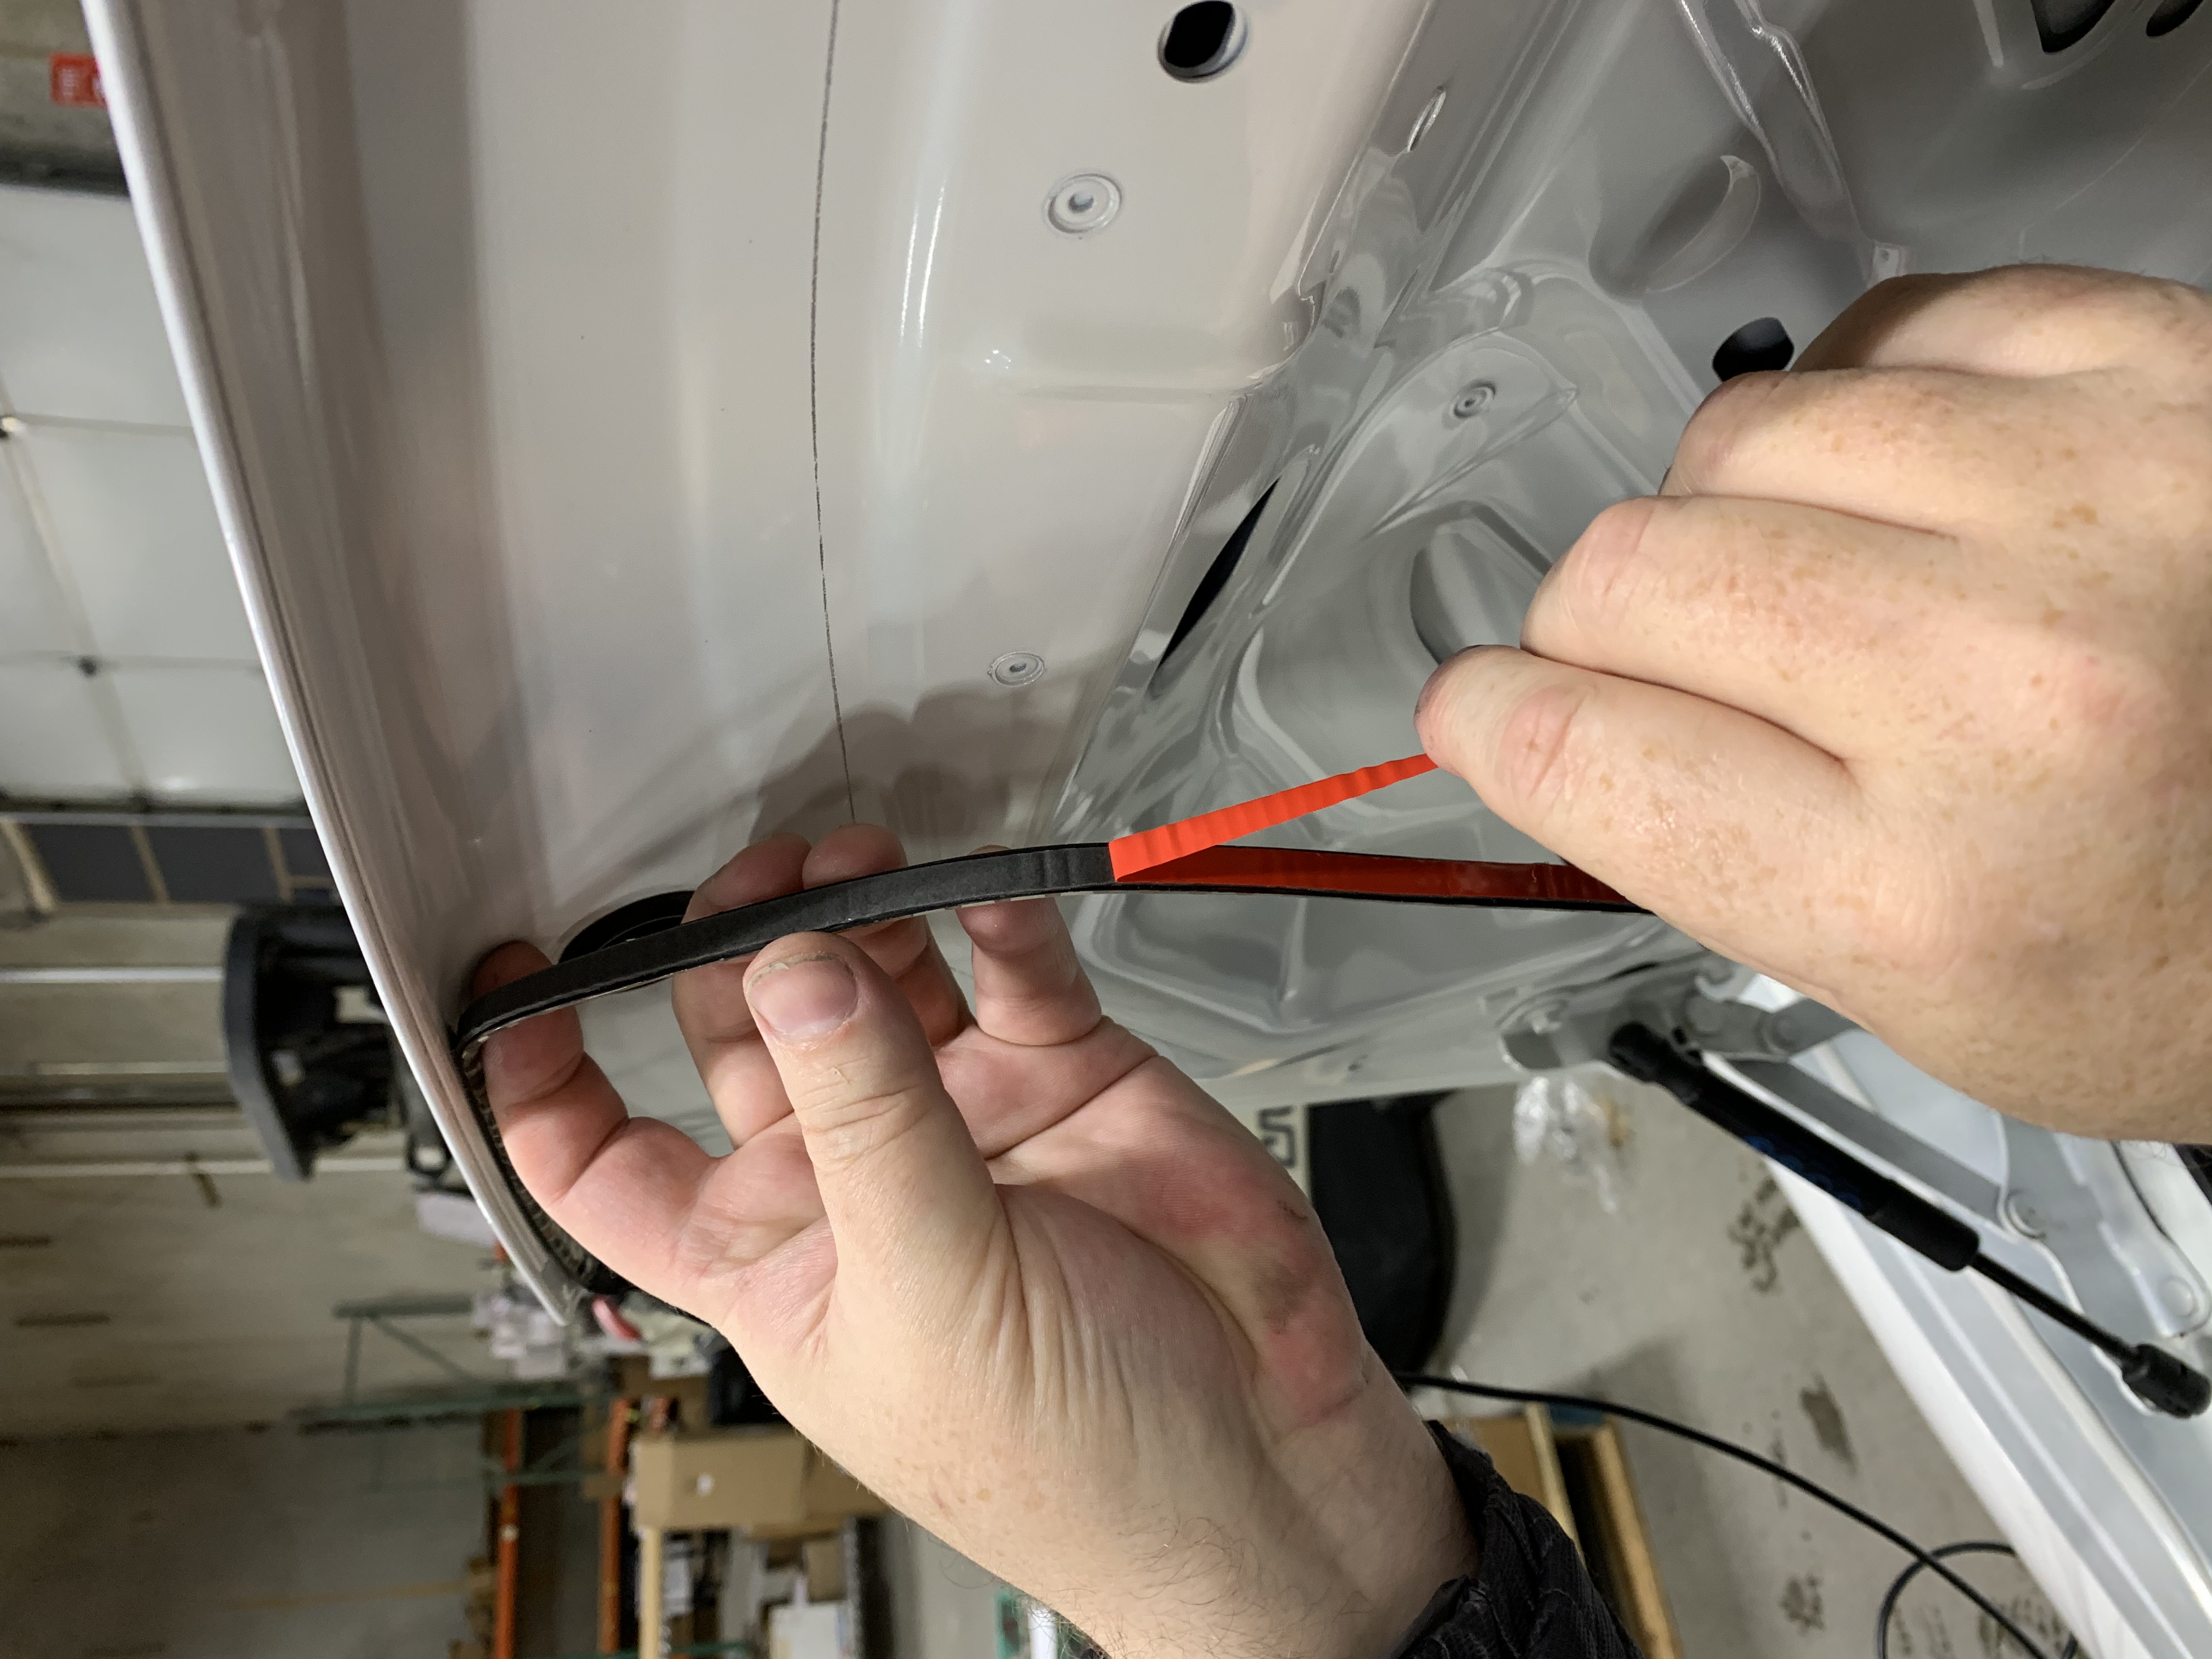
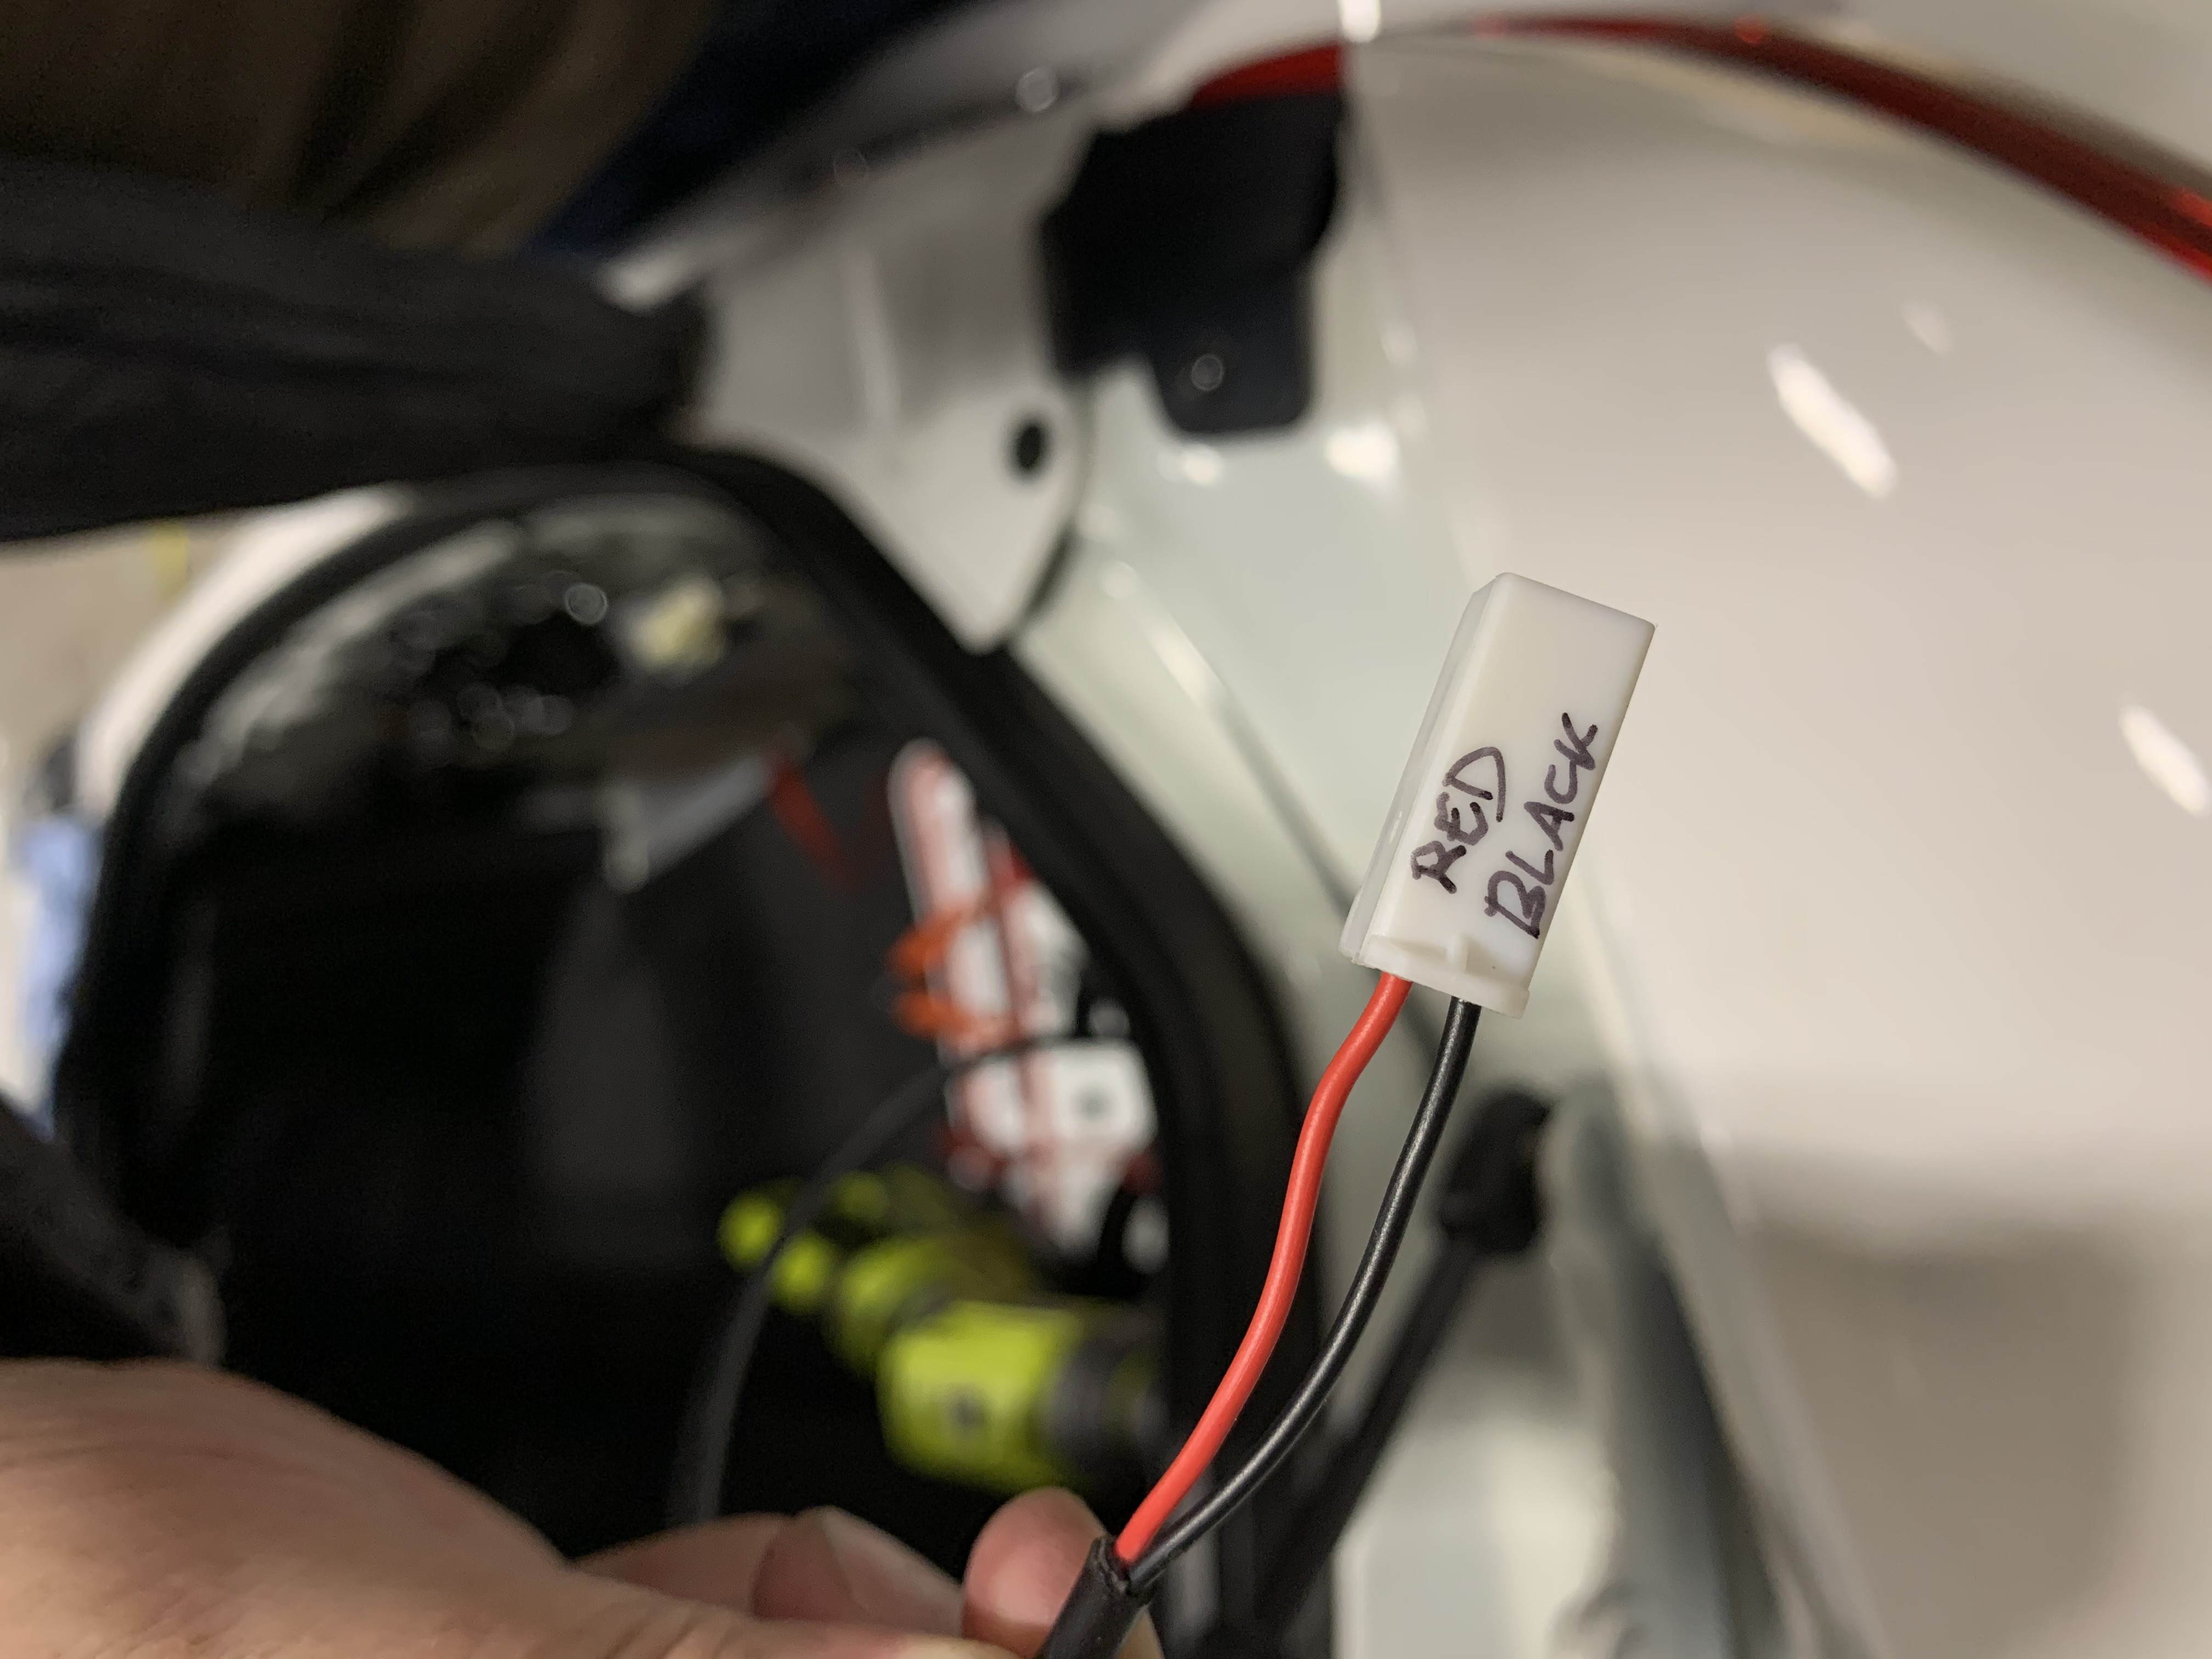
It only installs one way, so take a look at the plugs and match them up with the correct side. The two-wire plug will connect to the LED light strip.
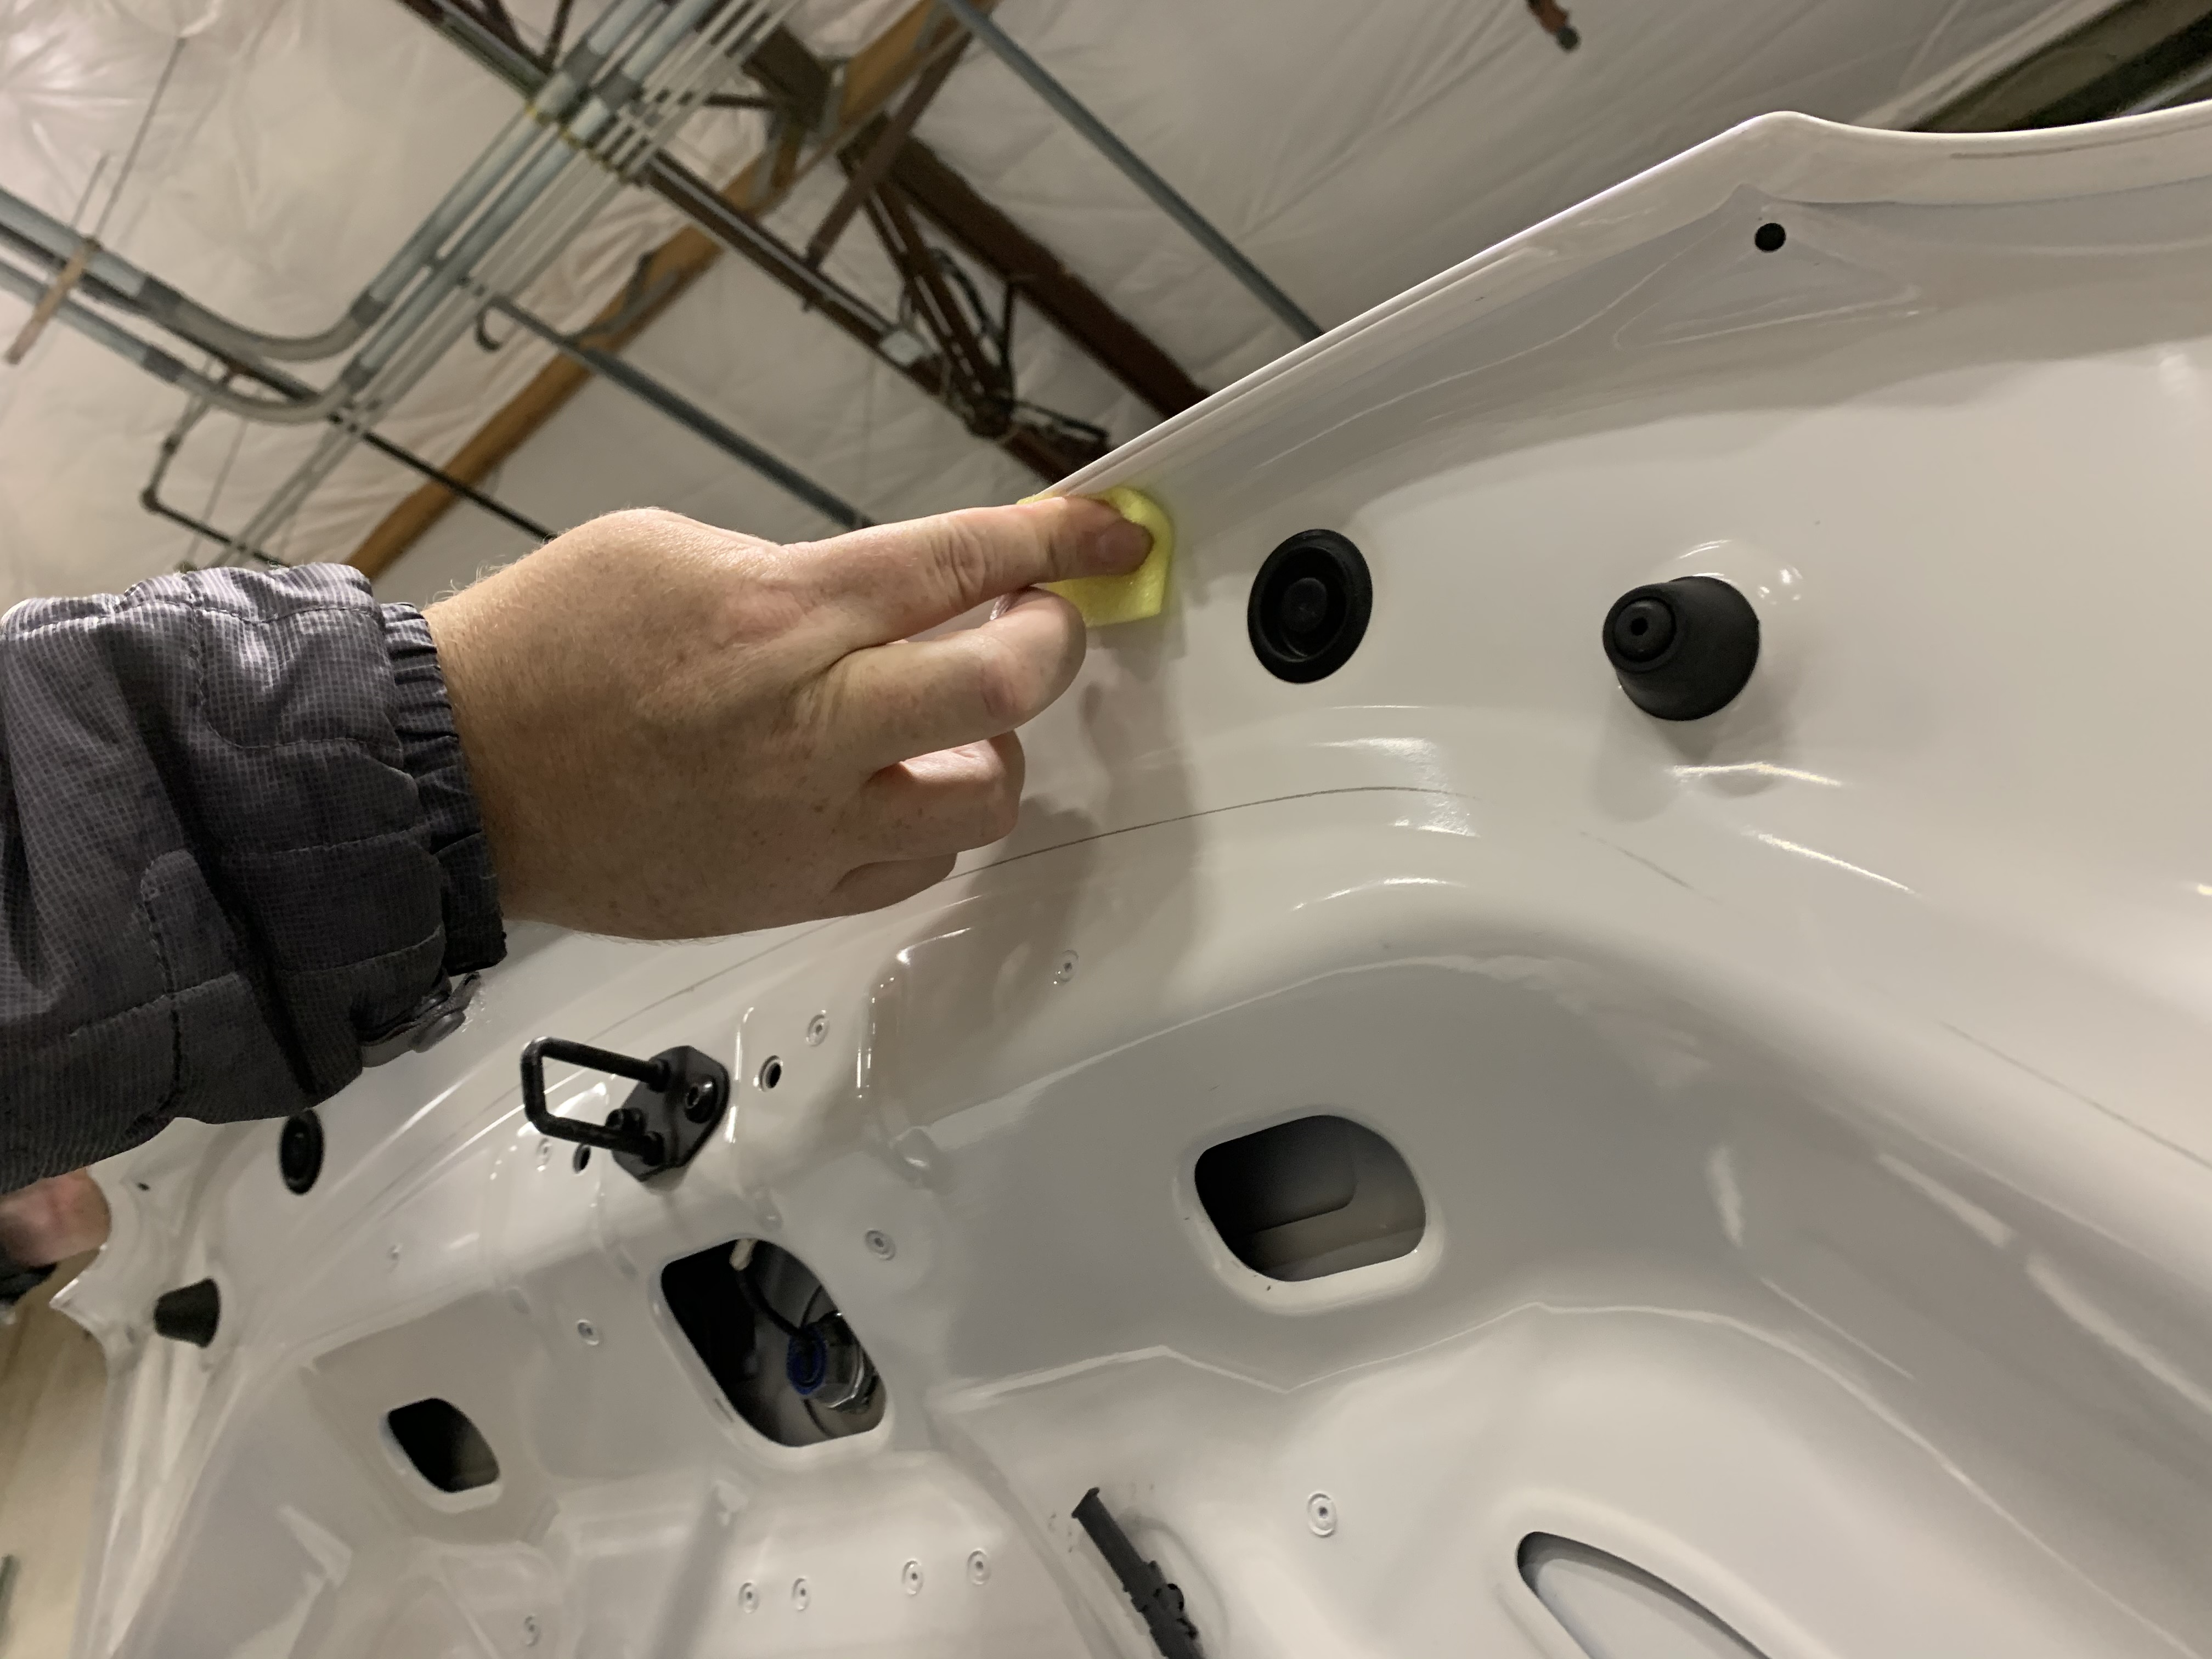
Look at the underside lip of the trunk and make sure it's clean. Utilize the included alcohol wipe to ensure the surface is prepped.
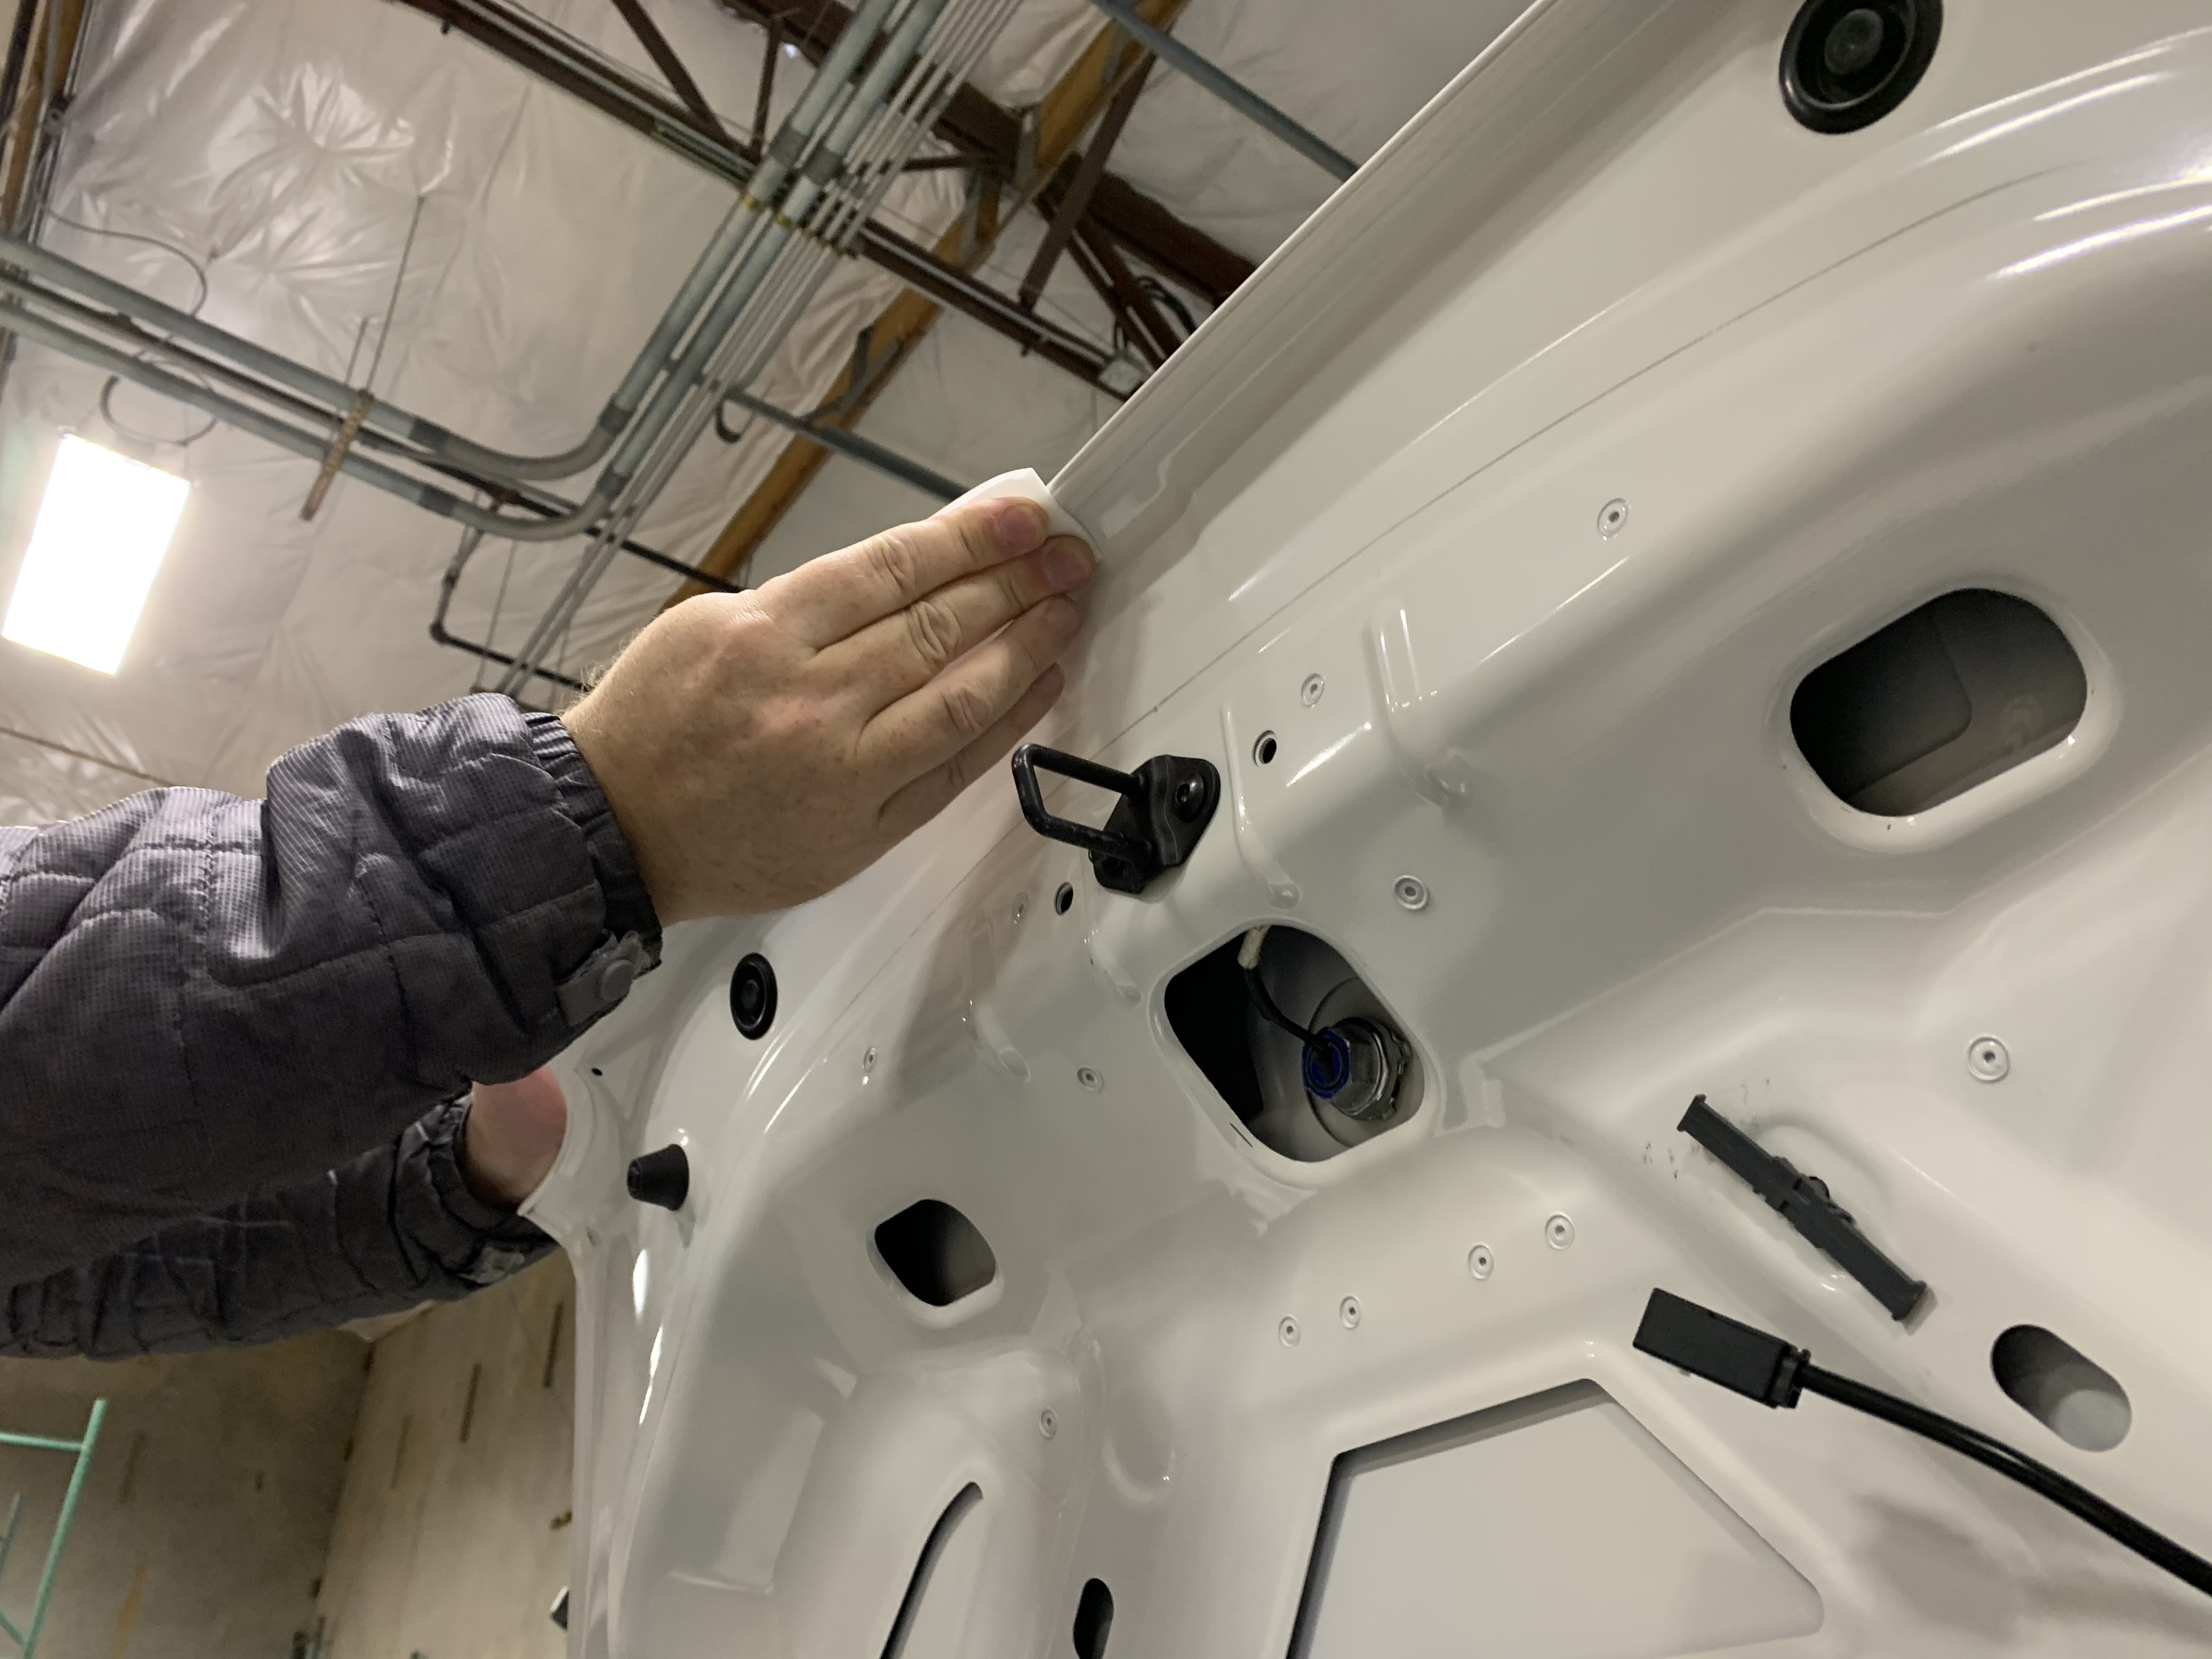
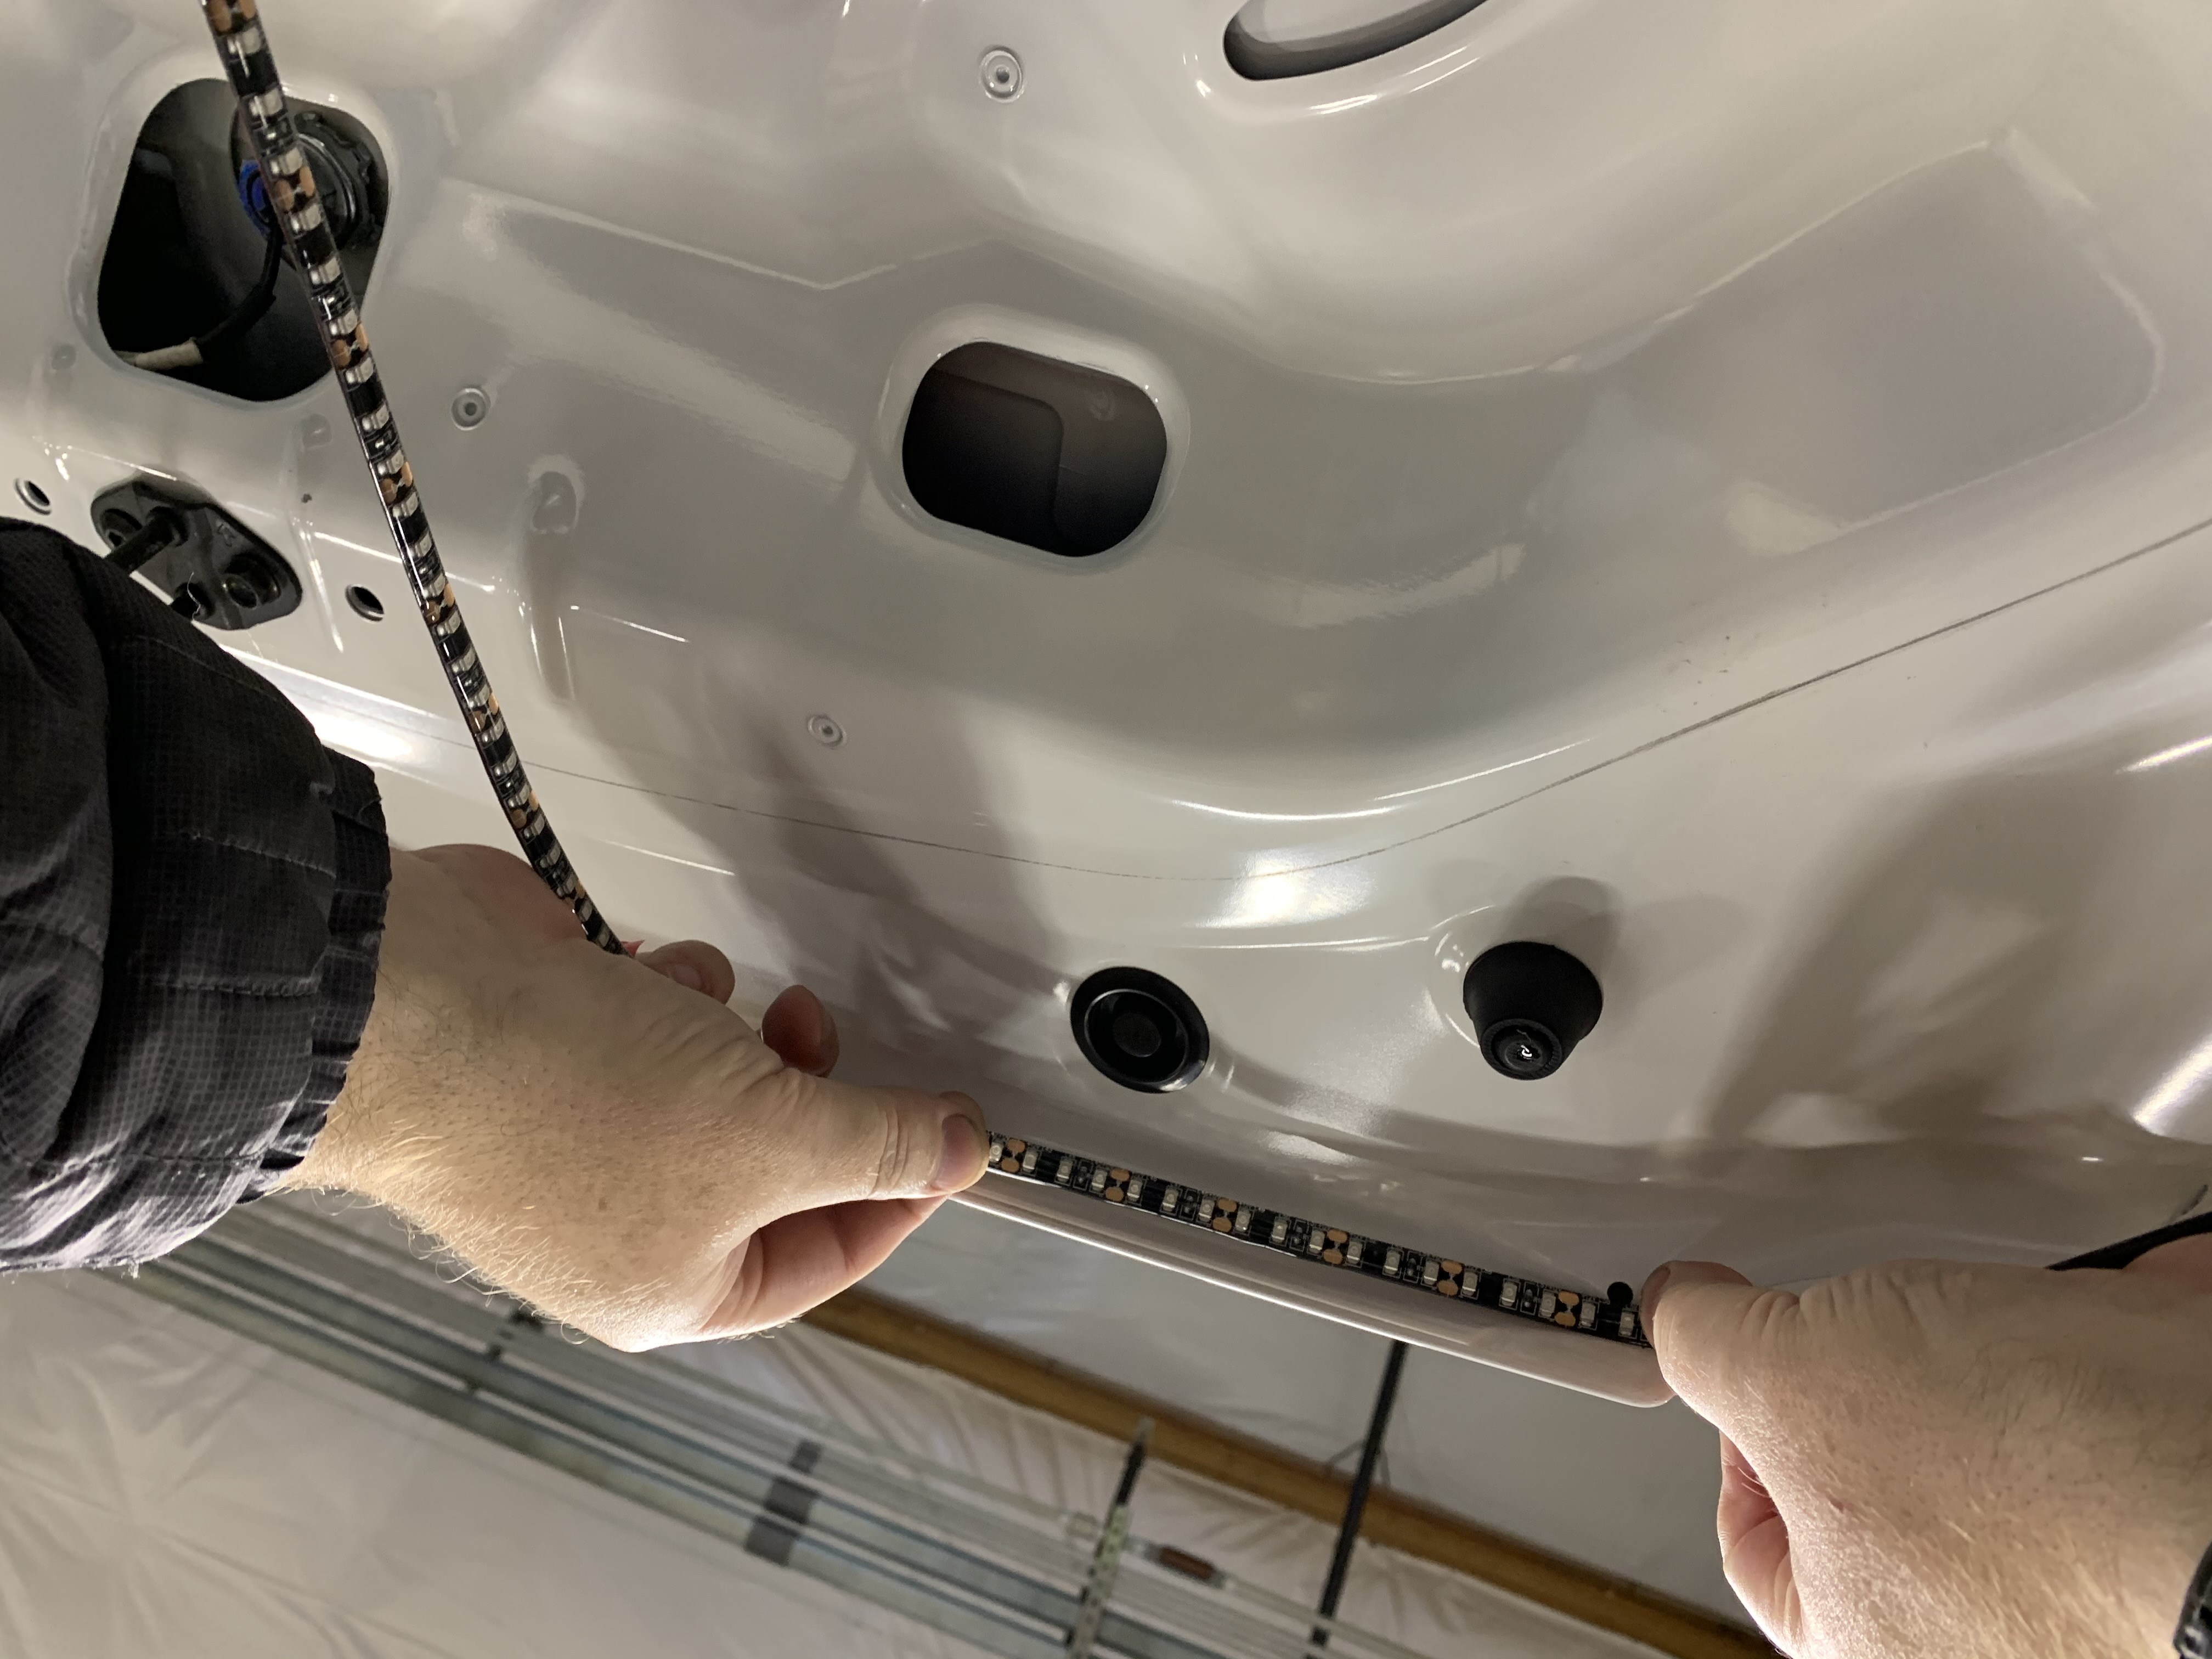
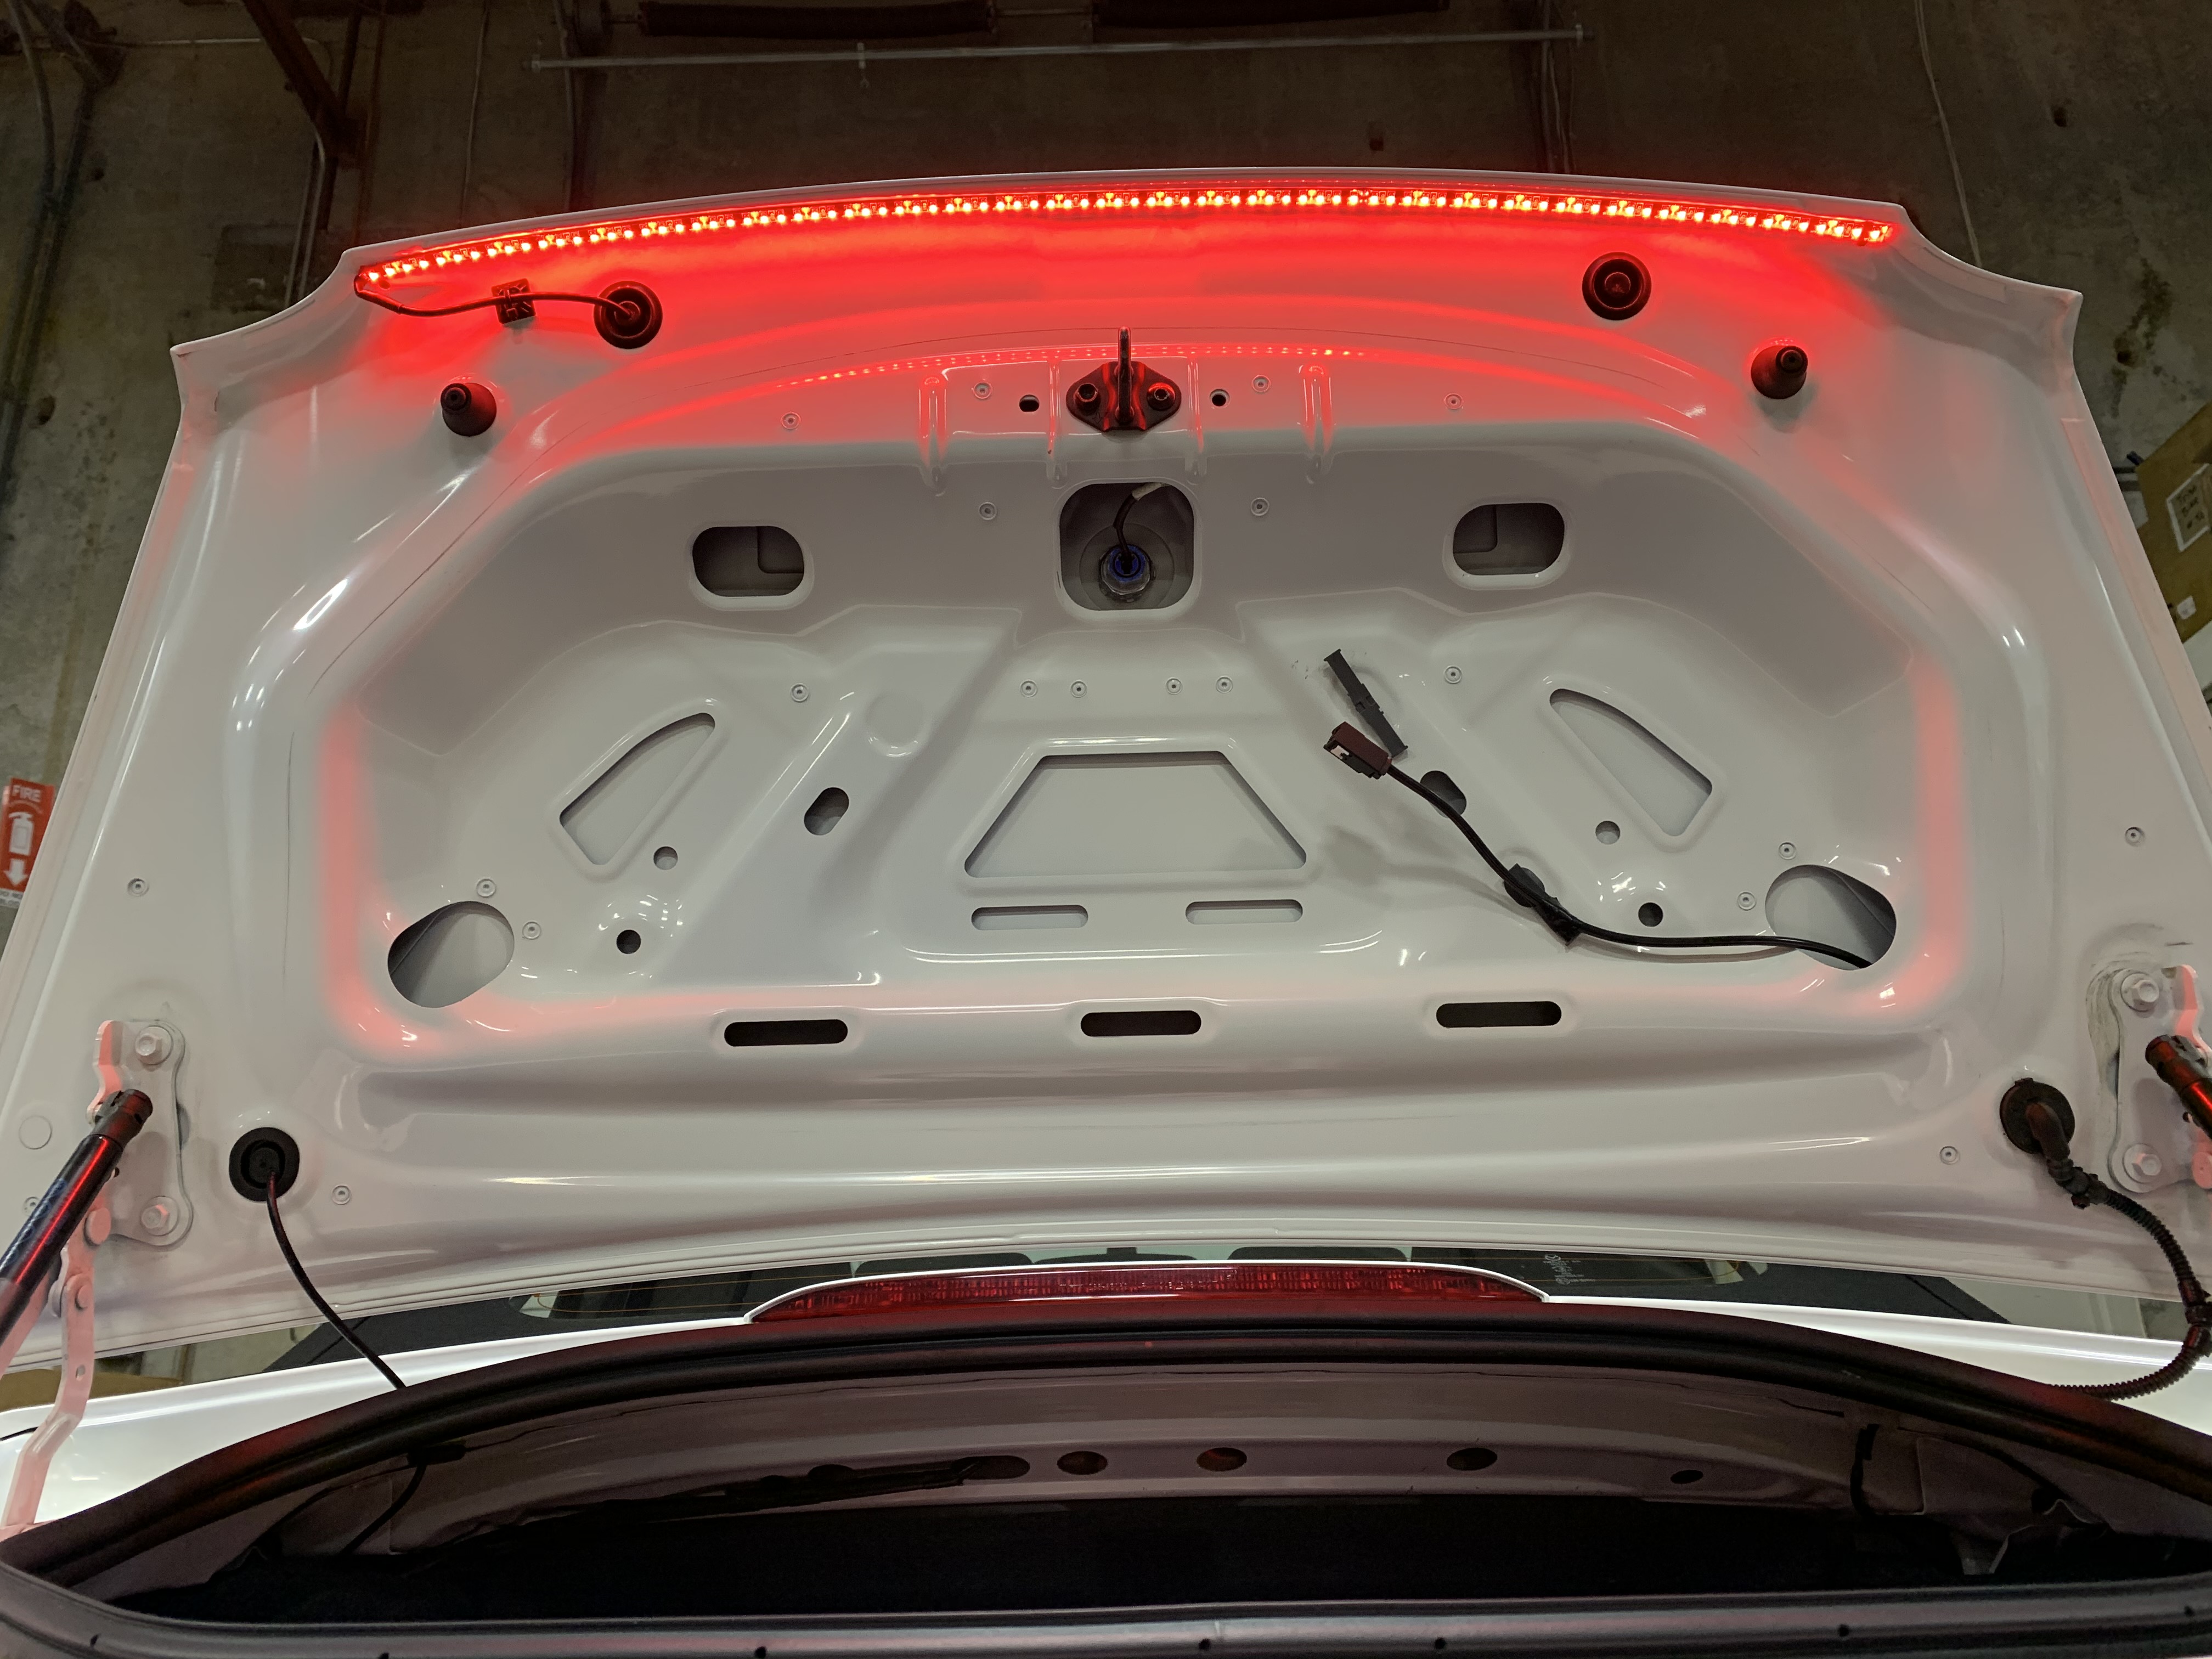
Remove the LED light strip from the spool and test fit it up against the lip with the wiring and plug on the drivers side. Take note of how much spacing you have on both sides so that you can center the LED light strip properly when you install it.
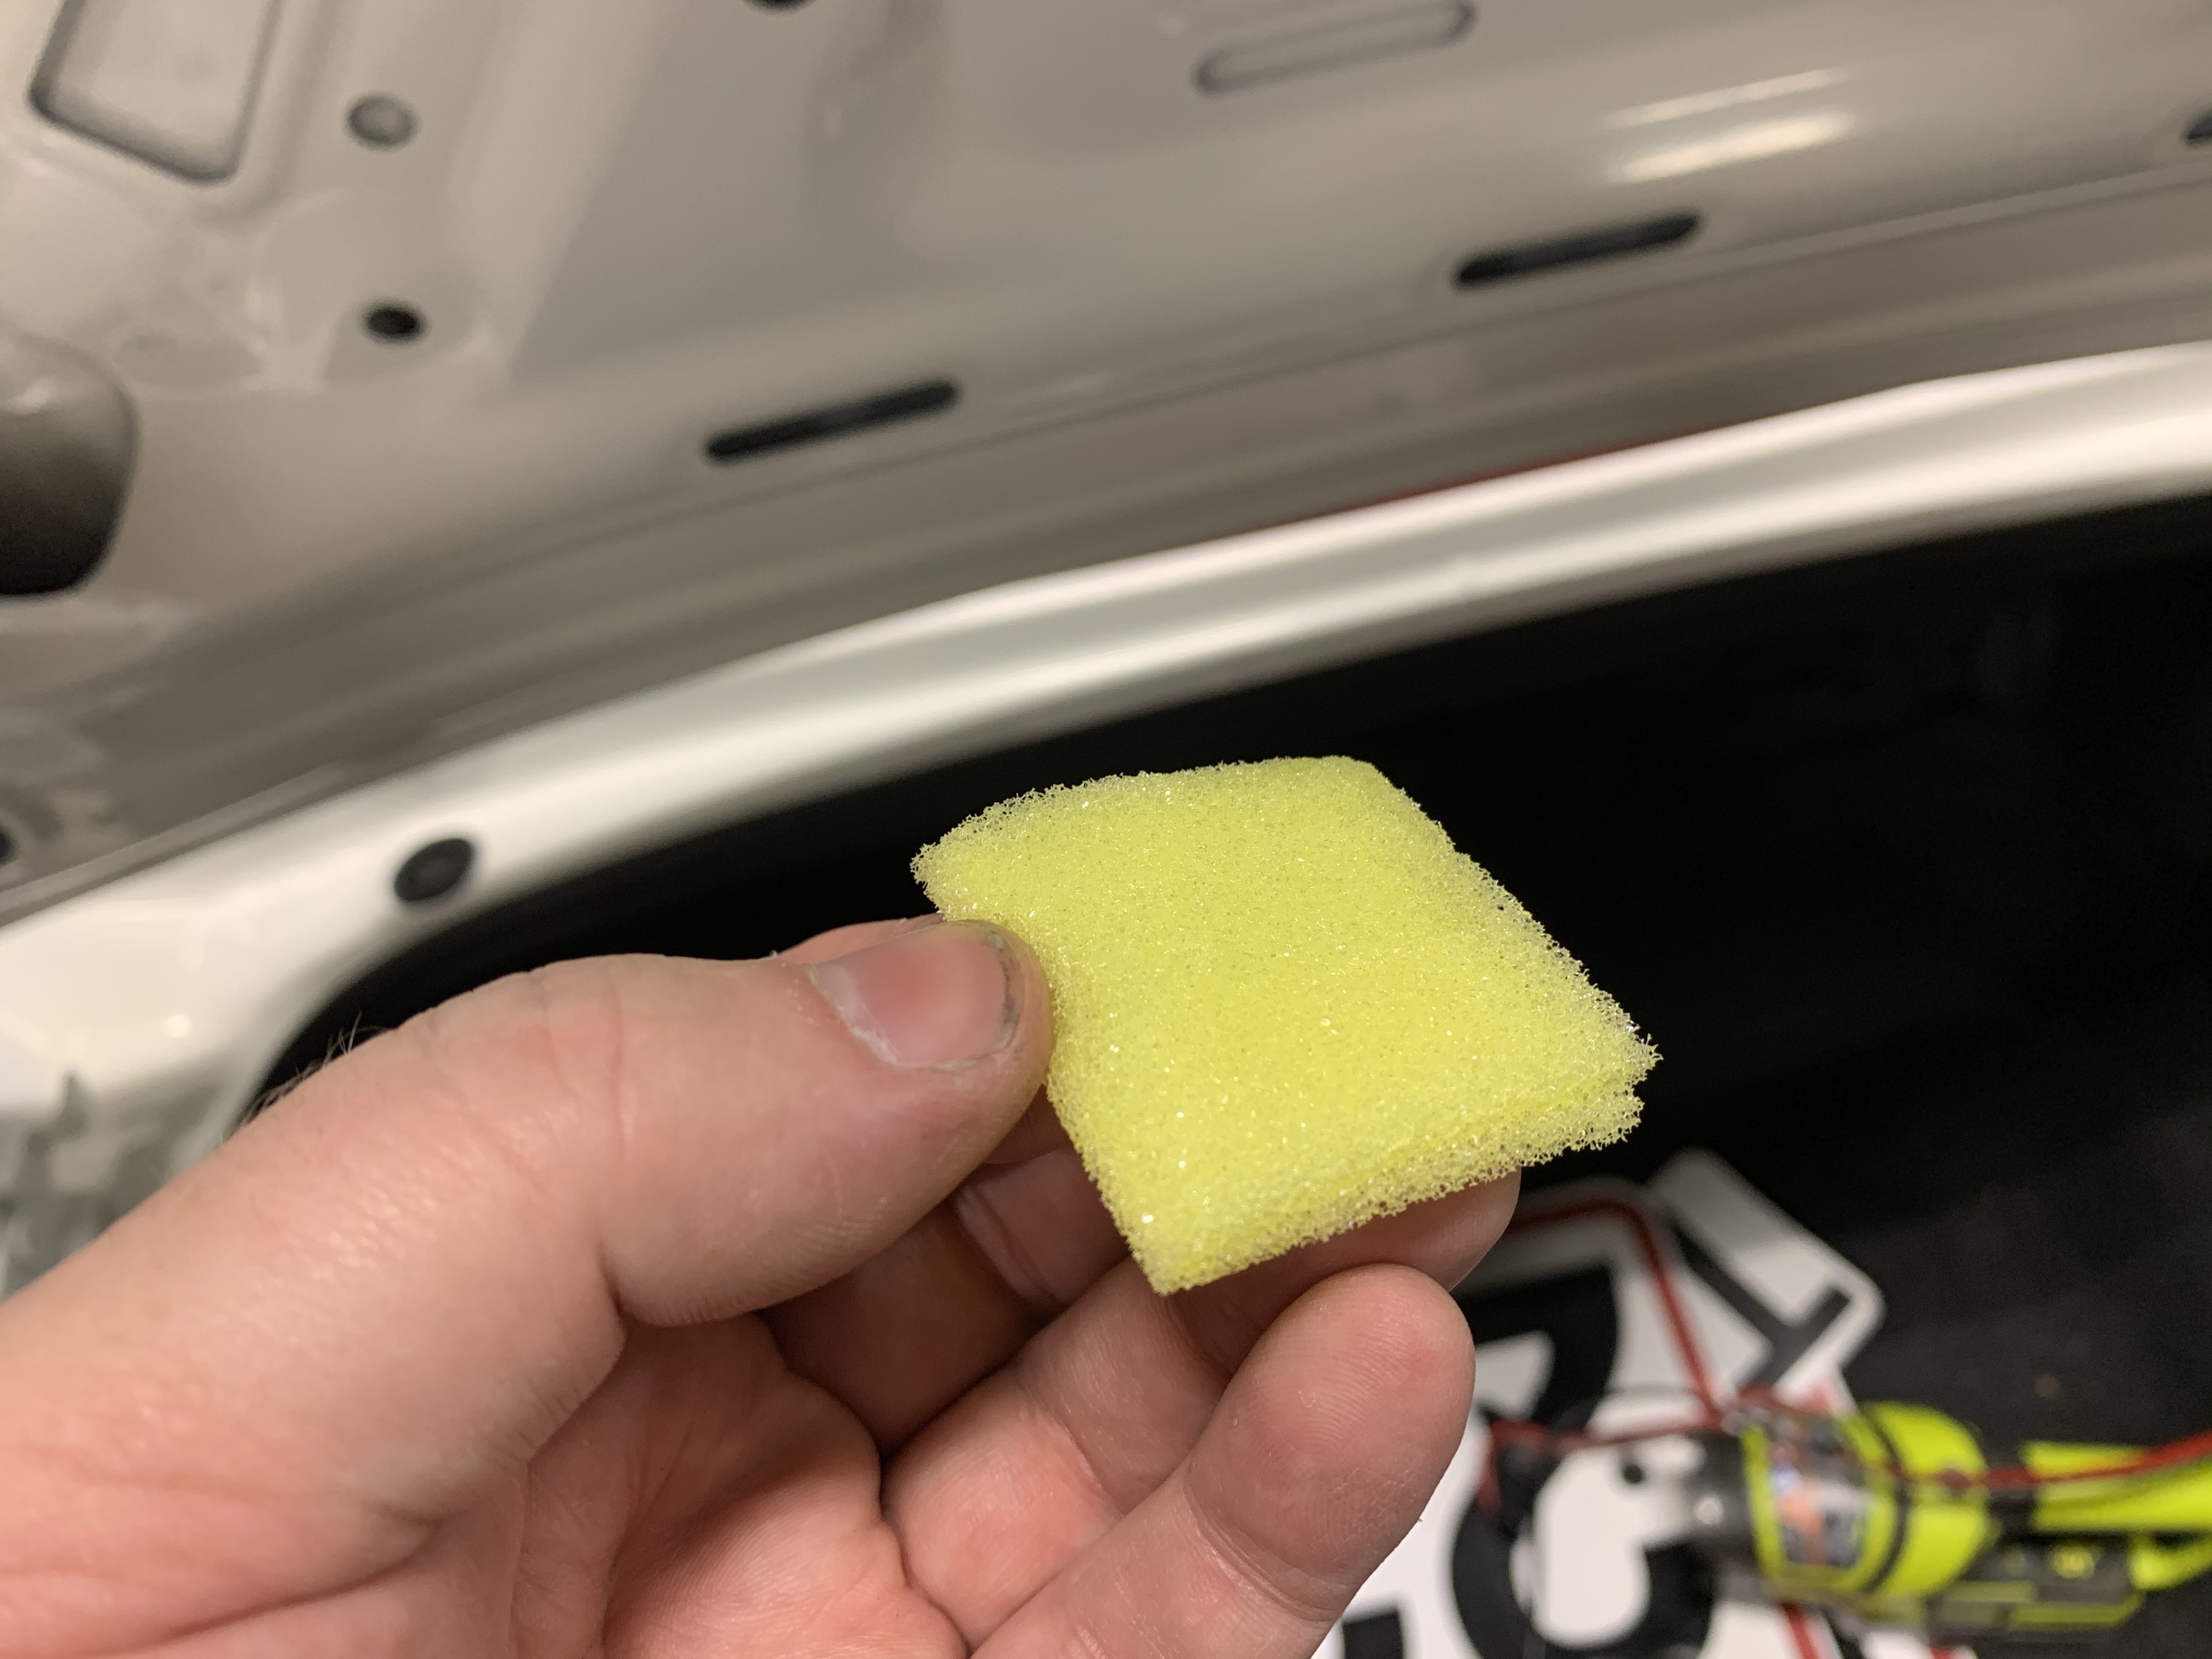
Take the adhesive promoter packet and remove the applicator foam pad. The solution will make your hands tacky, so wear some latex gloves if you have them.
Run the foam applicator along the underside trunk surface where the LED light strip will mount.
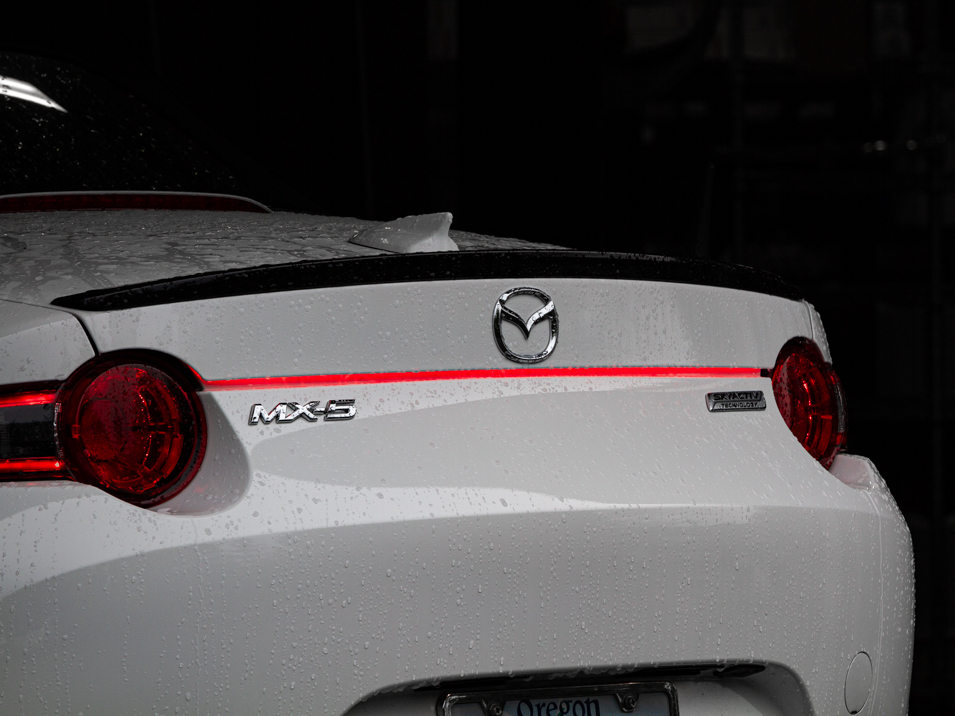
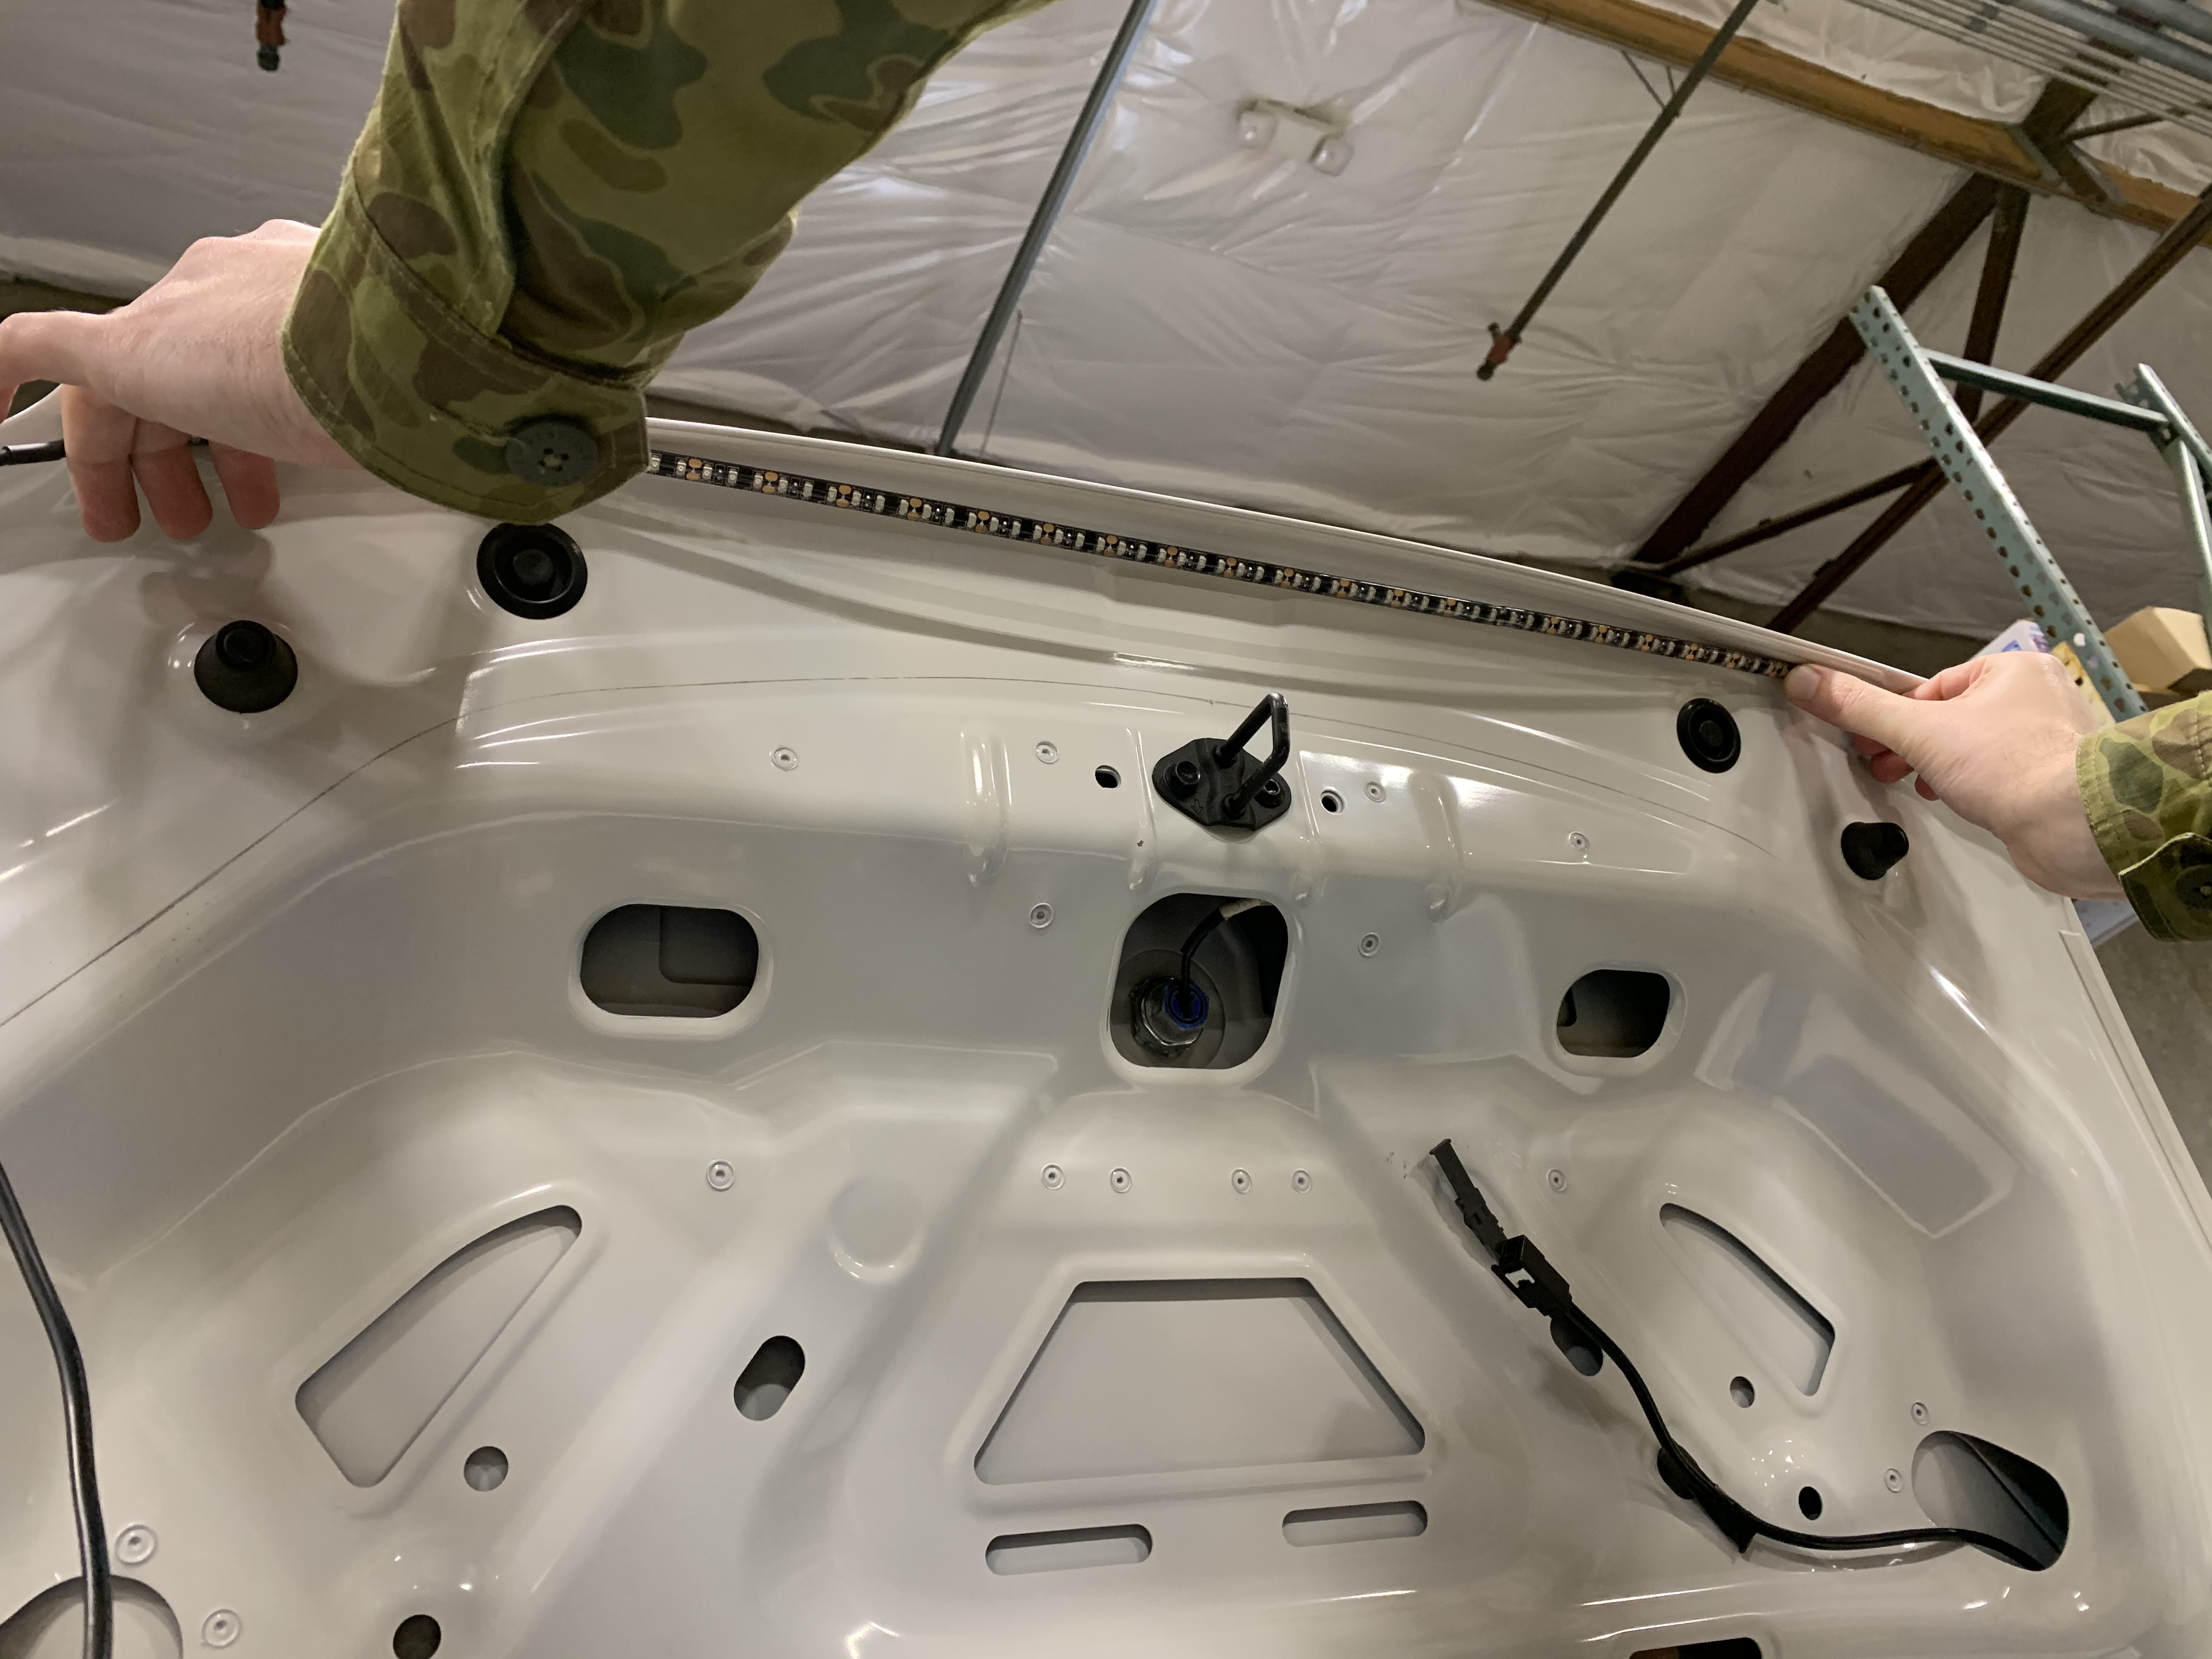
Peel the backing from the adhesive on the LED light strip and affix it along the underside of the trunk lip. Apply it in approx 6 inch increments.
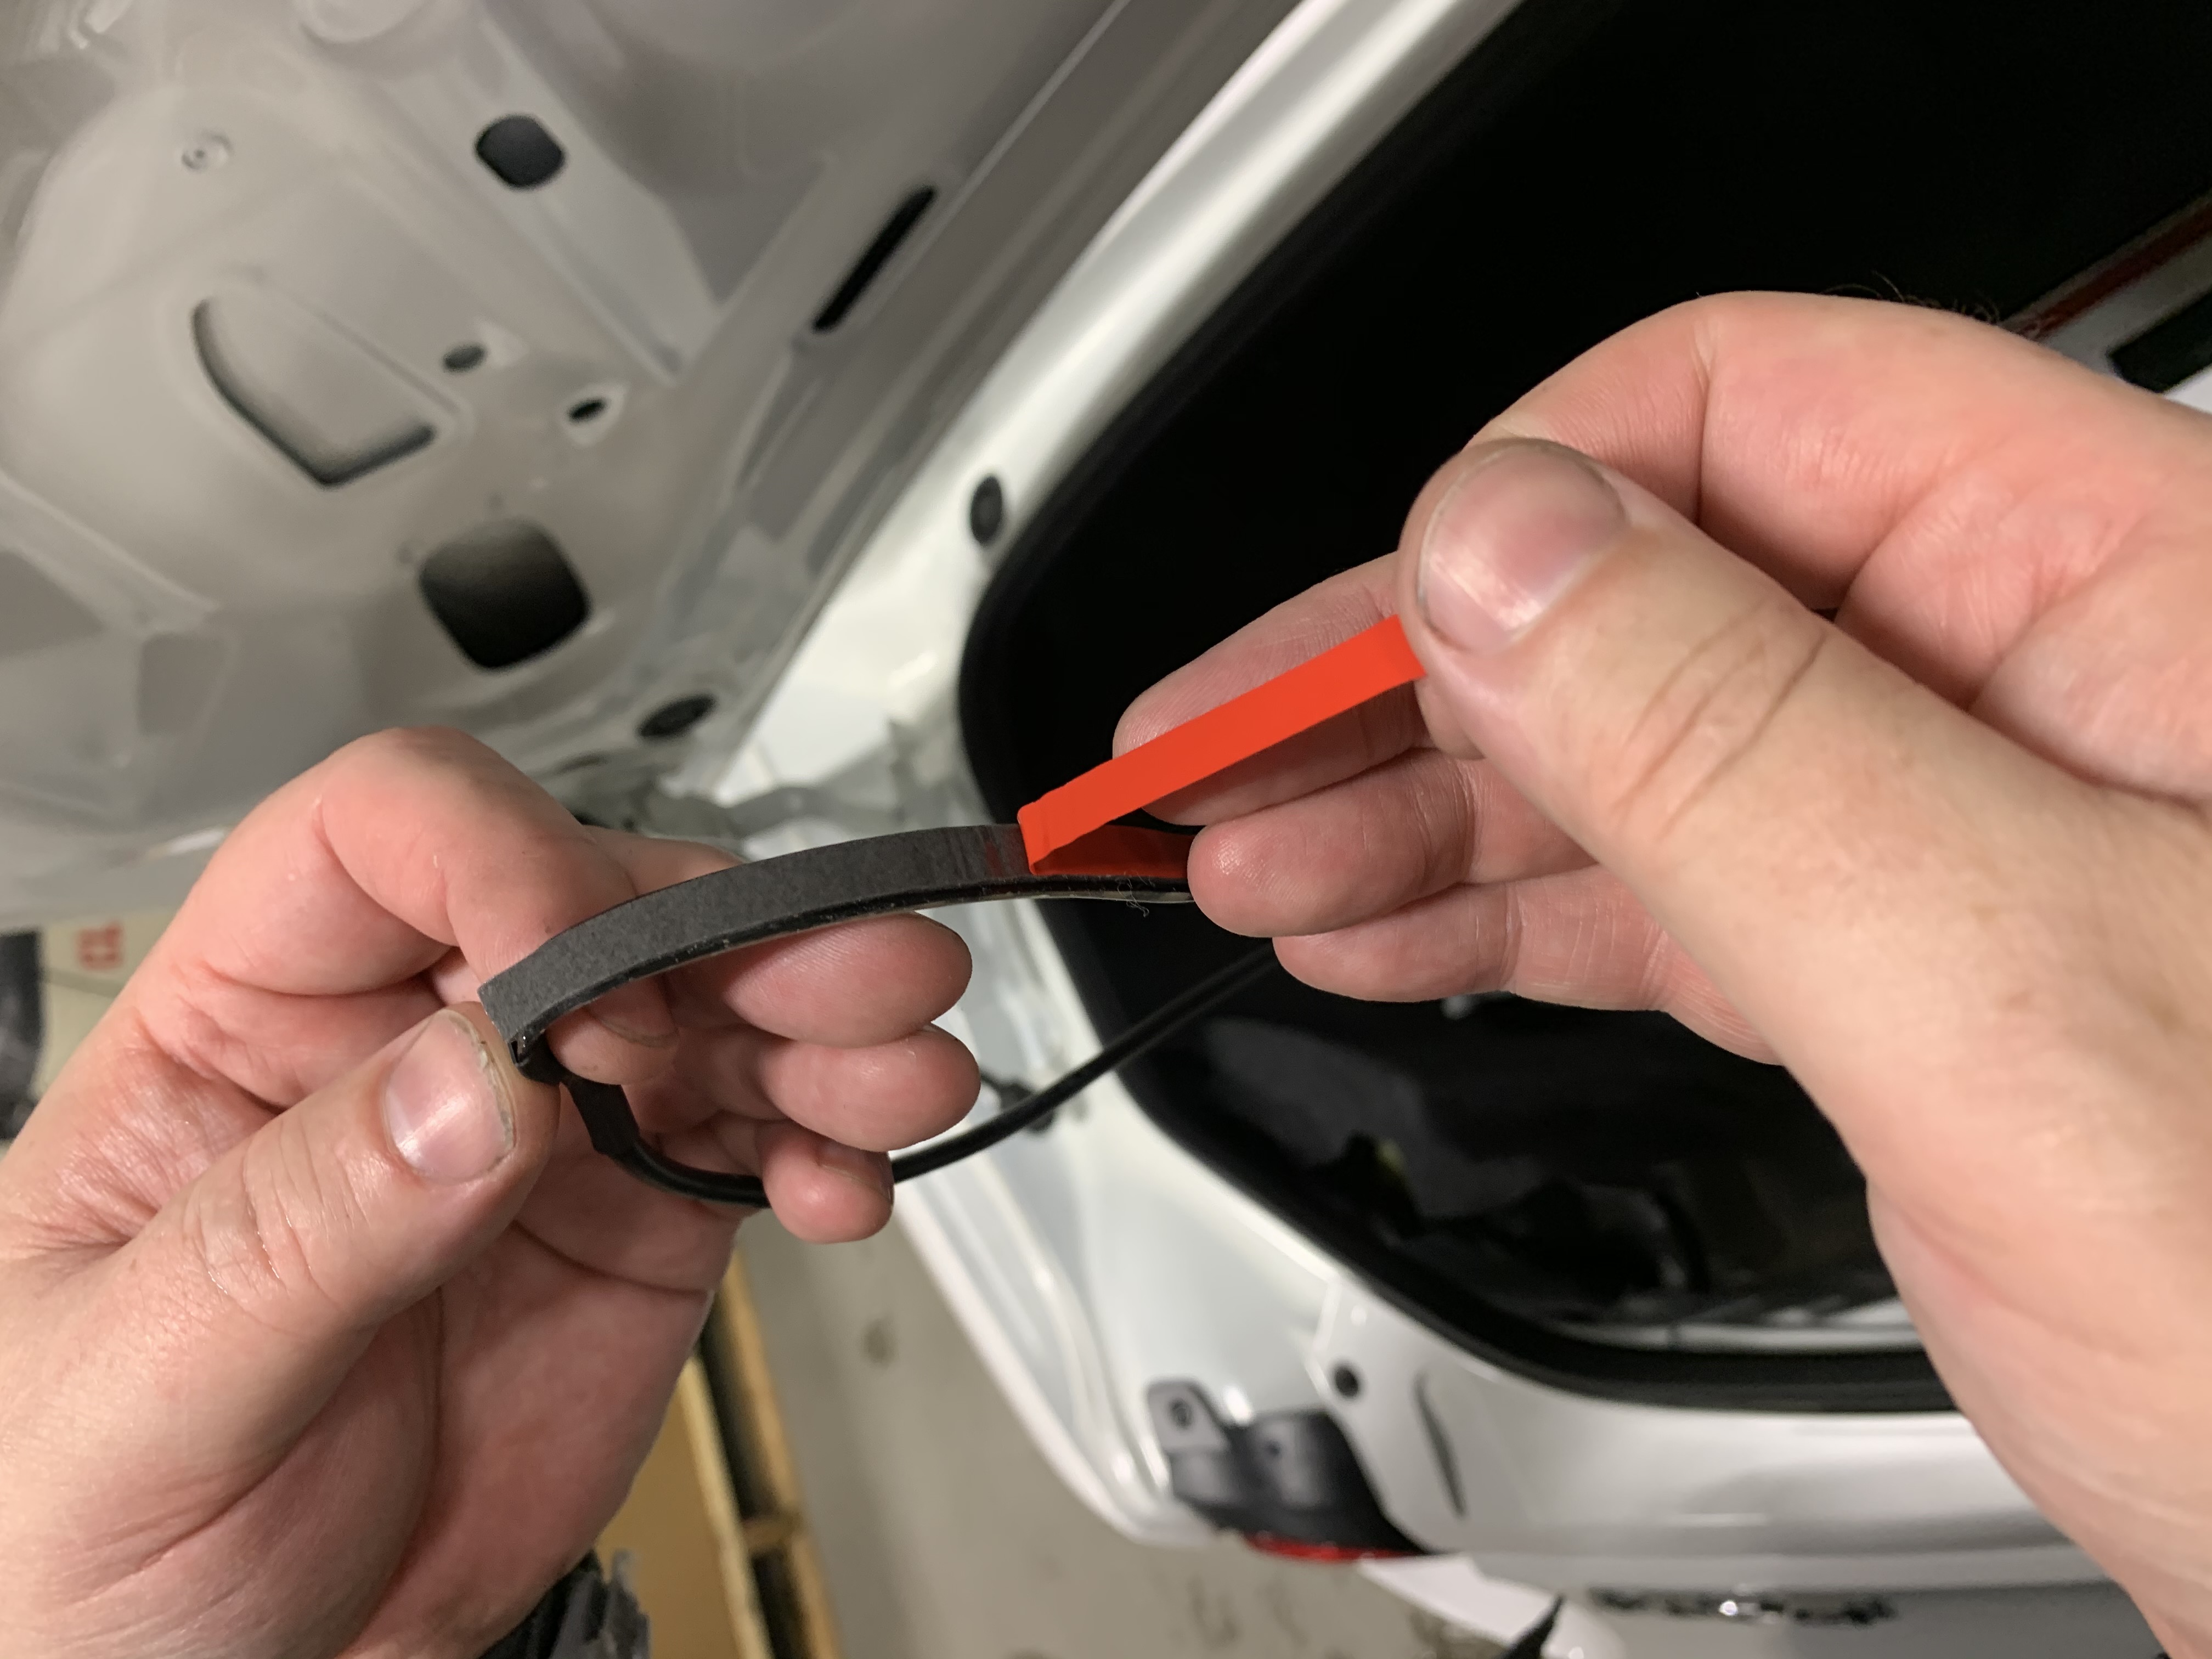

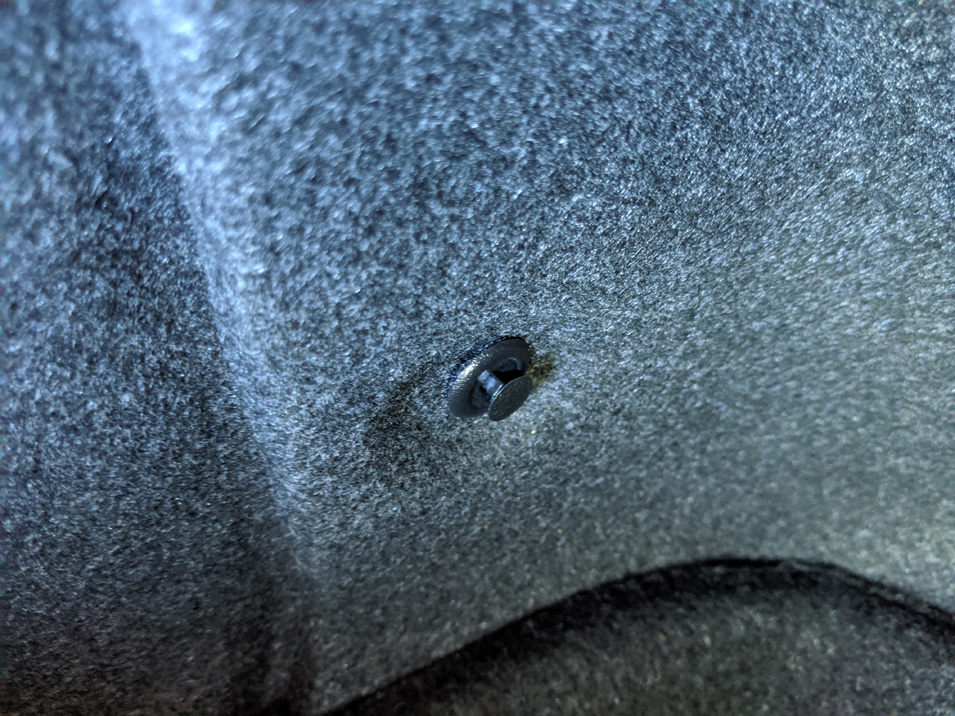
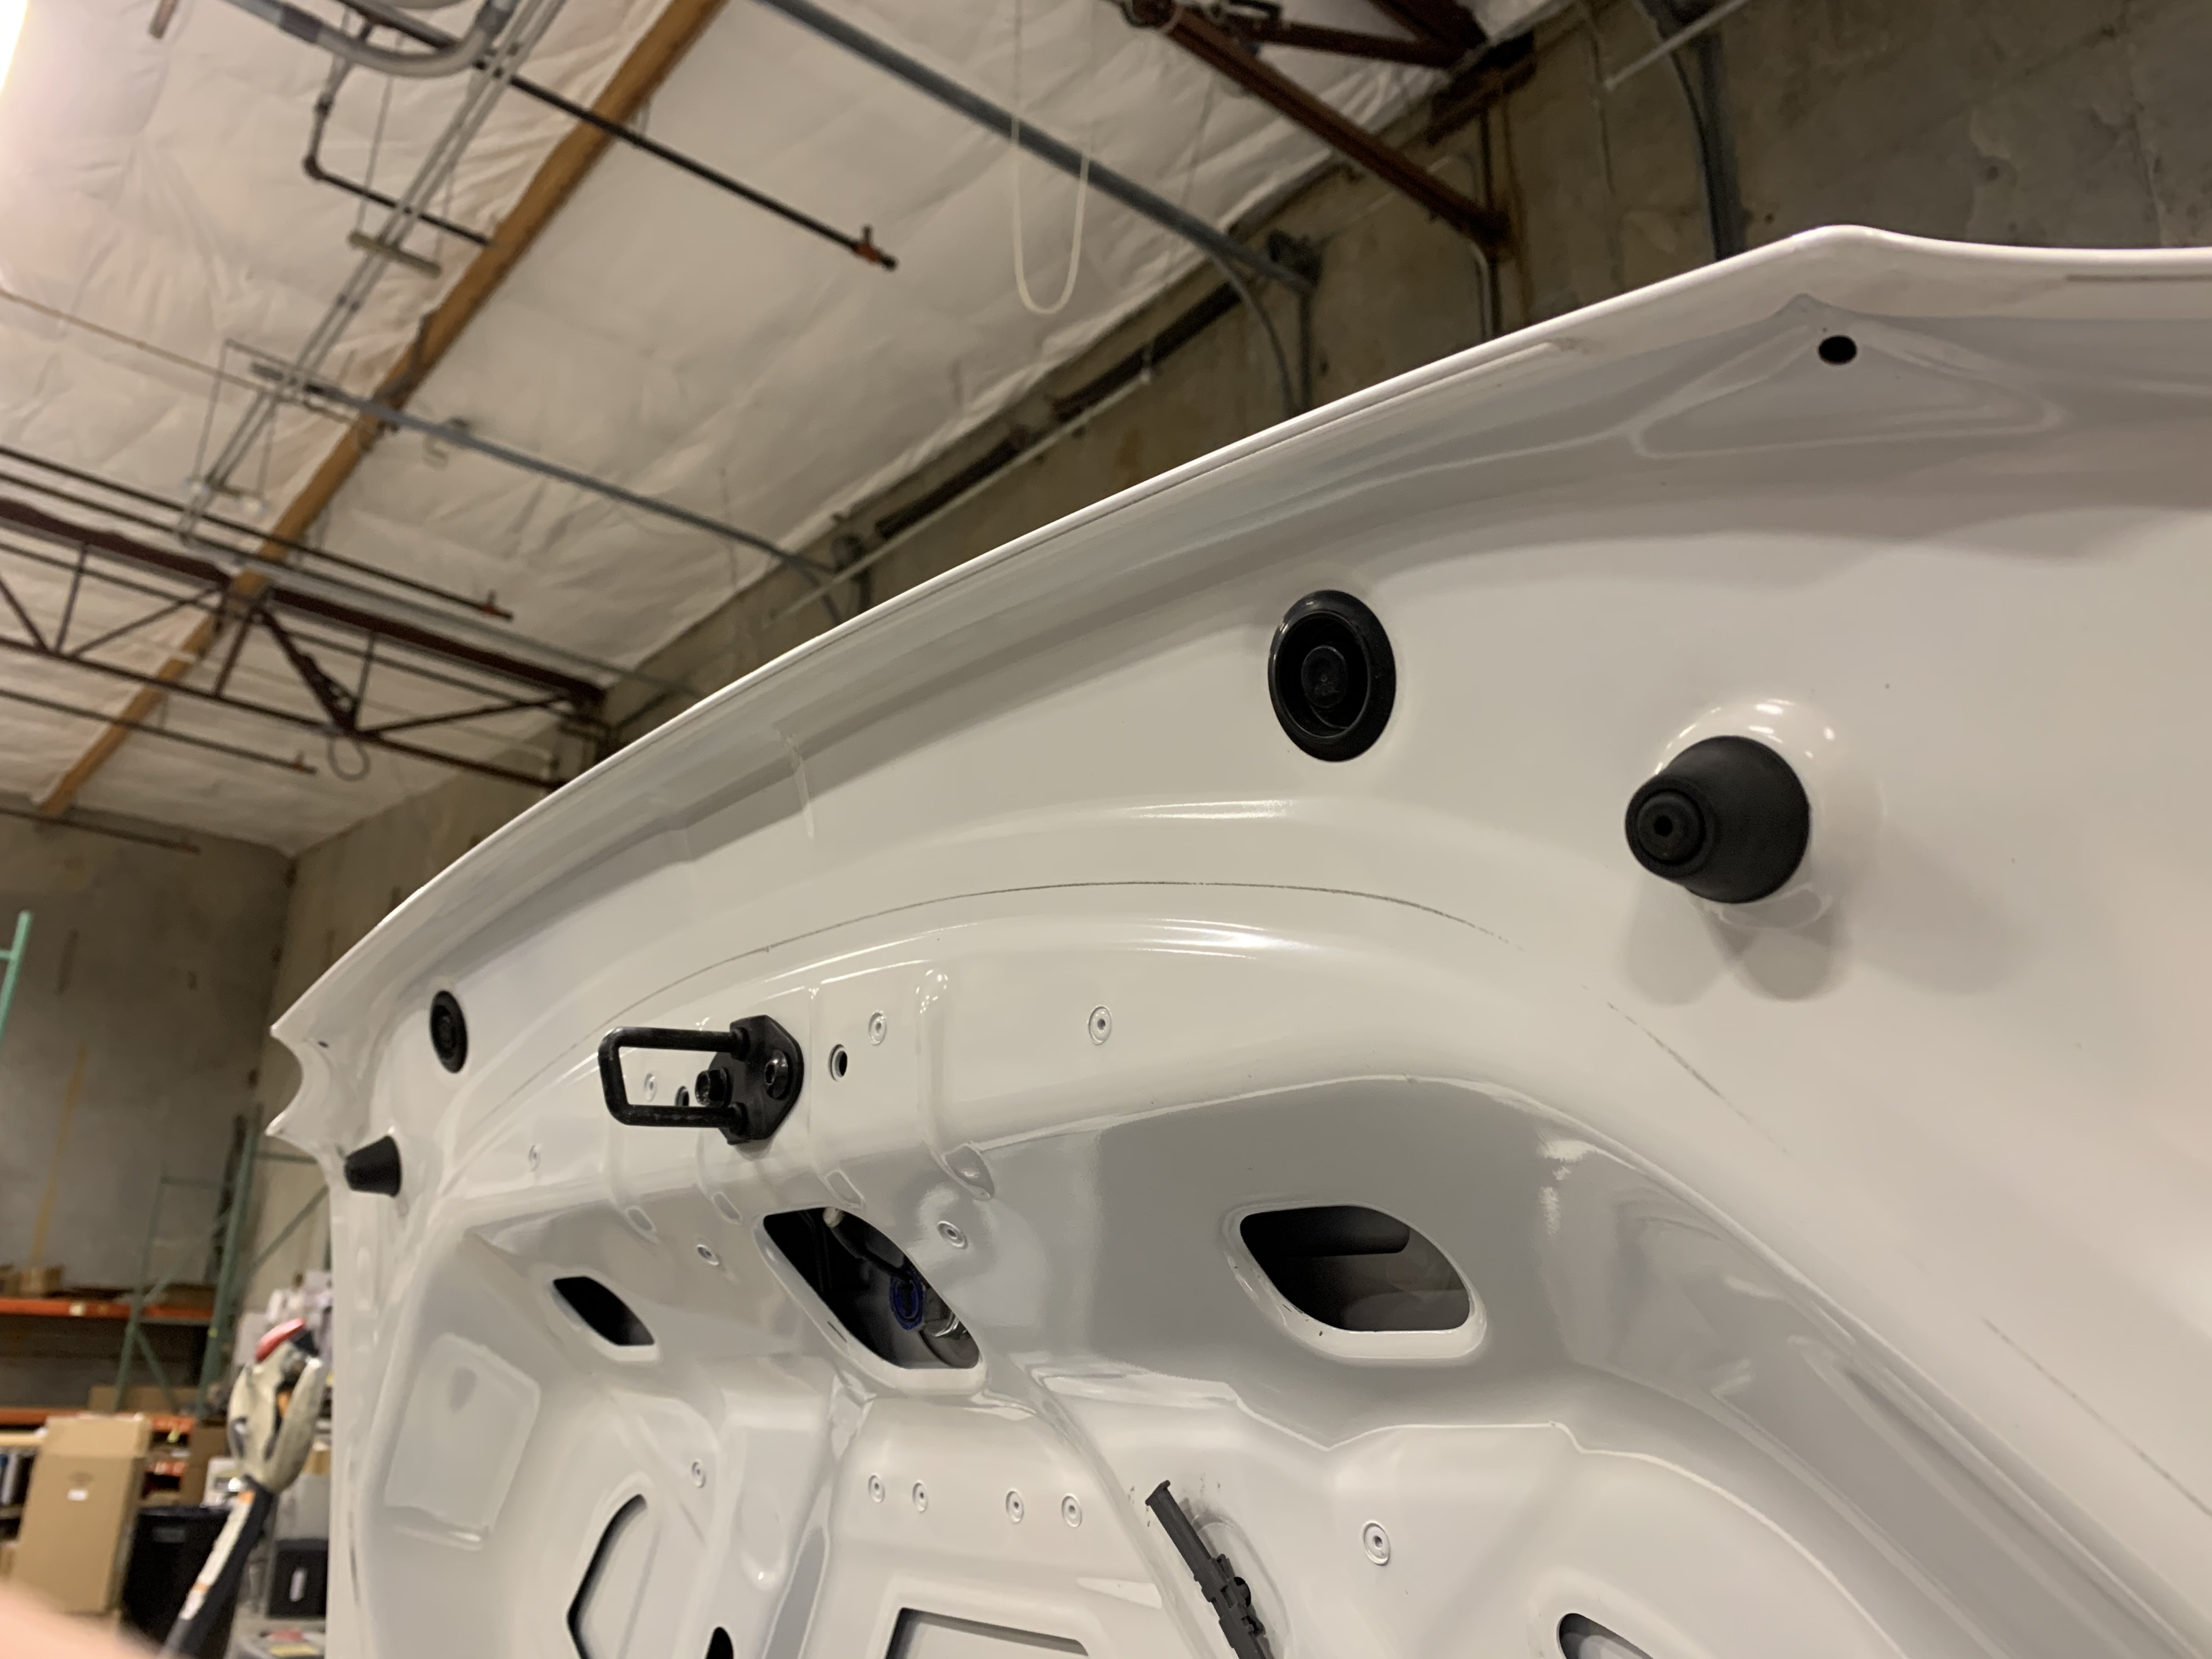
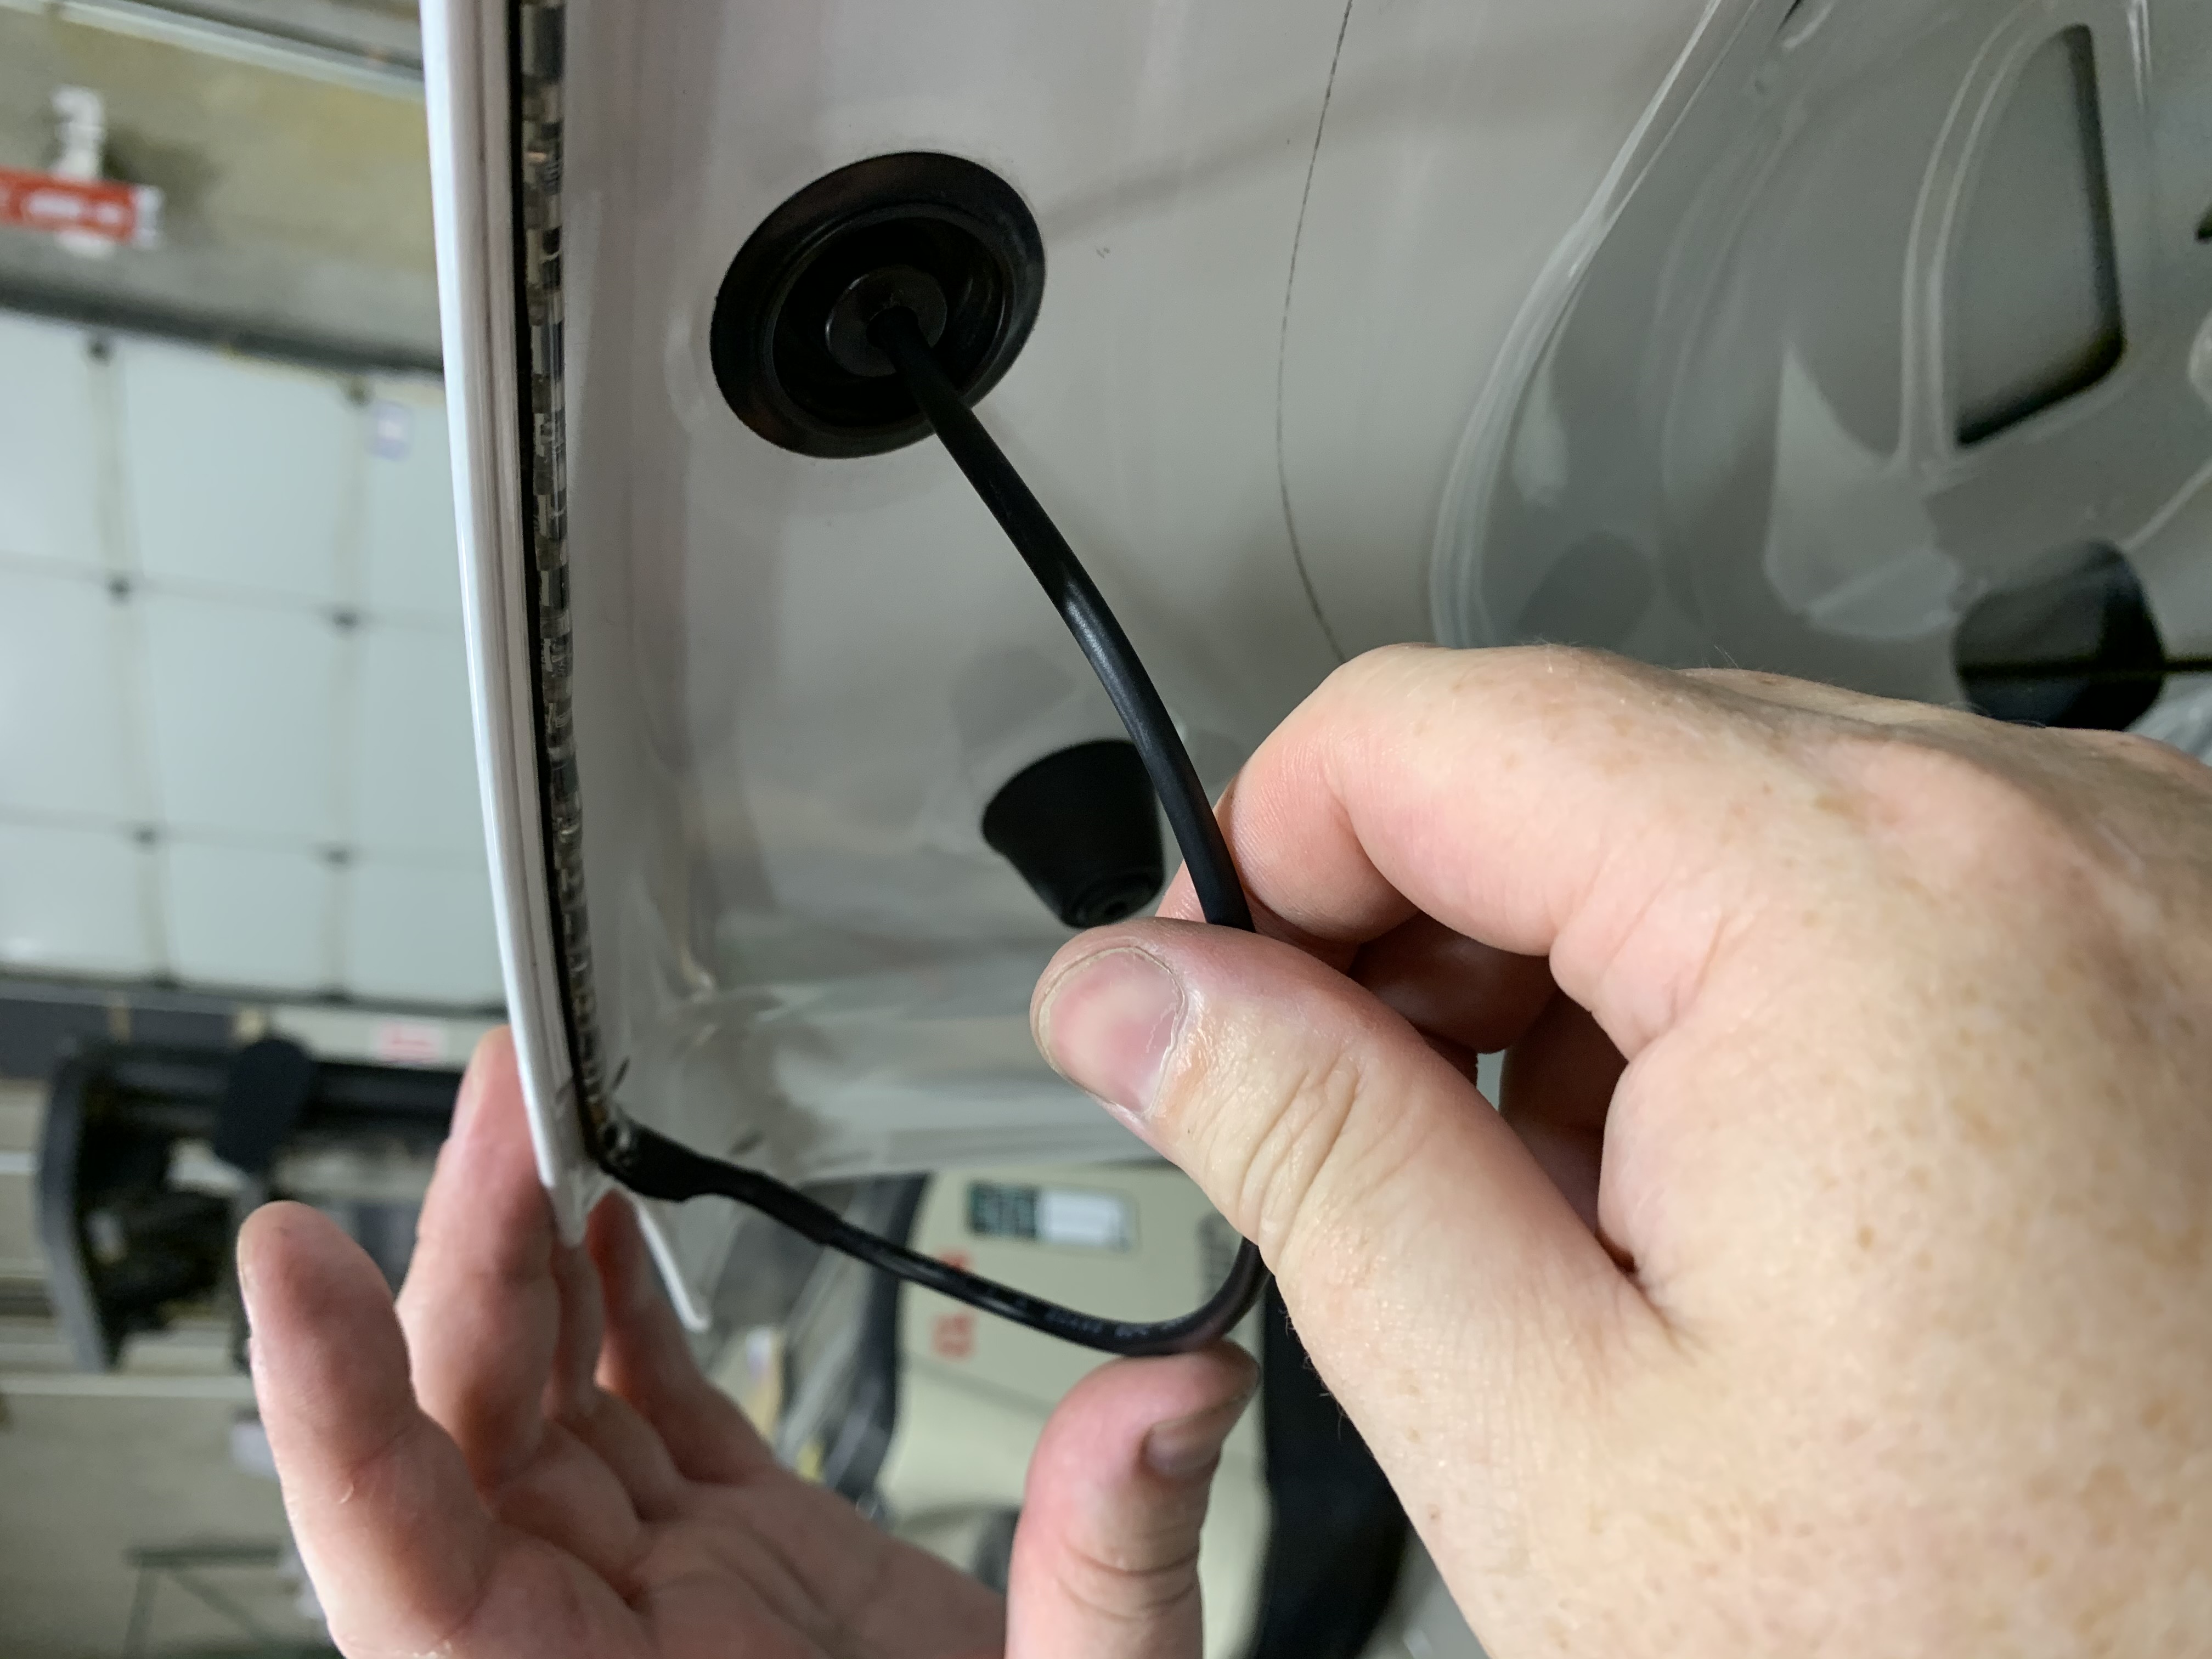
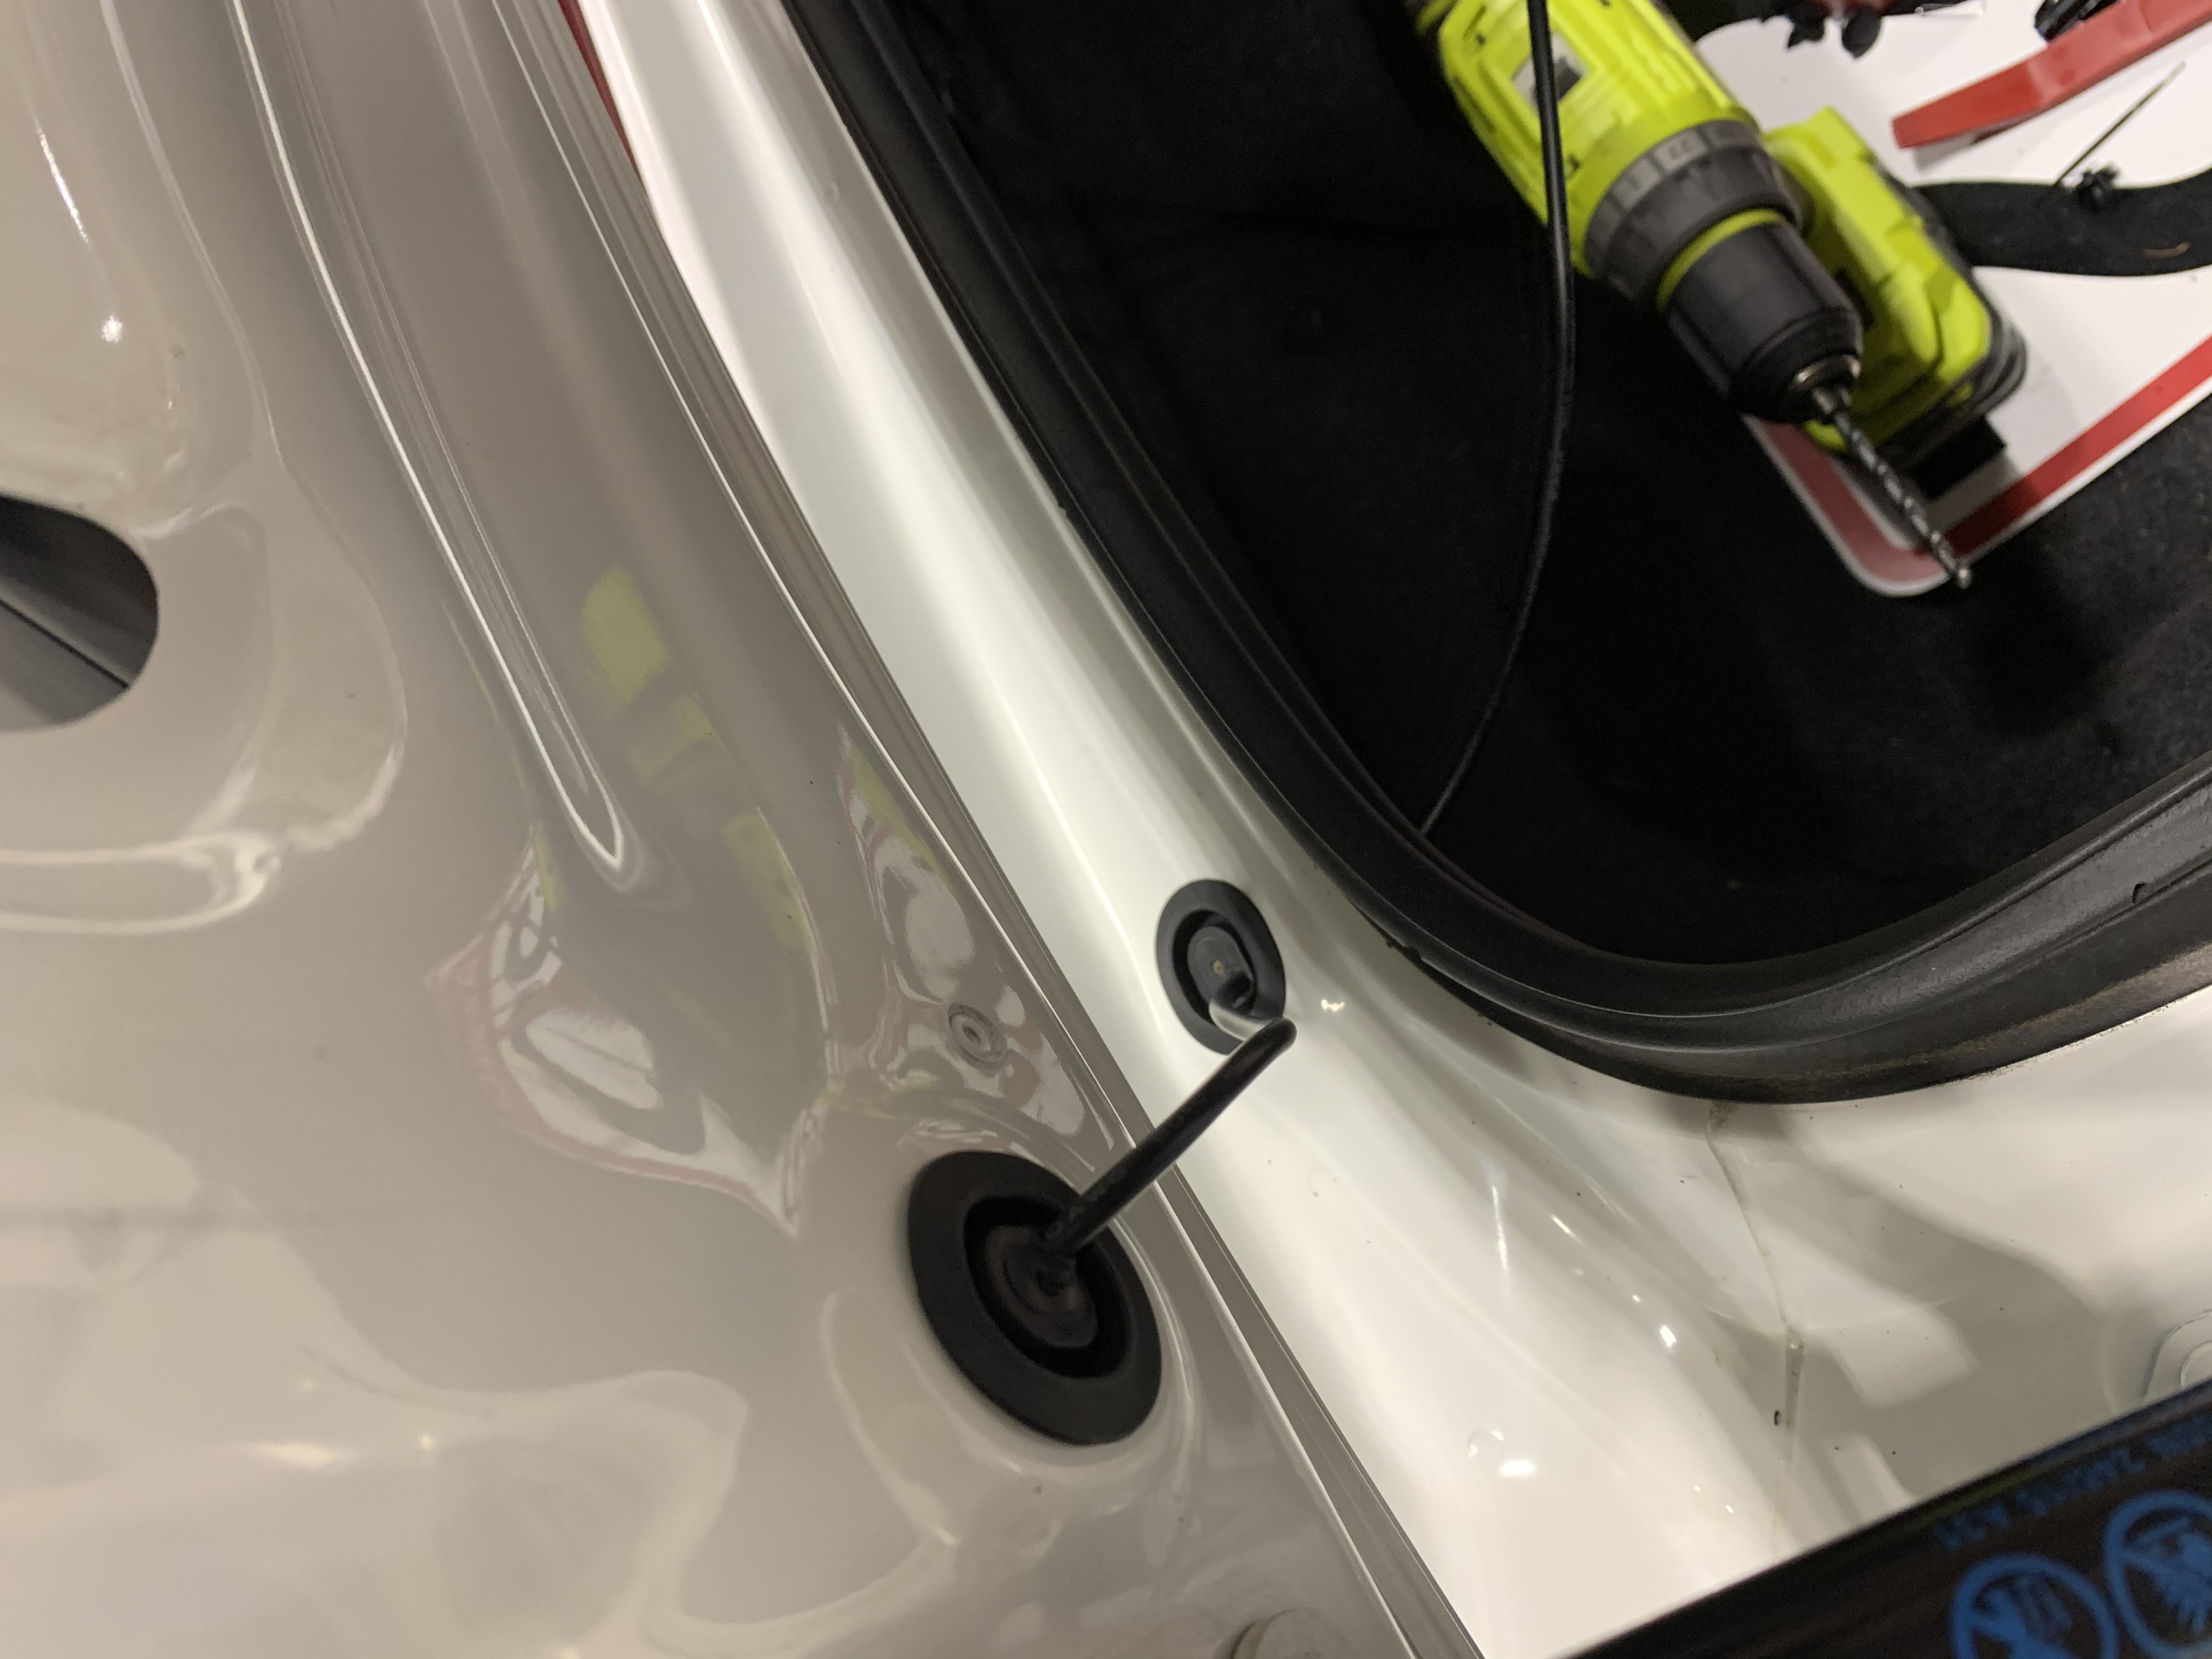
With the LED light strip completely installed, let's turn our attention to finishing up the wiring. Remove the round plastic plug that is just a few inches away from the wiring side of the LED light strip on the underside of the trunk lid.
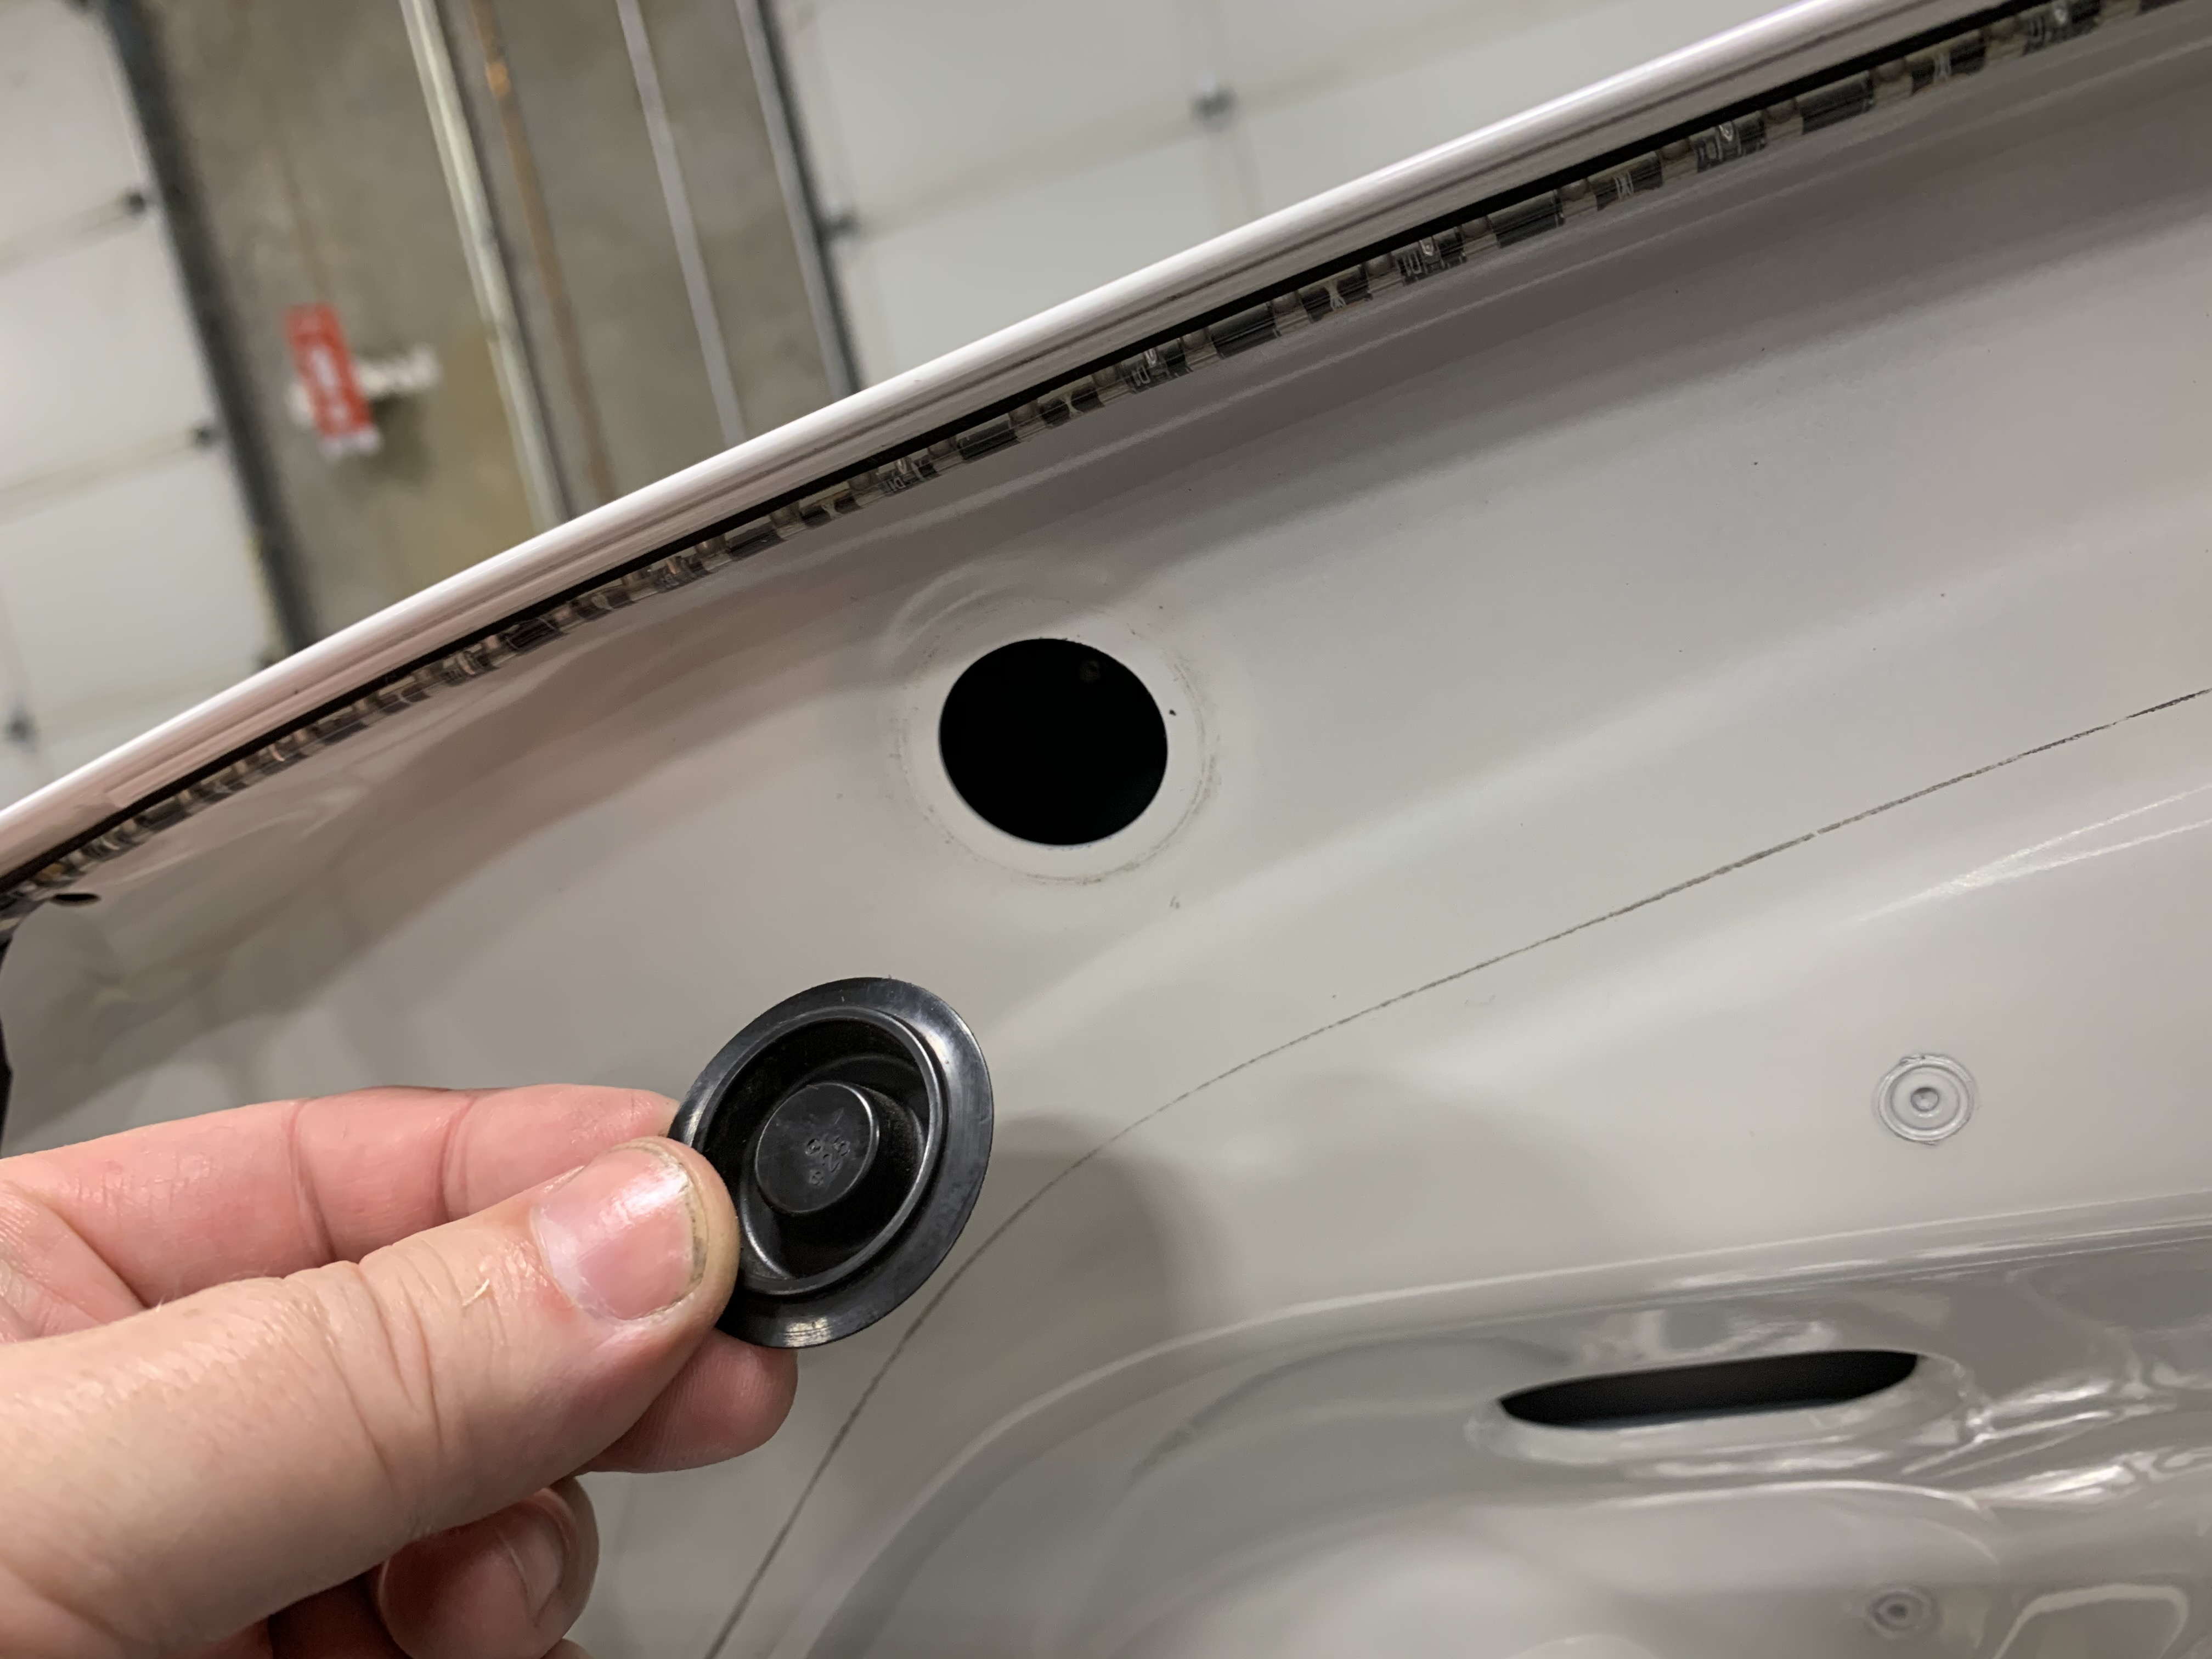
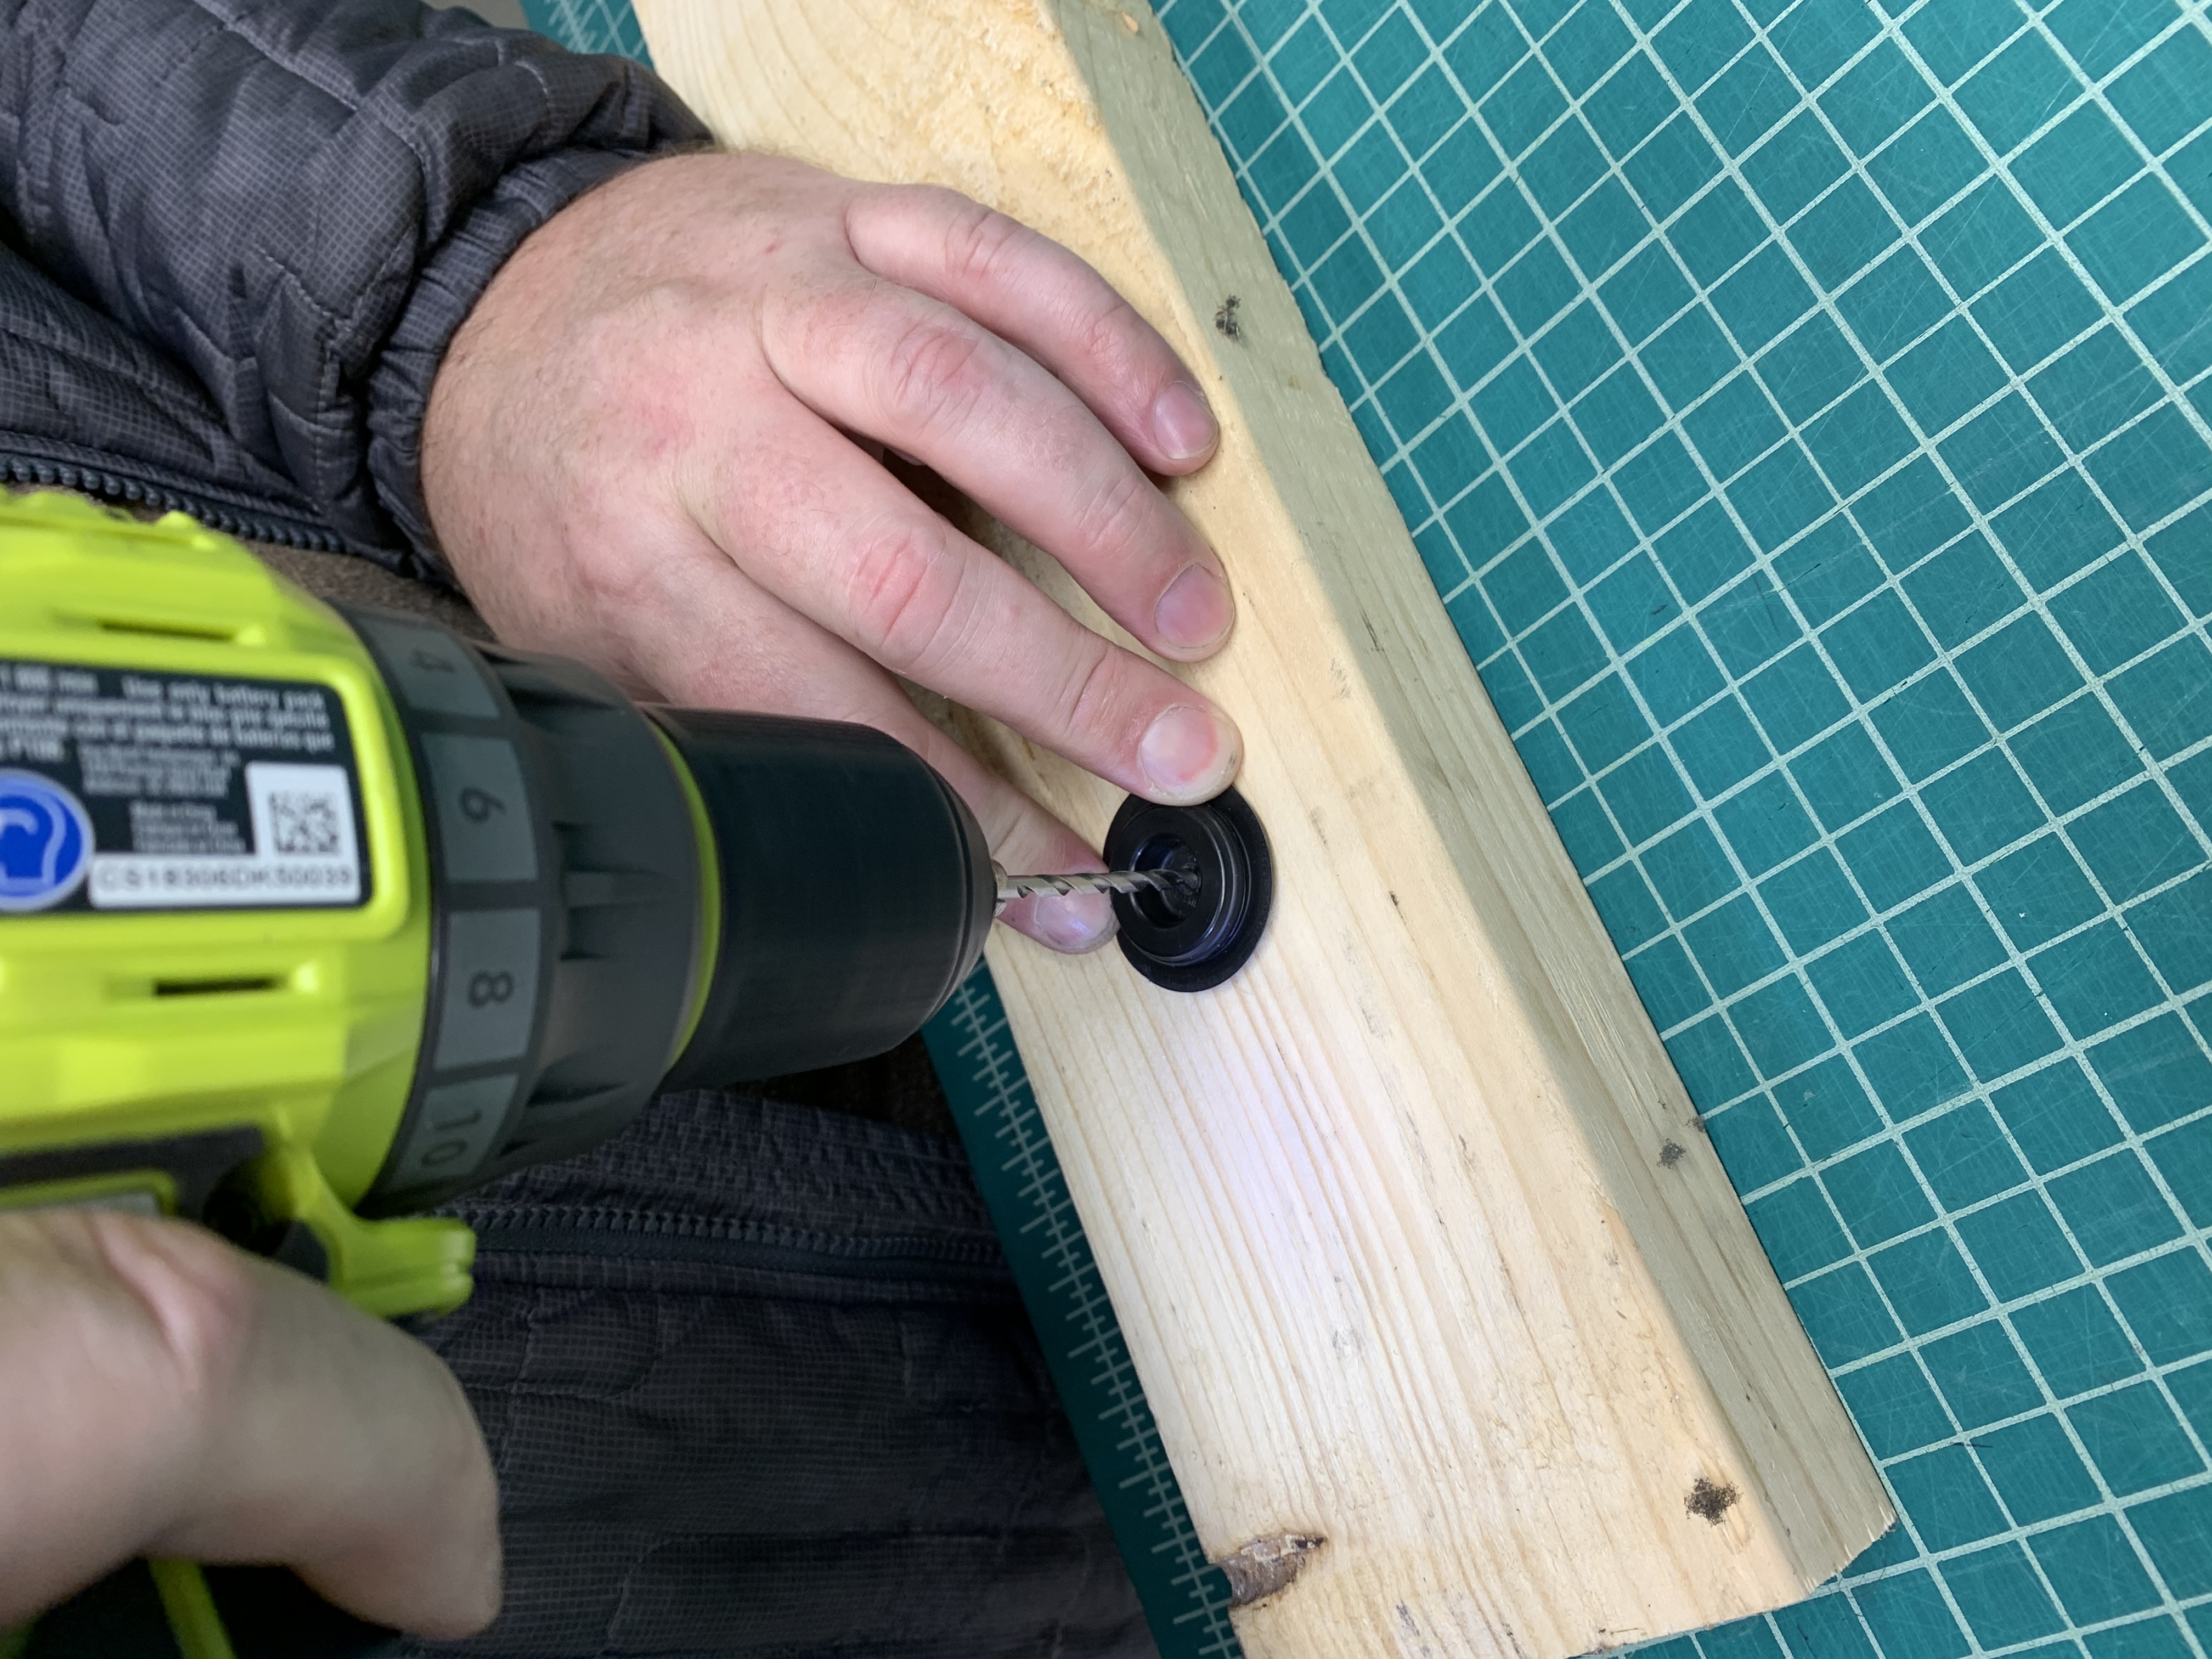
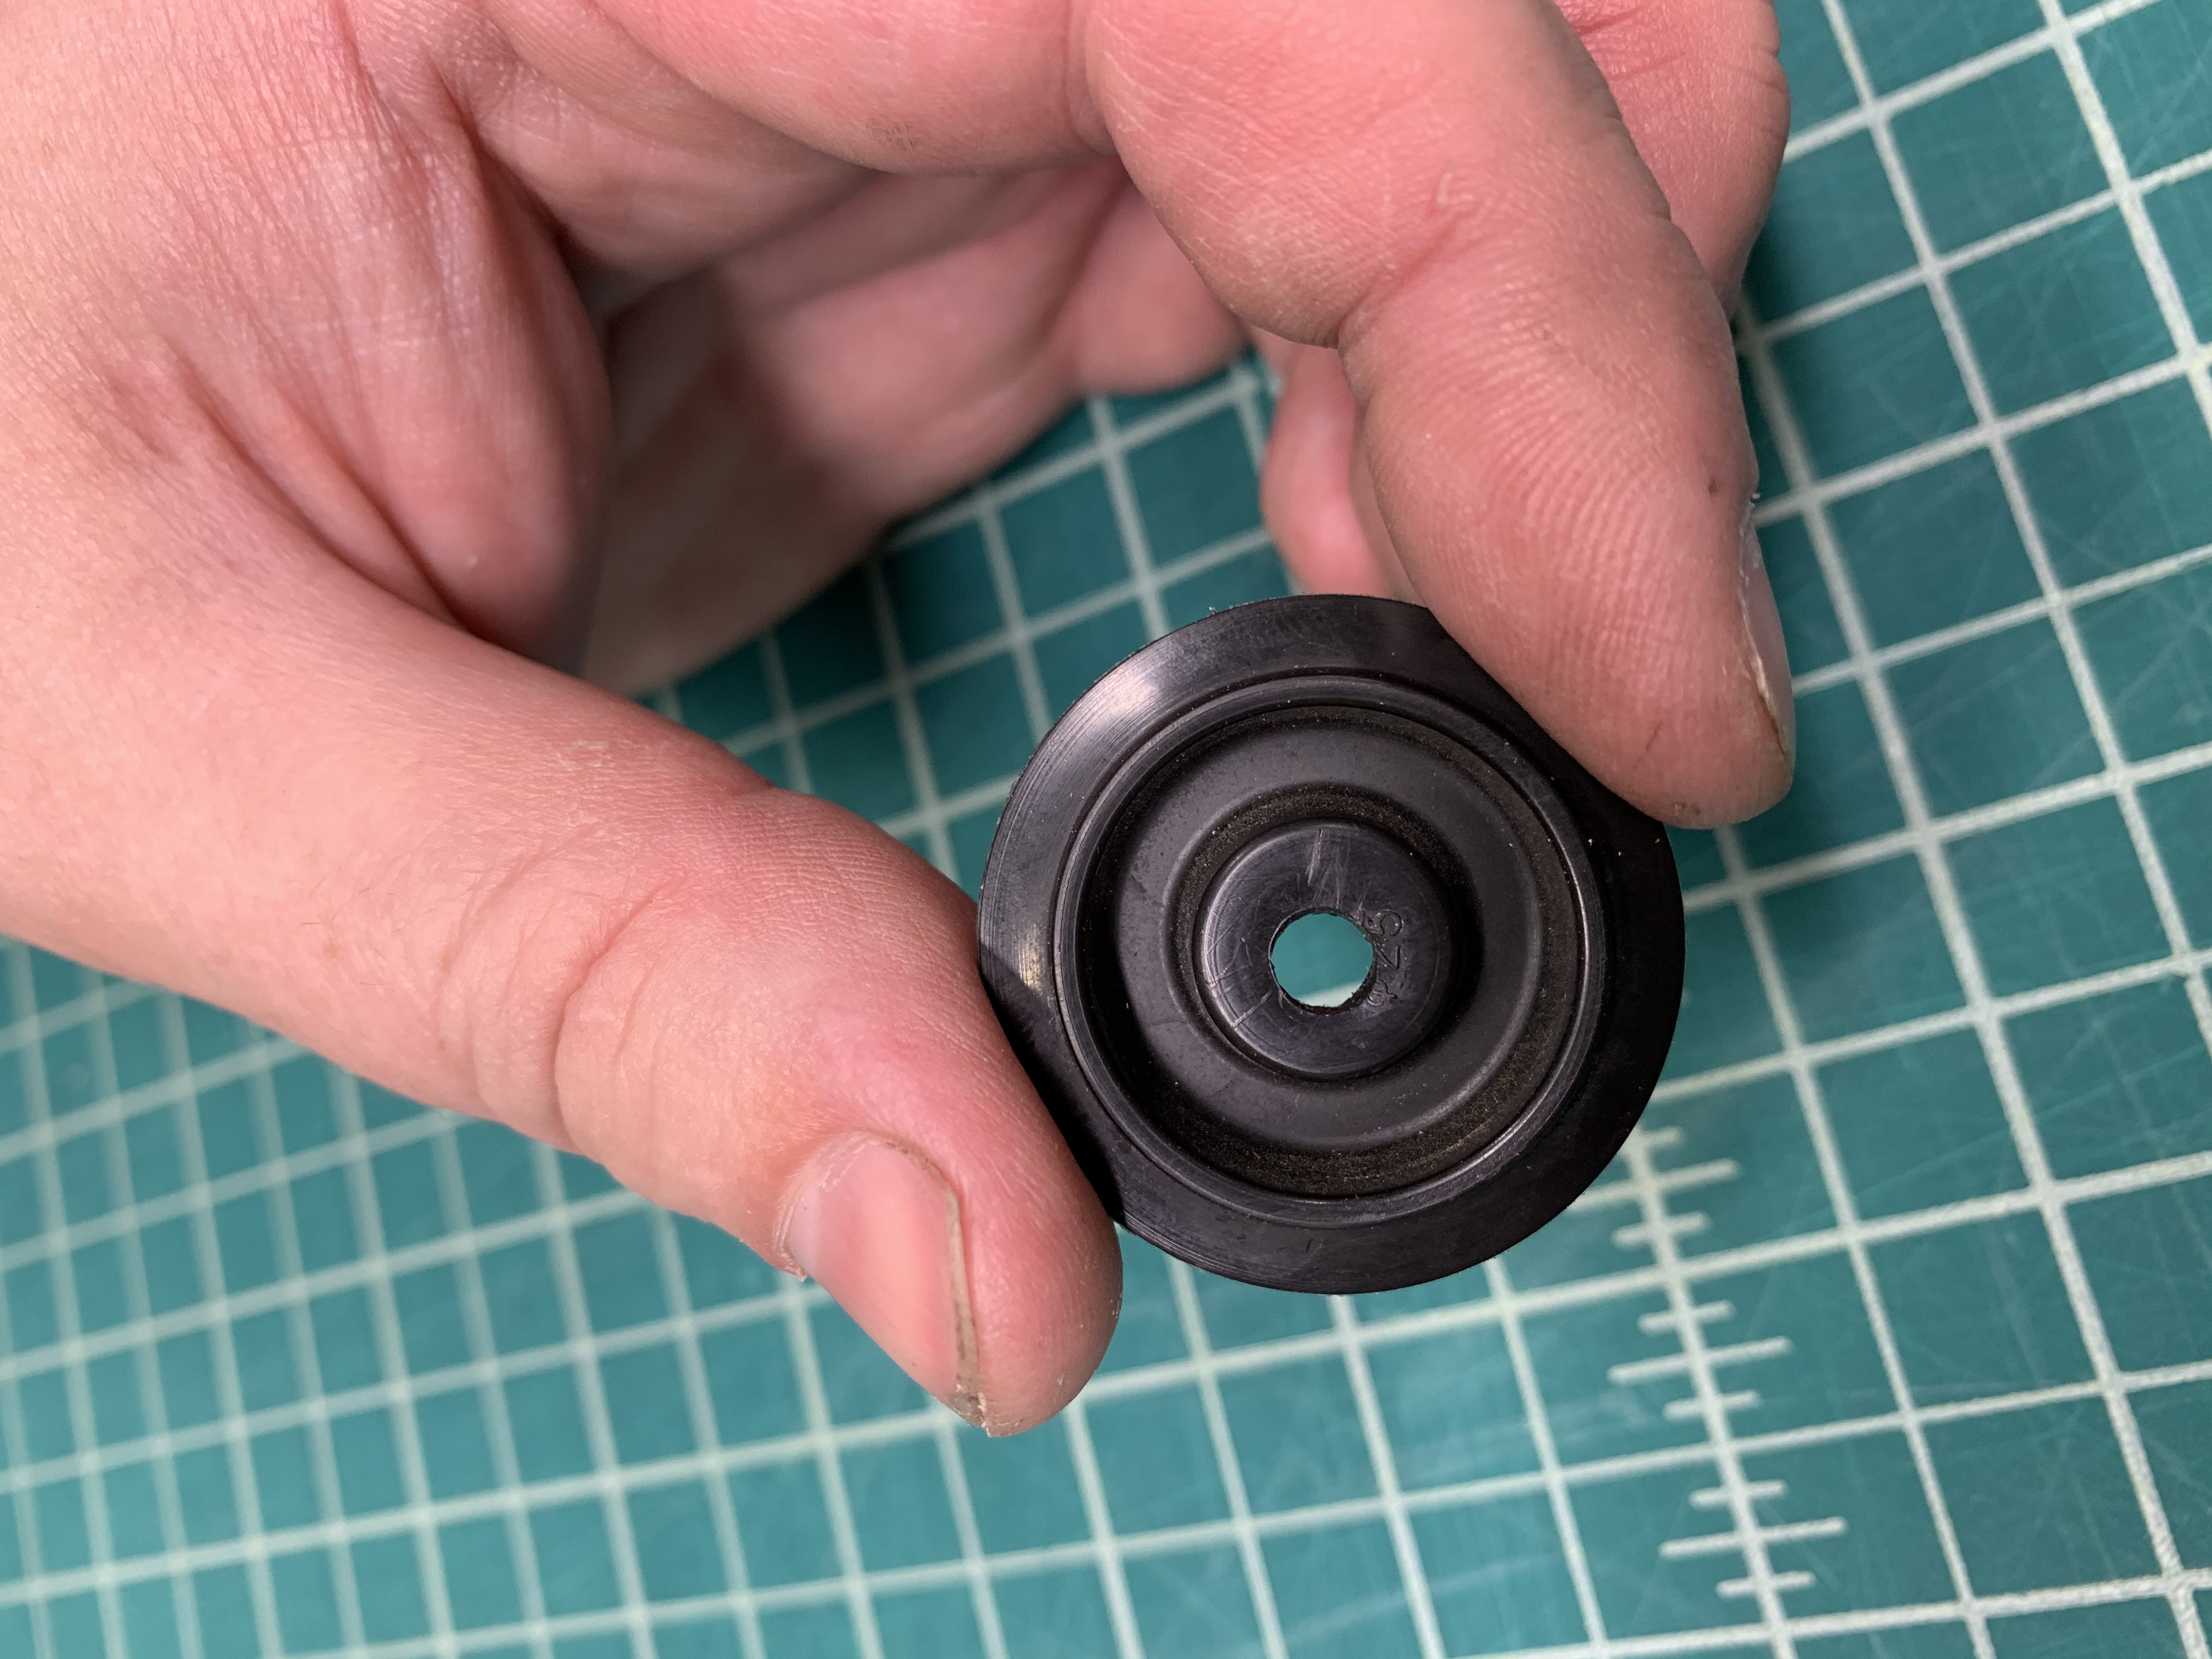
You can either drill a 3/16" diameter hole through the center of this plug or take a utility knife and cut a slit across the face of the center. If you choose to slit the cap you can then push the plug through the cap. If you drill the 3/16" hole, you will need to remove the plug from the end of the wiring.
Pro Tip: Disconnecting the wires from the plug may be challenging task, so if it does not easily separate for you, simply move on and just slit across the face of the panel plugs for easier wire installation.
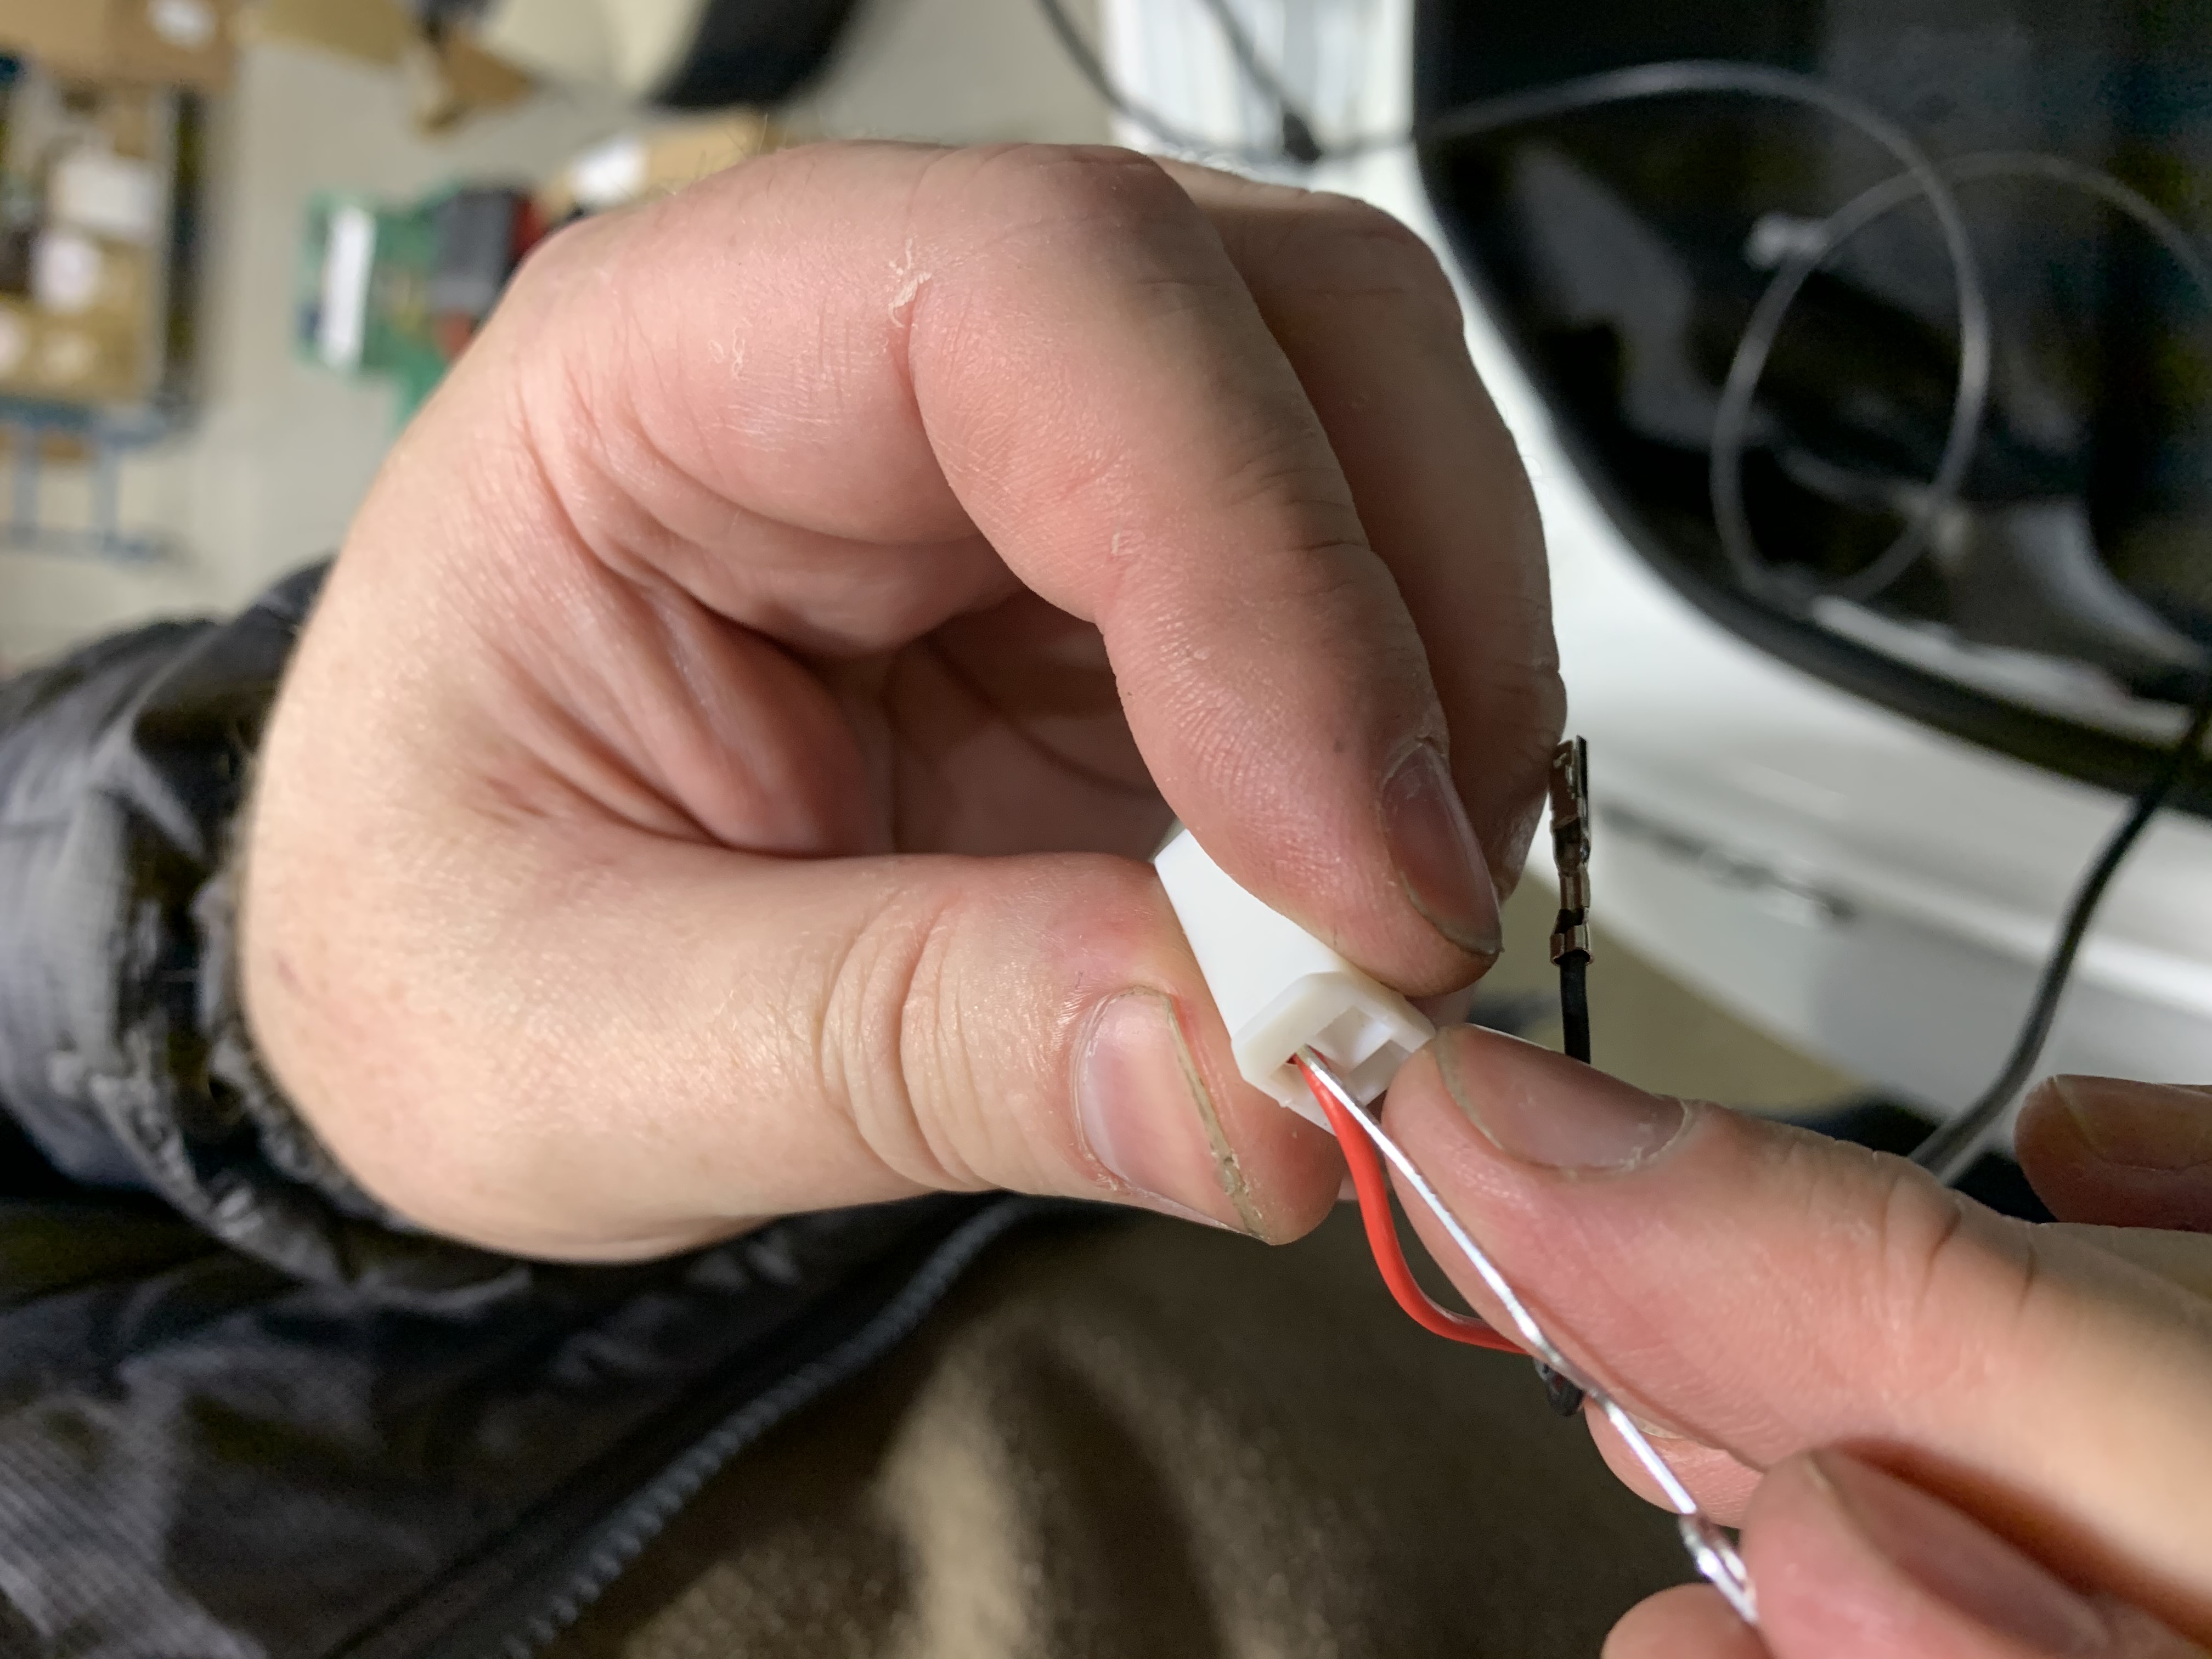
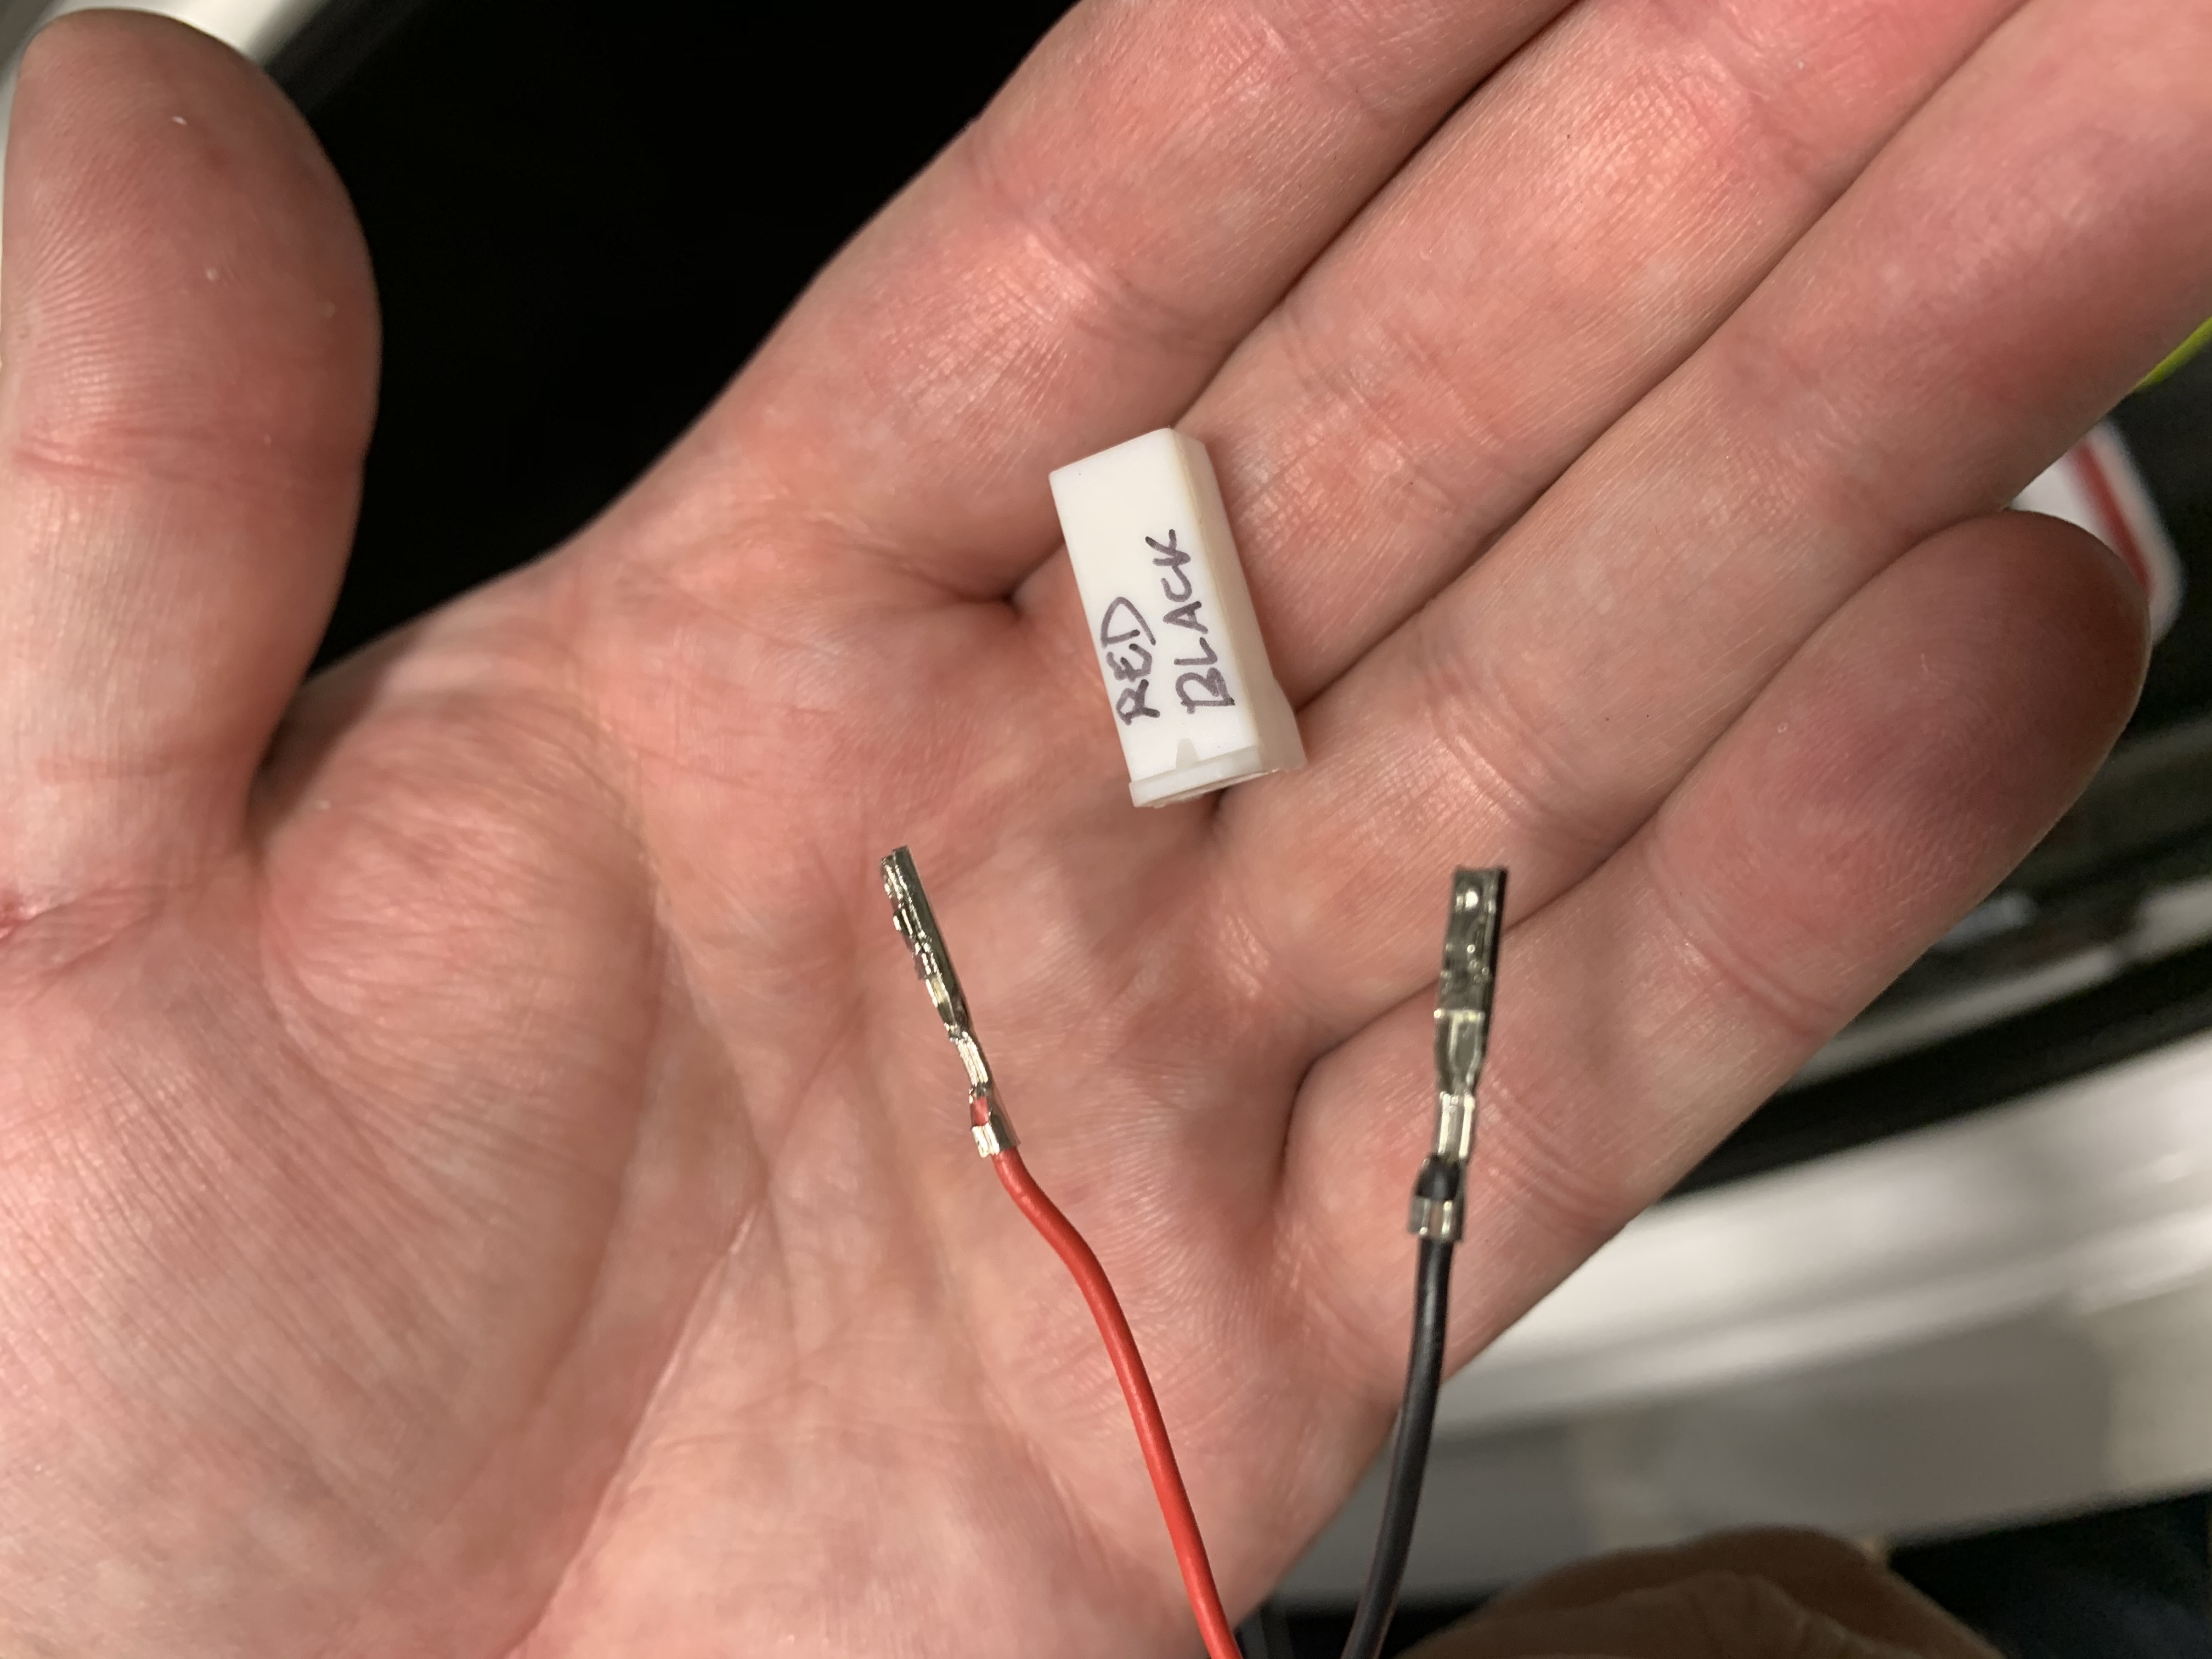
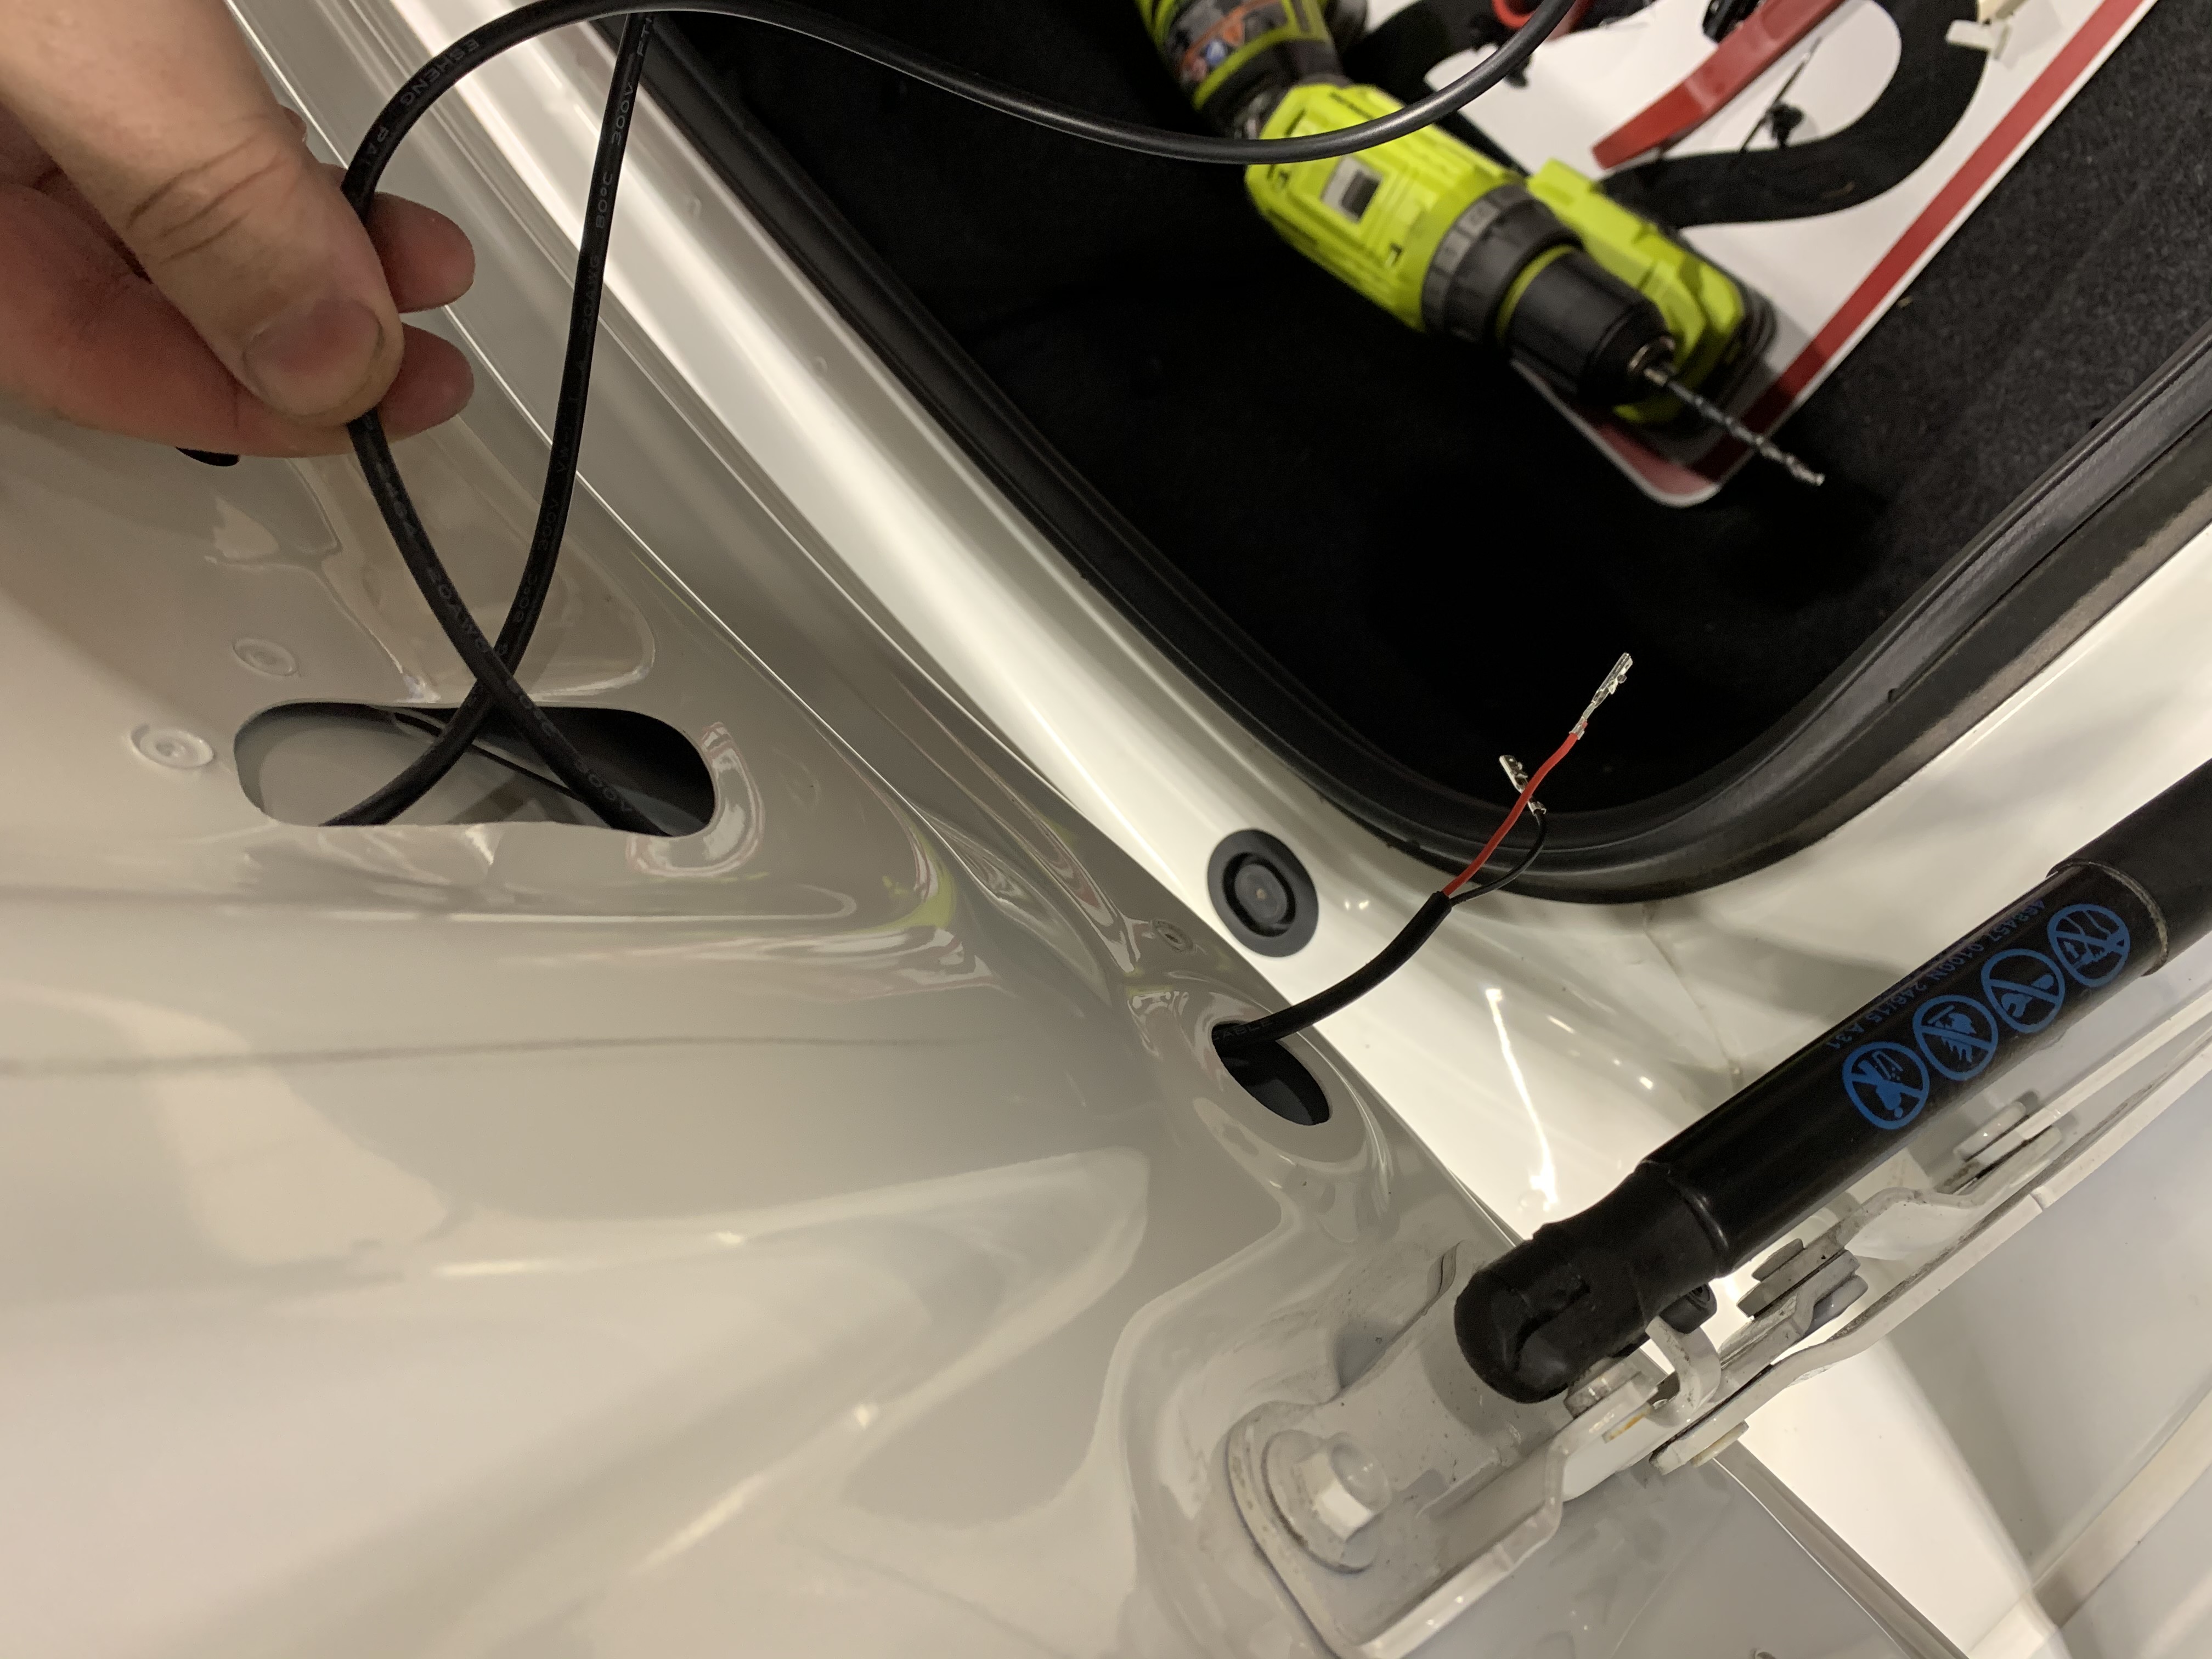
To remove the plug, utilize a small jewelers flat-head screwdriver and carefully insert it between the plug housing and the wires. There is a small catch integrated into the metal of the plug insert and you'll need to press it down with the screwdriver as you're gently pulling on the wire. Use a marking pen to remind you where each wire goes back into place.
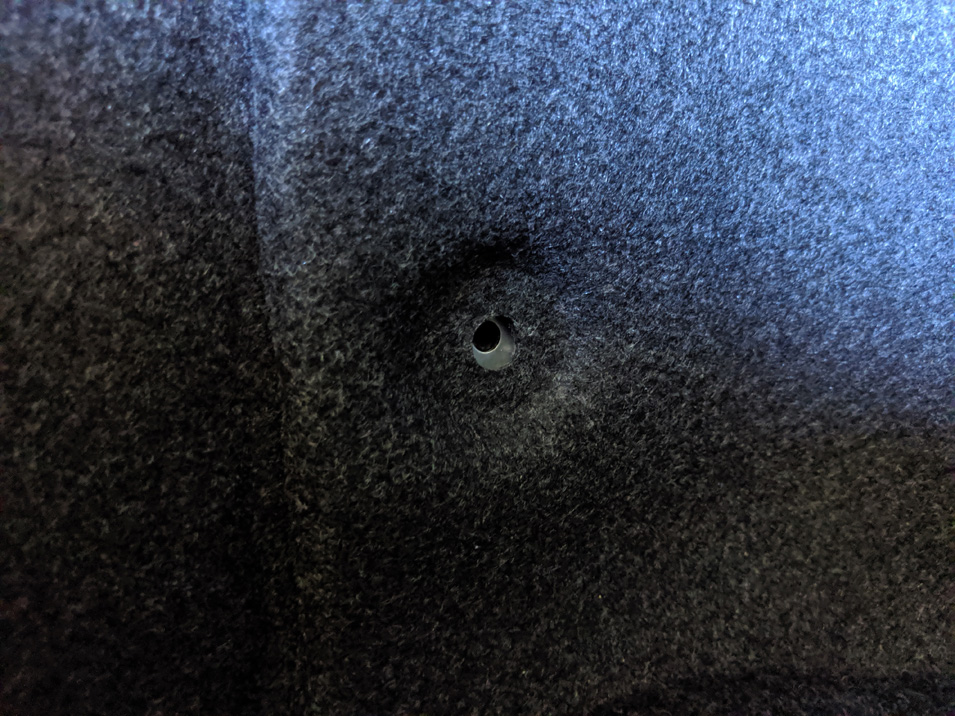
Slip the wires through the plastic plug and into the interior cavity of the trunk lid. Fish the wire down through to the oblong hole and pull them out. This is just a staging point before the next step.
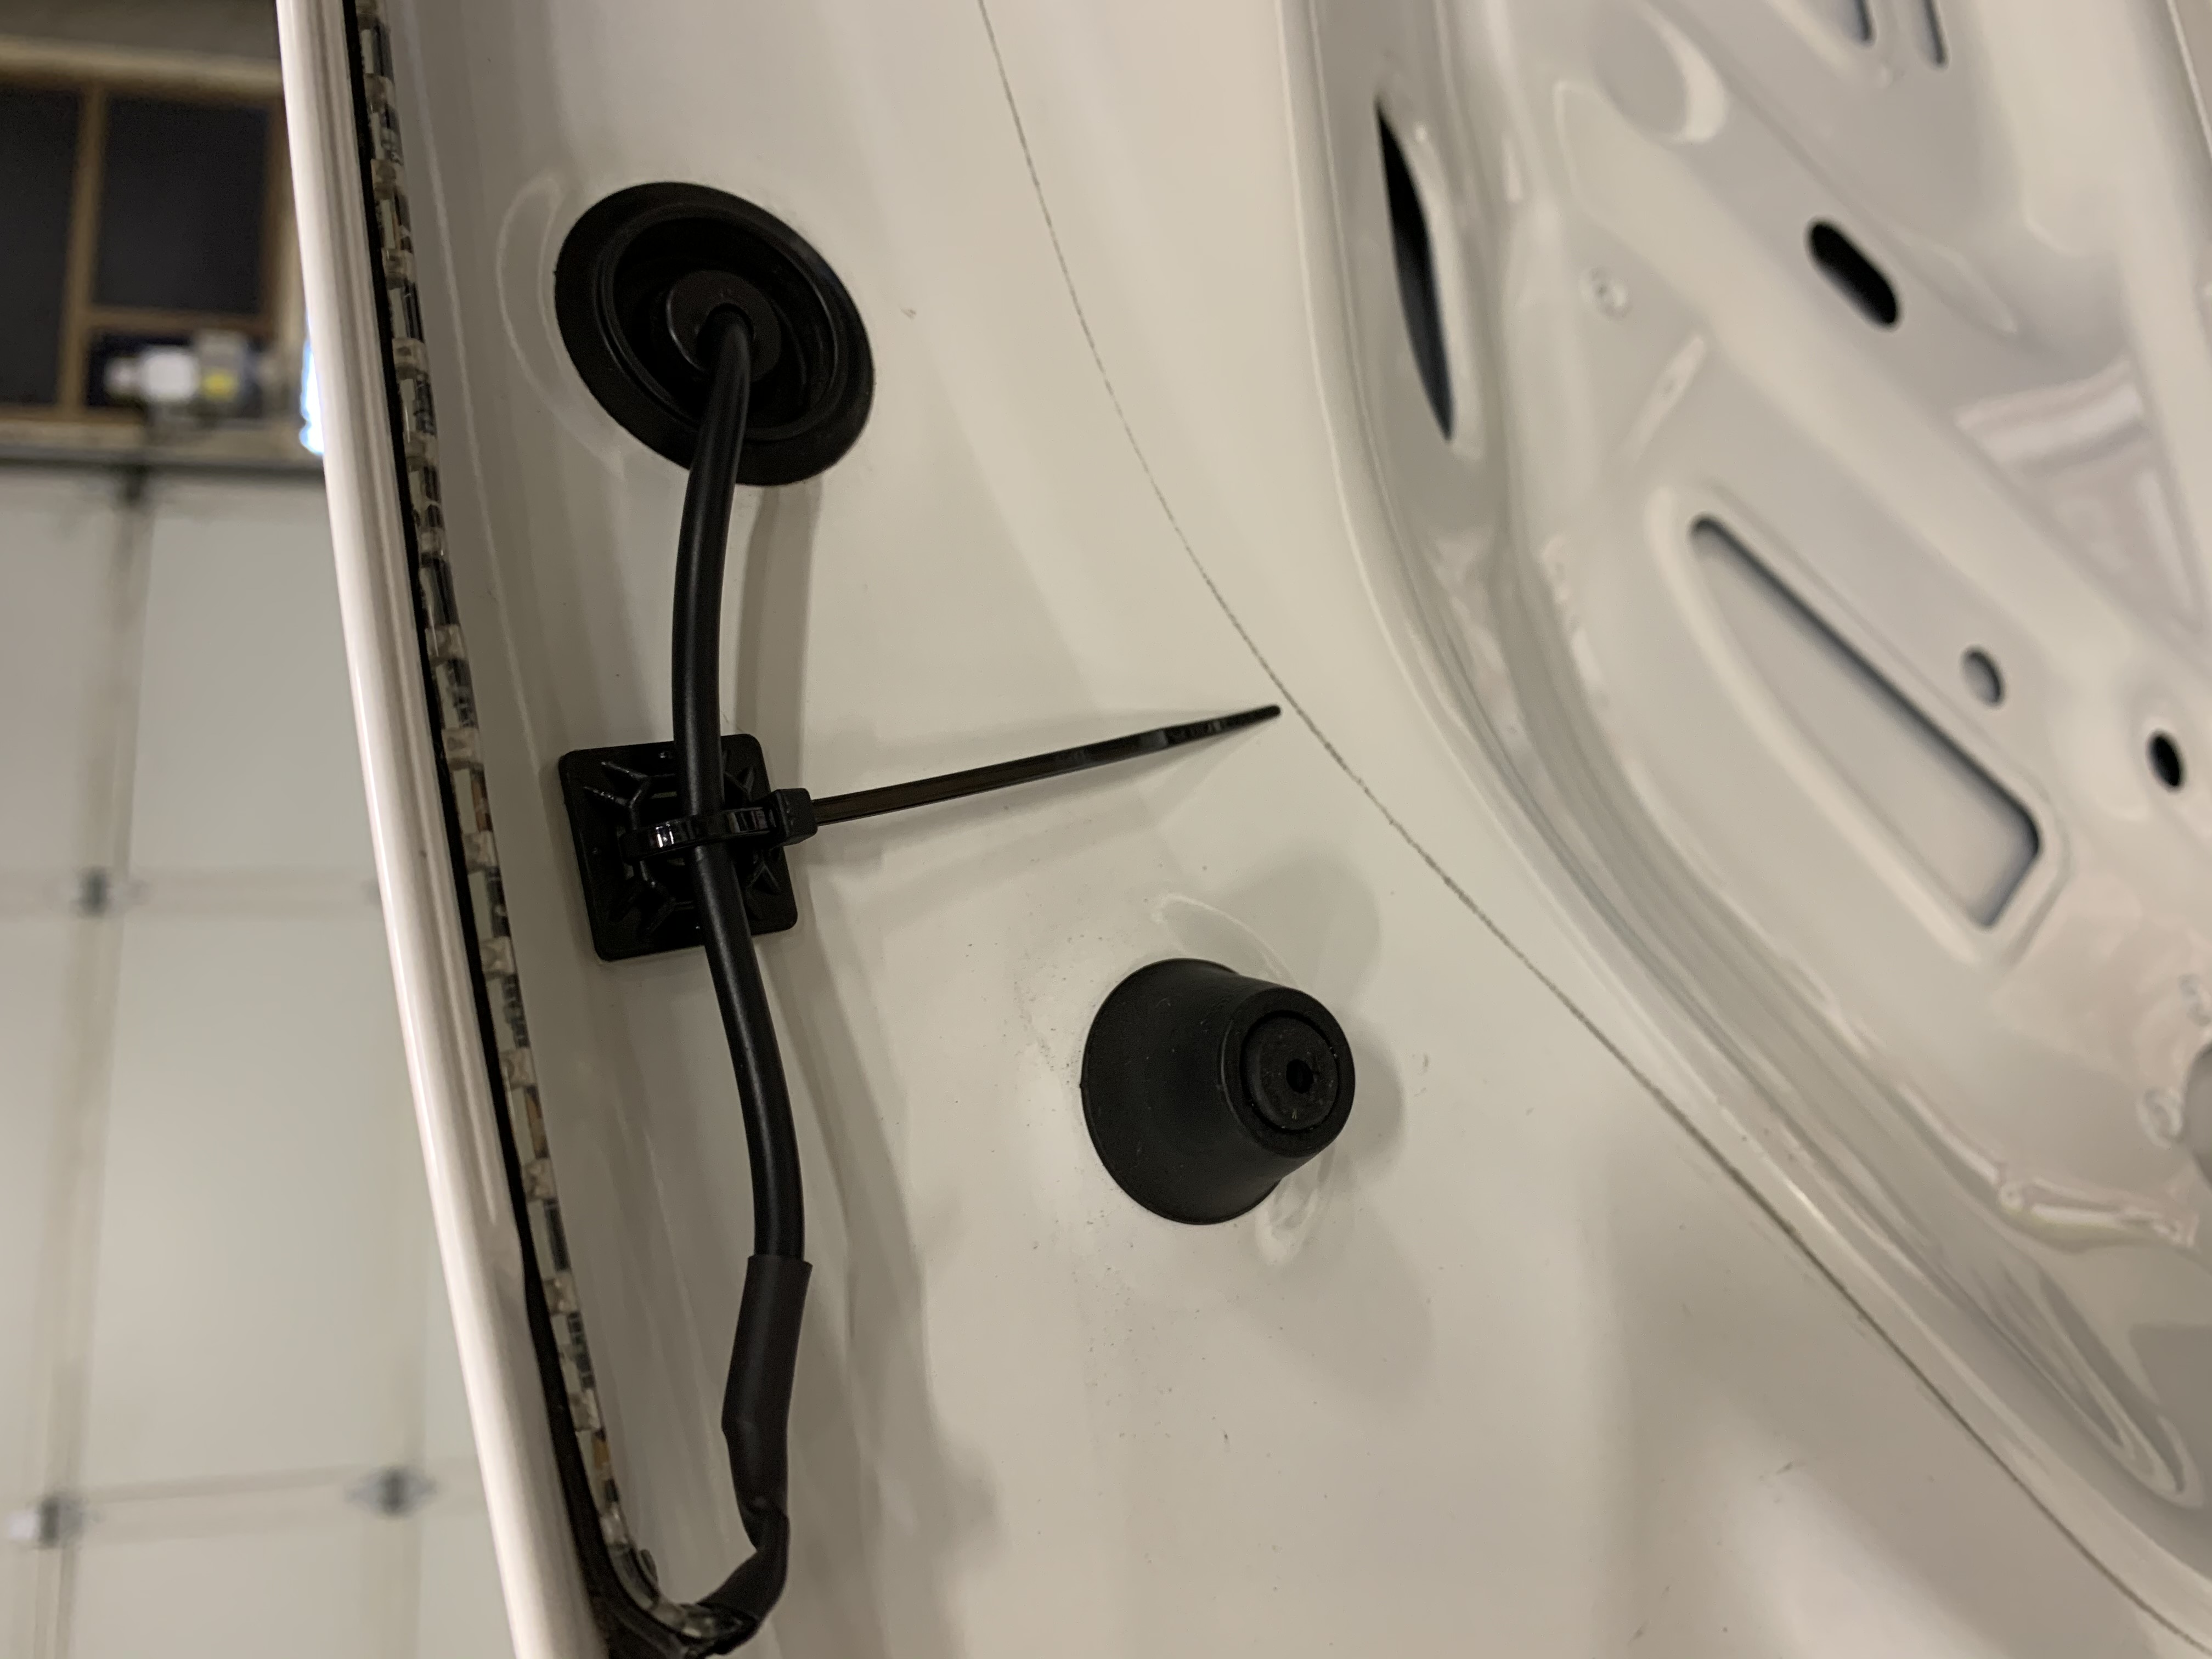
Snap the plastic plug back into place and take up the slack in the wire. Apply one of the cable tie mounts and a zip tie to keep the wire out of harms way.
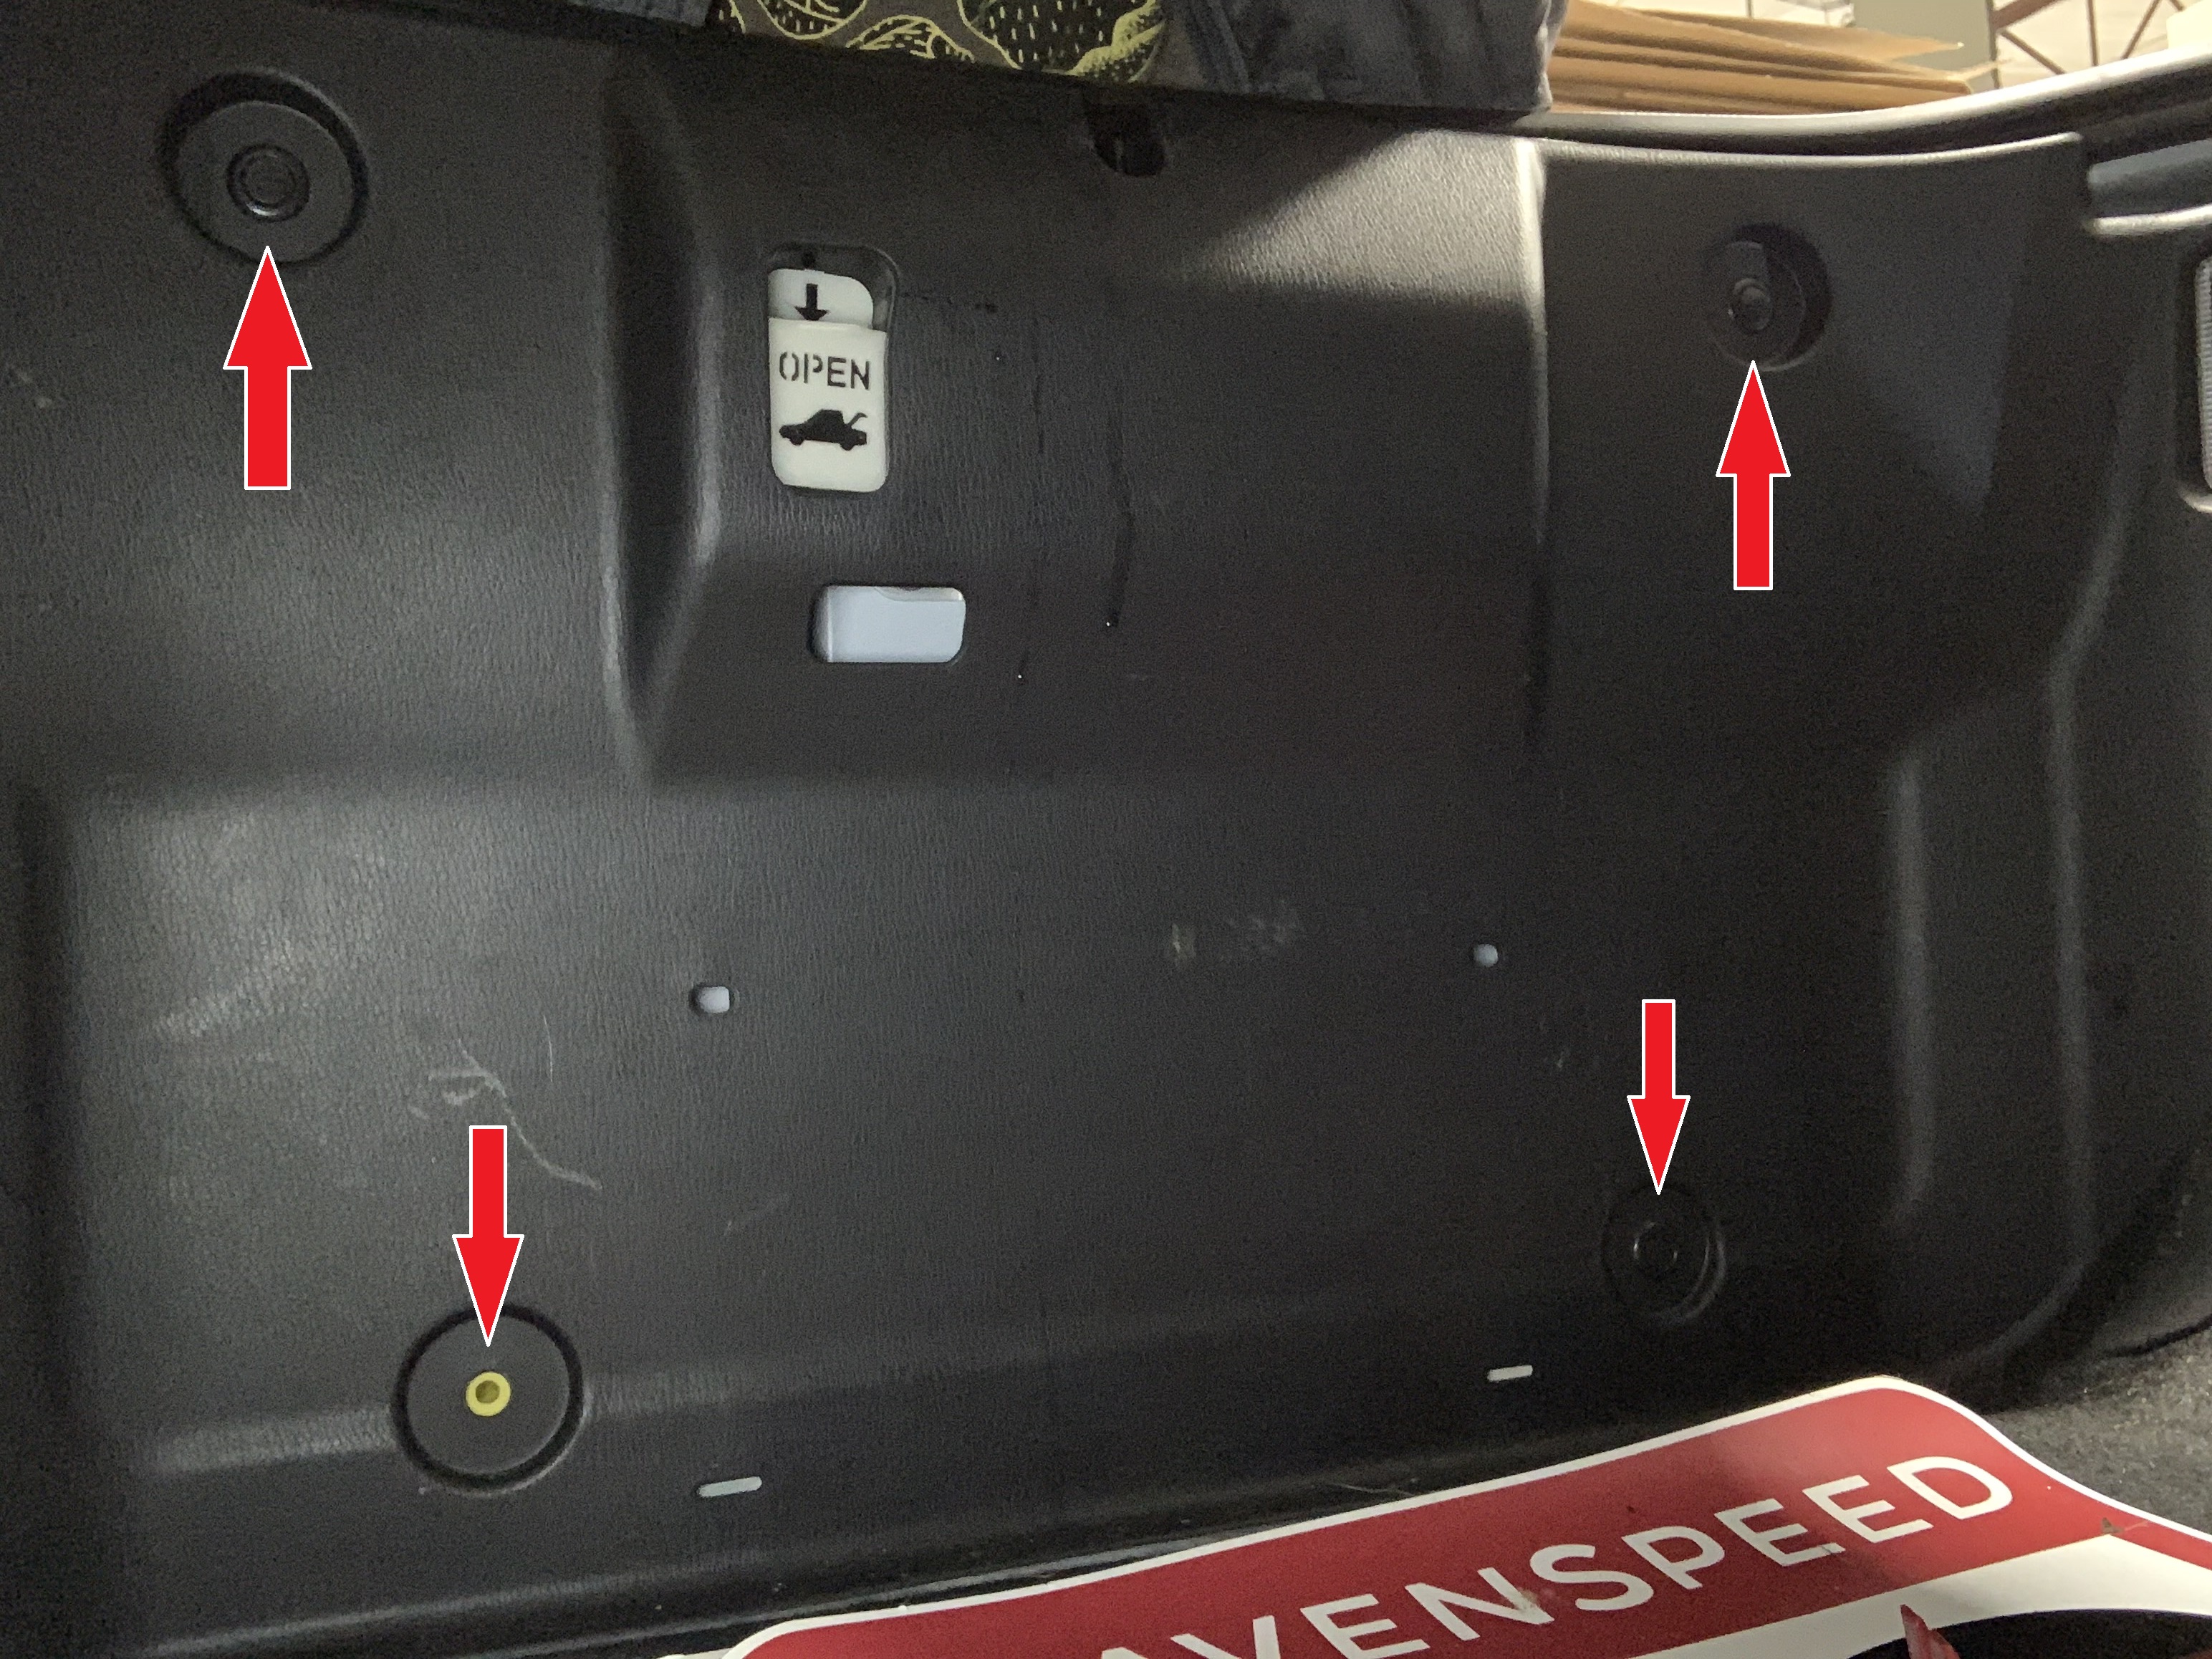
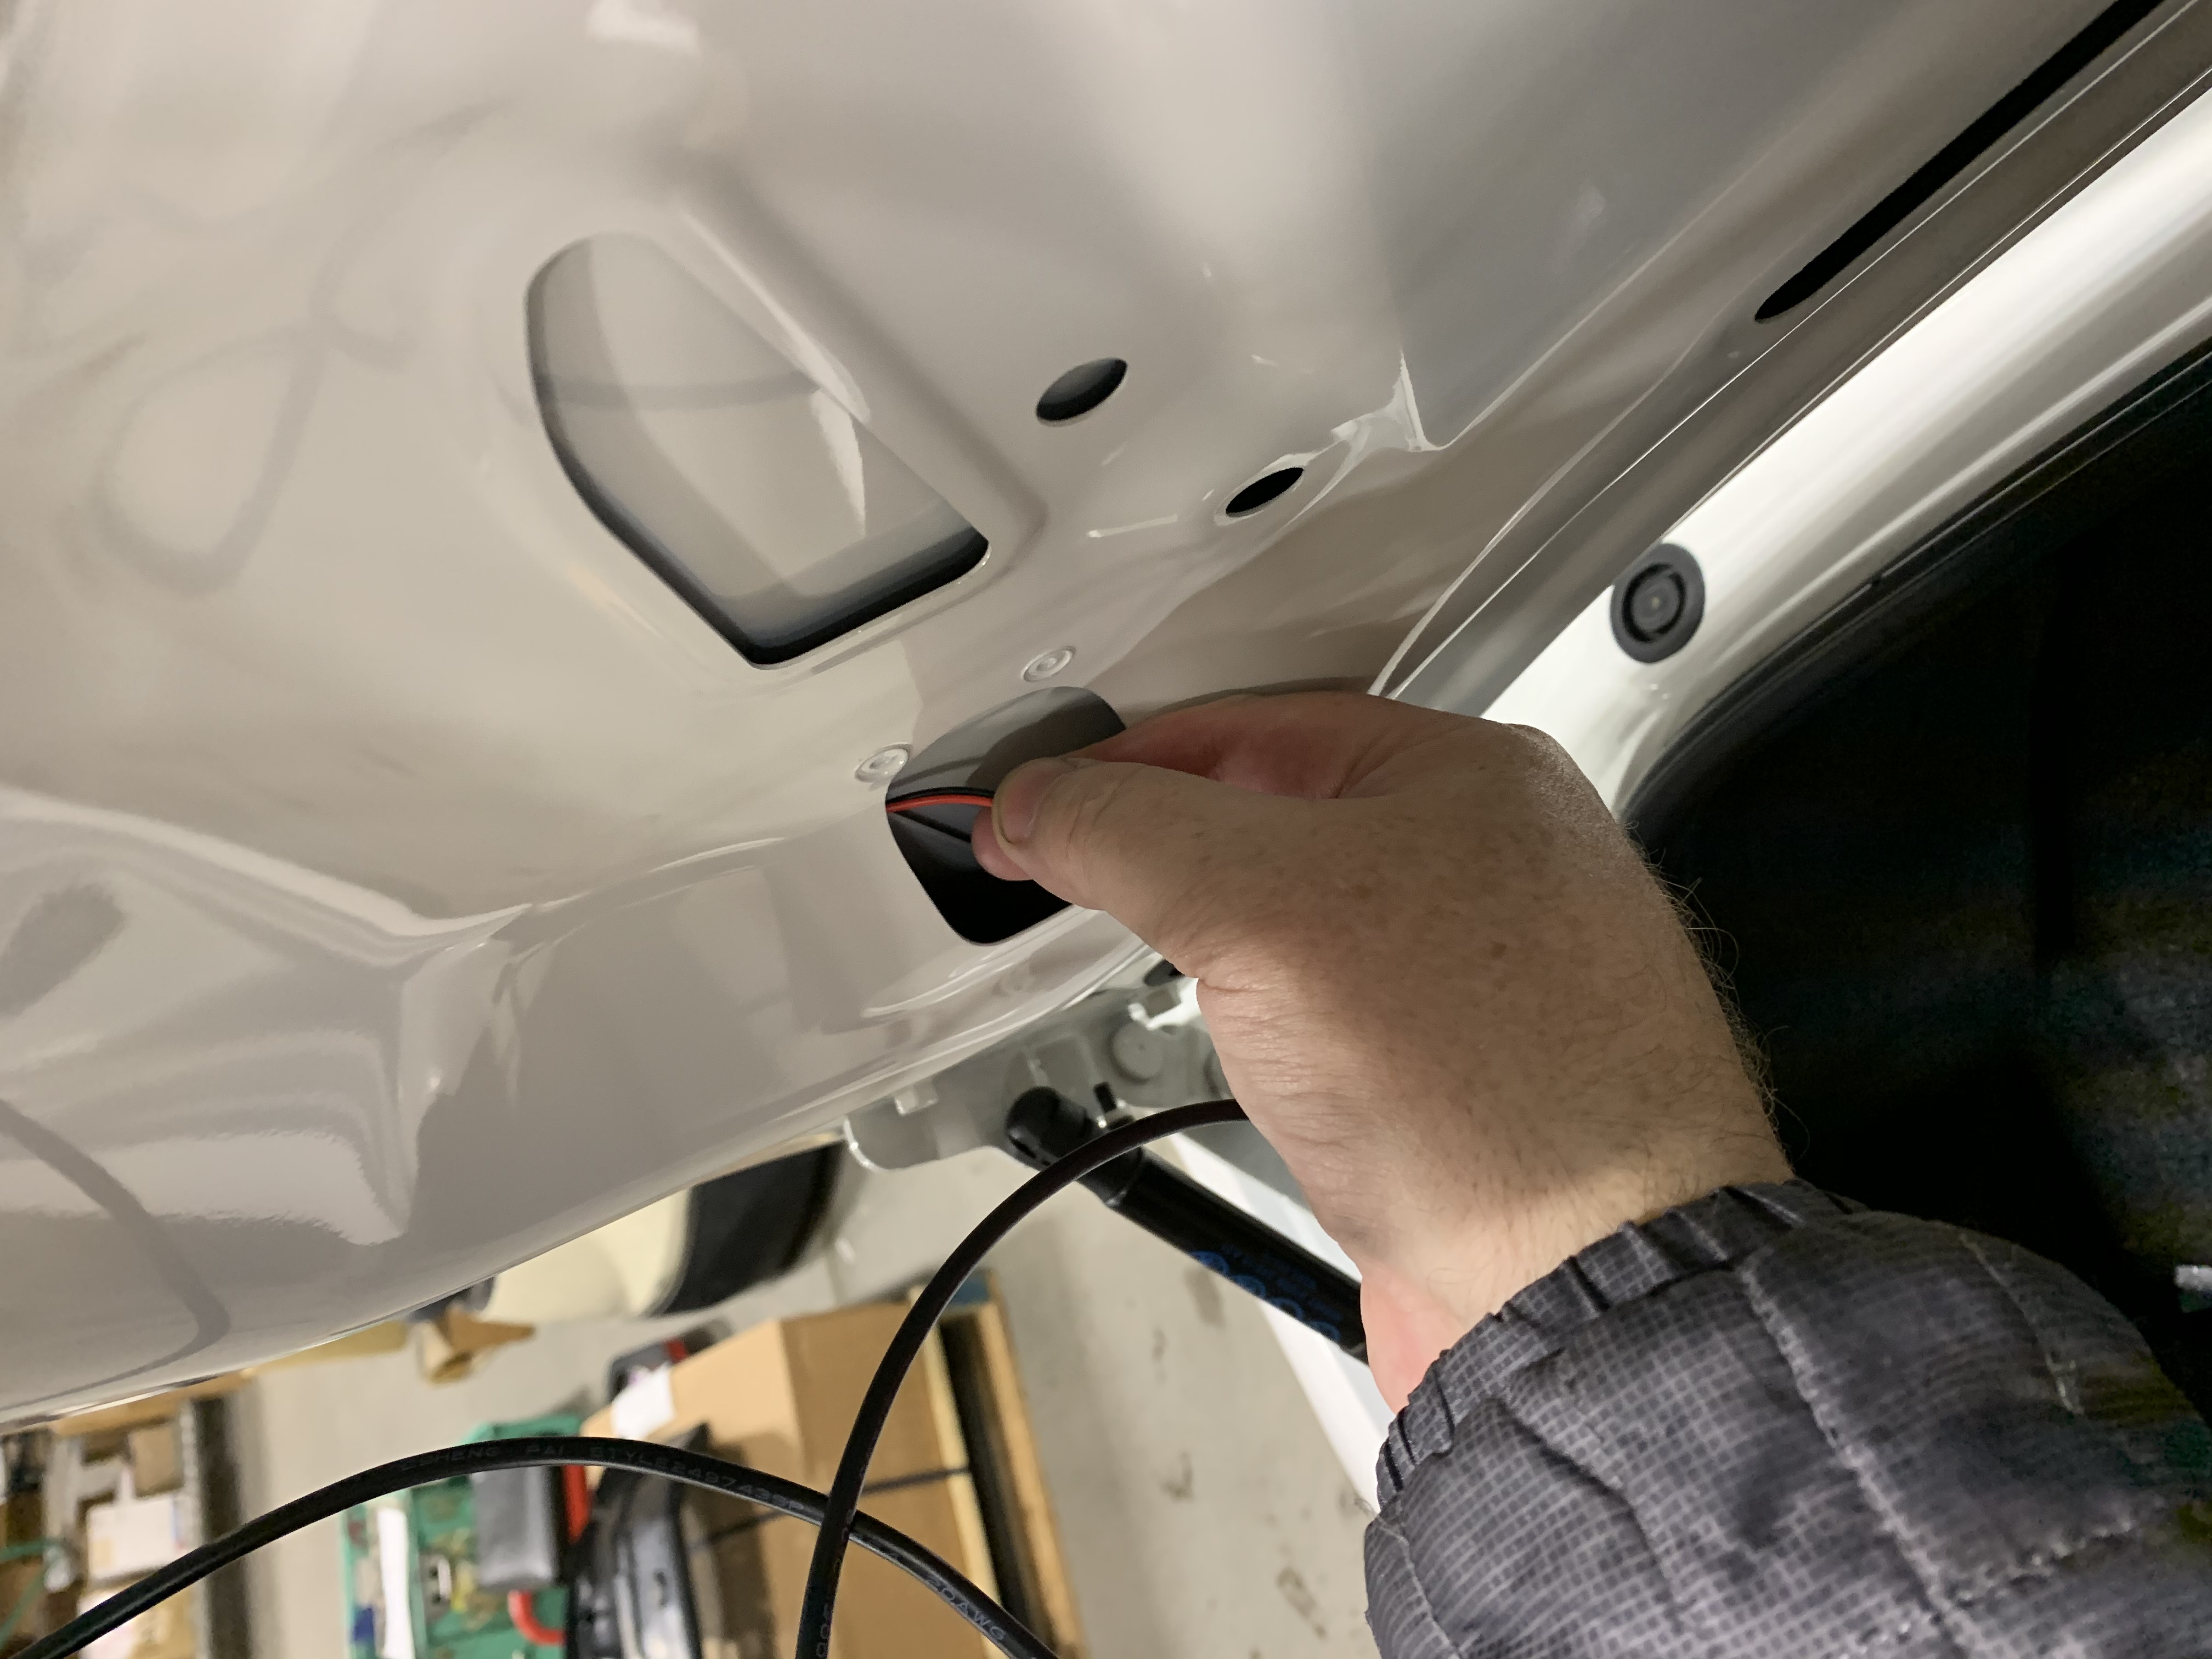
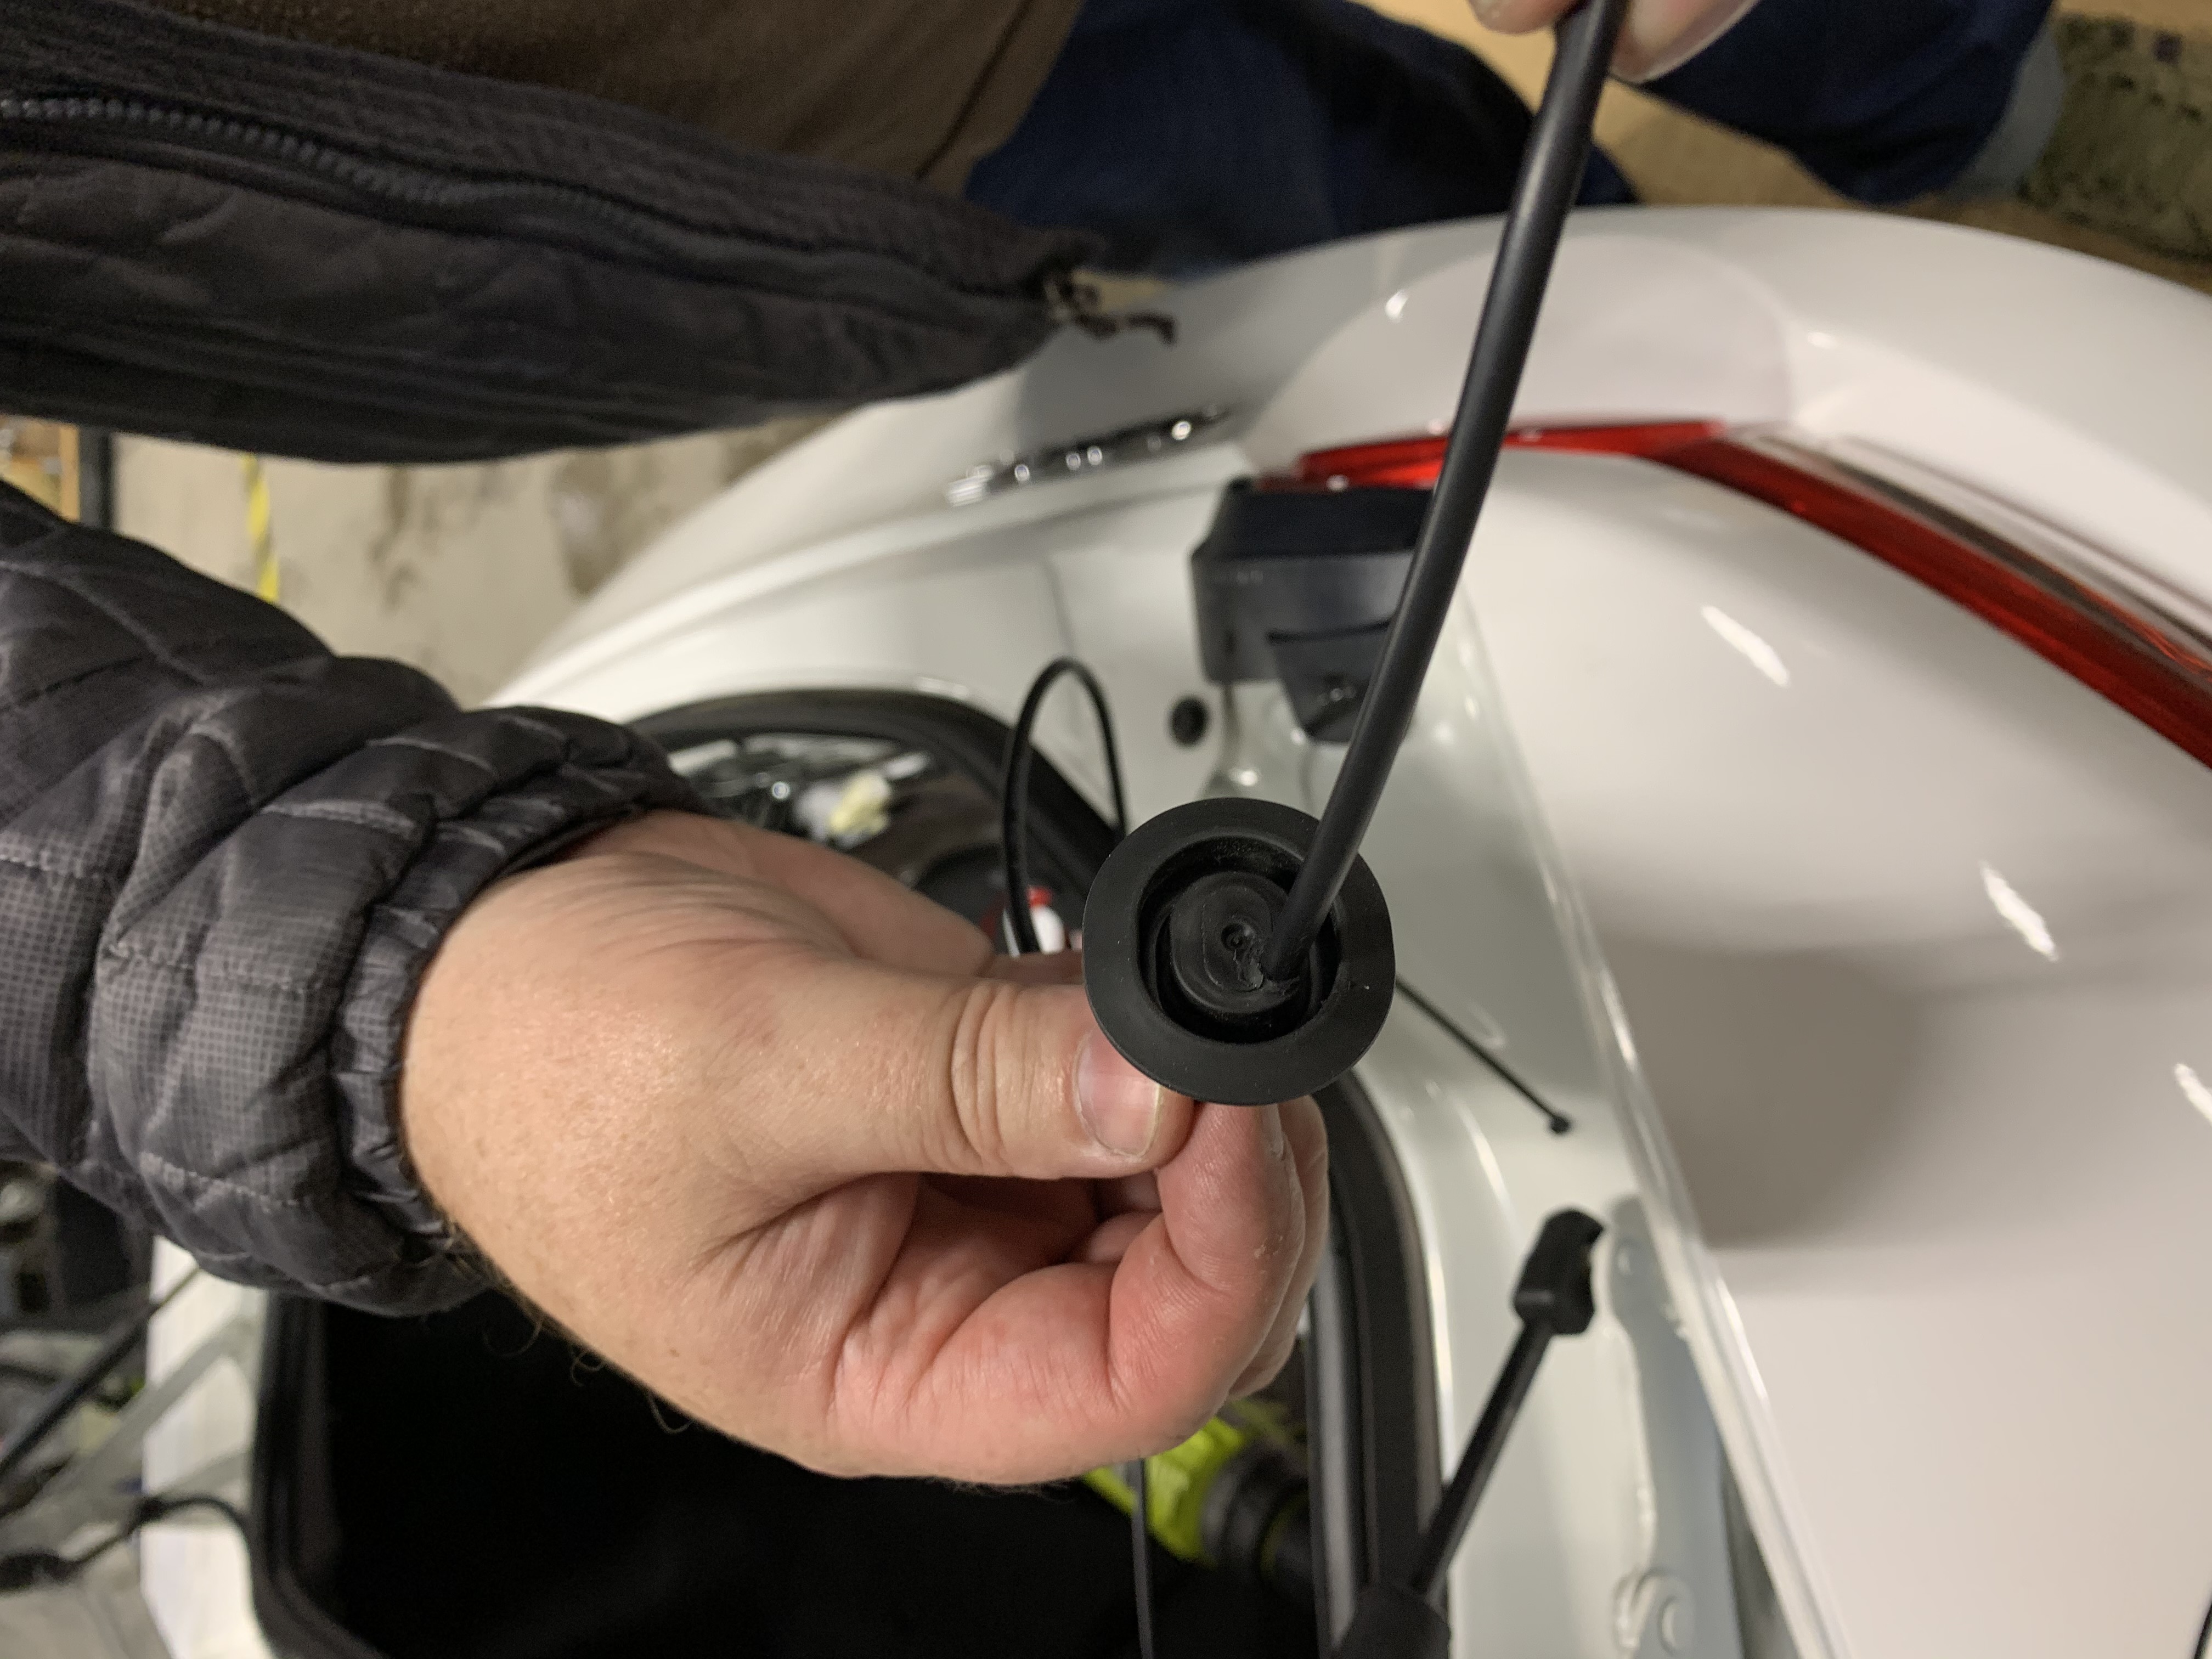
Going back to the wire now coming out of the oblong hole in the trunk lid, pull out the rubber plug in the lower left side of the lid and continue fishing the wire over and out that hole.
Create you wire clearance through this rubber plug and feed the wire through. Replace the plug and take out the slack in the wire through the lid interior.
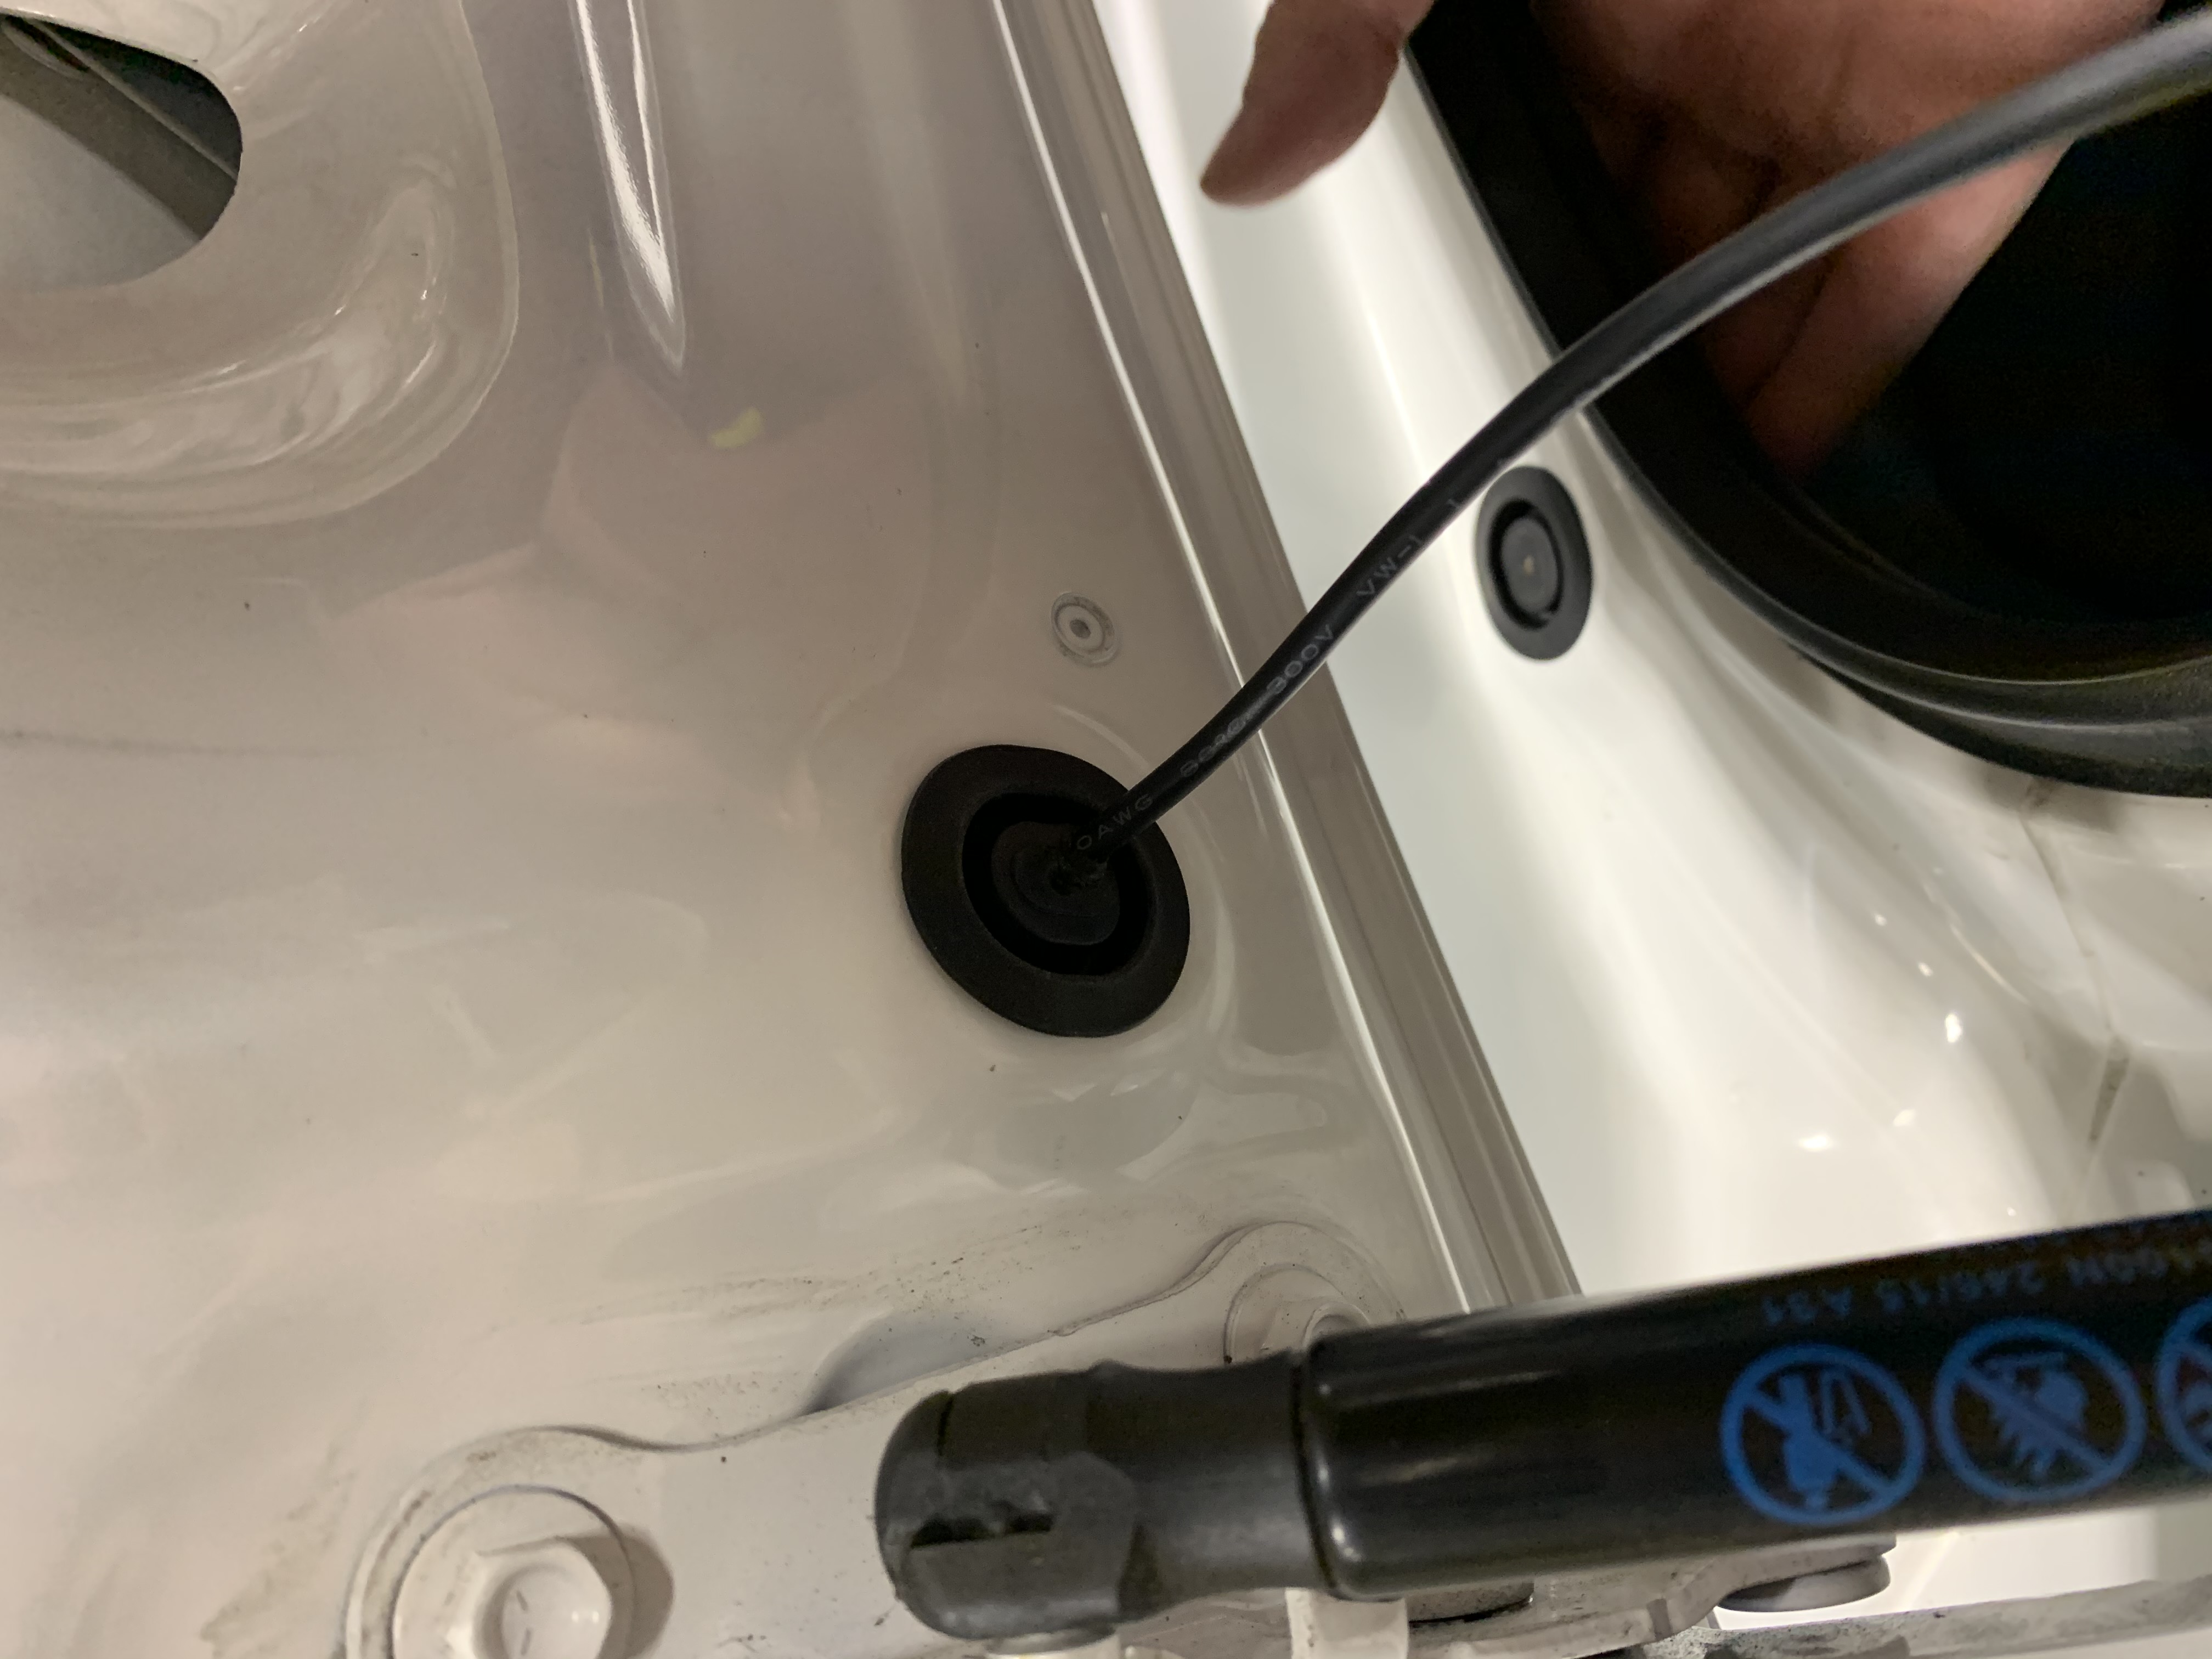
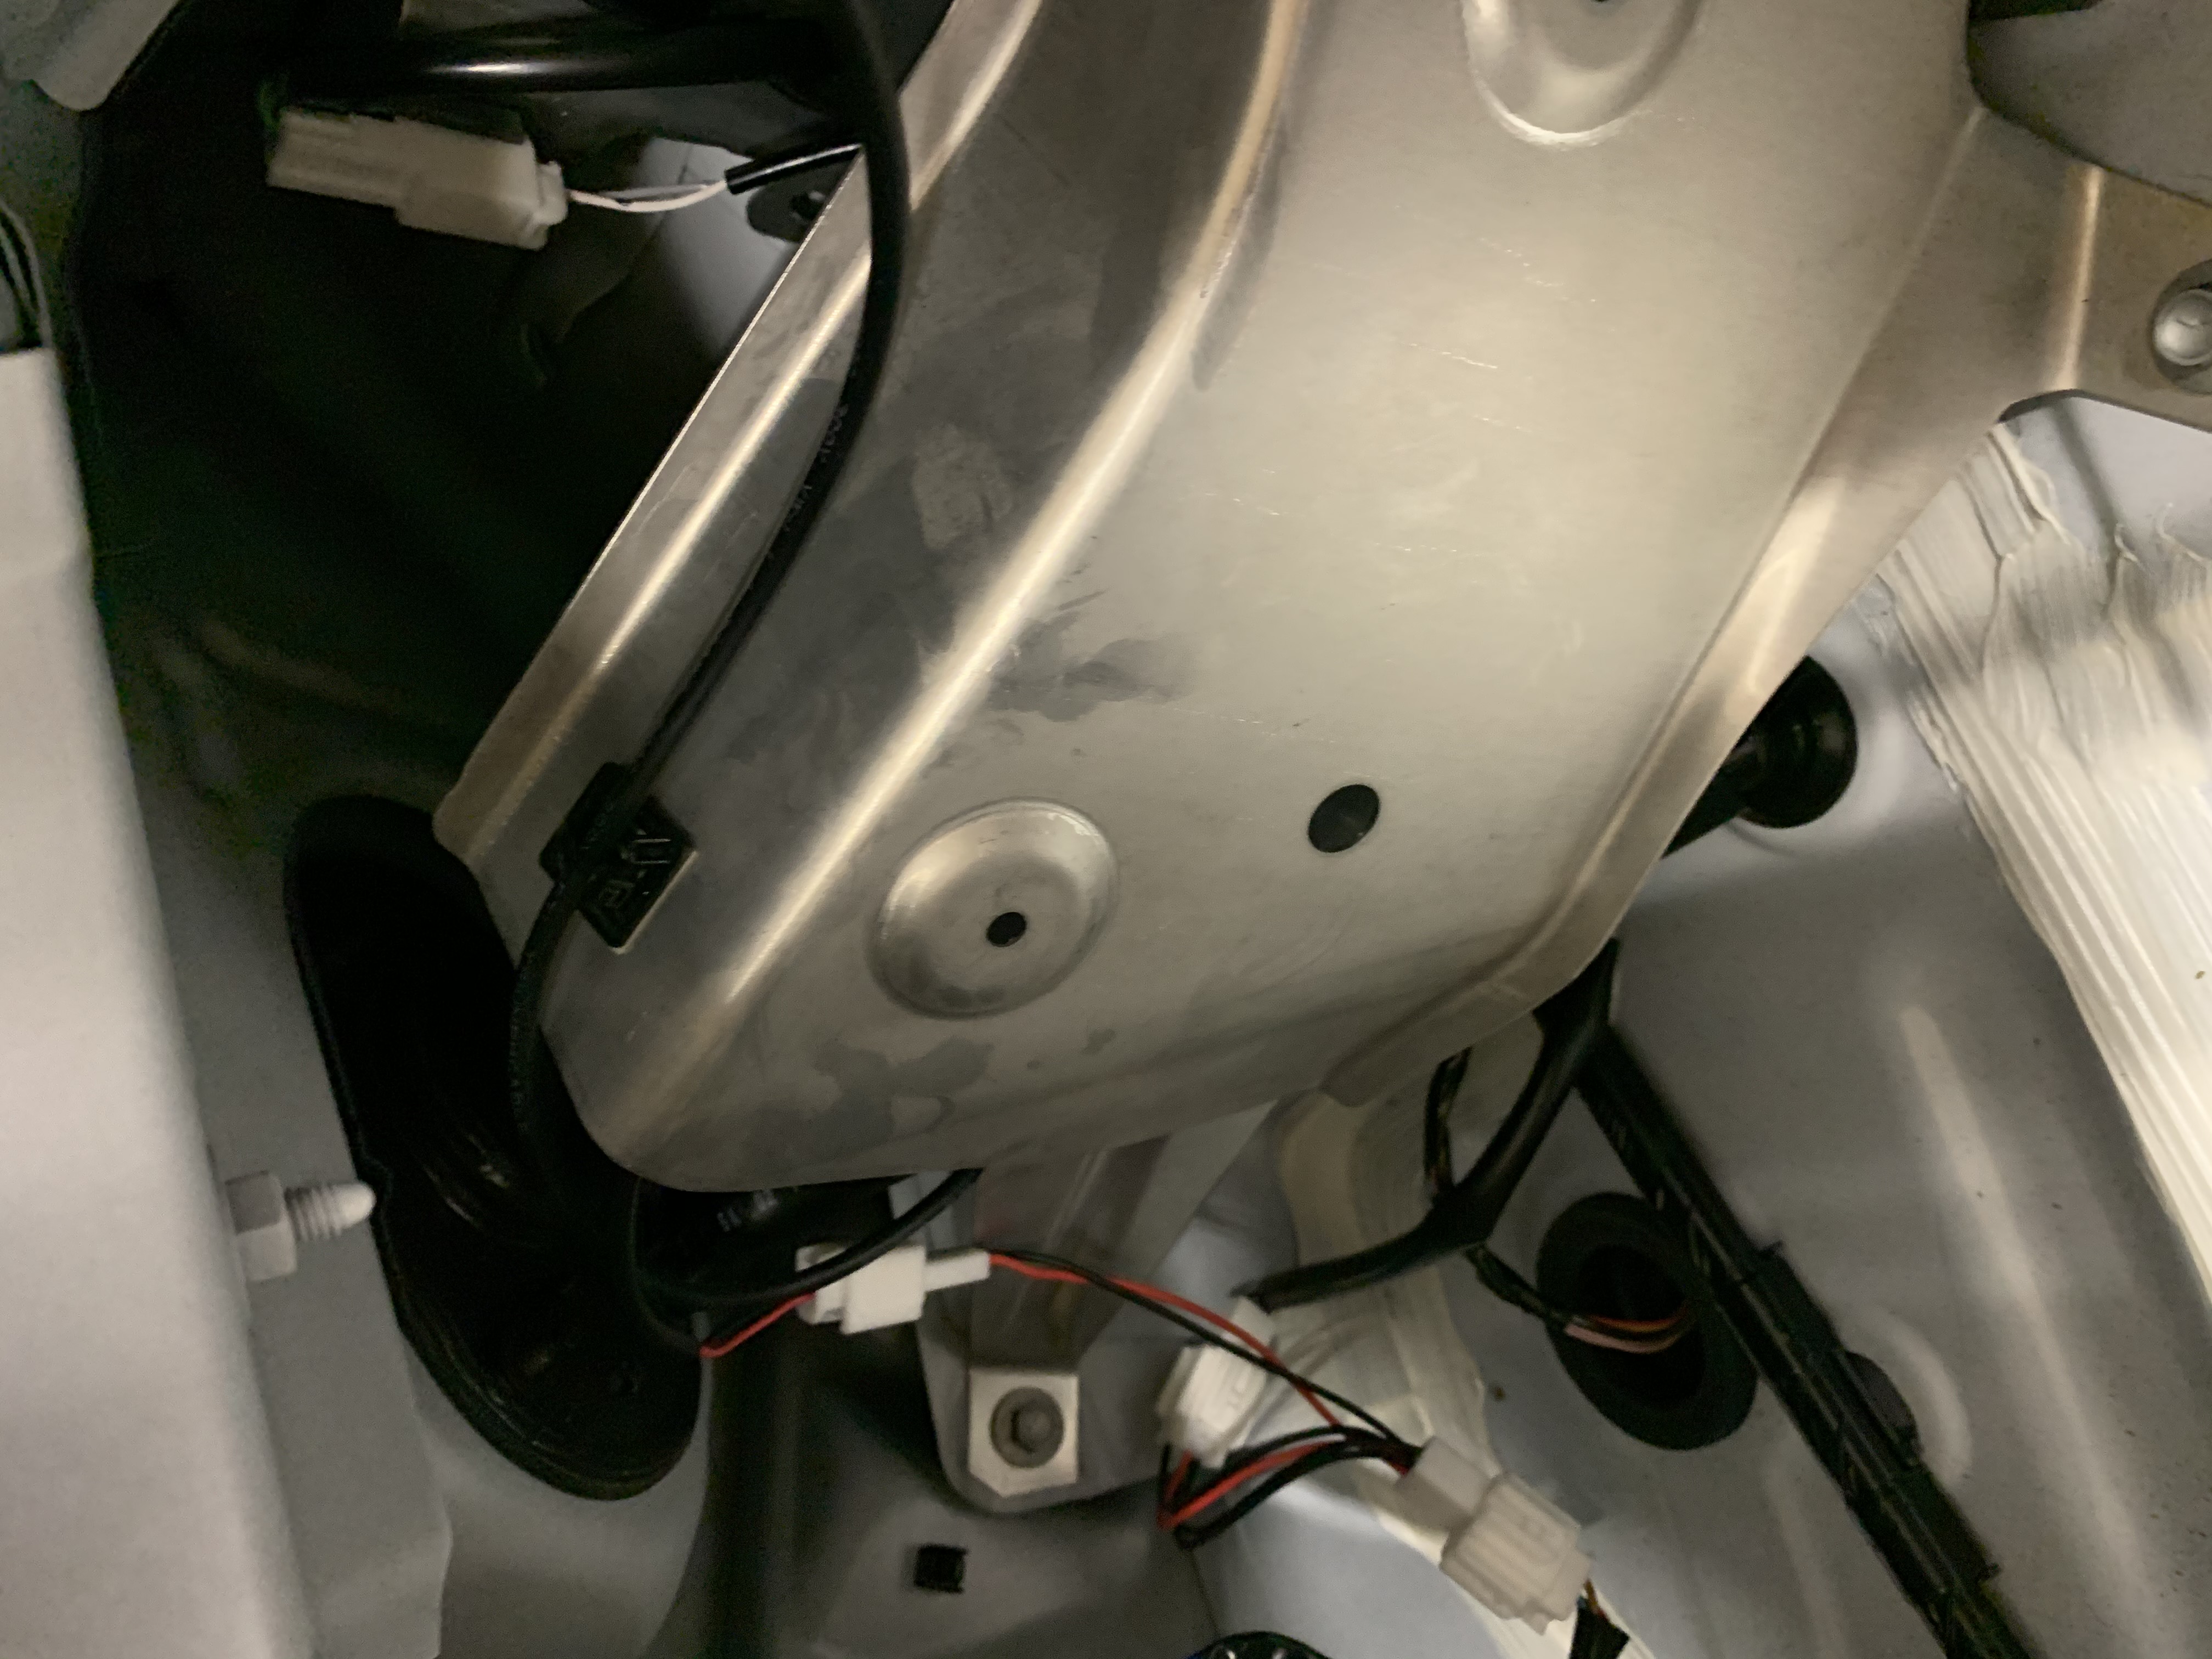
Remove the rubber plug on the body of the car just in front of the trunk weather stripping and perform the same treatment.
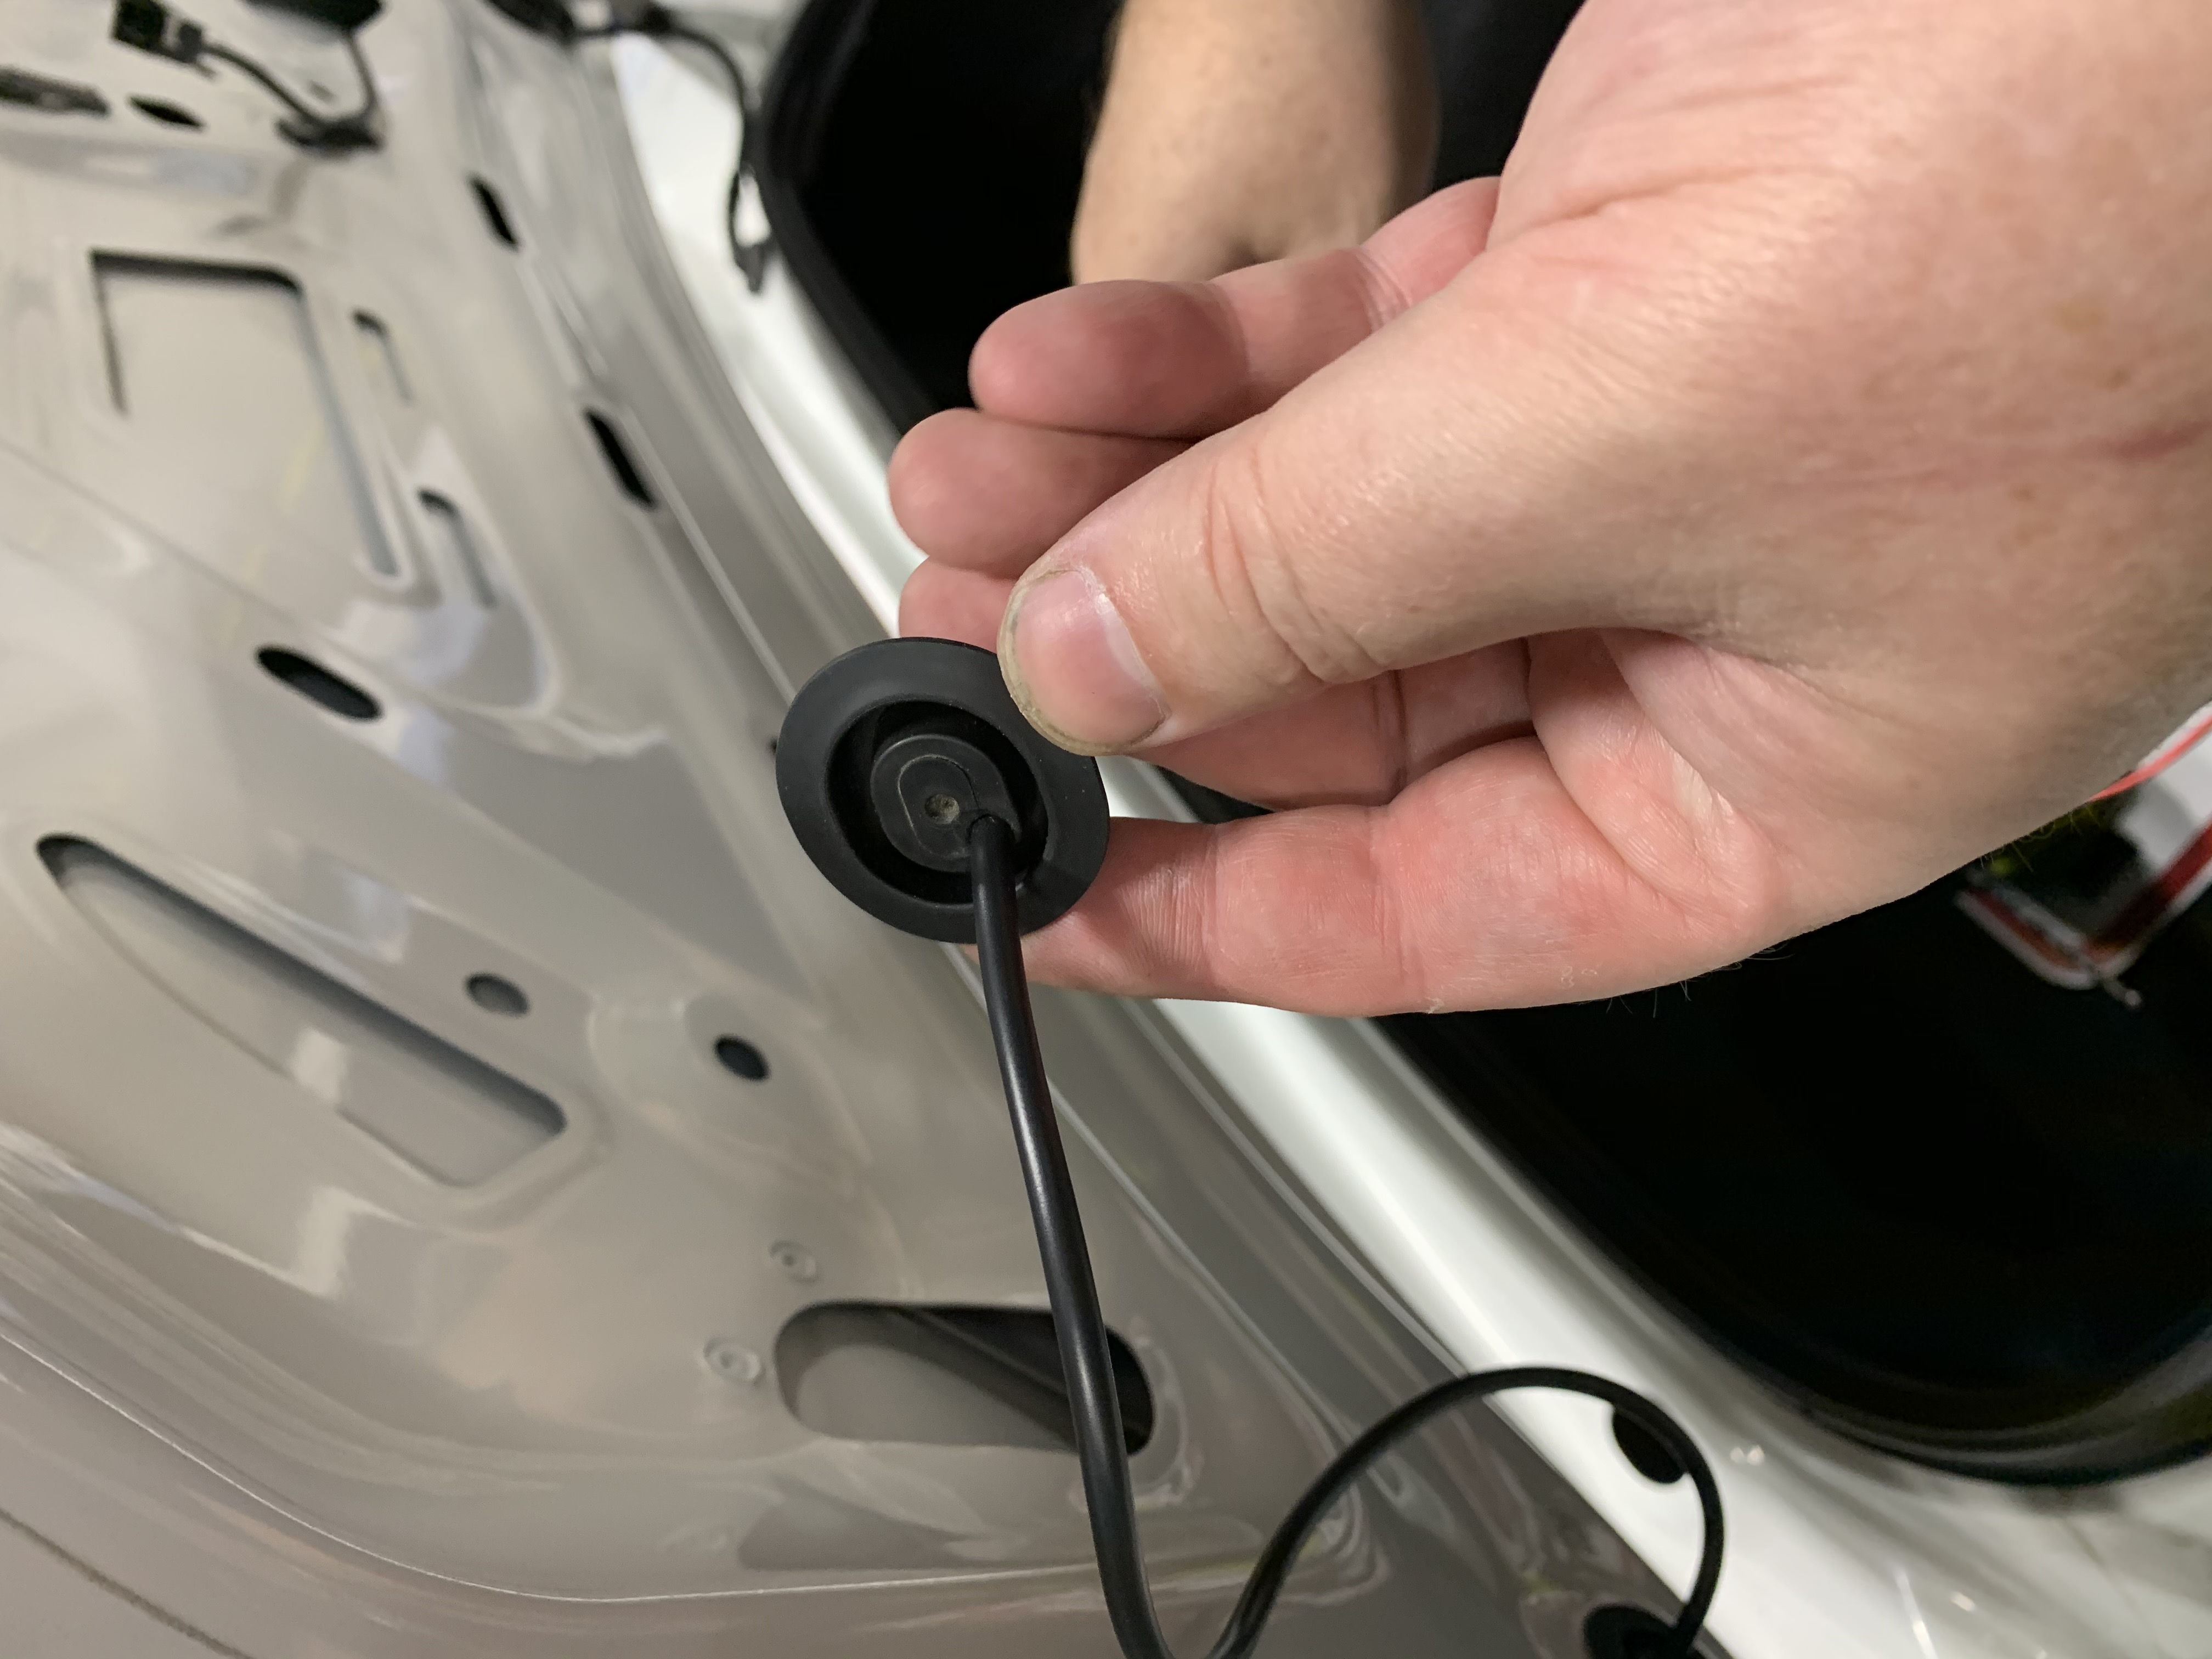
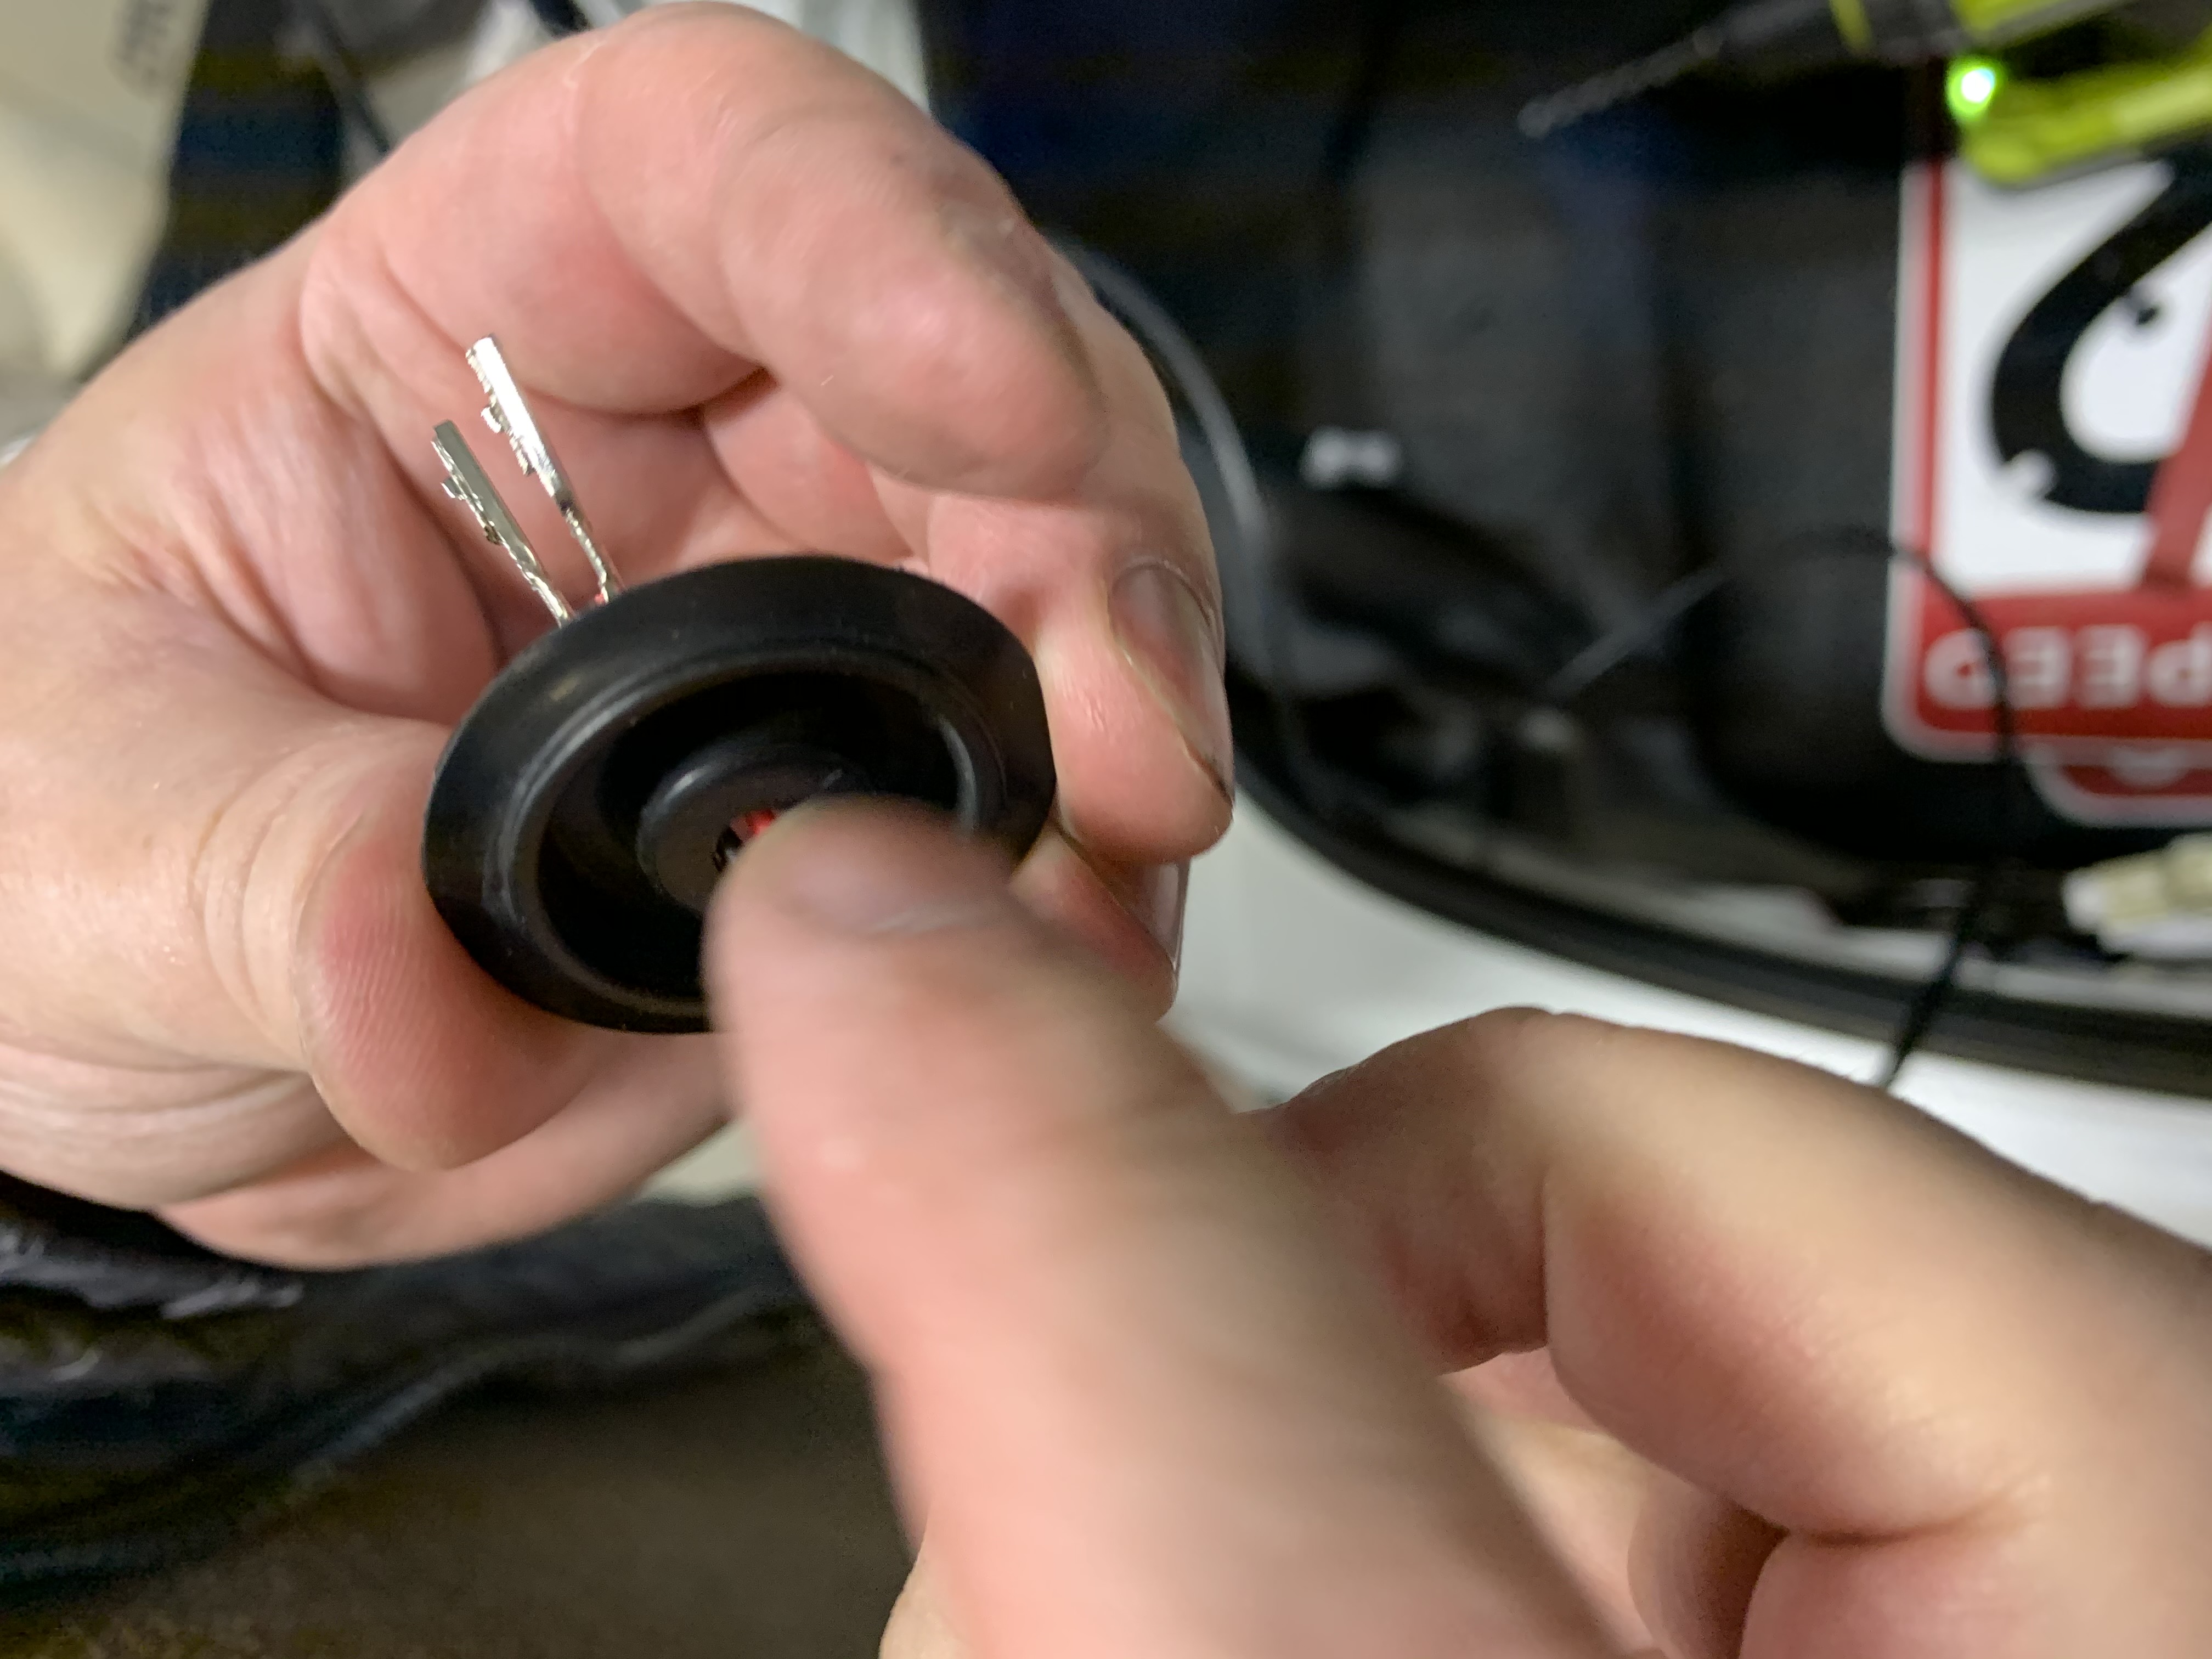
At this point, if you've removed the plug from the wires, go ahead and reinstall them back into the plug now.

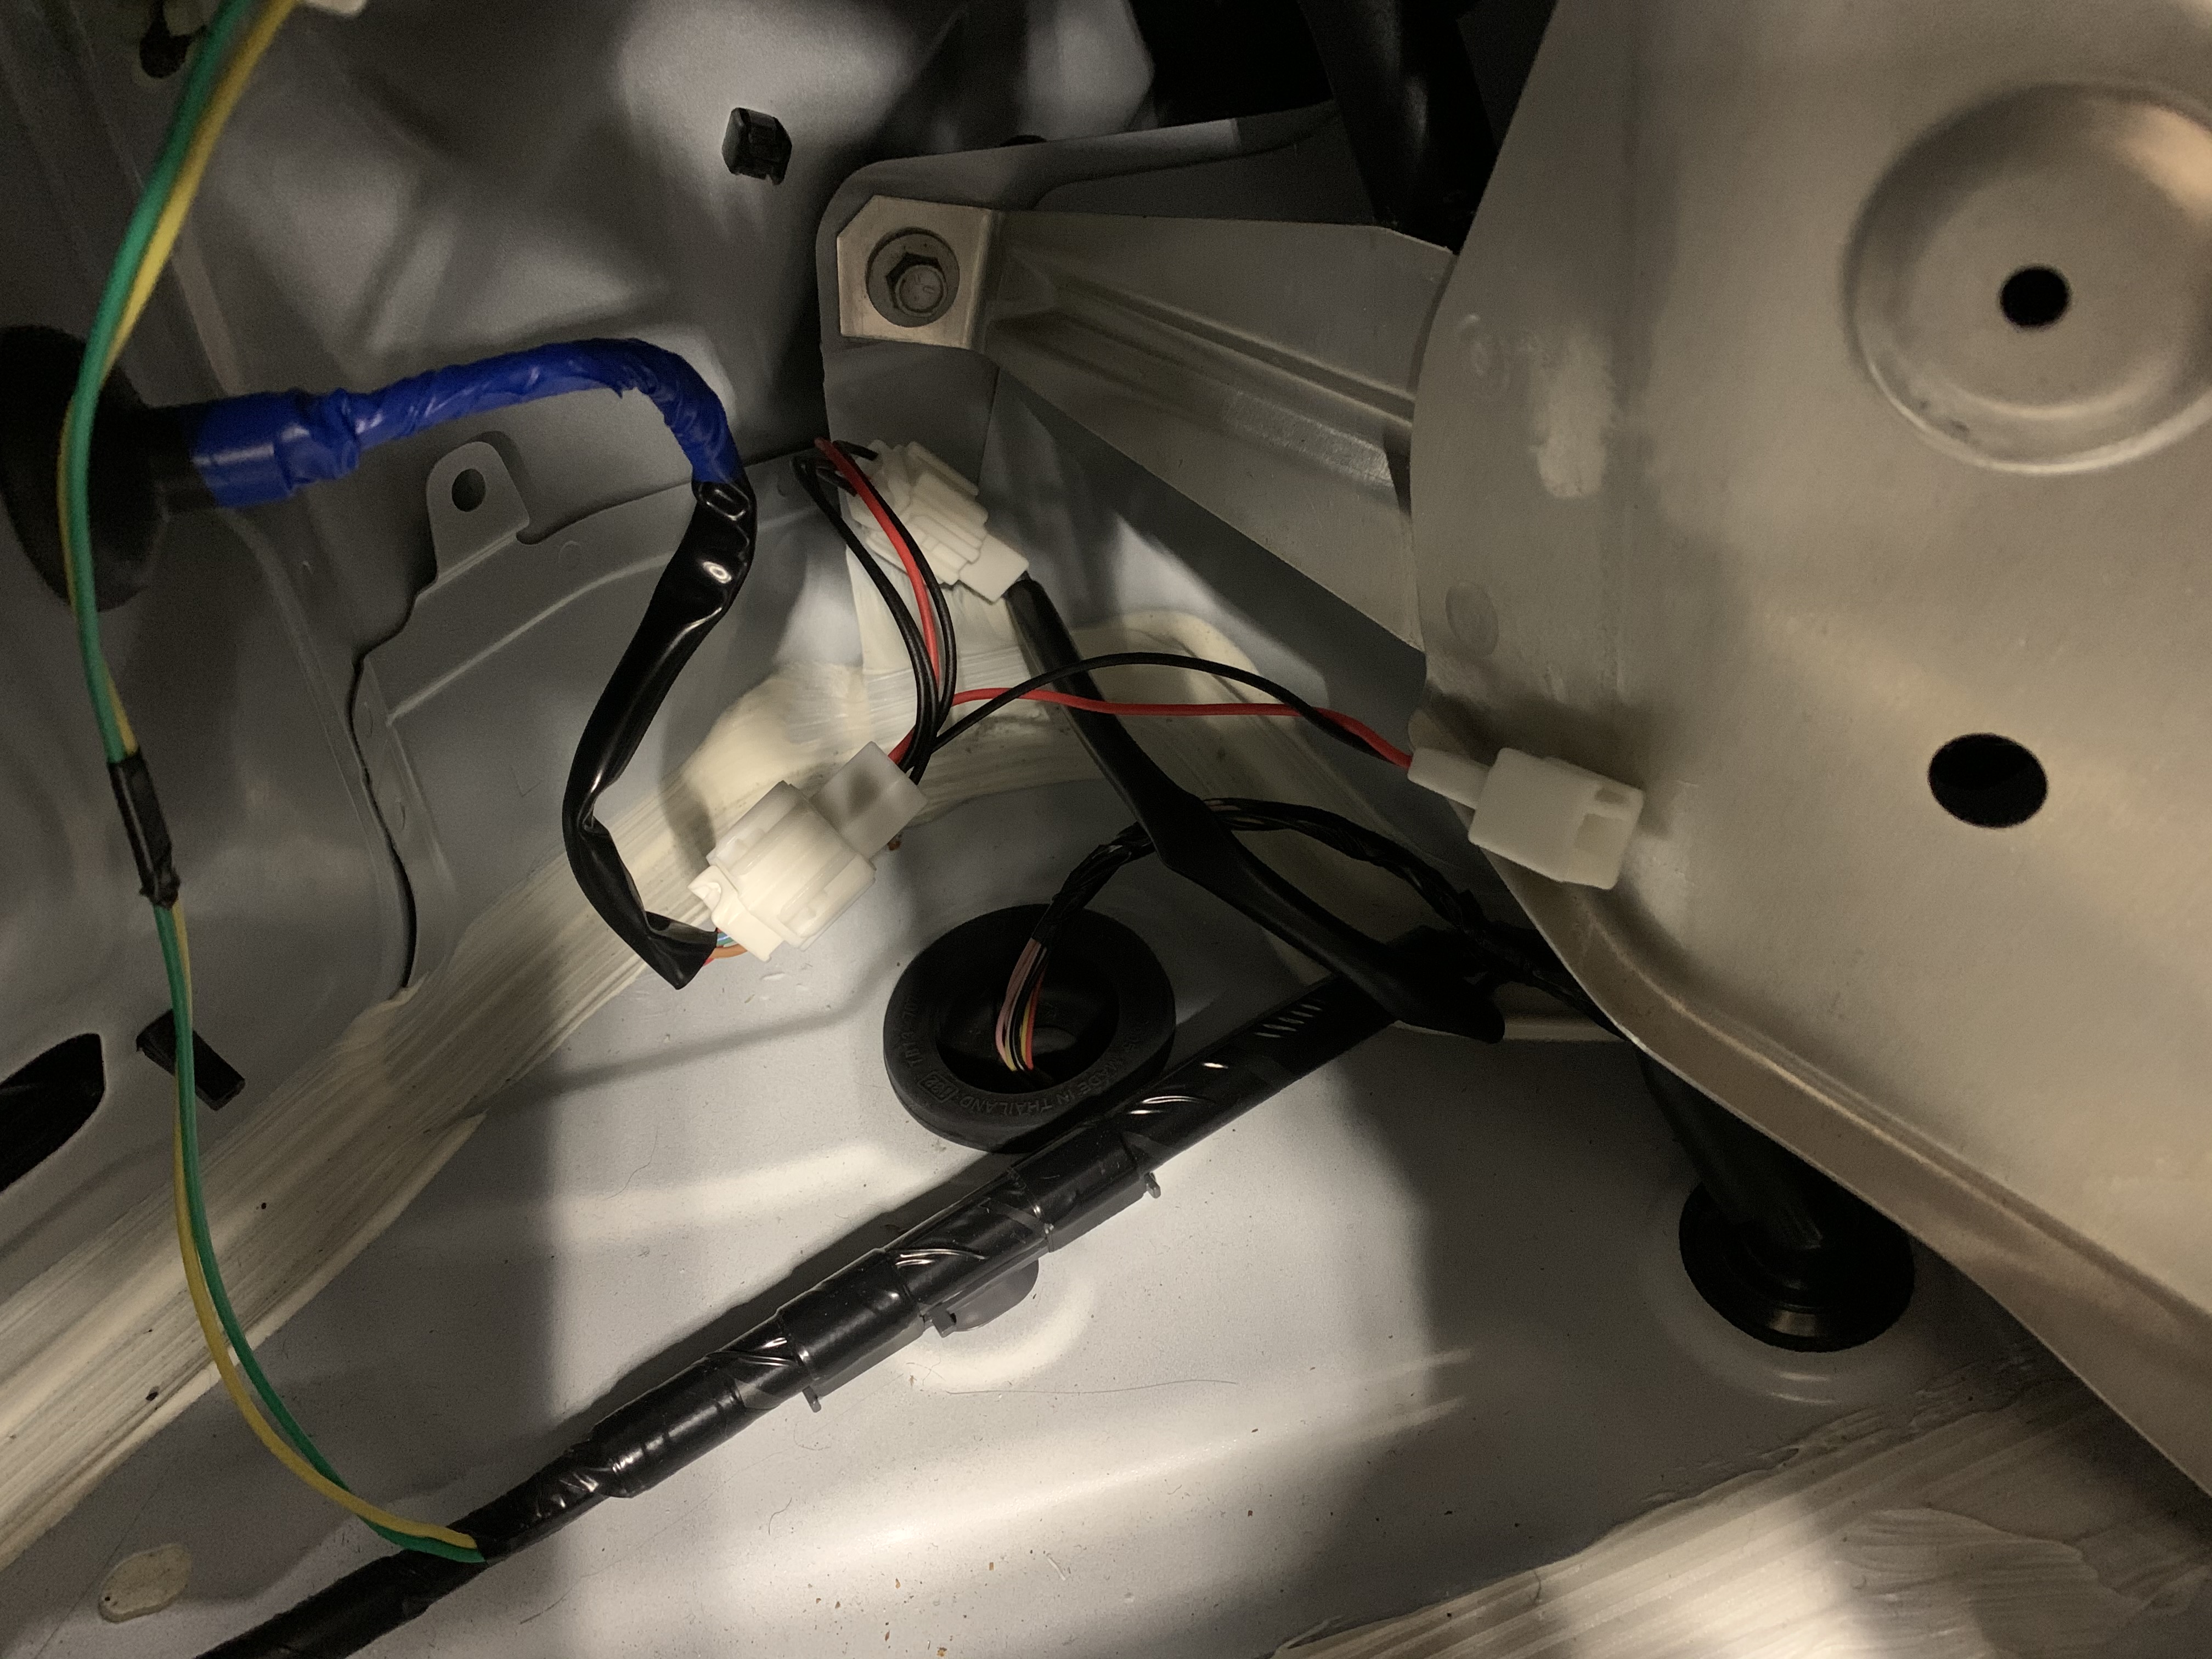
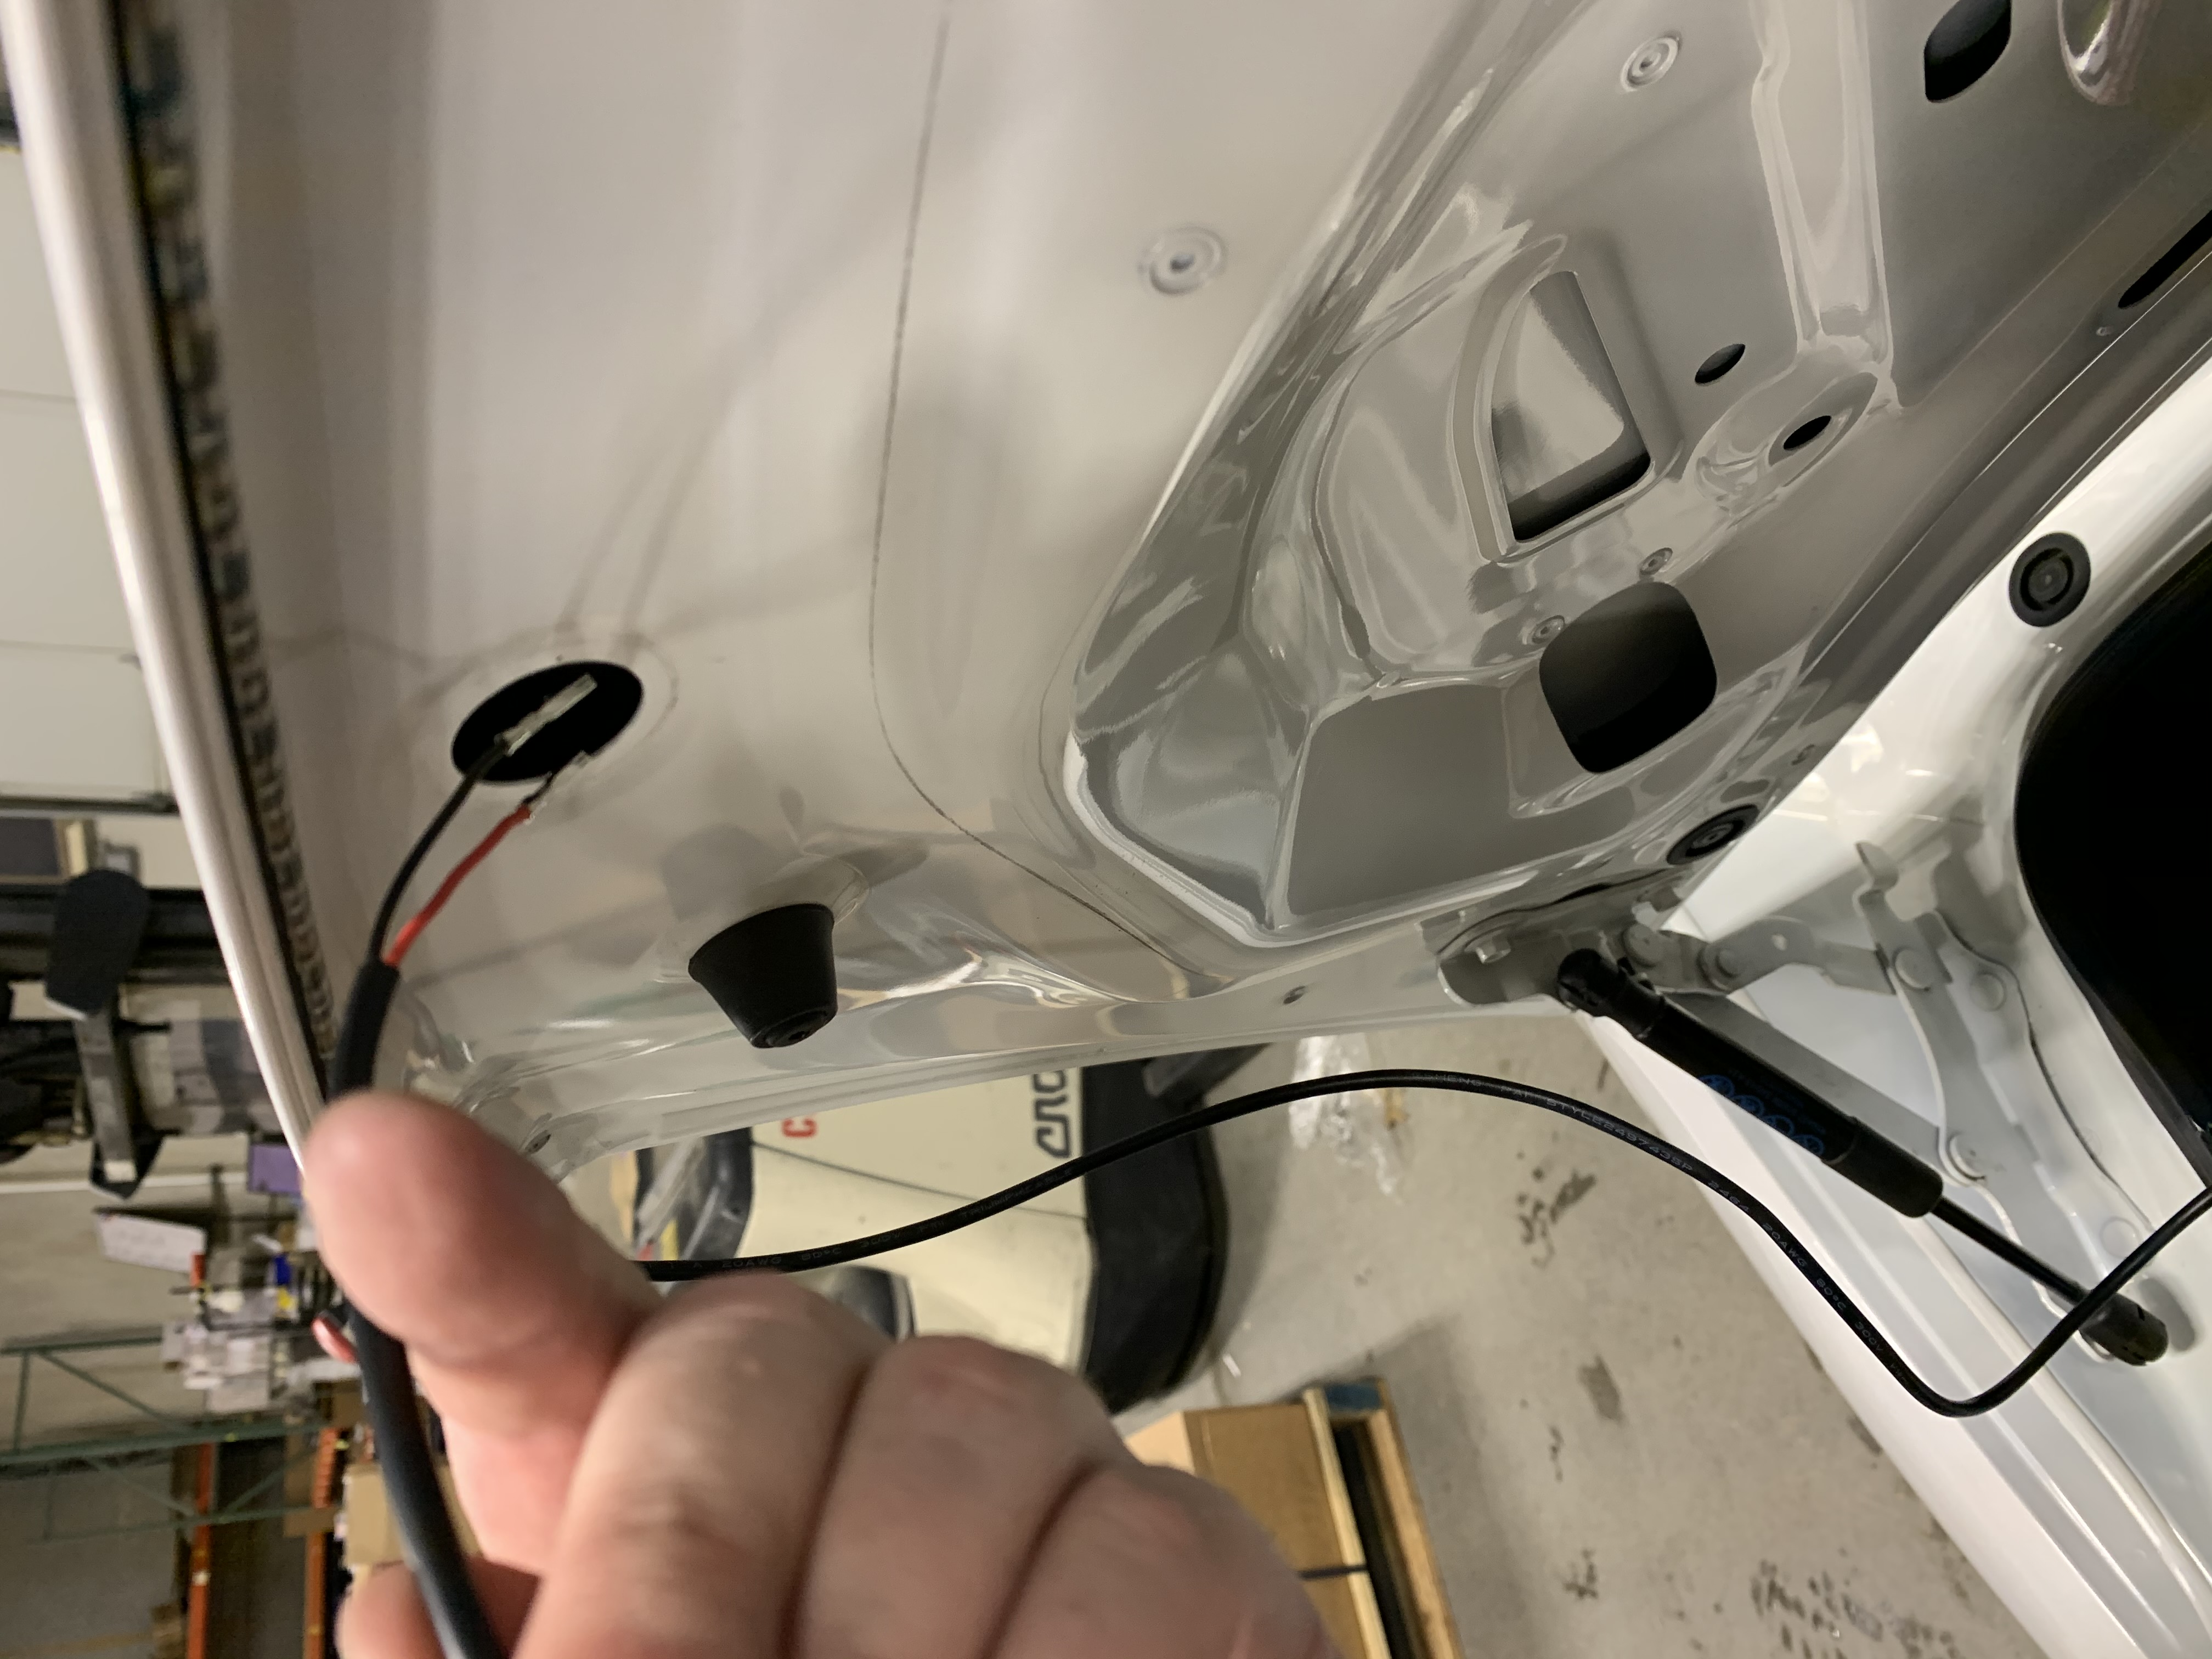
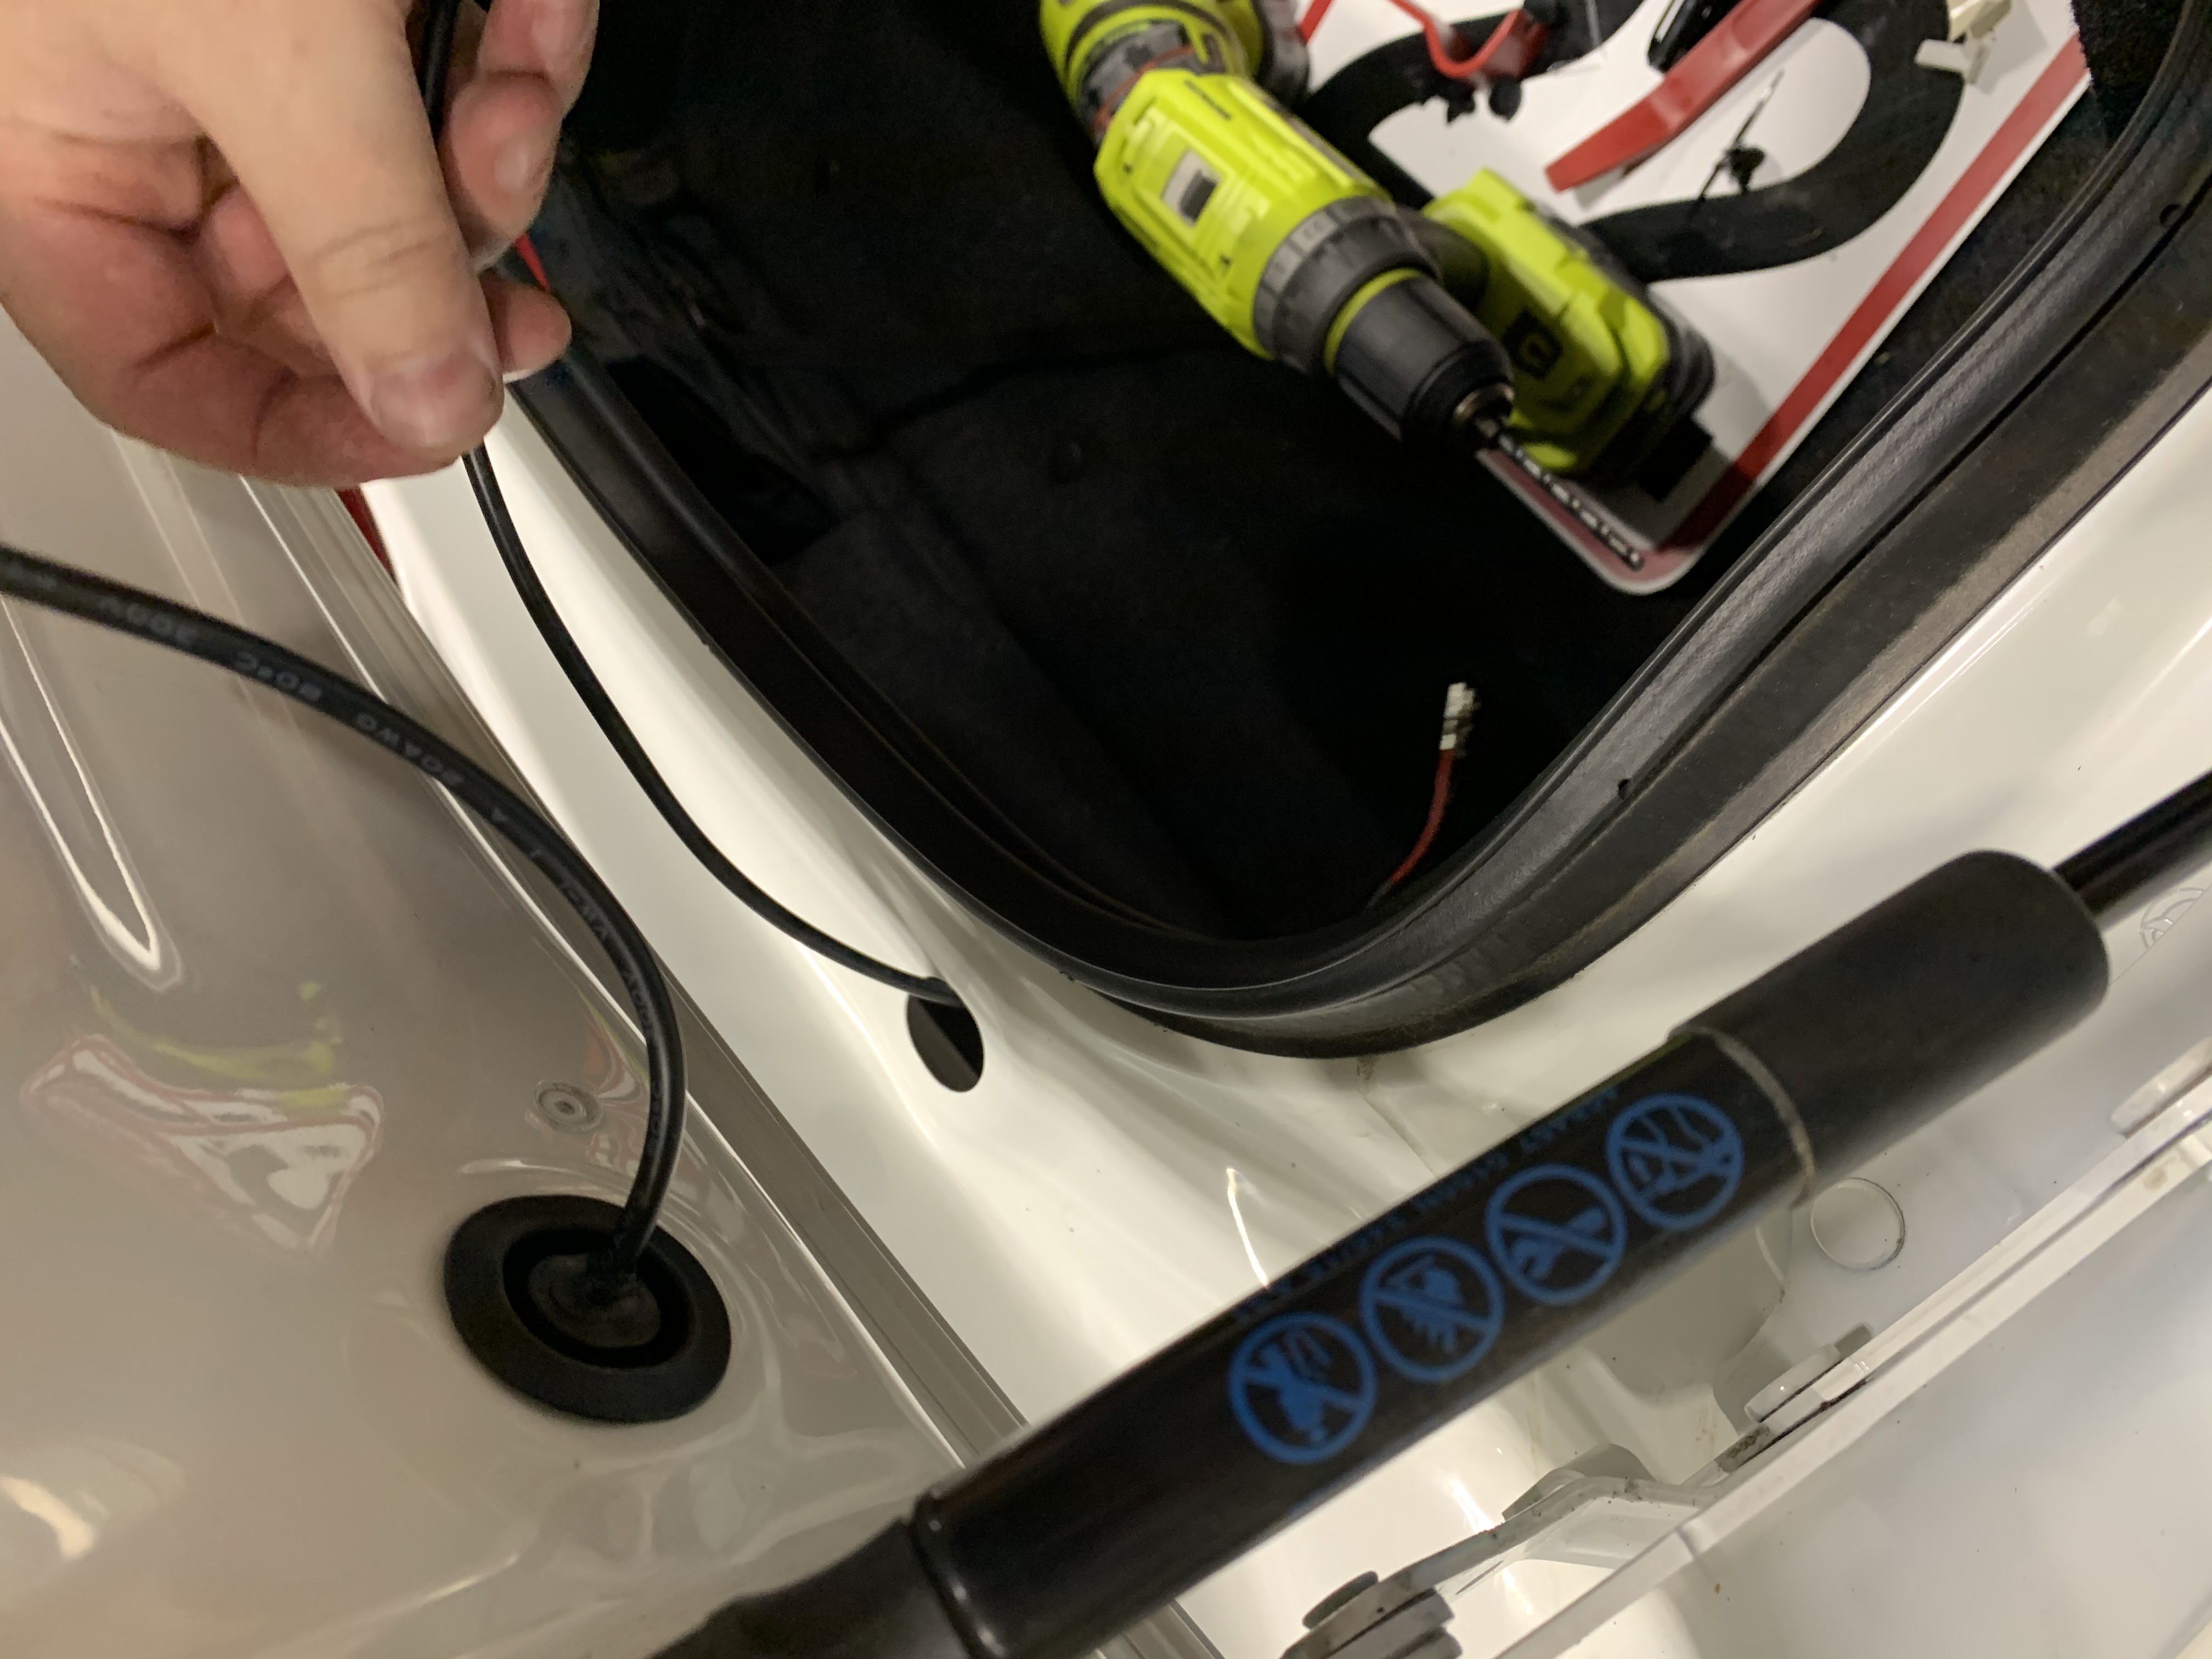
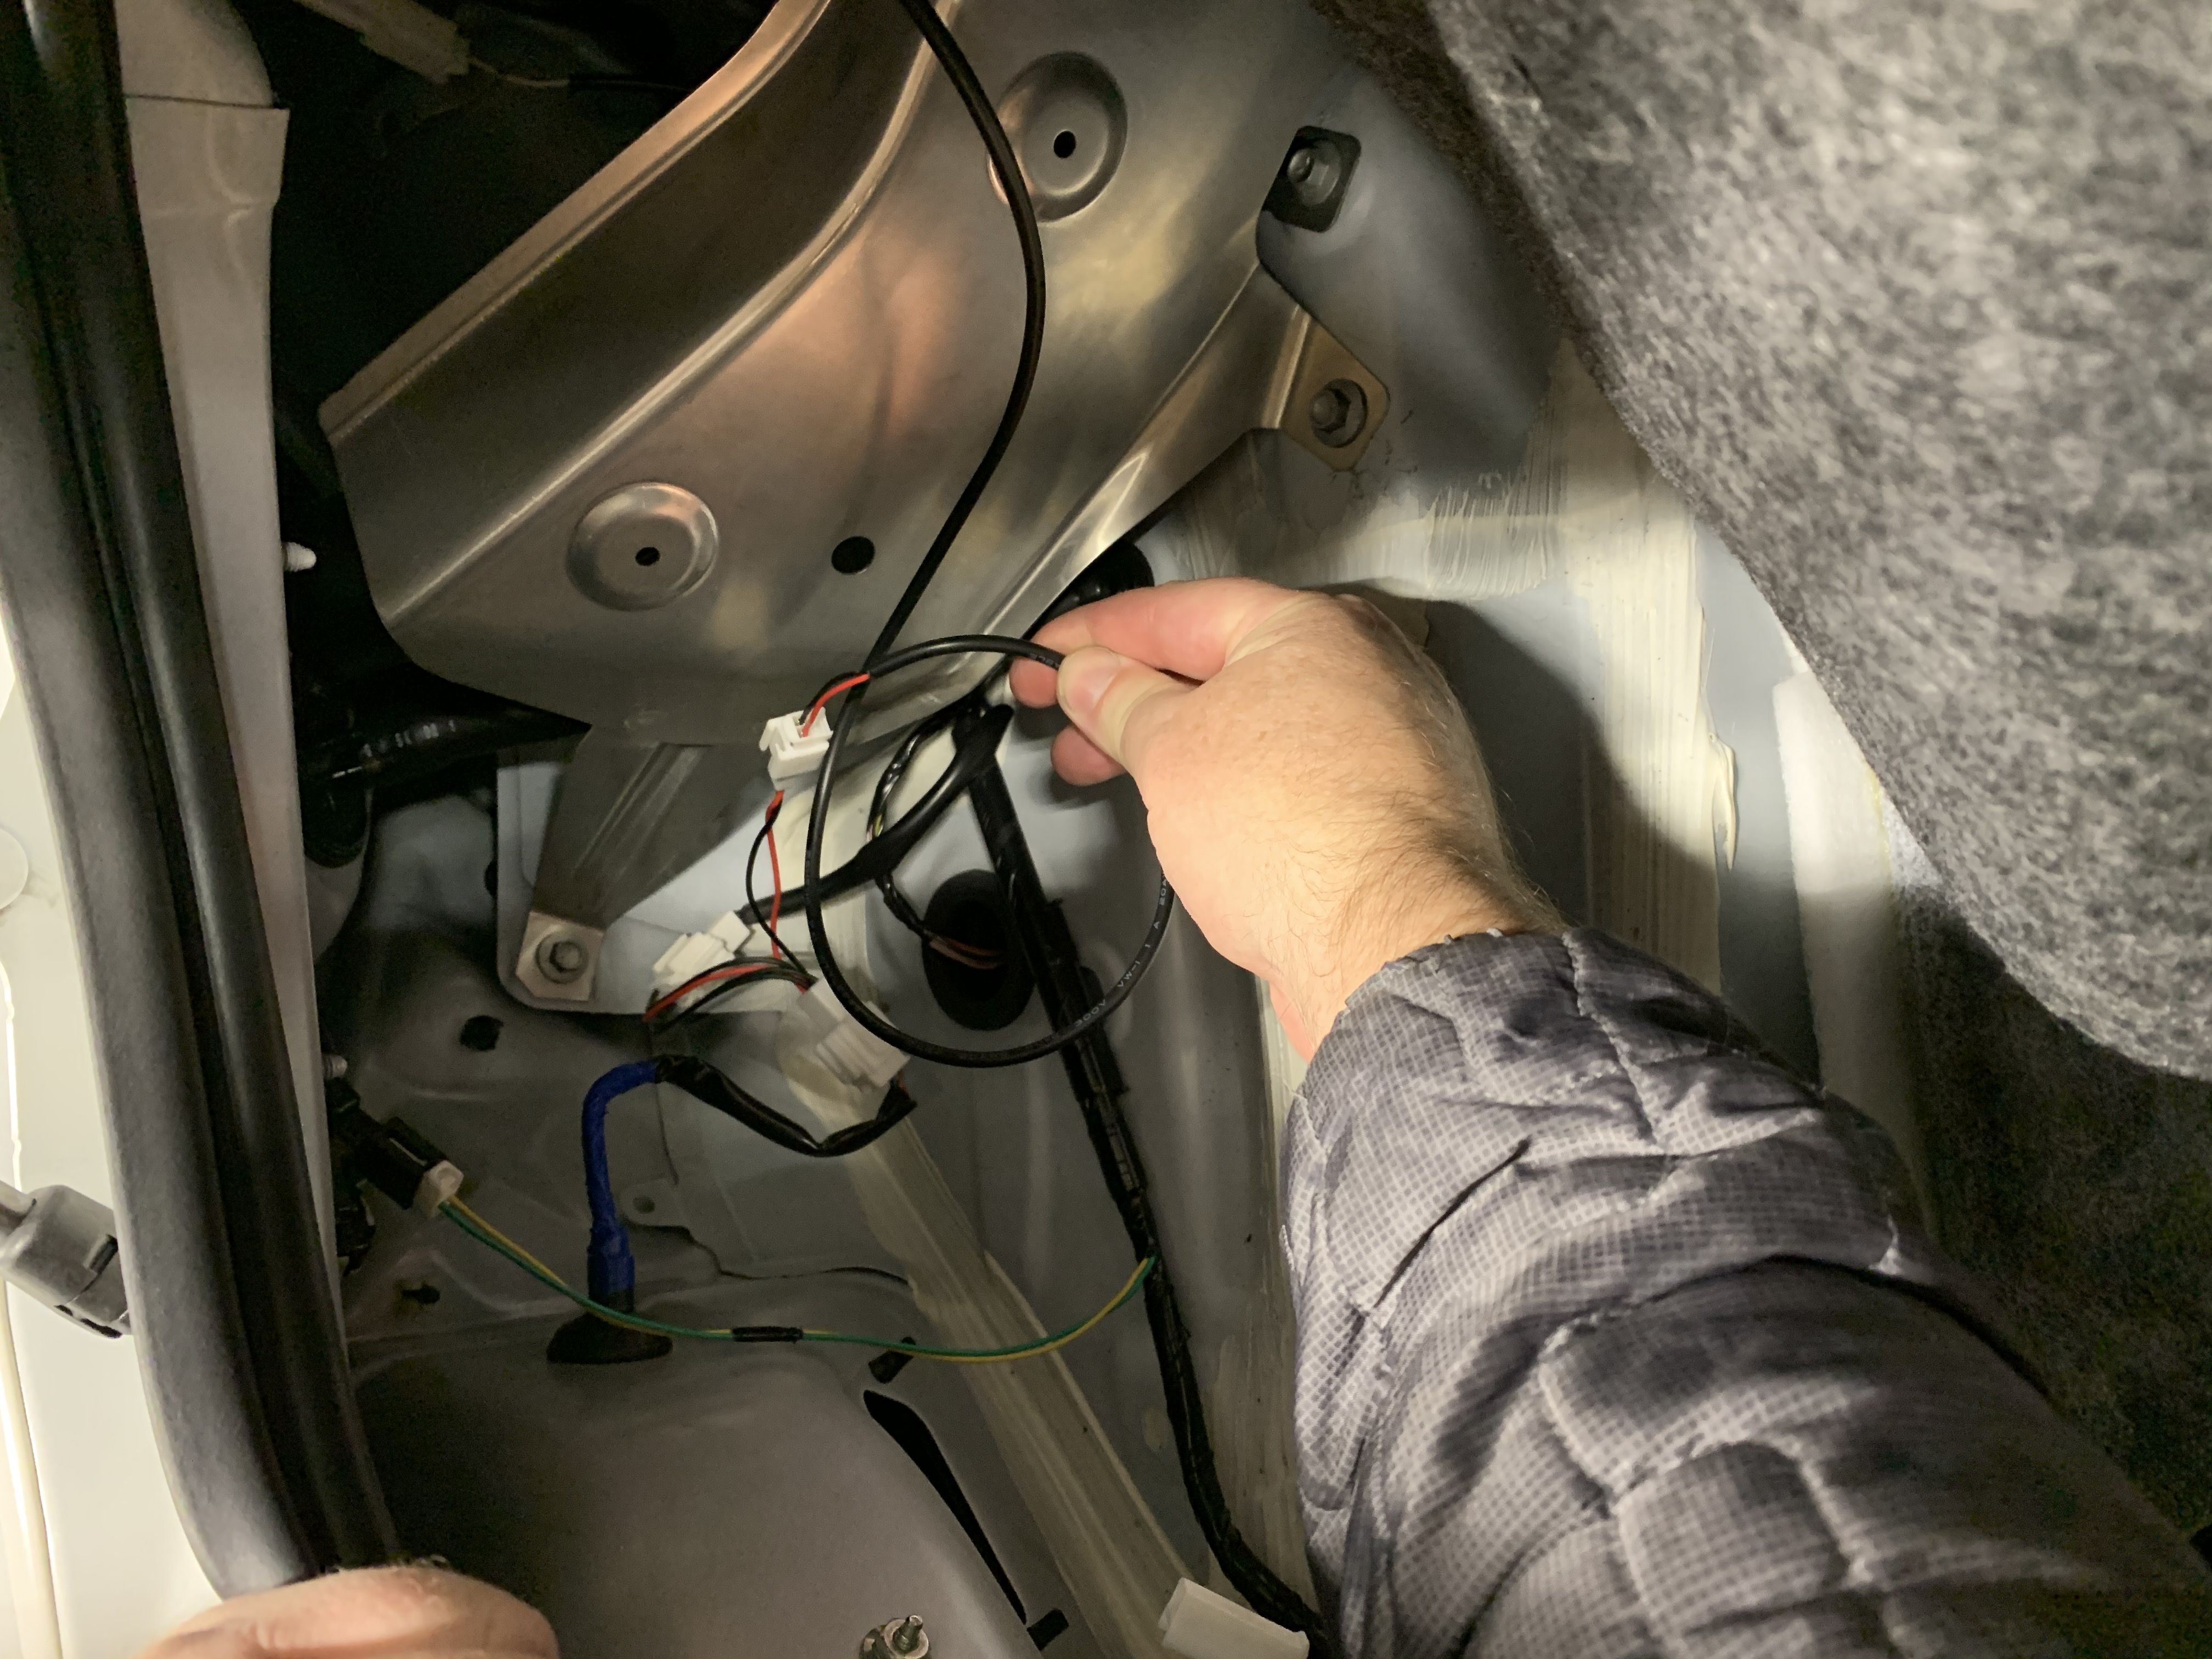
Feed the wire along the aluminum frame structure over to the Y-wire adapter you installed earlier and plug it in. Place another adhesive cable tie mount on the surface of the aluminum structure and zip tie the wire into place.
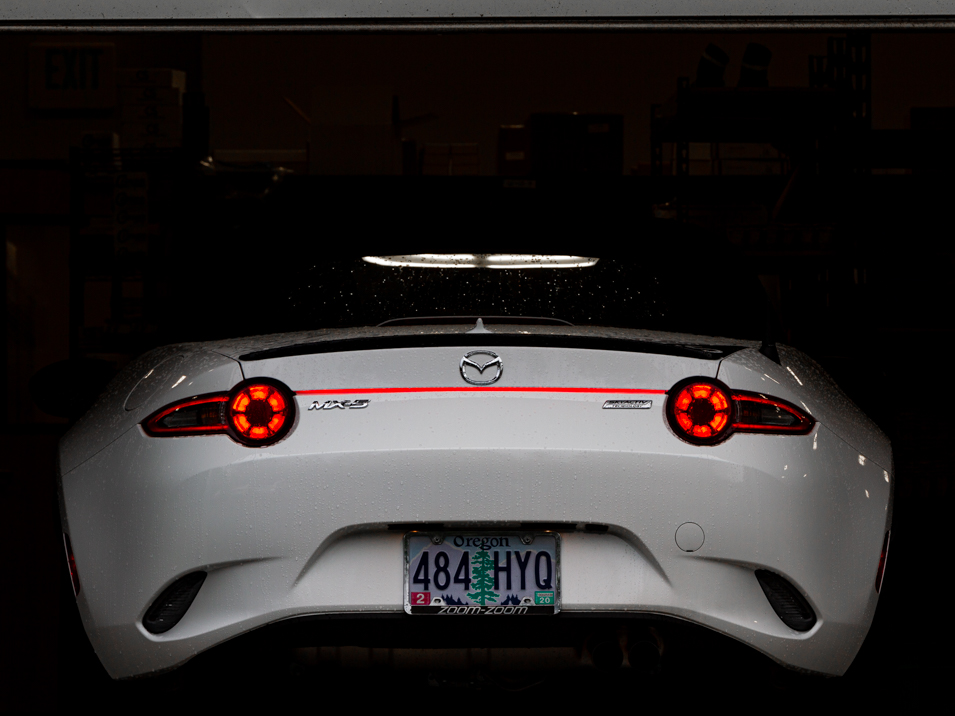
Test the installation by turning on your headlights and checking the parking light functionality.
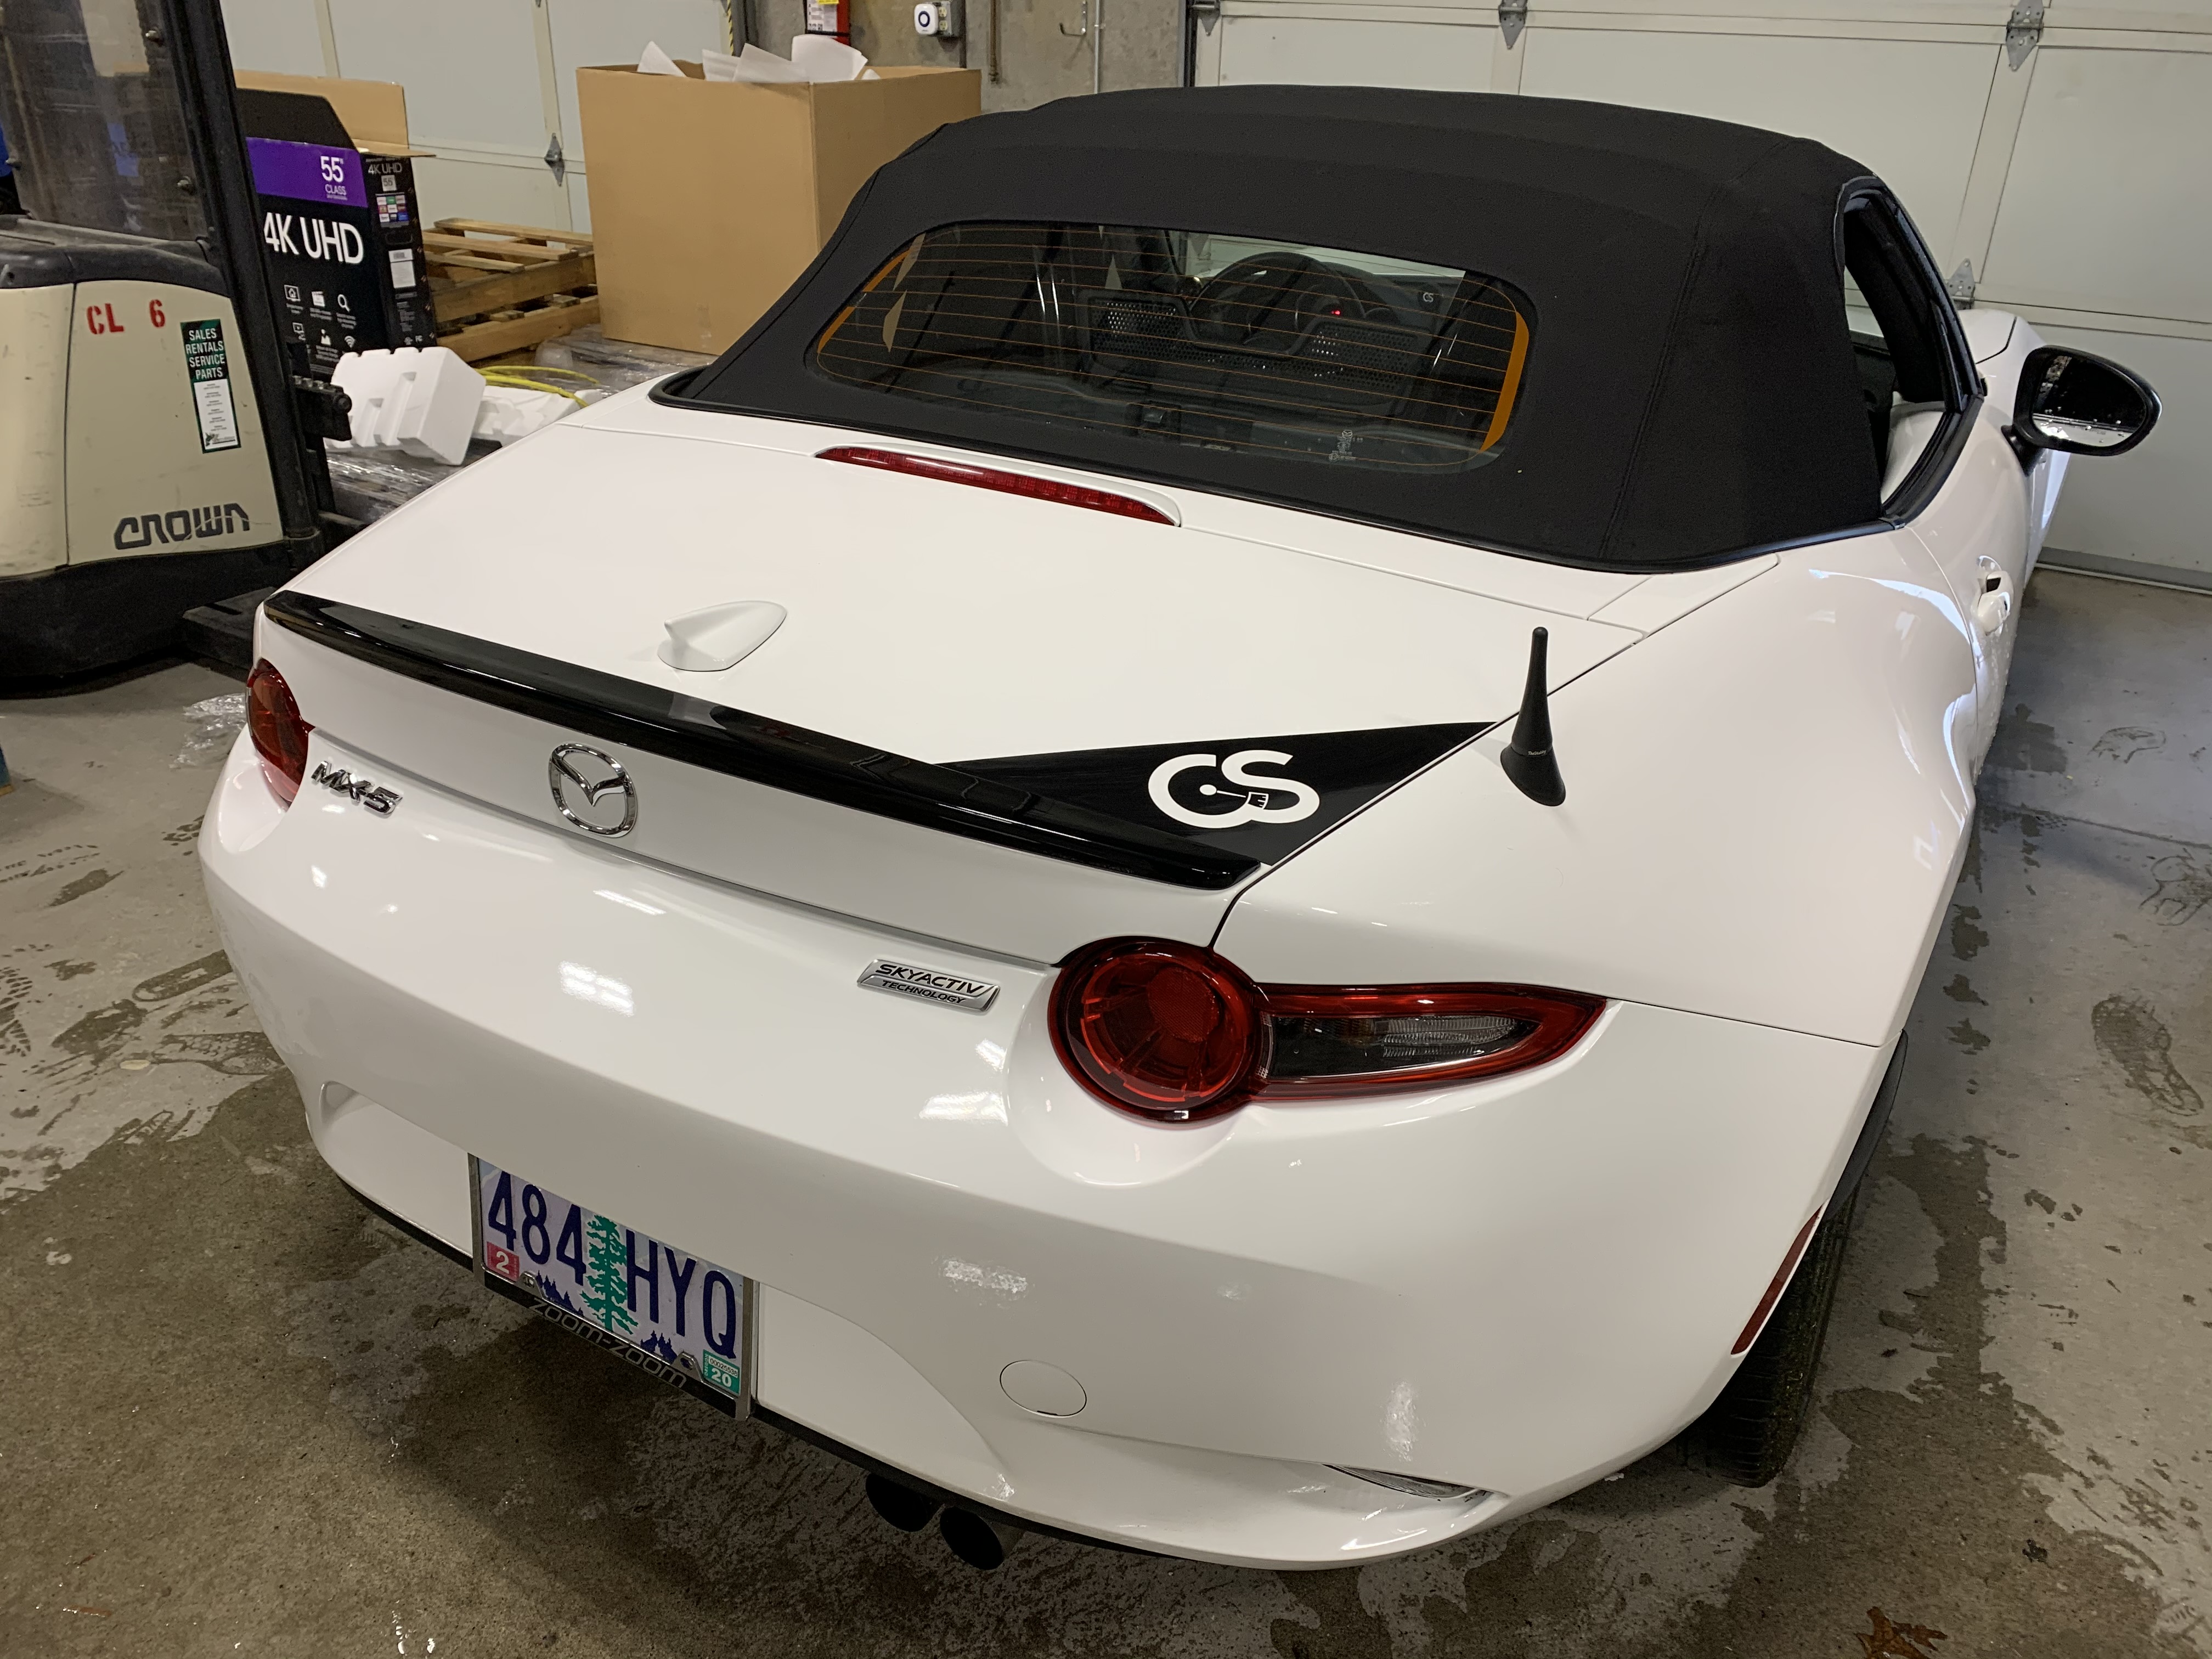
Close the trunk, step back and admire your handiwork!