THANK YOU for purchasing the Roof Trim Protector for the Fiat 500 from CravenSpeed. This product is made from the highest grade materials, and is guaranteed to be free from defects.
You can buy a Fiat Roof Protector for your car here
Parts Included:
- 1 x Roof Protector Decal
Tools Required:
- Denatured or Isopropyl Alcohol
- Soft, Lint-Free Cloth
- Squeegee
- Utility Spray Bottle
- Dish Soap
- H2O
- X-acto Knife or Scissors
NOTE: Installing vinyl decals may seem like an intimidating task, but we have developed this instructional guide to make the process much easier than it sounds. In the unlikely event your decal application goes awry, we offer one-time $5 mulligan kit on each purchase made directly through the CravenSpeed.com website. Just contact support@cravenspeed.com for help.
Procedure
Prepare the Decal
- If the decal has not been trimmed already, lay it face up on a flat work surface and trim it down to approx .125" (1/8") around the perimeter of the decal with your x-acto knife or scissors.
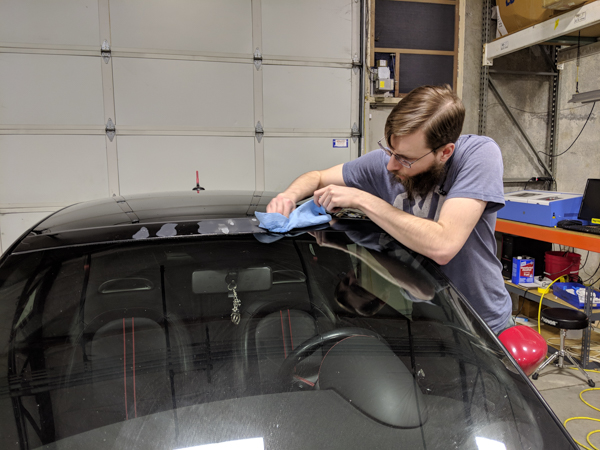
Clean and Prep the Roof Trim Panel.
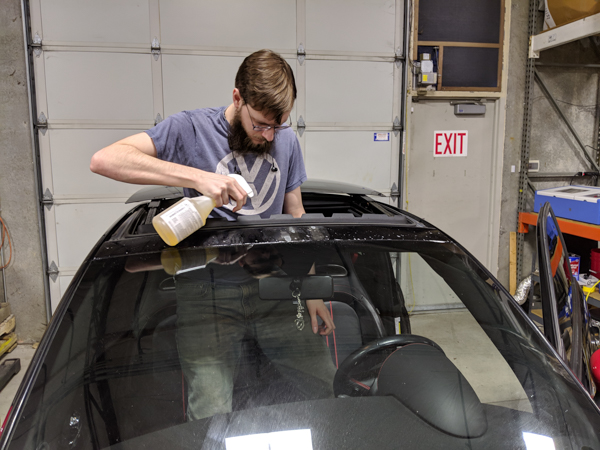
- Now that the decal is ready, we'll turn our attention to the car. Using a soft, lint-free cloth and some denatured alcohol (may sub Isopropyl), clean the roof panel. Make sure the panel is completely free of any lint or dust as these imperfections will show through the vinyl. Avoid touching the panel with your hand once it's clean.
- Fill up the utility spray bottle with water and add a couple drops of dish soap. This solution will serve as a lubricant on the vinyl to give us time to adjust the decal's positioning.
Install the Vinyl
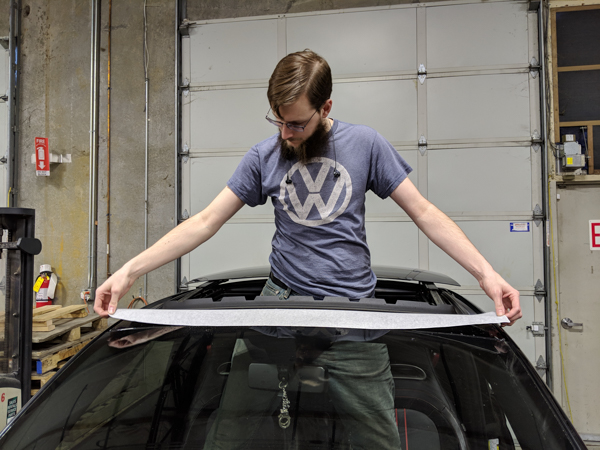
- Spray down the trim panel with your decal solution. Then peel the backing off the vinyl and give that a good spray as well.
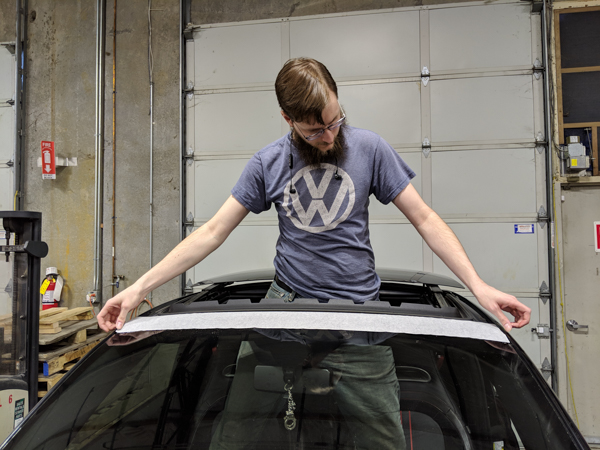
- With everything sprayed down, we're ready to lay down the vinyl. If your 500 has a sunroof, that's a great spot to work from. If not, you might need to grab a friend to assist in this step. Hold the vinyl in position and gently lay it down onto the trim piece. Because of the spray, you've got a couple shots at this and will be able to reposition the vinyl as needed.
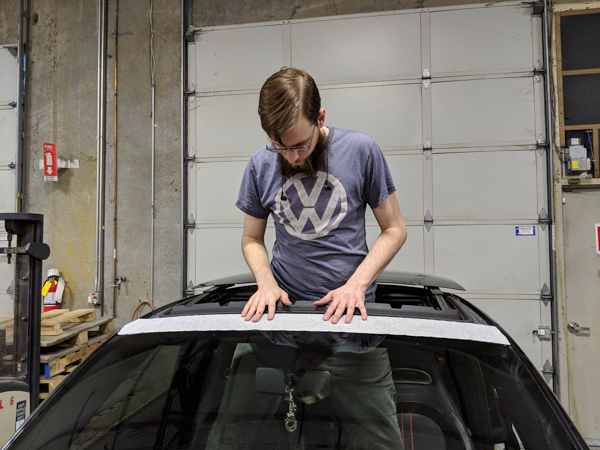
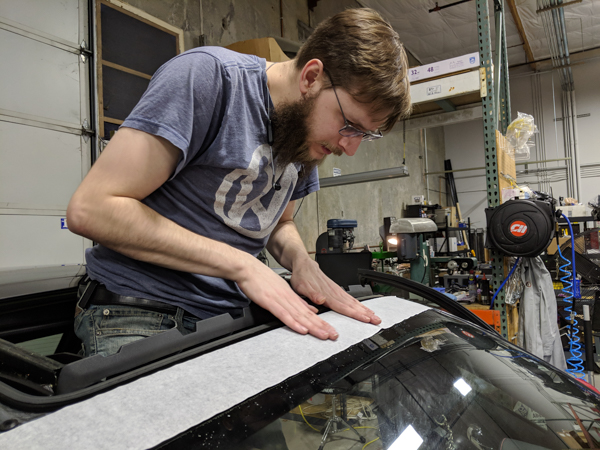
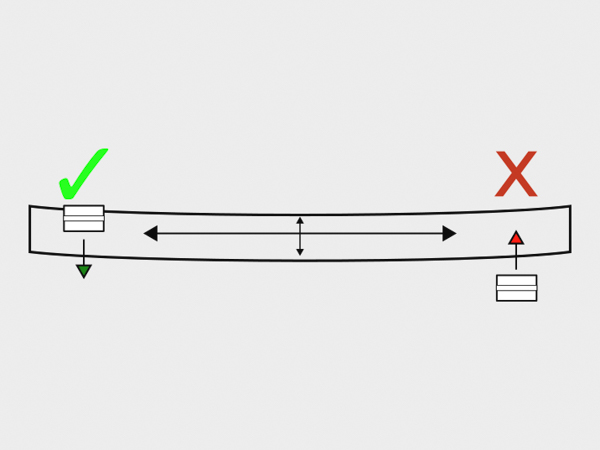
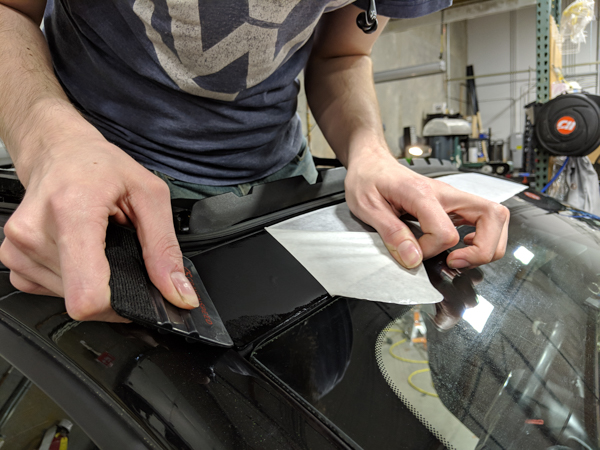
- Once you're happy with the position, you can begin pressing down the vinyl. You can do a gentle pass by hand first. When pressing down and squeegeeing the vinyl, you always want to work from the middle out. Never start on an edge and push toward the center. If you need to, you can still pull the vinyl up and readjust.
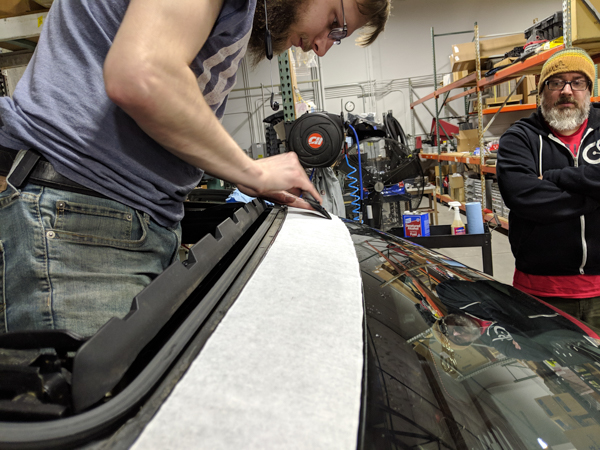
- Inspect the corners to make sure everything is lined up properly. Readjust as needed.
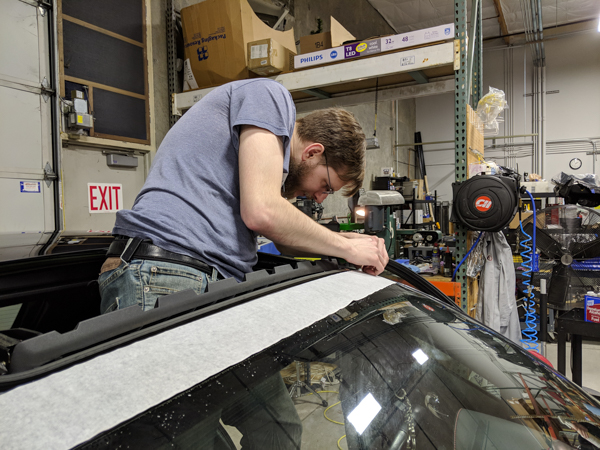
- Once you've got it lined up, you can begin to squeegee out all of the spray solution. Once you squeegee an area, you won't be able to move it anymore. Start in the middle of the car and work your way out. The goal is to run the squeegee over the entire surface in order to squeeze out both air bubbles and the spray solution. When working the edges, you always want to start from the middle of the vinyl and move outward past the edge. Never start the squeegee off of the vinyl. You'll mostly want to use the microfiber side of the squeegee.
- Take your time and work over the entire surface. Be sure to wipe up any squeeze-out with a soft, lint-free cloth as you go over the edges. If you encounter an air bubble, use the plastic side of the squeegee to push the bubble to the closest edge.
- Once you've squeegeed the entire surface, wipe up any remaining solution and let everything sit for about 20-30 minutes.
- Now for the fun part, time to peel off the transfer paper! Start at any corner and peel up the transfer paper. It's best to pull the paper back upon itself at 180 degrees directly away from where you started.
- Wipe up any remaining solution and inspect again for air bubbles. If you can, push them to the edge so they dissipate. If you can't get the bubble to budge, use the point of an x-acto blade to poke a small hole in the bubble. Smooth it out with the microfiber side of the squeegee. A lot of the smaller imperfections will disappear on their own once the car sits in the sun.