THANK YOU for purchasing the The Veloster Brace from CravenSpeed. This product is made from the highest grade materials, and is guaranteed to be free from defects.
You can buy a Veloster Chassis Brace for your car here.
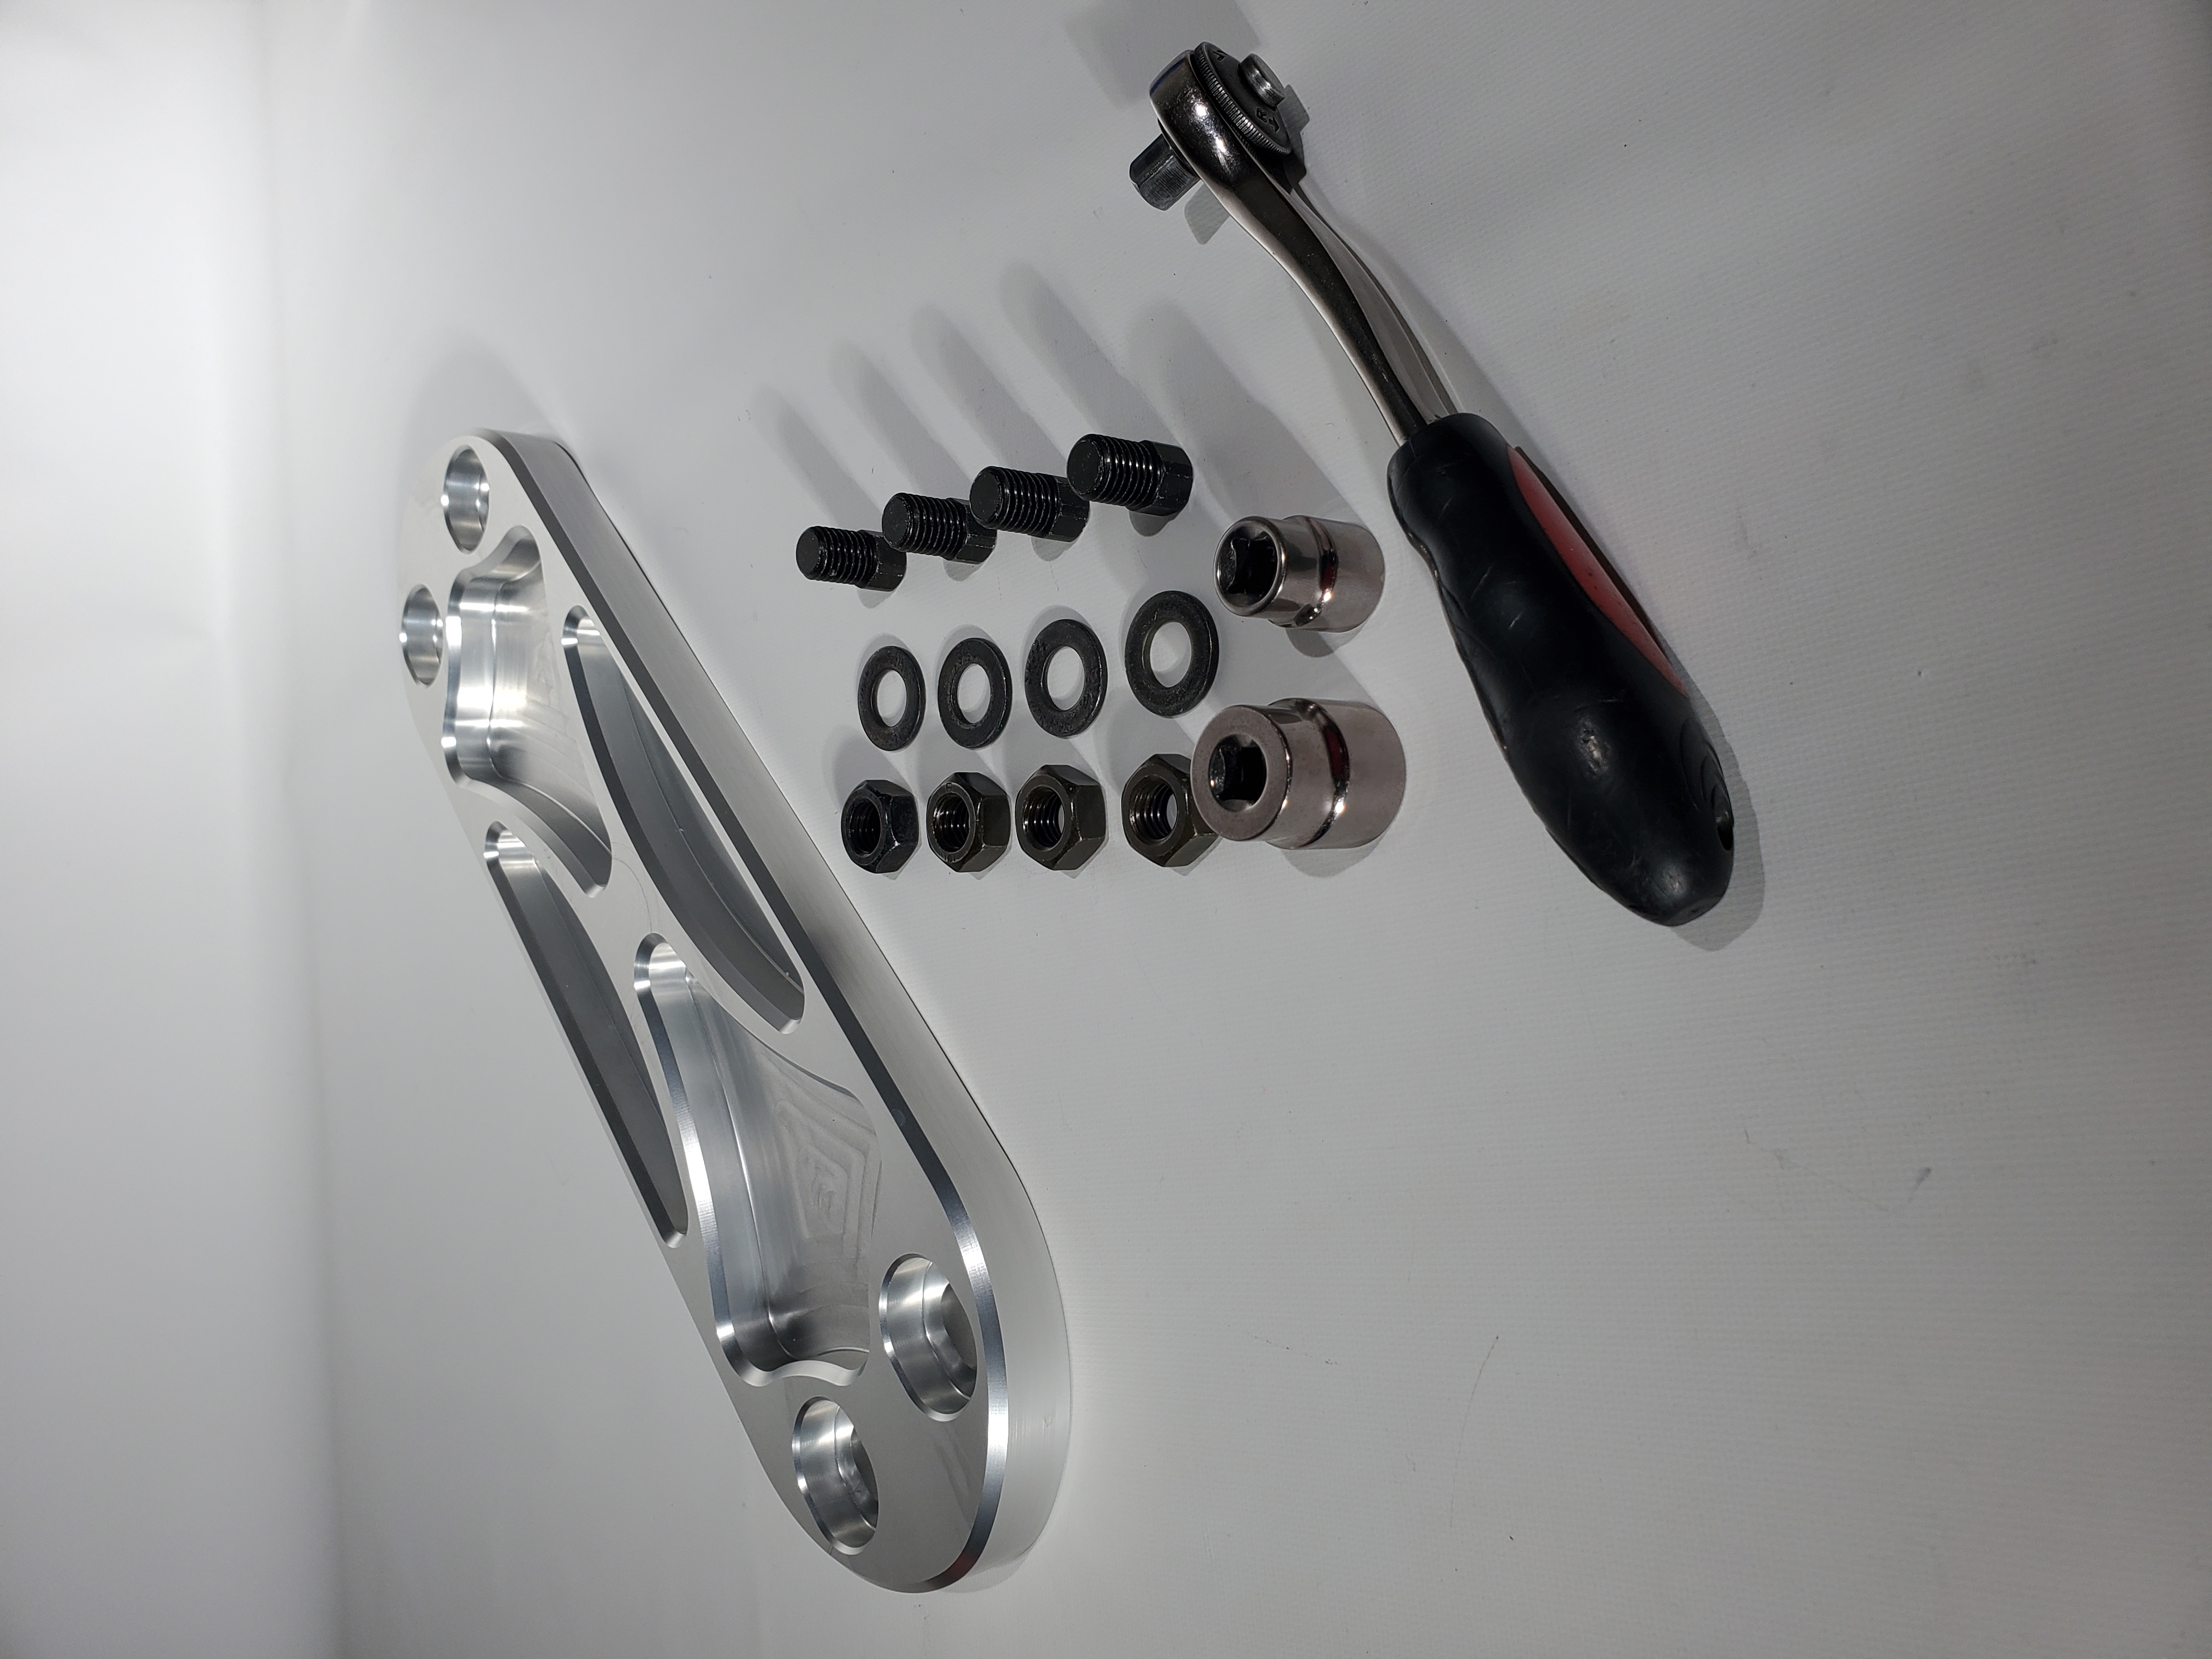
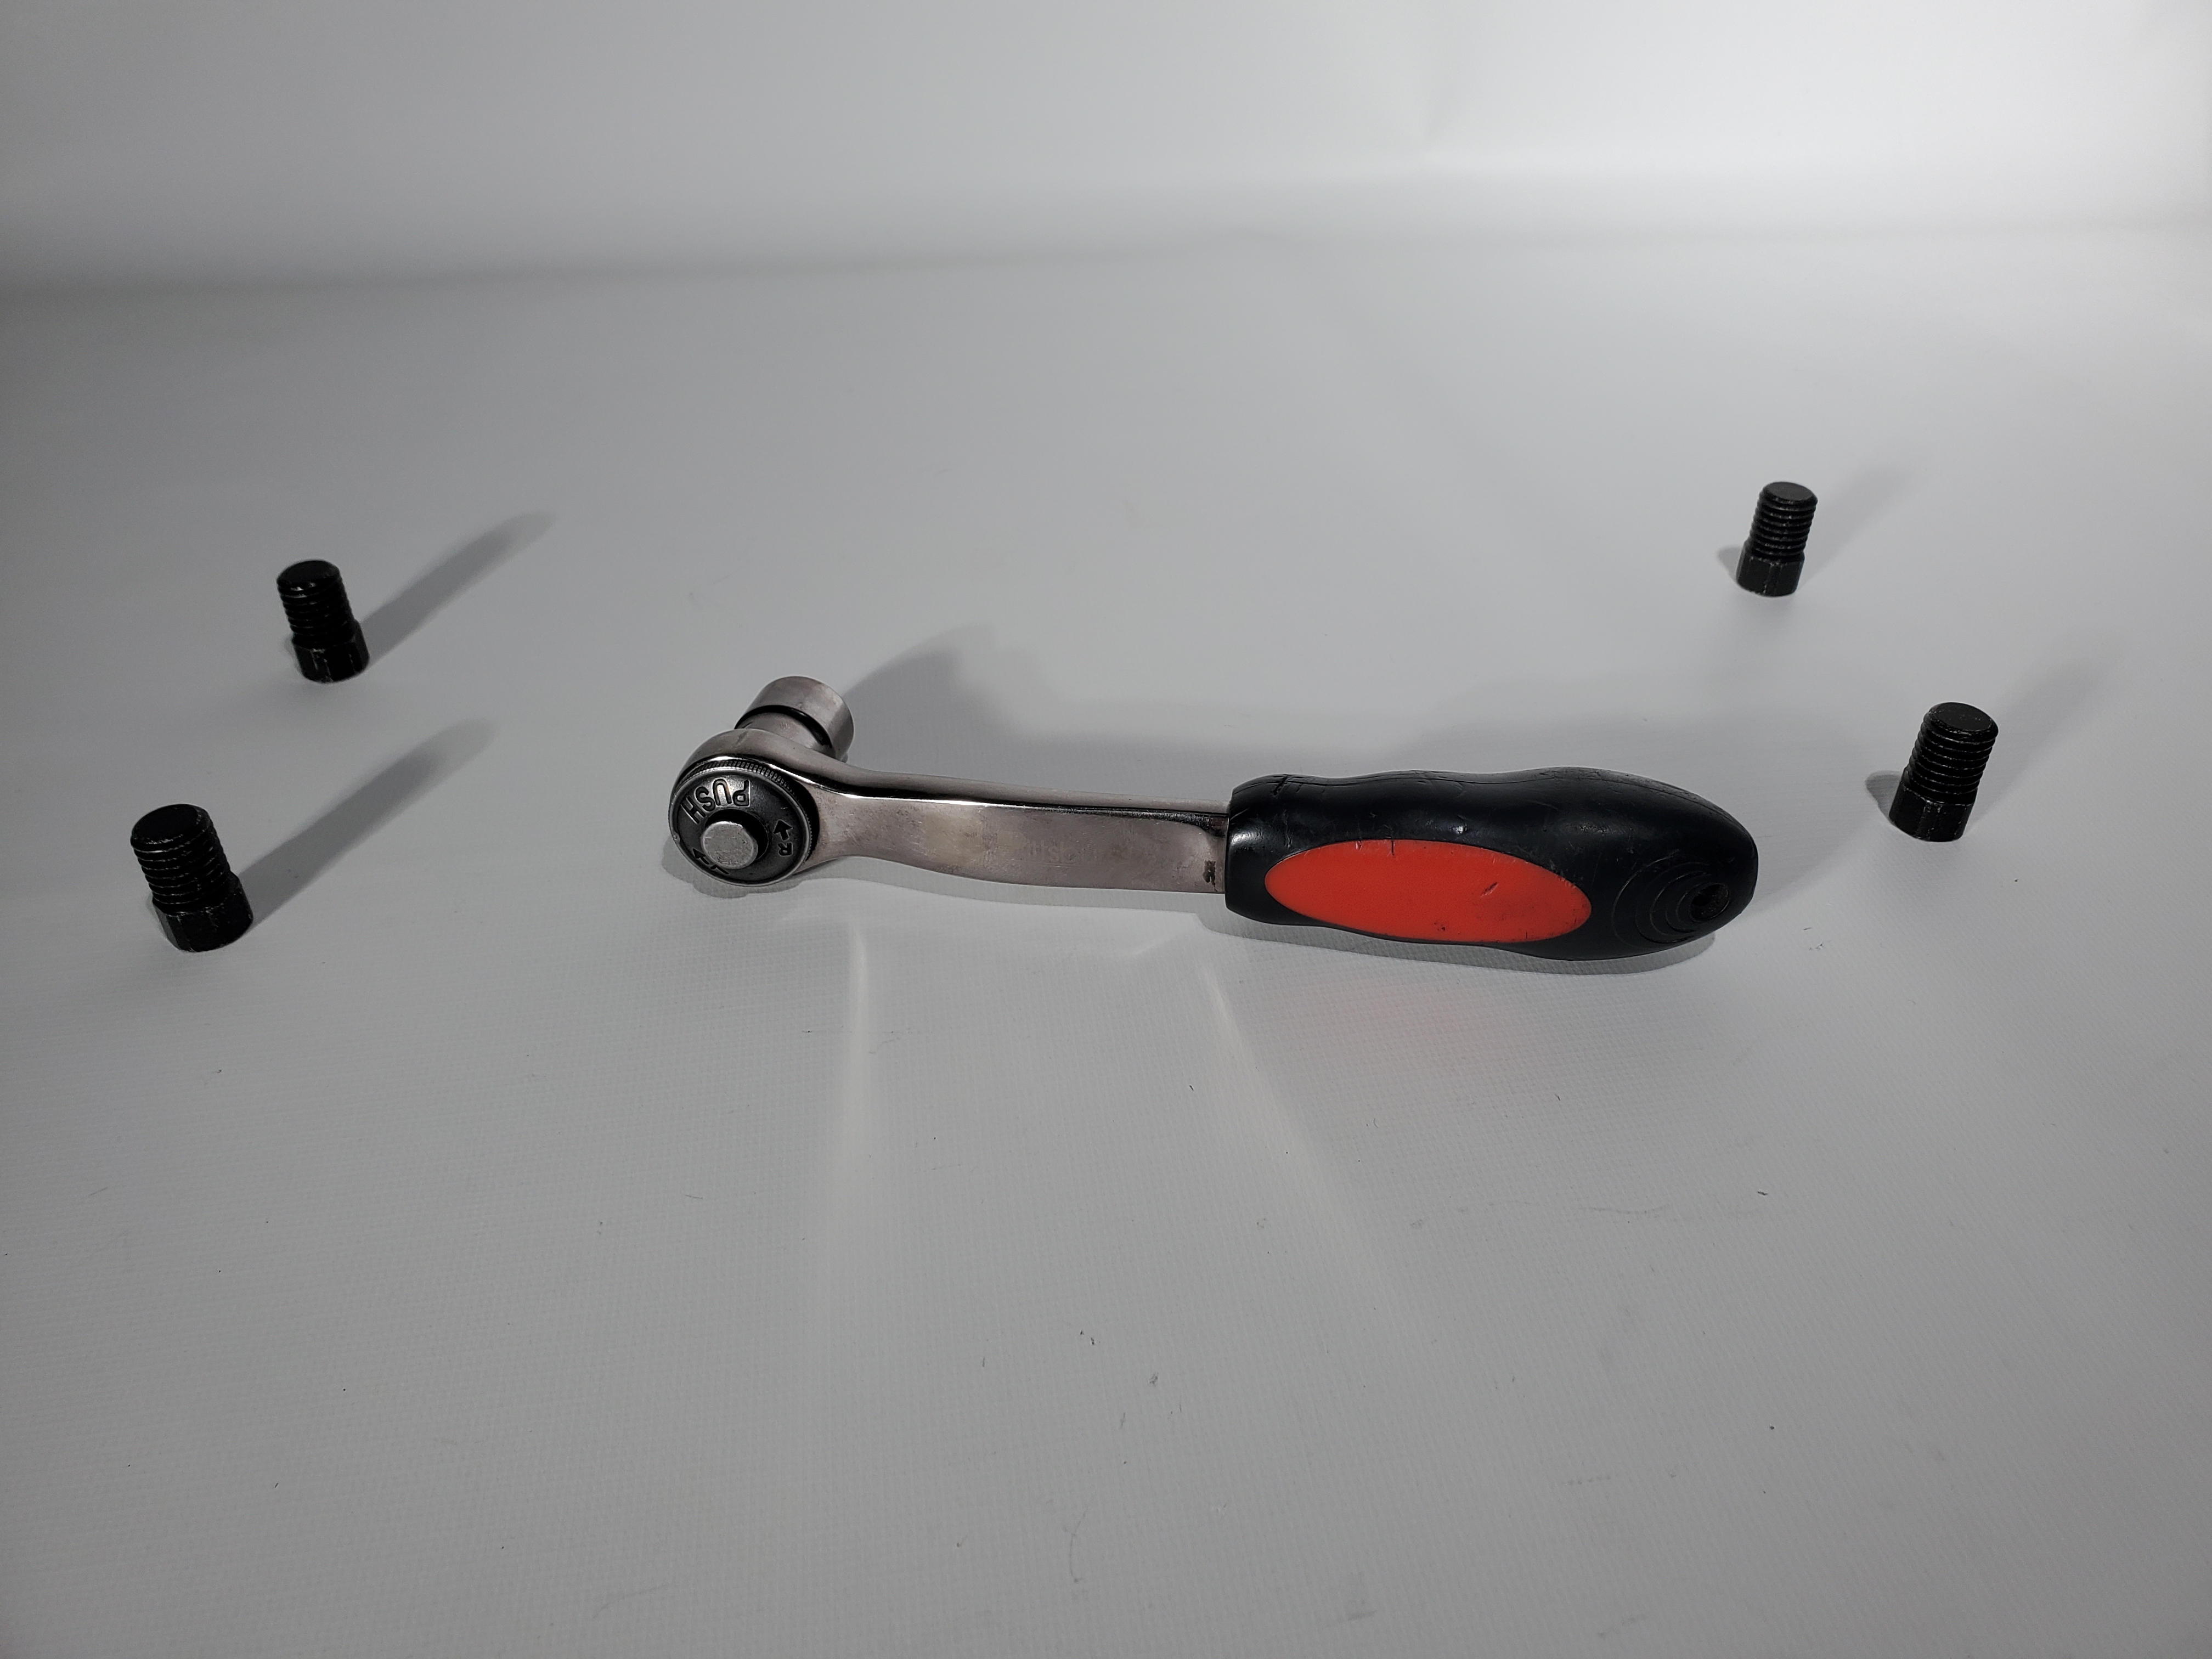
Parts Included:
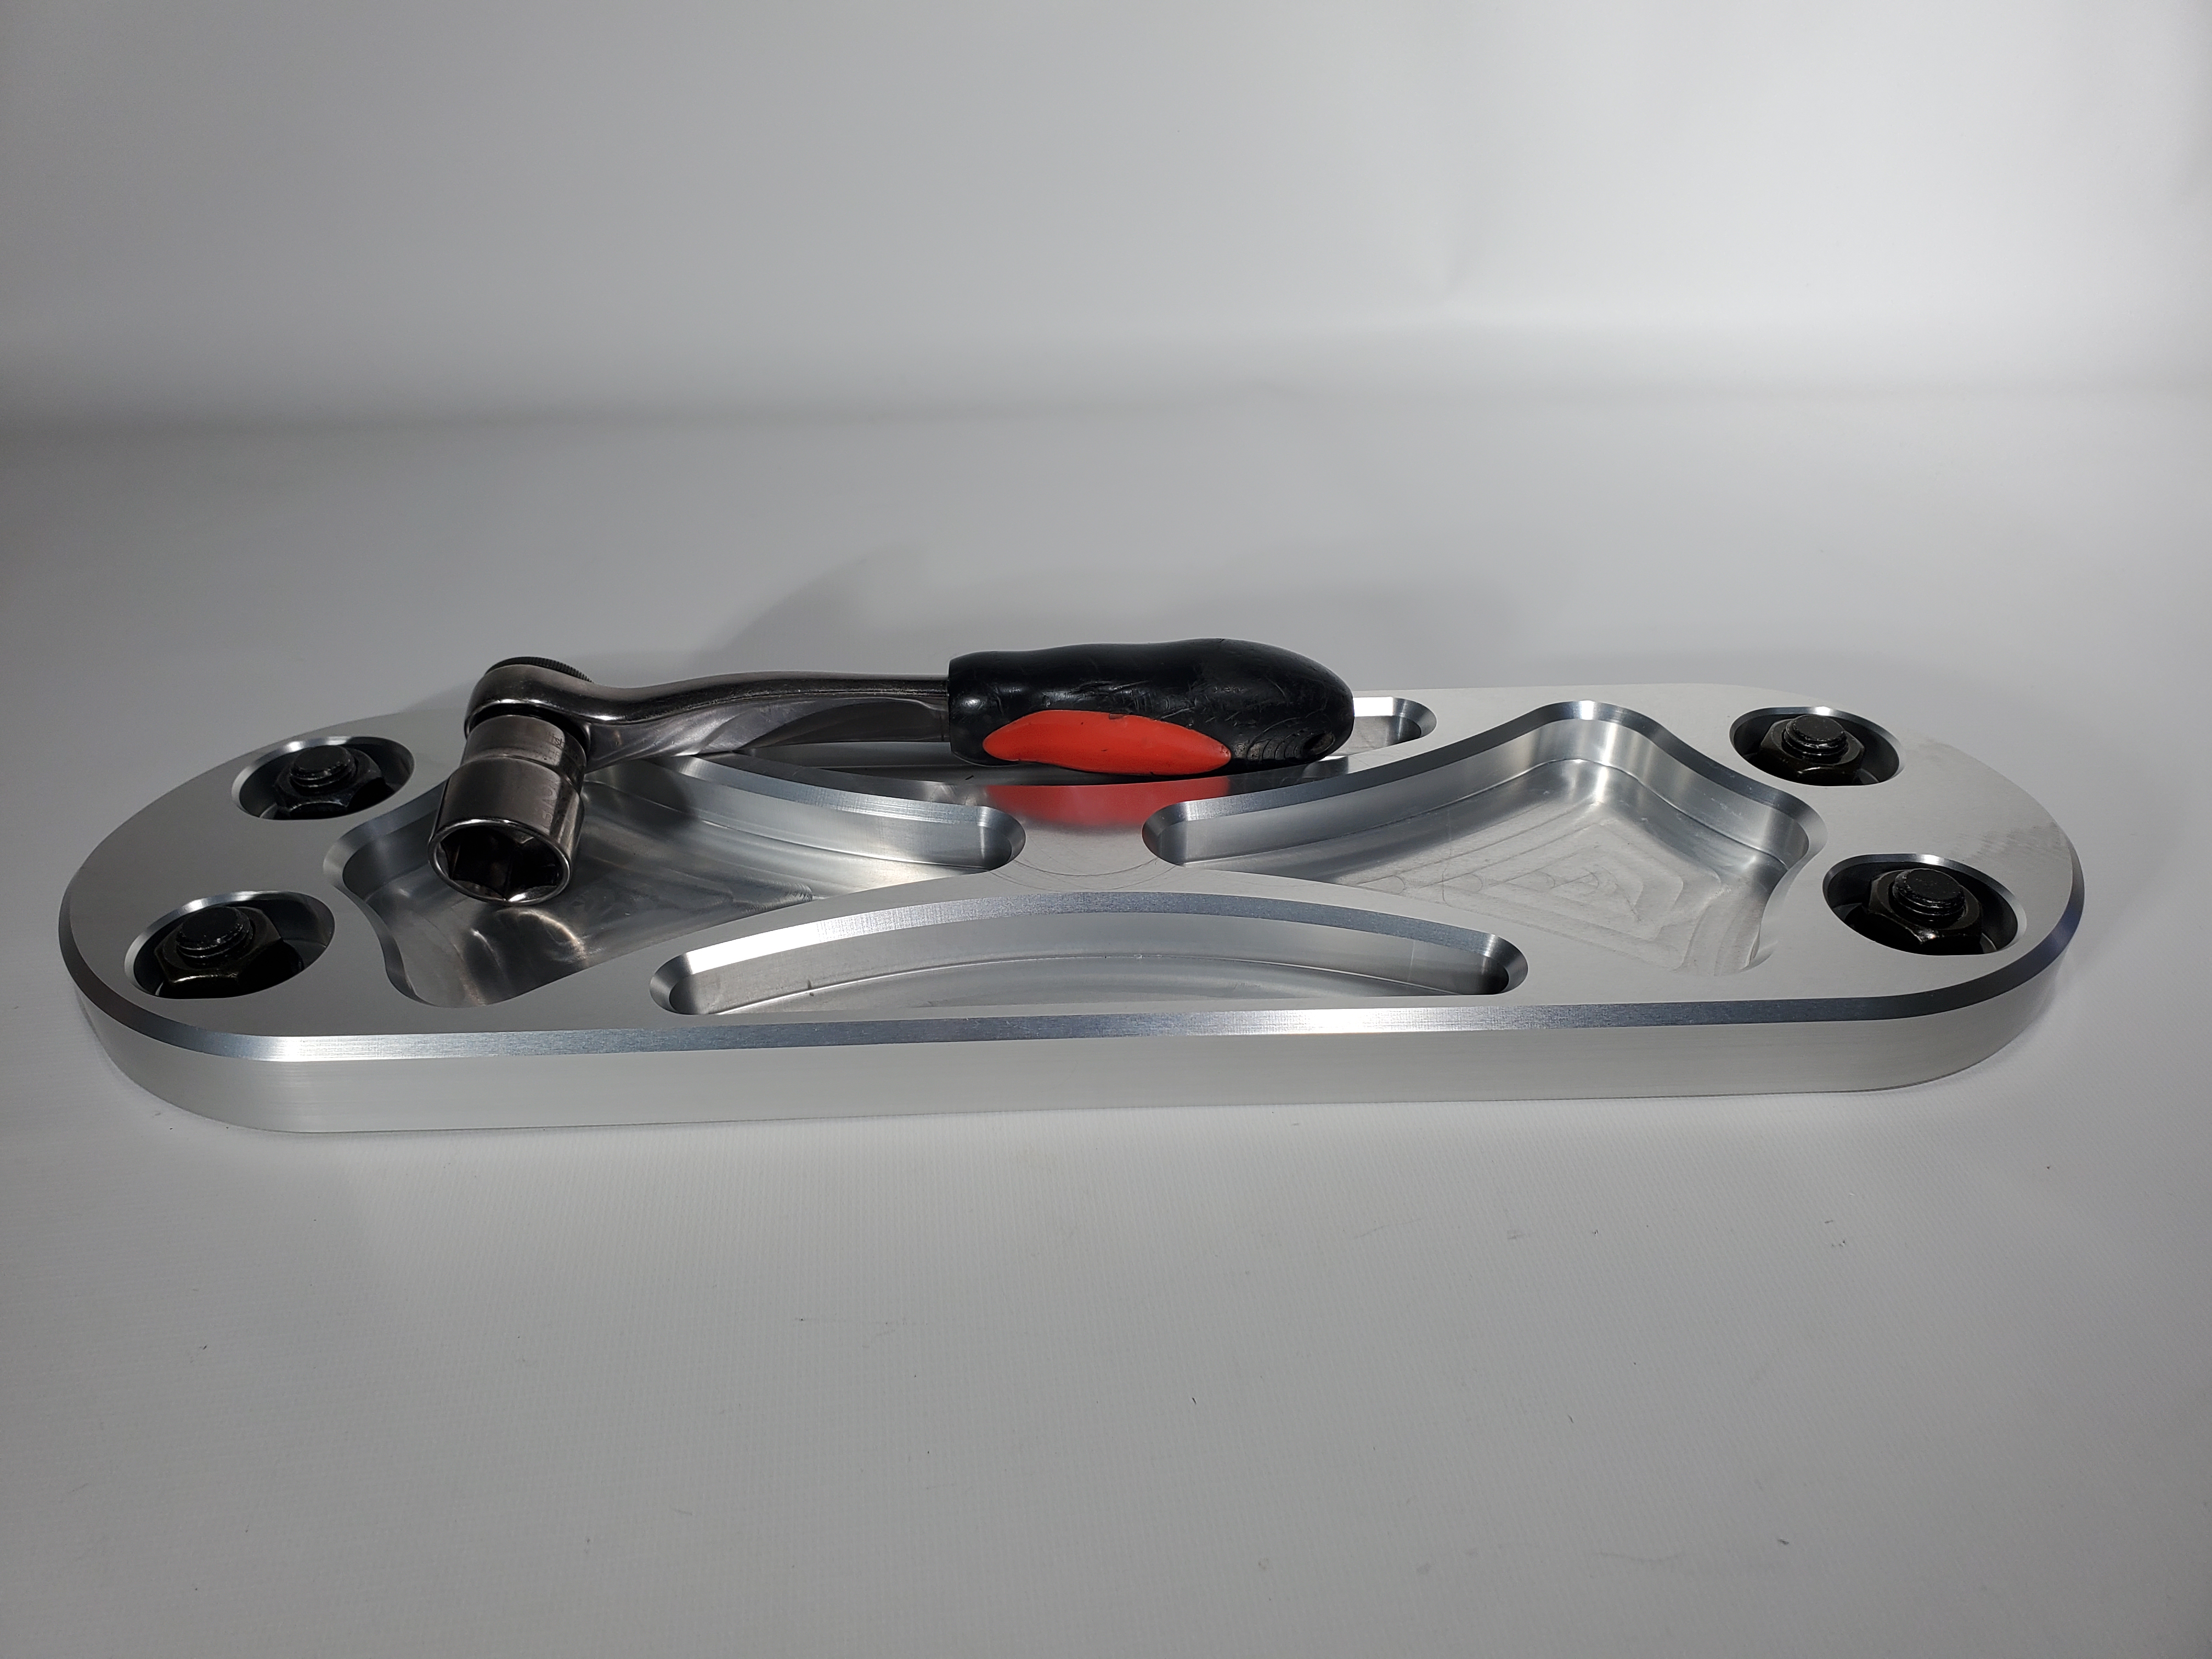
- Billet Aluminum Veloster Brace
- (4) Thread Adapters
- (4) Washers
- (4) Hex Nuts
Tools Required:
- Floor Jack
- Jack Stands
- Torque Wrench
- Ratchet Wrench
- 14mm Socket
- 22mm Socket
The recommended torque spec is 15 ft/lbs. for the thread adapters and the hex nut. It is critical to not over-torque the 22mm hex nuts, despite their size, as that force will be transmitted to the M8 studs protruding from the undercarriage.
NOTE: This installation requires raising the vehicle up on jack stands. Remember to always exercise caution and observe common safety procedures during this process, including but not limited to the wearing of PPE, the use of the parking brake and/or wheel chocks, and having a second person present during the entire process. If you are uncomfortable with any of the procedures laid out in this installation guide, don't hesitate to enlist the help of a professional.
Procedure
- Secure your Veloster in a well-lit, level, and clean area. Lift one side of the Veloster and place jack stands under the jack points. Slide underneath and locate the OEM sheet metal brace.
- Remove the OEM nuts using a socket or wrench. Keep the brace supported while removing the last flange nut, to prevent the brace falling and hitting you, as well as to prevent any damage to the protruding M8 stud.
- Before touching the machined aluminum brace, we first need to install the thread adapters. Torque the M8 thread adapters to 15 ft/lbs.
- Once the thread adapters are installed, place the brace over them and, one by one, install the washer and then finger tighten the hex nut.
- After the brace is properly supported on all four corners by the finger tightened hardware, use the 22mm socket to tighten them down to 15 ft/lbs.
- Congratulations… your install is complete! Safely set your vehicle back down and go motor hard!