THANK YOU for purchasing the F56 Throttle Body Spacer from CravenSpeed. This product is made from the highest grade materials, and is guaranteed to be free from defects.
You can buy our CravenSpeed Throttle Body Spacer for MINI R56 here
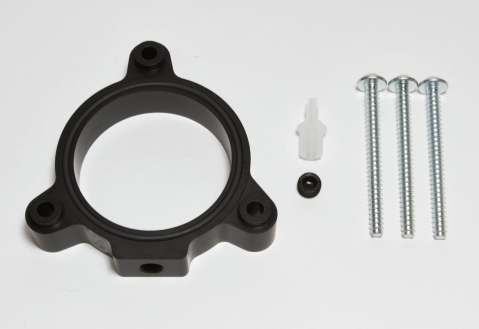
Parts Included:
- 1x Throttle Body Spacer (Gen 3)
- 1x O-Ring
- 3 ea T30 Torx Screws
- 1x ⅛ Pipe Plug
- 1x ⅛ Barbed Hose Fitting
- Teflon Tape (not included)
- Any related gauge components (not included)
Tools Required:
- 10mm Socket Wrench / Extension / Ratchet Wrench
- 3/16 Hex Key Wrench
- T25 and T30 Torx Drivers
- Flat-bladed Screwdriver
***EXTREMELY IMPORTANT*** THE ENGINE MUST BE COLD PRIOR TO INSTALLATION OF THIS PRODUCT.
Procedure
NOTE: If you think you can manage it, it may be possible to access the (3) Throttle Body screws and slip the Throttle Body Spacer into place without proceeding with the following steps, however since there is very limited space to work in that area, we’ve determined that it is much less of a headache to just proceed with the simple disassembly described below.
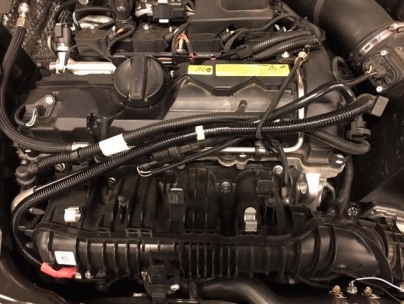
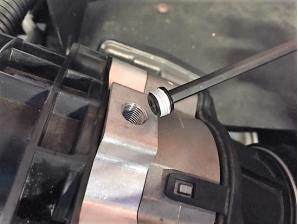
1. Remove the Air Intake Duct under the hood utilizing a 10mm socket.
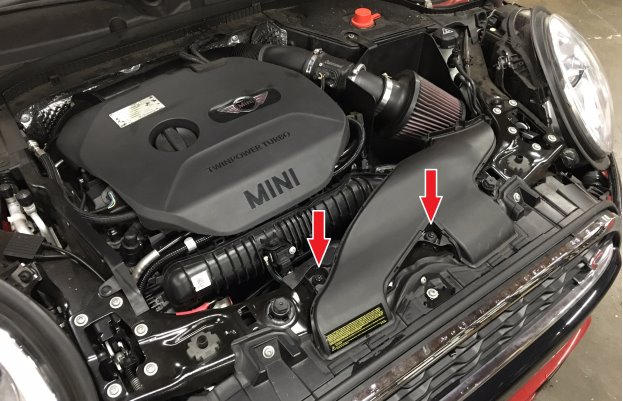
2. Pop the plastic engine cover off and set aside. It just pulls straight up and off.
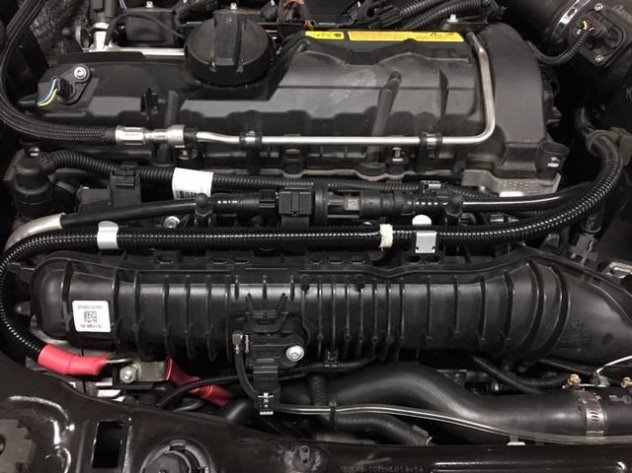
3. Disconnect the Fuel Tank Breather Line on the right upper side of the Intake Manifold. Pinch the connector together and pull off. Pull all the lines and wiring off of the Intake Manifold and keep track of the push on cable fasteners and where they’ll go upon reinstallation. There’s also a wire fastener attached to the underside of the Intake Manifold that goes to the Alternator. Pull it off as well. Hold these lines up and out of the way with a bungee cord or something similar so you’ll have unrestricted access to the intake manifold.
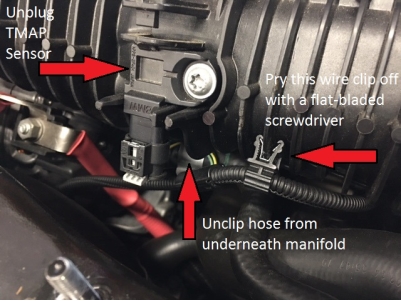
4. Unplug the T-MAP Sensor from the front of the Intake Manifold. If you have the PSIClone adapter already installed, just remove the entire assembly and let it hang out of the way. It is affixed with a T25 Torx screw.
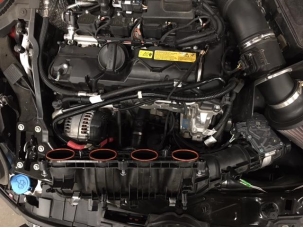
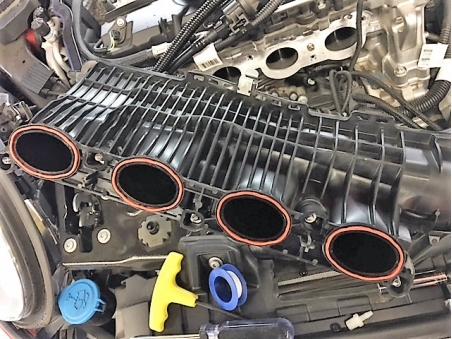
5. Remove the Intake Manifold via (5) 10mm hex bolts. Once lifted off of the engine, take 4 wads of paper towel and tuck them into the intakes so that nothing accidentally falls into them while you’re working around the engine. NOTE: DO NOT FORGET TO REMOVE THEM WHEN PUTTING THE INTAKE MANIFOLD BACK ON.
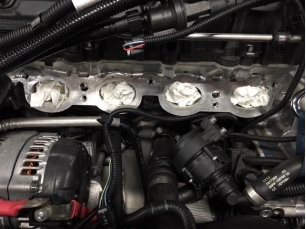
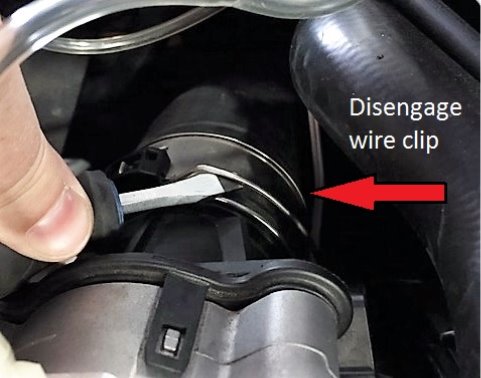
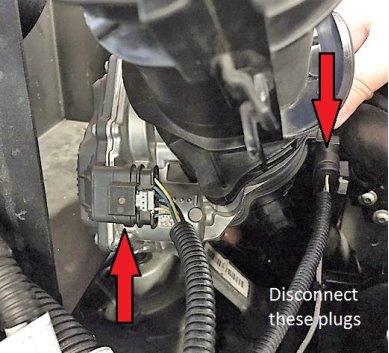
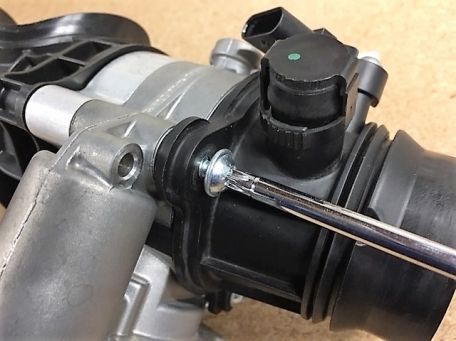
6. Disconnect the Intake Manifold and Throttle Body from the Charged Air Line Hose via wire quick disconnect and set aside. There are (2) wiring plugs connected to the underside of the Throttle Body that also need to be disconnected before completely lifting the assembly out of the engine compartment. NOTE: Do not lose any of the (4) Intake Manifold O-Rings that seal against the engine block.
Installing the Throttle Body Spacer
1. With the Intake Manifold/Throttle body assembly removed from the vehicle, set it upon a clean and clear work surface and we’ll cover installing the Throttle Body Spacer.
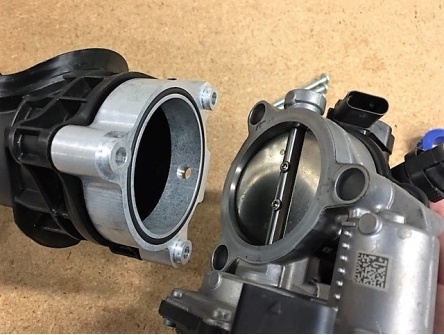
2. Remove the (3) 10mm screws to separate the Throttle Body from the Intake Manifold. Install the O-Ring included with your Throttle Body Spacer into the groove on the spacer.
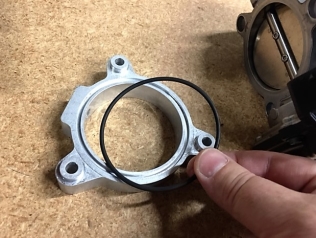
3. Before placing the Throttle Body Spacer onto the Intake Manifold, be certain that the Intake Manifold factory O-Ring (orange) is still in place.
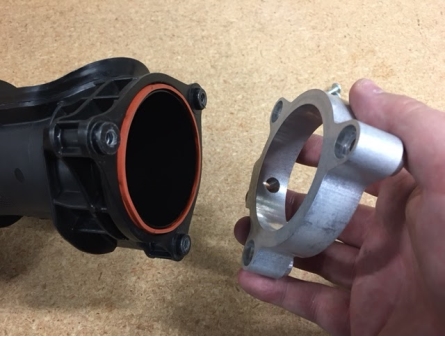
4. Place the Throttle Body Spacer onto the Intake Manifold. The hole pattern is such that it should fit in only one configuration.
5. Set the Throttle Body onto the Throttle Body Spacer and install the included T30 Torx Screws affixing the assembly back together.
6. Reinstall the completed assembly back into the Mini’s engine compartment. Take care to ensure all (4) O-Rings are still attached to the block-mating side of the intake manifold. Don’t forget the (2) wiring plugs that attach to the Throttle Body.
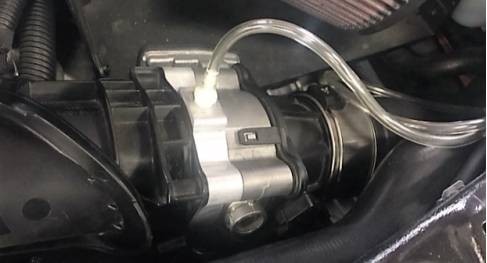
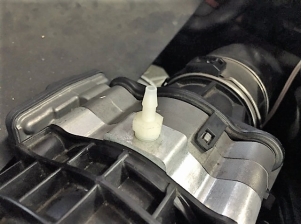
7. Now that you have the completed Intake Manifold/Throttle Body Spacer/Throttle Body assembly reinstalled onto the engine, depending upon your specific application you will now install either the ⅛ NPT plug or the ⅛ NPT Barbed Hose Fitting. Wrap some teflon tape around the threads for a good seal.
8. Reassemble the remaining engine compartment components.
9. Installation of the Throttle Body Spacer is now complete. If you are planning on installing a boost gauge, we recommend you now take a few moments and familiarize yourself with the installation instructions included with your aftermarket gauge.