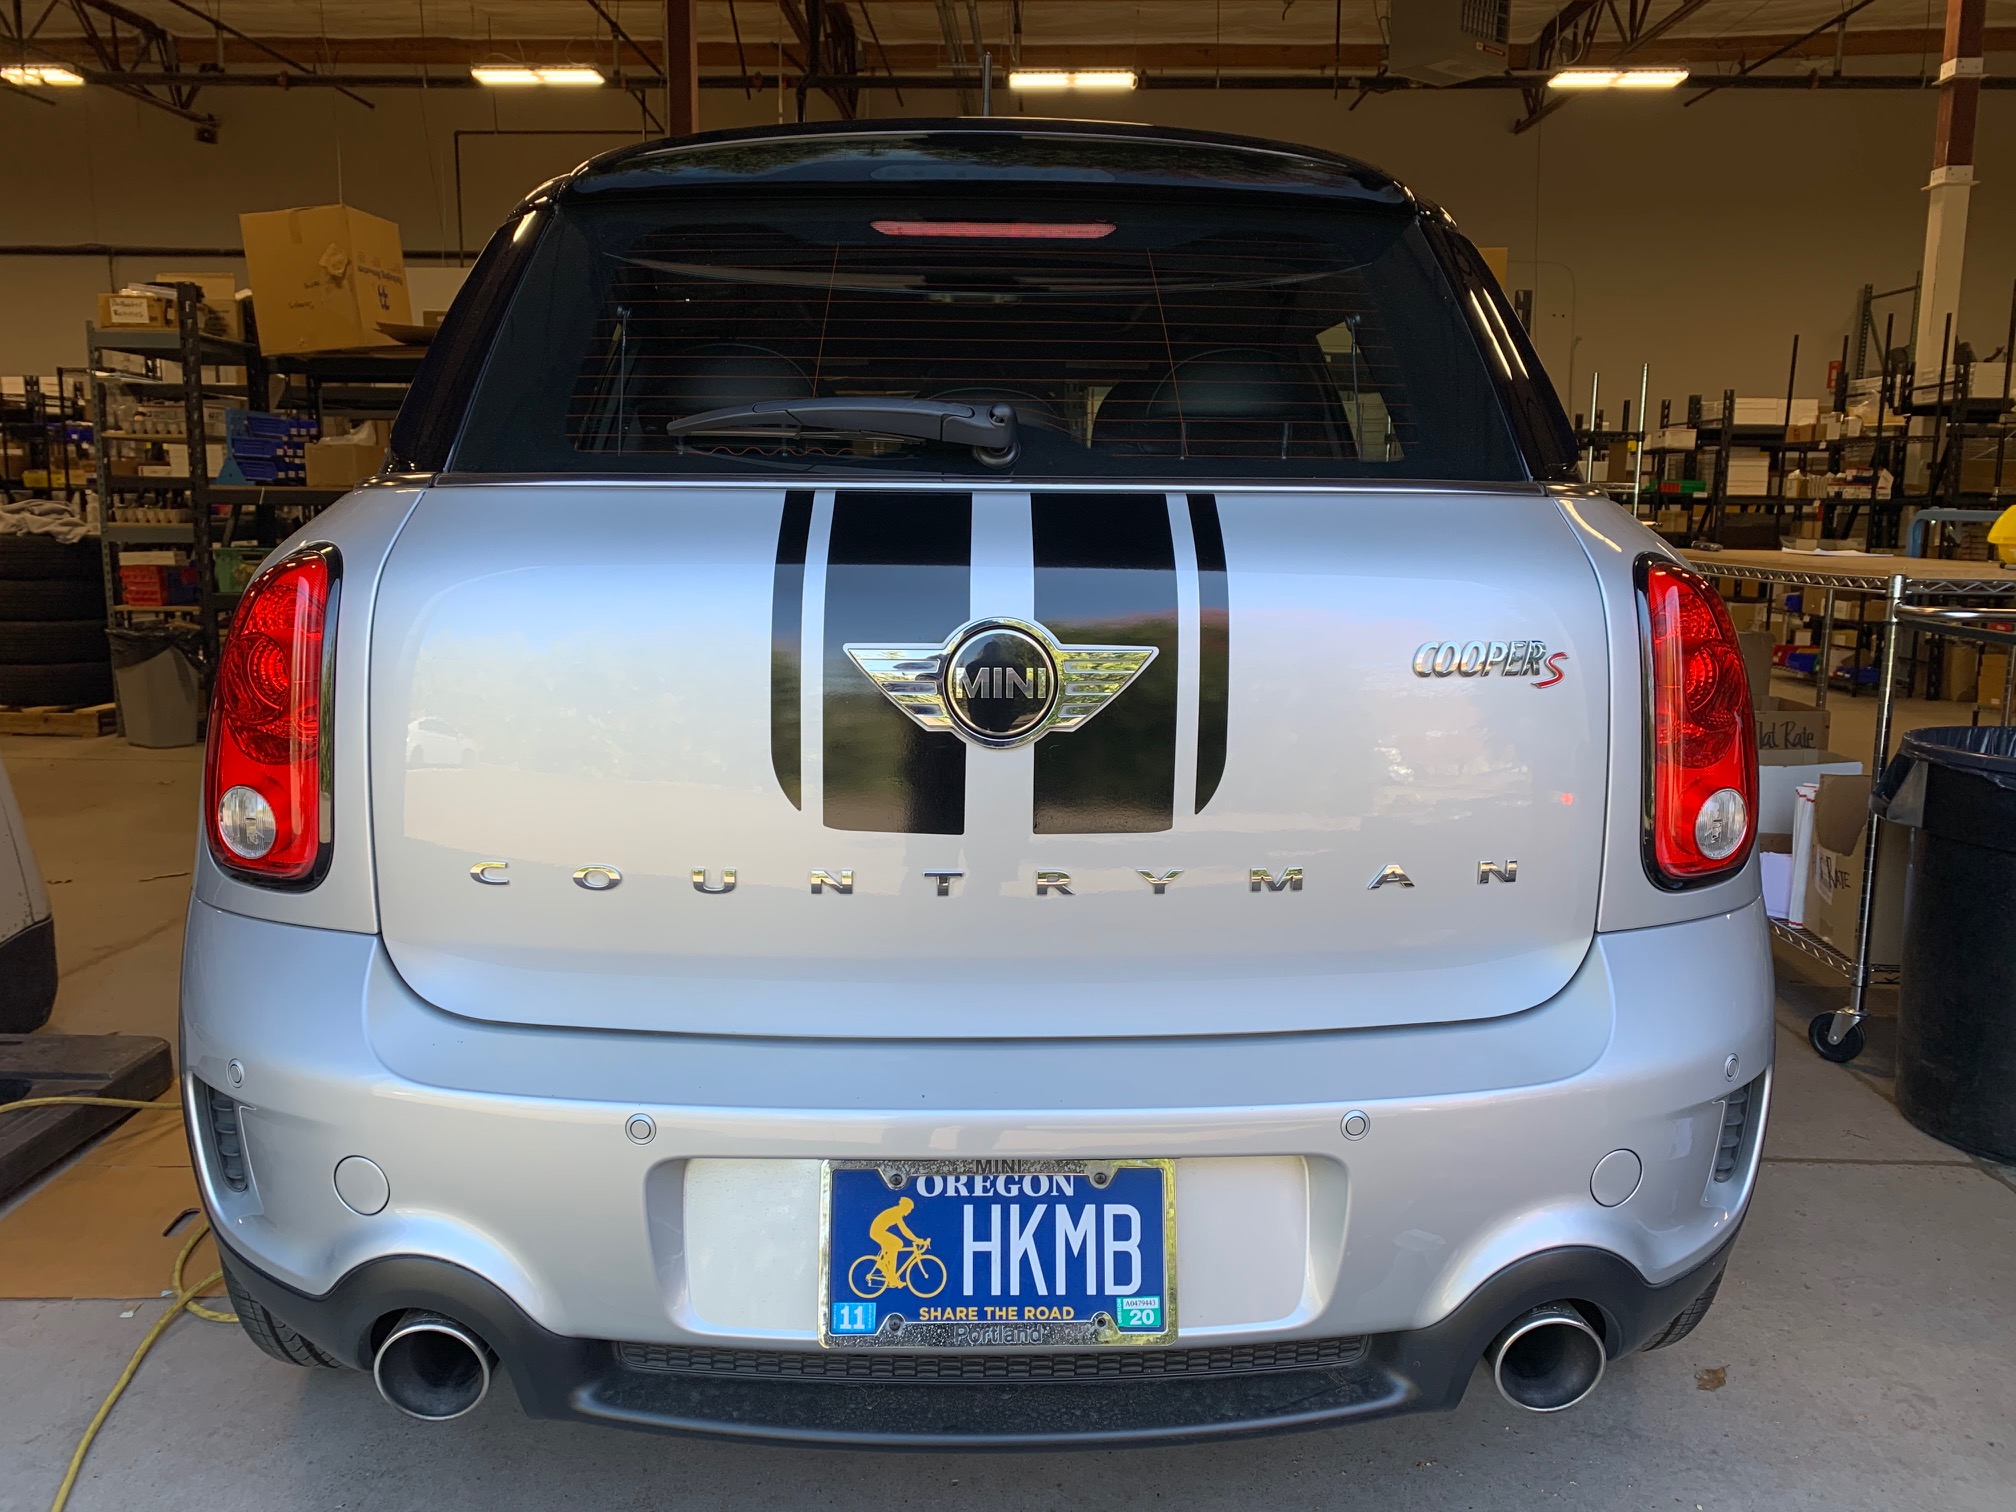
THANK YOU for purchasing the MINI R60 Trident Boot Stripe Decal Kit by CravenSpeed. This product is made from the highest grade materials and is guaranteed to be free from defects.
You can buy our CravenSpeed Trident Boot Stripe Decal Kit for MINI R60 here
Items Included:
- 1 Pair Trident Boot Stripe Decals
Items Required:
- Soft, Lint-Free Cloth
- Squeegee
- Painters Tape
- Utility Spray Bottle
- H2O
- Dish Soap
- X-acto Knife or Scissors
- Measuring Tape
- Marking Pen
NOTE: Installing vinyl decals may seem like an intimidating task, but we have developed this instructional guide to make the process much easier than it sounds. In the unlikely event your decal application goes awry, we offer one-time $5 mulligan kit on each purchase made directly through the CravenSpeed.com website. Just contact support@cravenspeed.com for help.
Procedure
Pro Tip: Do not attempt to install your decals in direct sunlight as the heat will soften the vinyl and make the process extremely difficult. A cool, shady location is ideal.
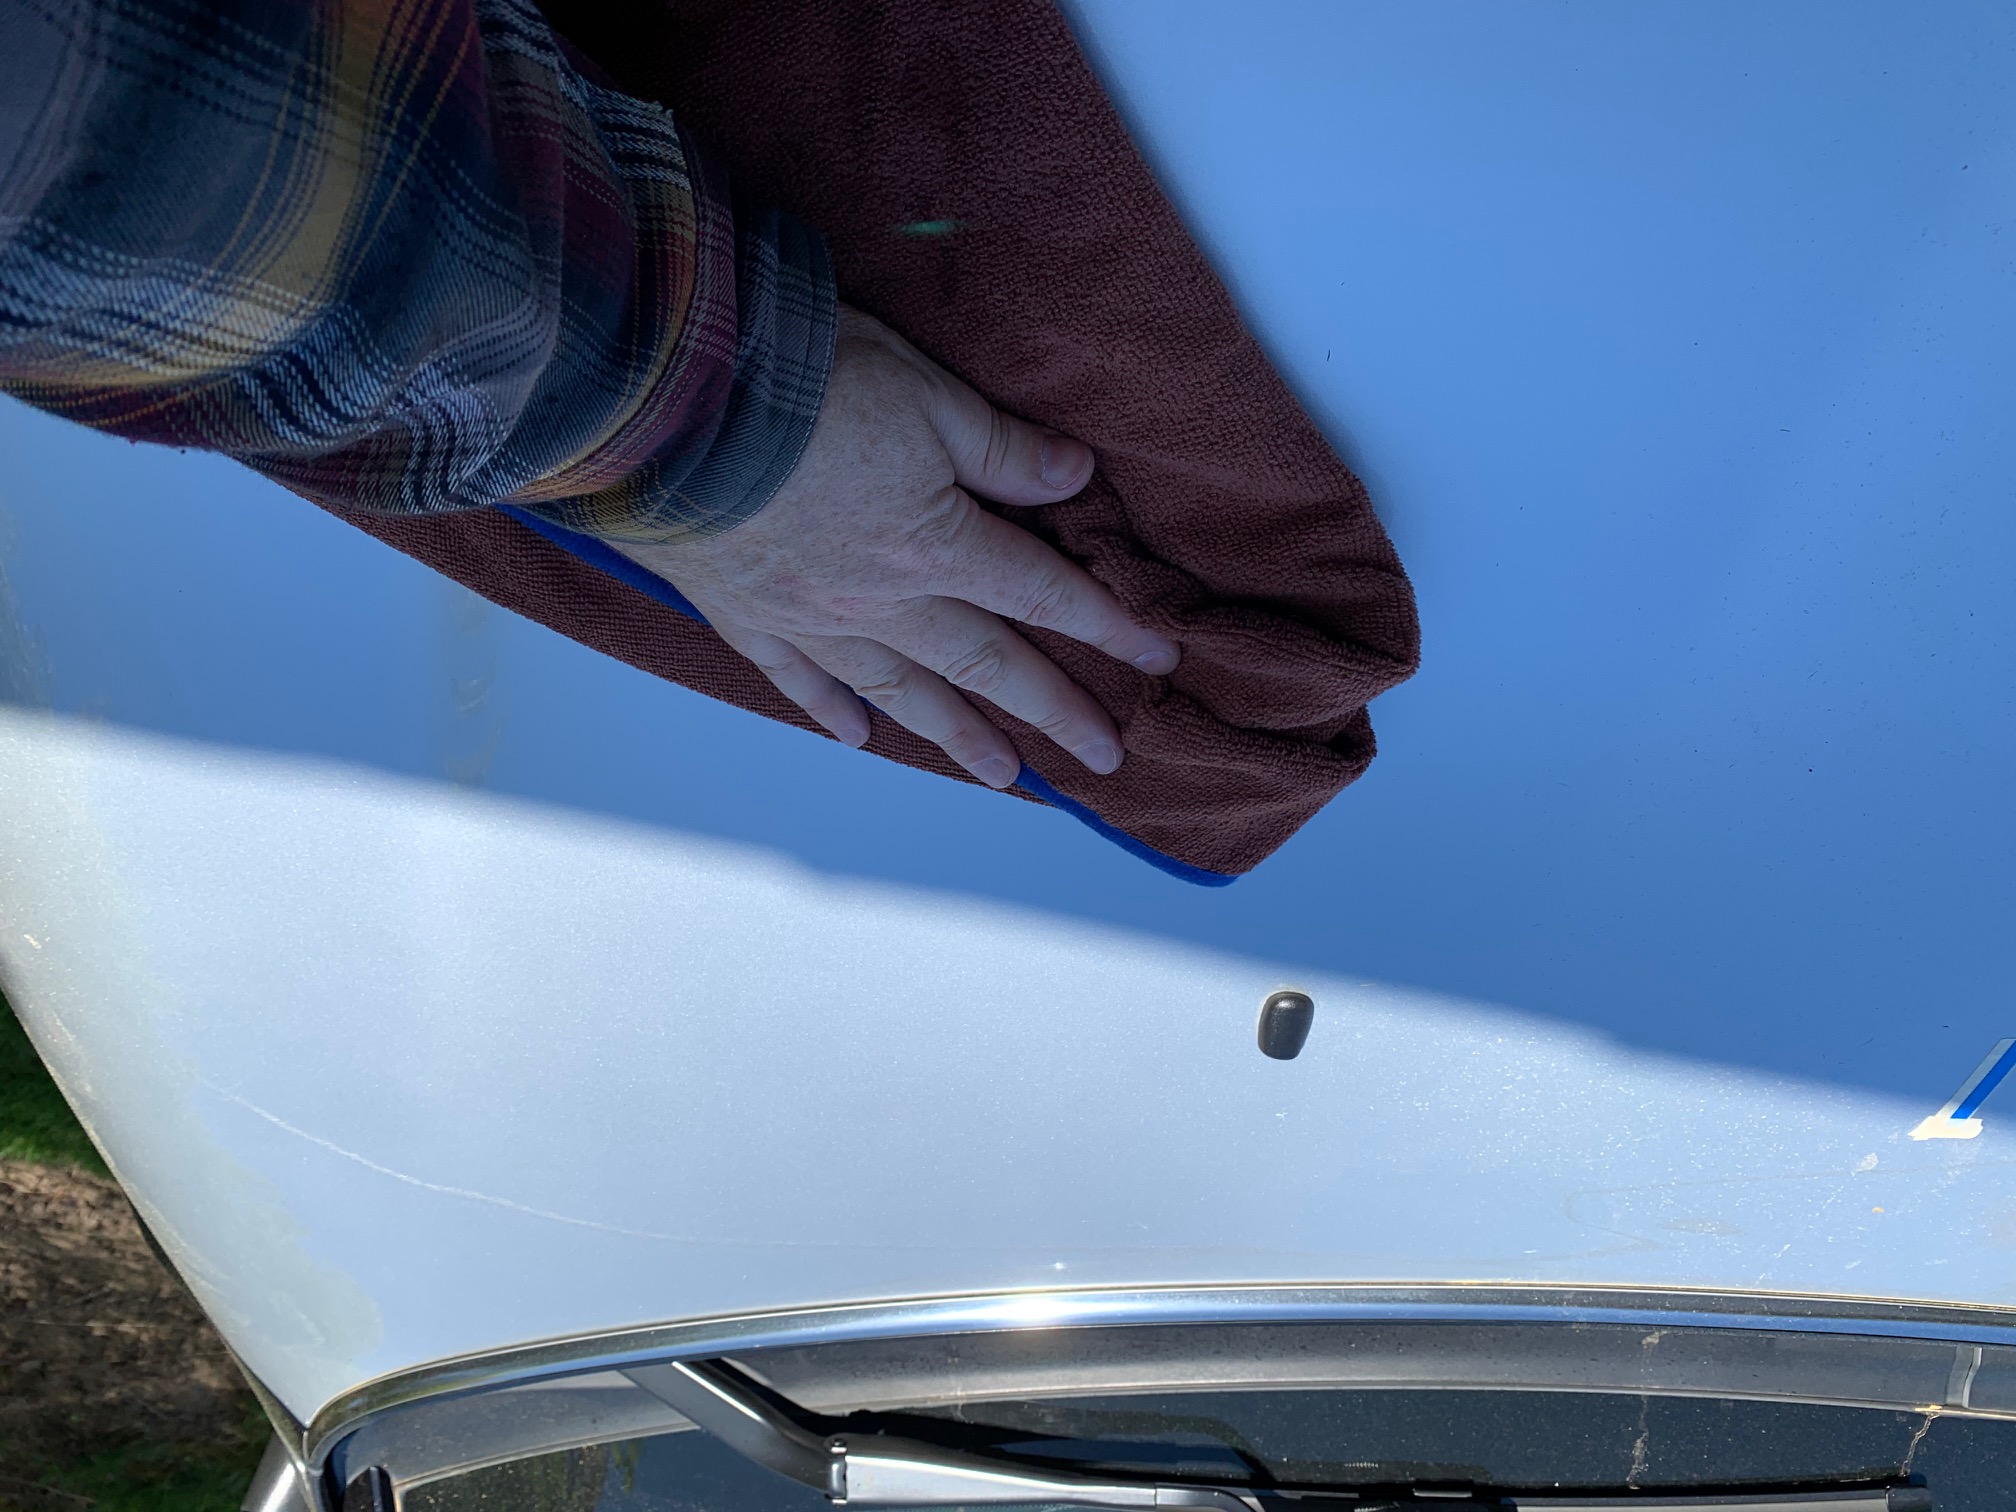
- Let’s start by giving your MINI’s boot (trunk) a thorough cleaning in preparation for the decals. A clay bar treatment would be perfect at this time, but we understand this process is not for everyone. Once the surface is dry, wipe down the area again with a lint-free, soft cloth making sure there are no swirls or debris left behind. Any imperfections left on the paint may be visible through the decals.
- Take your utility spray bottle, fill it with water and add a couple small drops of dish soap. Shake it up and set it aside.
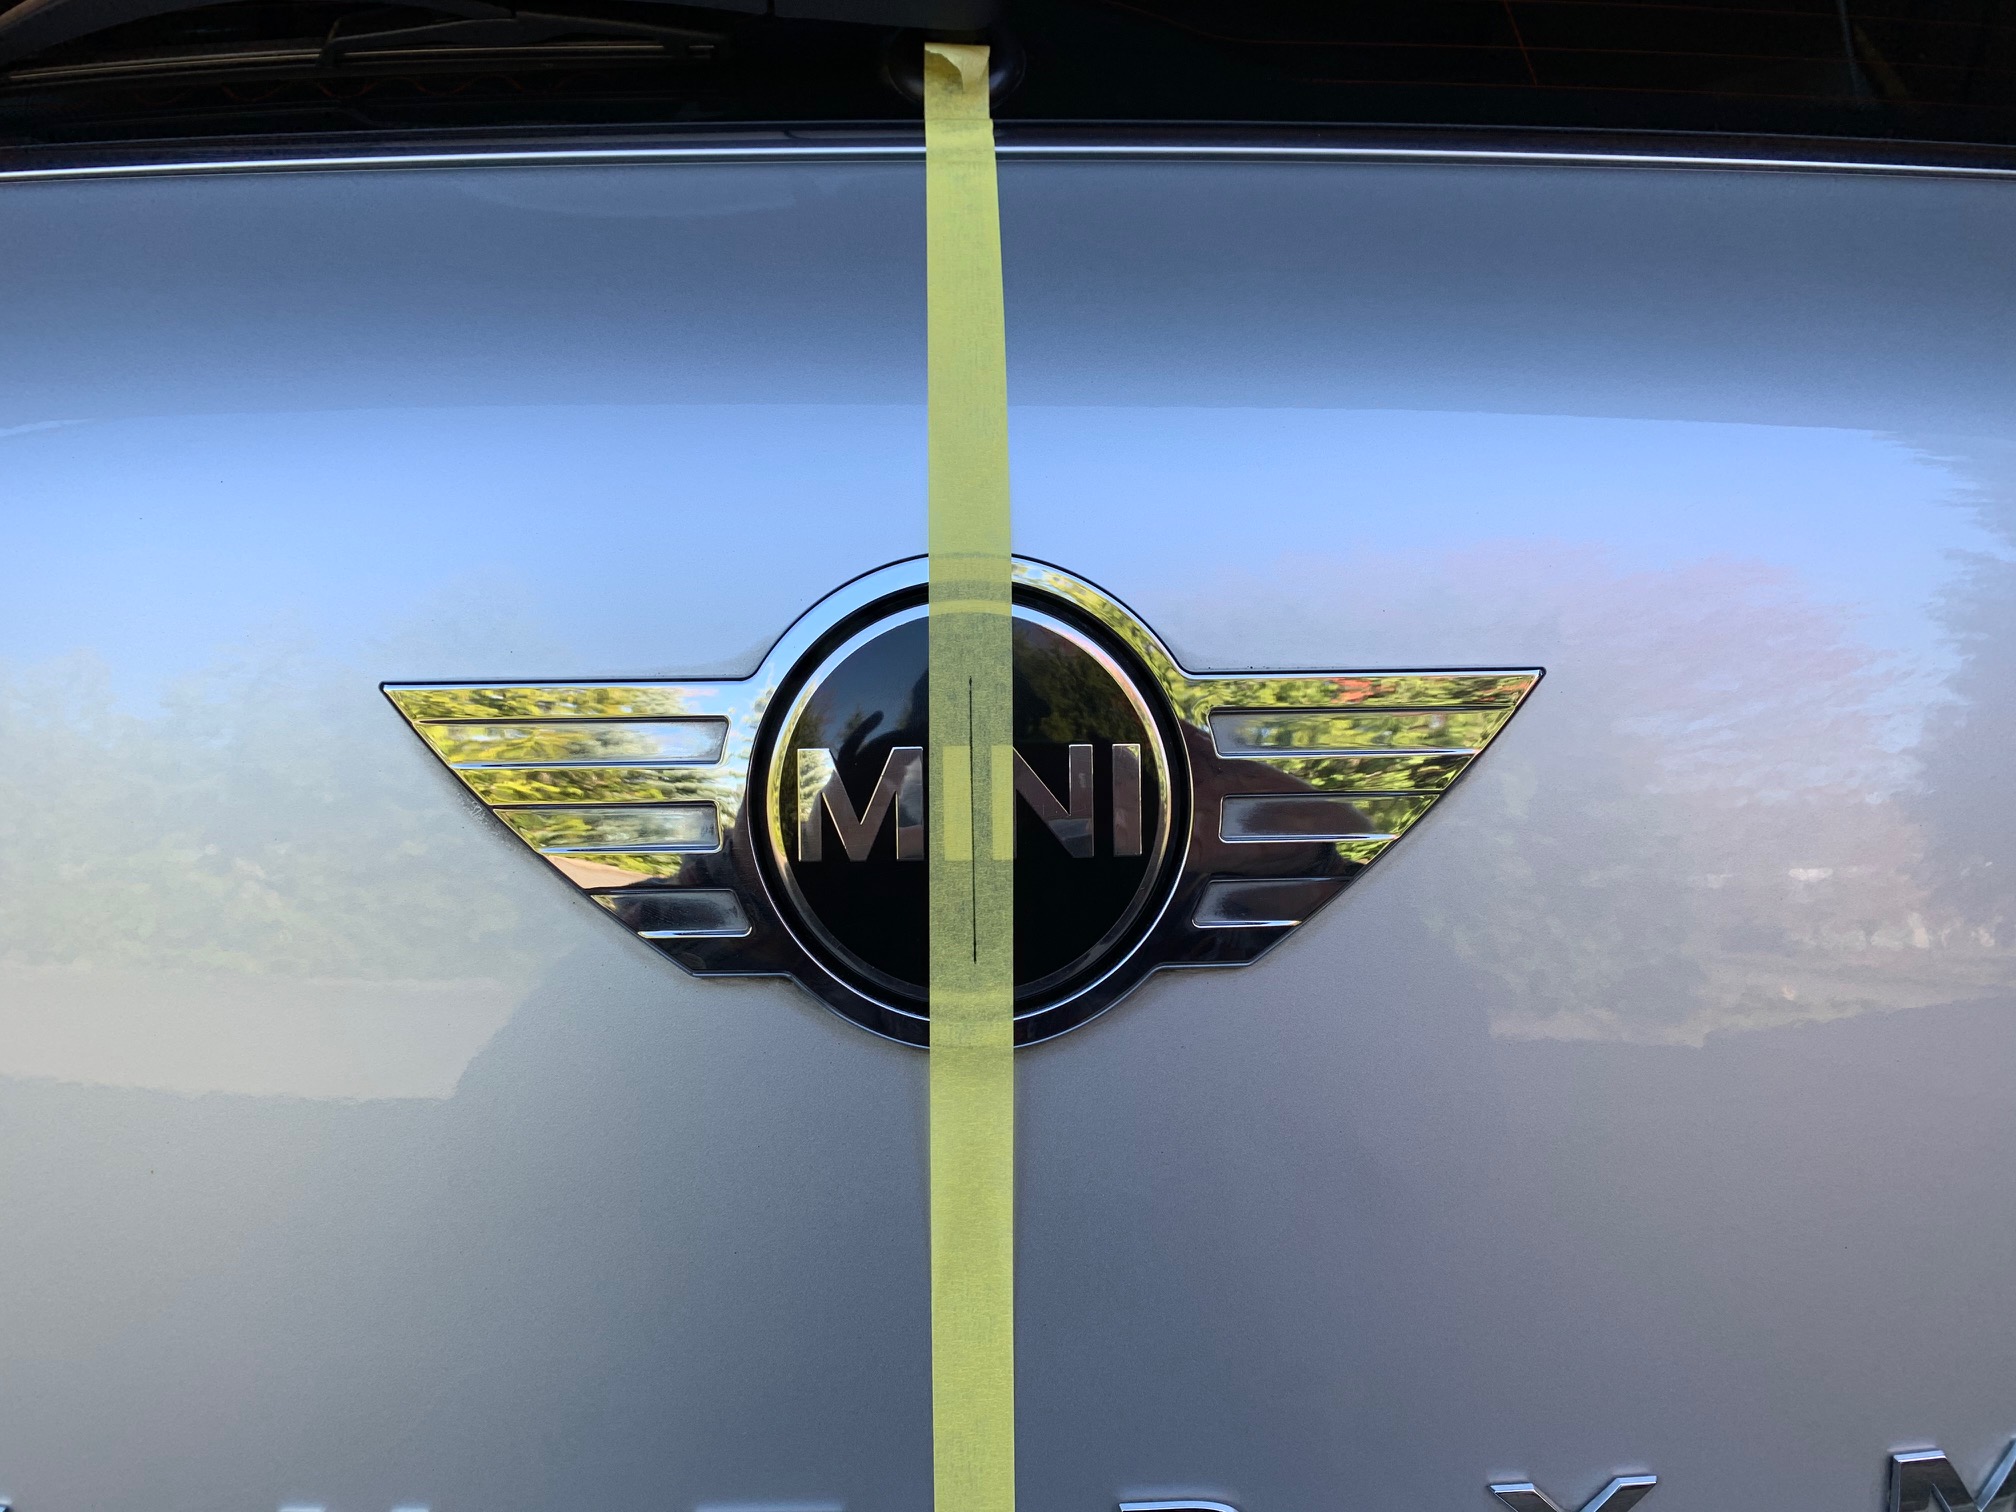
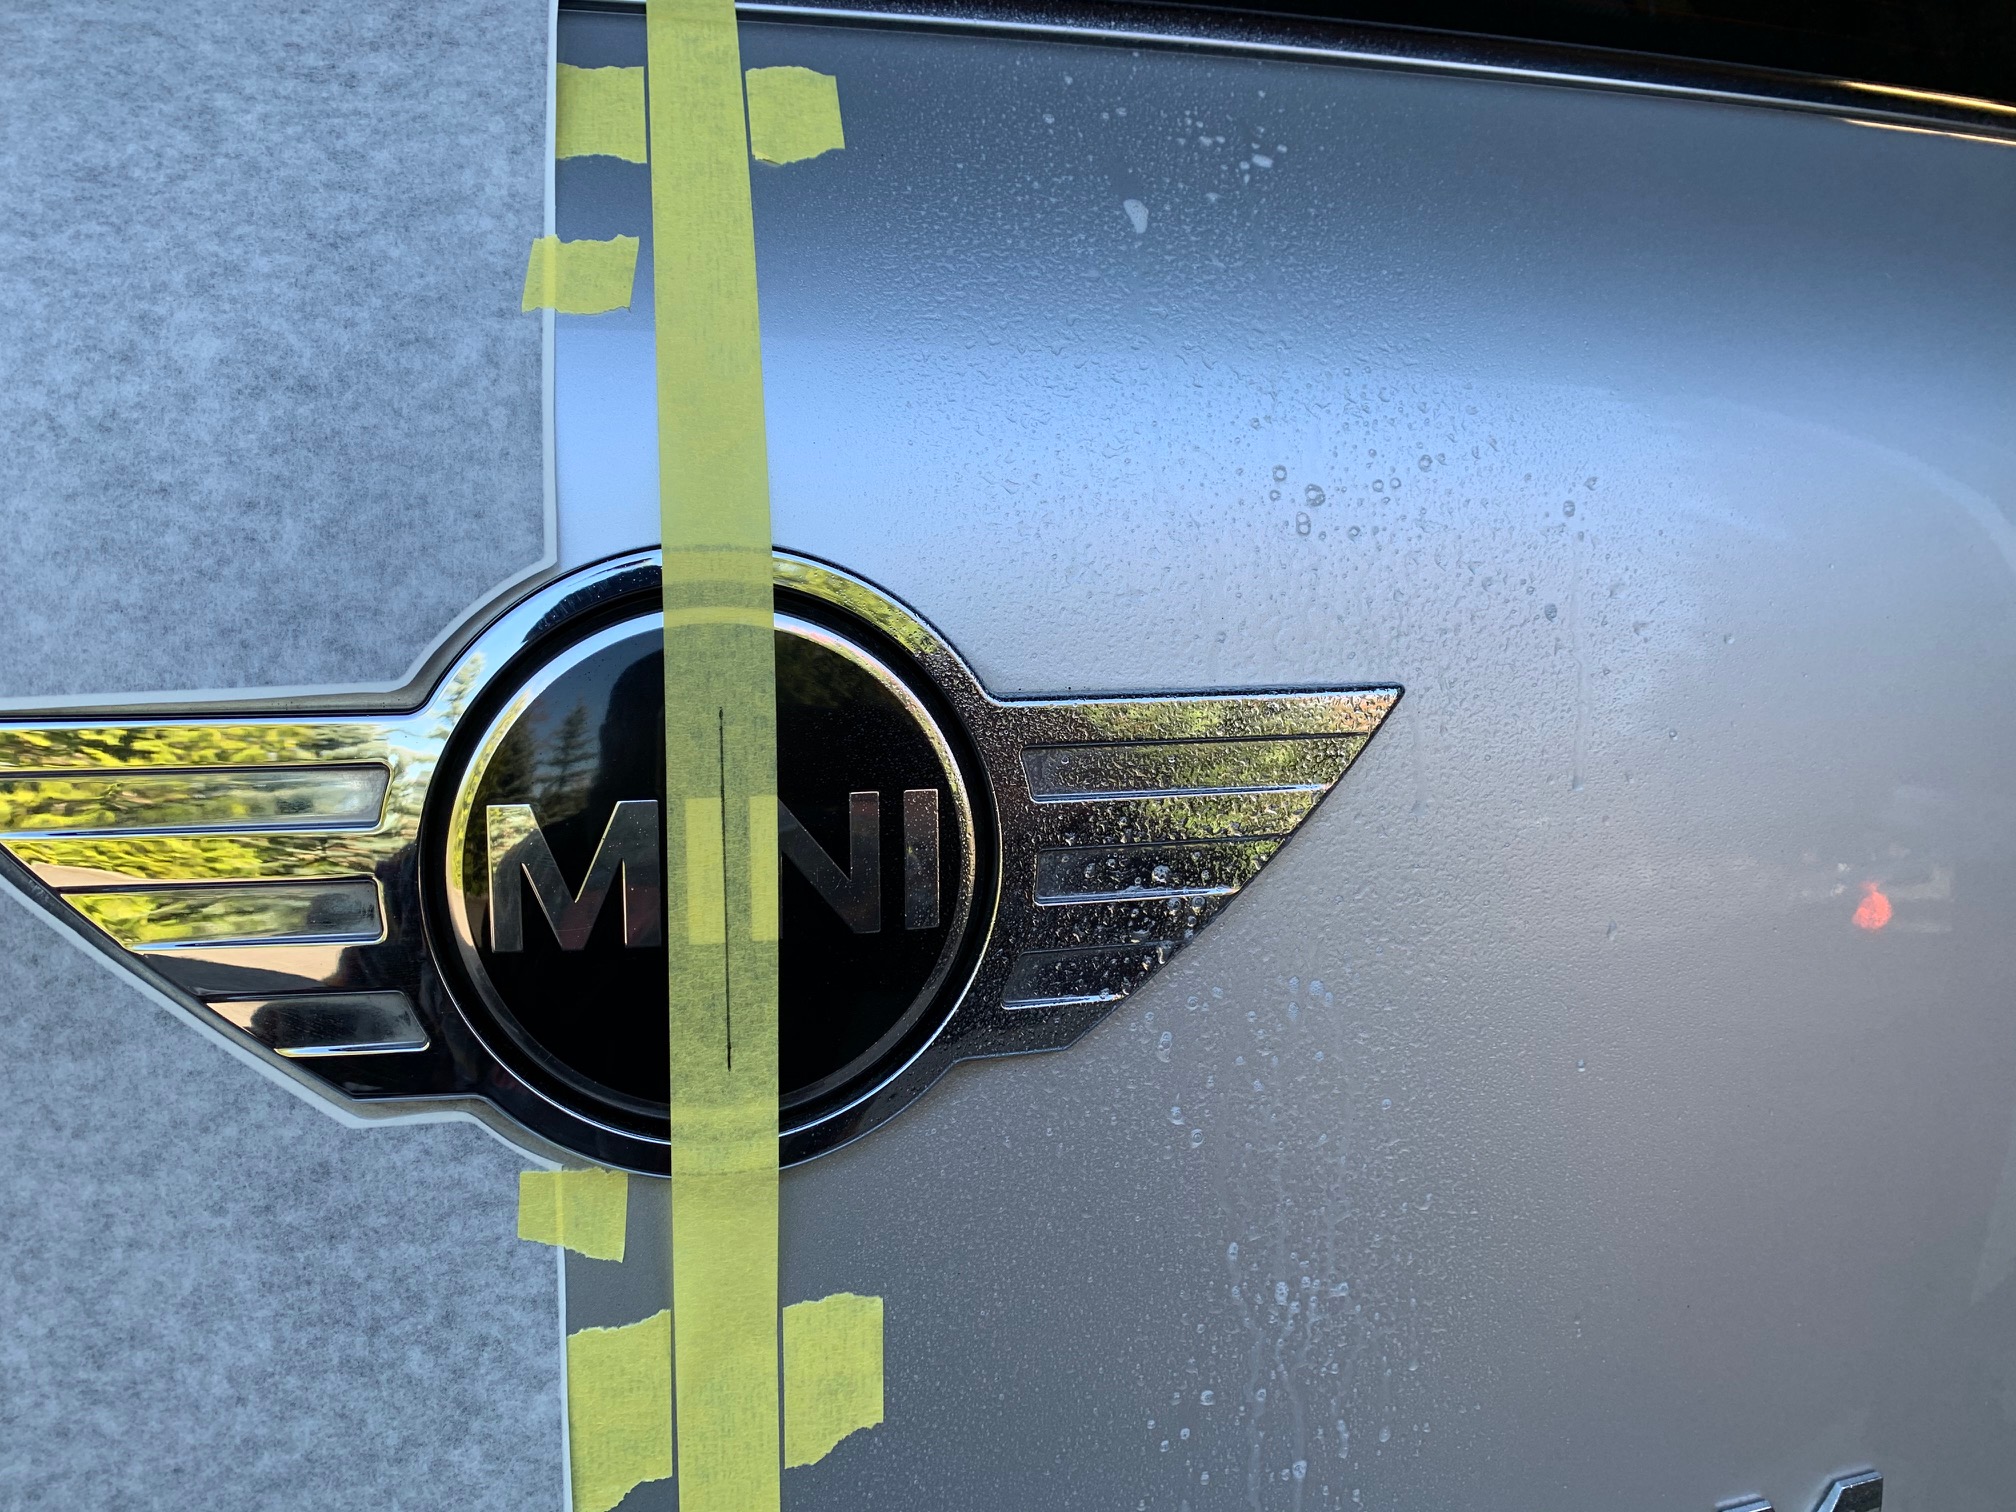
- Before we begin slapping on the decals, we’ll need to mark off where they will lay on the boot, so grab the stripes, your painters tape and a measuring tape and let’s get to it. For this install we'll be taking our measurements primarily from the MINI emblem. Take a length of tape and apply it right down the center of the boot over the MINI emblem and from the beltline to the bottom edge of the hatch.
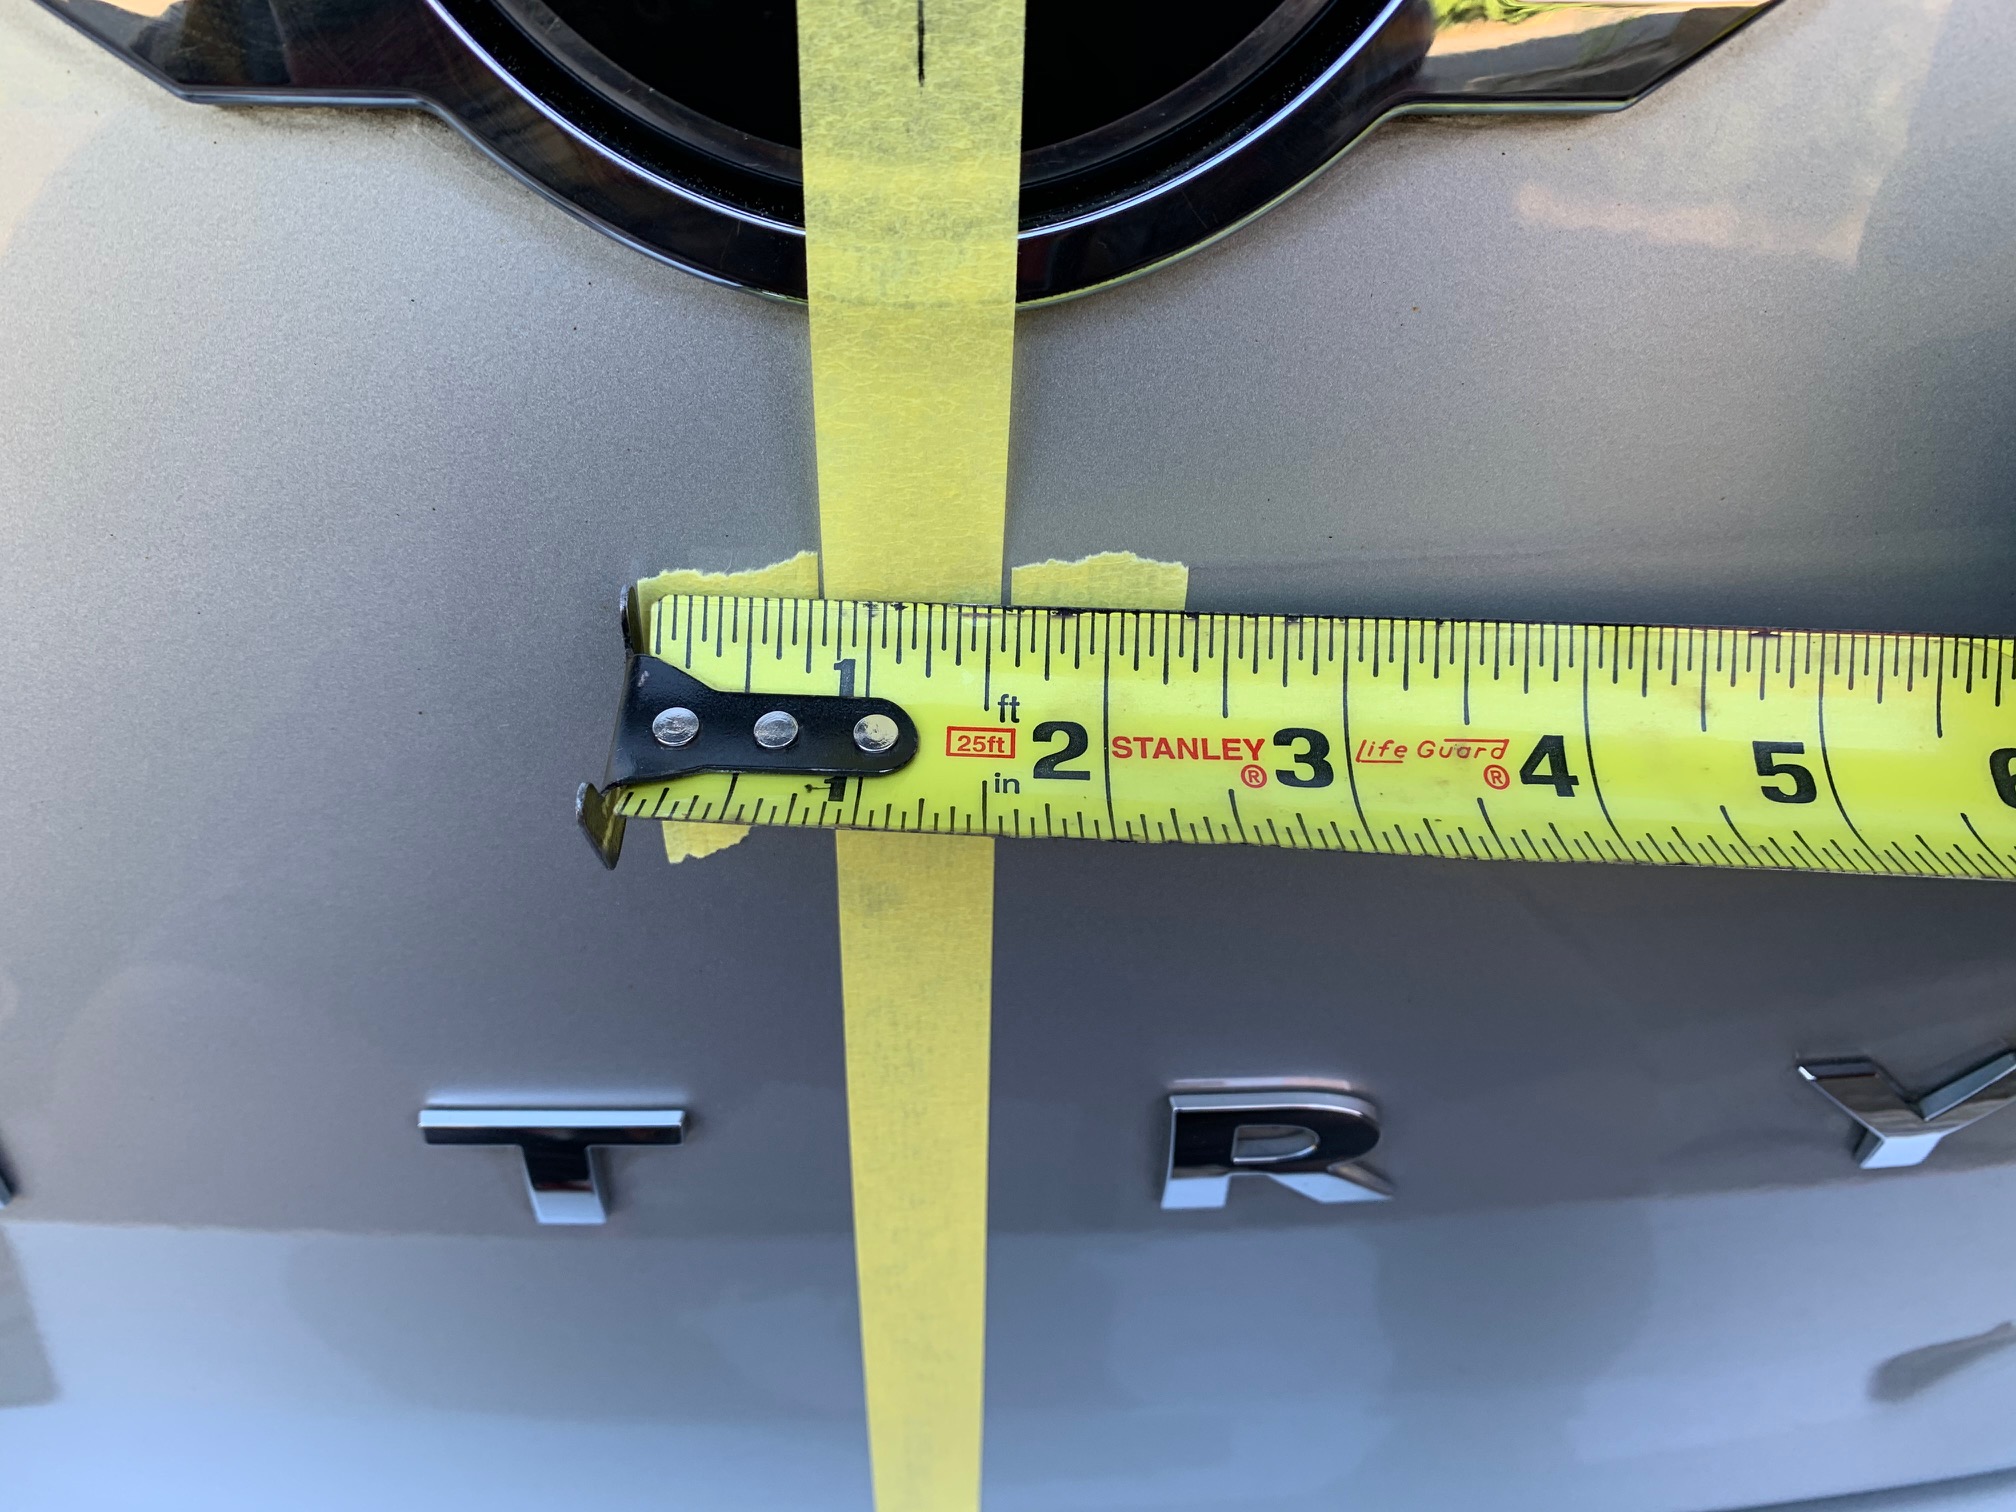
- Just above and below the MINI emblem, place a couple pieces of tape on either side of the center tape line so that their outer width dimension is approx 2.375".
- Using the MINI emblem and the 2.375" width pieces of tape as your points of reference, set the boots stripes against the surface and hold them into place using a few more pieces of tape. Ensure that the spacing is consistent around the perimeter of the MINI emblem and stand back to assess their placement.
- Using your x-acto knife or some scissors, trim around the perimeter of the stripes to within approx .125” (1/8”) from the vinyl if this has not already been done so. This will give the proper spacing away from the beltline trim and from the tape indicators you applied onto the boot.
- With the bonnet stripes trimmed out and ready to apply, bring them over to the car and set them against your tape marks and the beltline just below the front wind screen to confirm fitment one last time before proceeding. If you're satisfied with their placement, move on to the next step, otherwise, make your final adjustments now.
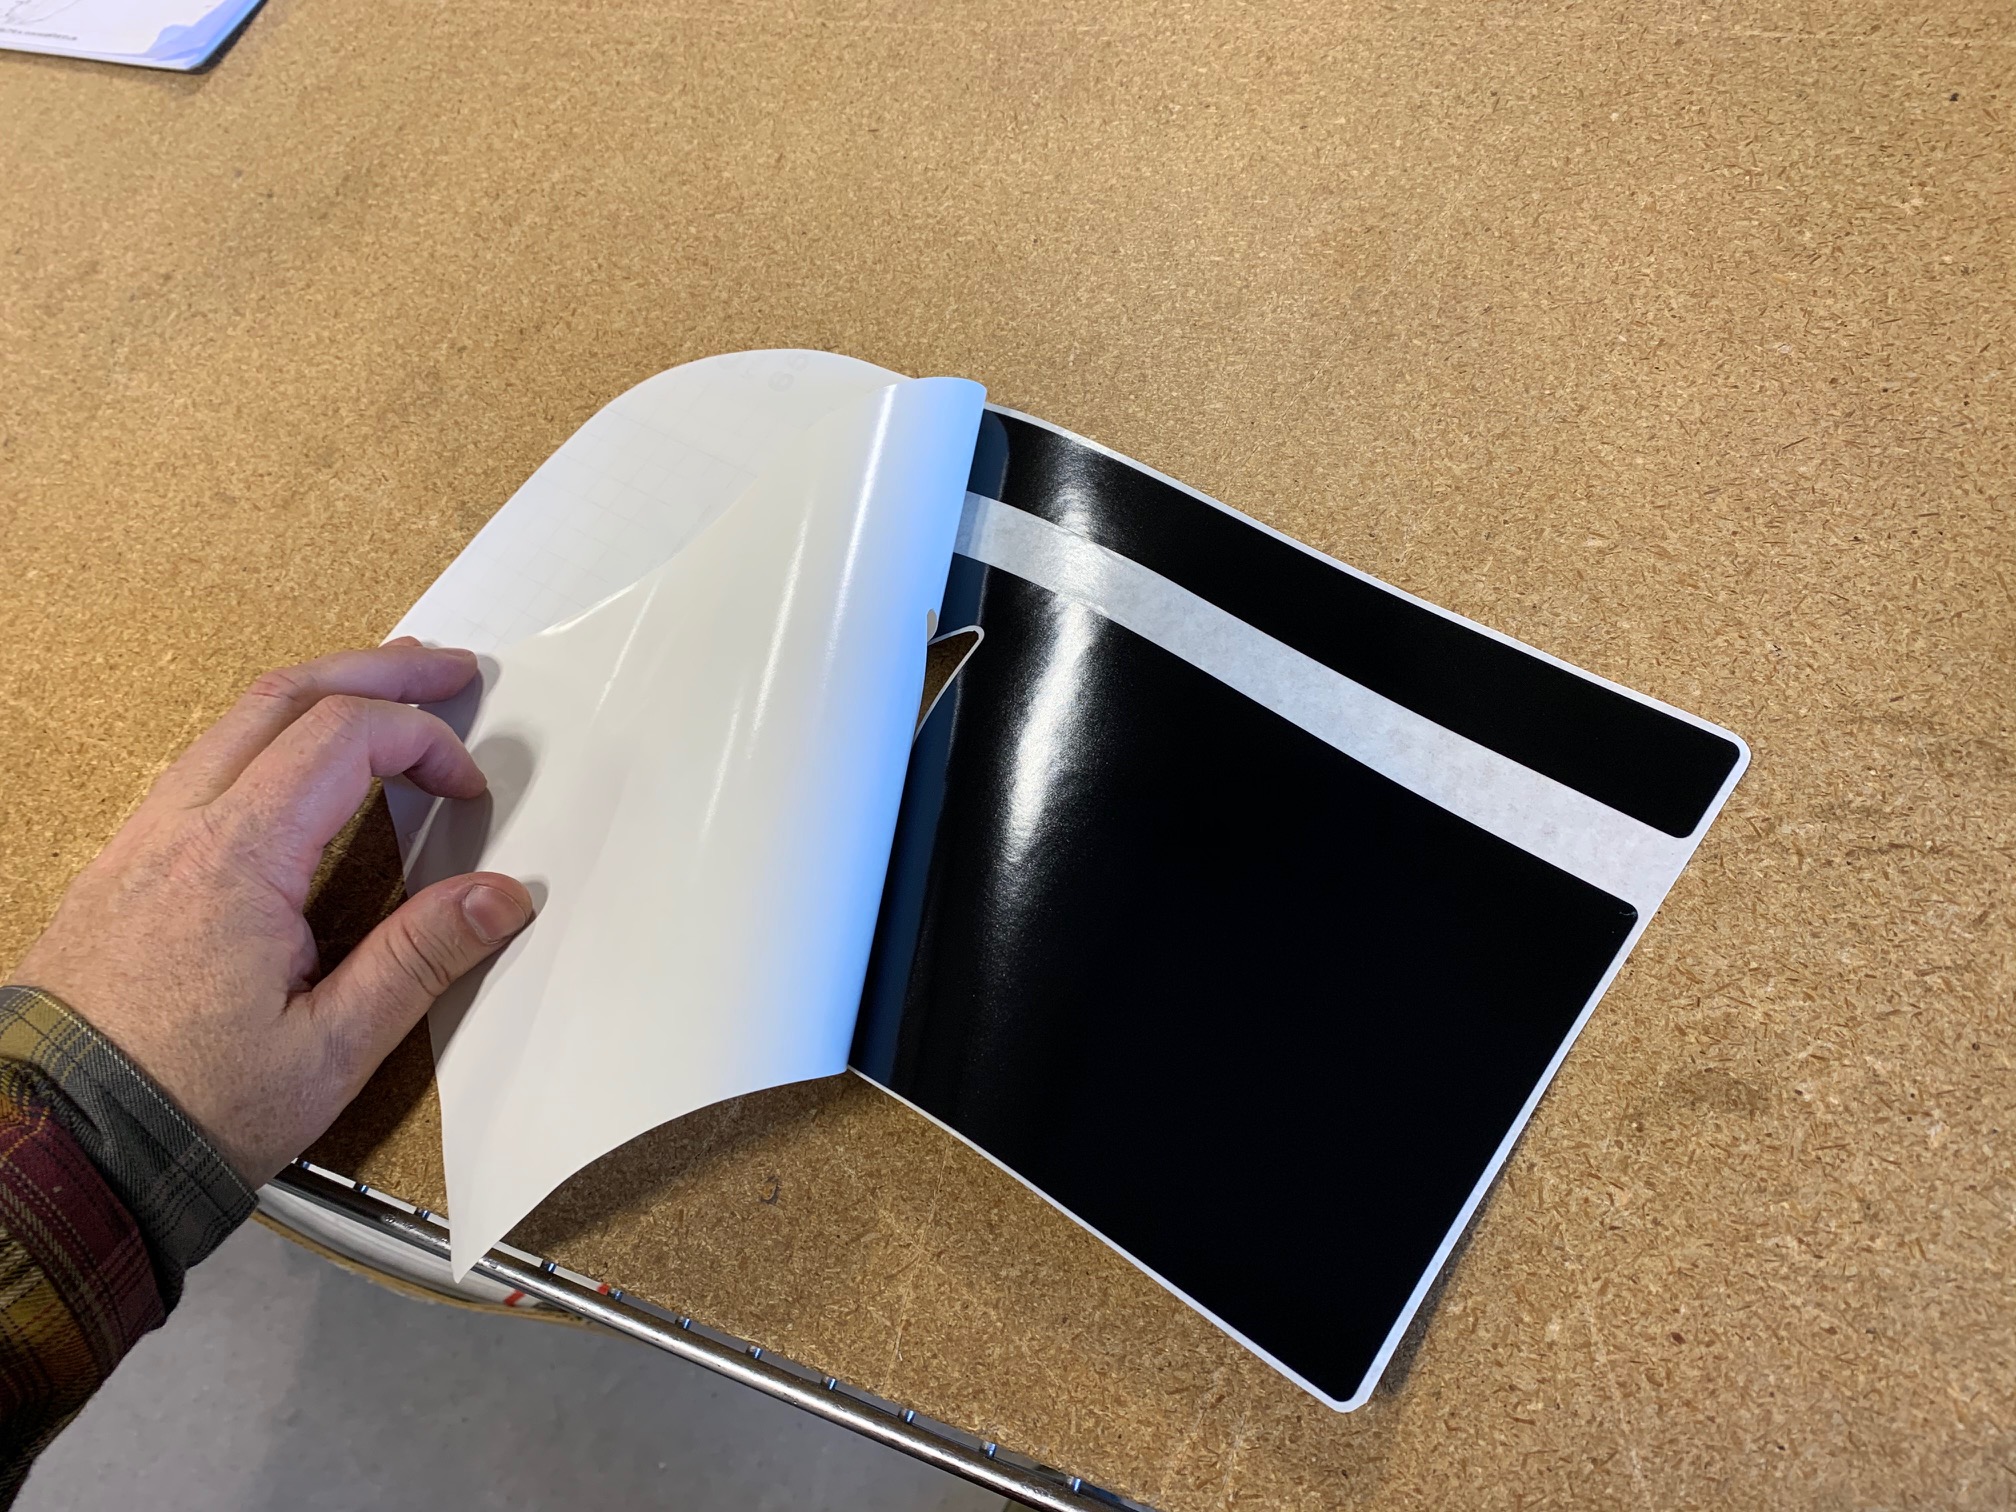
- Take one of the boot decals and completely peel the backing paper off so that the adhesive side is exposed. Do your best not to touch the vinyl and leave any fingerprints on it that could affect the adhesion, and whatever you do.. don't drop it!
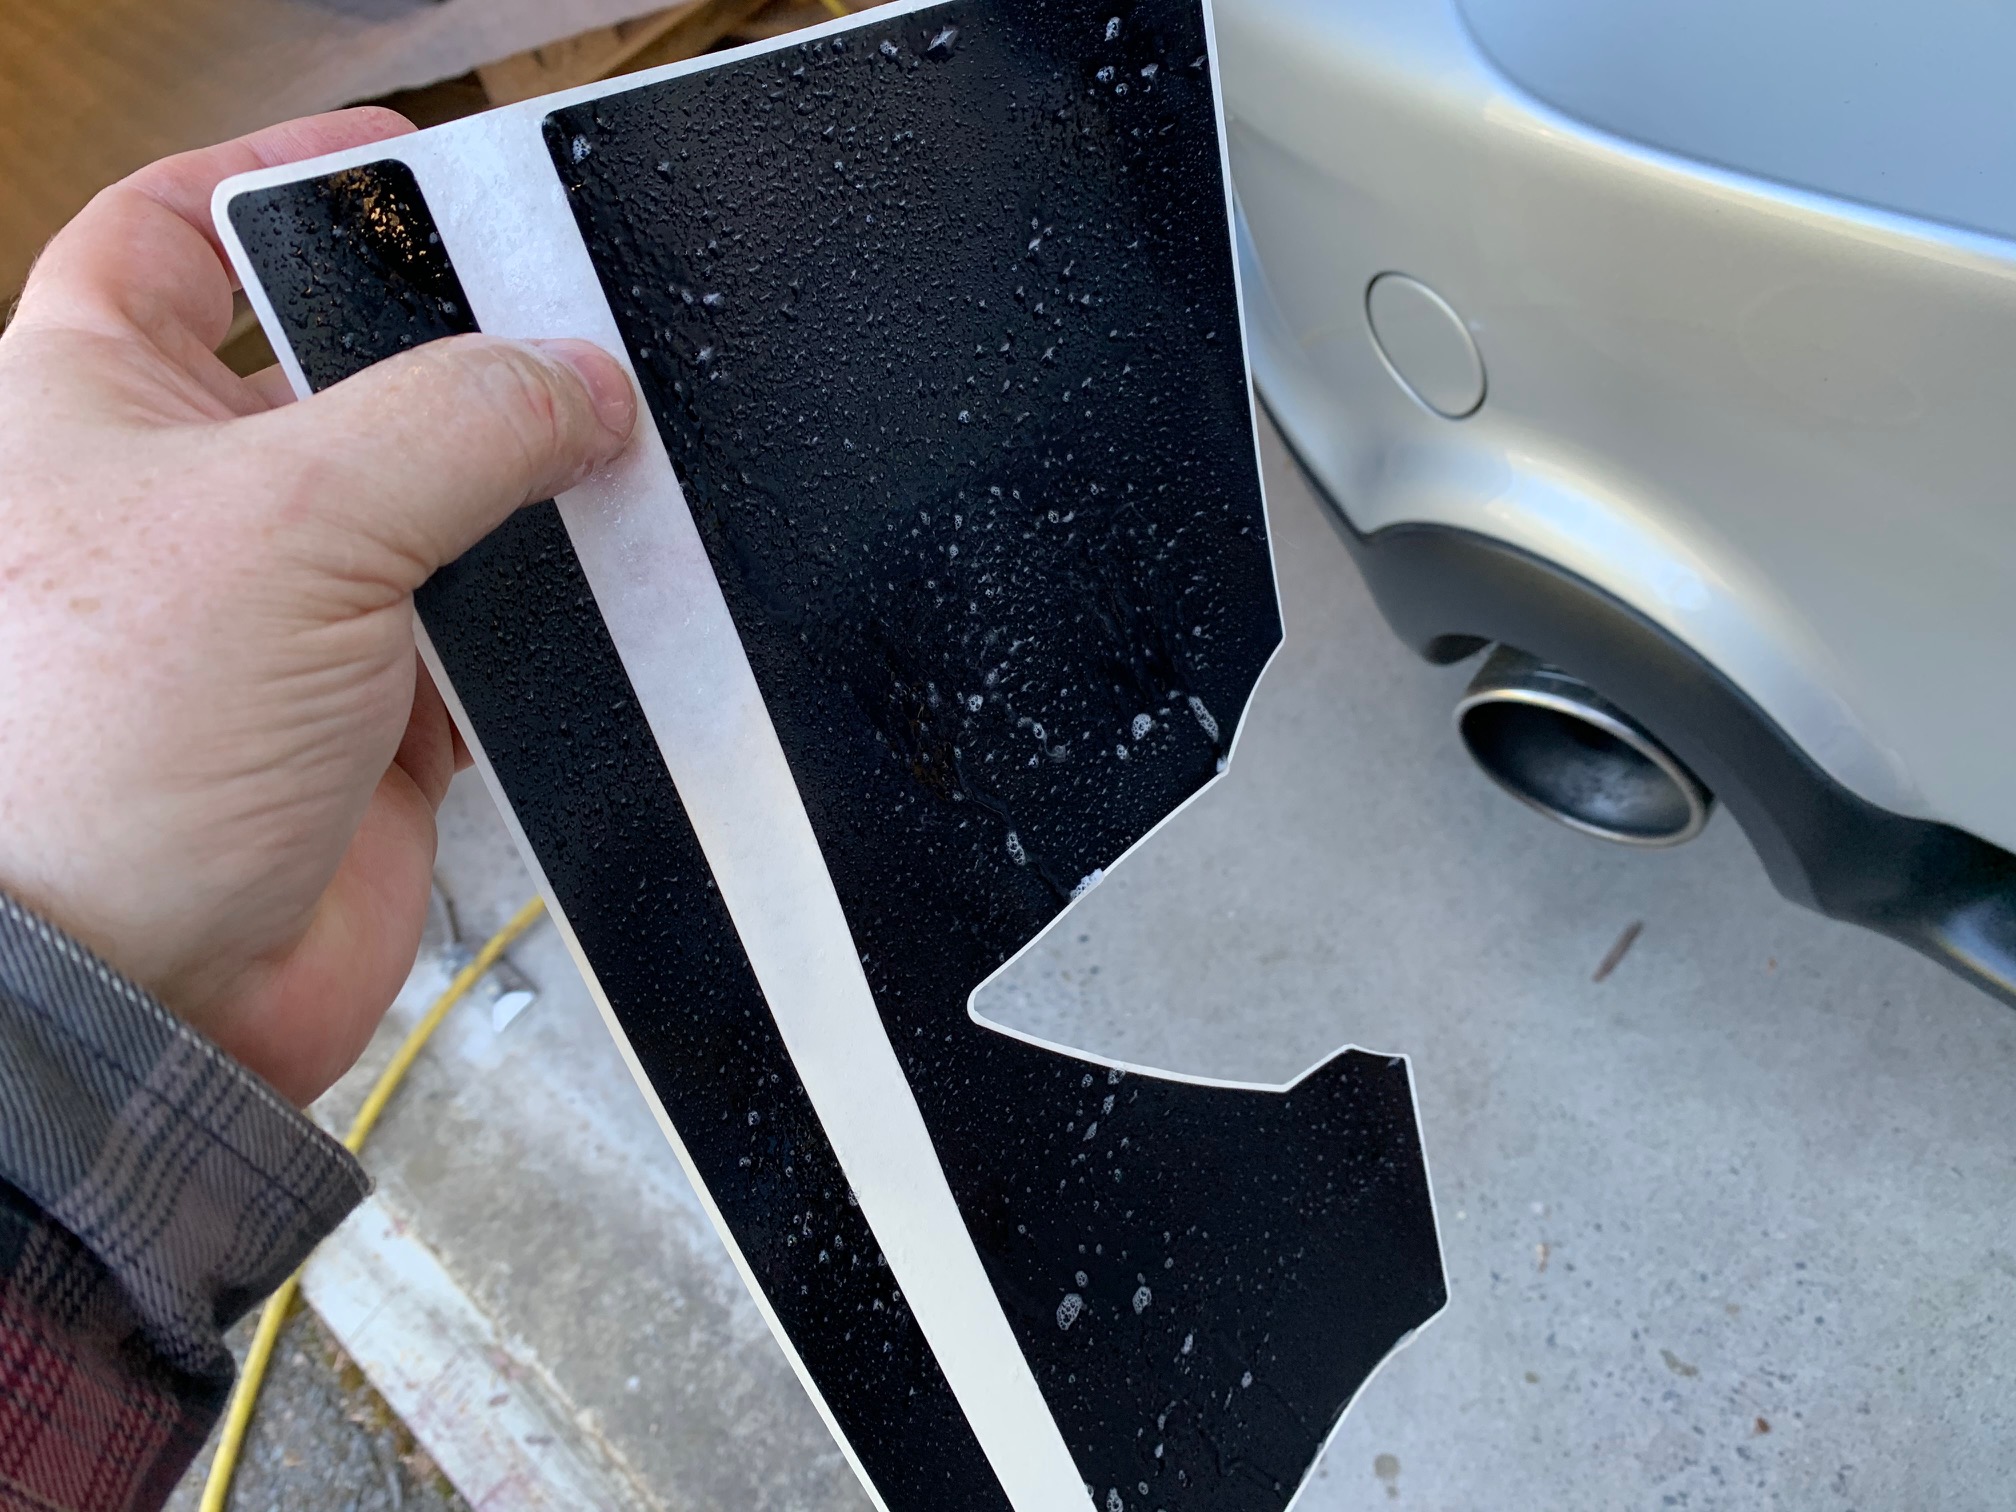
- Spray an even coat of your soap/water solution to both sides of the decal. It doesn’t need to be completely soaked… it just needs enough for you to be able to readjust the decal if you don’t set it down perfectly straight on the first try. Spray the stripe area of the boot as well
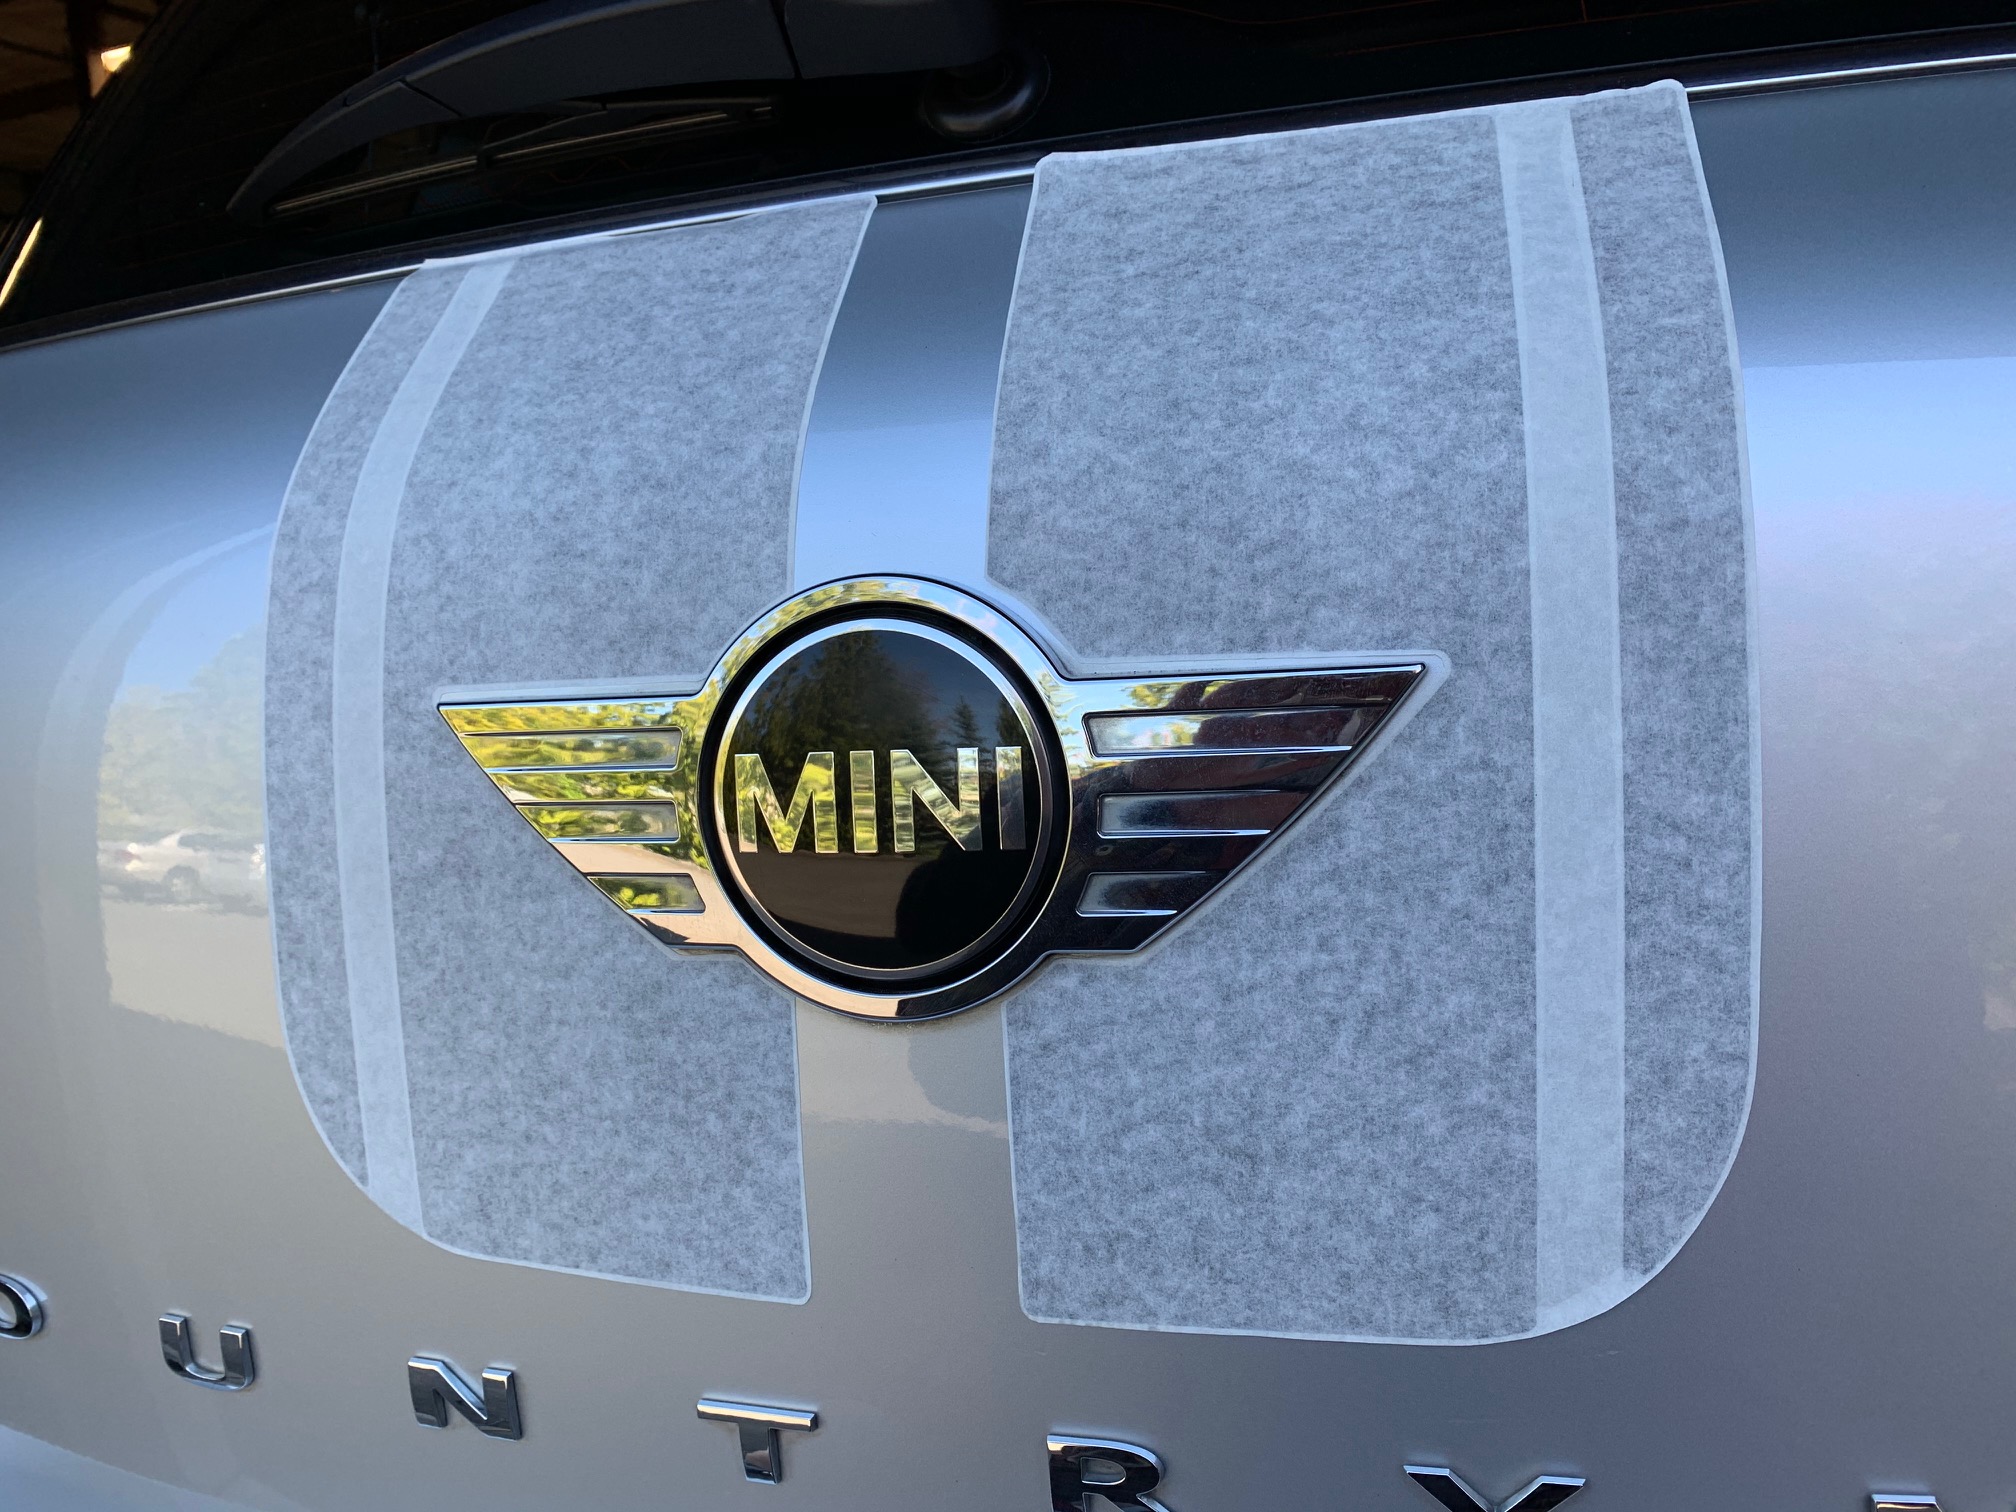
- Carefully set the decal down onto the boot with the windshield edge of the decal close up against the beltline trim and lining up the inside edge with the taped layout marks. The mixed solution should allow you to pull up and reposition the decal if necessary and you may even be able to slide it around a bit.
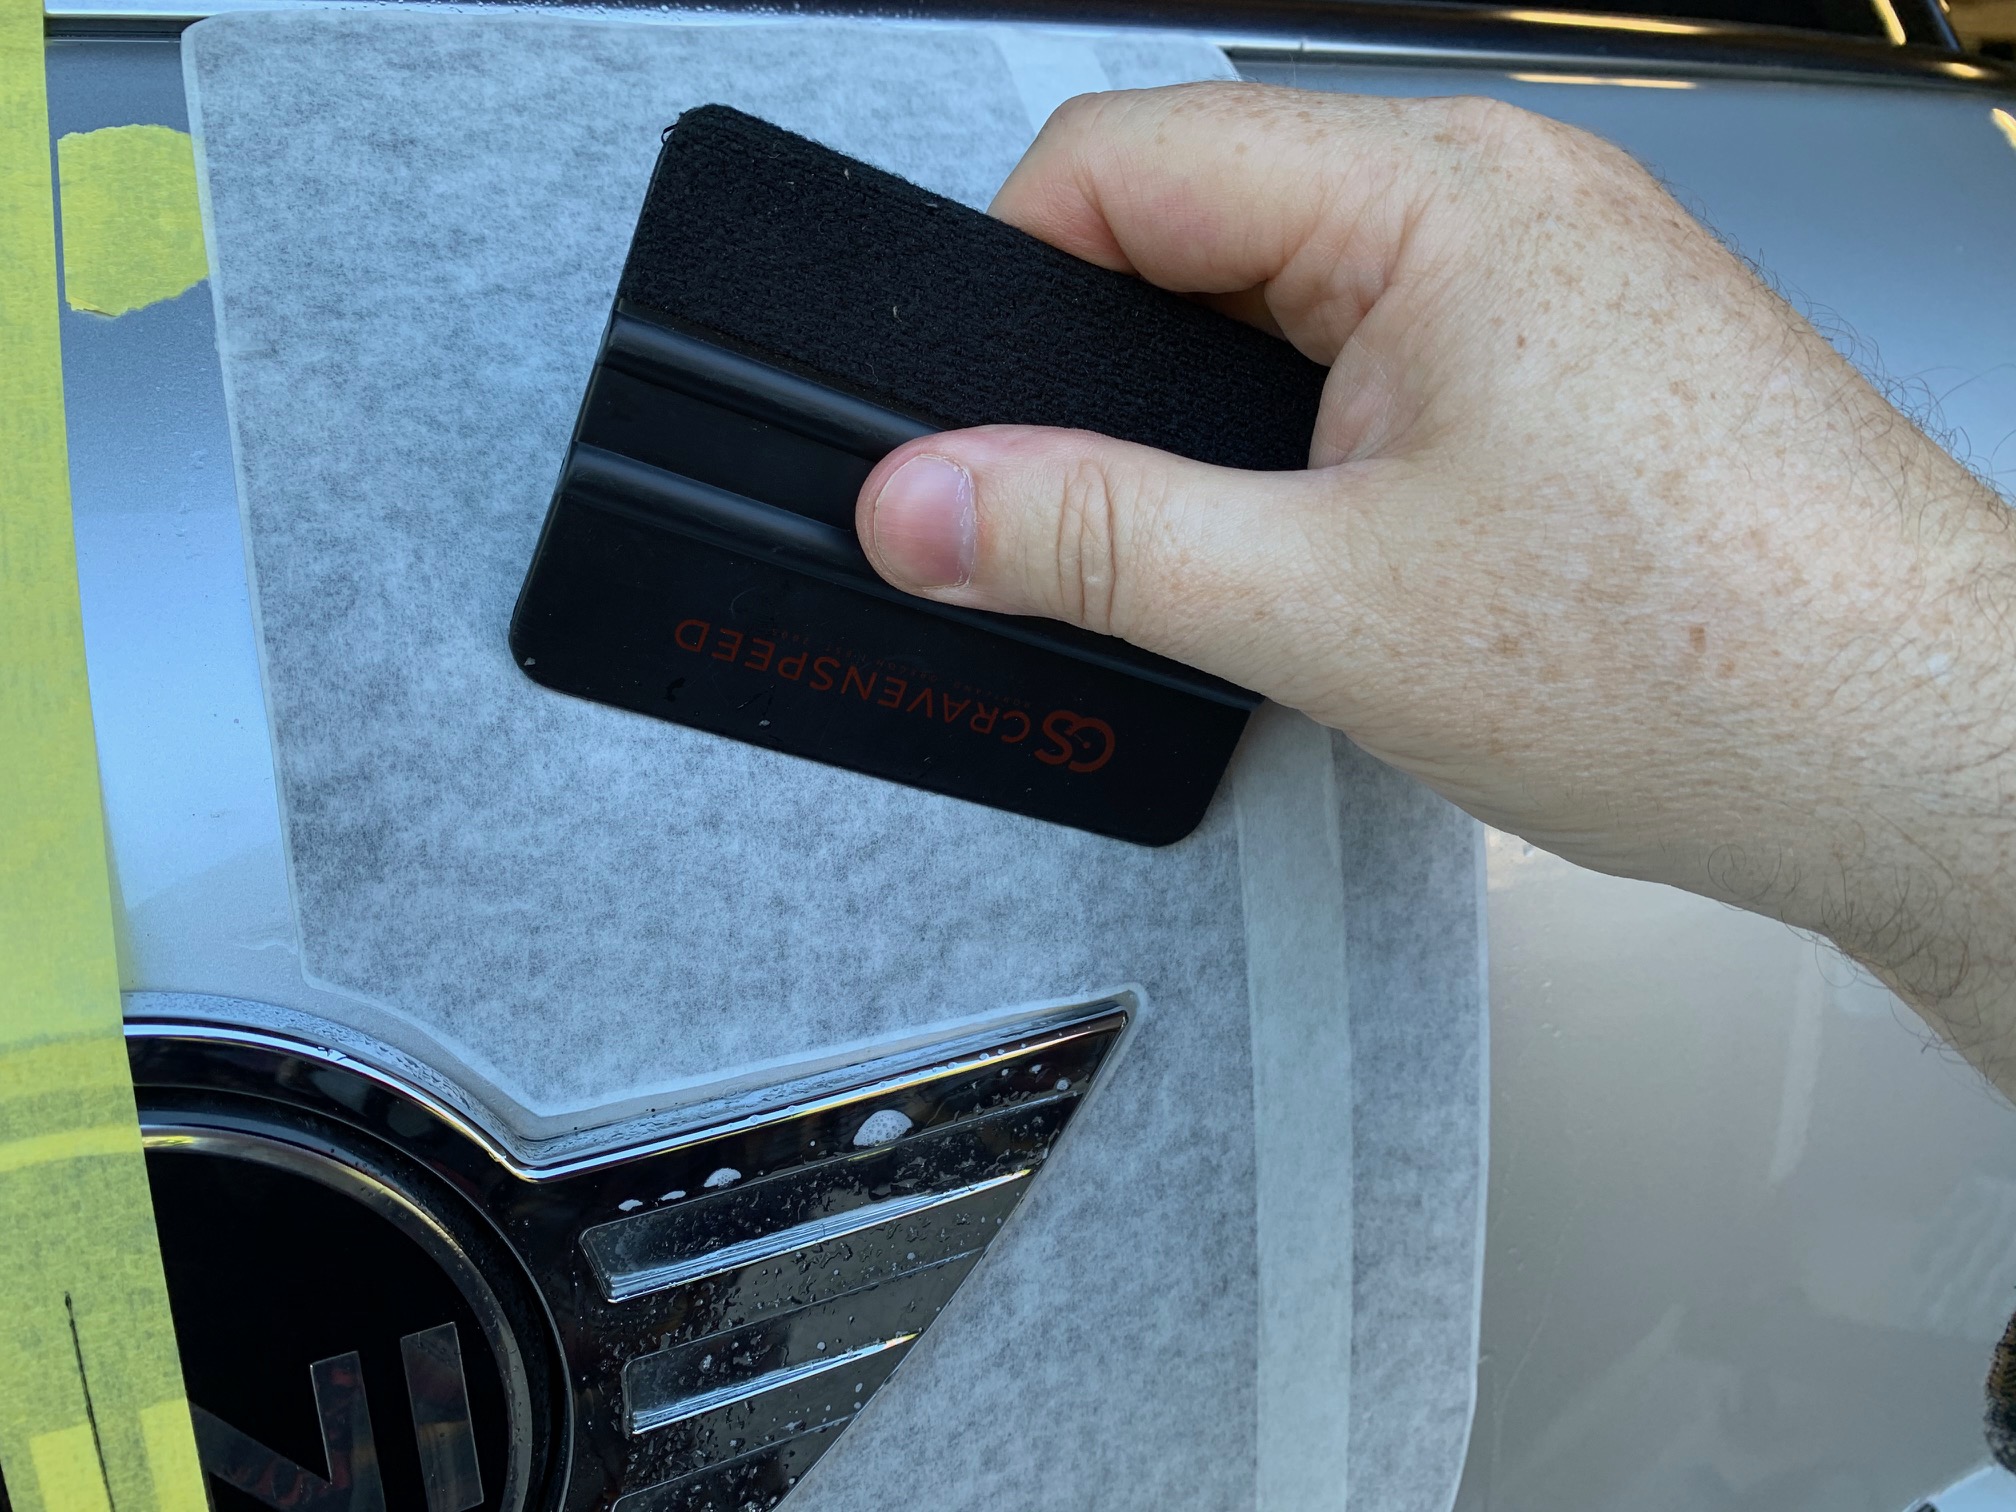
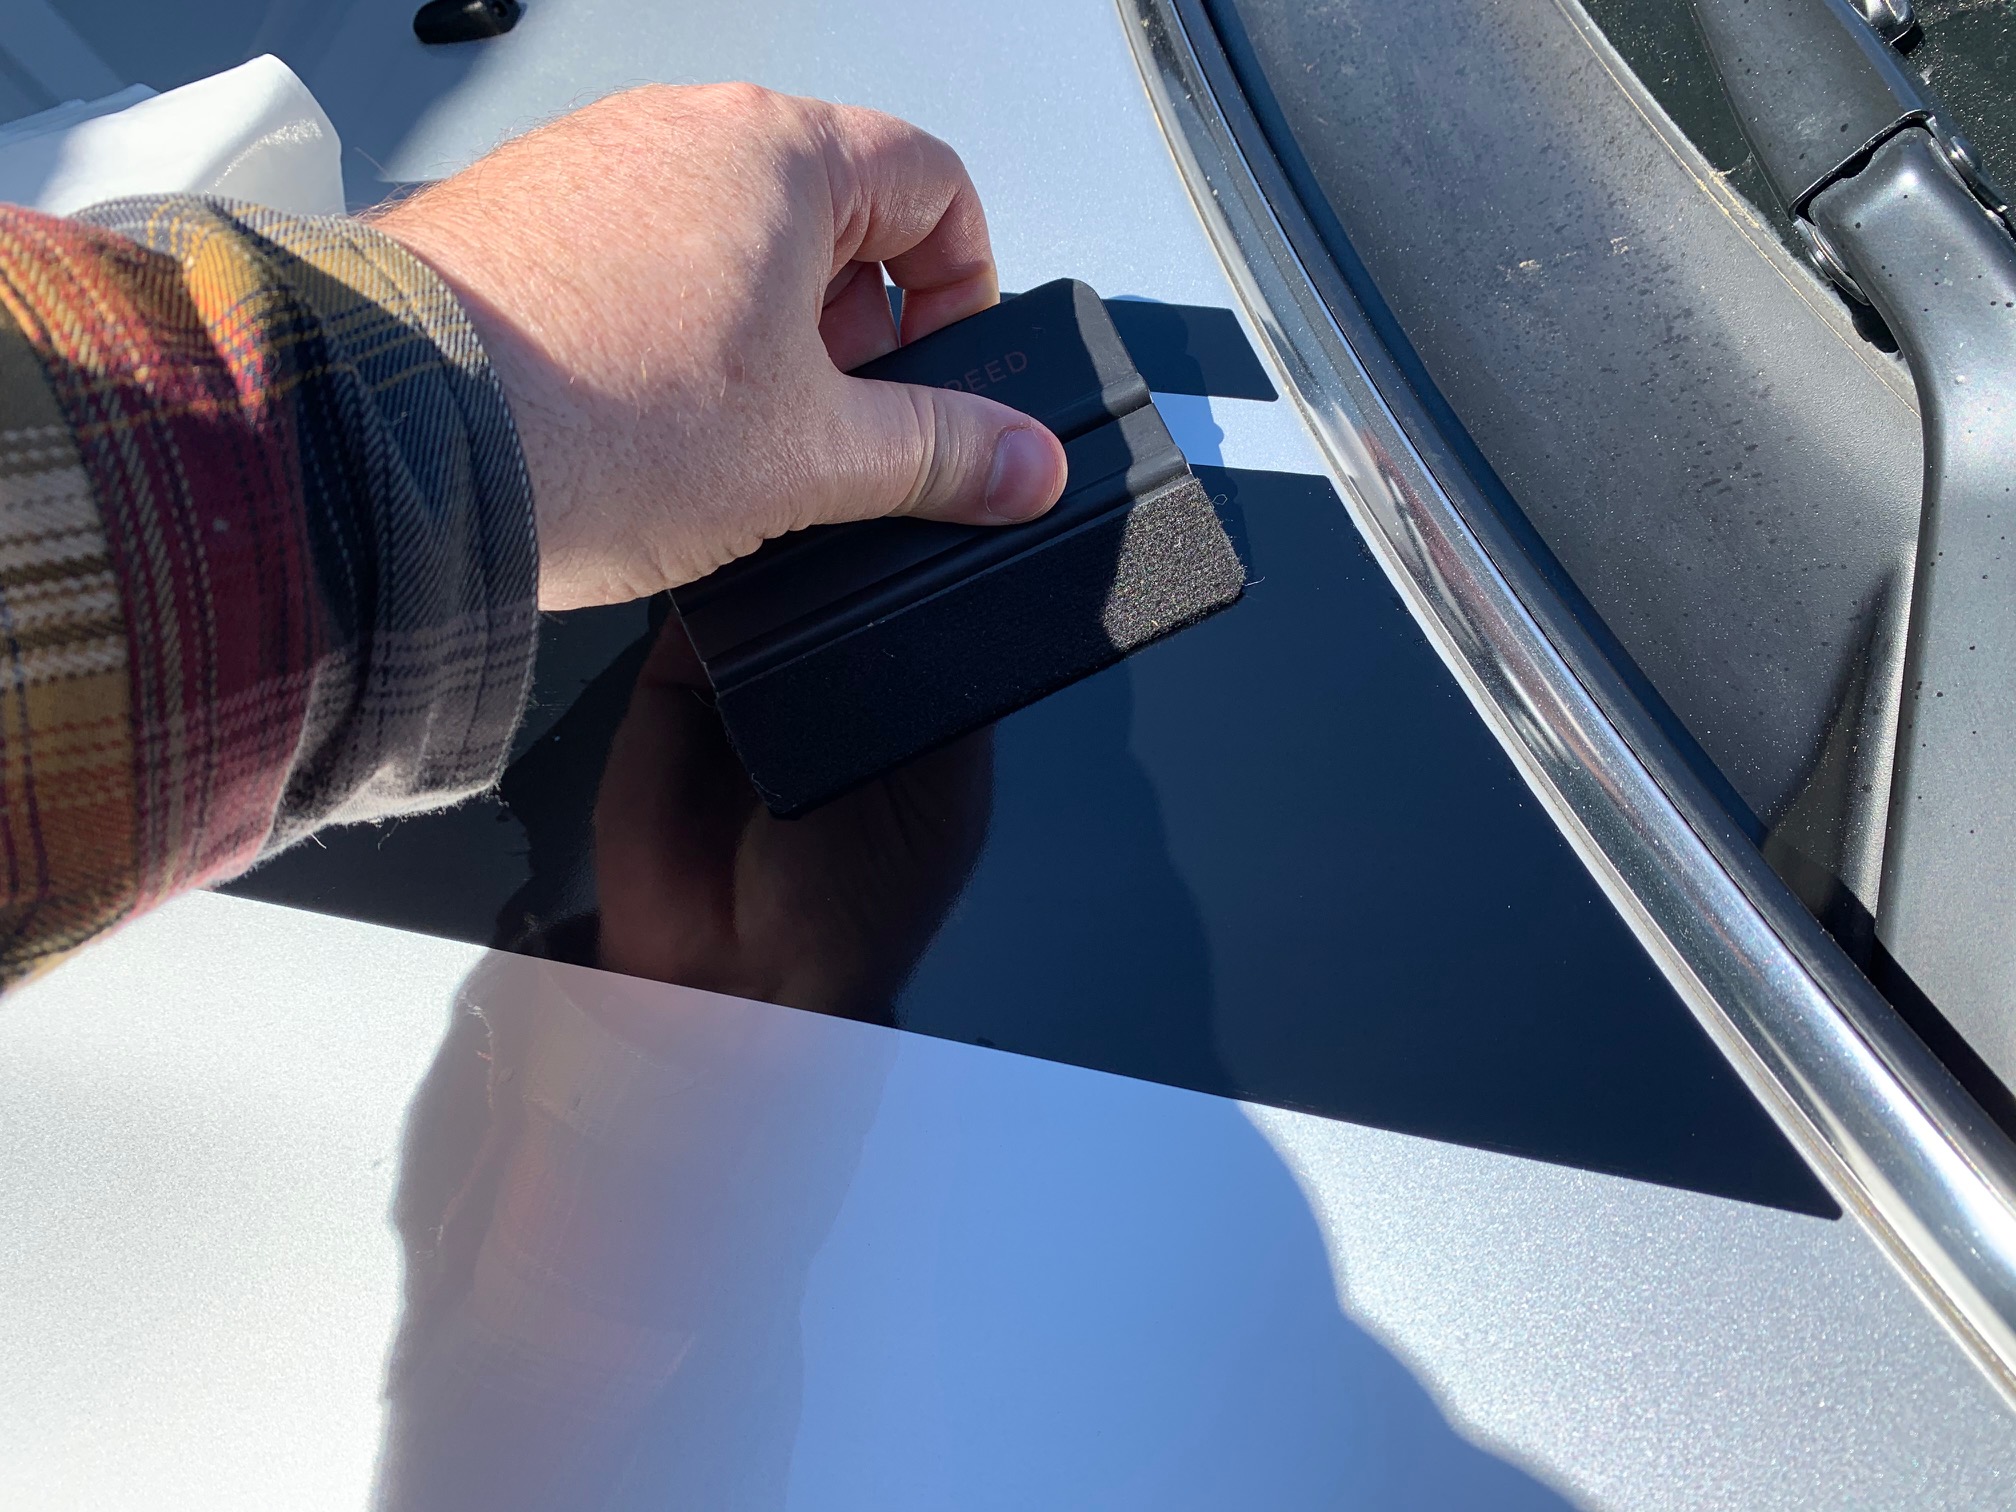
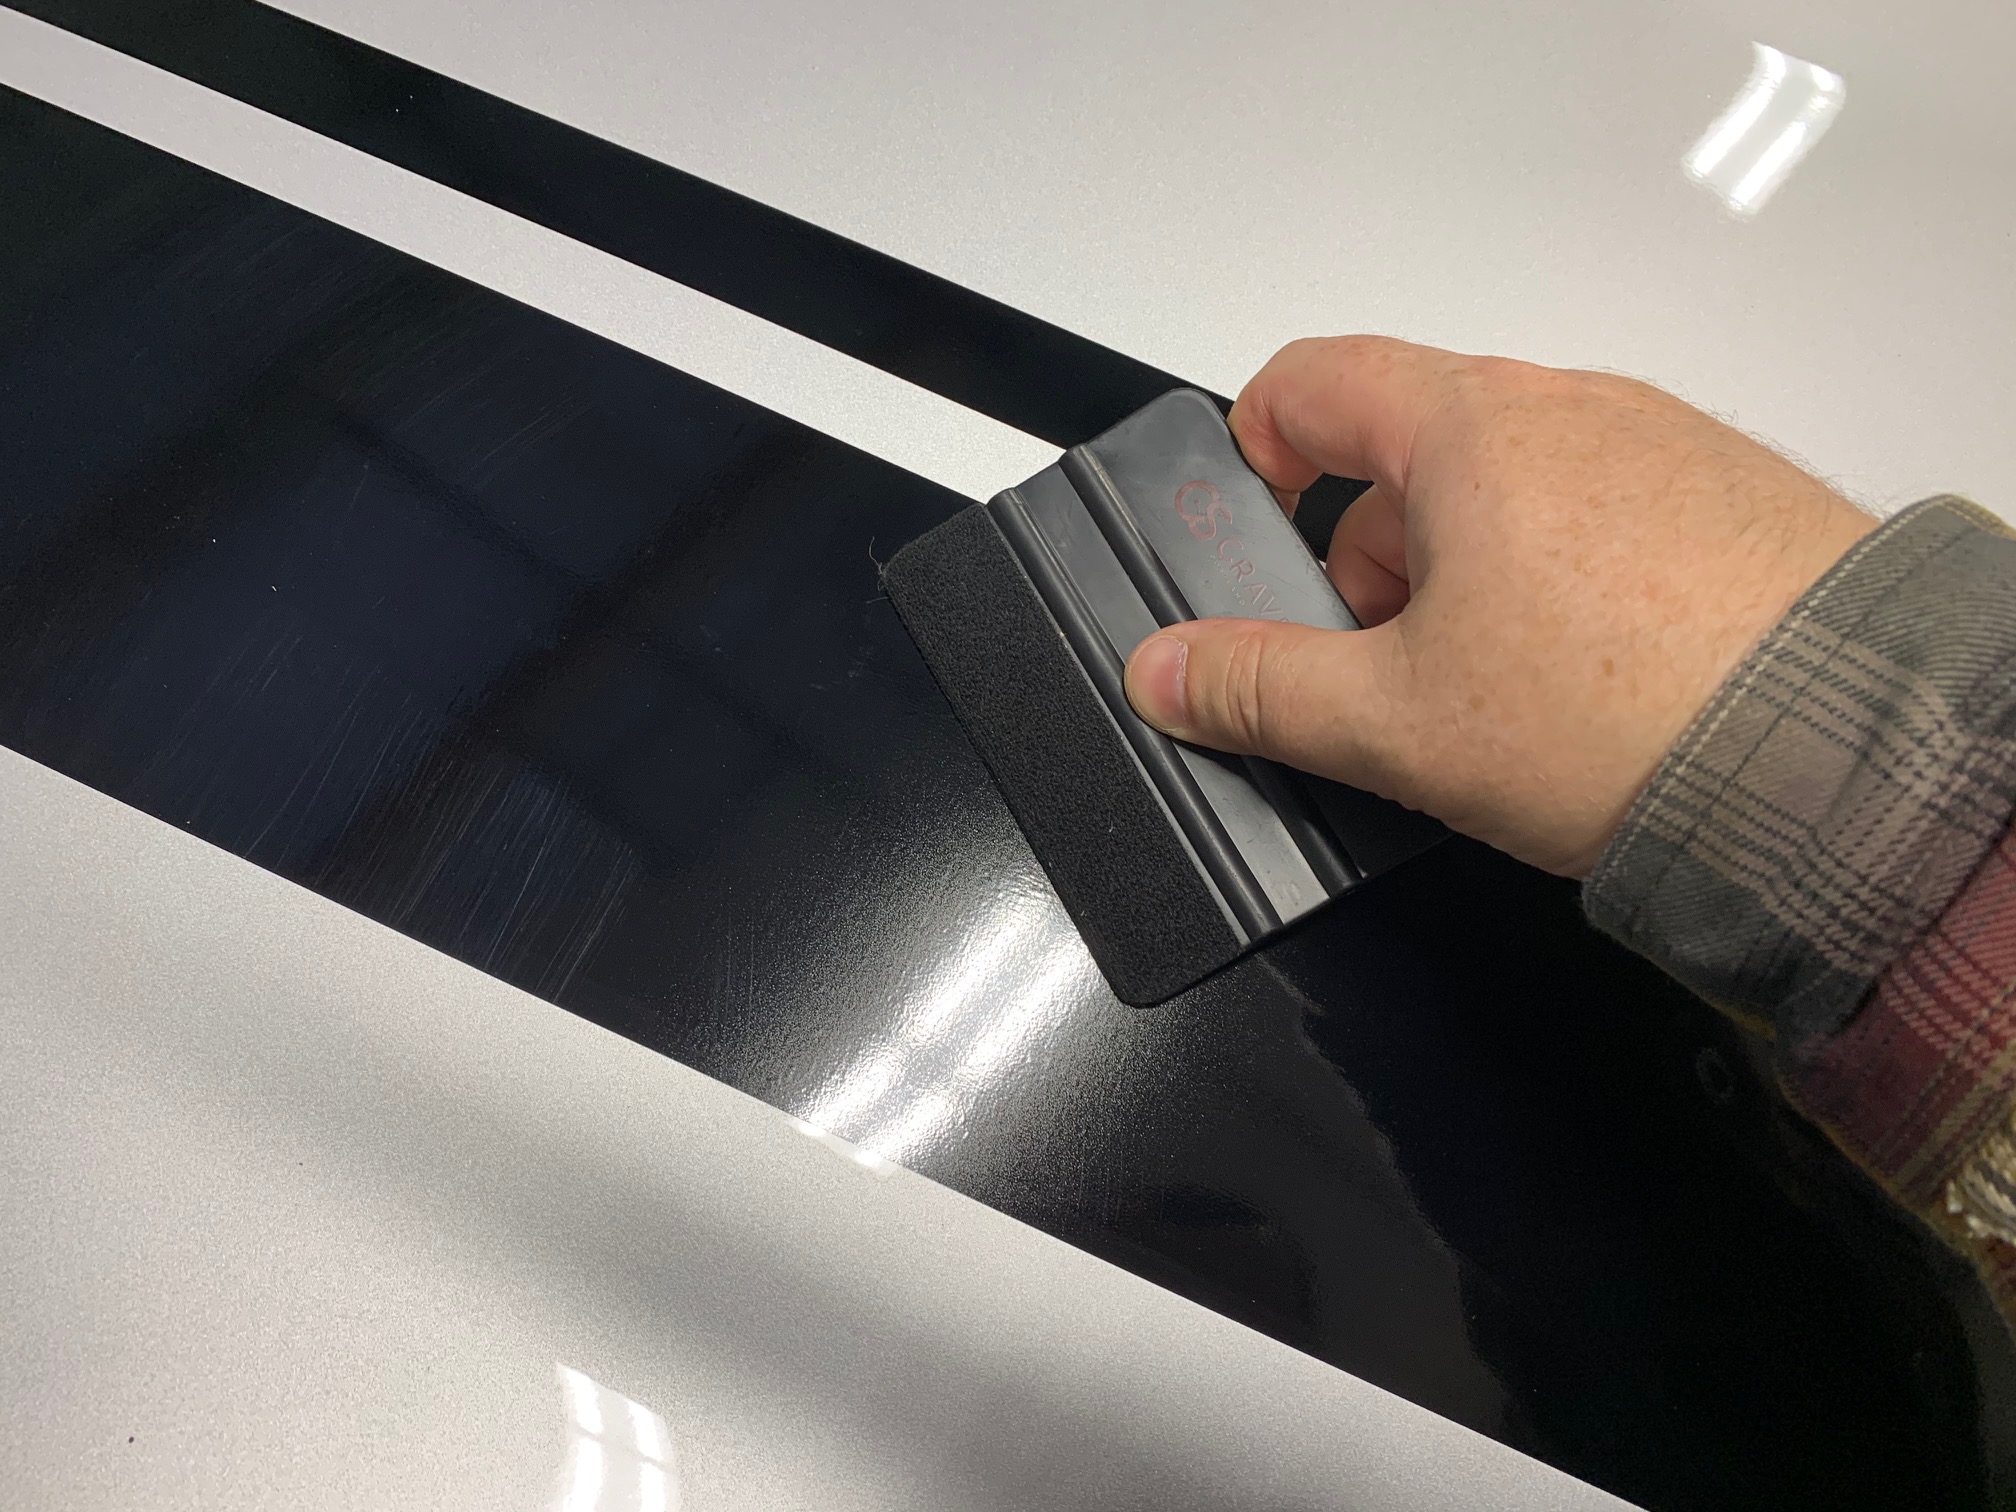
- Once you’re pleased with its positioning, start from the middle and gently squeegee the soap/water solution out from under the decal. Use the soft, lint-free cloth to clean up any excess solution while you work the decal down. Use the hard plastic edge of the squeegee on the transfer paper, but once you peel the transfer paper off, to avoid any scratching of the vinyl only use the microfiber edge.
- Once you’ve thoroughly gone over the first decal a couple times, give it a rest and proceed with the other side. This will allow the solution to evaporate a little bit and assist with adhesion before peeling the transfer paper off.
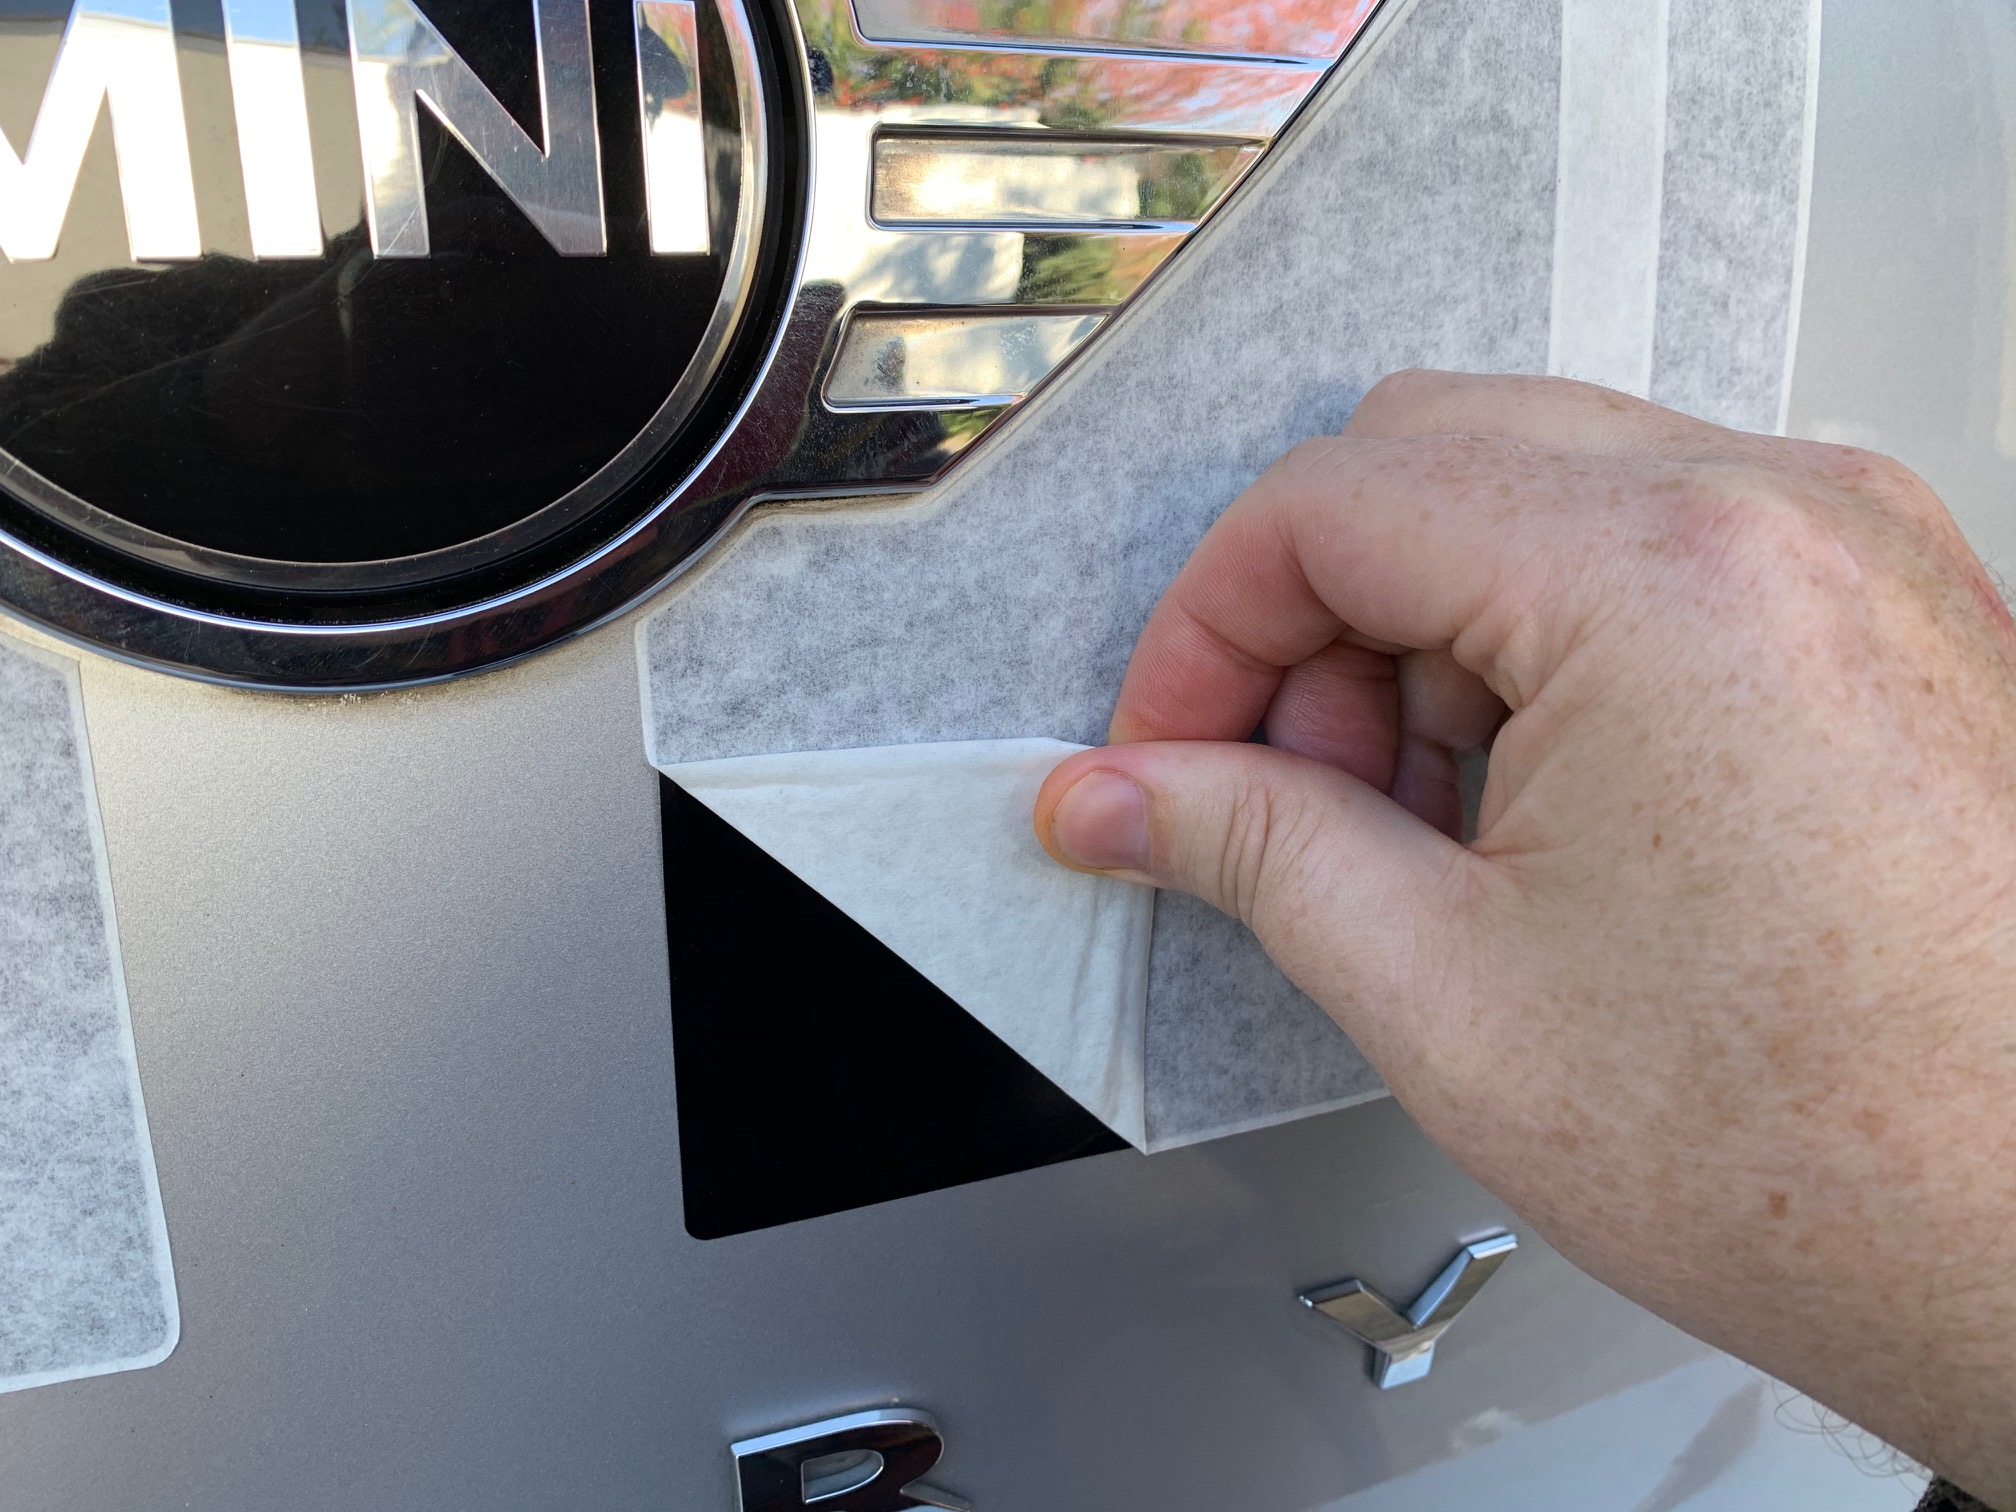
- Ok.. you’ve fully squeegeed both decals down. Starting at one end, gently peel the transfer paper back upon itself to facilitate separation of the vinyl from the paper. If the decal wants to come up with the paper, use the soft-side of the squeegee to press it back down again. Don’t worry too much about any air bubbles or creases at this time. You can address those once the transfer paper is completely removed.
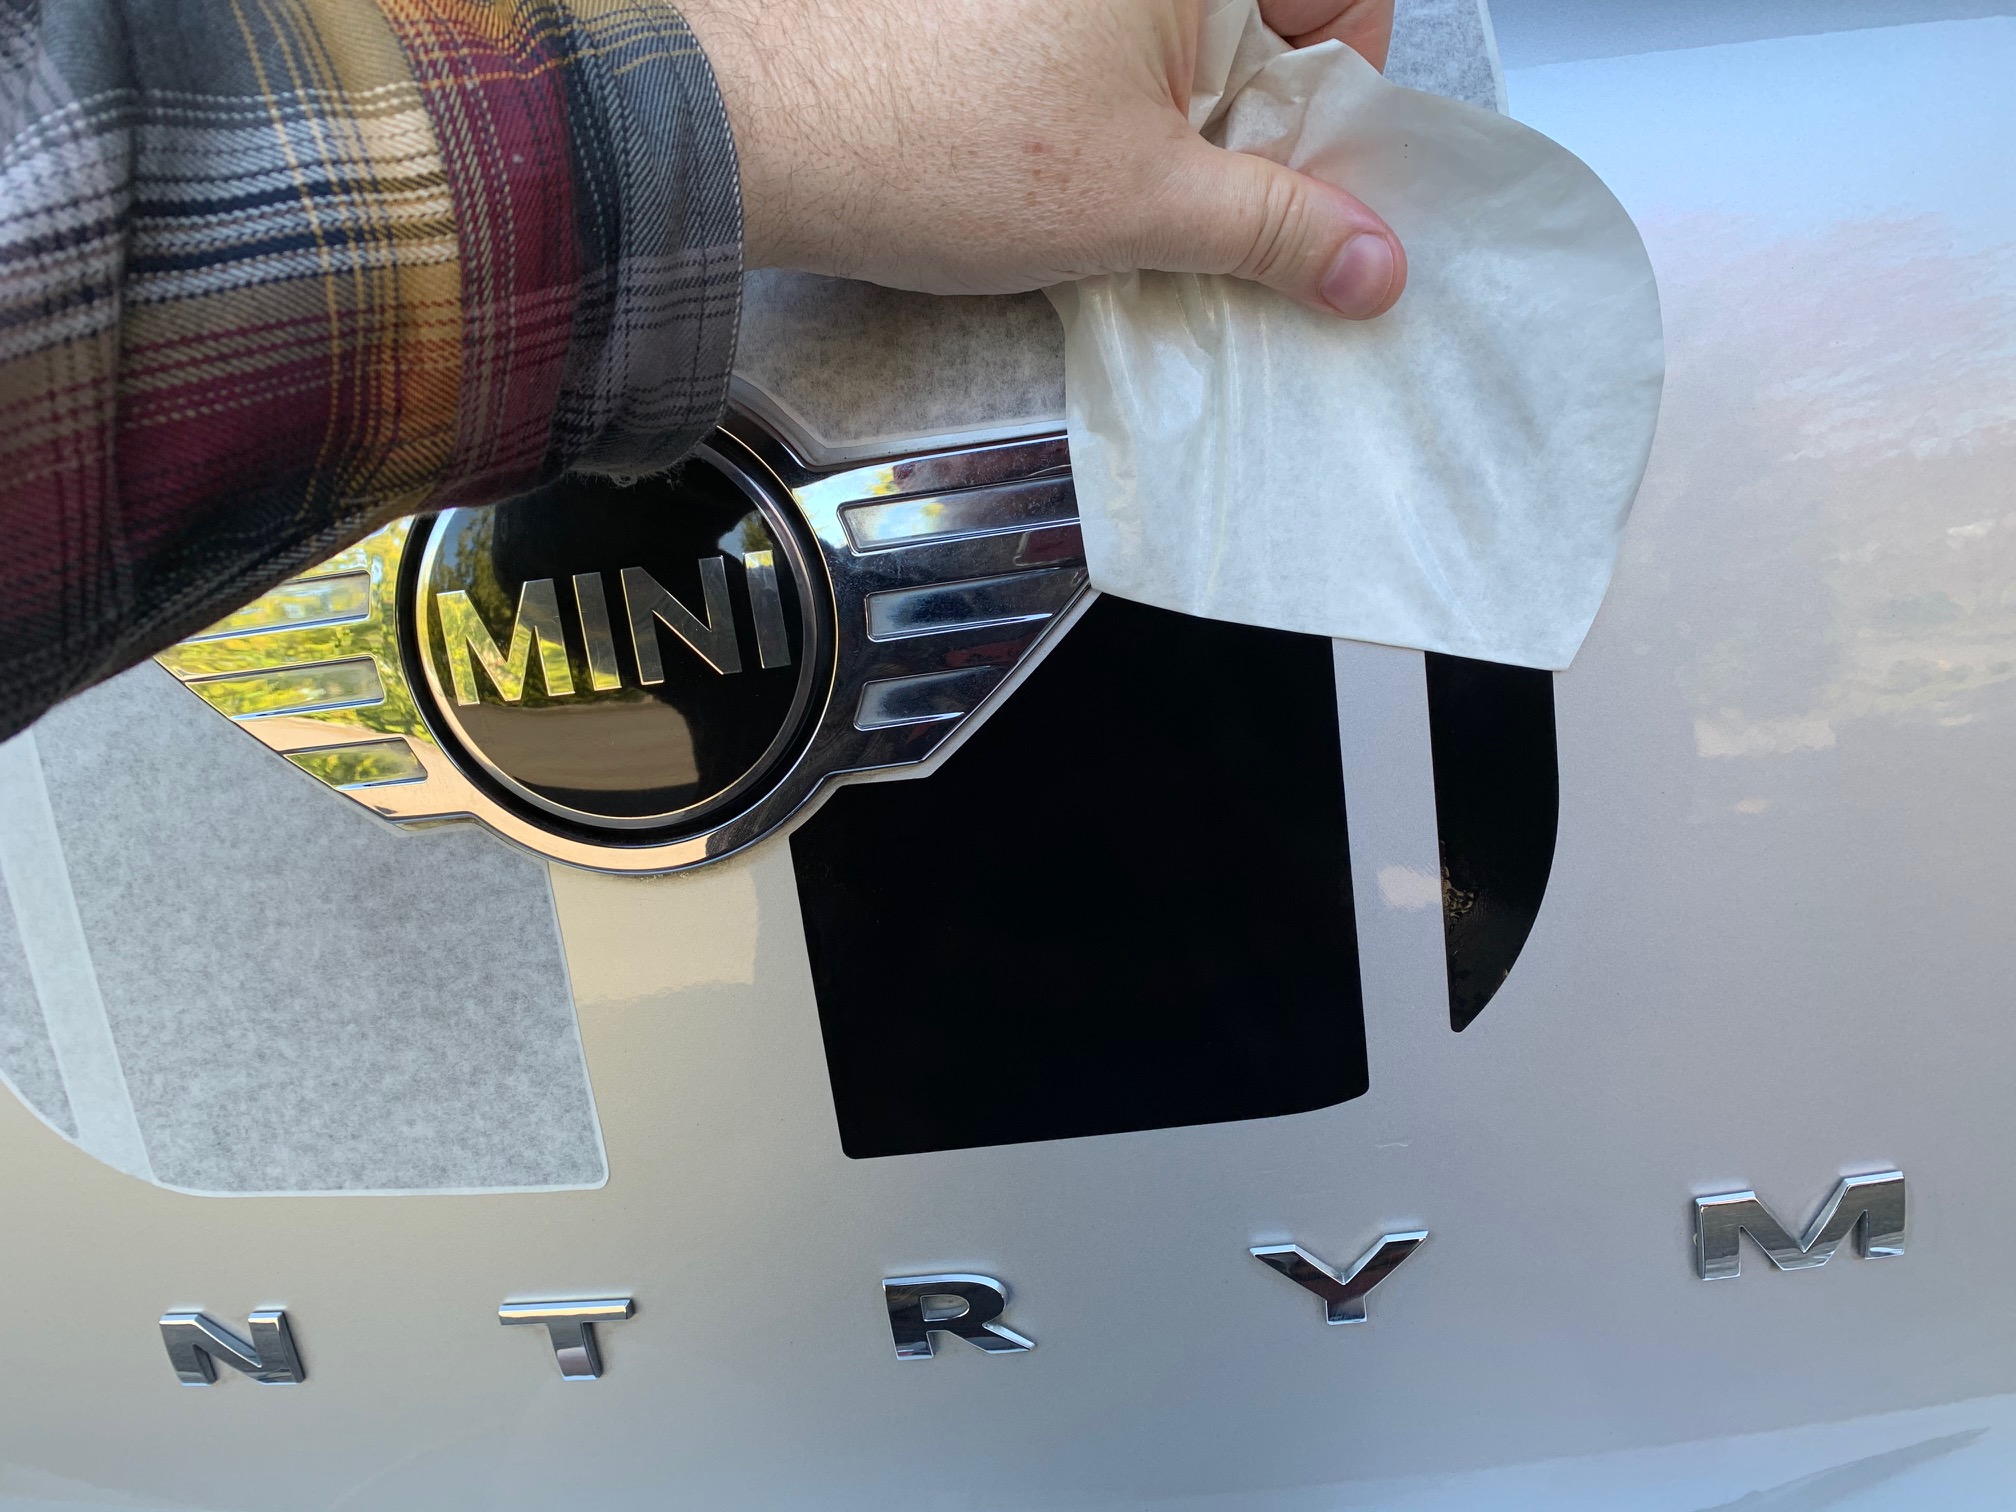
- Once you have the transfer paper completely removed, inspect the decal for any creases or solution bubbles. In all likelihood you’re probably going to have bubbles to some extent that will need attention. Use the microfiber side of the squeegee to work the bubbles to the edge of the decal and then soak up the solution with the soft, lint-free cloth.
- For pesky bubbles that don’t want to slide to the edge, try to combine them by pushing them toward one another and then piercing the vinyl with your x-acto knife. You should then be able to squeegee the solution out through this tiny hole. Any minor bubbles or surface imperfections that you can’t seem to eliminate should disappear over the next couple of weeks as the solution evaporates and the vinyl decal shrinks a wee bit. Leaving the car exposed in the sun will help speed up this process.
Clean Boot Surface
Measure the Stripe Layout

Prepare the Boot Stripe Decals
Apply the Boot Stripes
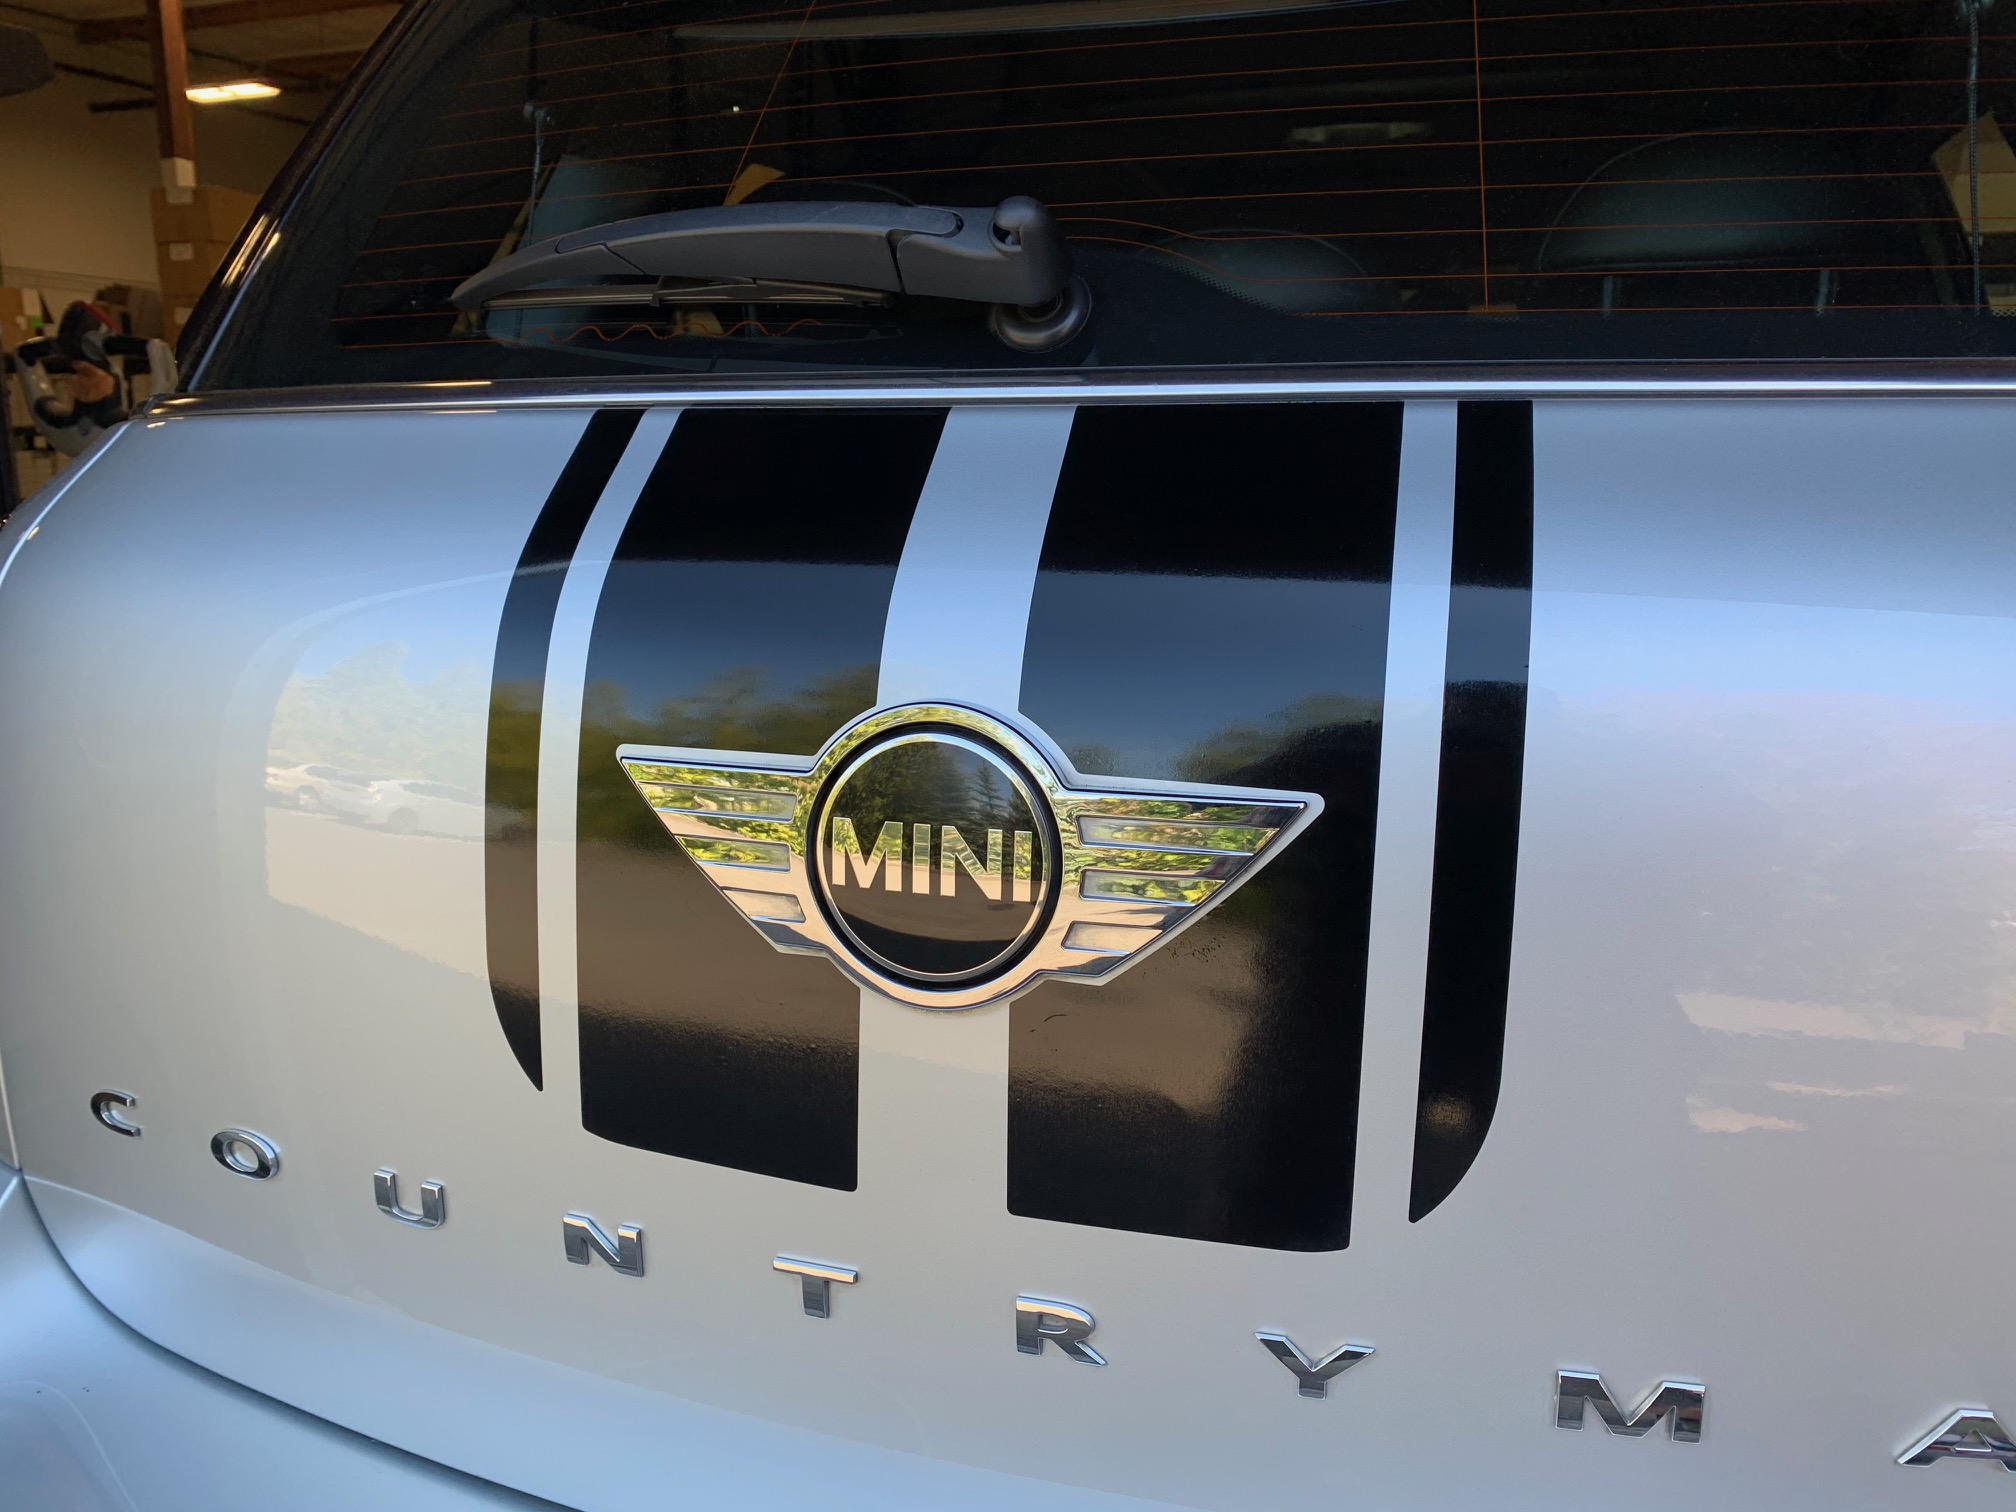
Congratulations… your install is complete! Stand back and admire your handiwork!