THANK YOU
for purchasing the 2016 And Newer MX-5 3pc Pulley Kit from CravenSpeed. This product is made from the highest grade materials, and is guaranteed to be free from defects.
You can buy our
CravenSpeed Lightweight Pulley Kit for ND MX-5 Miata here
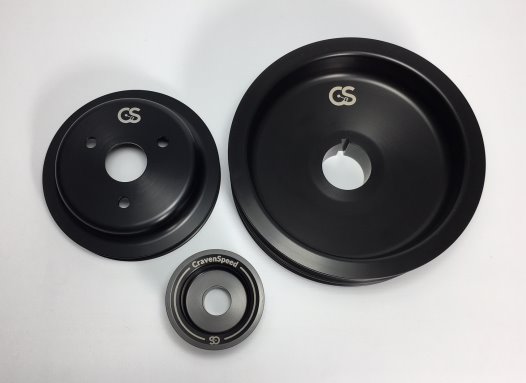
Parts Included:
-
1x Crankshaft Pulley
-
1x Water Pump Pulley
-
1x Alternator Pulley
Tools Required:
-
Ratchet wrench and sockets: 8mm 10mm 12mm 17mm 21mm 24mm
-
Various lengths of socket extensions
-
Impact wrench
-
Torque wrench (capable of 80 ft-lbs)
-
Torque wrench (capable of in-lbs)
-
Breaker bar
-
Shop rag
NOTE:
This procedure is fairly straightforward, but does require some measure of mechanical aptitude. If you are not confident in your abilities, please seek out a qualified mechanic or friend to assist you.
Let's get started
Remove the Belts
-
Park your vehicle in a clean and well-lit area, Put the car in neutral, set the parking brake and pop the hood. It’s always a good idea to disconnect the negative battery terminal prior to working under the hood, so go ahead and do that now.

-
To access the pulleys we’ll need to remove the airbox assembly. Utilize your 10mm socket wrench and loosen the hose clamp at the throttle body and the mounting tab just to the left of the coolant overflow tank. Slip off the various hoses that will facilitate this removal. Lastly, disconnect the plug at the MAF sensor. Unclip the airbox lid and lift it up and out. The wiring for the MAF sensor has a clip mount attached to the airbox lid. Disconnect this to lift the airbox lid completely off the engine. The base of the airbox is attached by a couple of detents on the subframe. Just grasp the sides of the airbox, give a sharp tug upwards and the assembly should disconnect itself. You’ll need to finesse the intake tube on the left side a bit, but the unit should lift out now without too much trouble.
-
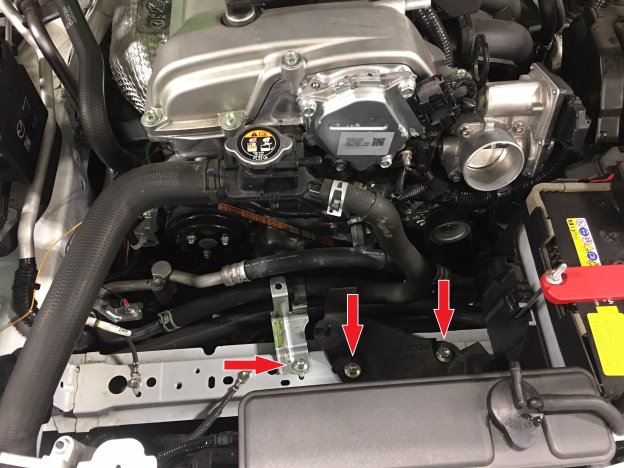
Once the airbox is out you’ll see a couple brackets attached to the subframe. A silver metal one and a black plastic one… take ‘em out. Silver one is attached with a 10mm screw and the black plastic one has 12mm screws. The silver one also has a plastic clip attached to a hose. Disconnect it to finish removing the bracket.

-
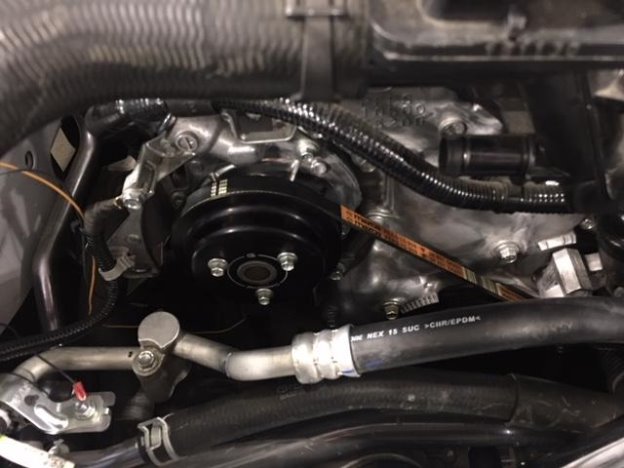
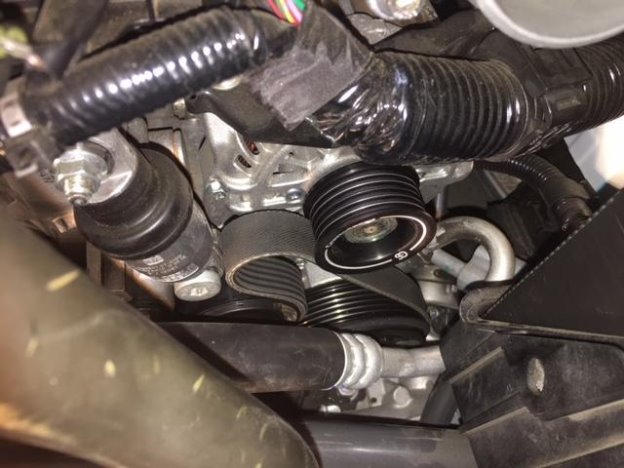
We’ll be removing the main belt first (wider of the two), so locate the belt tensioner assembly that is just above and to the right of the crankshaft pulley. There is a 17mm hex casted onto the body of the tensioner assembly. Utilize your 17mm socket with a long handled ratchet and turn the hex counter-clockwise, taking the tension off of the main belt. You should now be able to slip the main belt off the alternator pulley and remove it from the remaining pulleys. Go ahead and allow the belt tensioner to pivot back into place for the time being.
Alternator Pulley
-
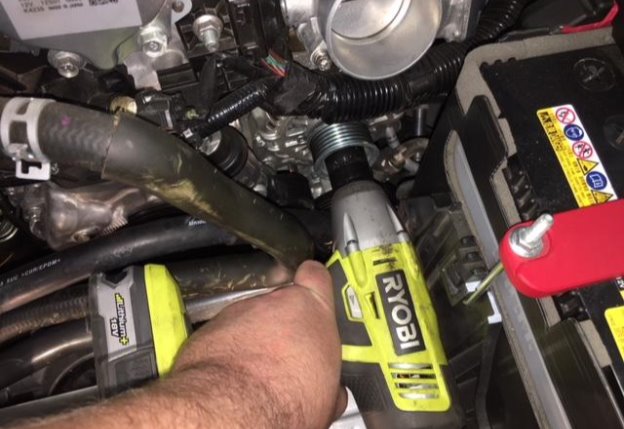
The best (and perhaps only) way to remove the OEM alternator pulley is with an impact wrench because you’ll need the quick spooling and hammer function to loosen the 24mm nut. A few quick blips of the impact wrench and the nut should come loose. The pulley itself should slip off without too much effort.
-
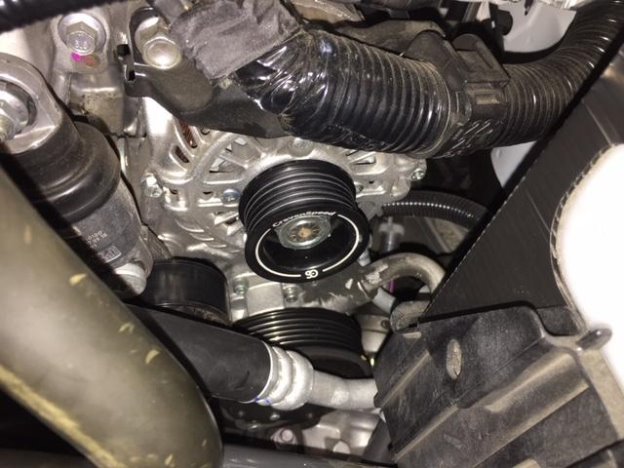
Before installing the CravenSpeed alternator pulley, inspect the mating surfaces of the alternator shaft and the bore of the pulley to ensure there is nothing that may affect fitment. Place the CravenSpeed alternator pulley onto the alternator shaft and spin the nut back on by hand as far as it will go. Use the impact wrench once more to set the nut into place. Give it a few good blips to tighten it back to 73-101 ft lbs range.
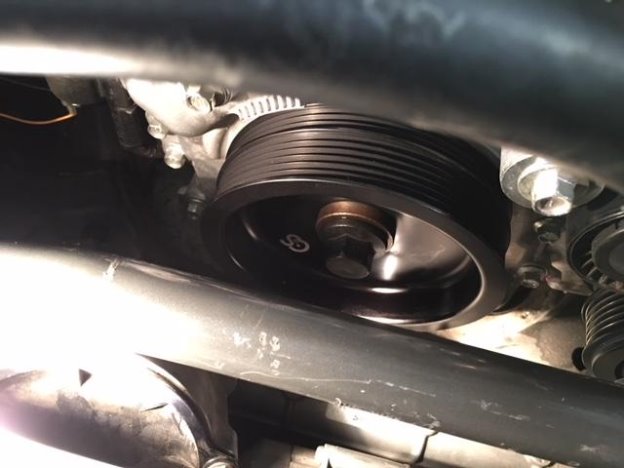
Water Pump Pulley
-
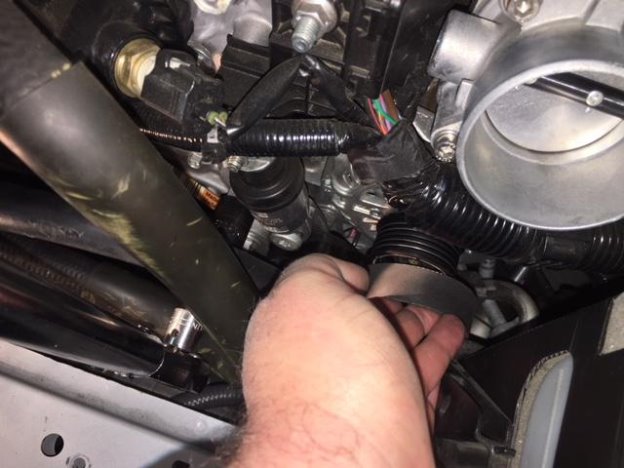
The thinner of the two belts stretches a bit to assist in removal and installation. Take a clean shop rag and loop it through the lower side of the belt just under the OEM water pump pulley.
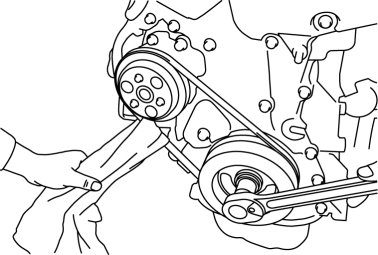
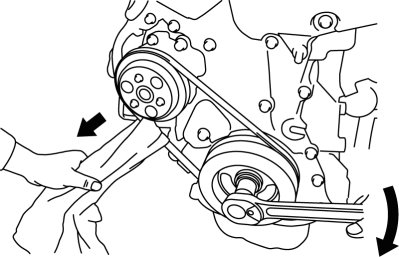
-
Place a long-handled ratchet wrench with a 21mm socket onto the crankshaft bolt and while cranking the pulley clockwise, pull the rag-wrapped belt toward the front of the vehicle and off of the water pump pulley.
-
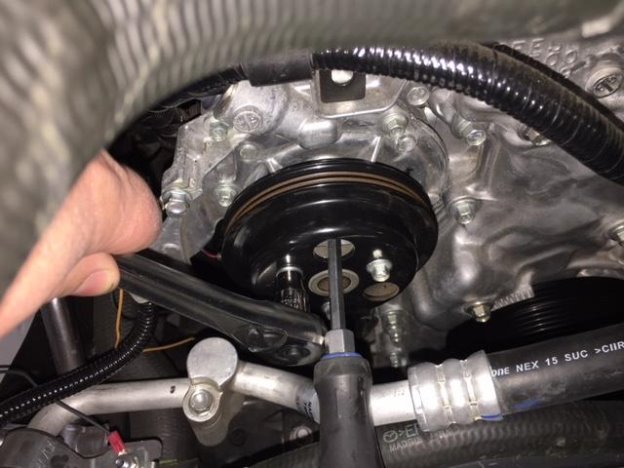
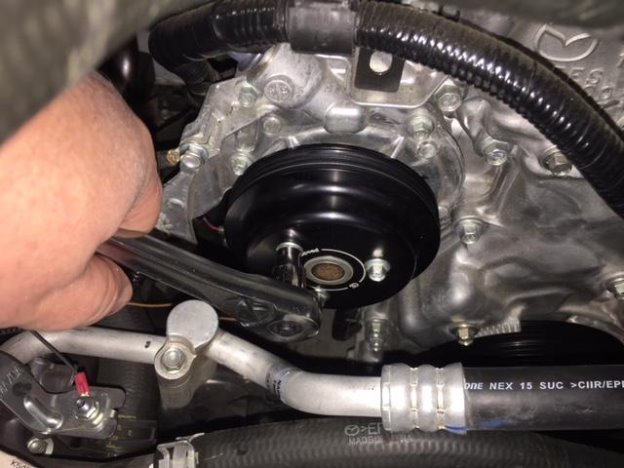
To remove the OEM water pump pulley, place a screwdriver through one of the (3) three holes in the face of the pulley and lock it into place against the water pump housing. Use a ratchet wrench with an 8mm socket to remove the (3) three screws.
-
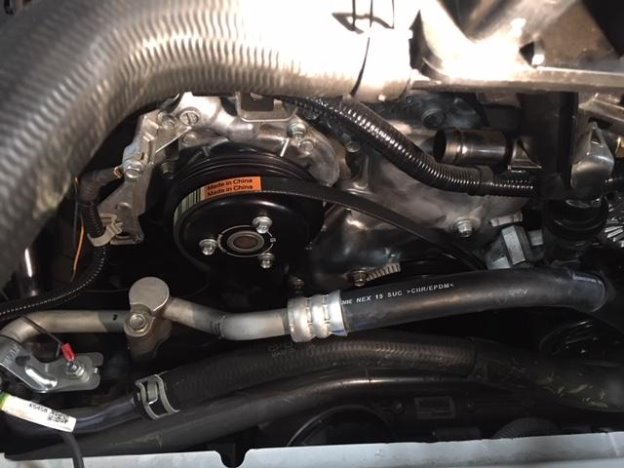
Set the CravenSpeed water pump pulley into place and thread the (3) three factory screws back into place. Hold the pulley with one hand and snug the screws down with your 8mm socket wrench. After you reinstall the belts you can go back and properly torque the water pump screws again to
71-97
in-lbs
(6-8 ft-lbs).
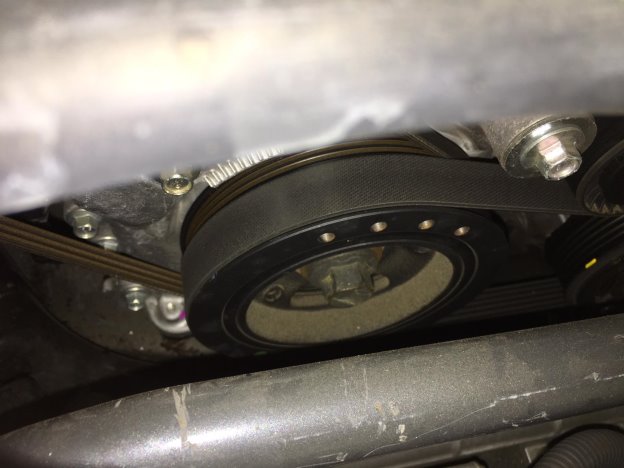
Crankshaft Pulley
-
Place the transmission in 6th gear (‘Park’ if automatic) and set the parking brake. The following procedure will try to overpower the parking brake, so if the car creeps while loosening the crankshaft bolt, have an assistant sit in the car and apply the brakes.
-
The crankshaft pulley bolt requires a 21mm socket along with a breaker bar of some sort. It is a regular-threaded bolt so we’ll be removing it counter-clockwise. Place the socket and breaker bar onto the crankshaft bolt and loosen the bolt. It may be on there pretty good, so keep at it and it’ll eventually loosen.
-
Once you have the crankshaft bolt/washer loosened, reach down and remove it by hand. Don’t drop it or you’ll be fishing it off the lower engine cover with a magnet or going under the car to retrieve it. Pull the factory crankshaft pulley off and set aside. It should come off without too much effort.
-
Use a flashlight and visually inspect the oil seal around the crankshaft to make sure it is still in place and in good condition. Confirm that the key on the crankshaft is still in place and take note of its orientation. Take the CravenSpeed crankshaft pulley and apply a thin film of clean motor oil to the inside bore and backside collar.
-
Line up the key way on the CravenSpeed crankshaft pulley with the key on the crankshaft and carefully install the pulley. Due to possible variance of tolerances, it may slip right on with no issues or it may be a fairly tight fit, so have patience and take your time. Once the pulley is installed onto the crankshaft as far as it will go, hand-thread on the 21mm bolt/washer then use your torque wrench to set it to
67-80 ft-lbs
.
Reinstall the Belts
NOTE:
Inspect your belts for wear or damage and if you’re unsure, go ahead and replace them now.
-
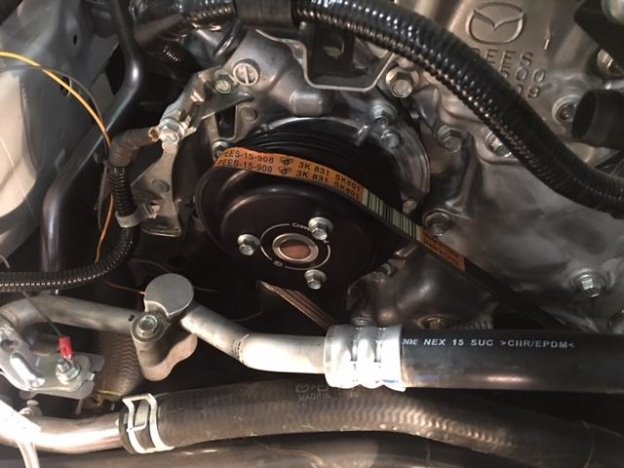
Place the thinner of the two belts back onto the crankshaft pulley and over the ‘shoulder’ portion of the water pump pulley. Ensure that the belt is seated correctly into the grooves of the crankshaft pulley then using your 21mm socket and wrench, turn the crankshaft clockwise while pushing the belt up and over the lip of the water pump pulley. Take precaution that you don’t pinch your fingers during the install. Go ahead and perform one last tightening of the water pump pulley screws now that the belt is holding it from turning.
71 - 97
in-lbs
(6 - 8 ft-lbs)
-
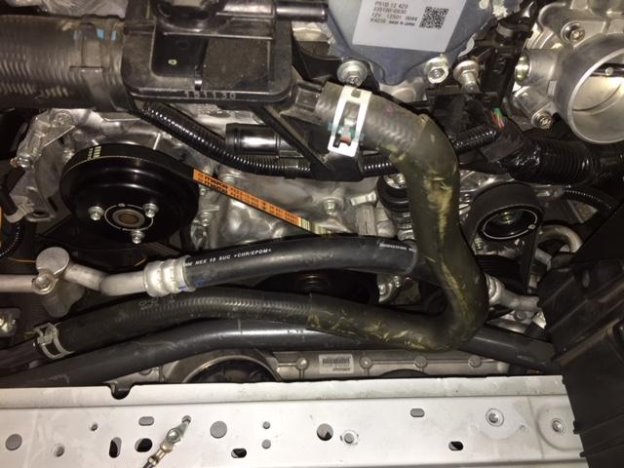
Place the main belt onto the grooves of the crankshaft pulley, around the a/c pulley and belt tensioner. Don’t place it around the alternator pulley just yet, but confirm that the belt is seated correctly into the other pulleys.
-
Use your 17mm socket and long-handled ratchet to once again take pressure off of the belt tensioner and allow you to loop the rest of the main belt up and over the alternator pulley. Ease the belt tensioner back into place and perform a final visual inspection of the belts to make sure nothing has shifted out of their grooves. Shine a flashlight and/or run your hand along them if you’re unsure.
-
Reinstall the various engine components in reverse order and reconnect the negative battery terminal. Ensure that no stray tools are left in and around the engine and go start your vehicle. While it’s running, shine a flashlight down and around the pulleys and visually confirm that the belts are running true and seated correctly. If everything is to your satisfaction, close the hood and go for a drive! You’re done!