null Skip to main content

Action Cam Grill Mount Install Guide

THANK YOU for purchasing The Action Cam Grill Mount from CravenSpeed. This product is made from the highest grade materials and is guaranteed to be free from defects.

You can buy an Action Cam Grill Mount for your car here

The completed installation of the Action Cam Bumper Mount

Parts Included:

  • Grill Mount Bracket
  • Action Cam Bracket
  • Action Cam Mount
  • M10 Flanged Screw
  • Serrated Washer
  • 1/4-20 Thumb Screw
*No actual action cam is included with this kit.

Tools Required:

  • Ratchet Wrench
  • 15mm socket
  • 5/32" Hex Driver

NOTE: This installation process is very easy, and should take around 5 minutes. Please read through the entire instructions before you begin.

Procedure

arrow-tip

Install the Grill Mount Bracket

  1. Visualize where you'd like to mount your action cam. Locate the two, 2" L stainless steel countersunk screws, install a black cone washers onto each of them, then place them through the oblong holes on the grill mounting bracket.
  2. The completed installation of the Action Cam Bumper Mount The completed installation of the Action Cam Bumper Mount
  3. Thread on the two (2) aluminum J-hook nuts just enough so that they're flush with the bottom of the stainless screws.
  4. If your grill mesh is rather tight, then place the 'toes' of the J-hook nuts in through the grill first and pivot them into place.
  5. With the J-hook nuts set where they need to be, apply slight pressure to them by pulling on the grill bracket while evenly tightening them against the grill. This keeps them from spinning while you're tightening the screws.

Install the Action Cam Bracket

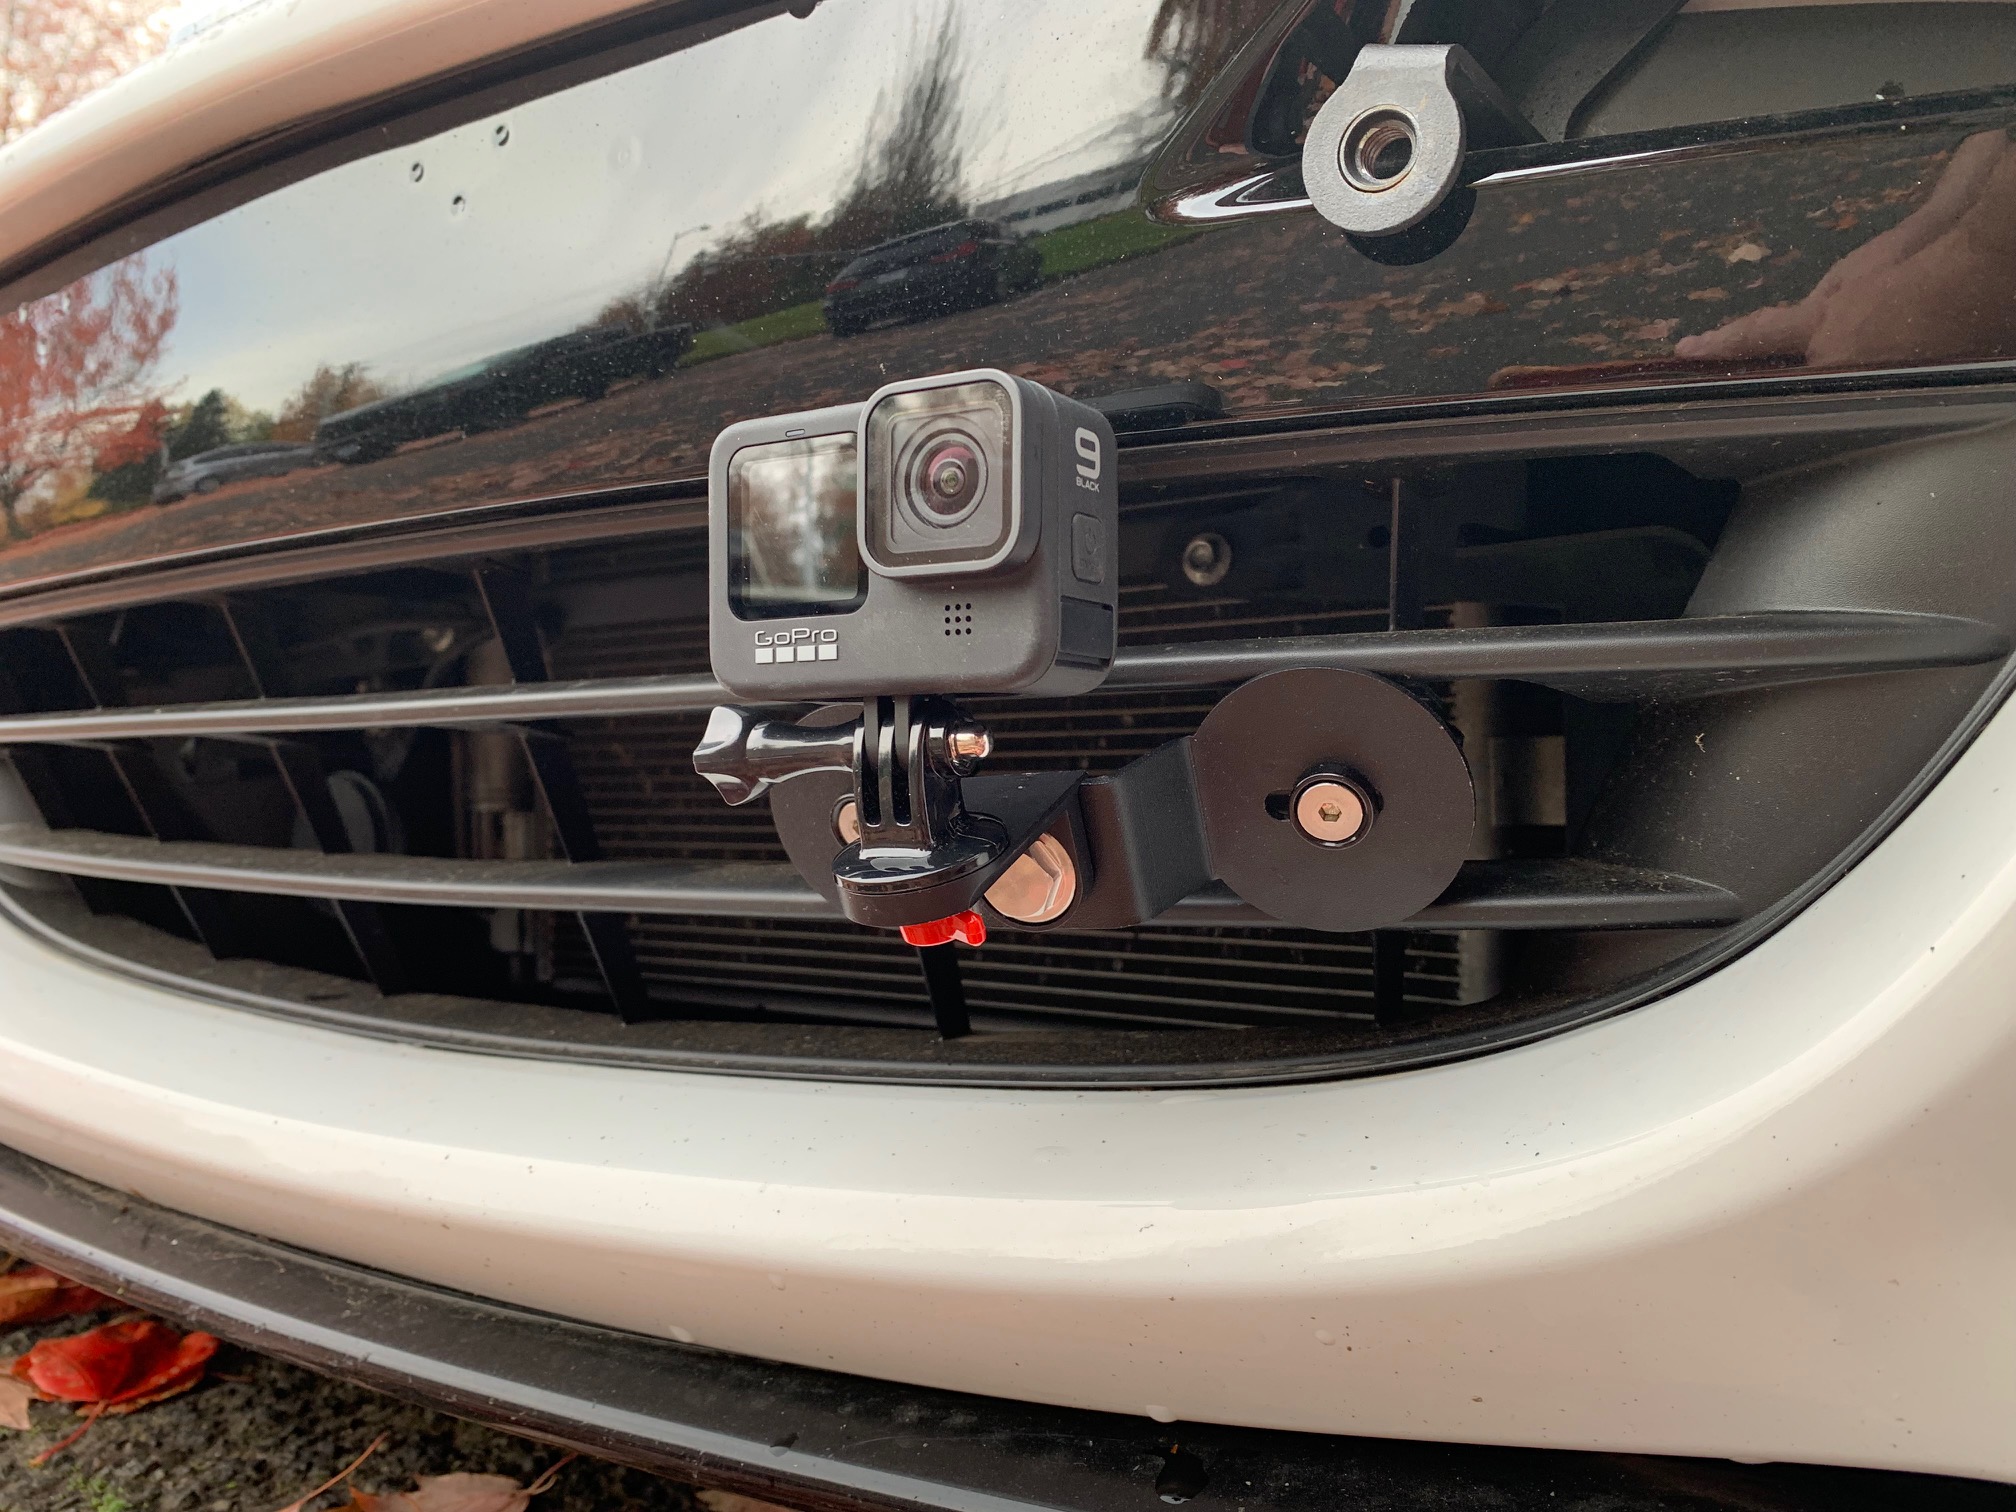
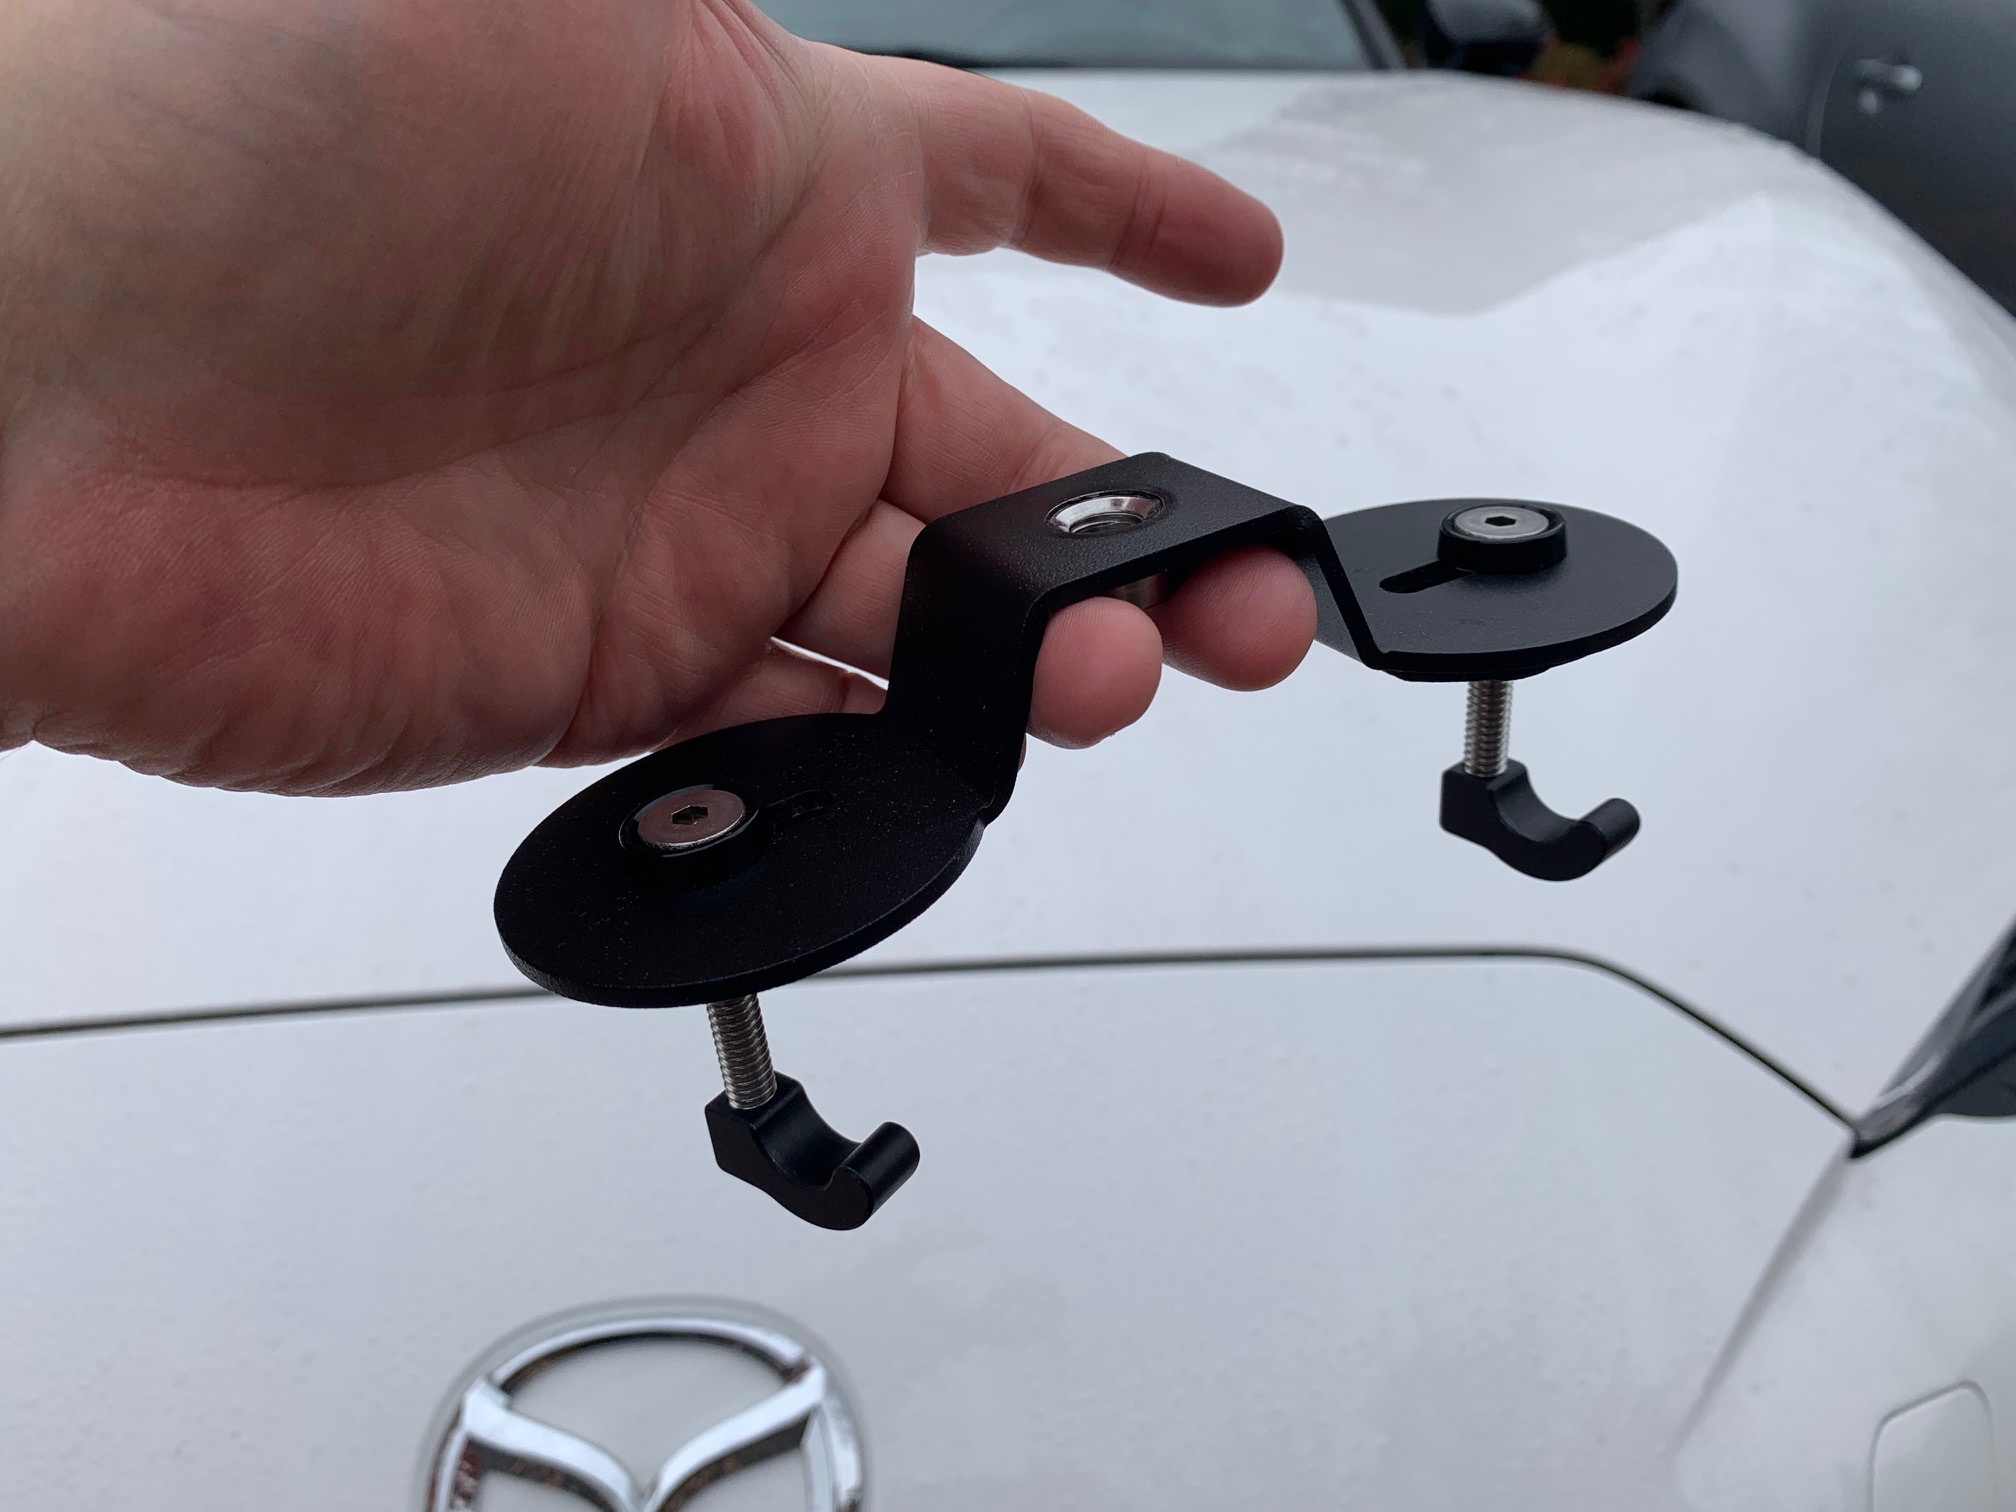
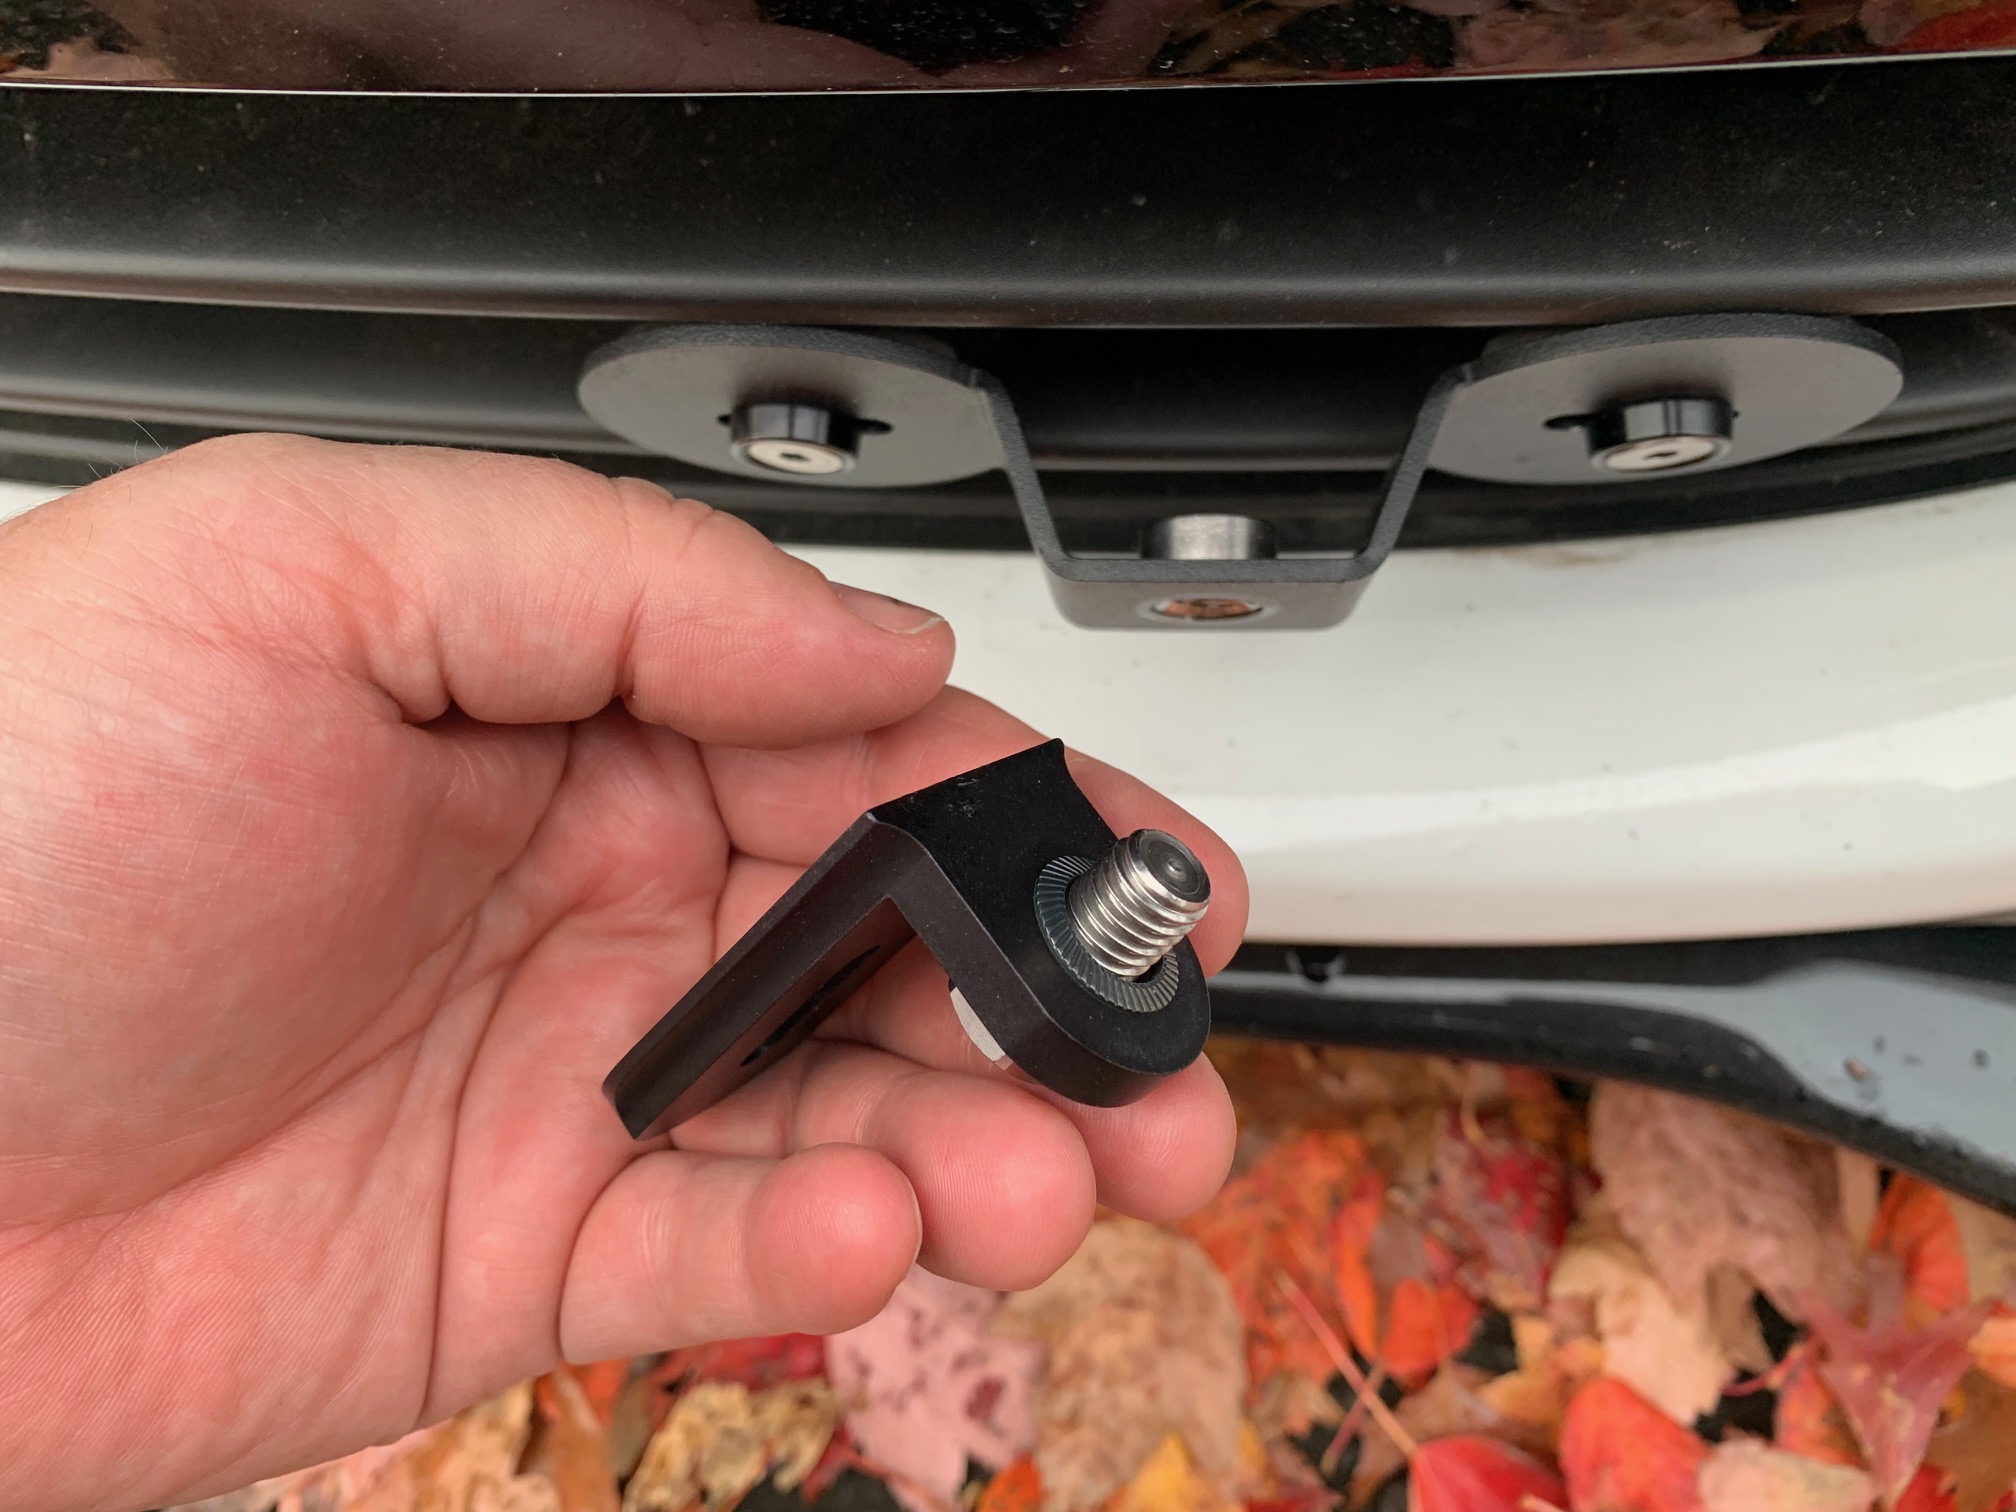
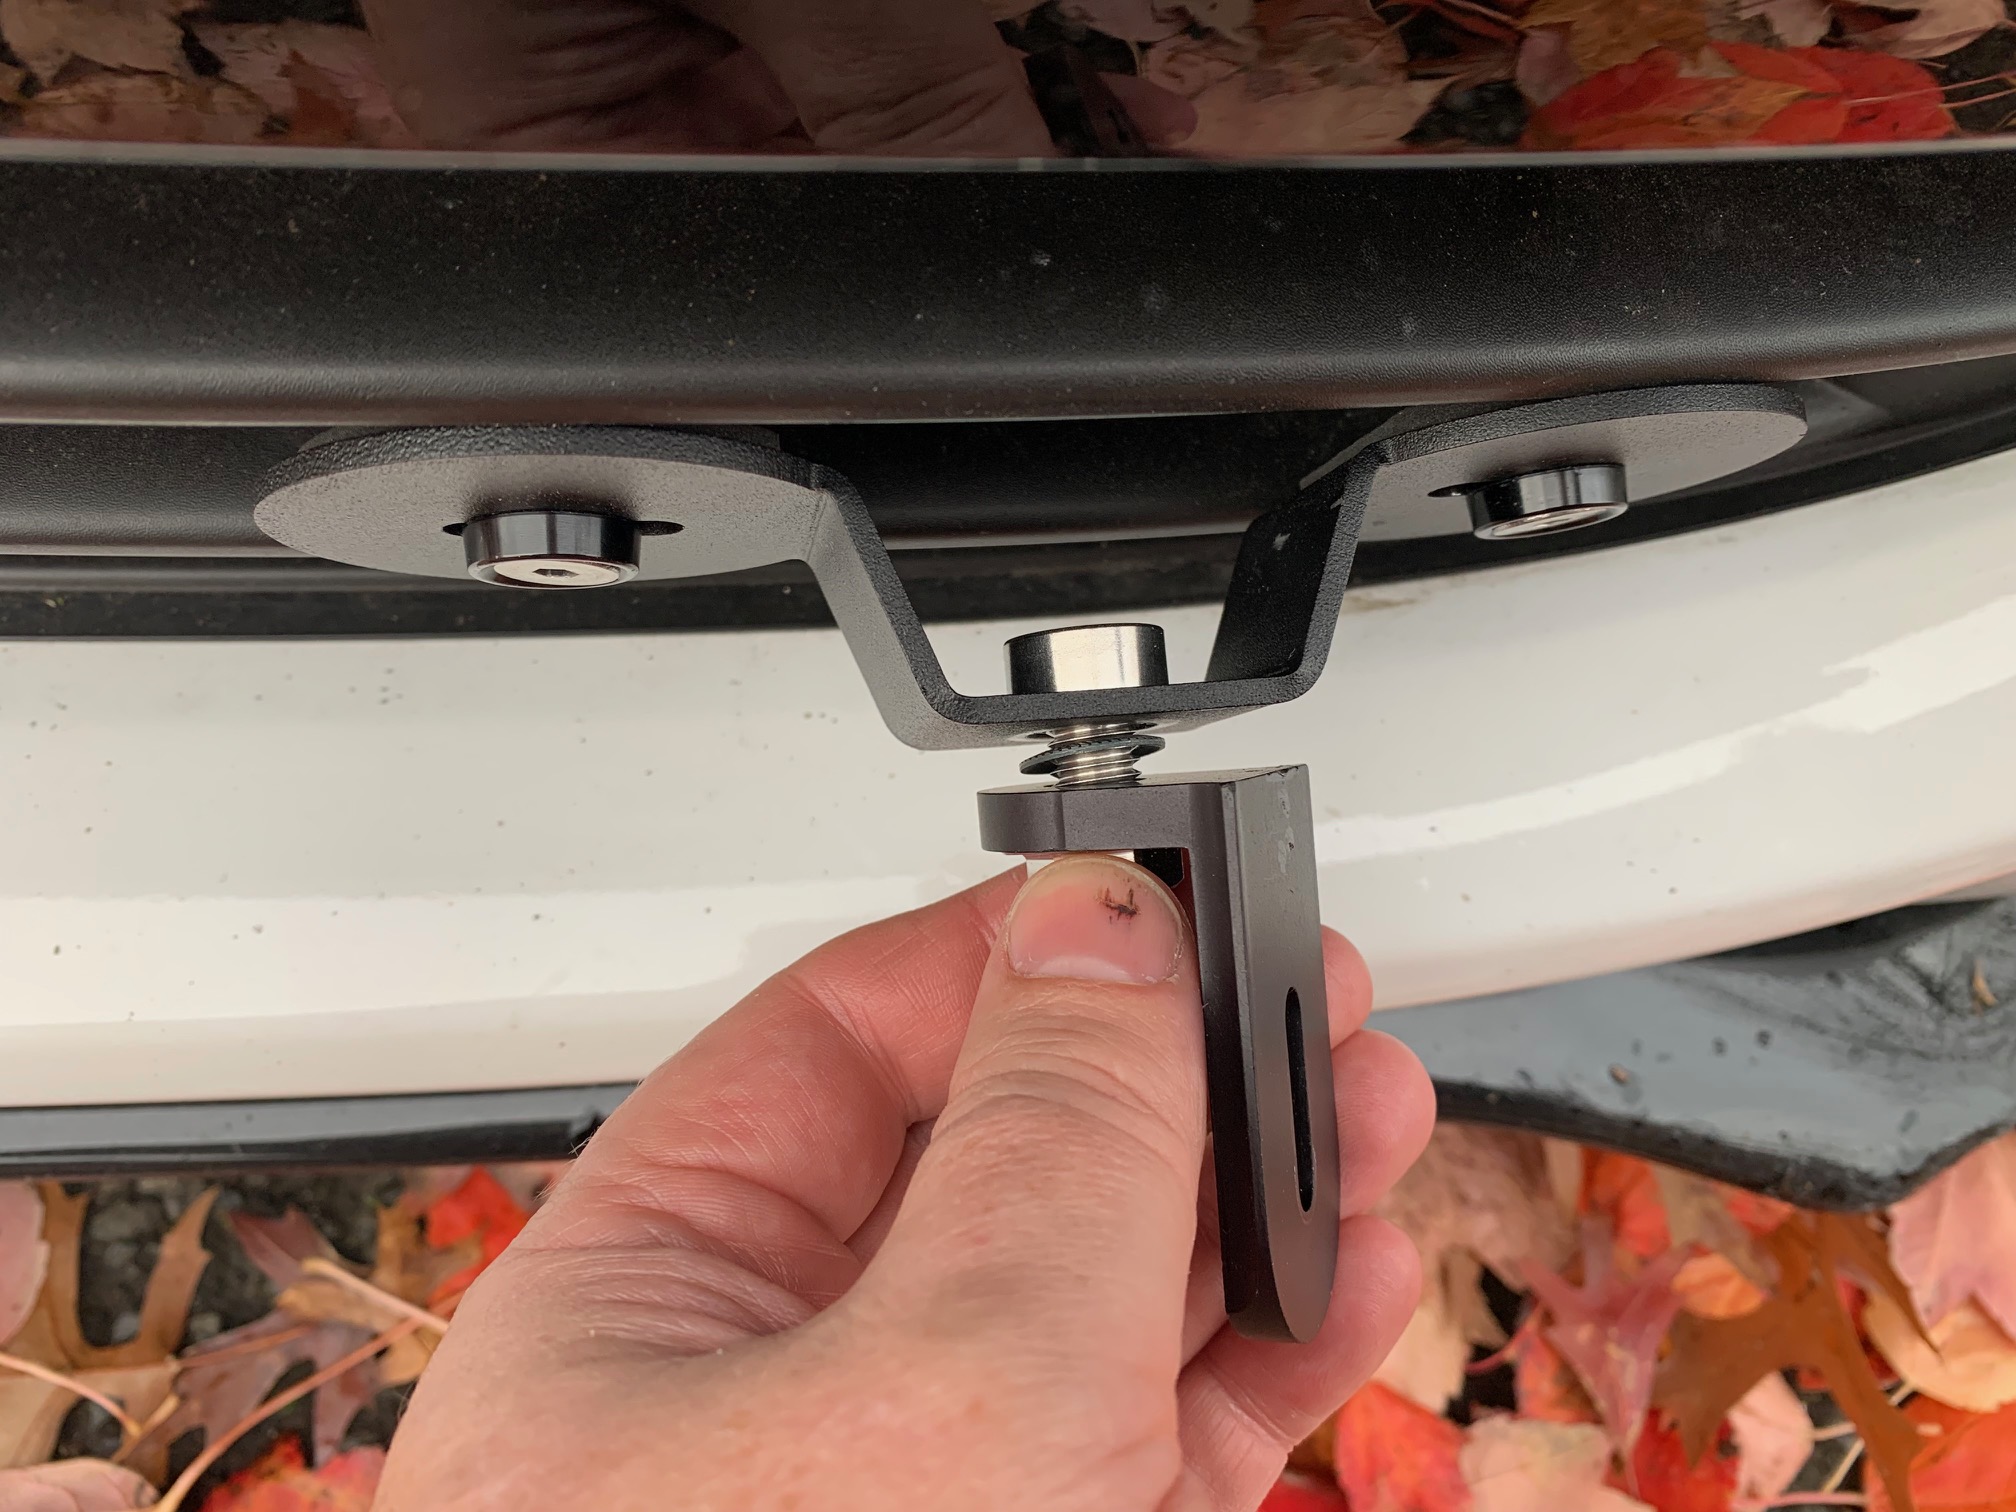
    To install the Action Cam Bracket, place the M10 flange screw through the bracket then place the serrated washer over the bolt, as shown. Level the mounting surface of the bracket and tighten the M10 screw onto the hex stud with your 15mm socket wrench.

    The completed installation of the Action Cam Bumper Mount The completed installation of the Action Cam Bumper Mount The completed installation of the Action Cam Bumper Mount

    Install the Action Cam Mount

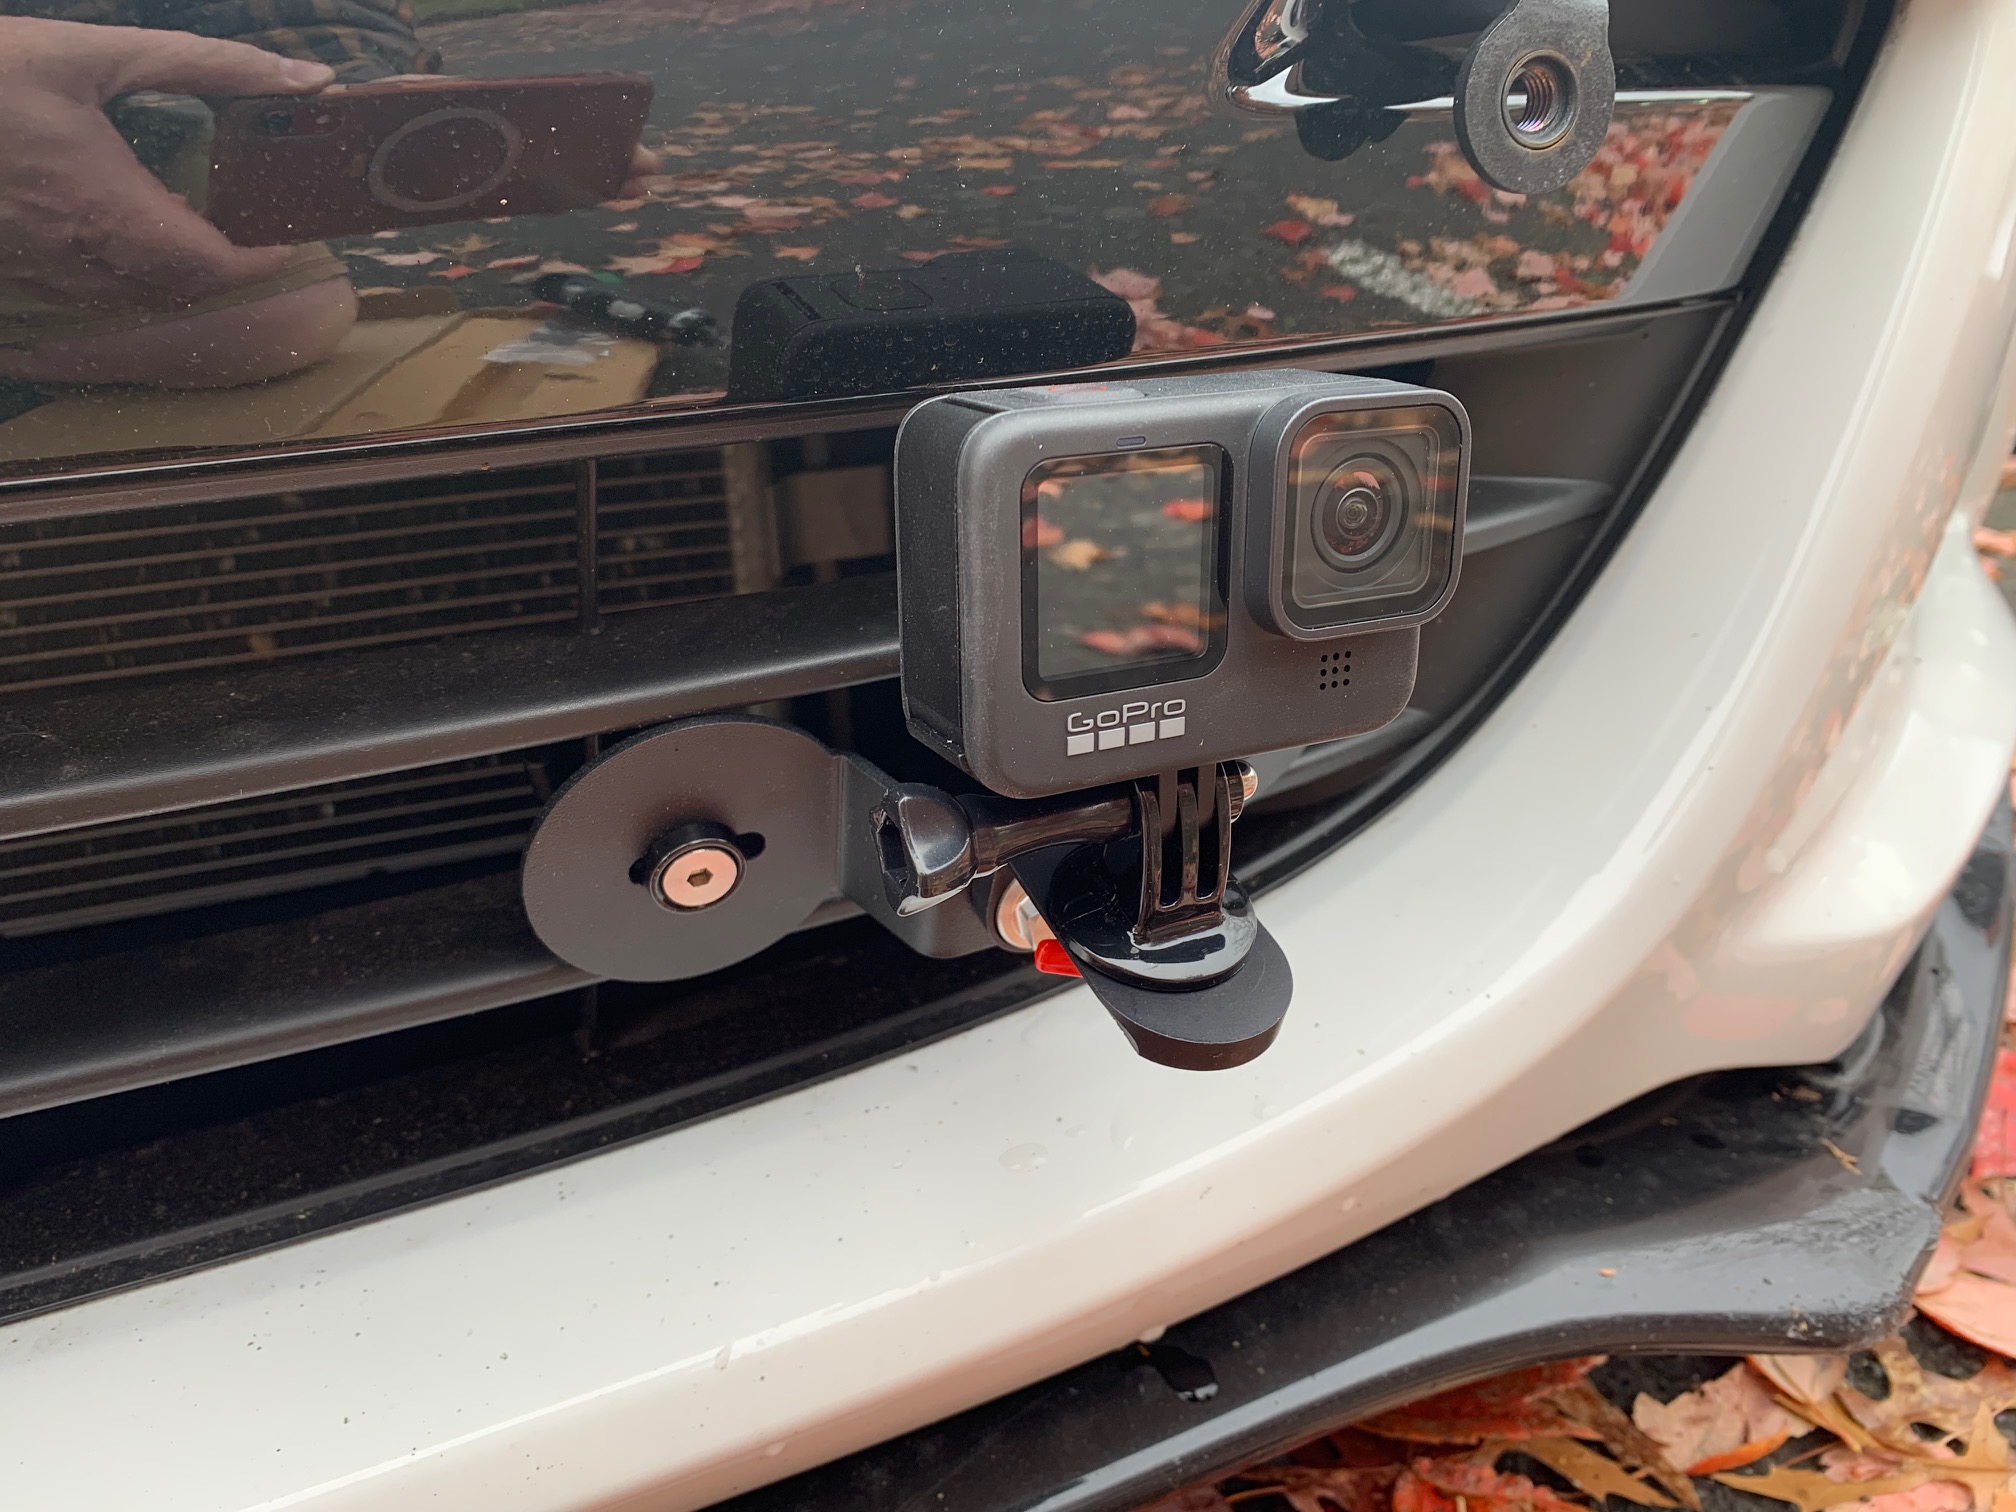
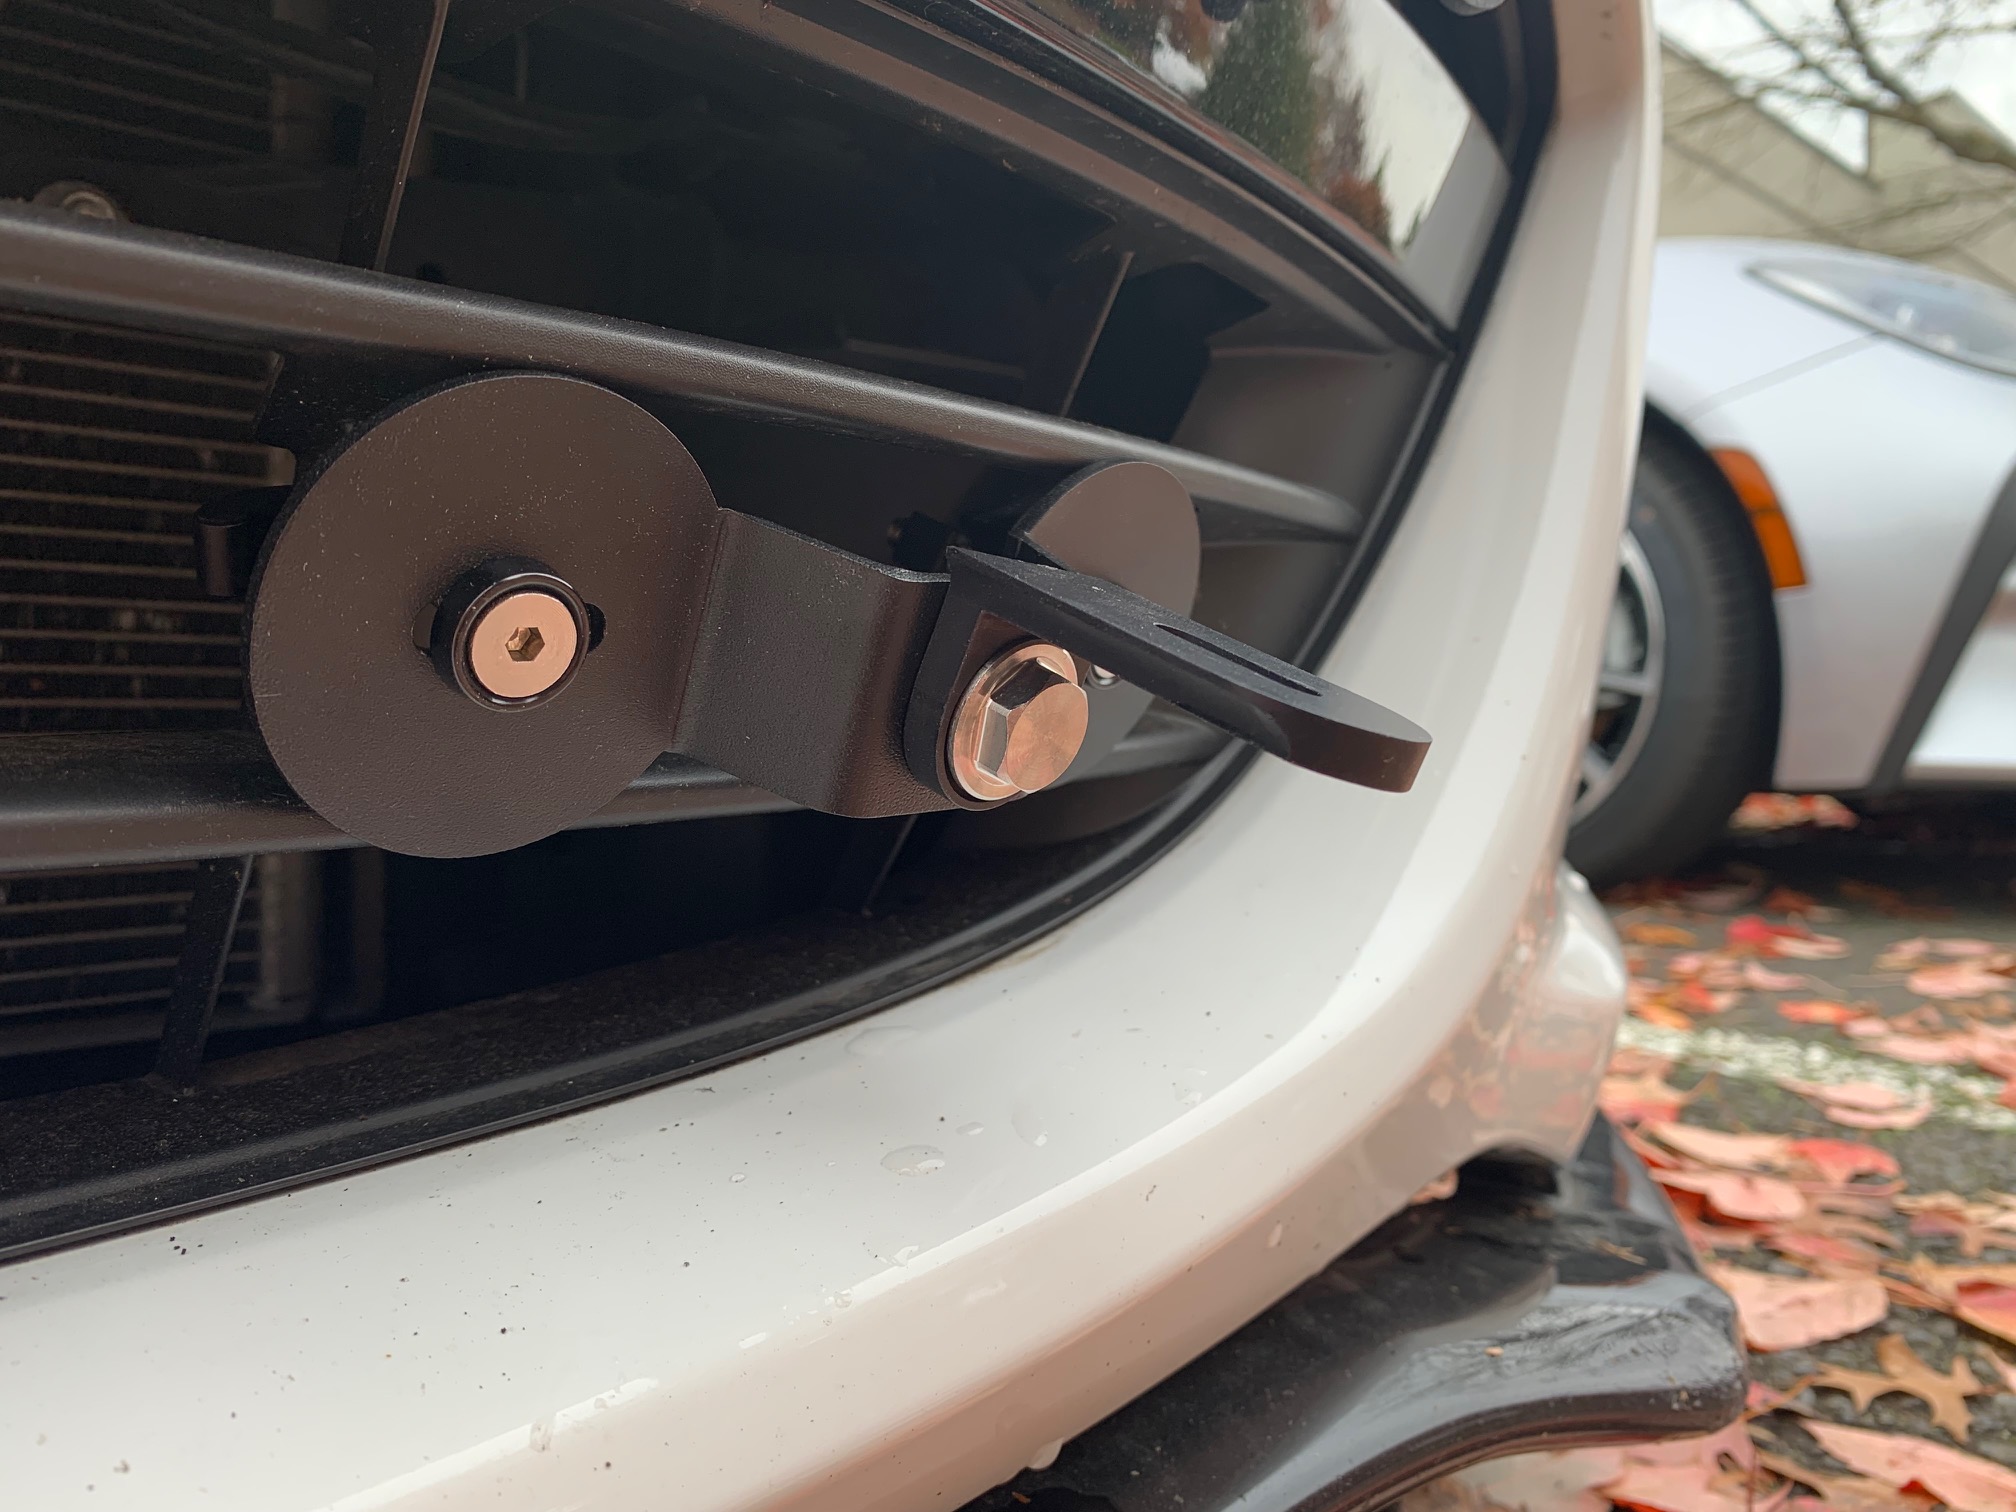
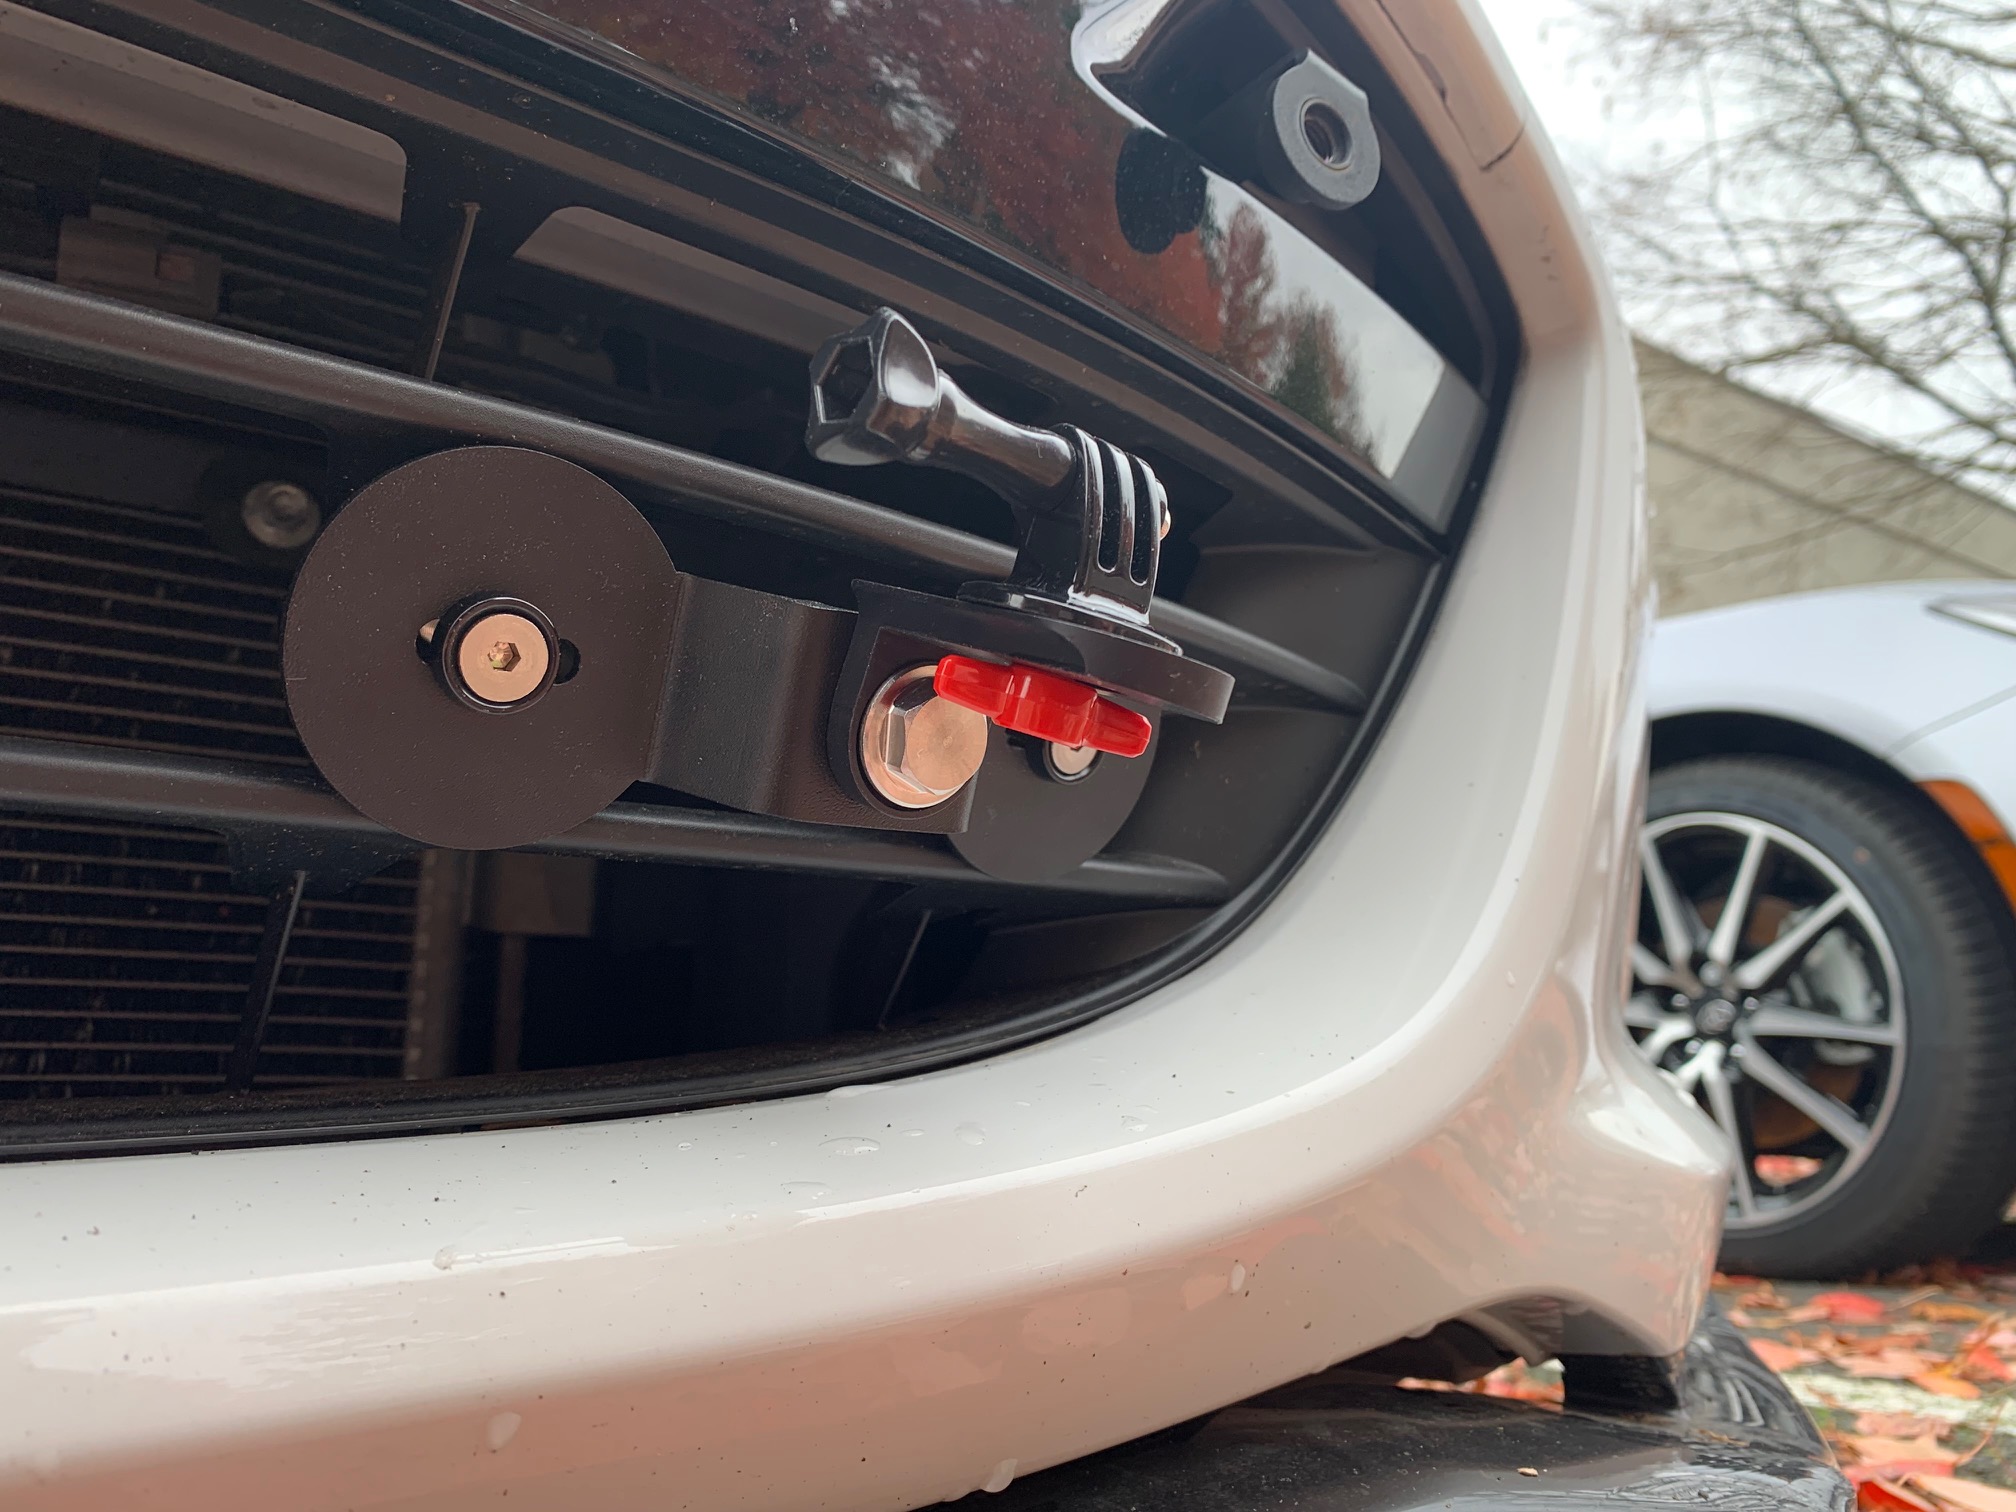
      Use the included red thumb screw to tighten the Action Cam Mount onto the bracket, as shown

      The completed installation of the Action Cam Bumper Mount

    Installing the Action Cam

      Remove the thumb screw from the Action Cam Mount, place the Action Cam into the gaps on the mount, and reinstall the screw.

      The completed installation of the Action Cam Bumper Mount

      You can loosen all 3 bolts in order to rotate your camera into the optimal position, just remember to tighten them back up!