
Gimme a Sign!
Posted by Steve on 9th Dec 2019
We've been in our new digs here for a couple years now and finally decided we needed some cool signage on the outside of the building. After contacting a few local sign making companies and receiving some fairly eyebrow-raising estimates, we put our heads together and said, "Making cool stuff is what we do... let's just make it ourselves!". Well, that's just what we did, so grab a fresh cup, have a seat and join us on this little adventure!
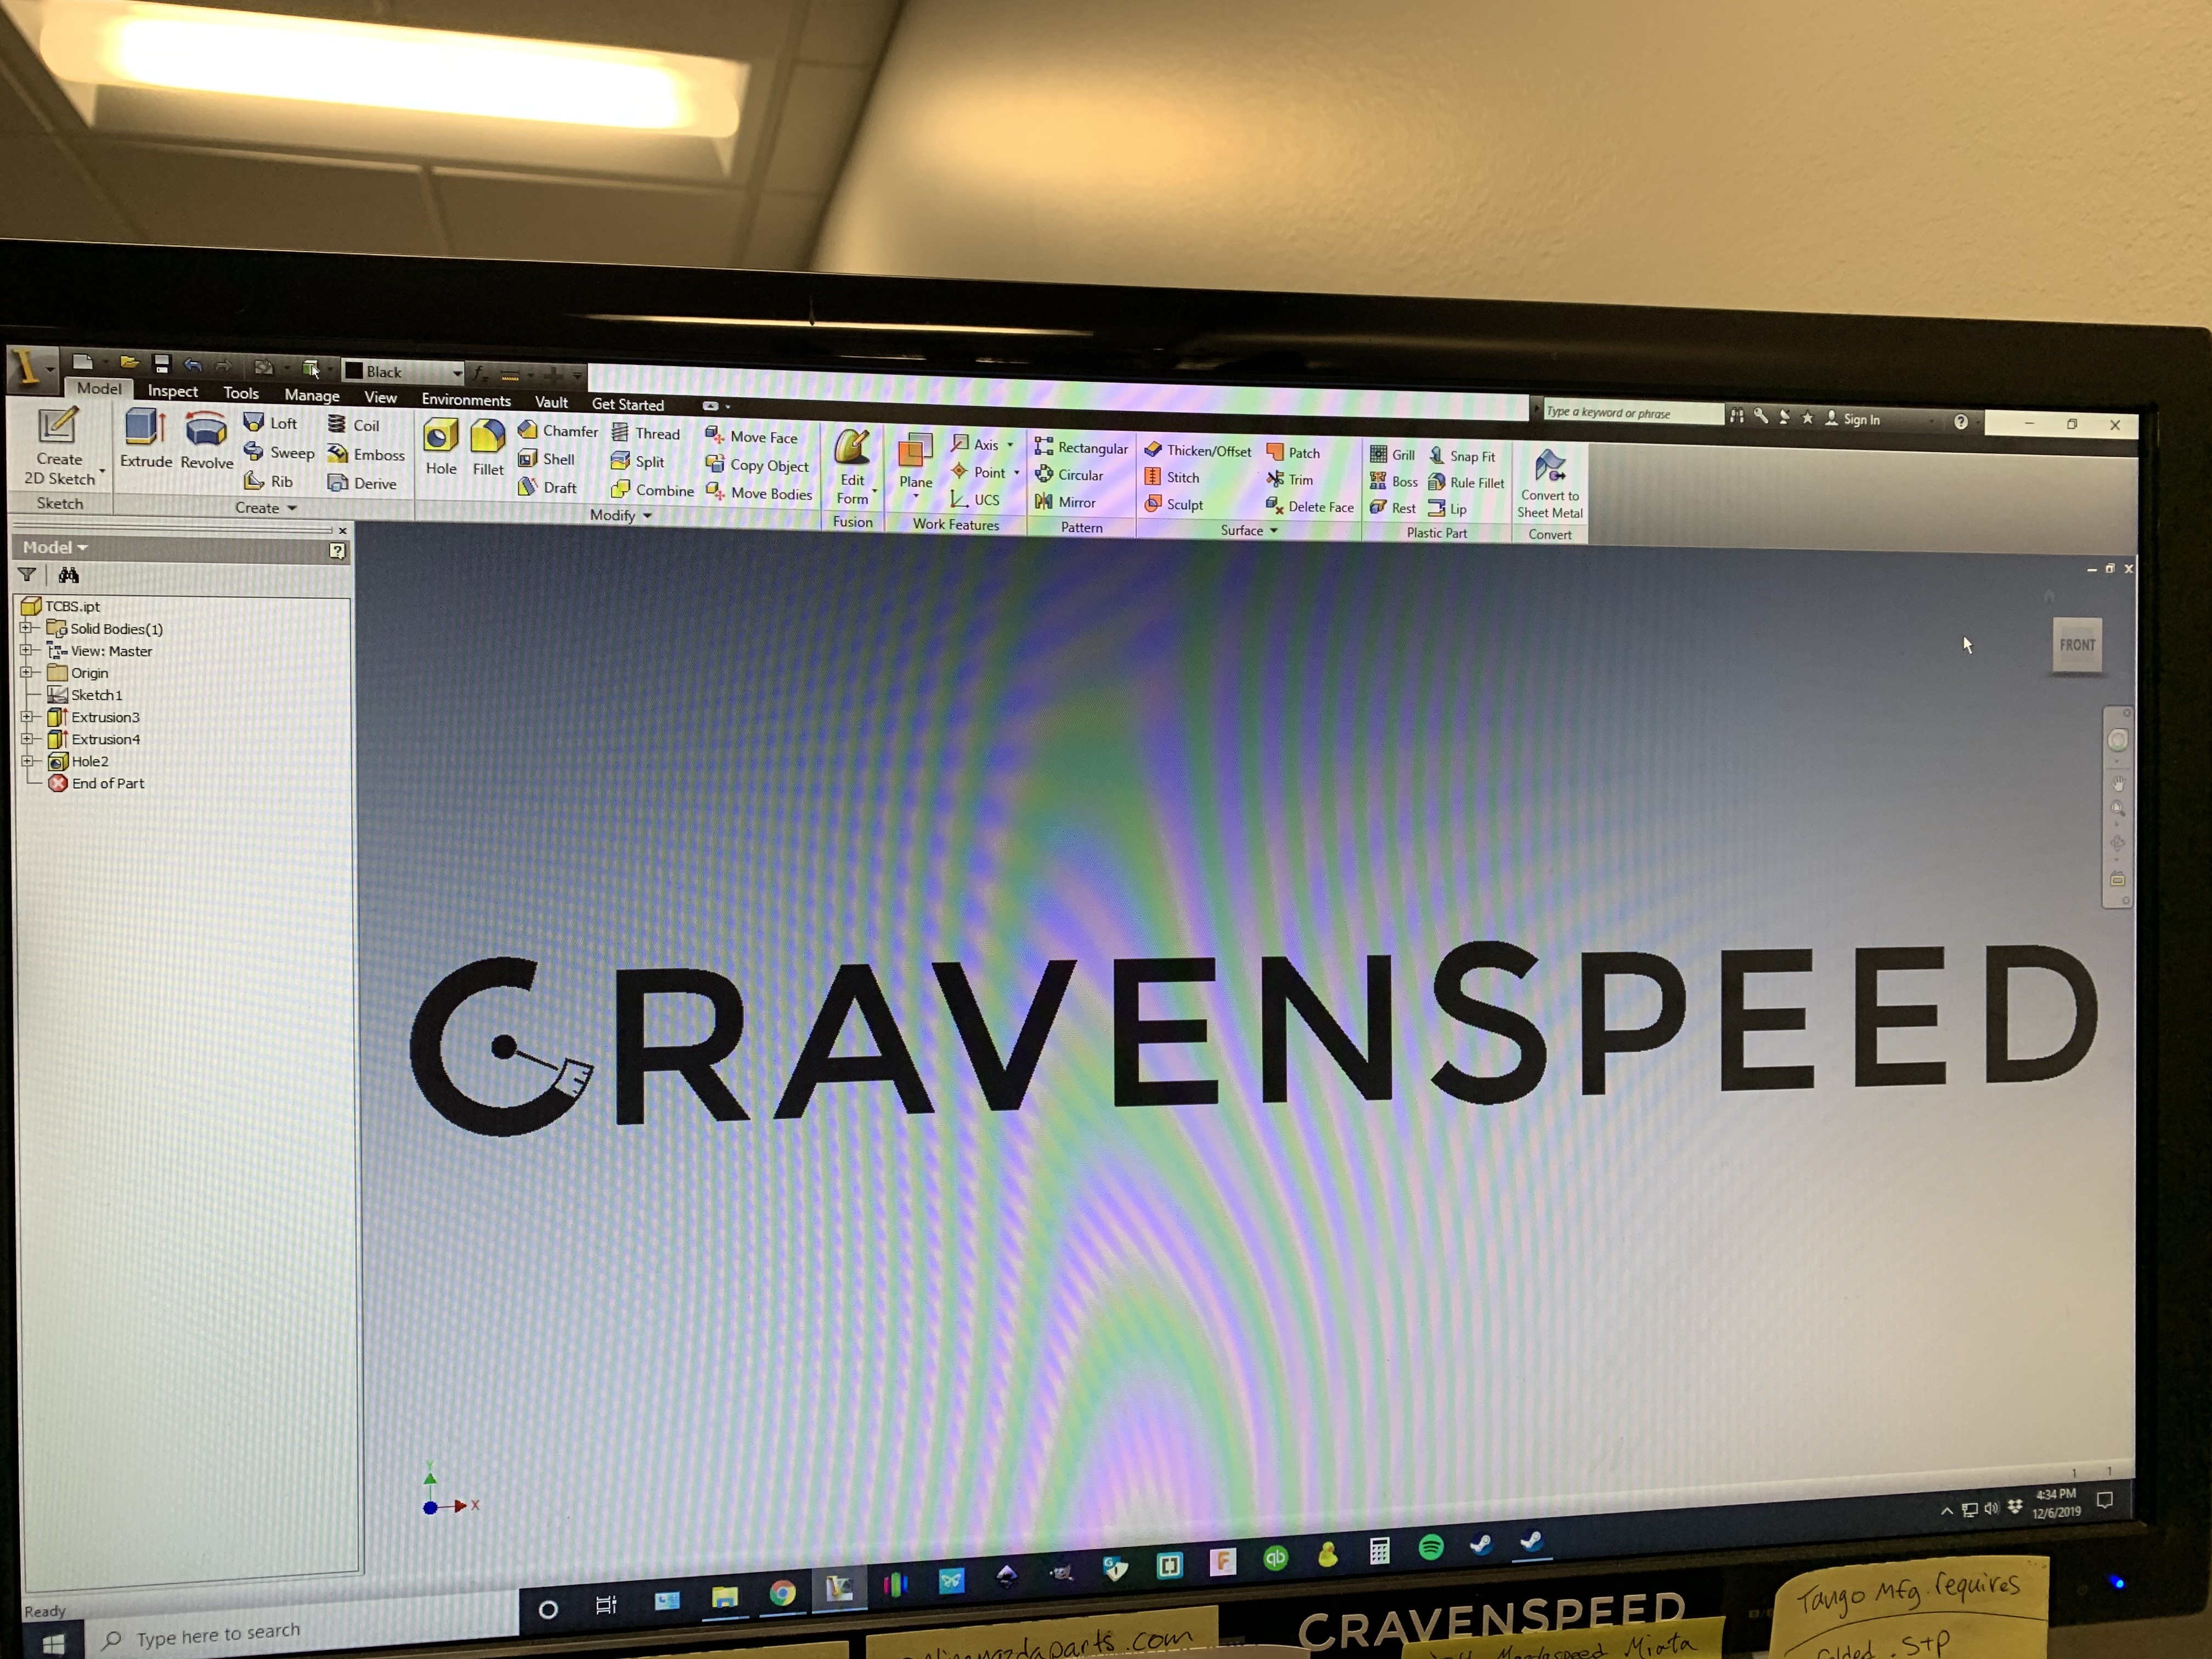
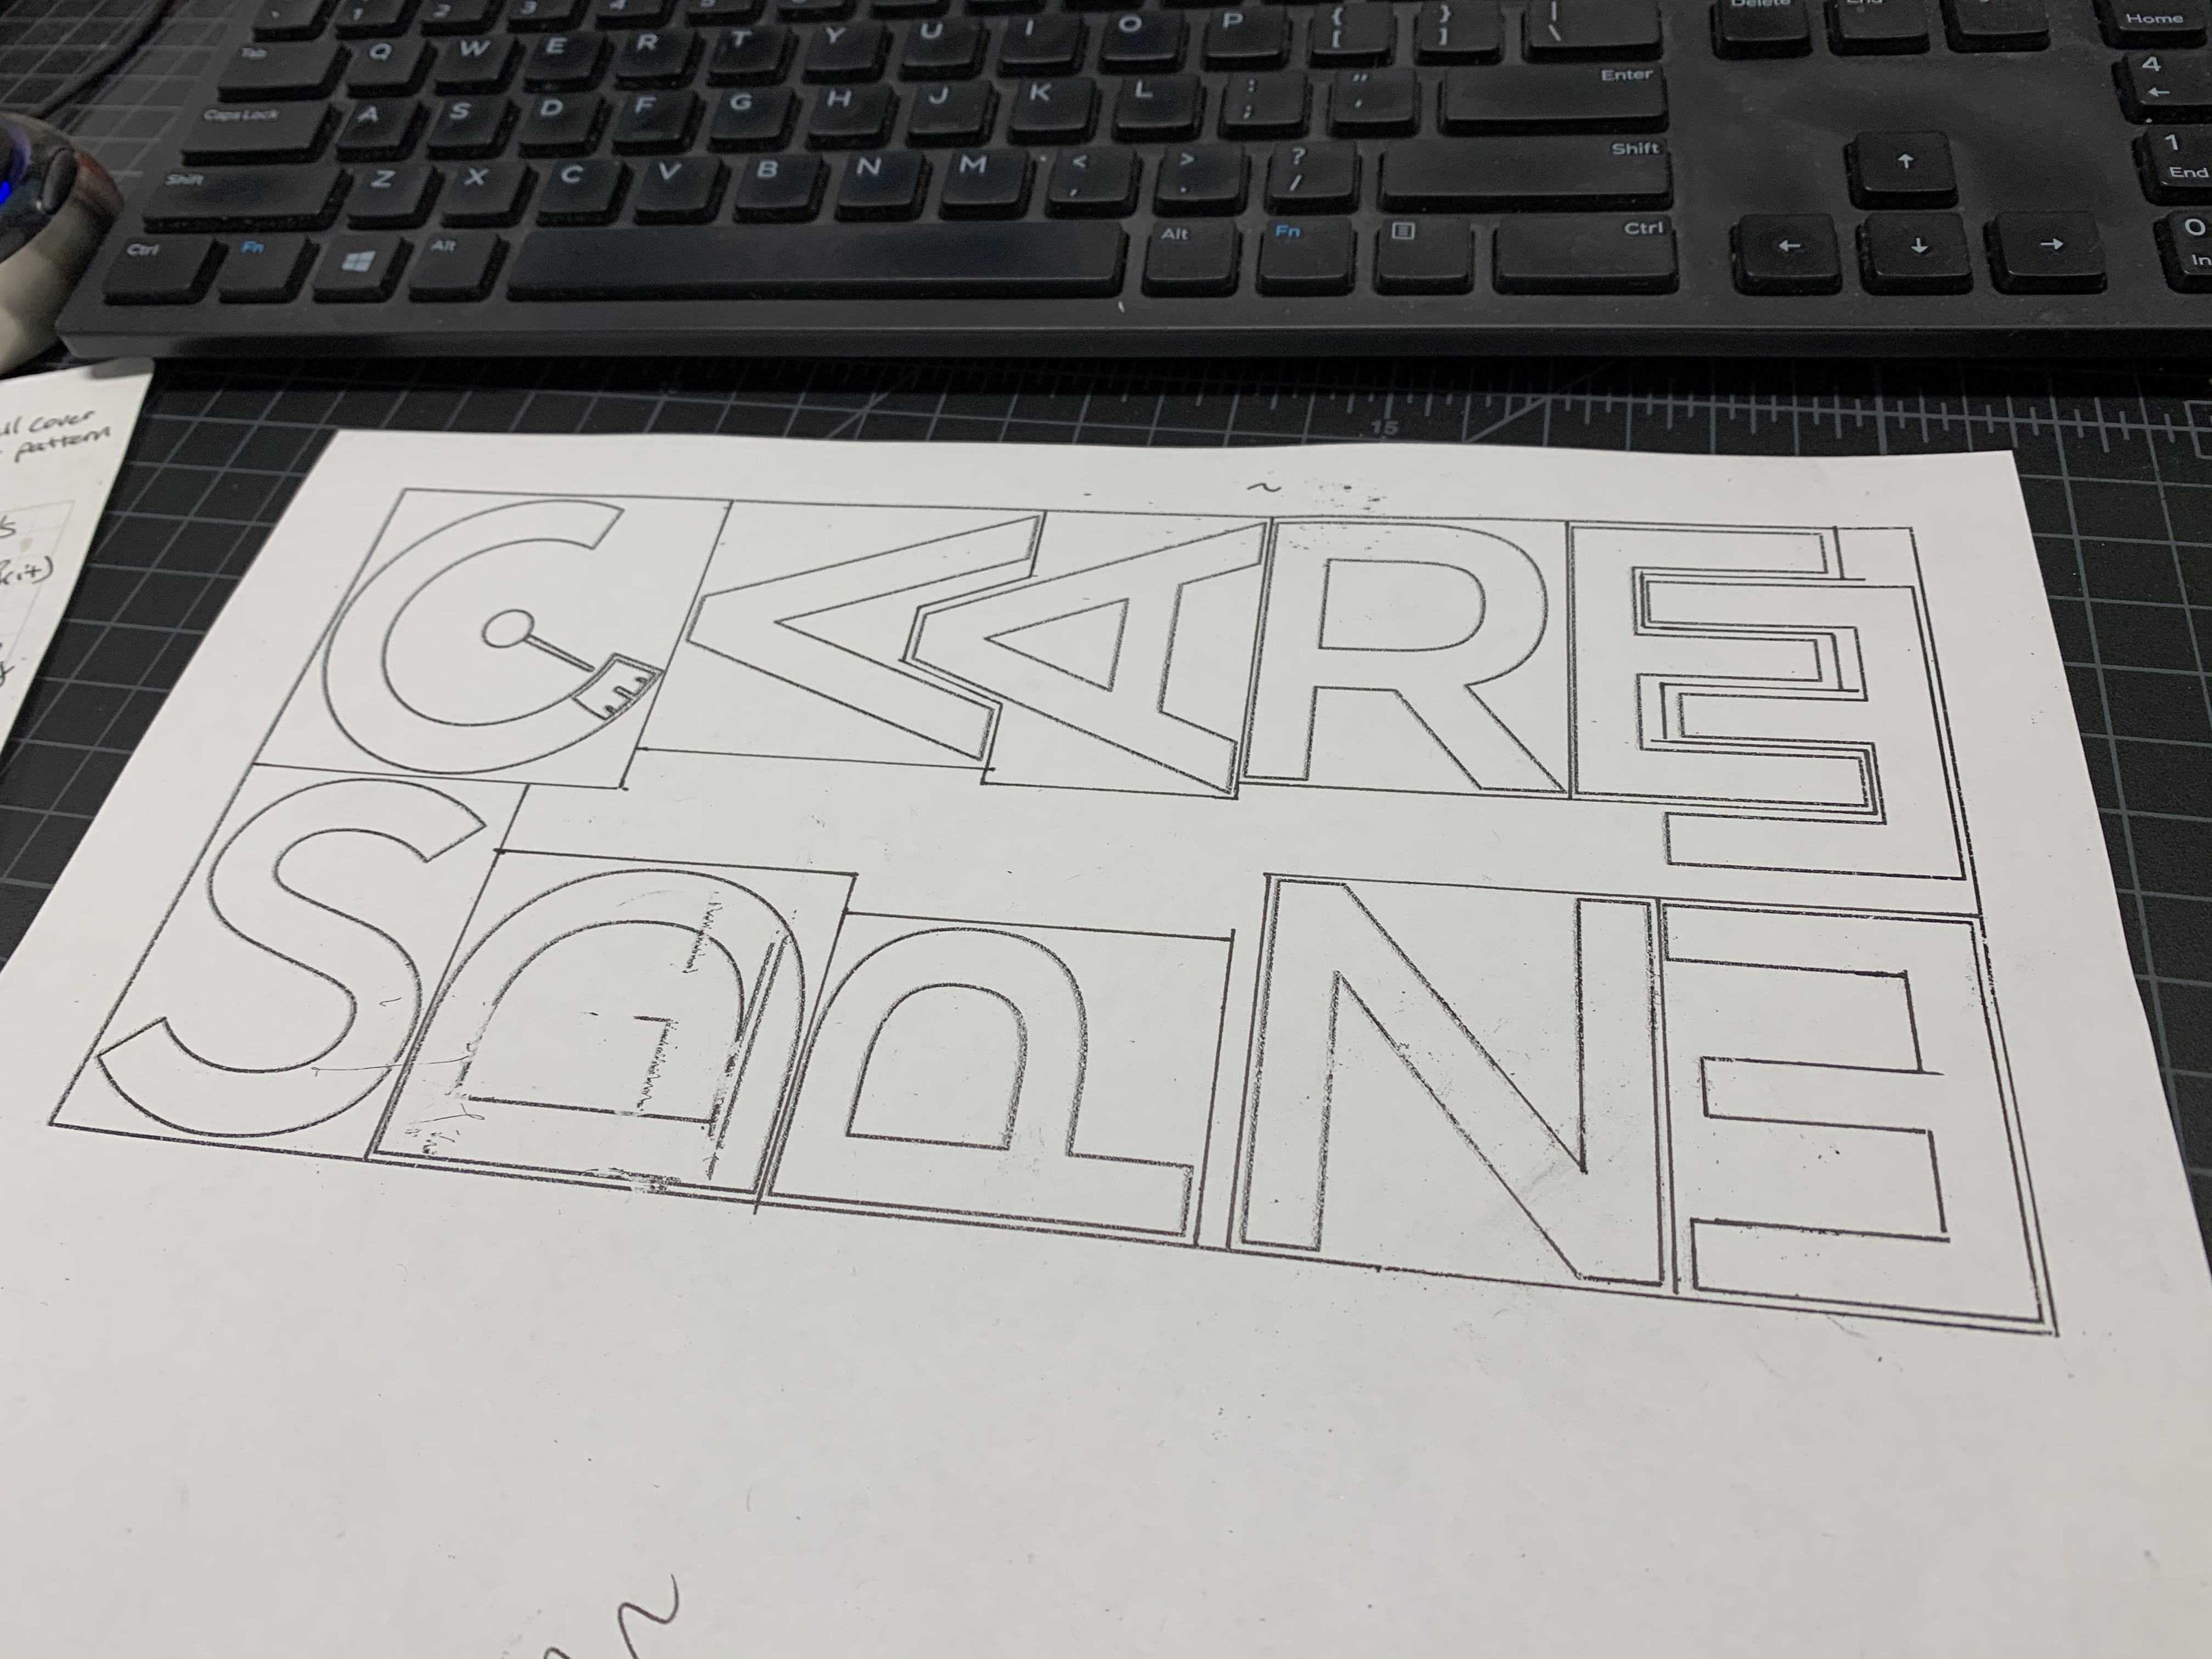
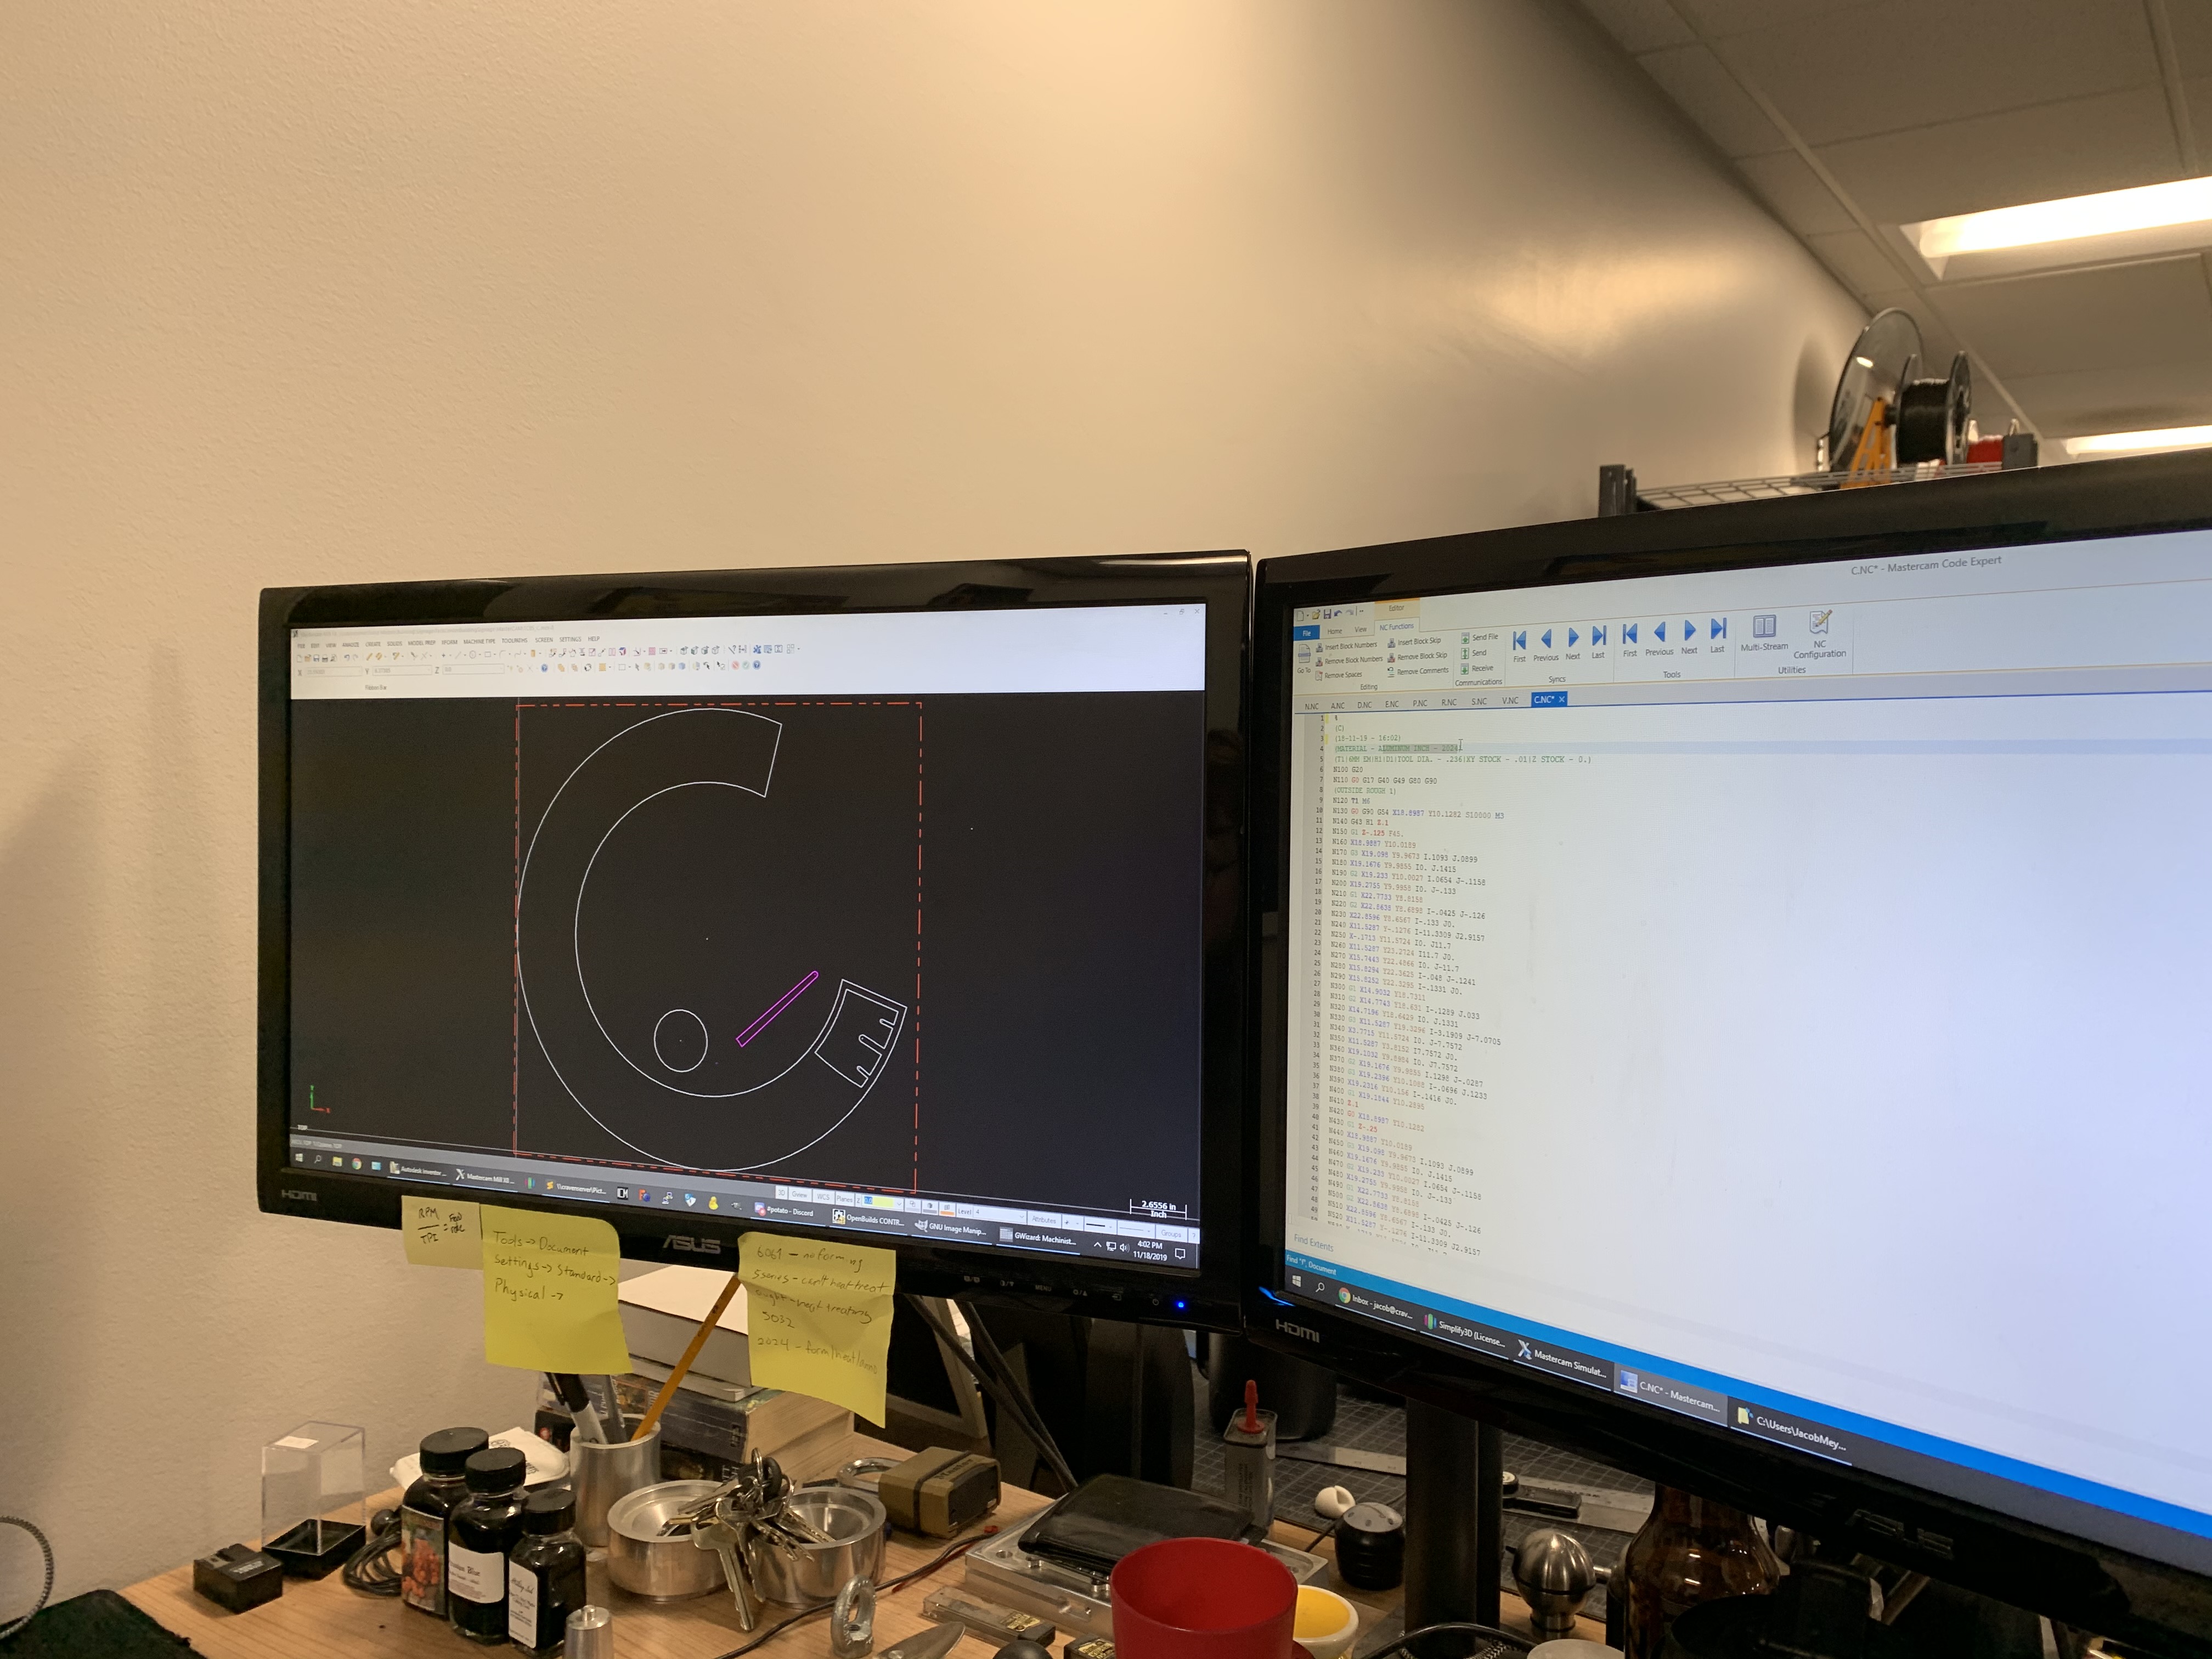
Once we made the decision to handle the job in-house, we started gathering the necessary information and recruited folks for the sign team. Kellen became our logistics guy taking over the legal side of things we needed to know in regards to permits and such. Jacob was the CNC CAM wizard translating files once the design was finalized and I did a lot of signage research and note scratching while I created the 3D files.
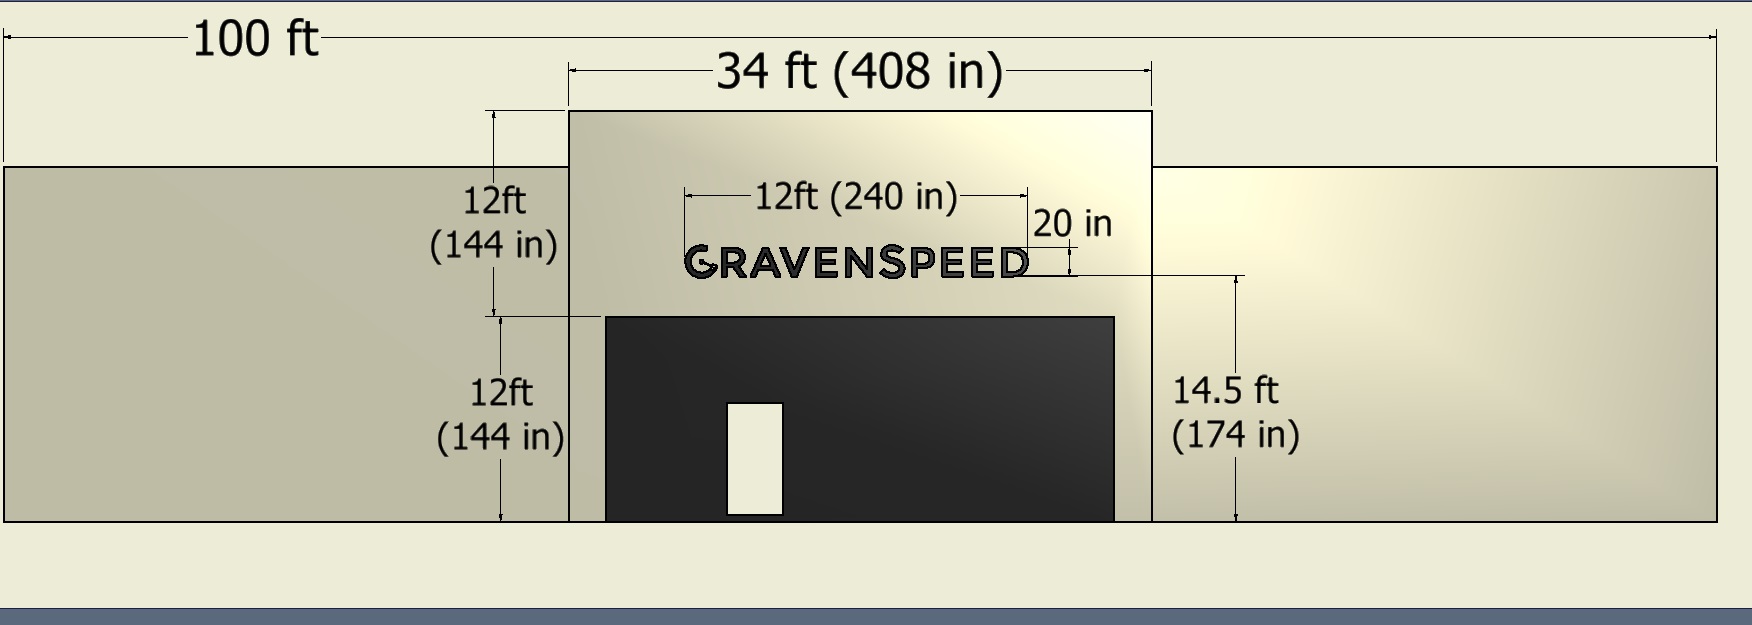
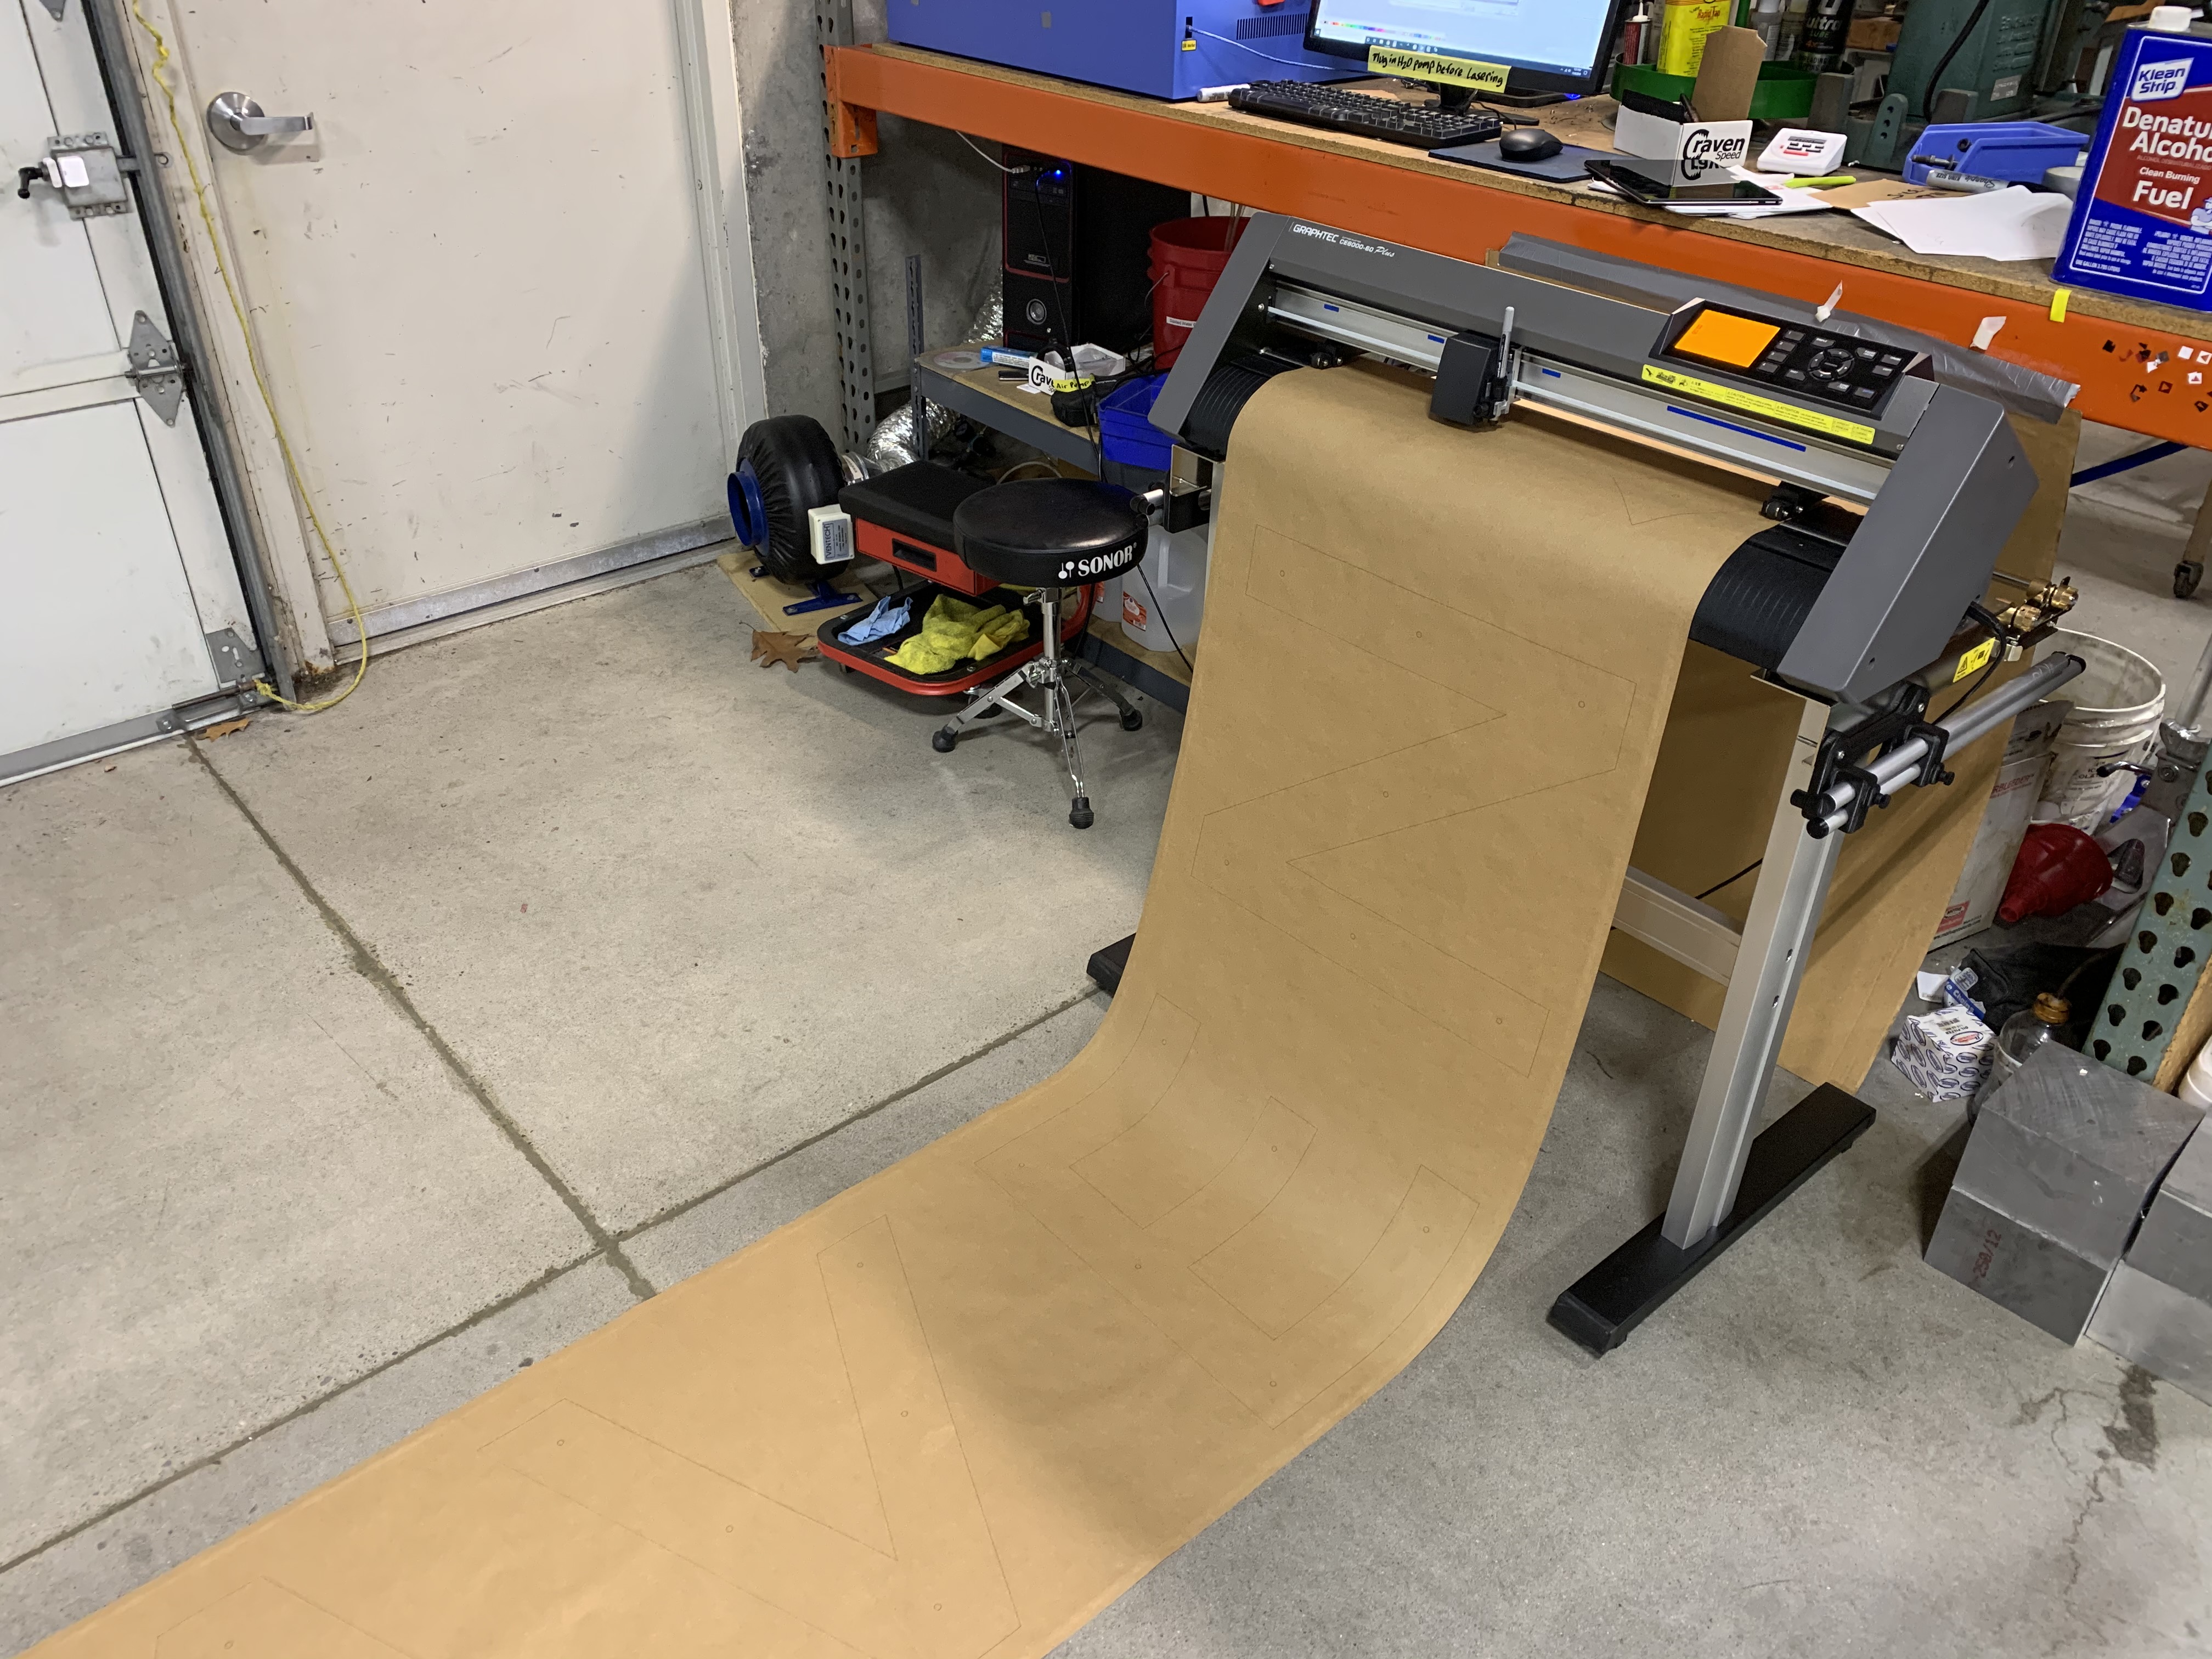
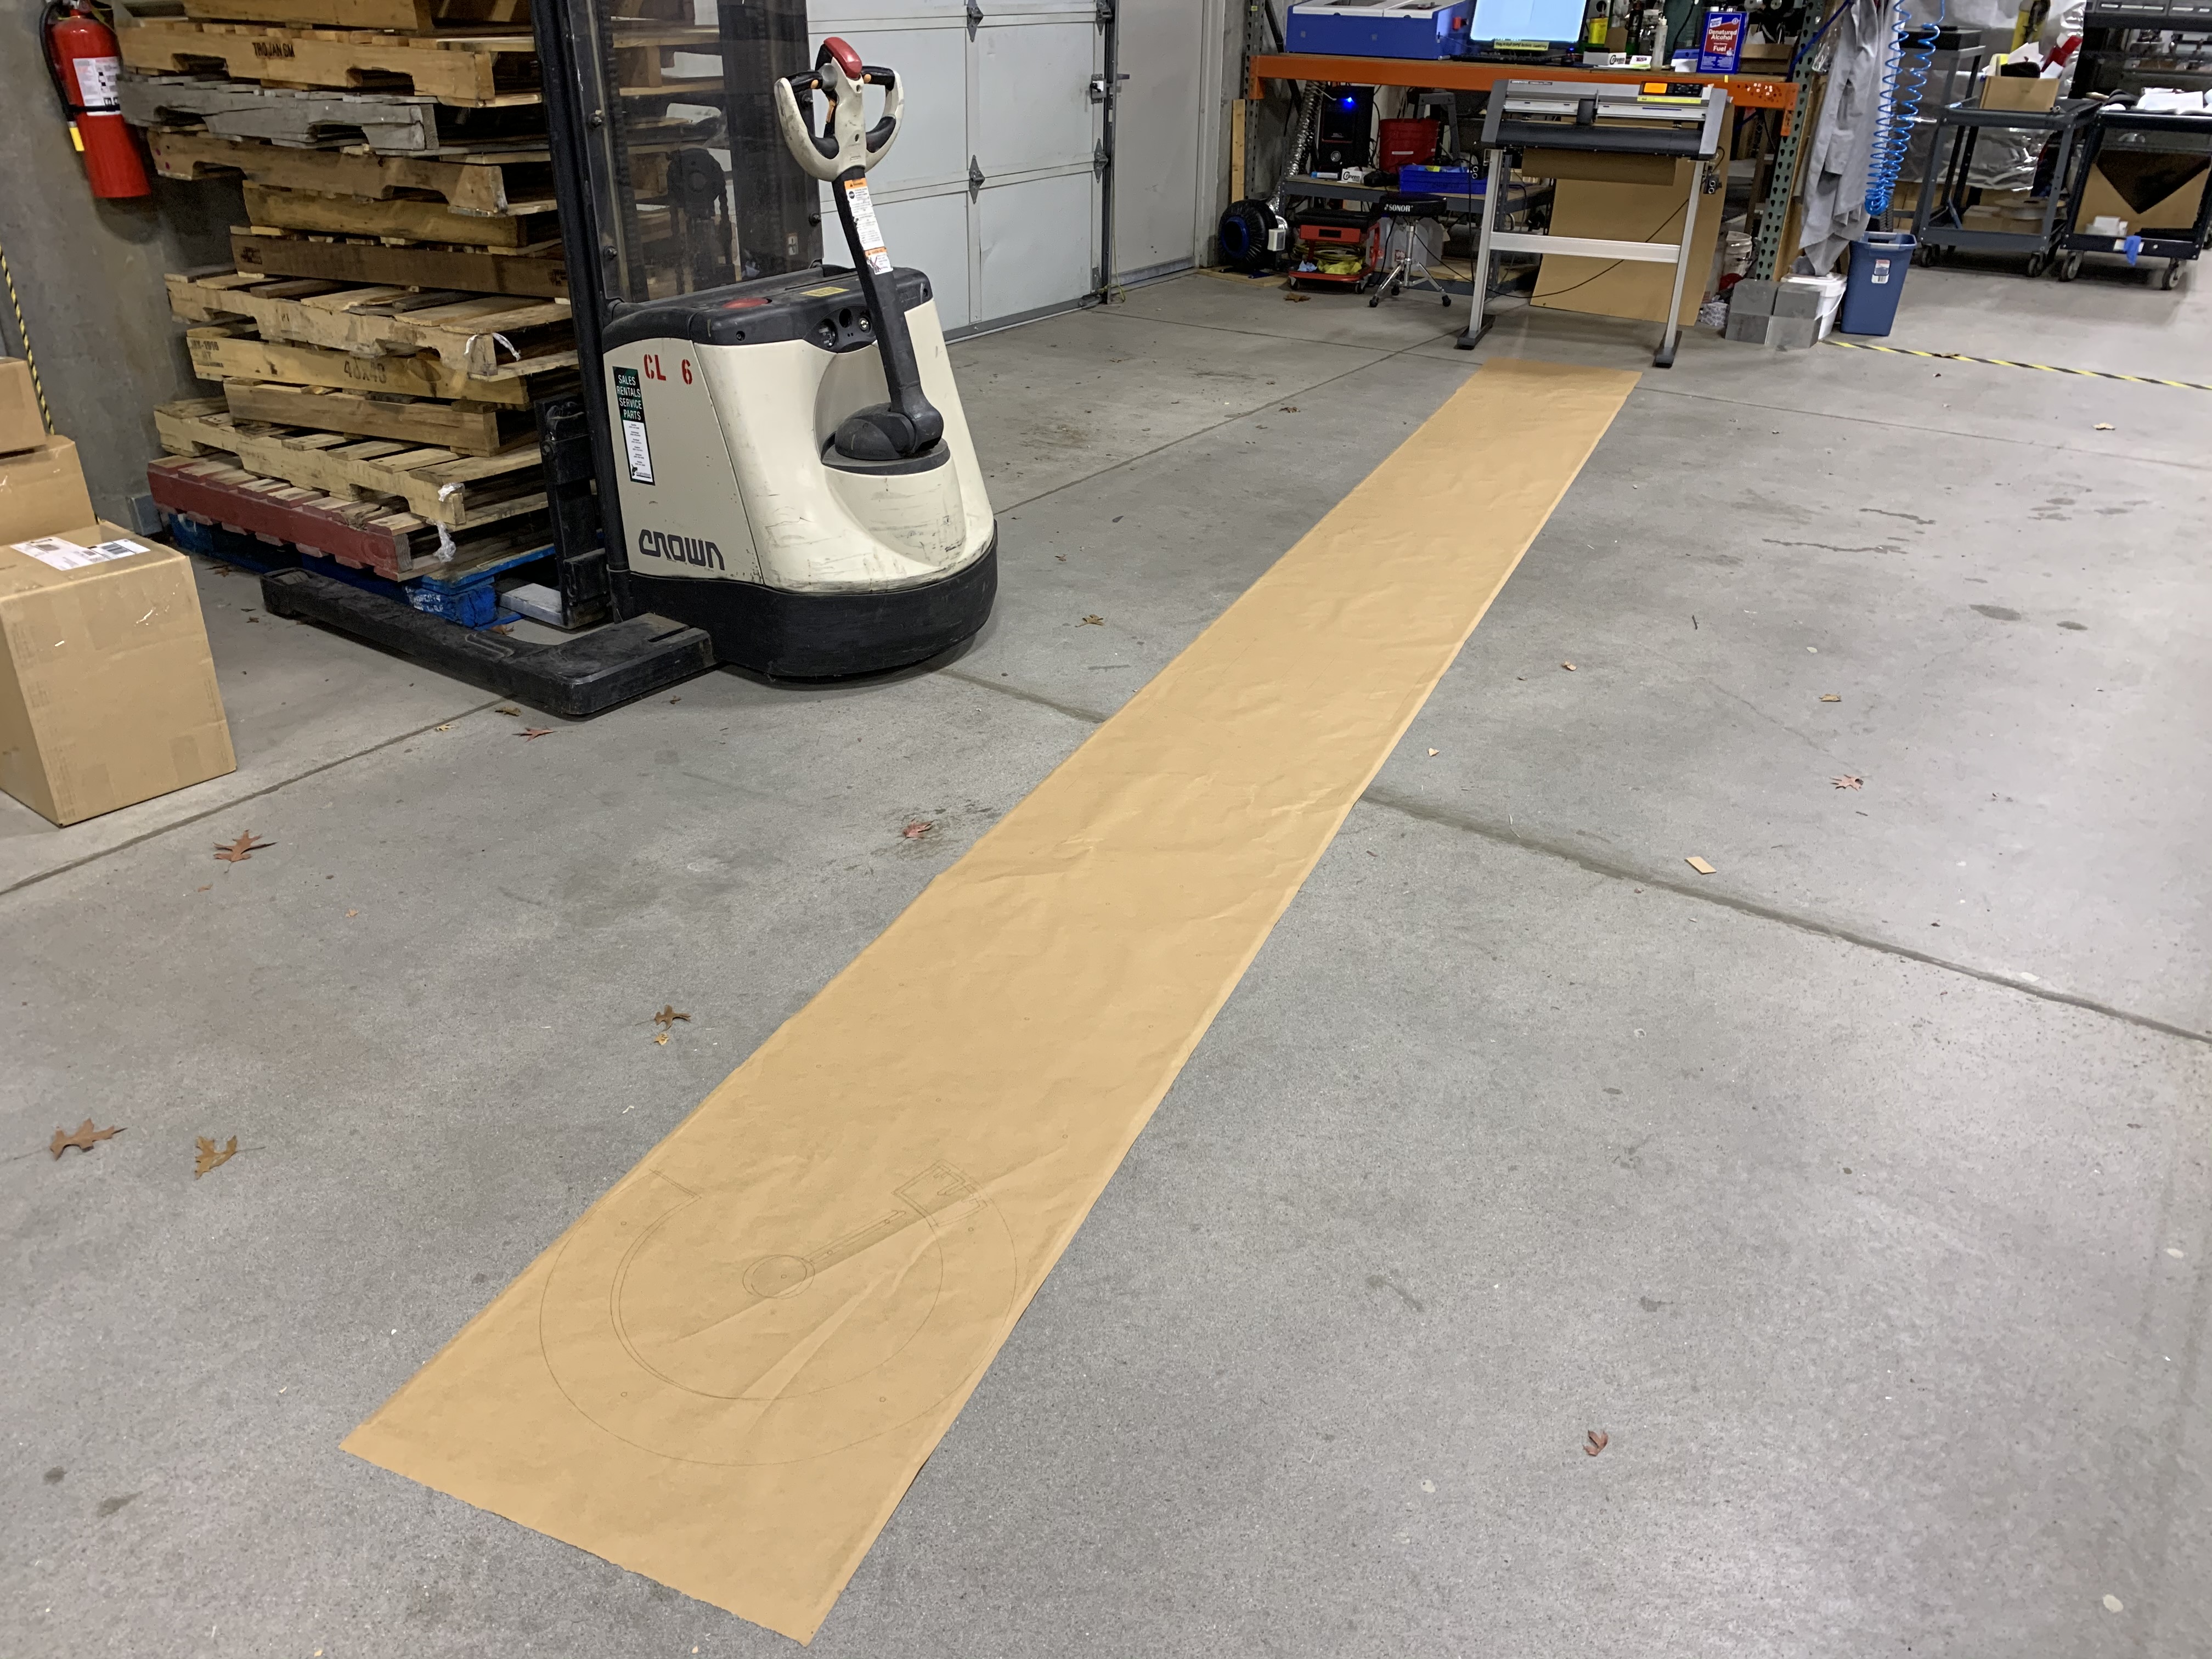
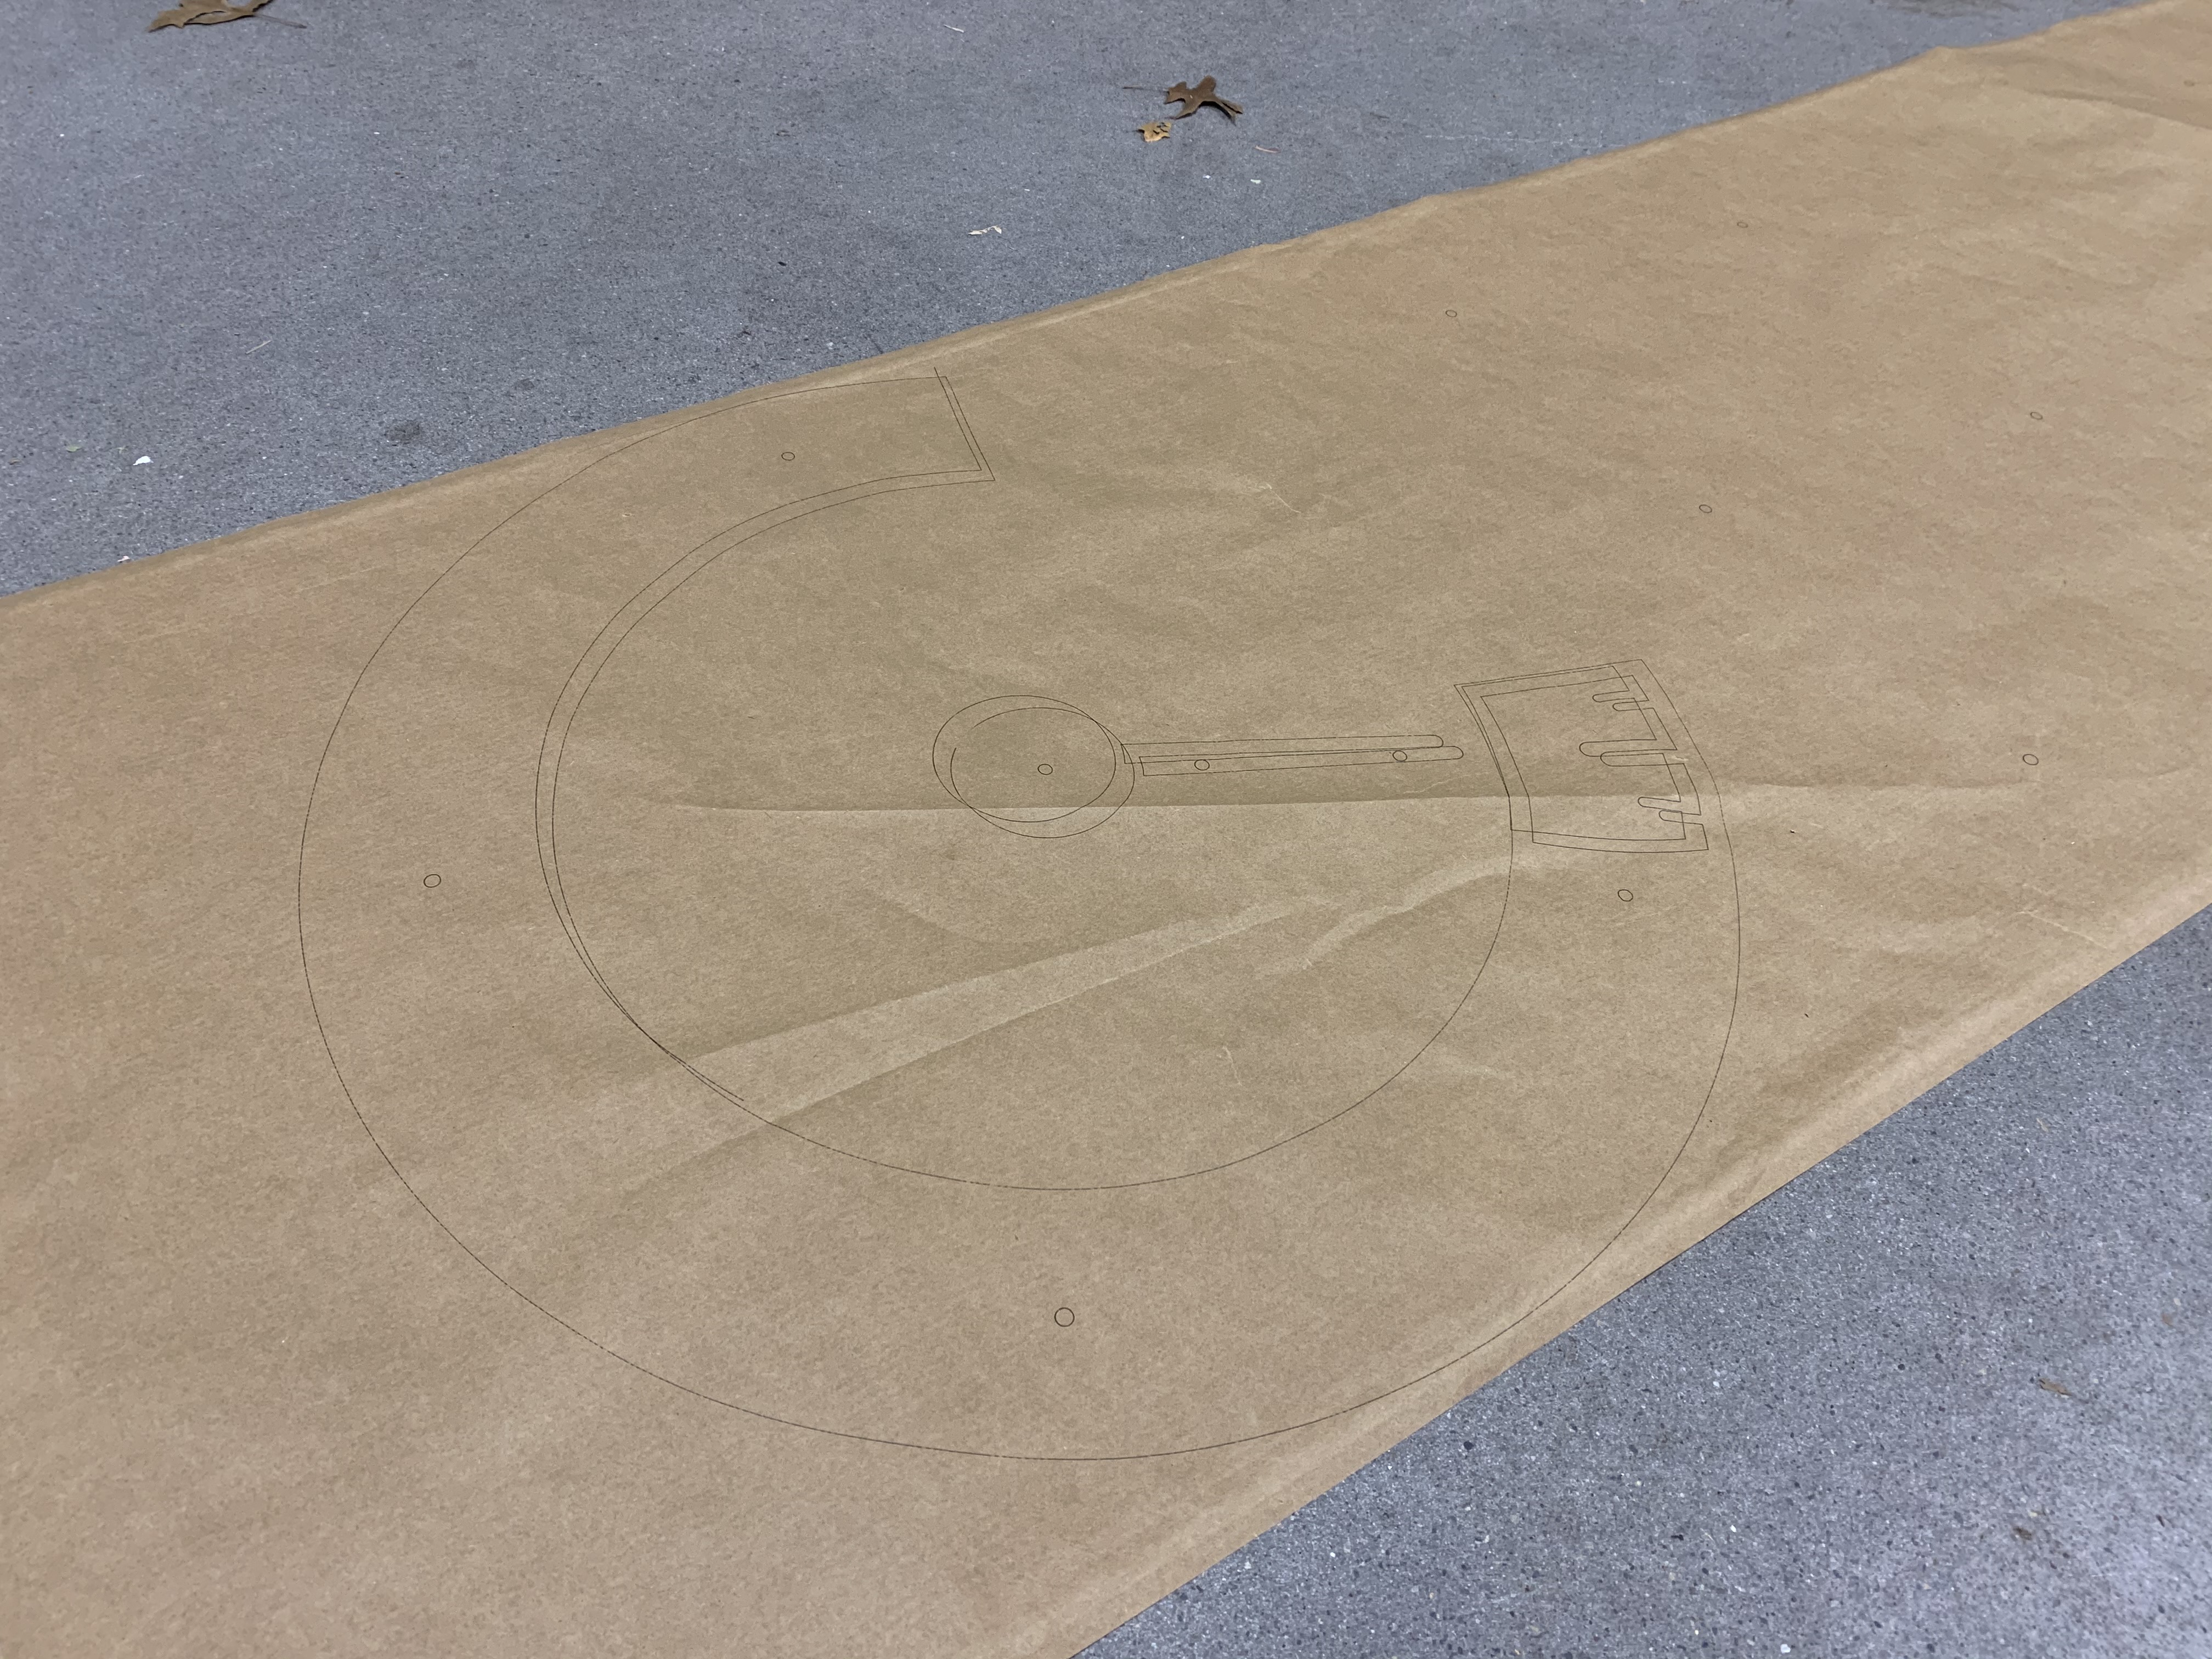
The size and placement of the sign was determined and we got straight to work. Having a cutter/plotter for our vinyl decals also came in handy for this project as we printed the entire sign 1 : 1 scale on a long sheet of shipping paper. This allowed us to not only use the pattern for visualization purposes, but to also use it as a drilling template for when it came time to install the letters onto the front of our building.
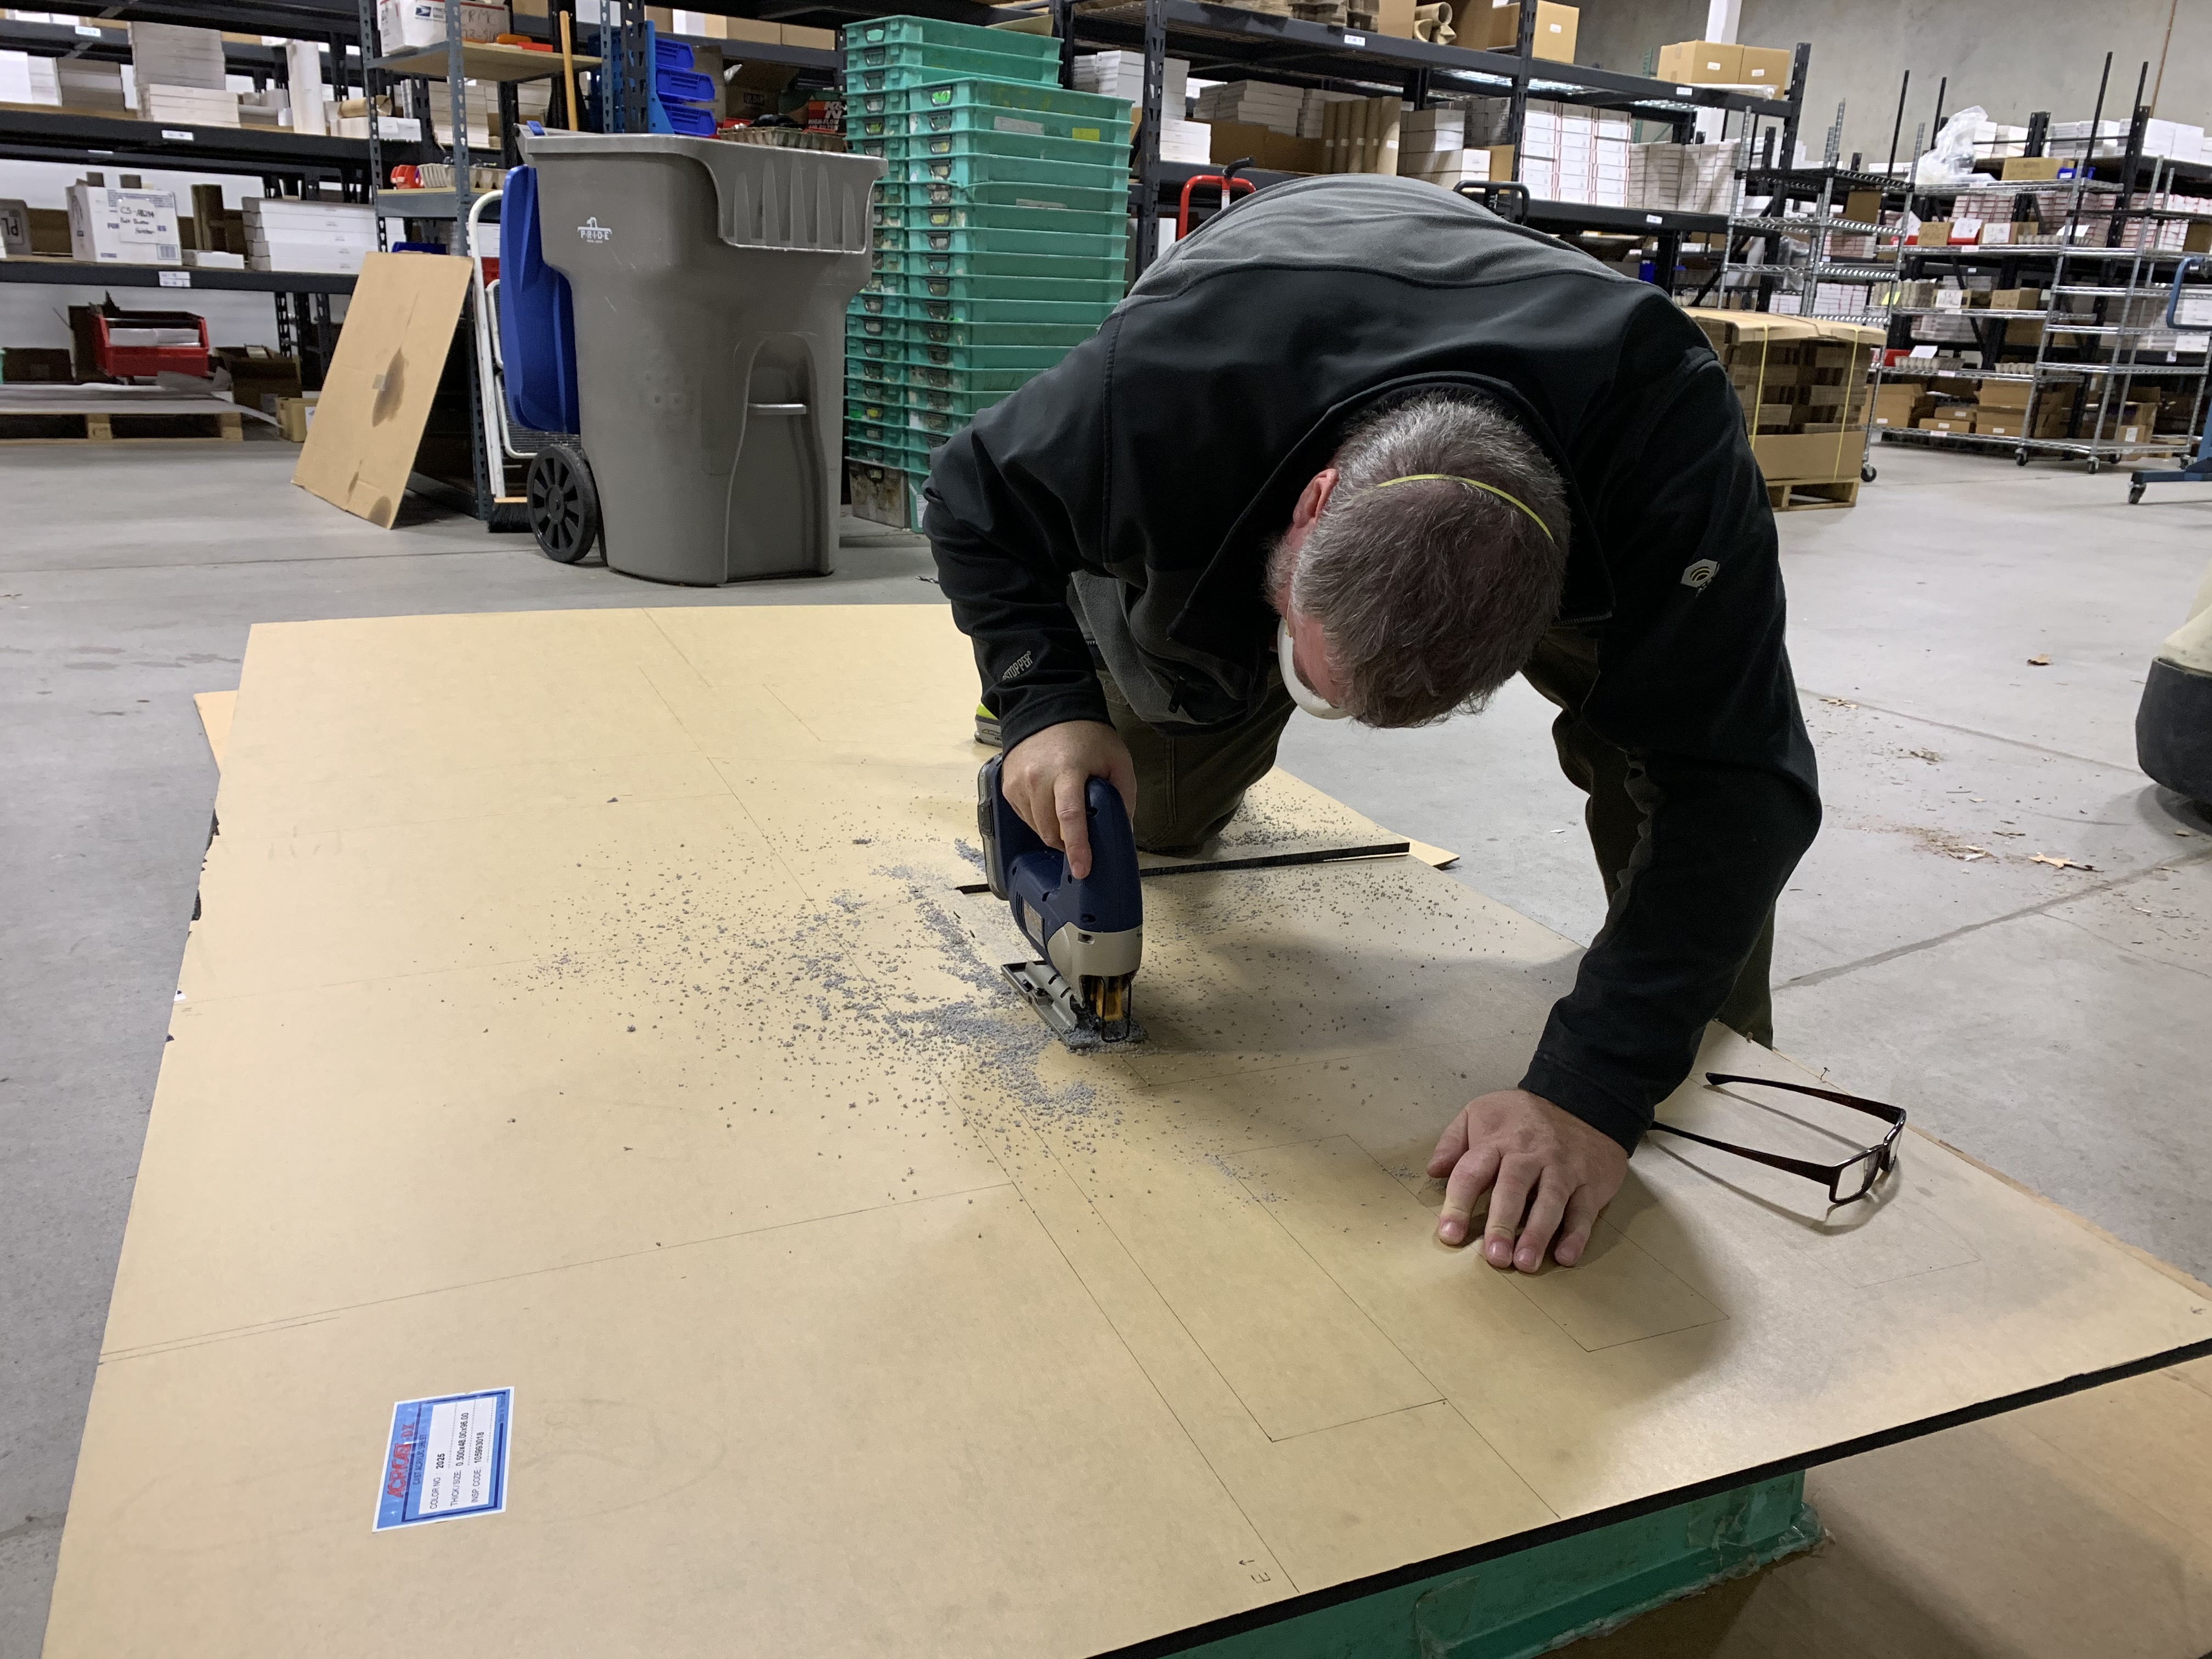
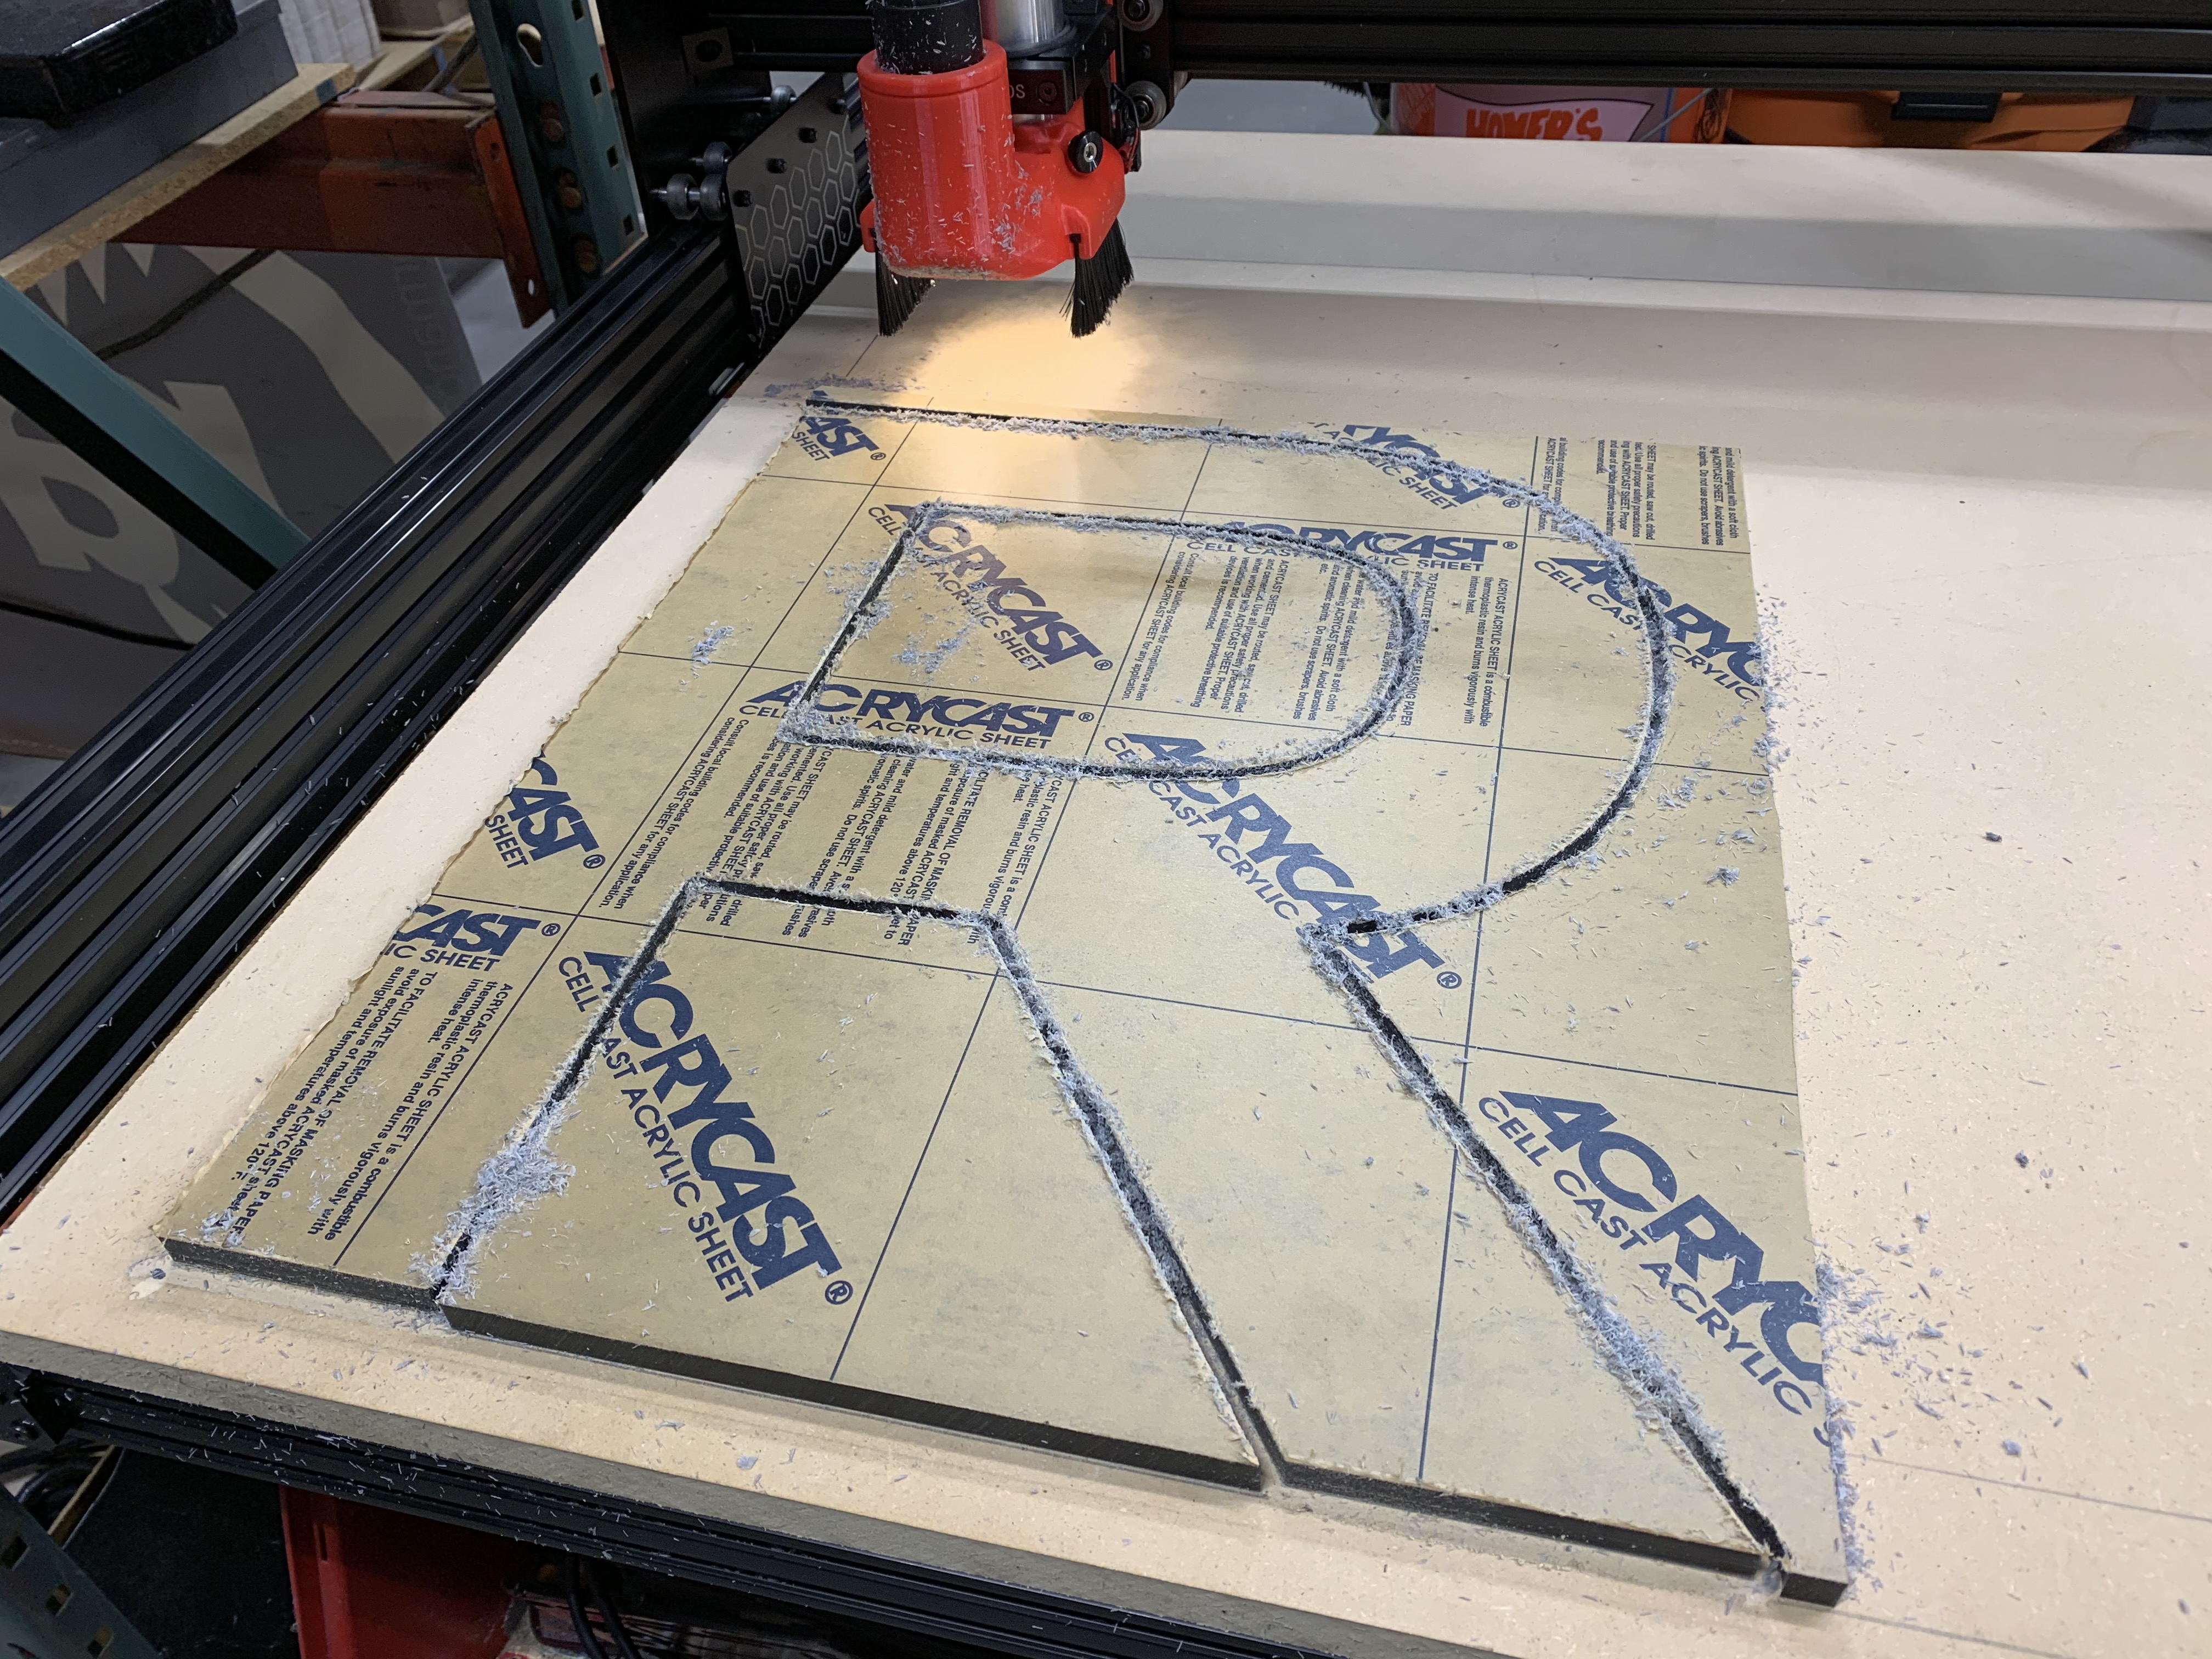
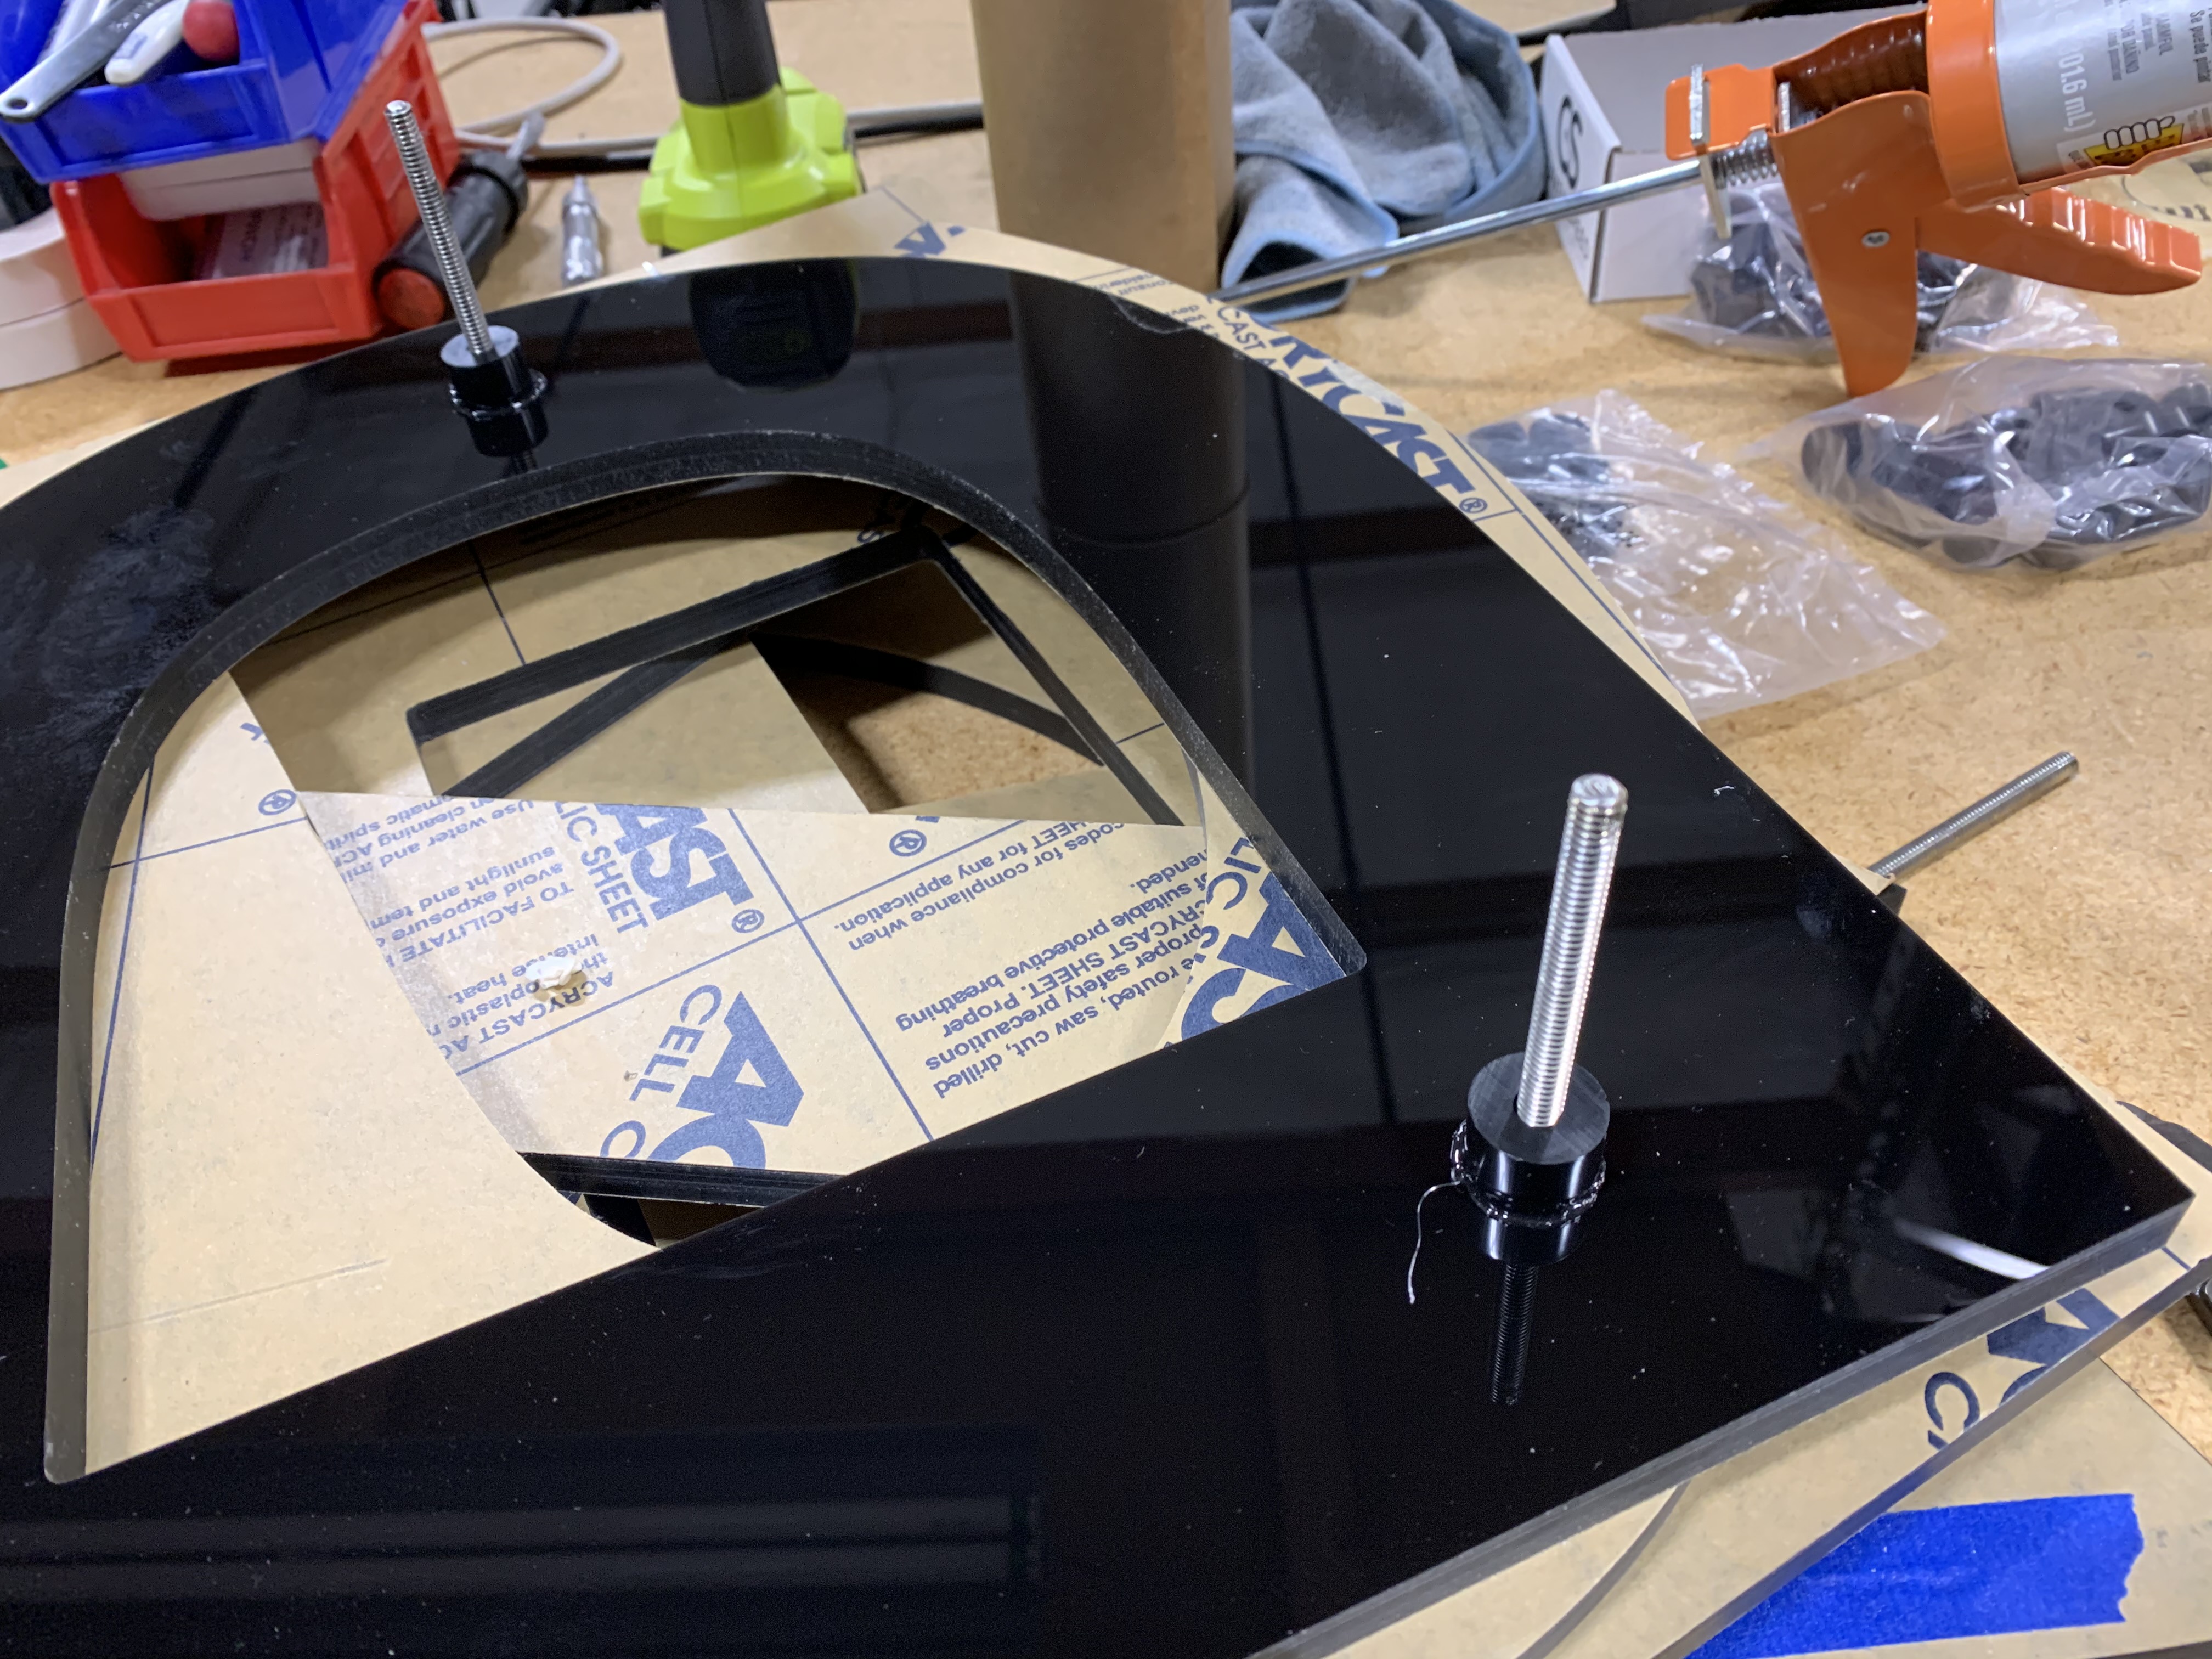
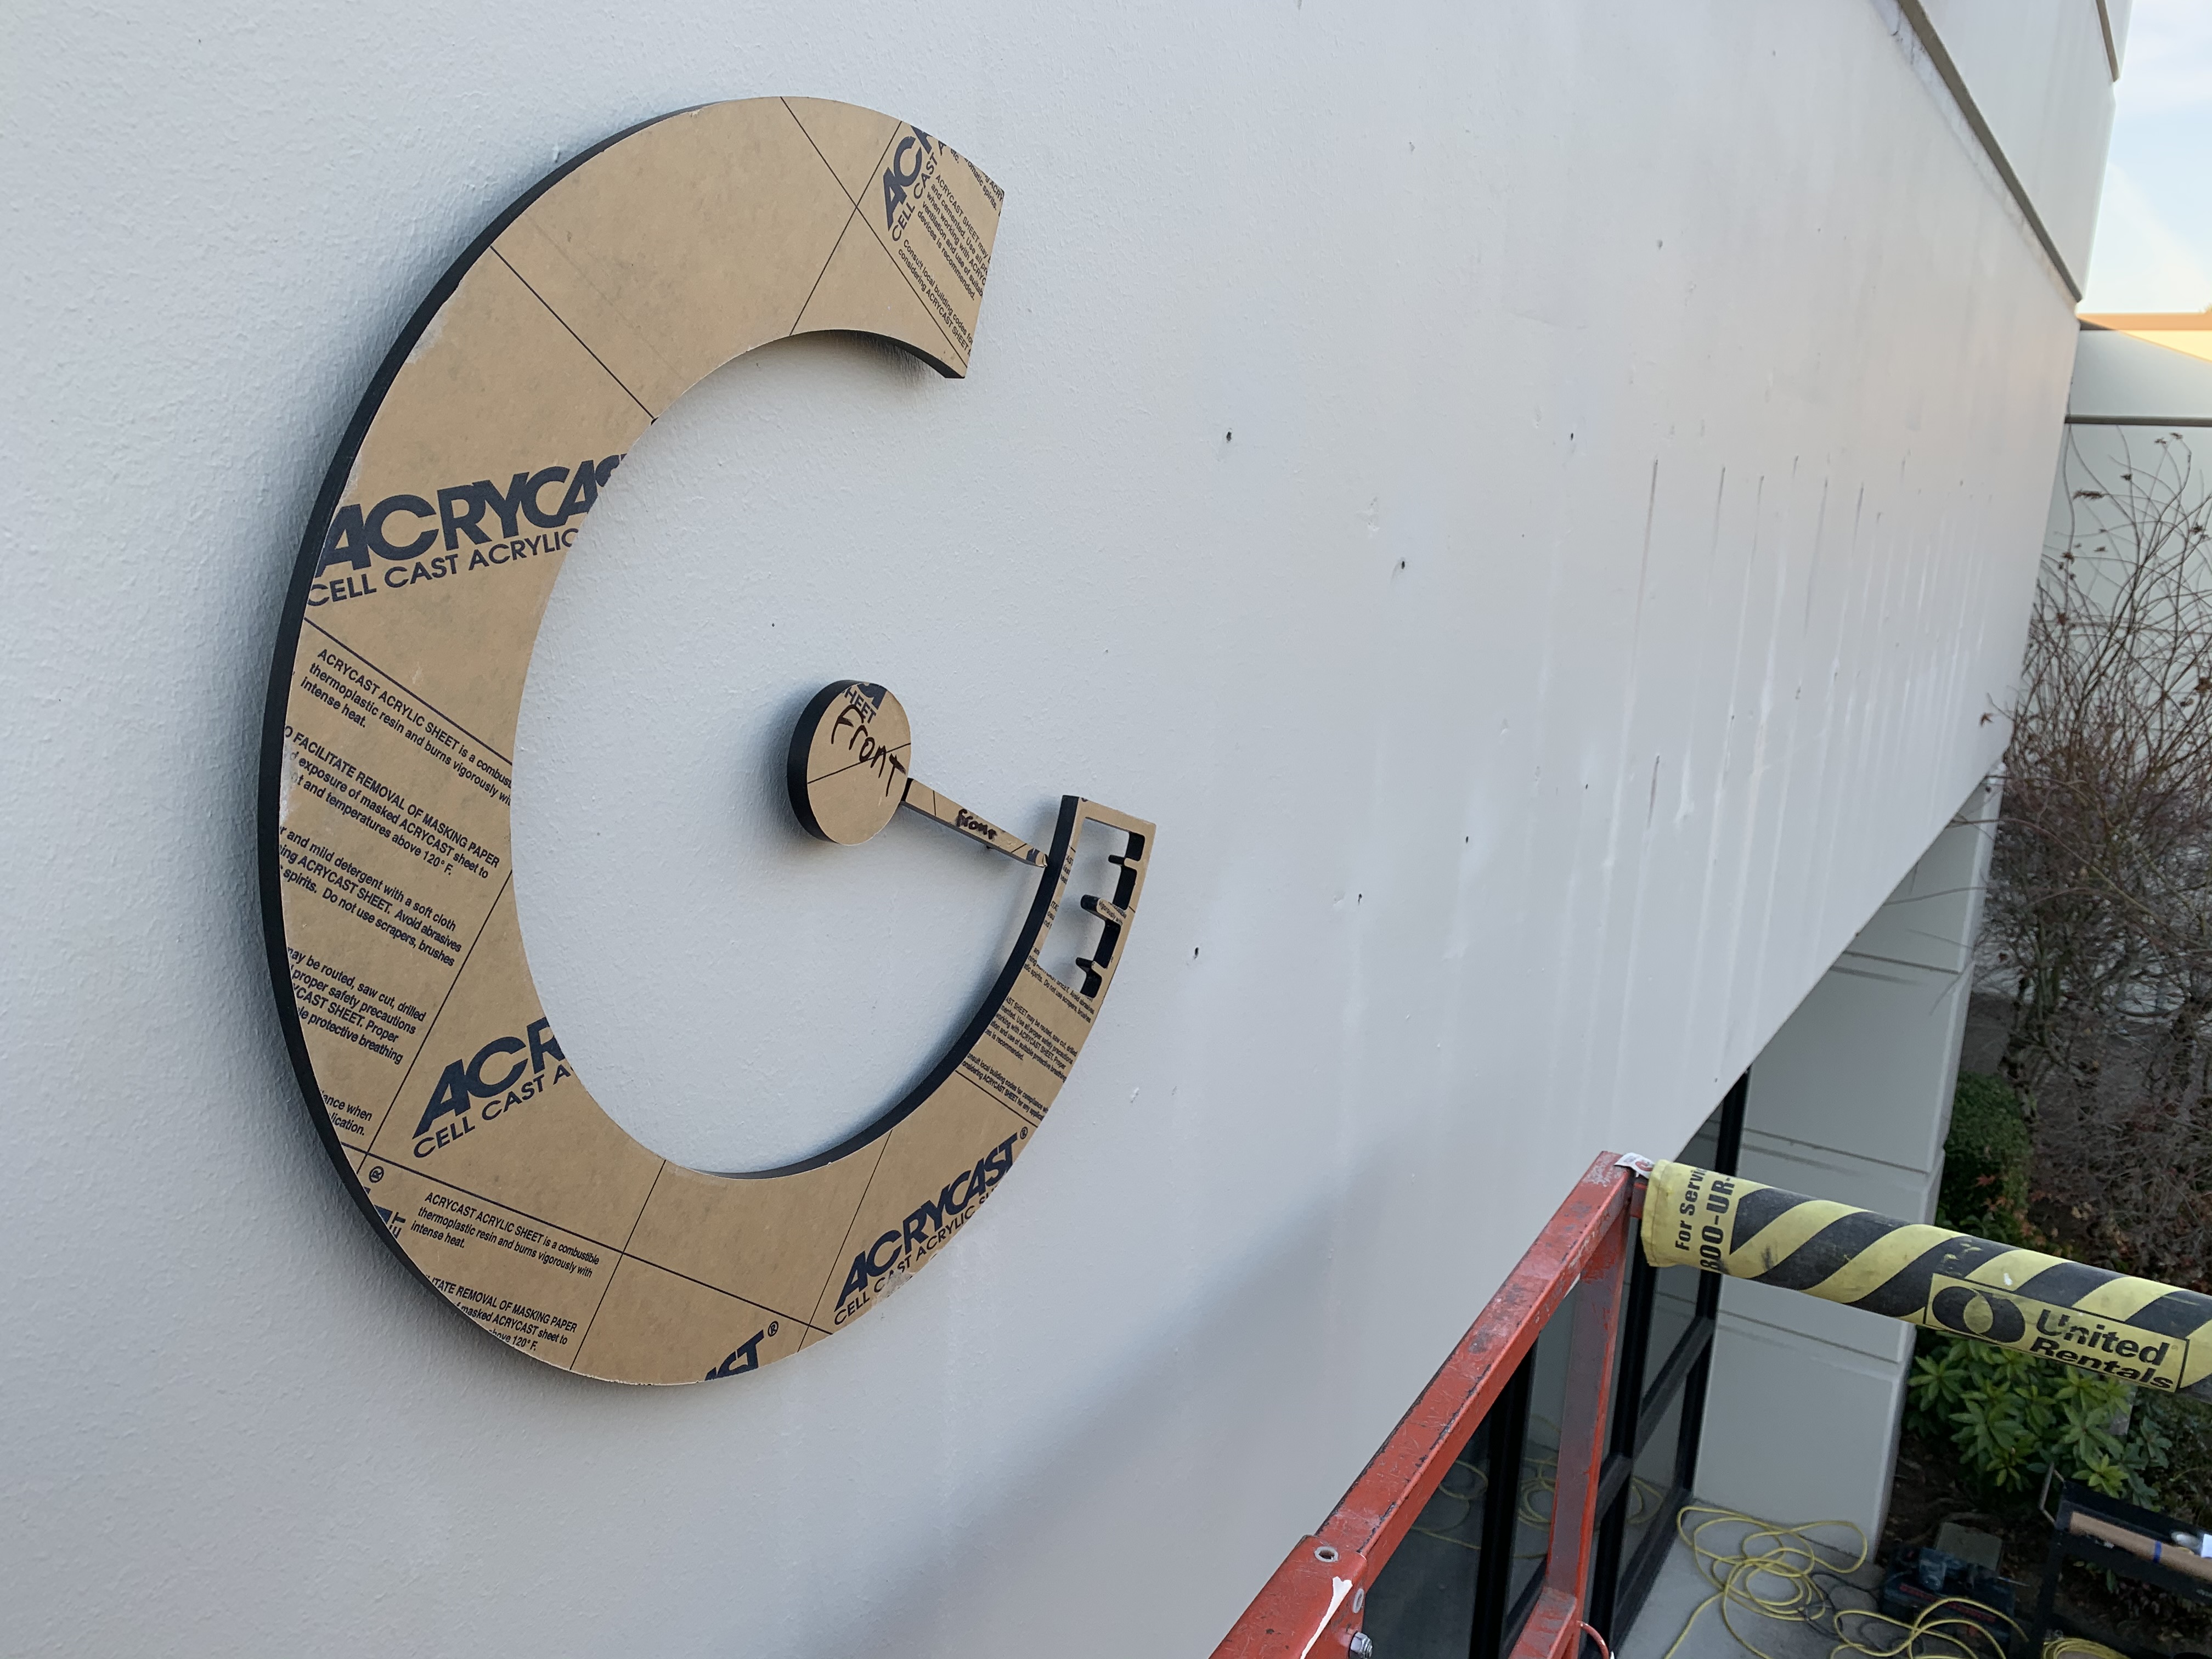
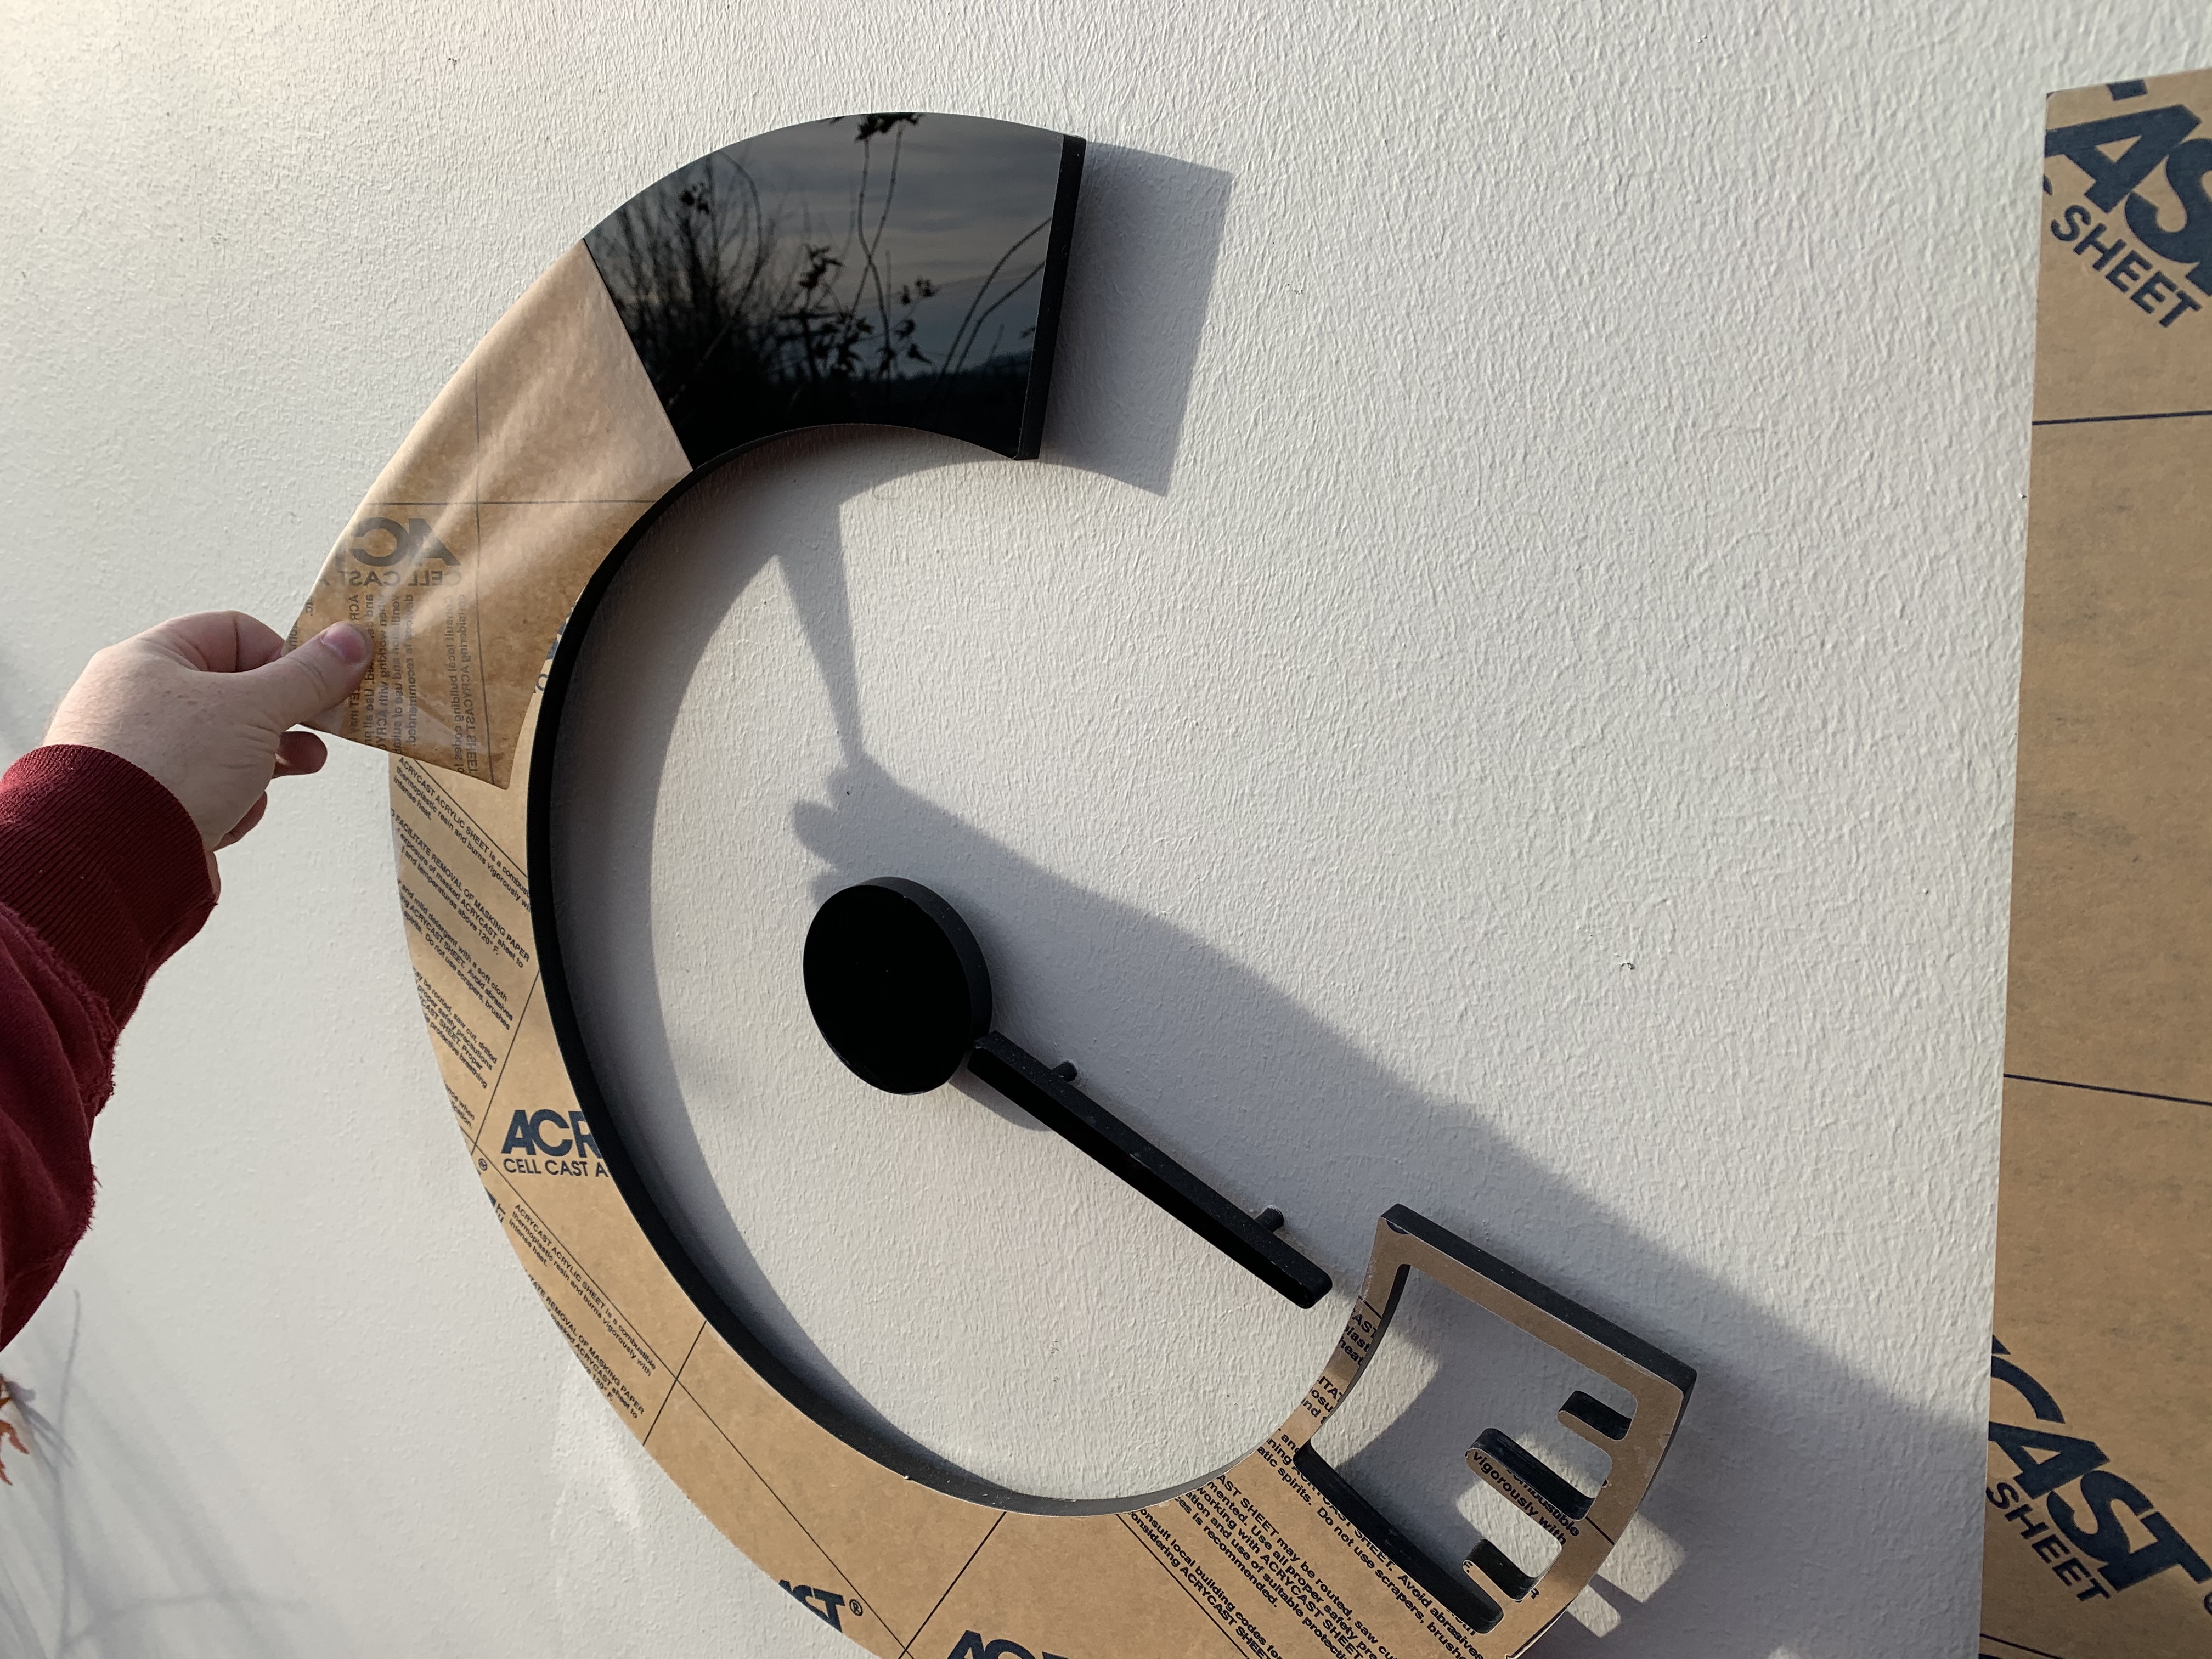
We went around a bit with material selection, but in the end decided upon .500" thick, gloss black cast acrylic sheet. I then modeled up a pattern where we could nest all the components of the sign onto one sheet.

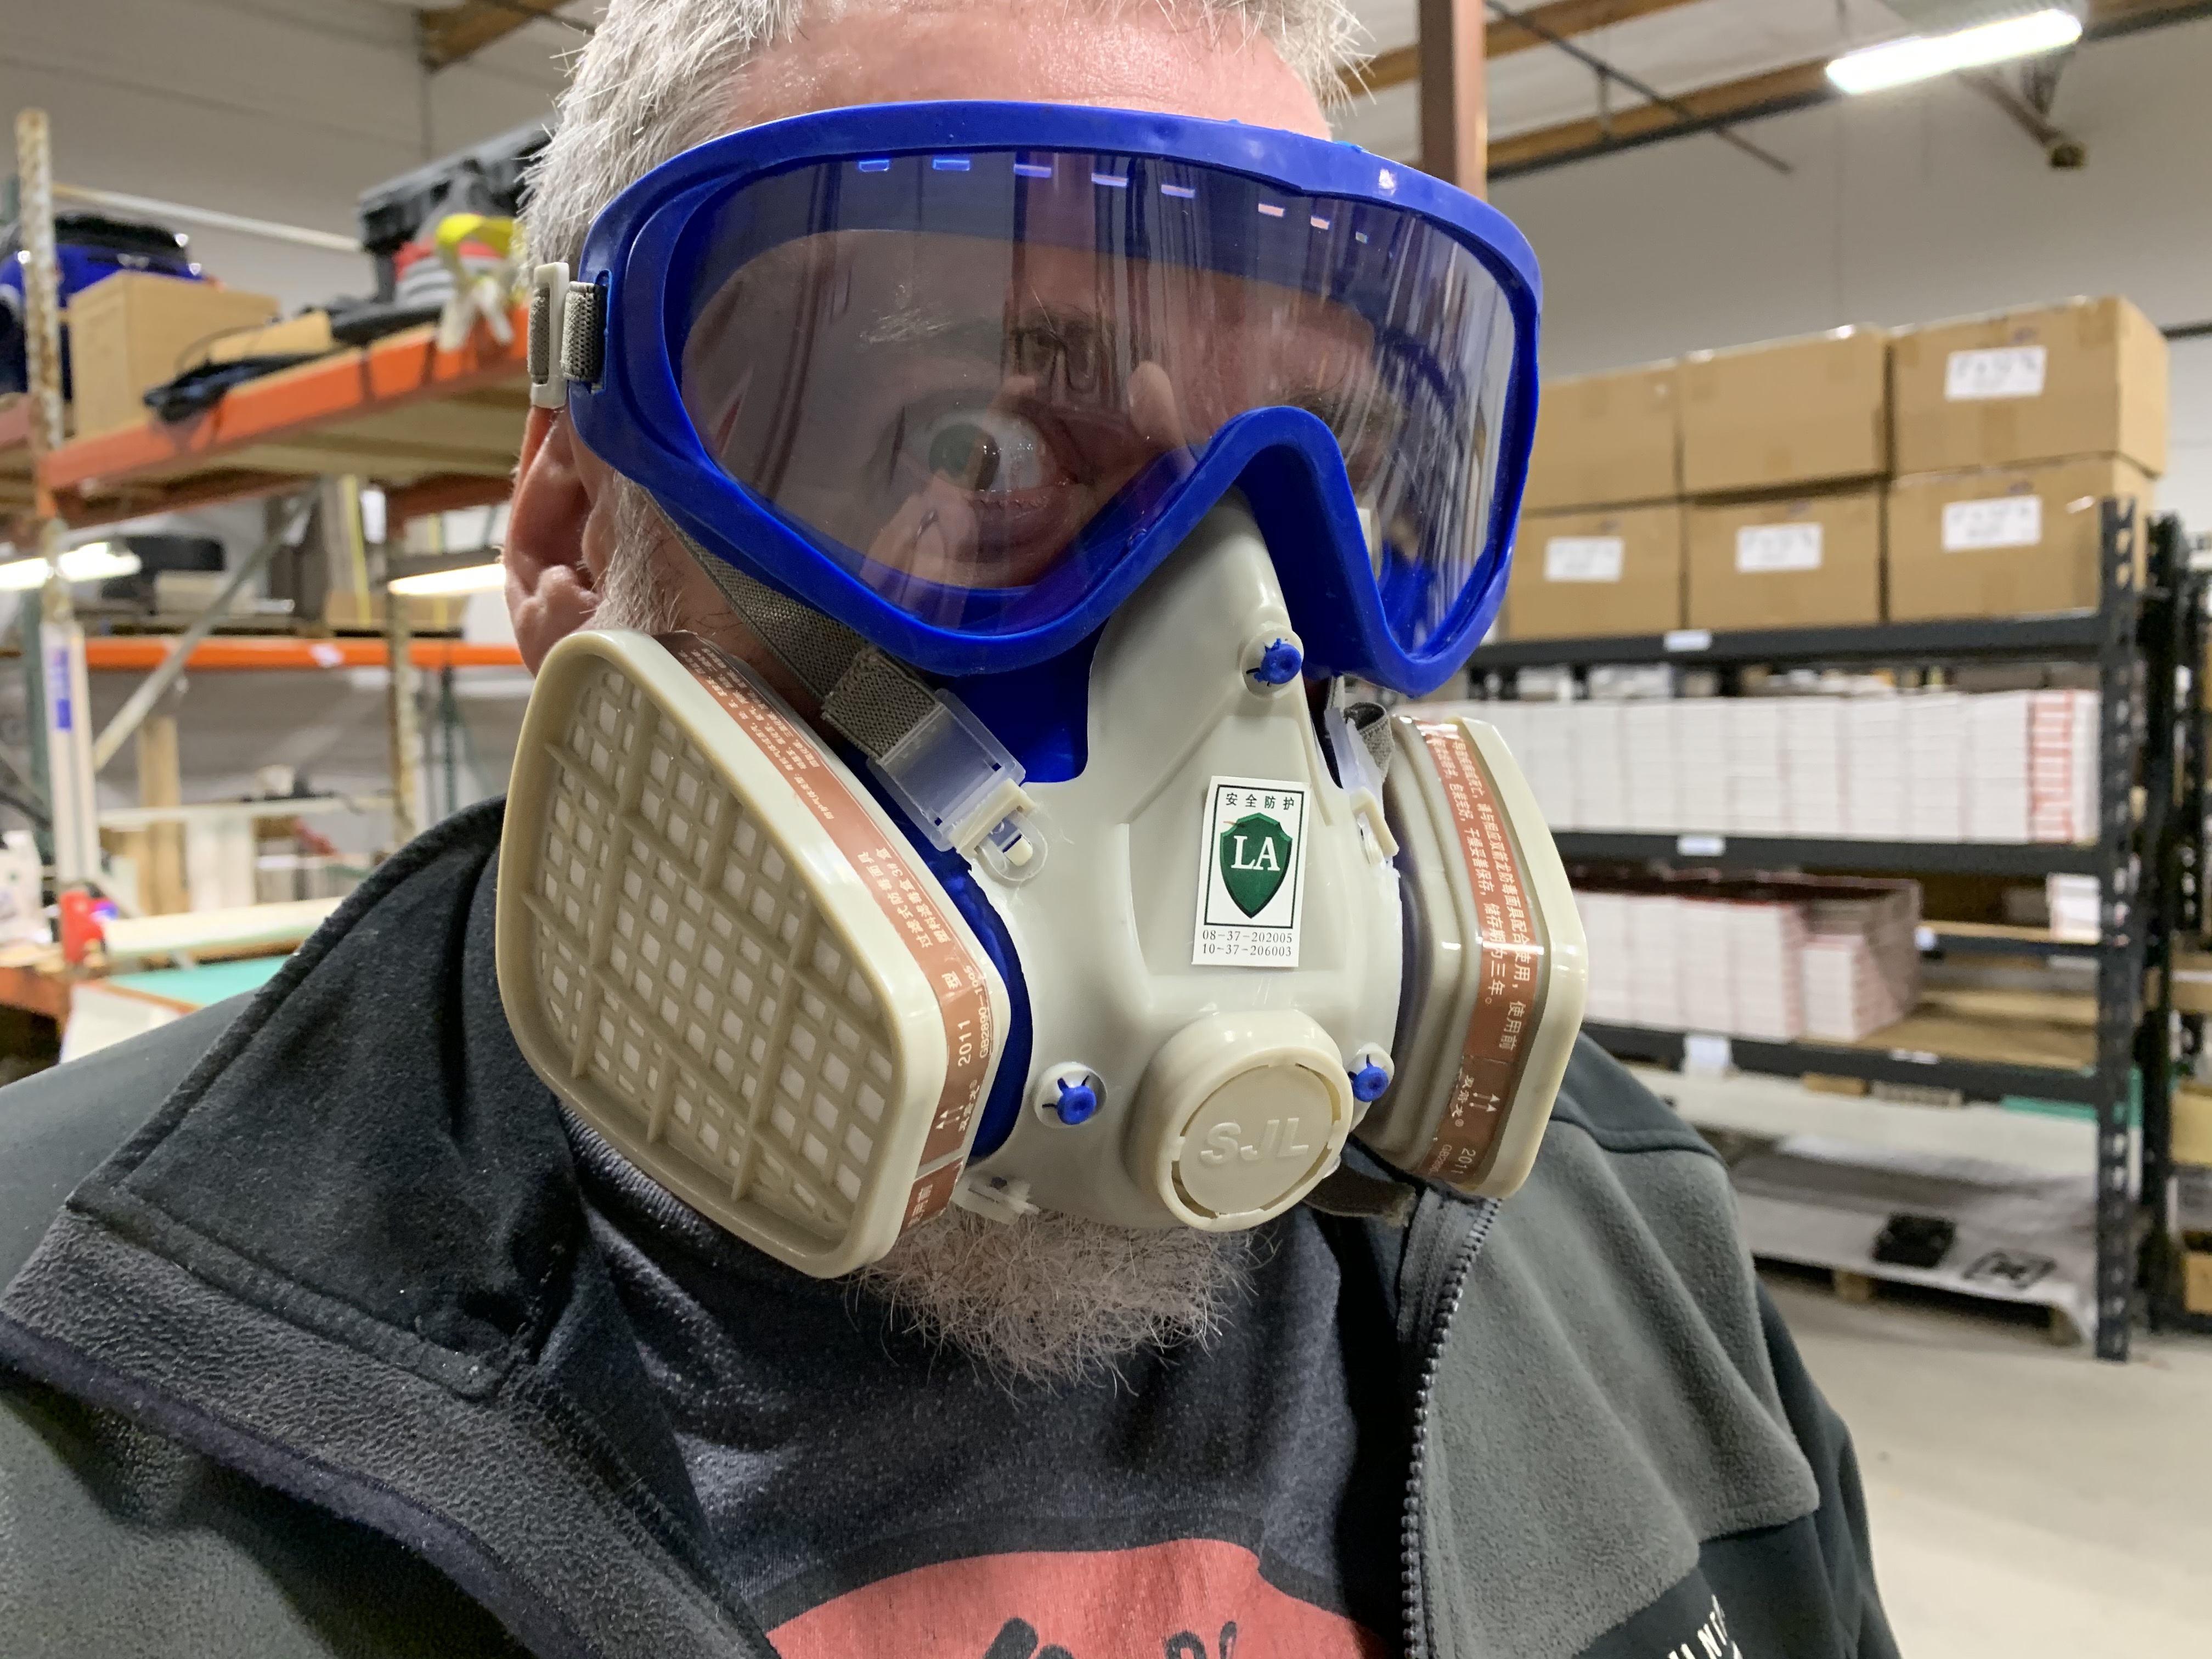
A trip across the street to the local plastics supplier and we were ready to get cutting. Donning some PPE, I transferred the patterns onto the acrylic sheet and cut them out with our cordless jigsaw.
Although quite capable, our in-house CNC mill doesn't quite have the capacity to machine such large parts, so I brought in my own CNC router from home. It's an Openbuilds Workbee 1010 and just about perfect for this type of project.
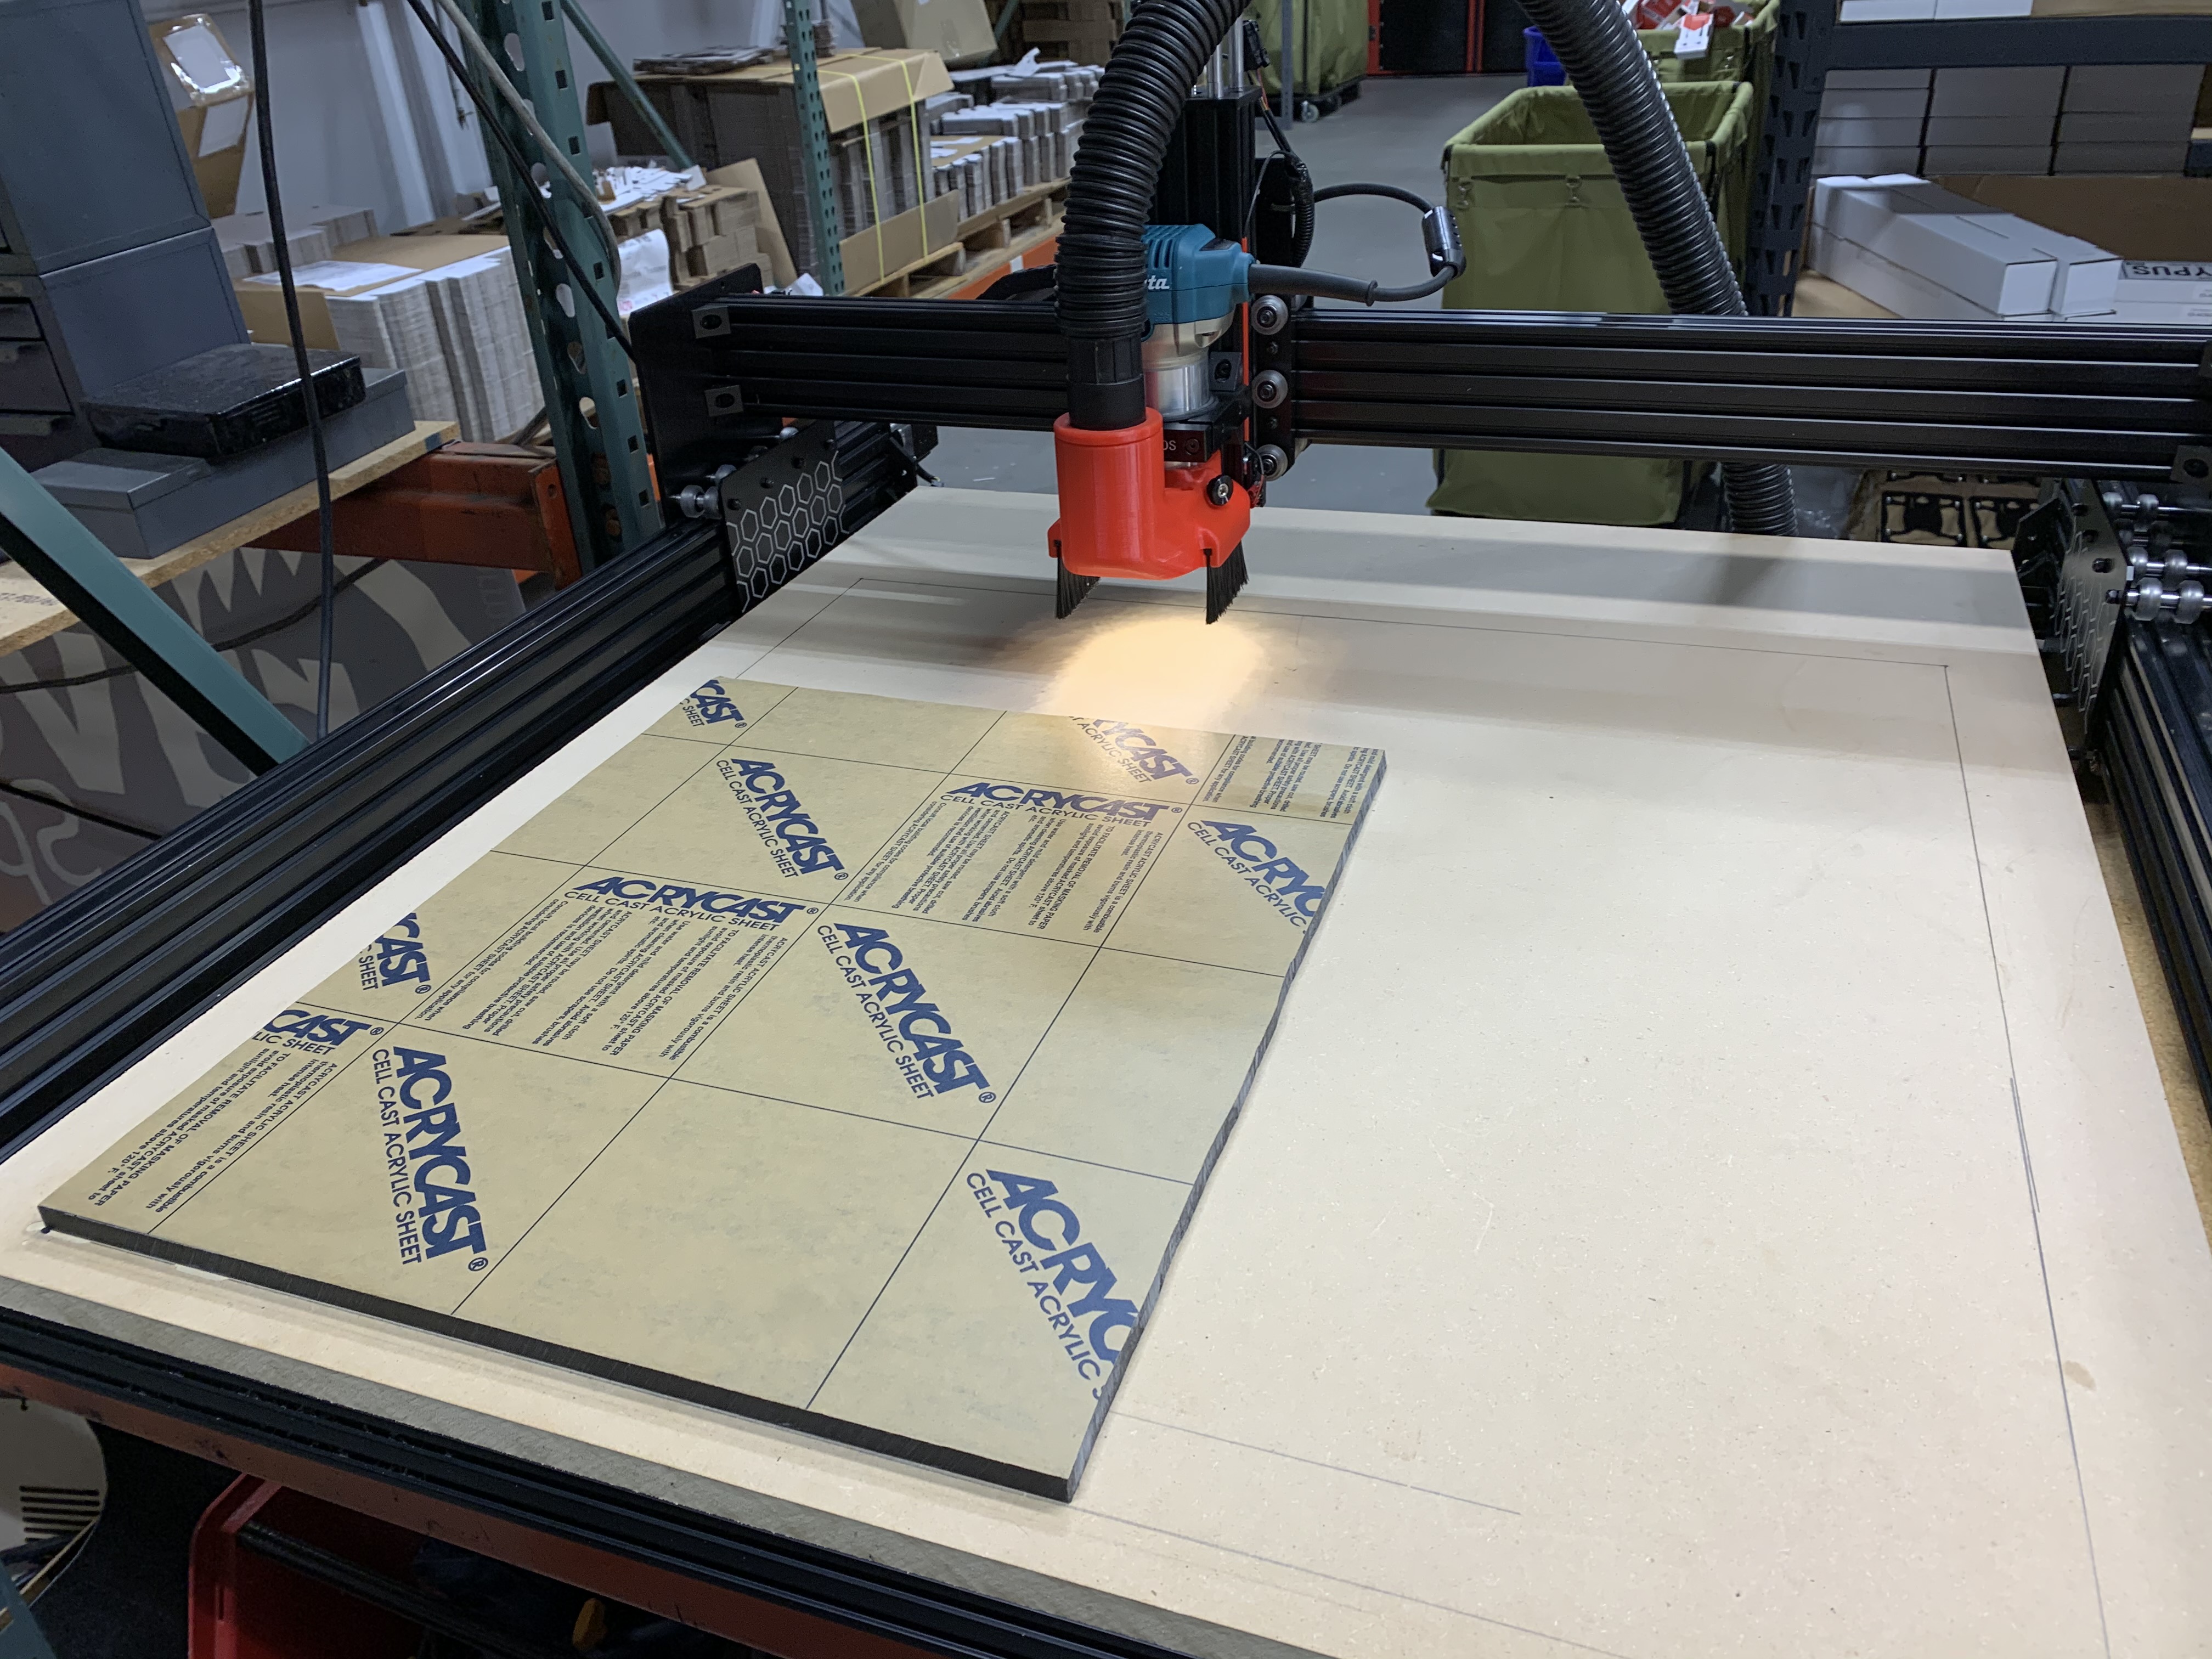
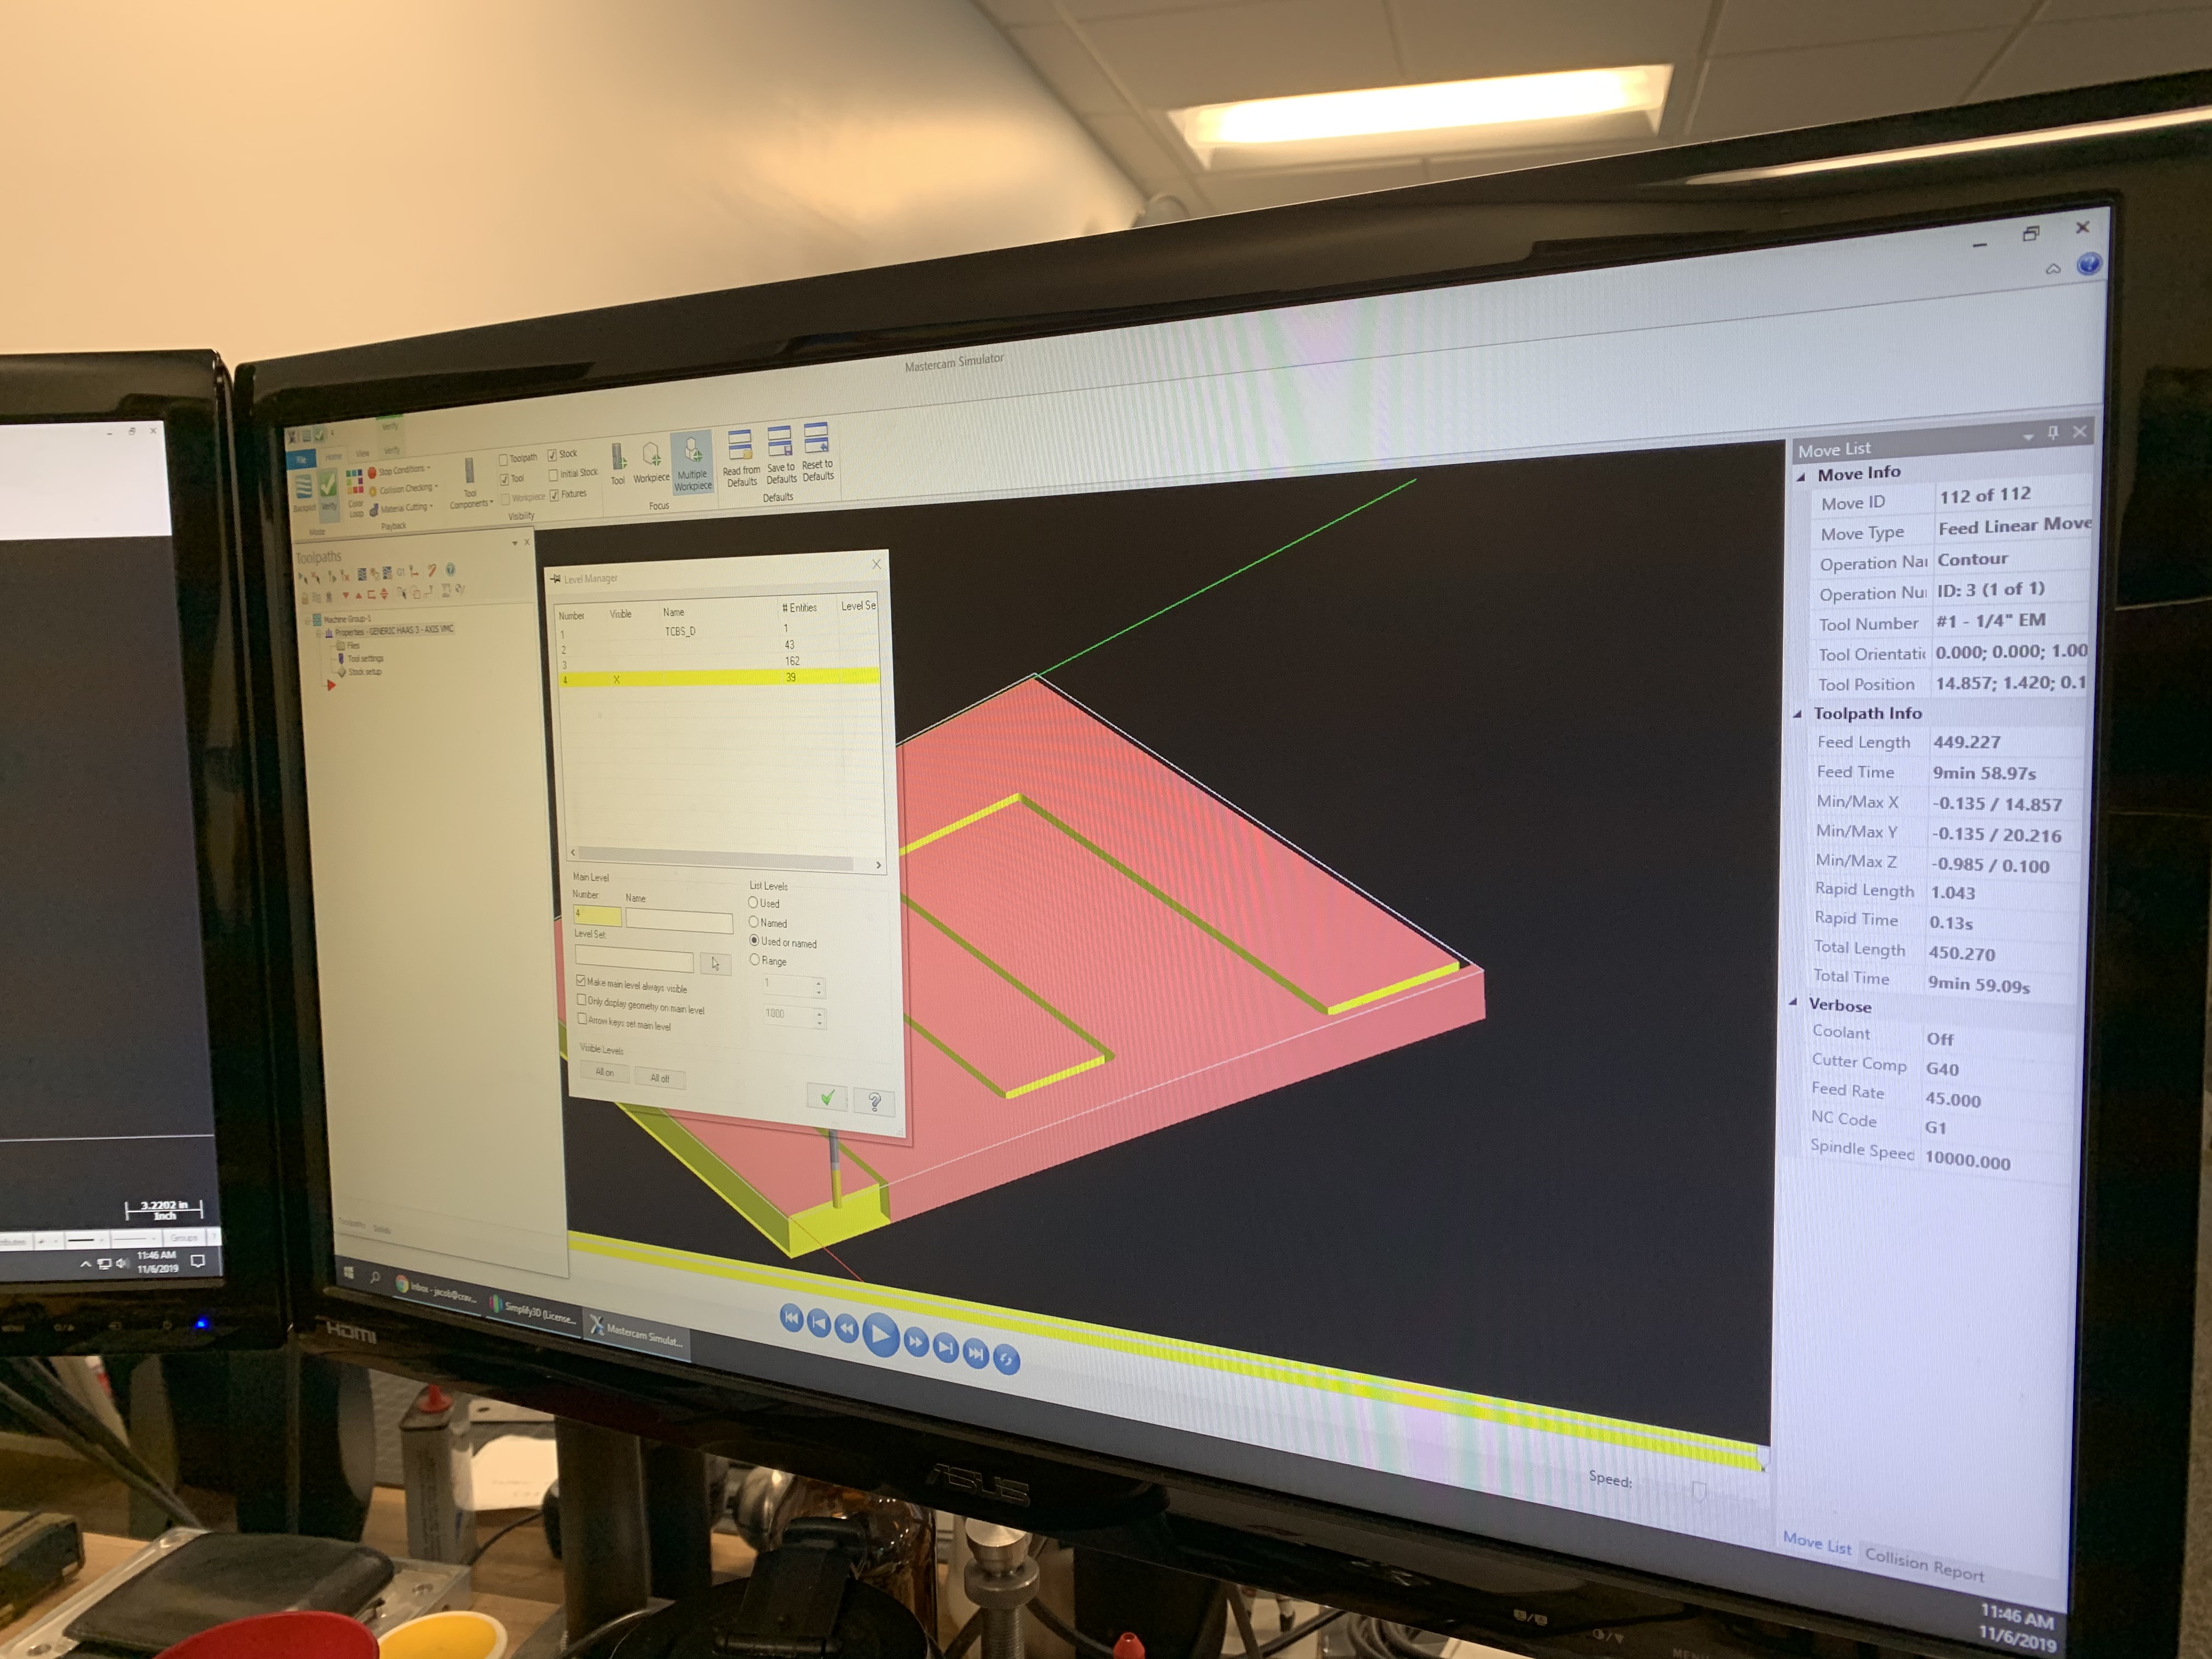
While I prepared the individual pieces of acrylic for the machining process, Jacob worked his MasterCam magic so the coding would communicate with the CNC router.
We made a few sample cuts to get the feeds and speeds correct and then started cranking out sign parts.
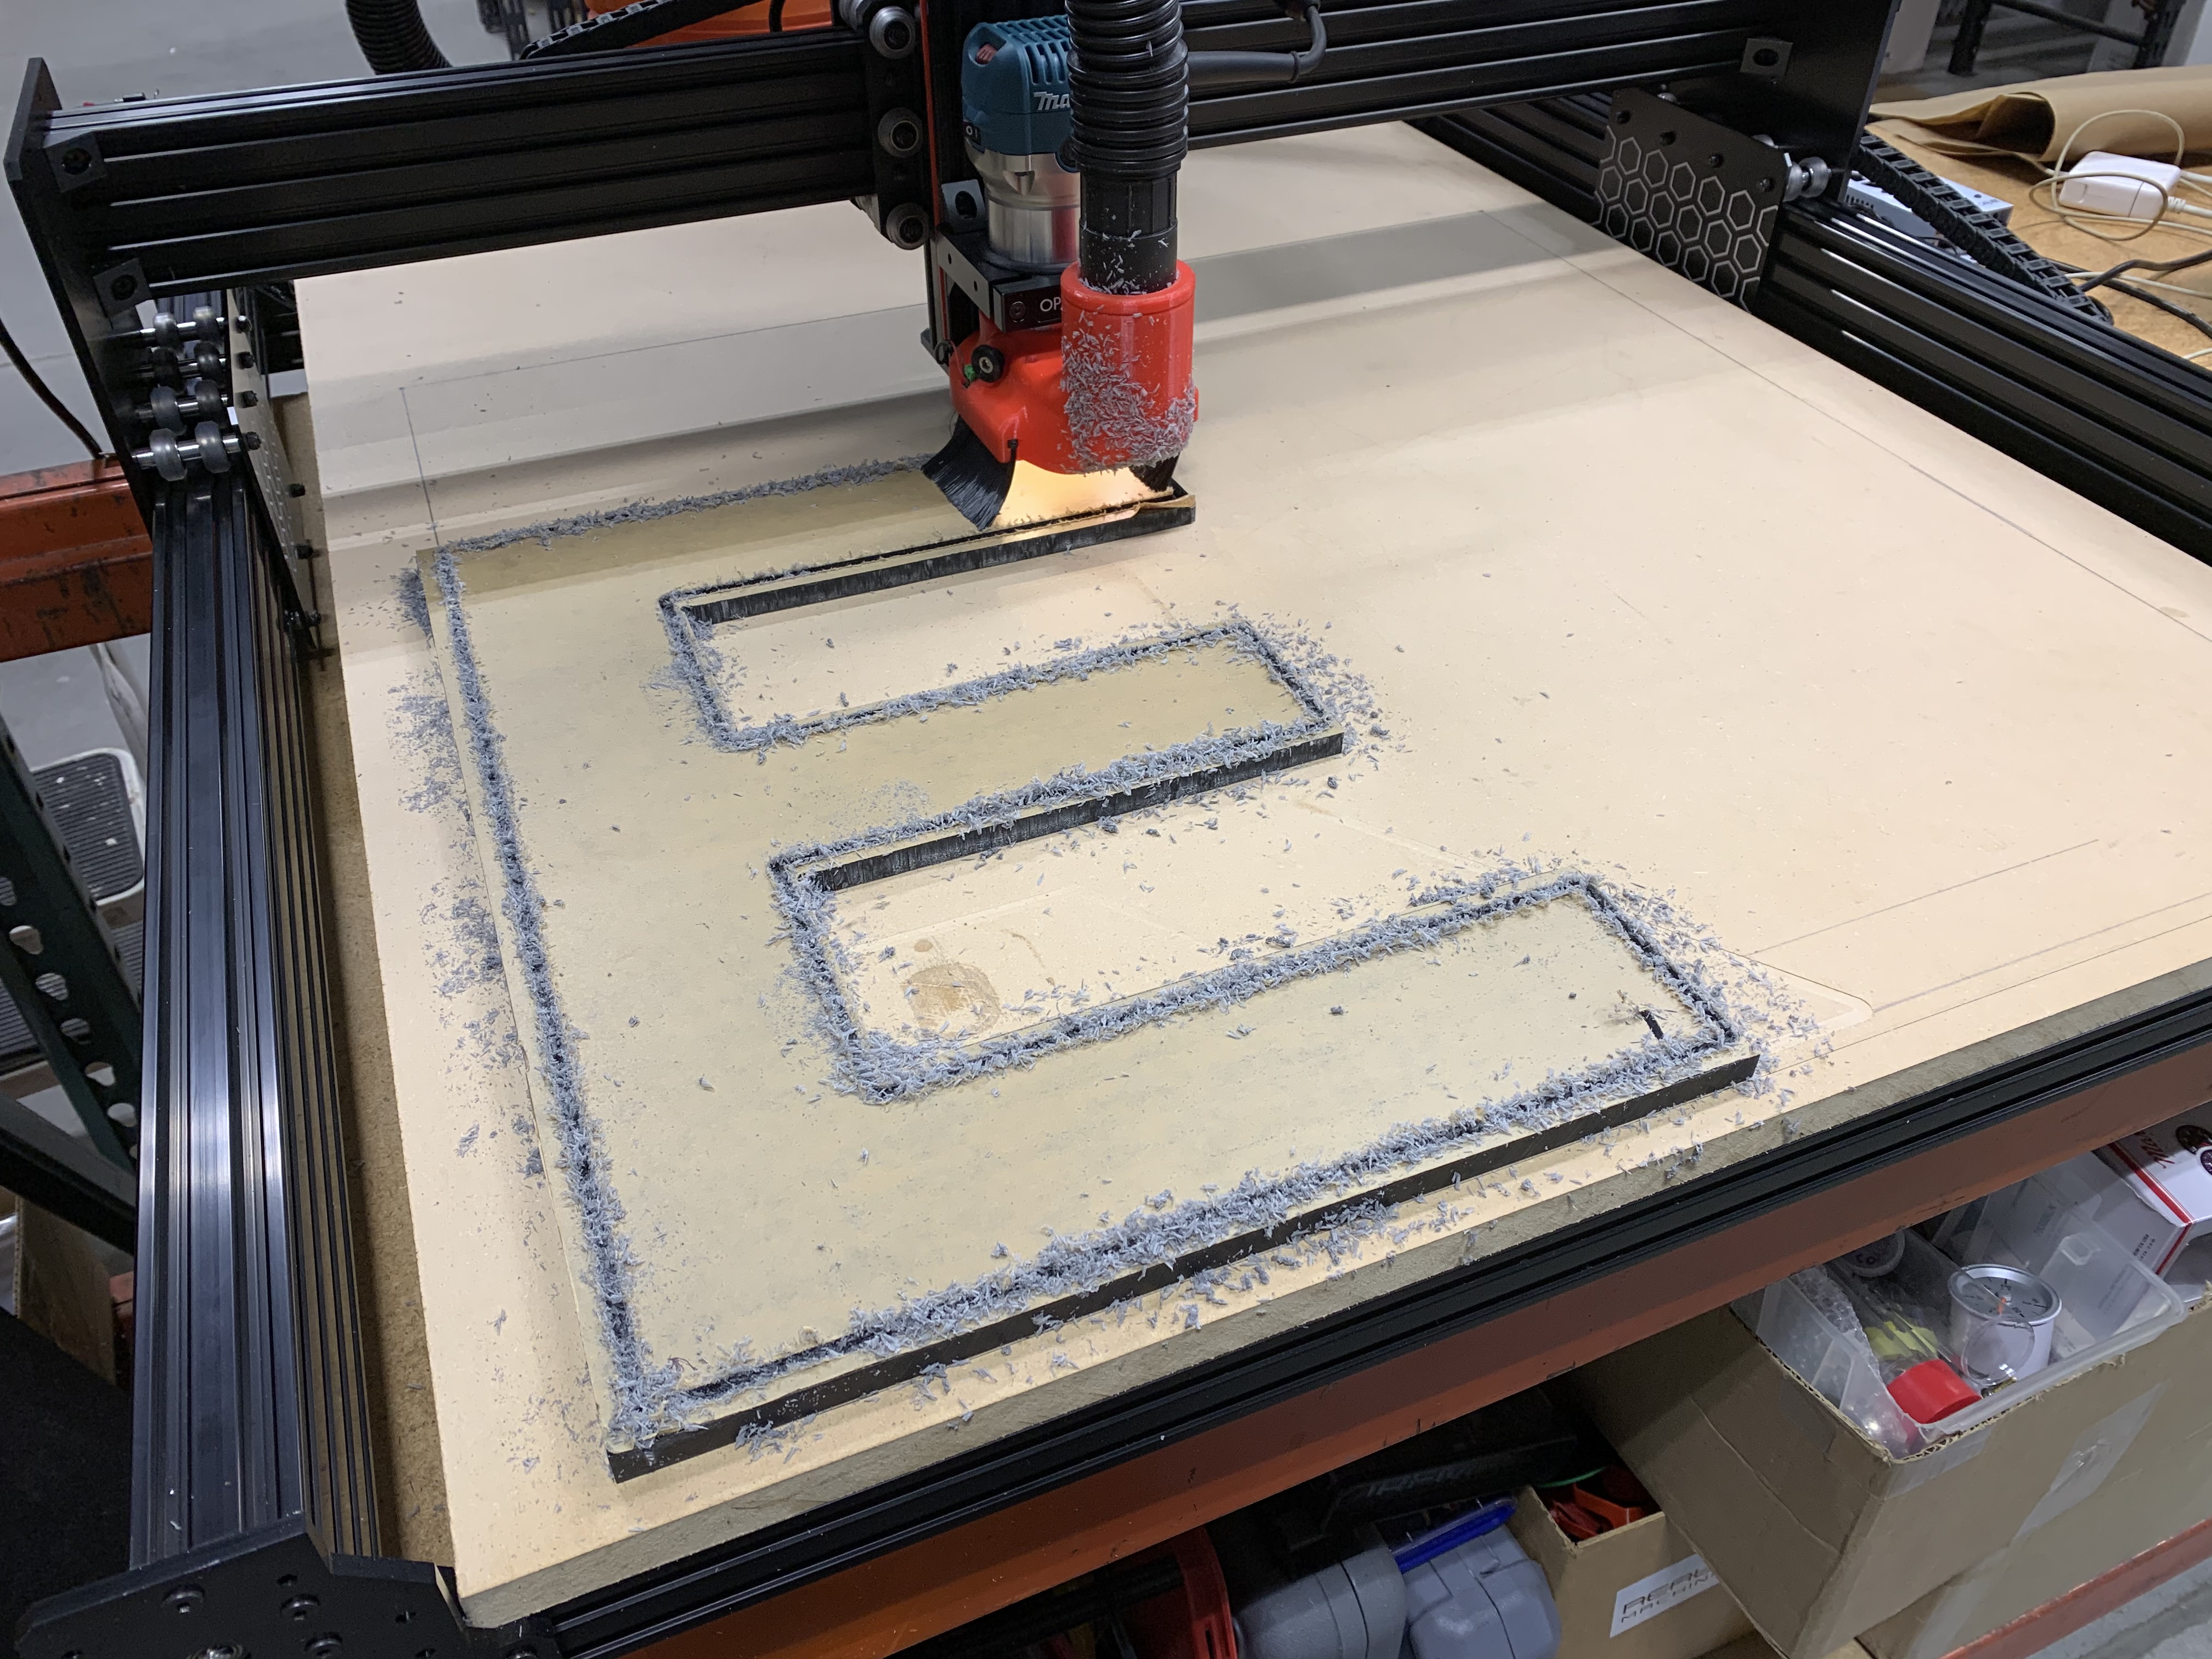
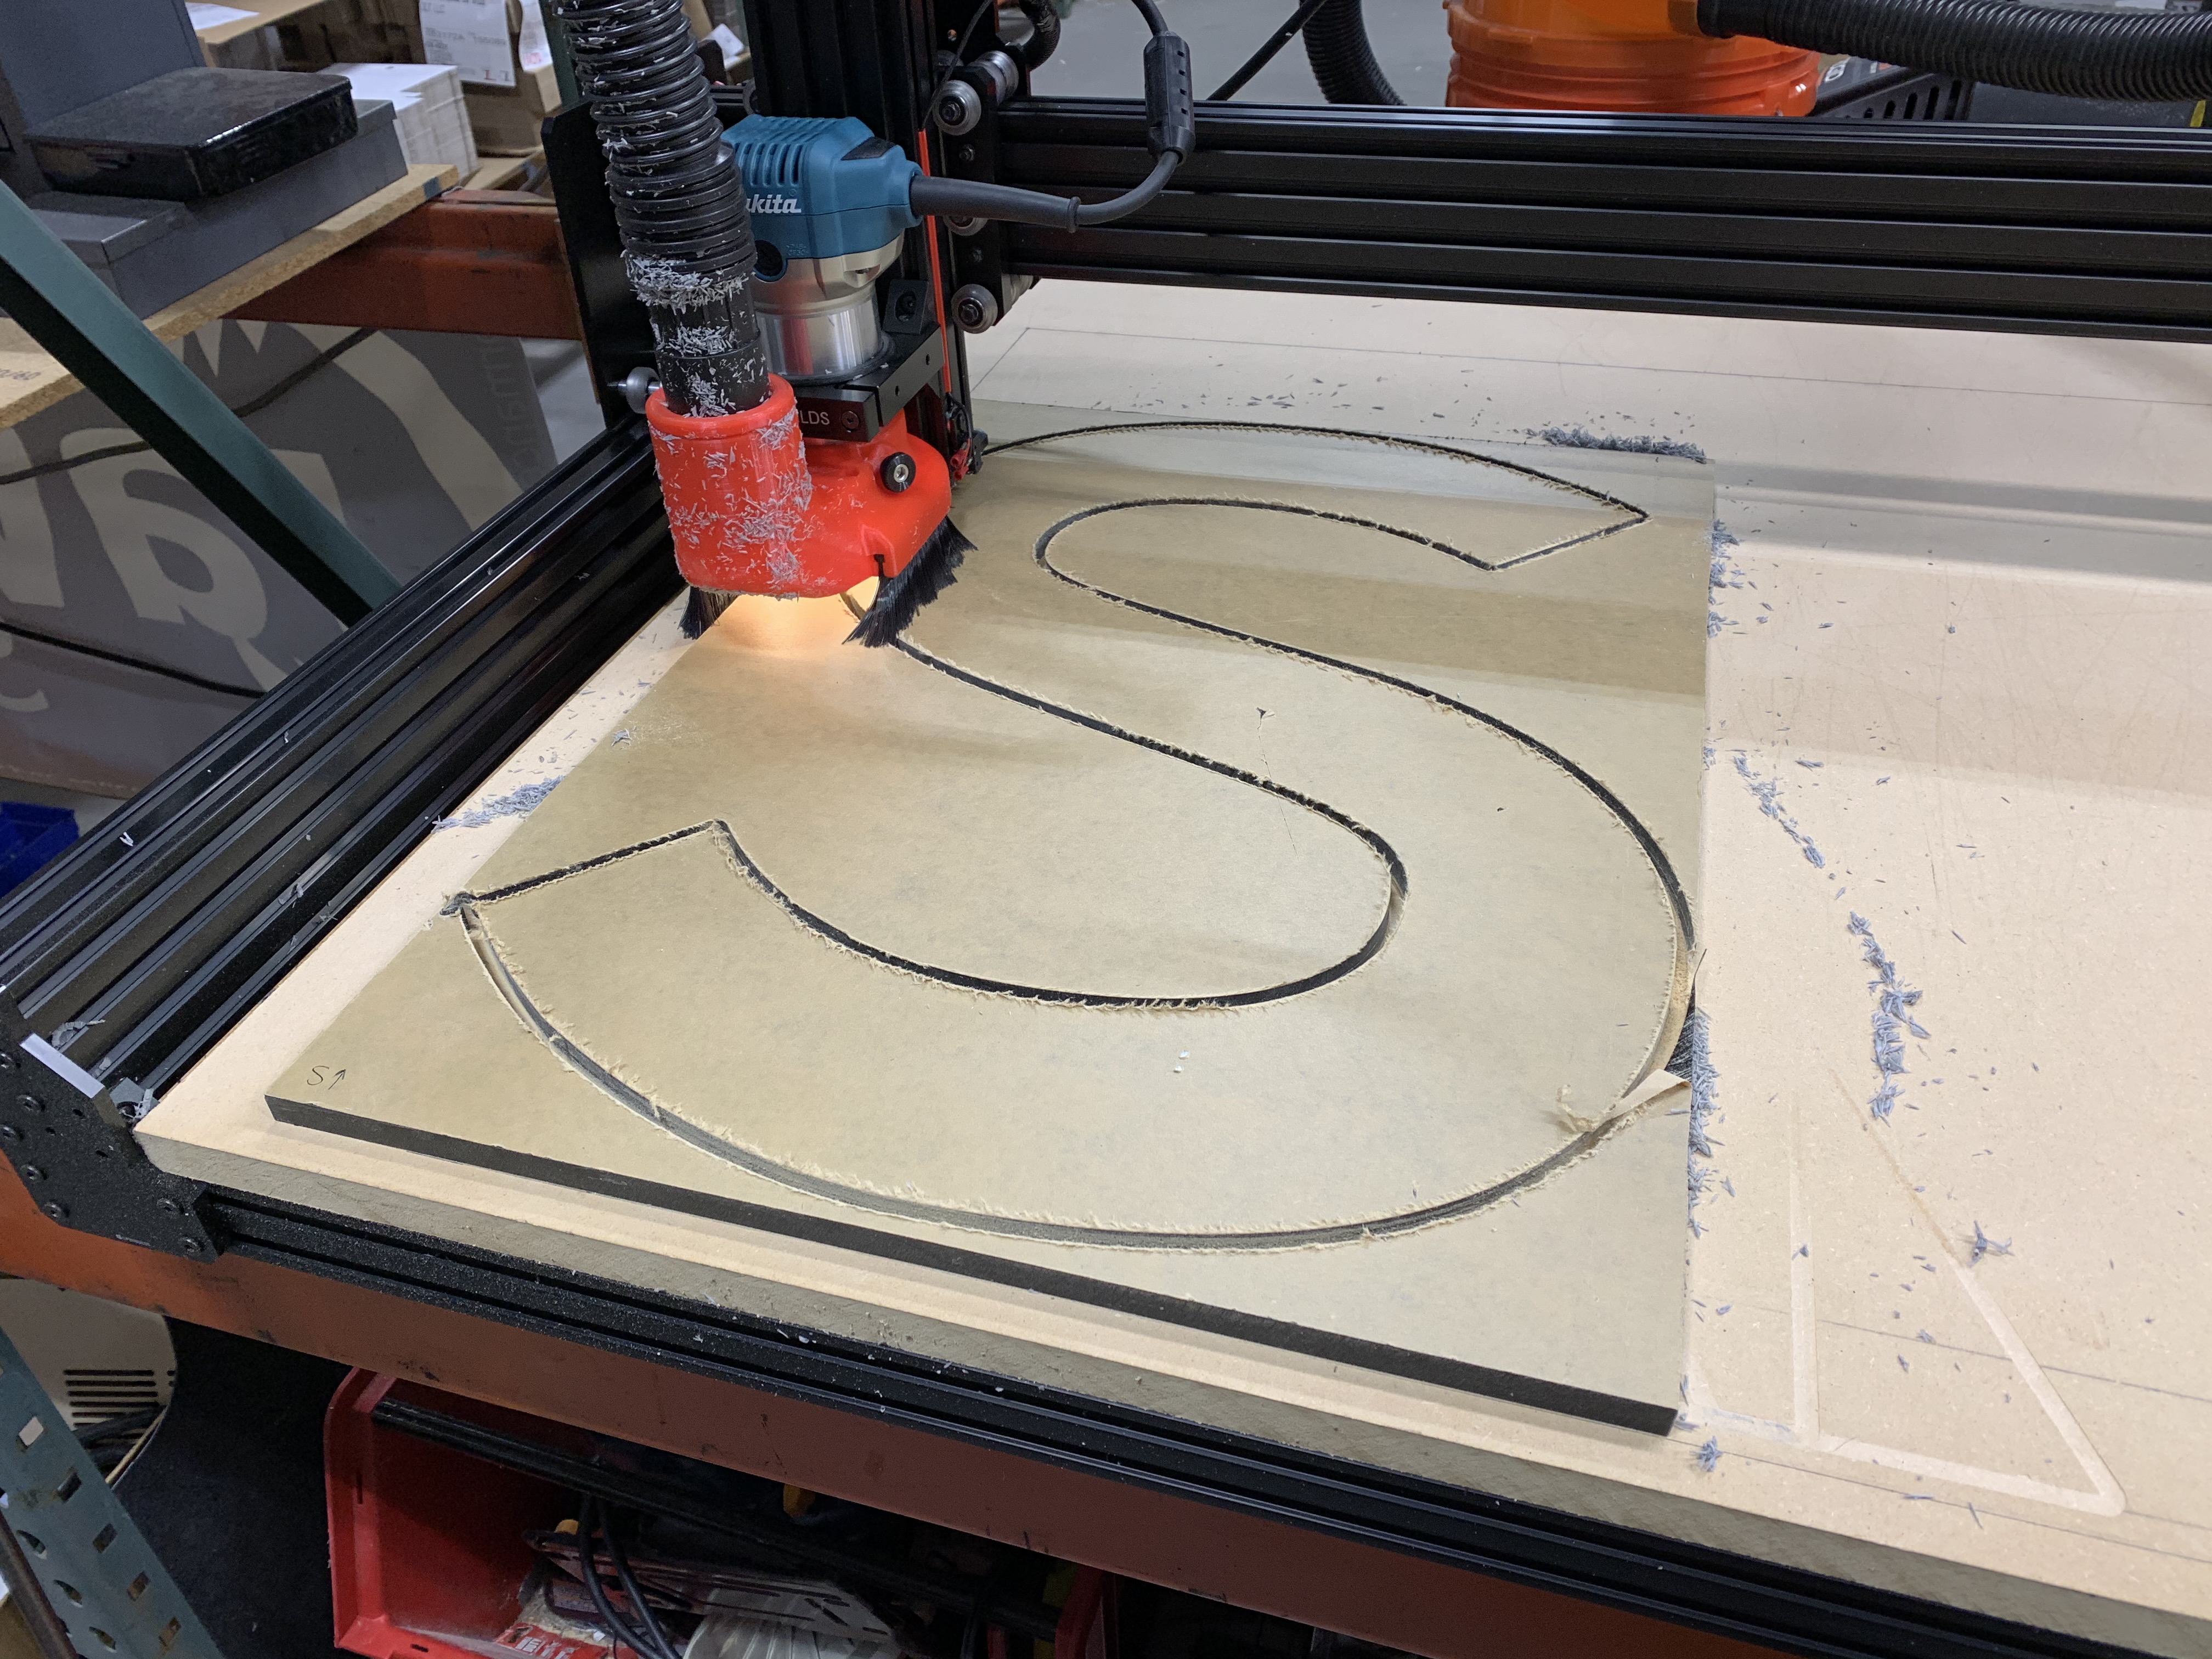
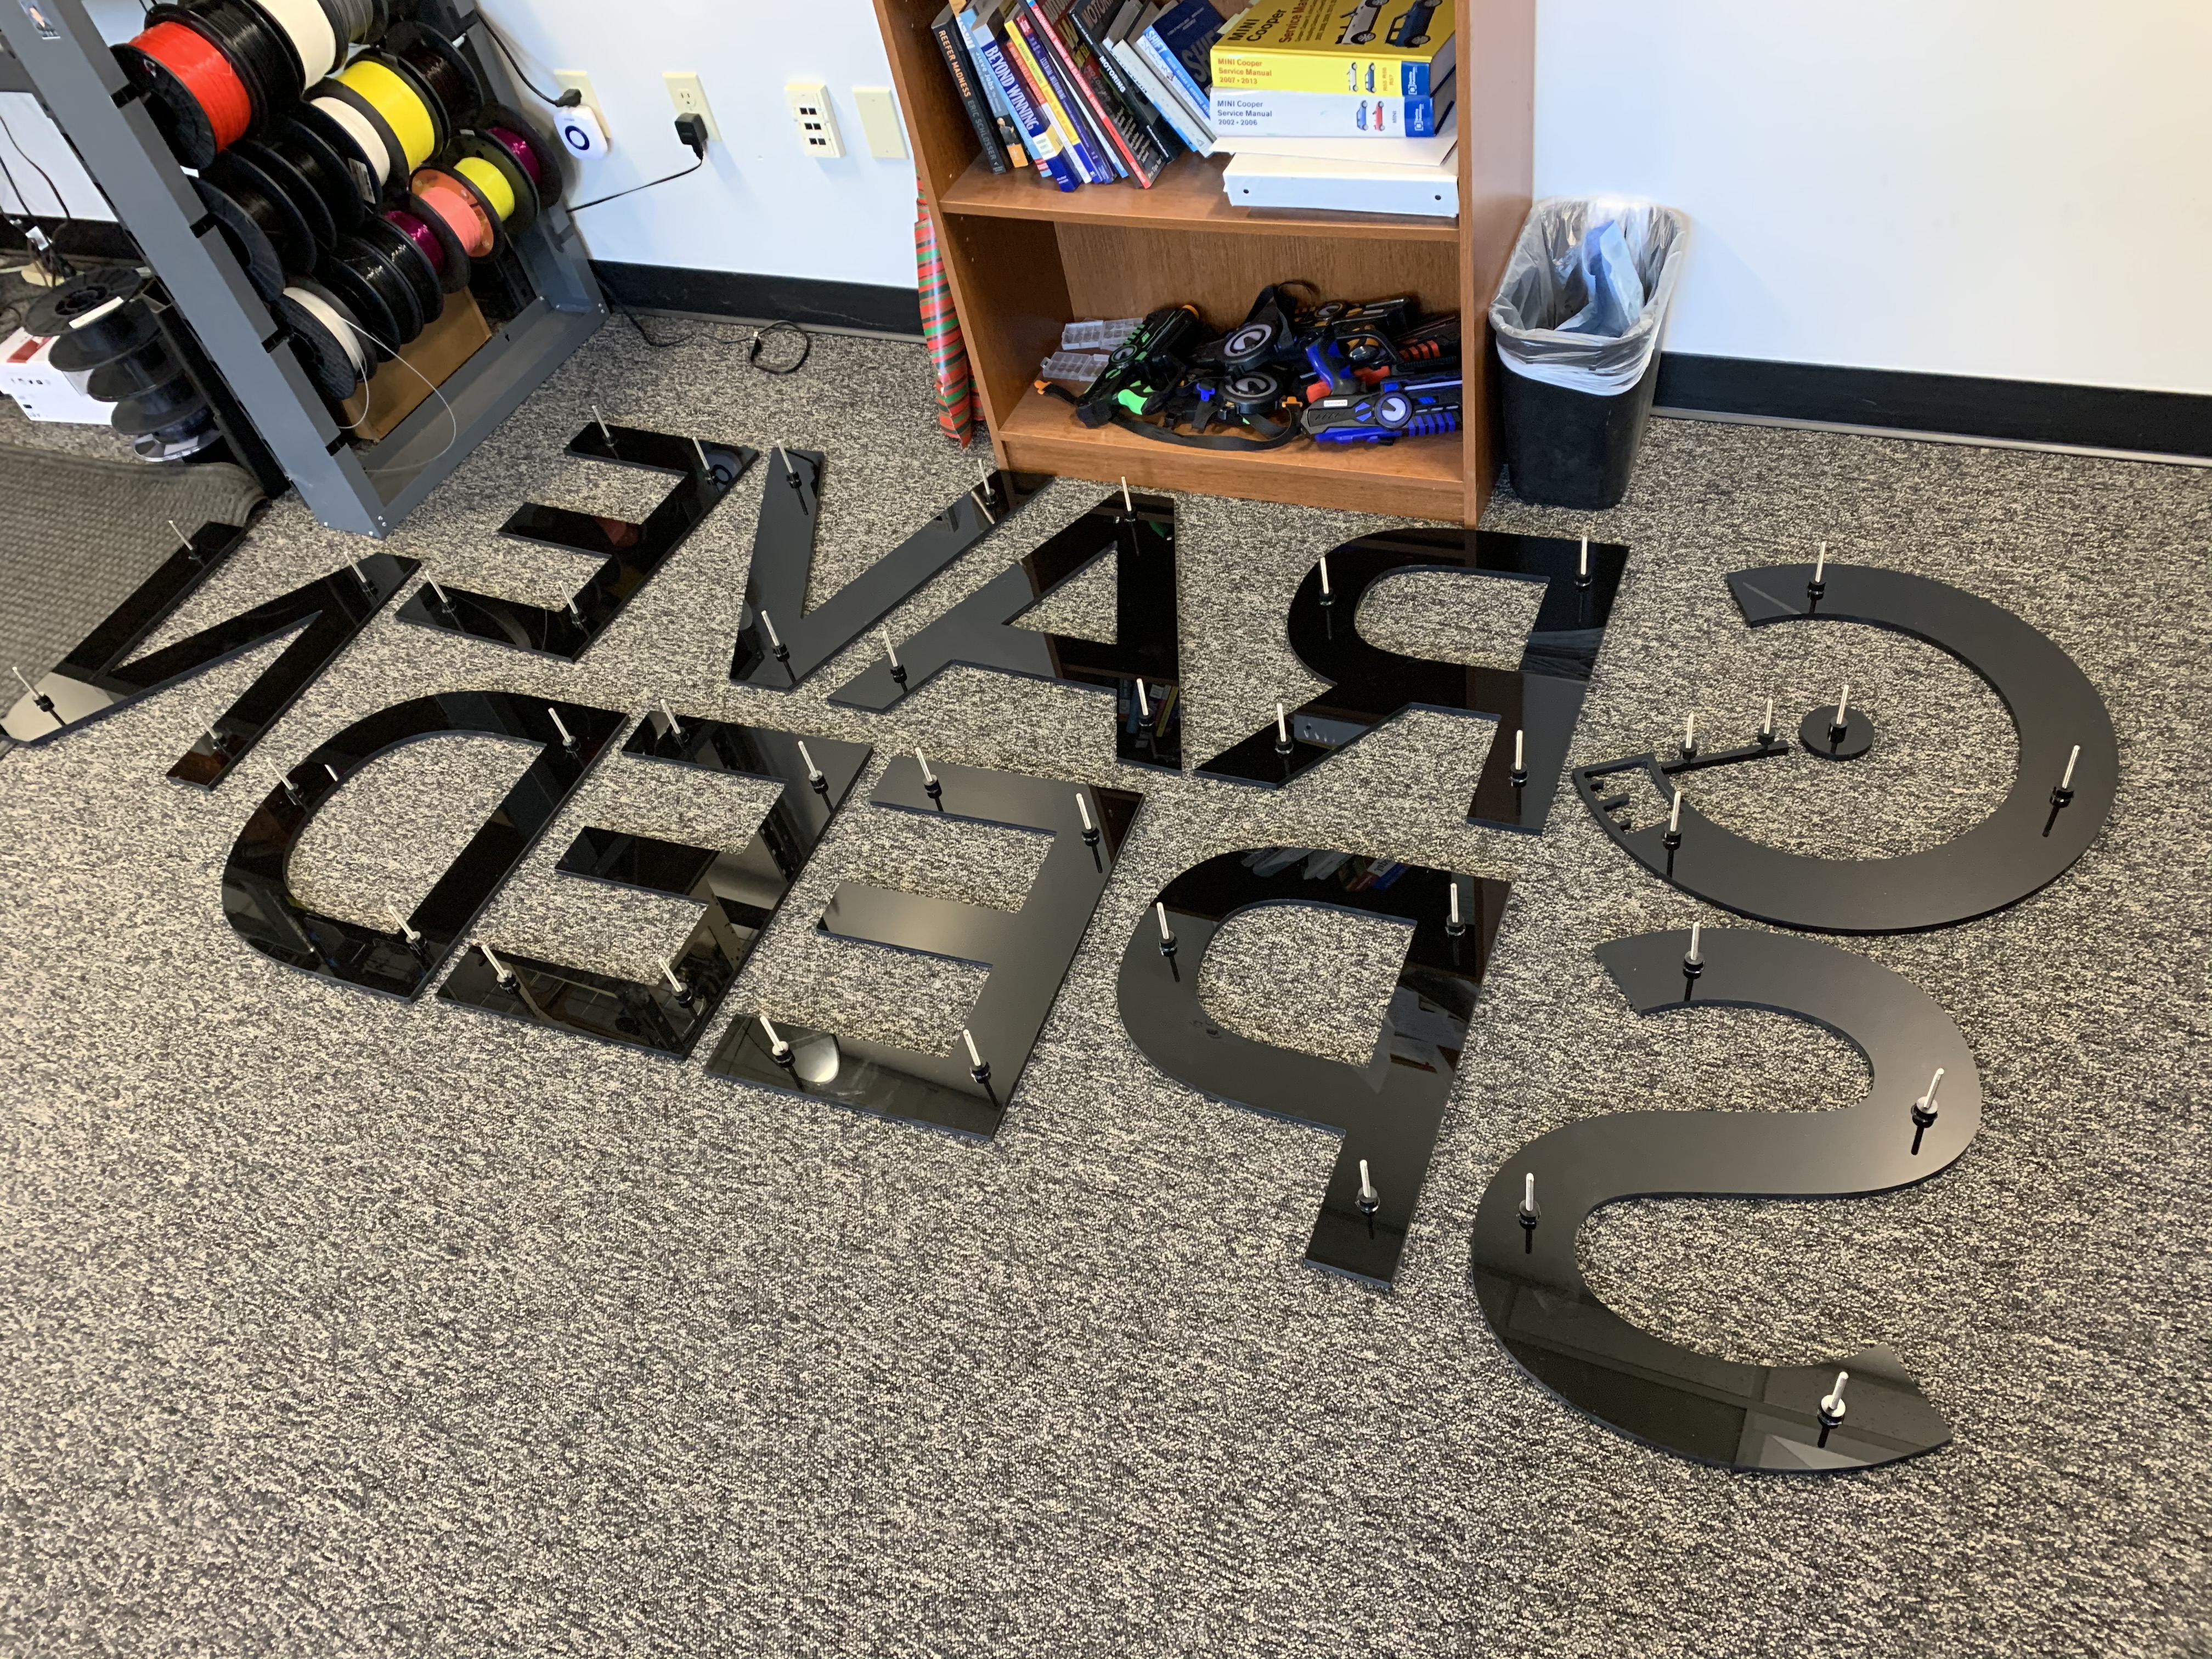
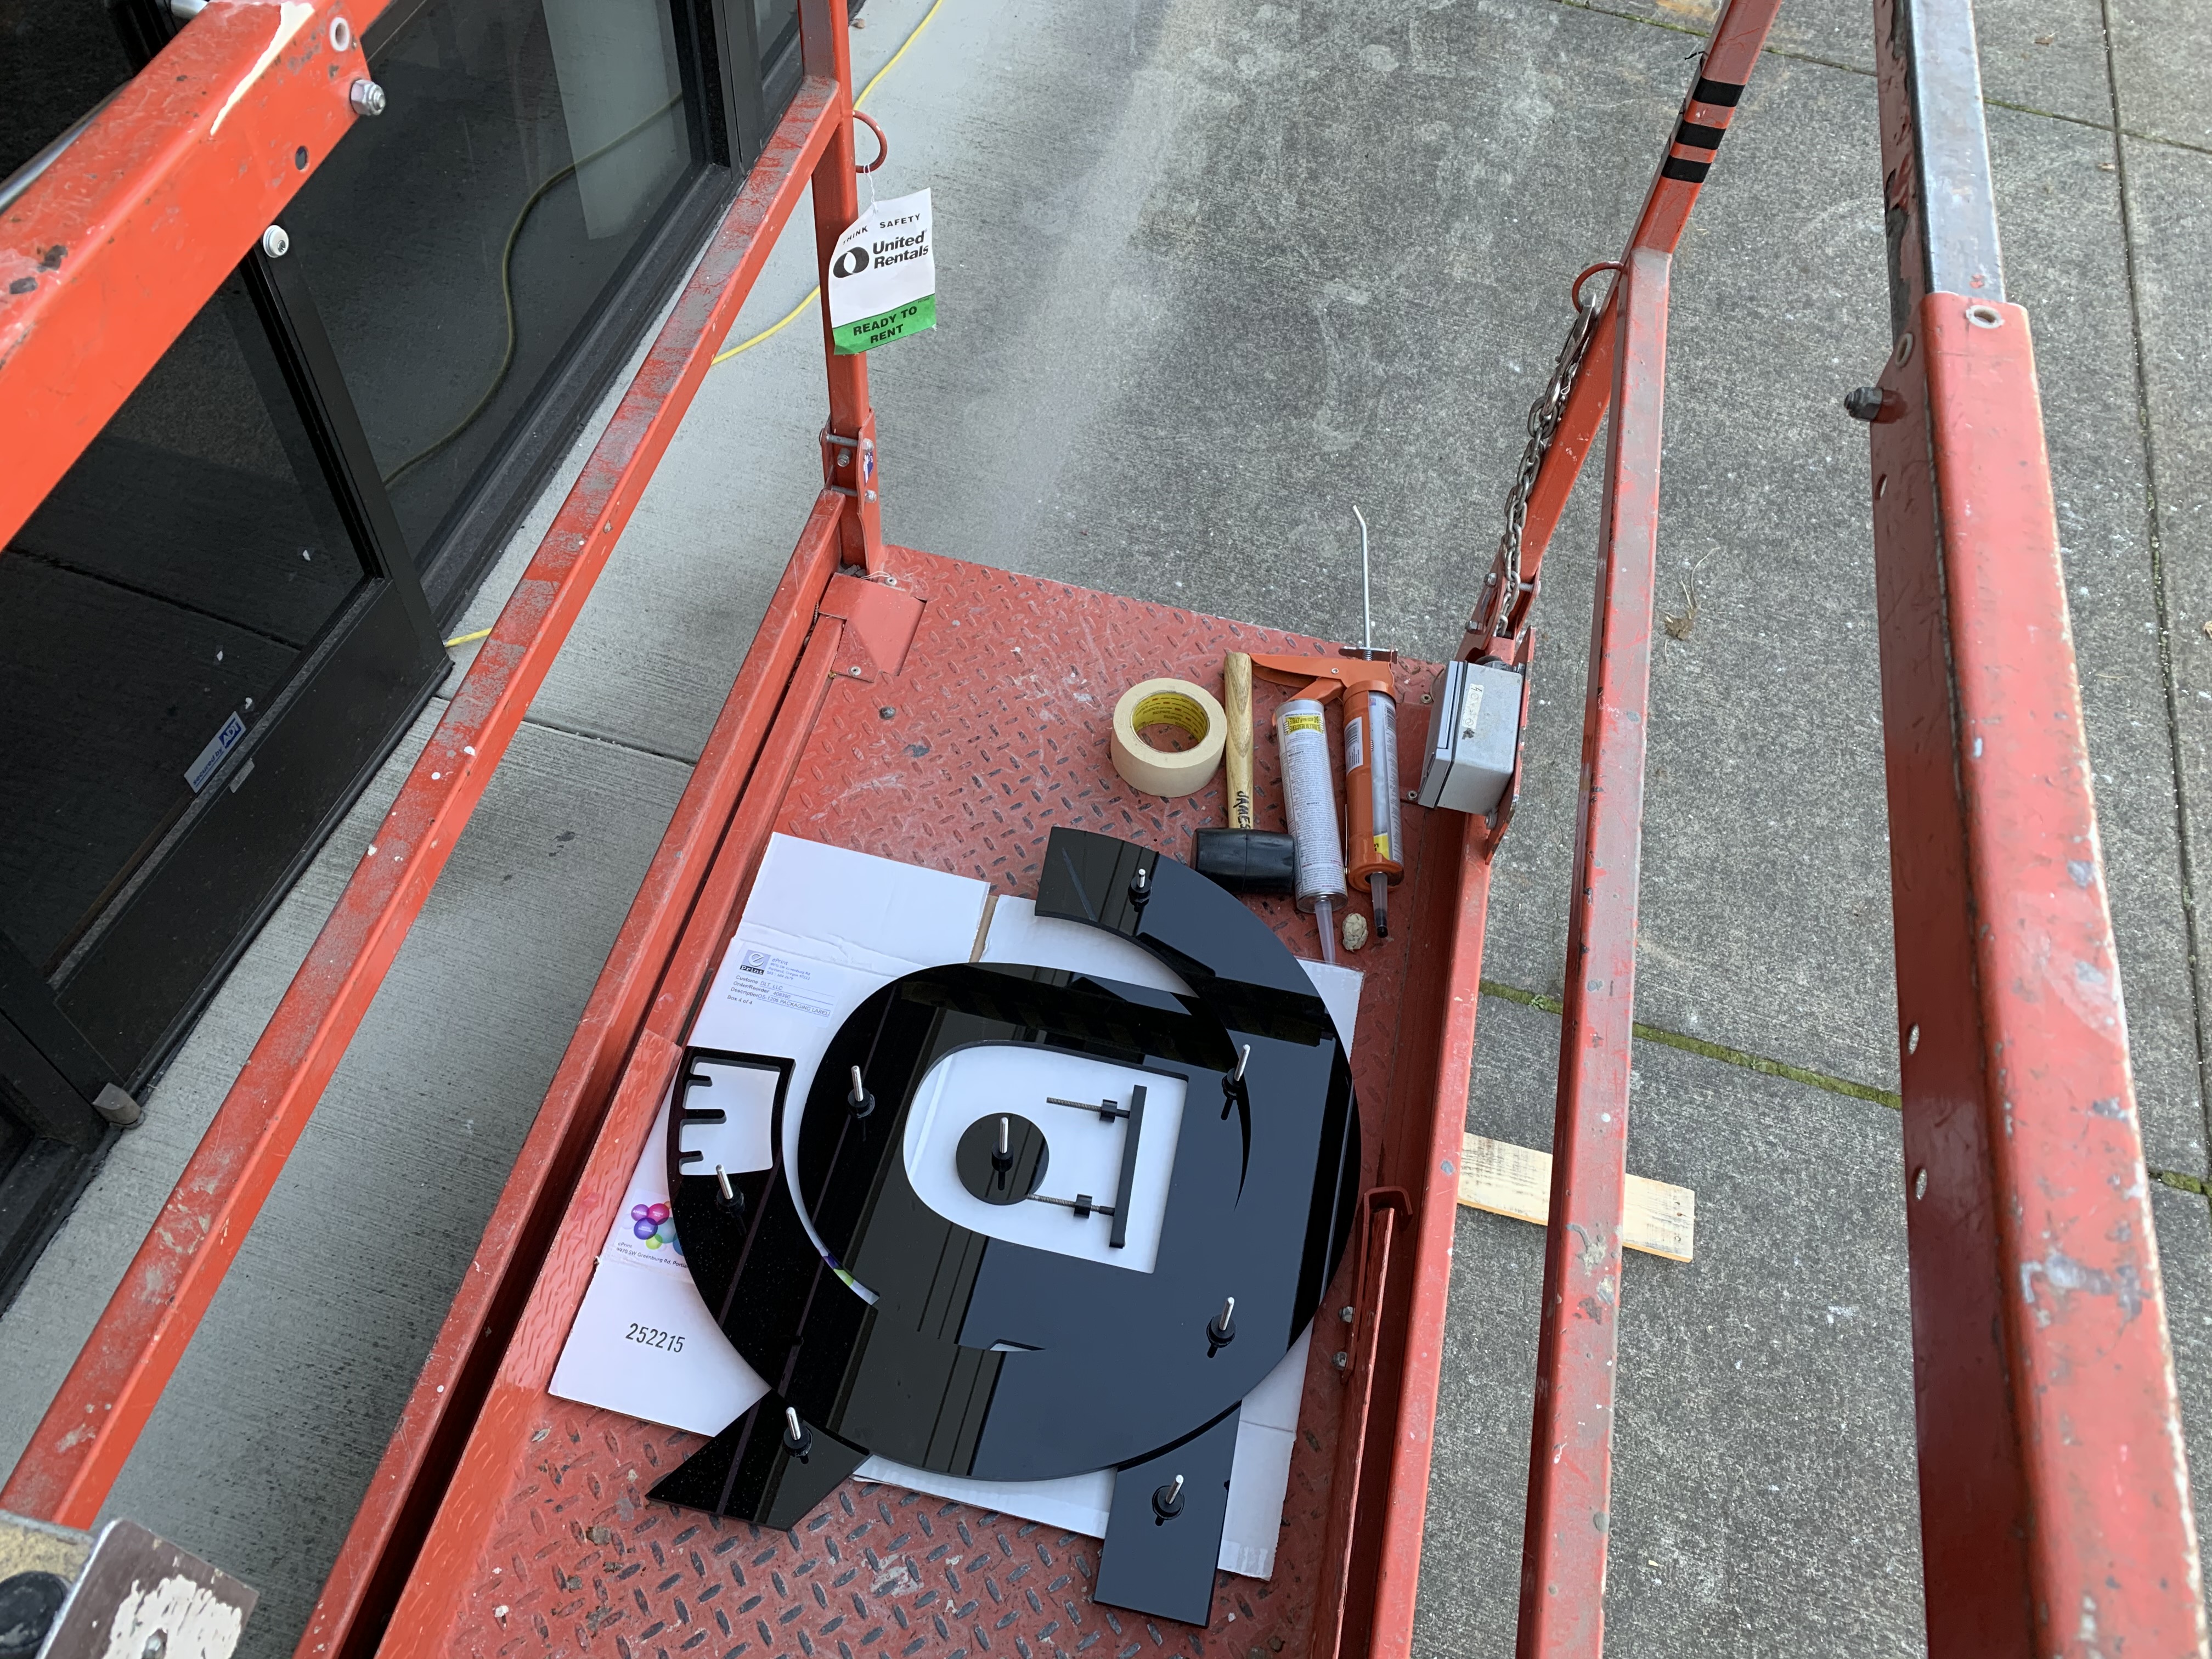
A satisfactory pile of components later and we're ready to added the mounting hardware.
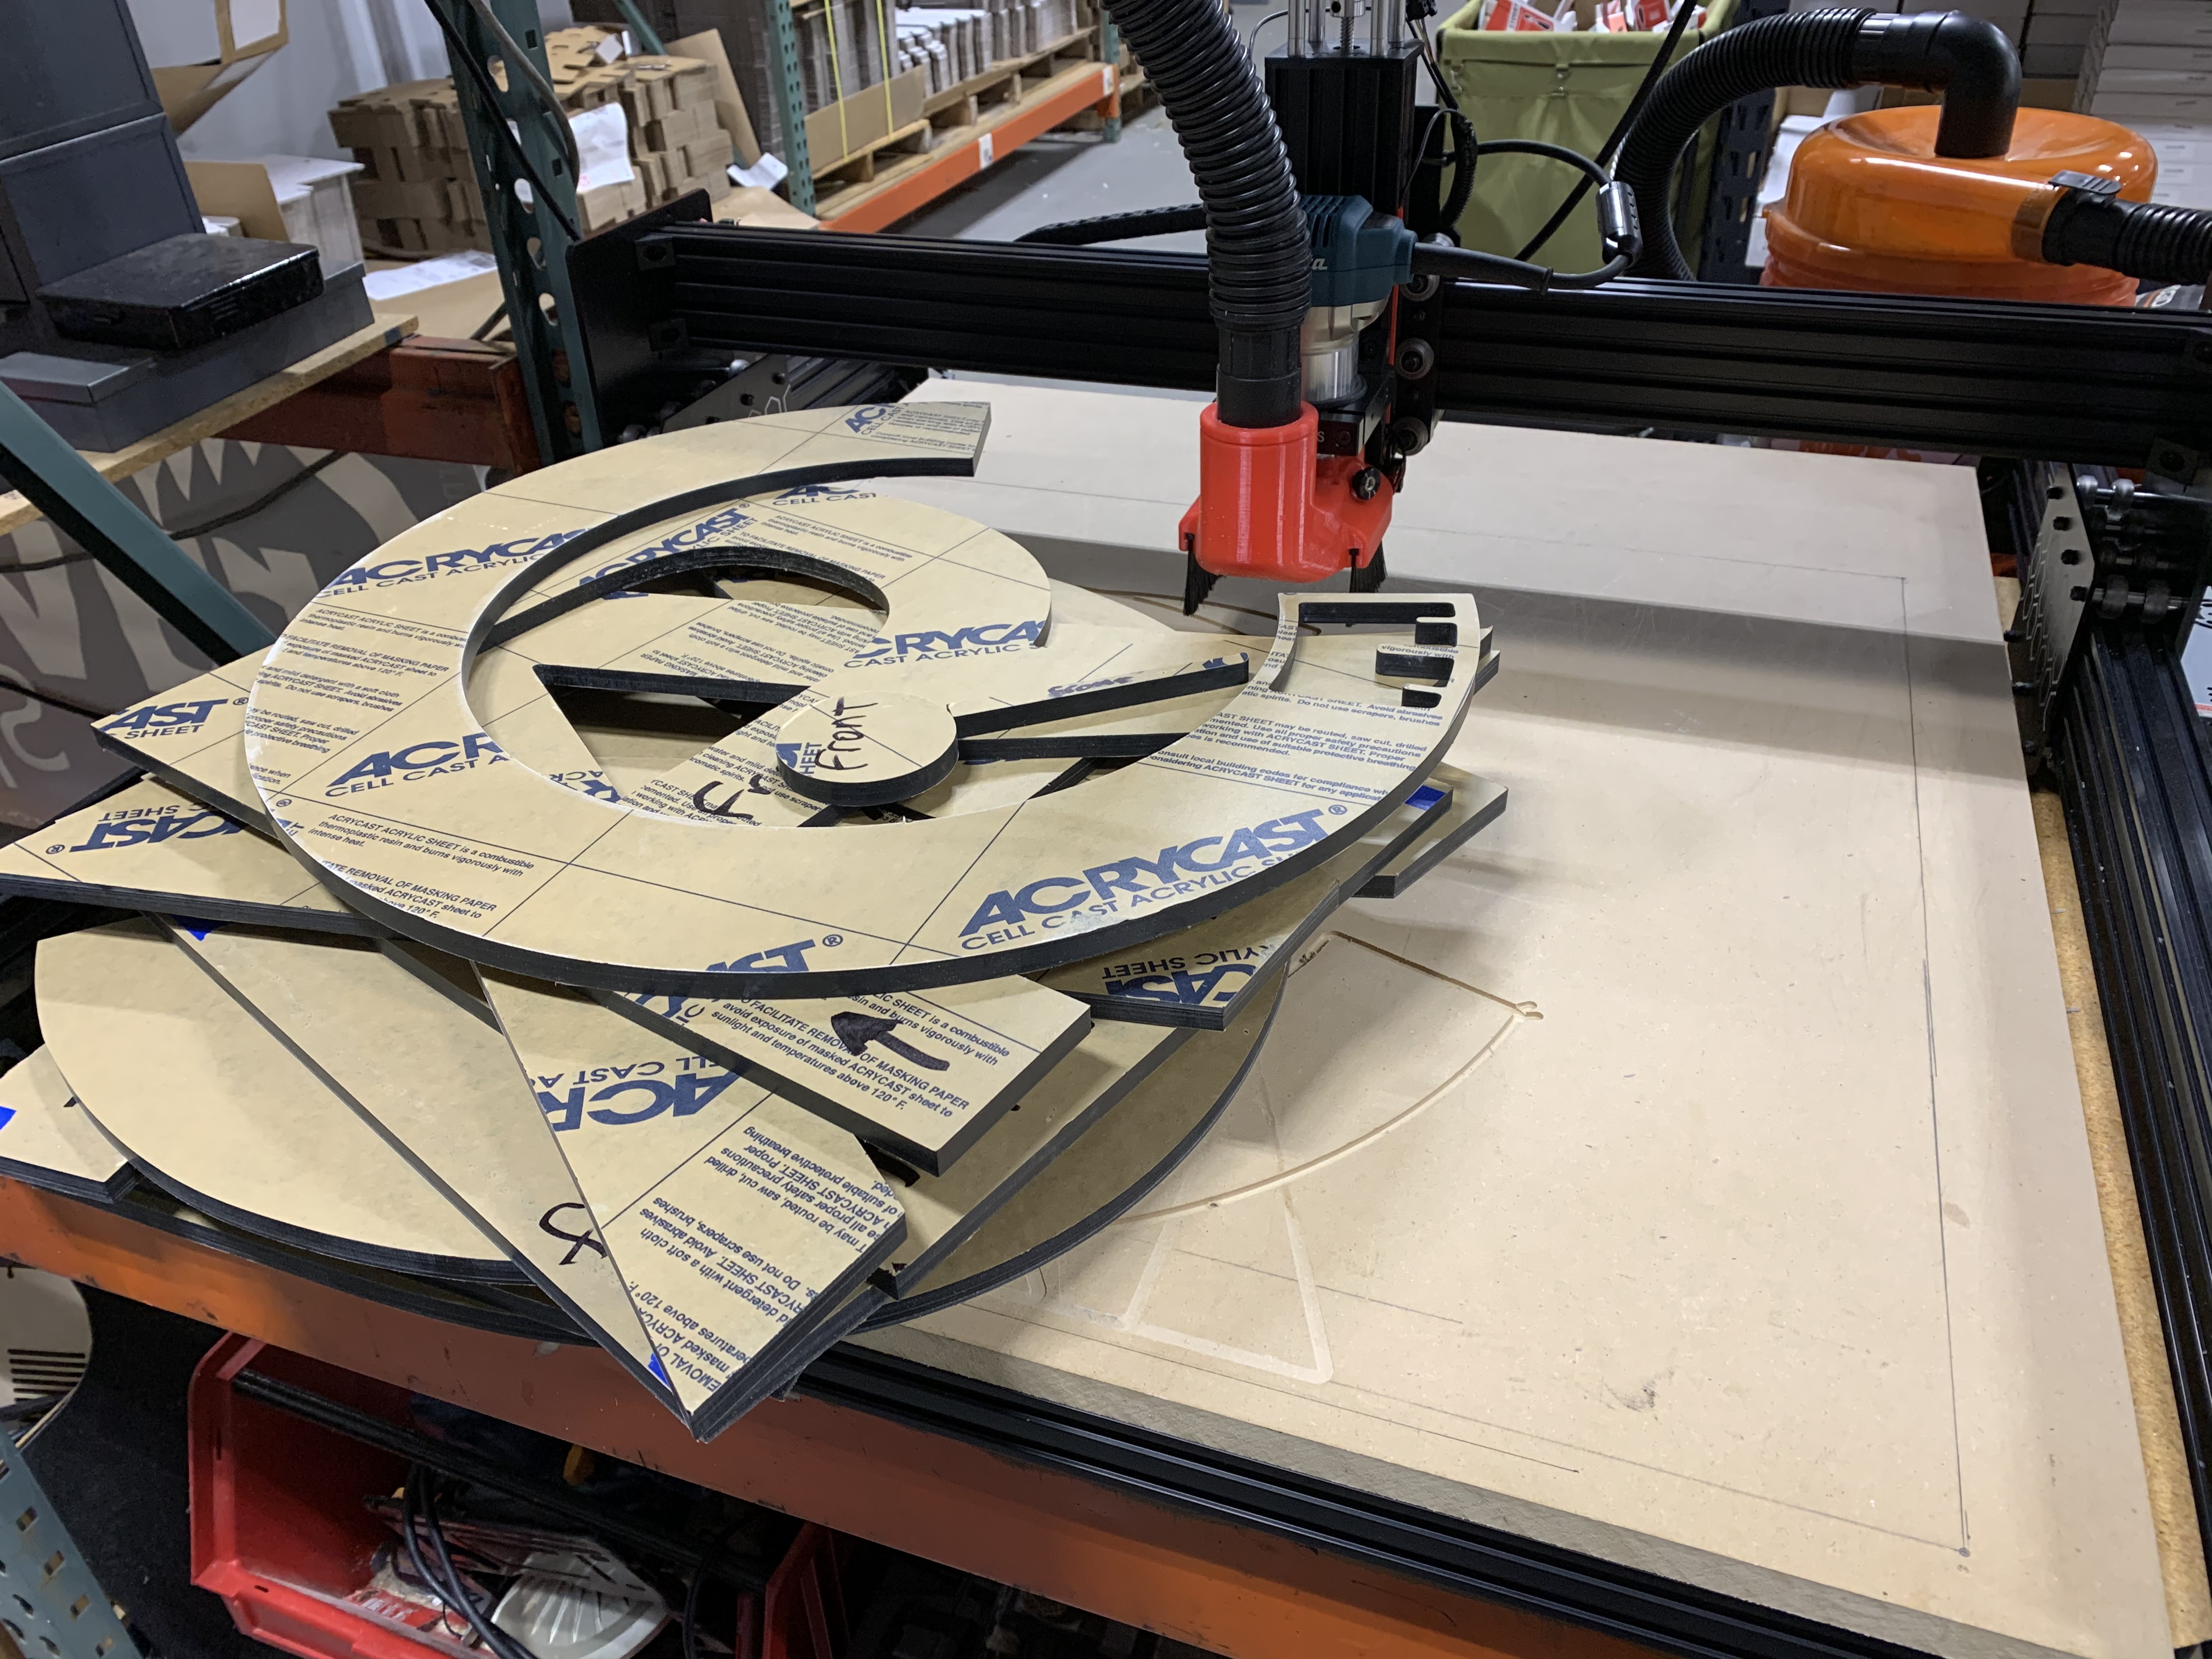
I set the drill press at a fixed depth about 2/3rds of the way into the acrylic and then threaded the holes.

We ordered a length of all-thread and cut it down into the necessary lengths and quantities needed. Using a bit of construction adhesive and some plastic spacers, the studs are installed into the back of the letters at the pre-drilled and threaded locations.

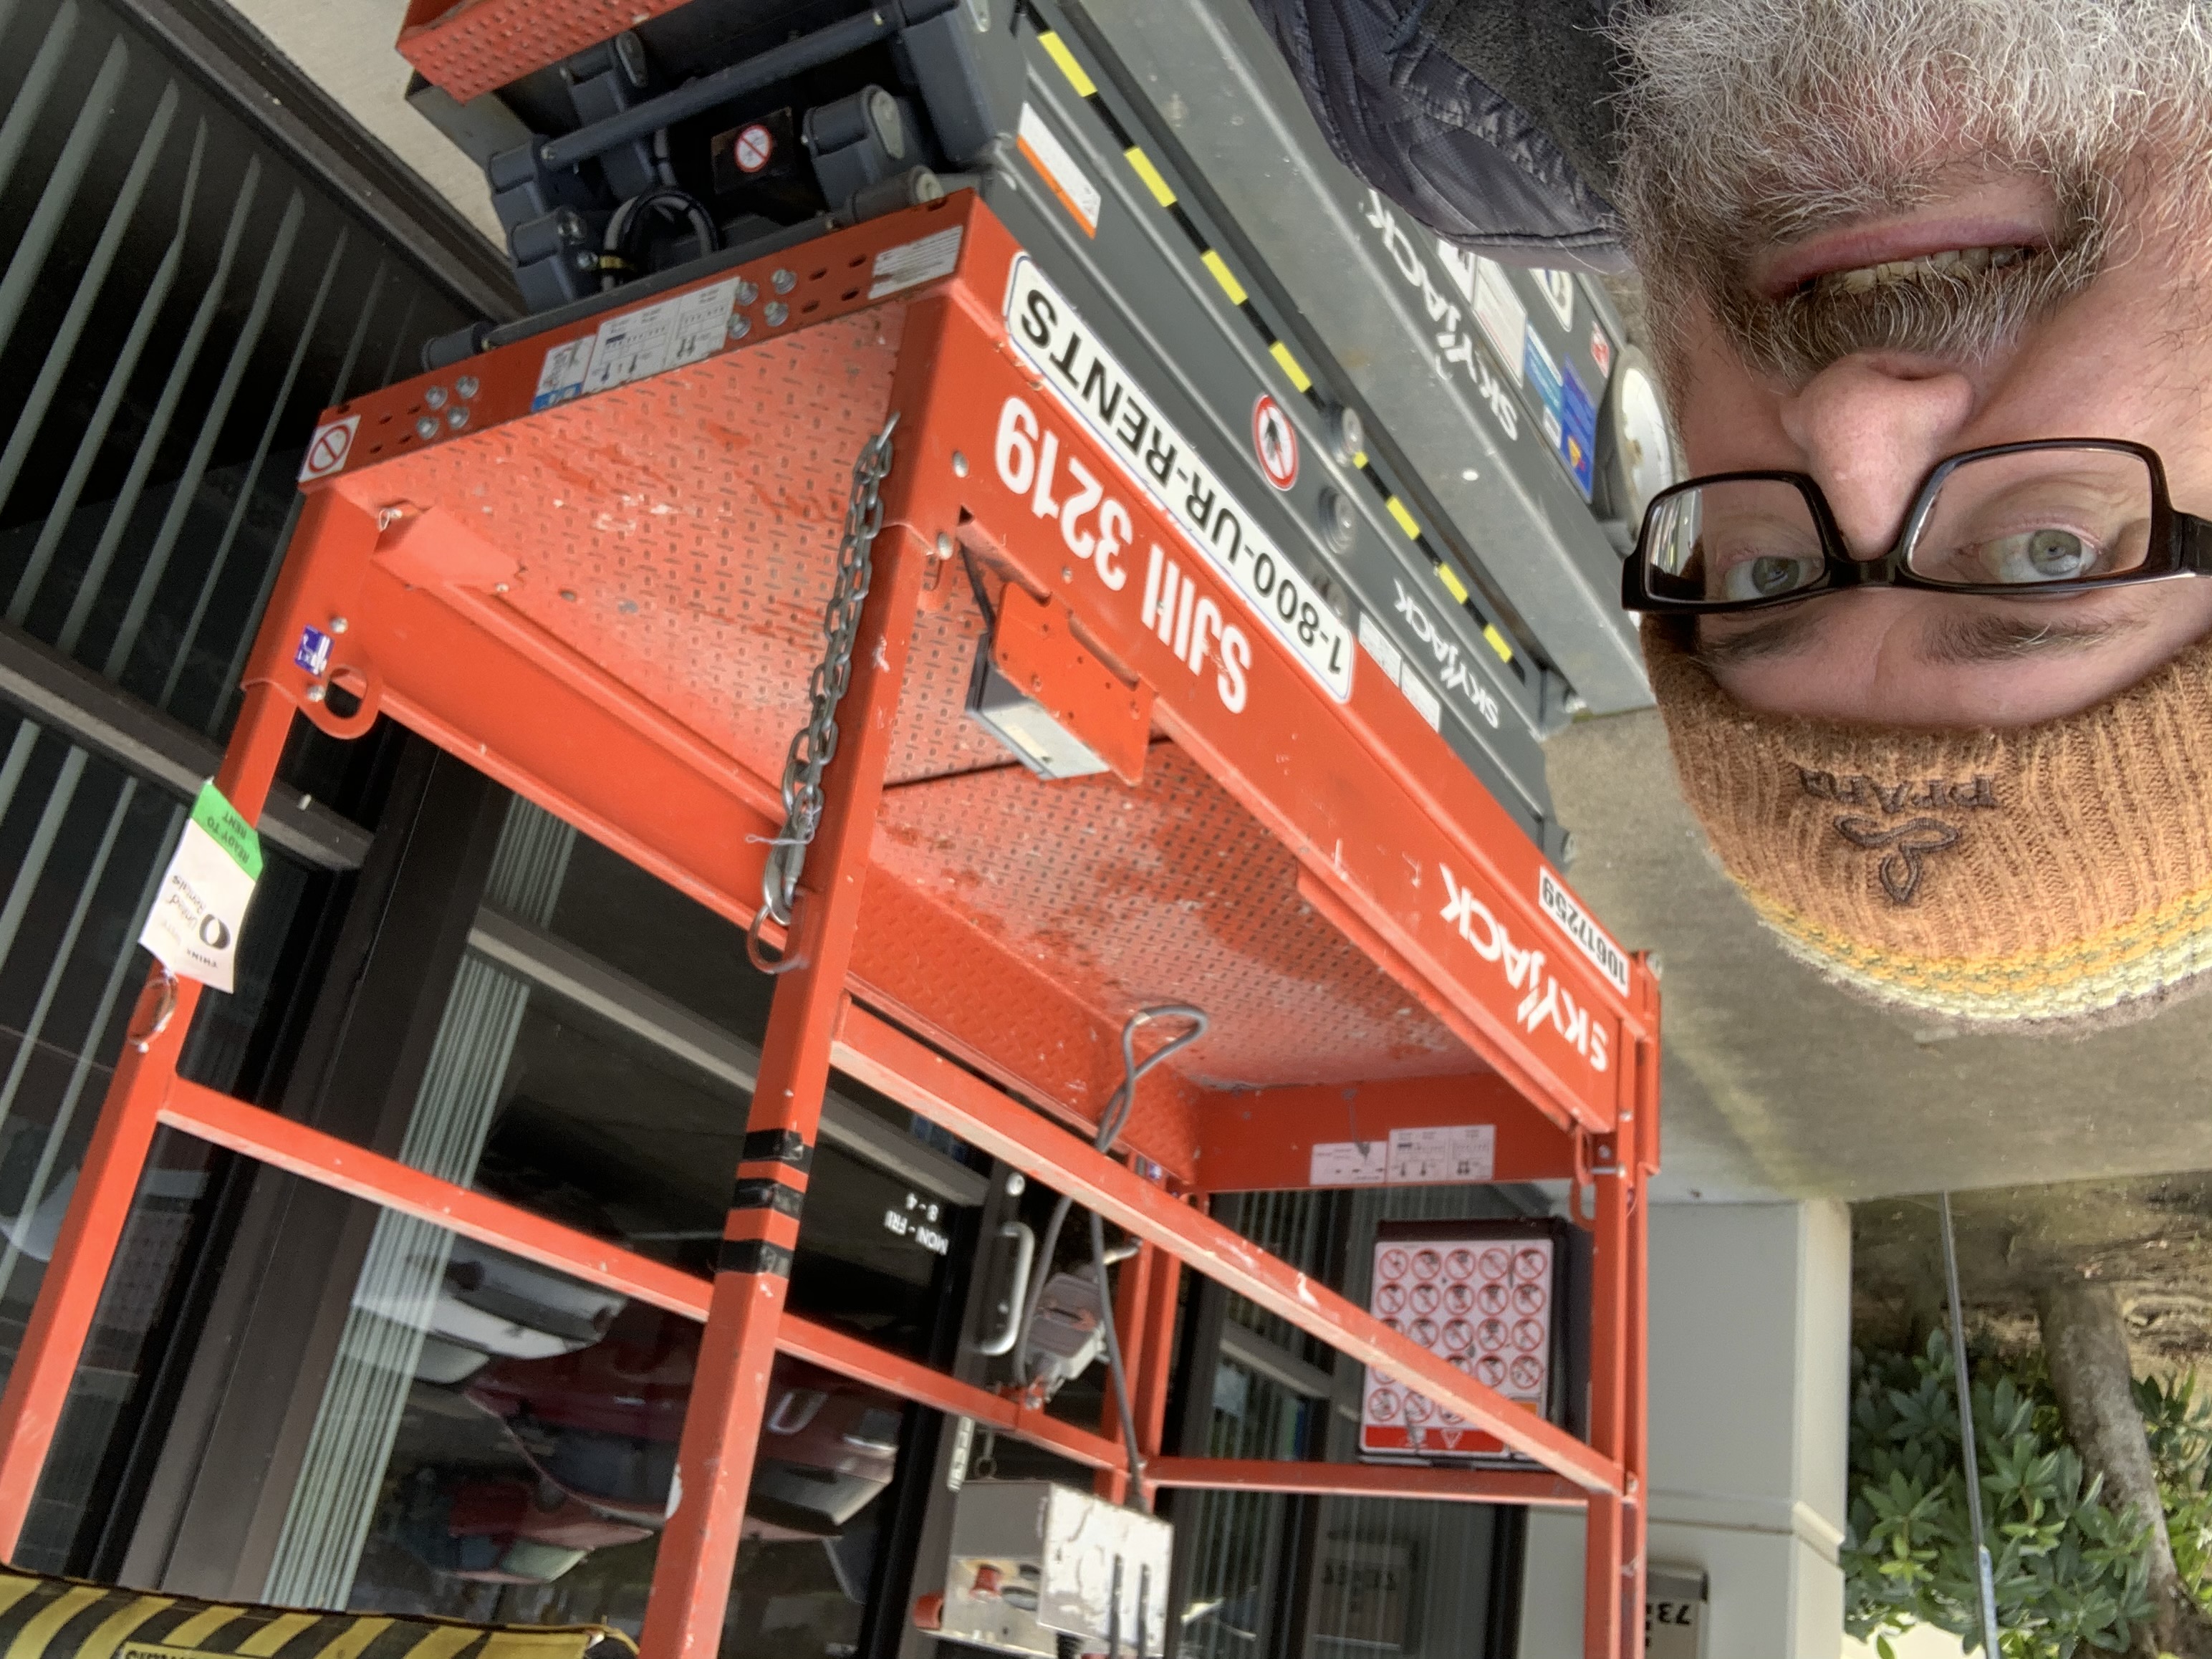
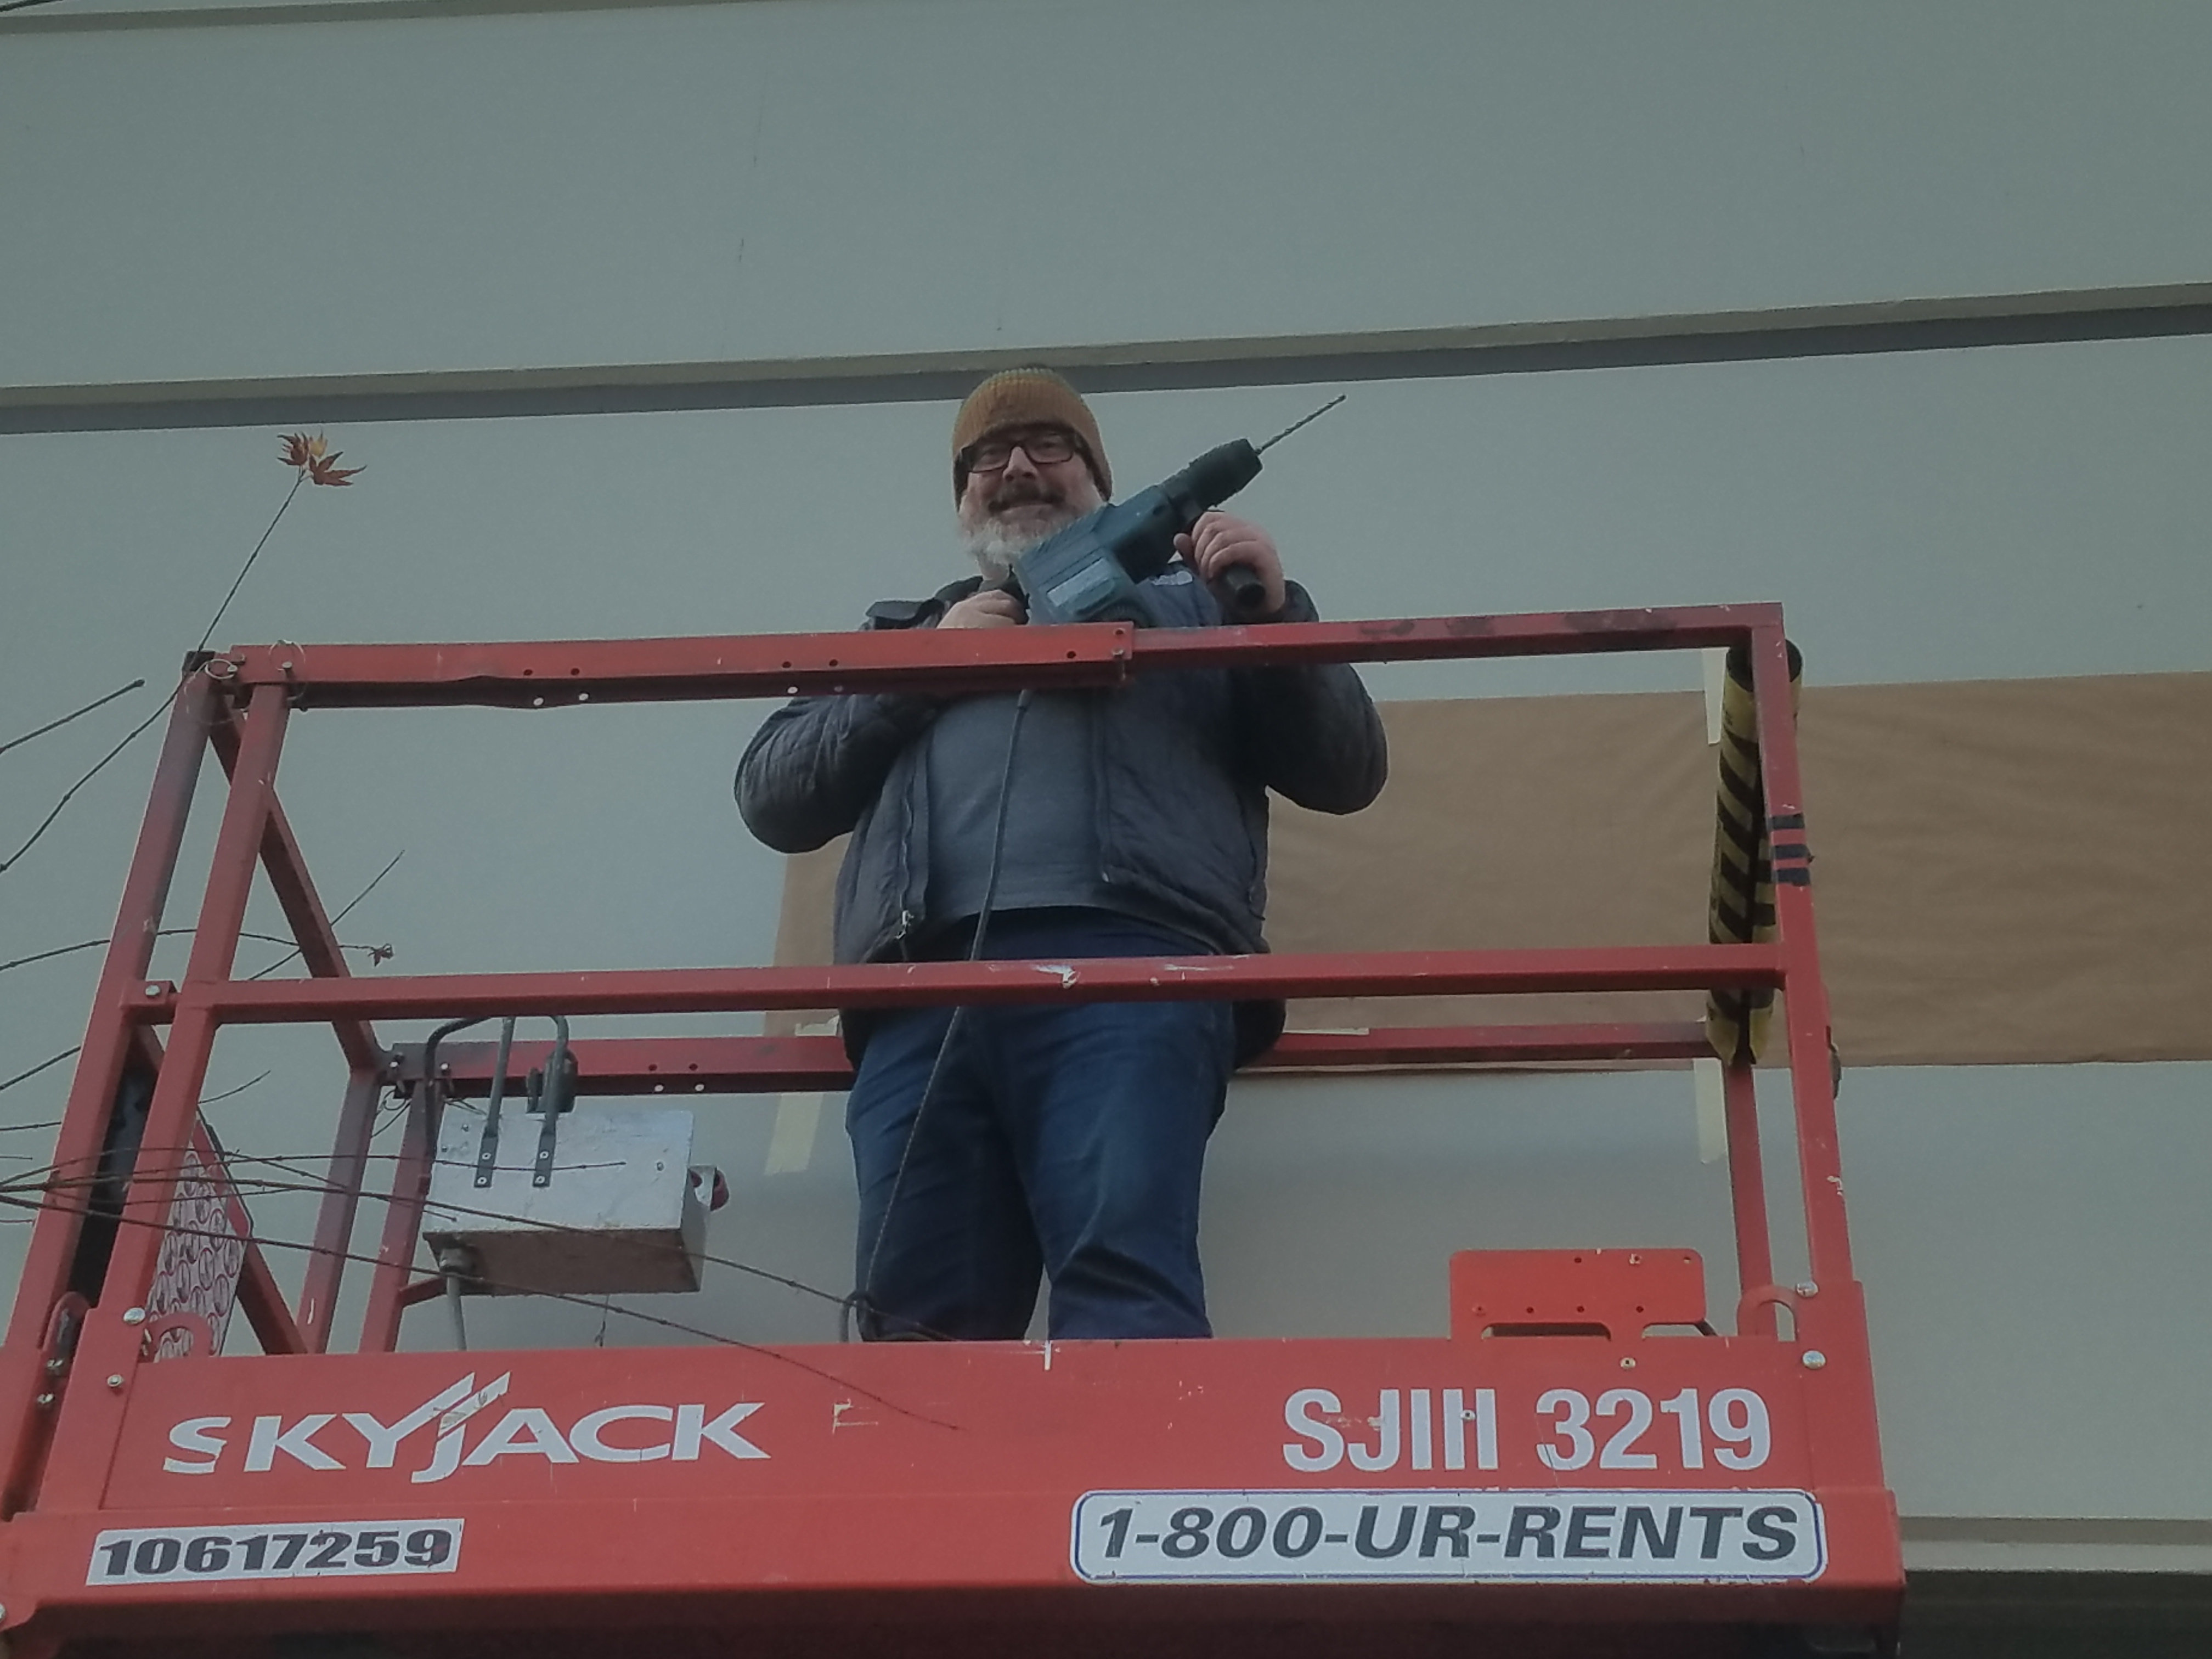
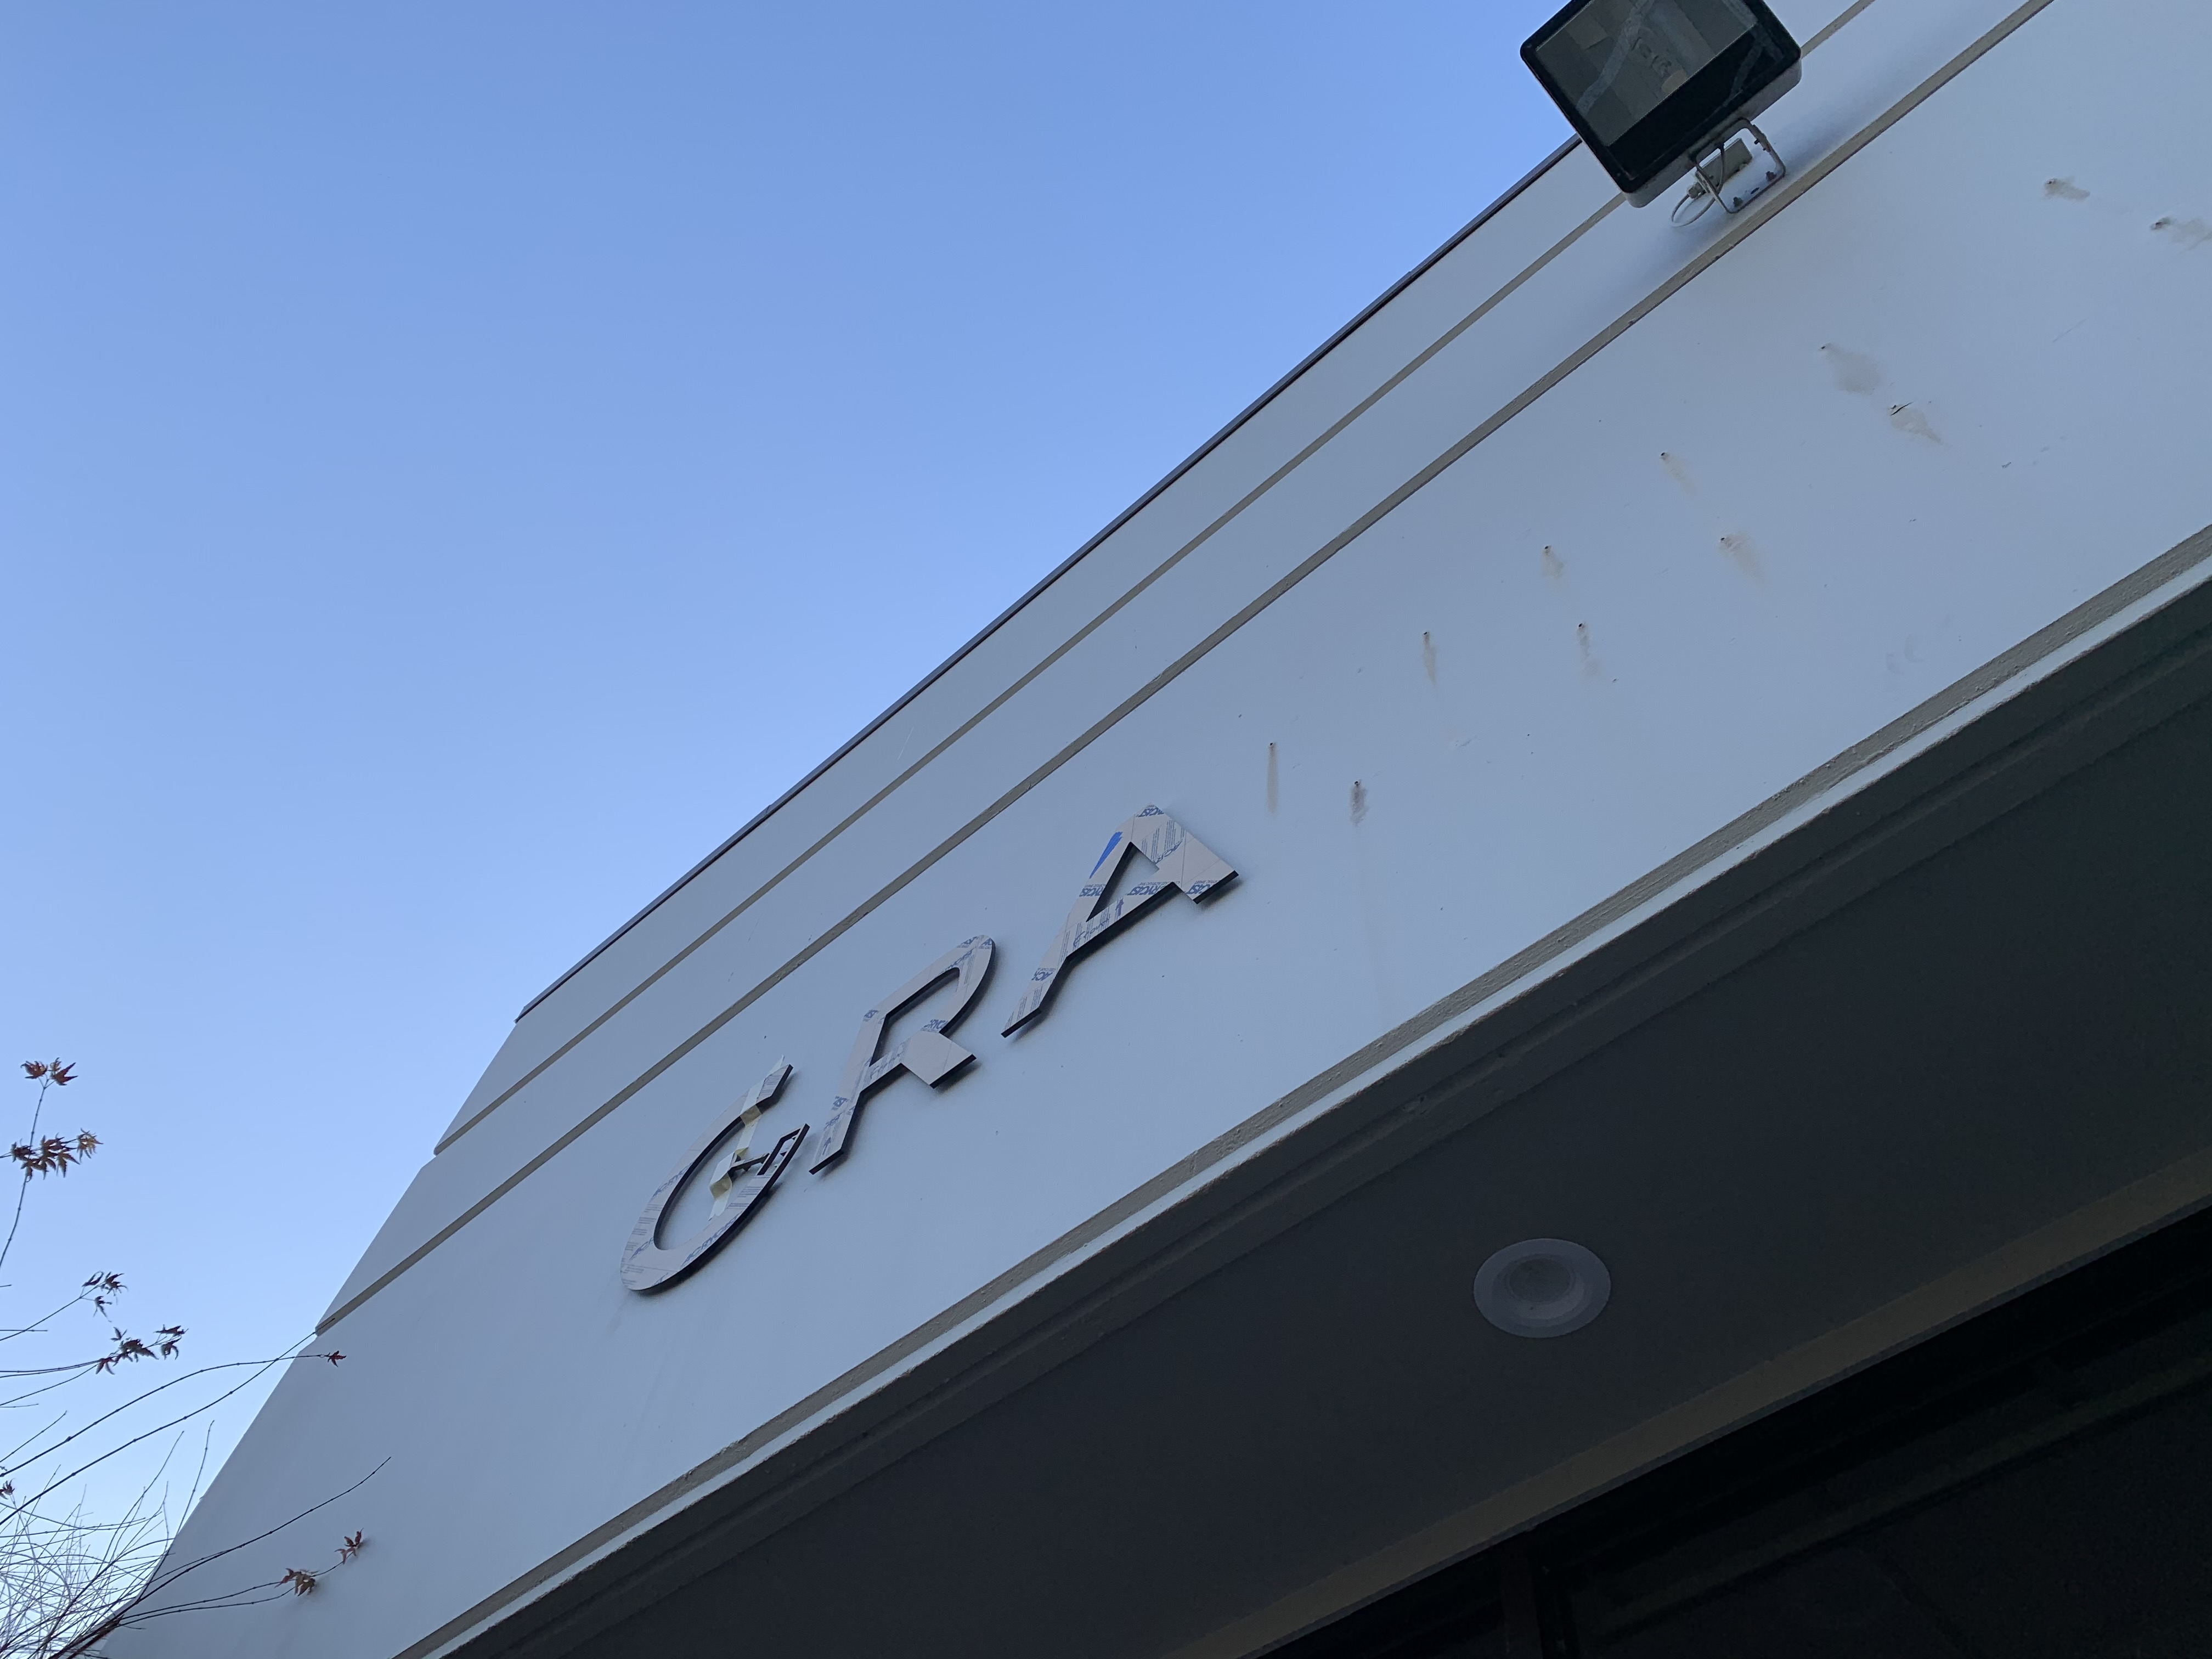
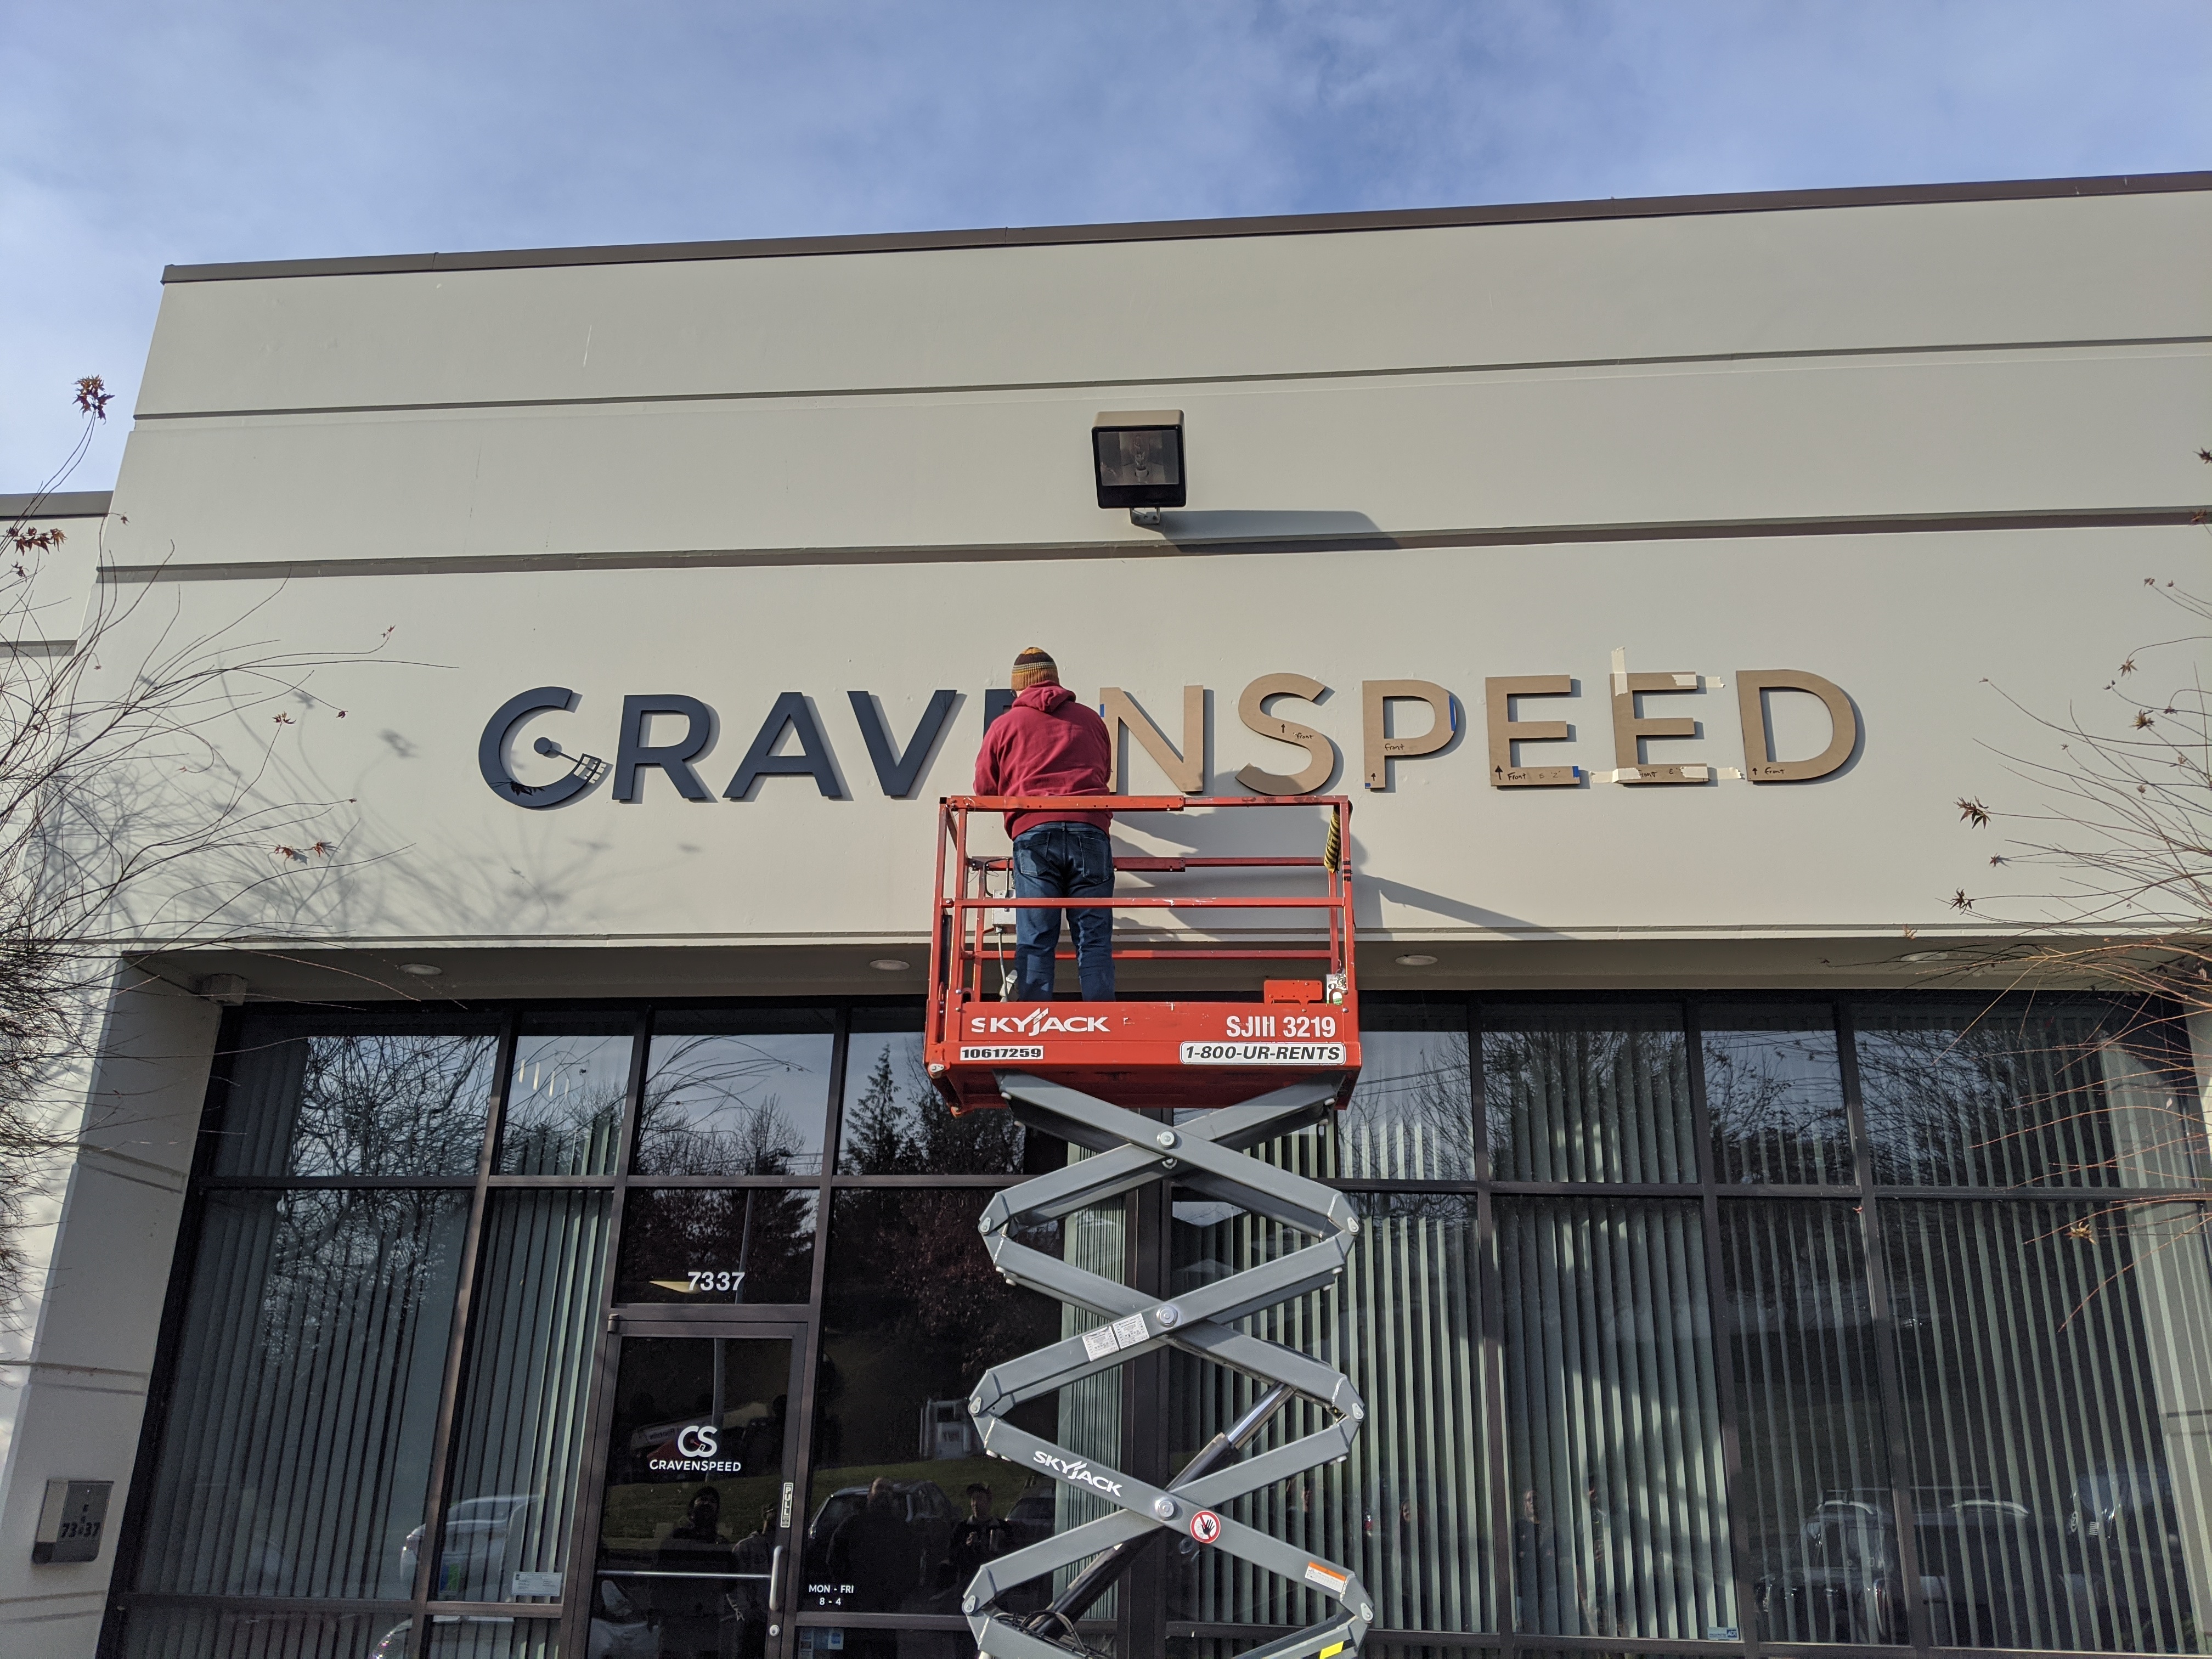
The day came when a scissor lift was rented and we had a nice collection of sign components laid out and ready to go.
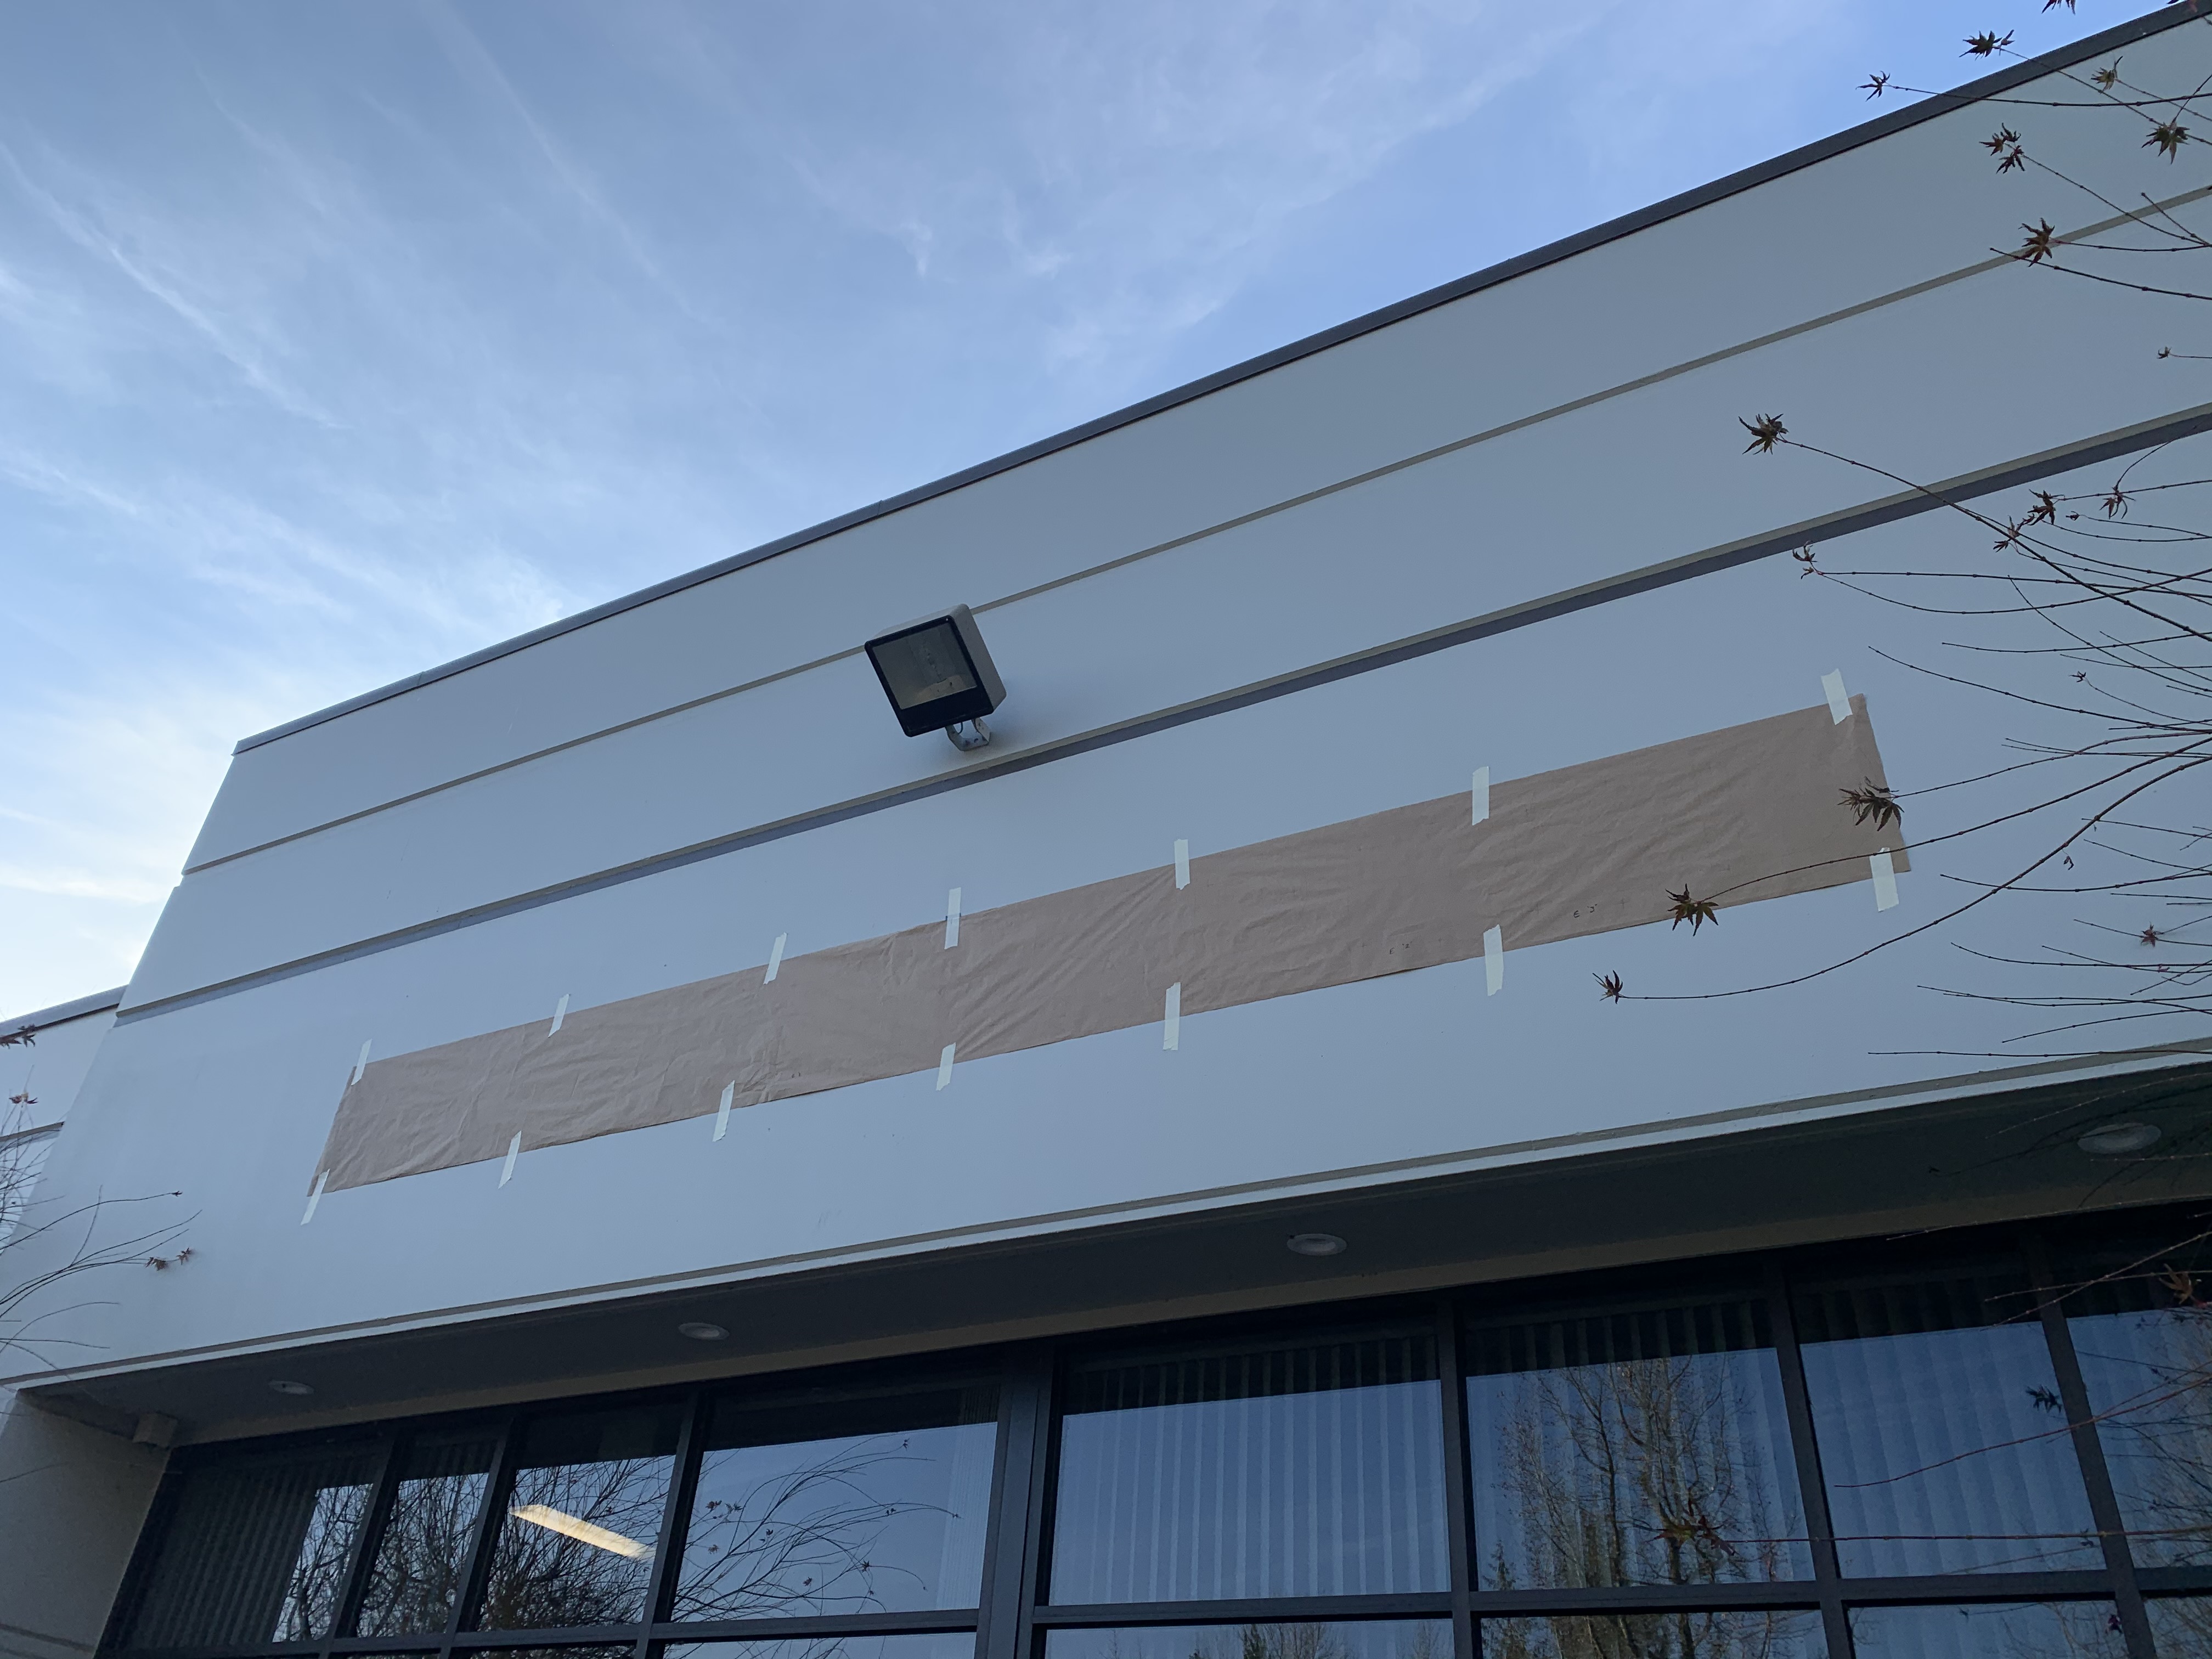
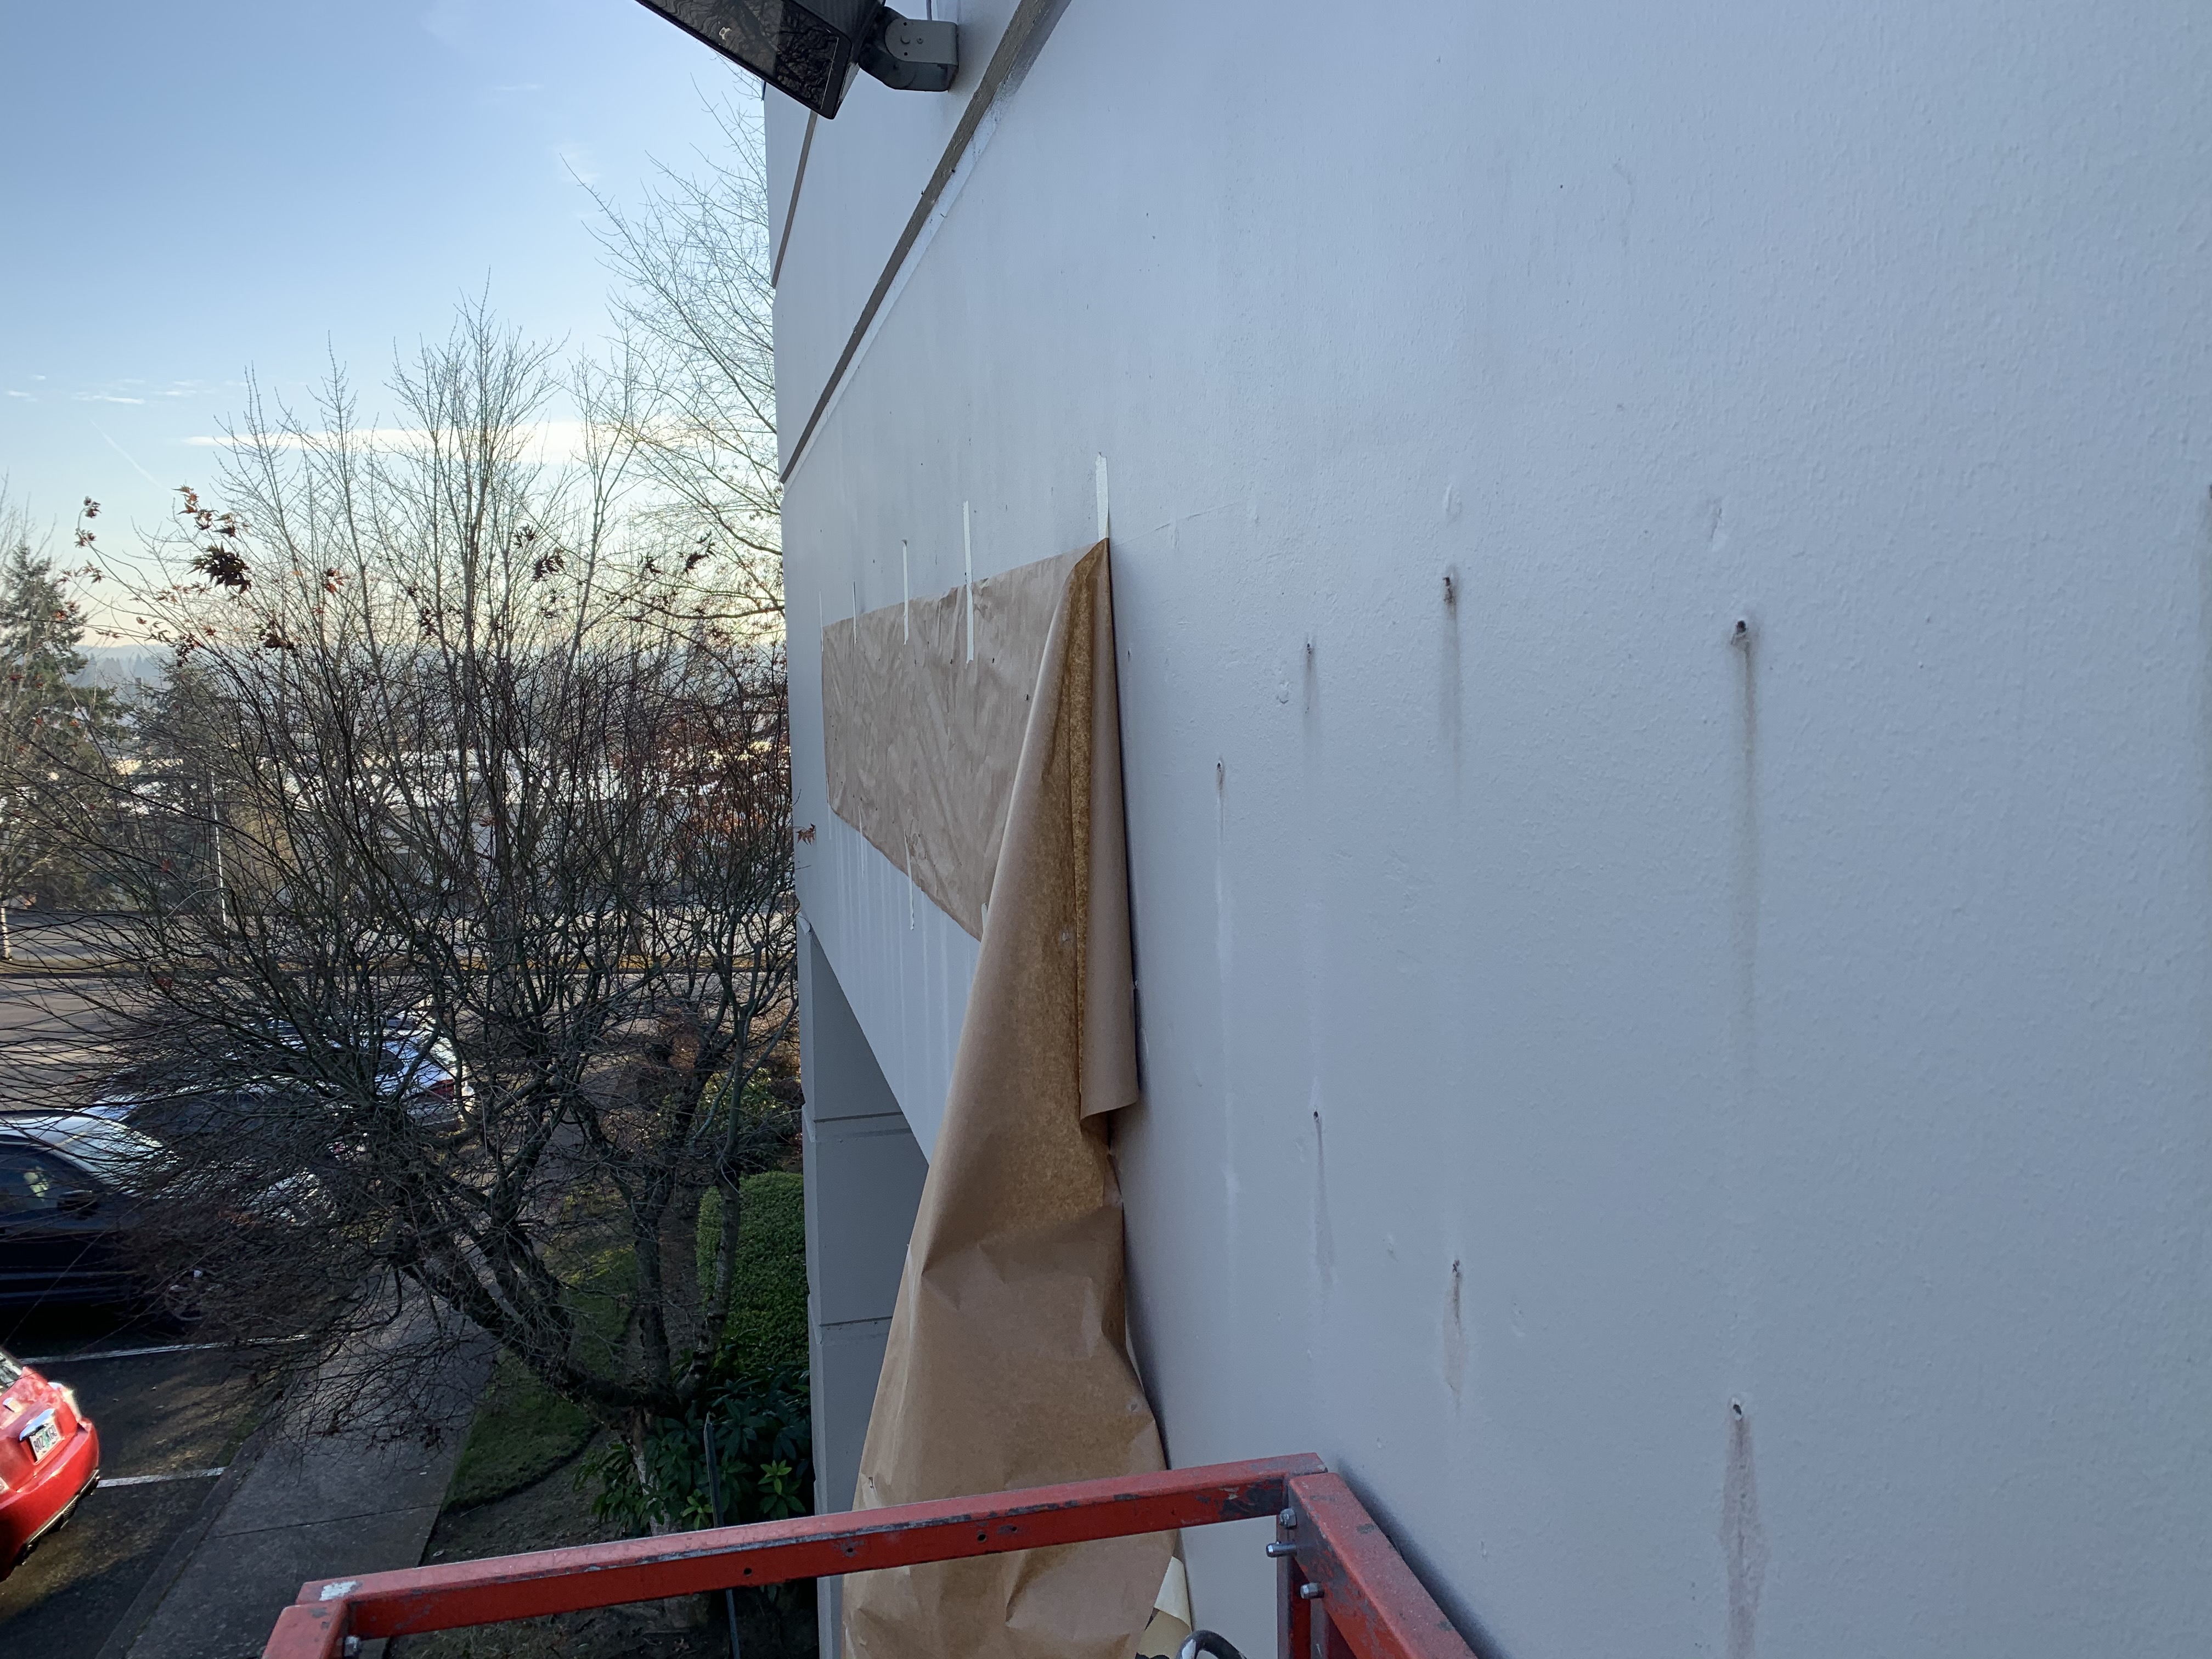
I affixed the 1 : 1 paper template to the outside of the building and marked the drilling locations.
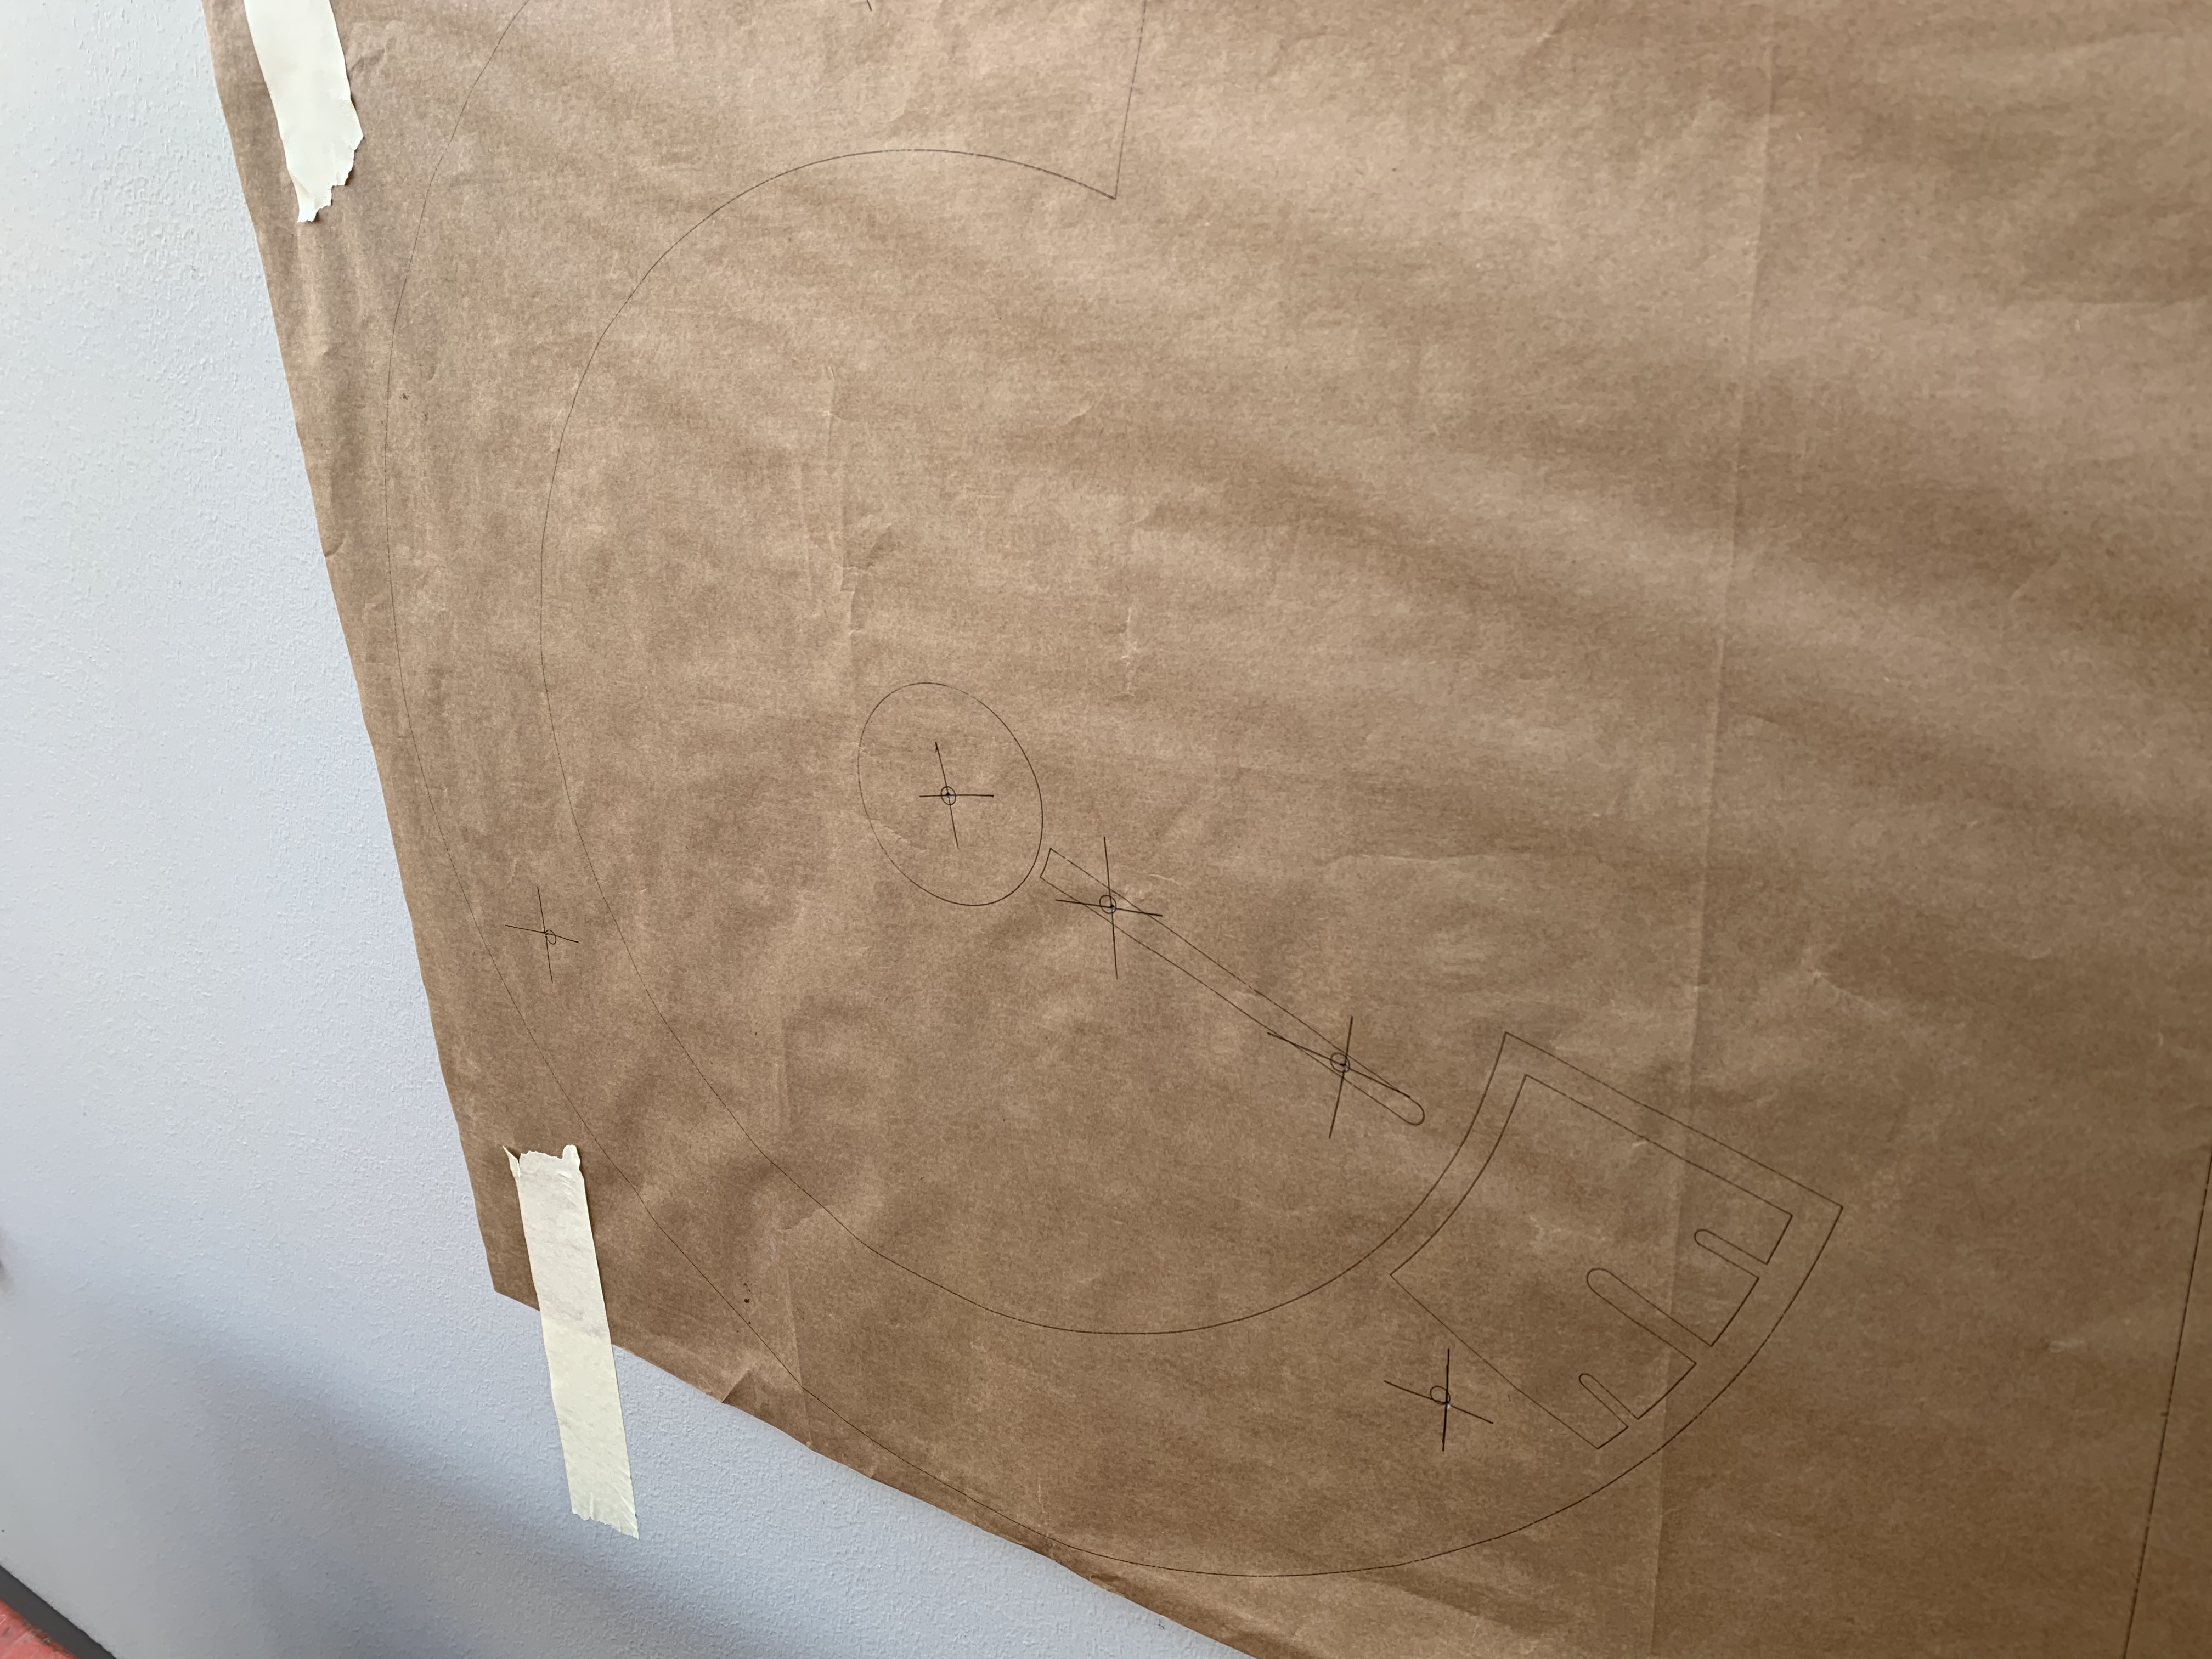
42 holes later and things are looking great!
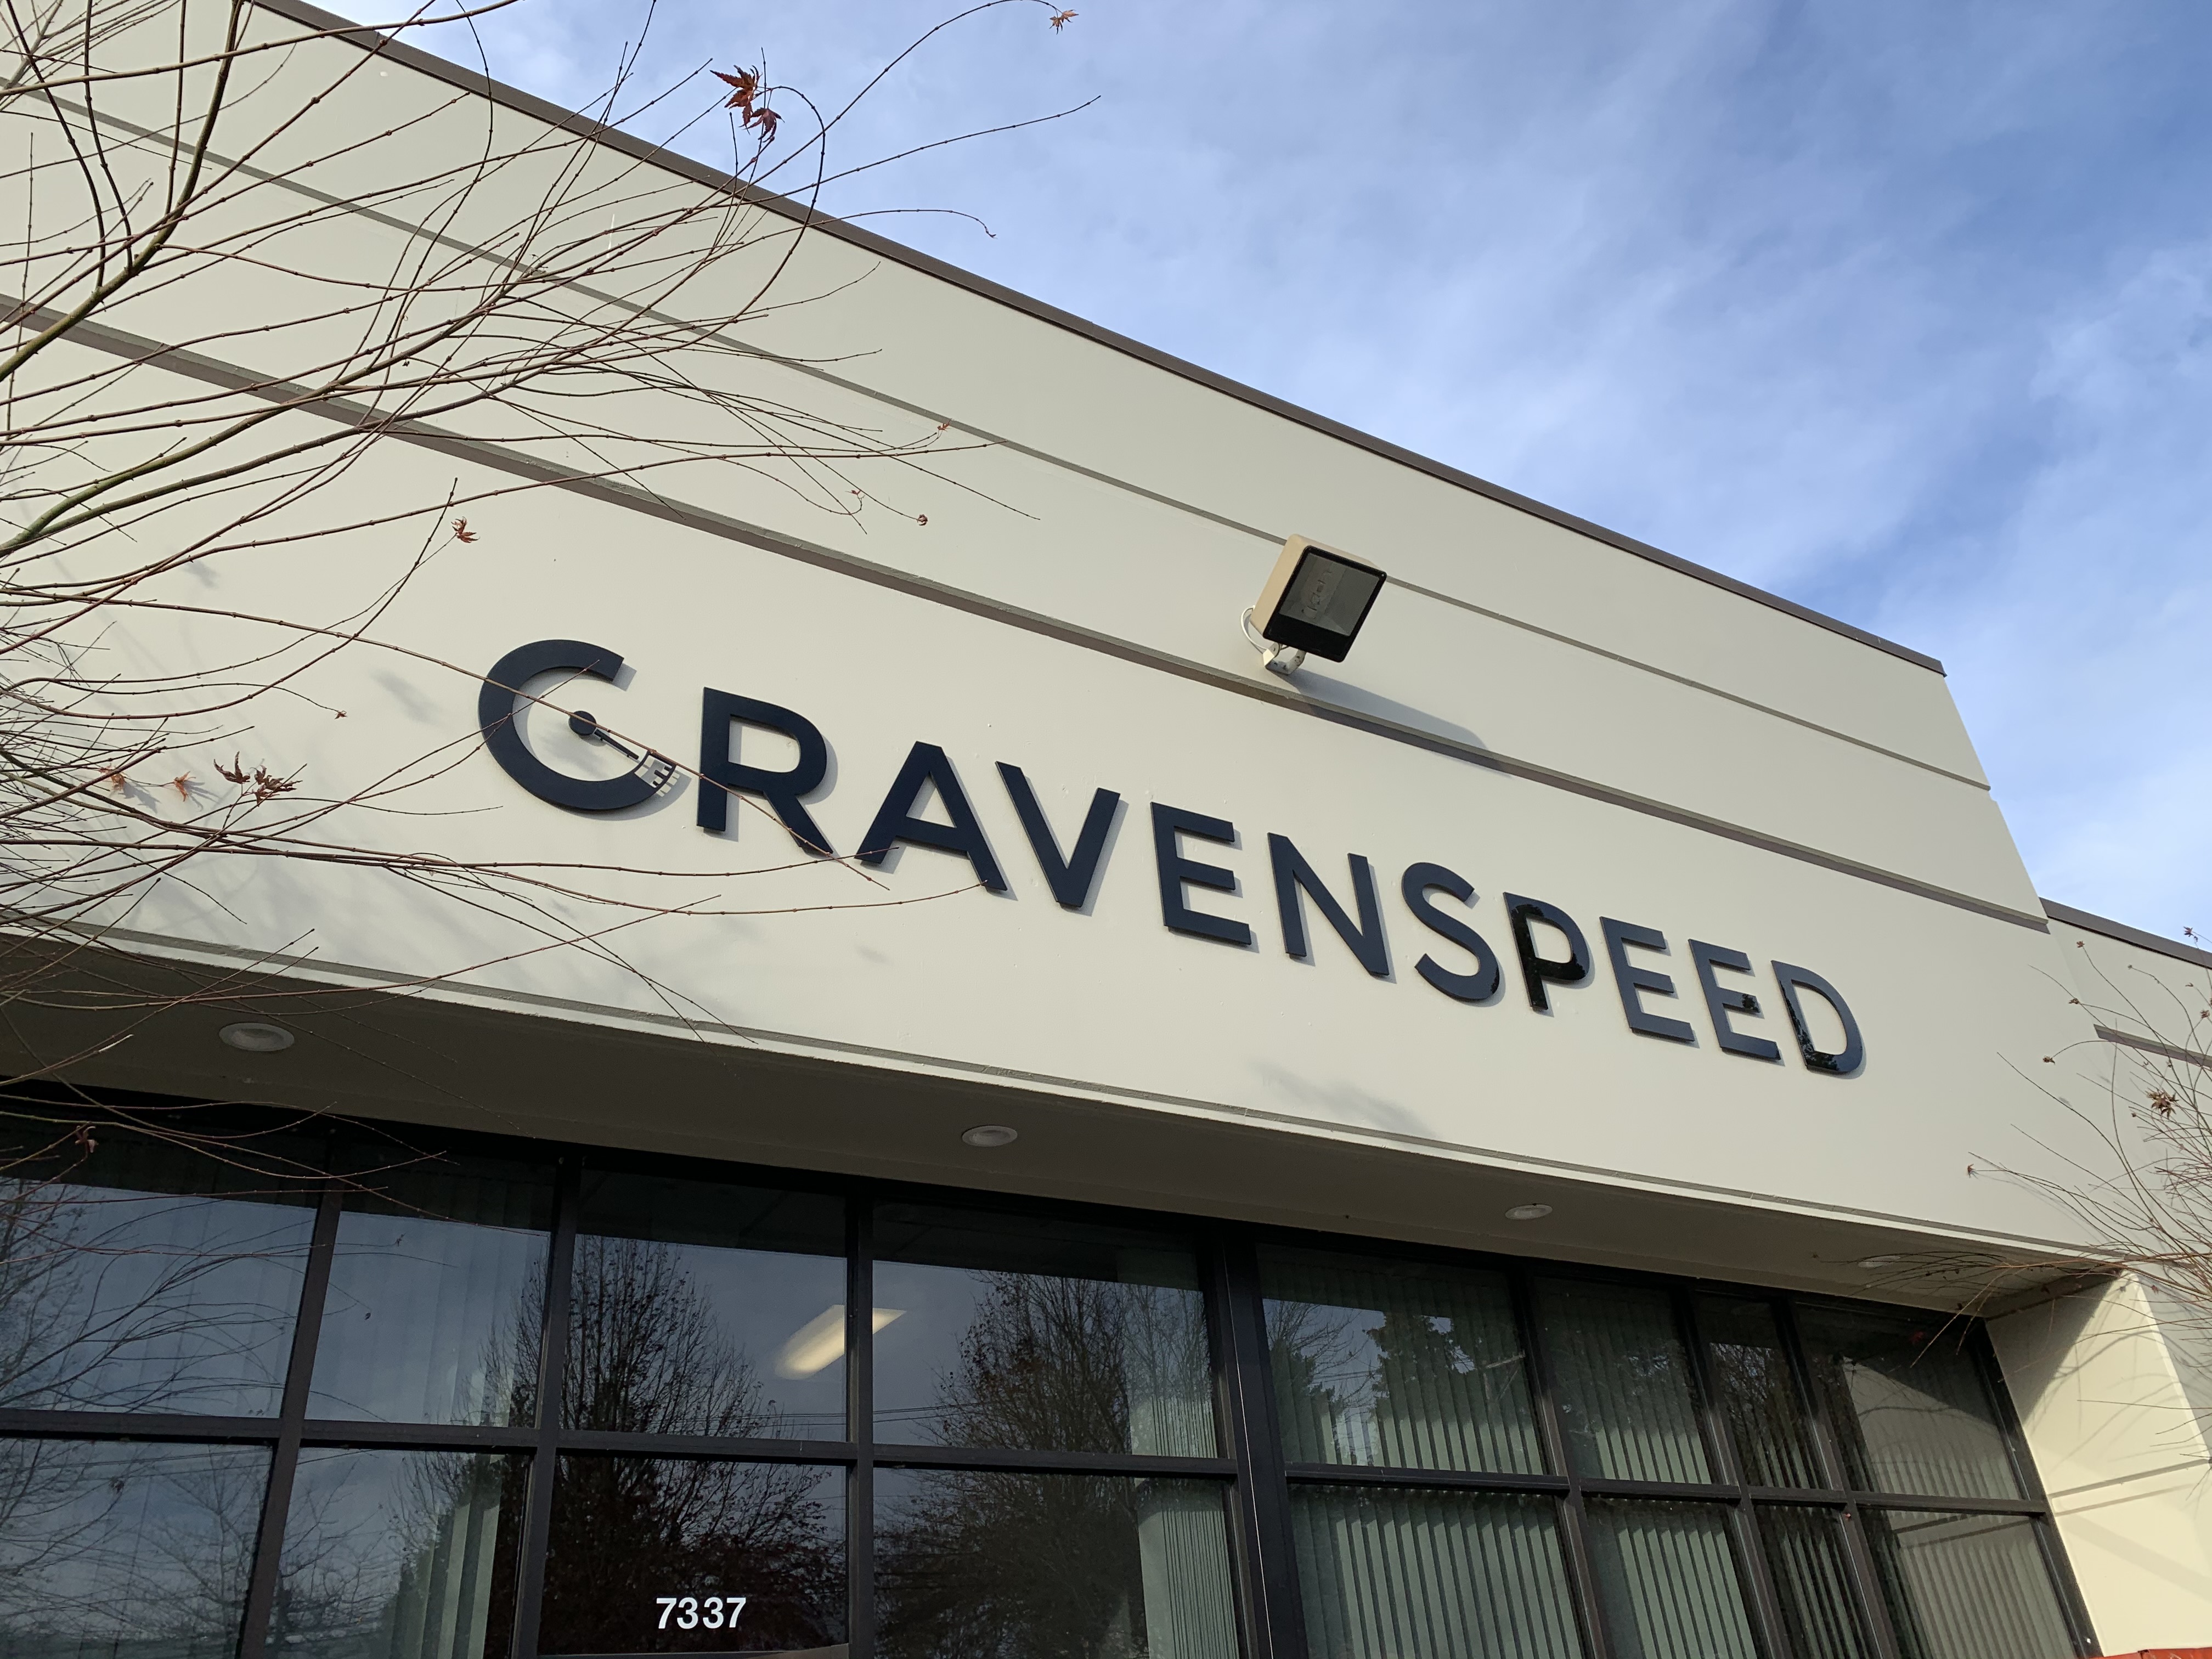
I added a bit of construction adhesive to the mounting studs and set them into their designated positions.
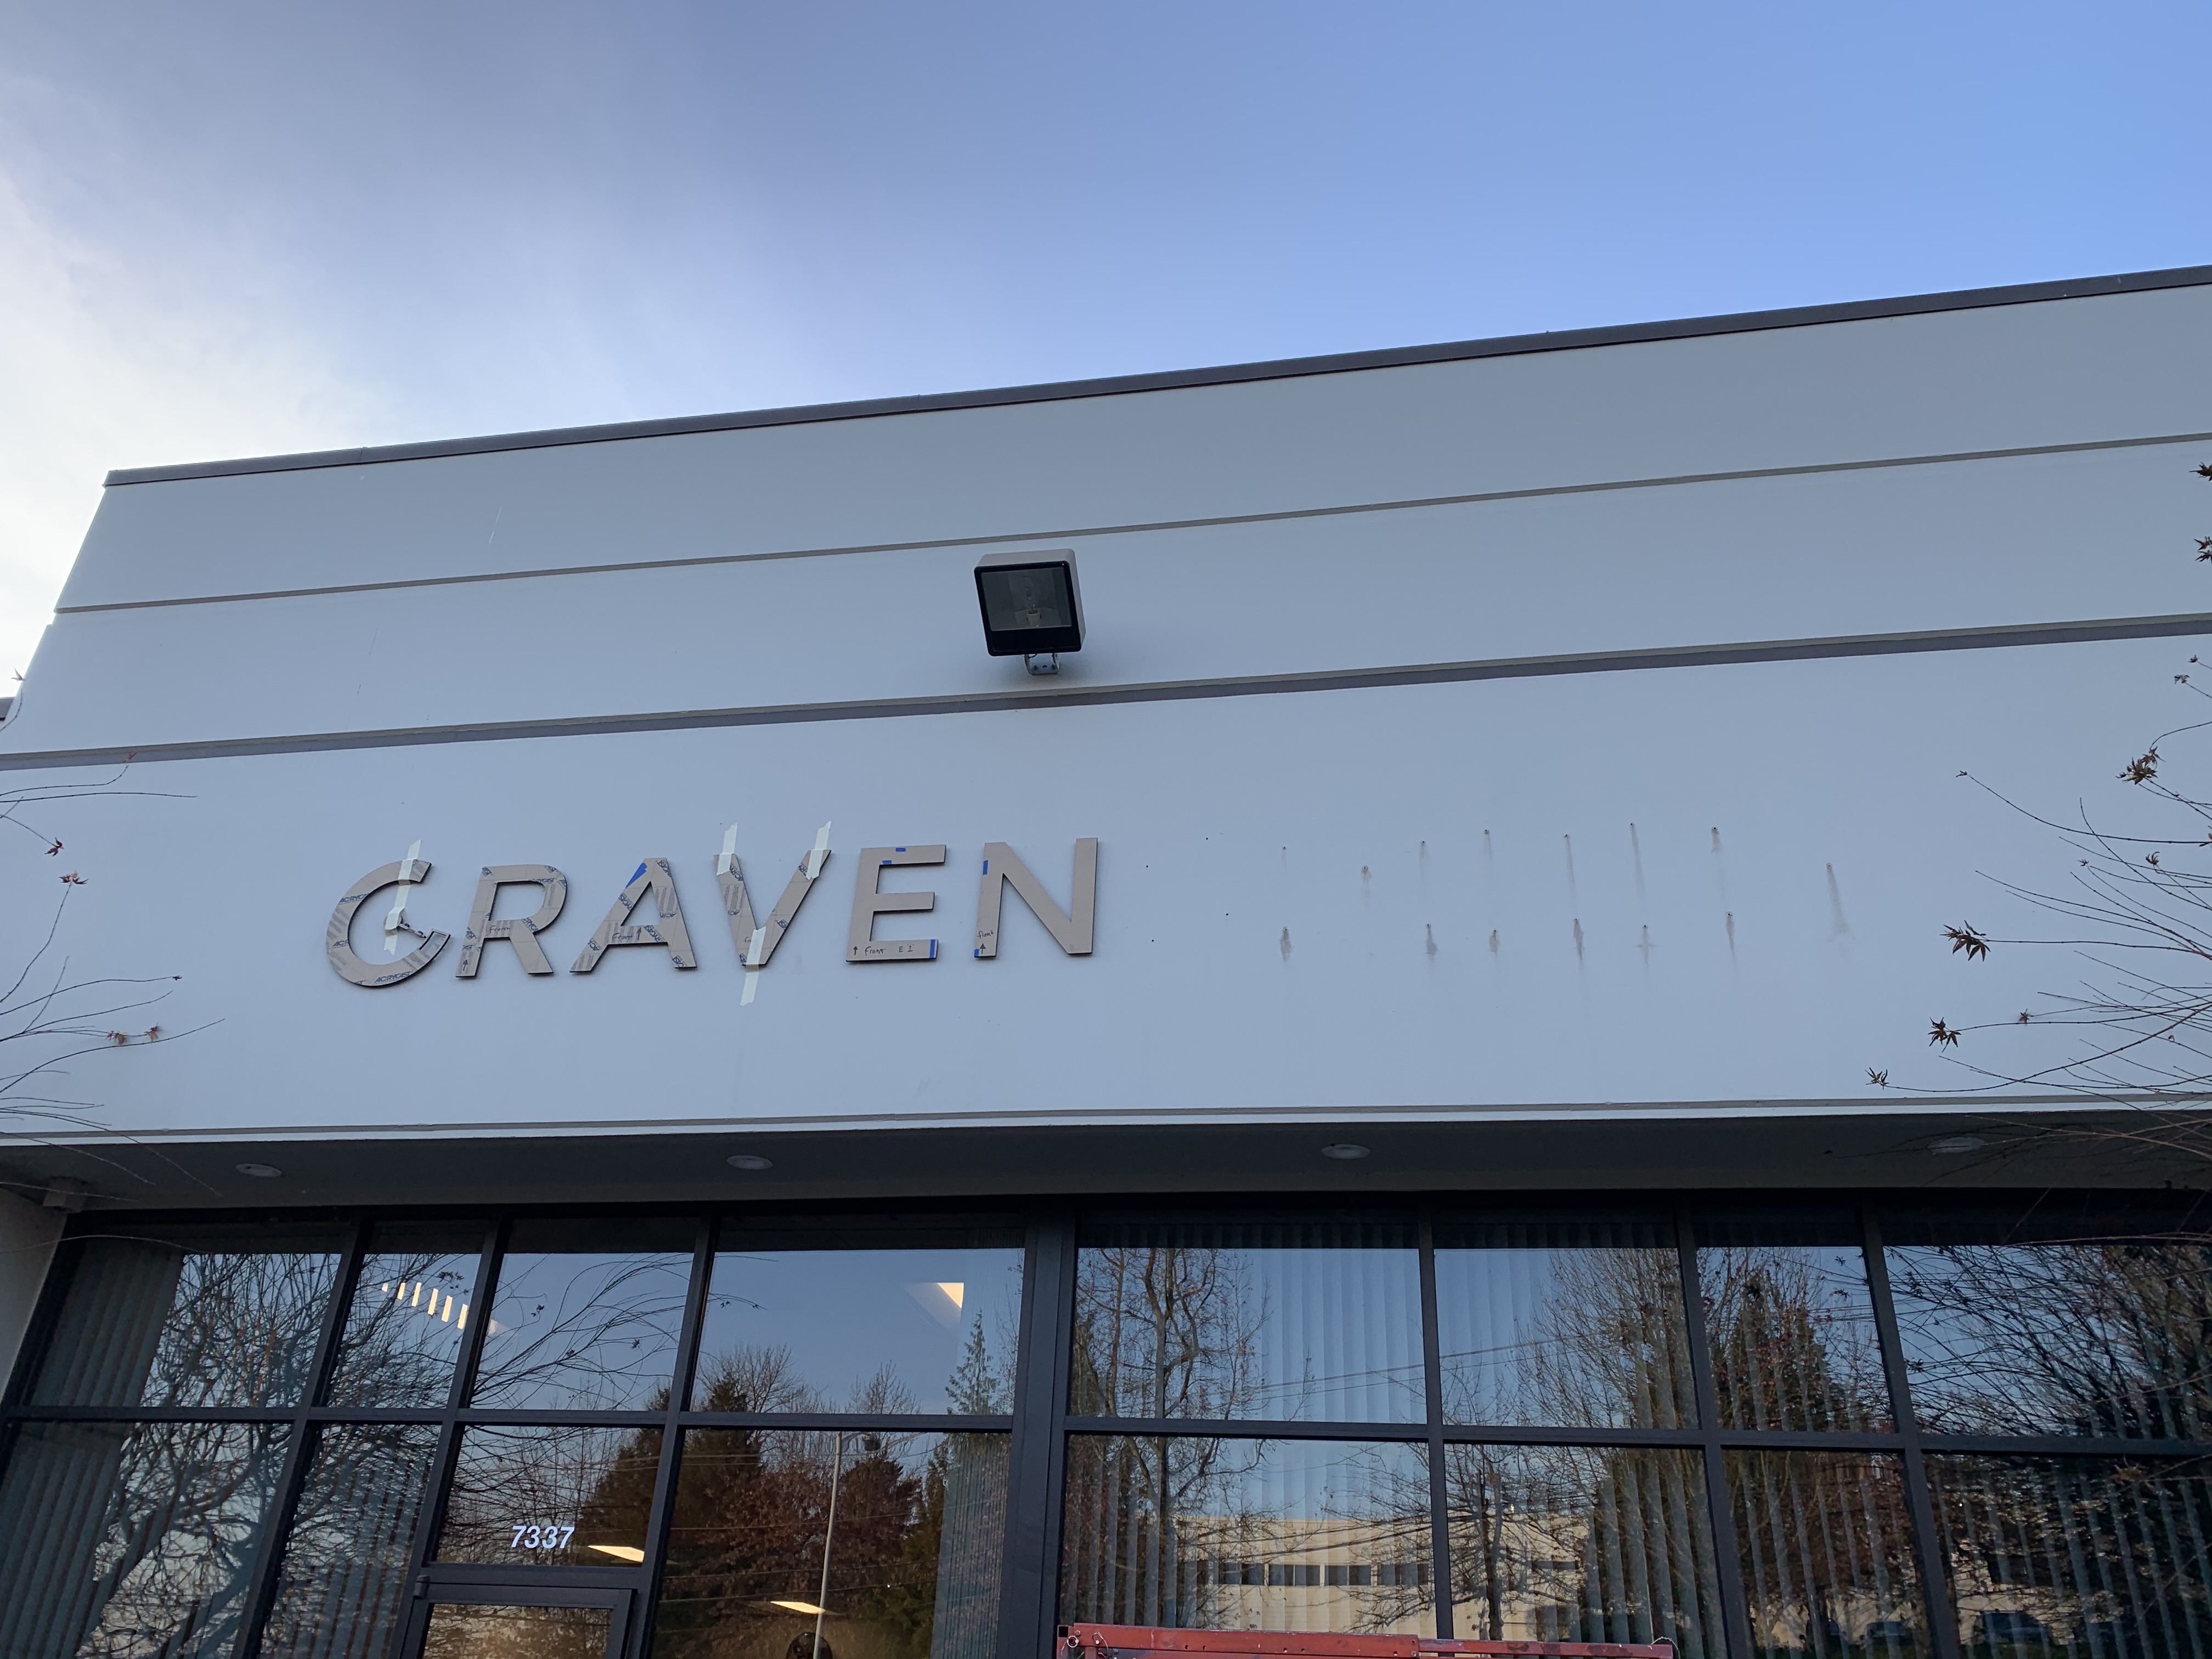
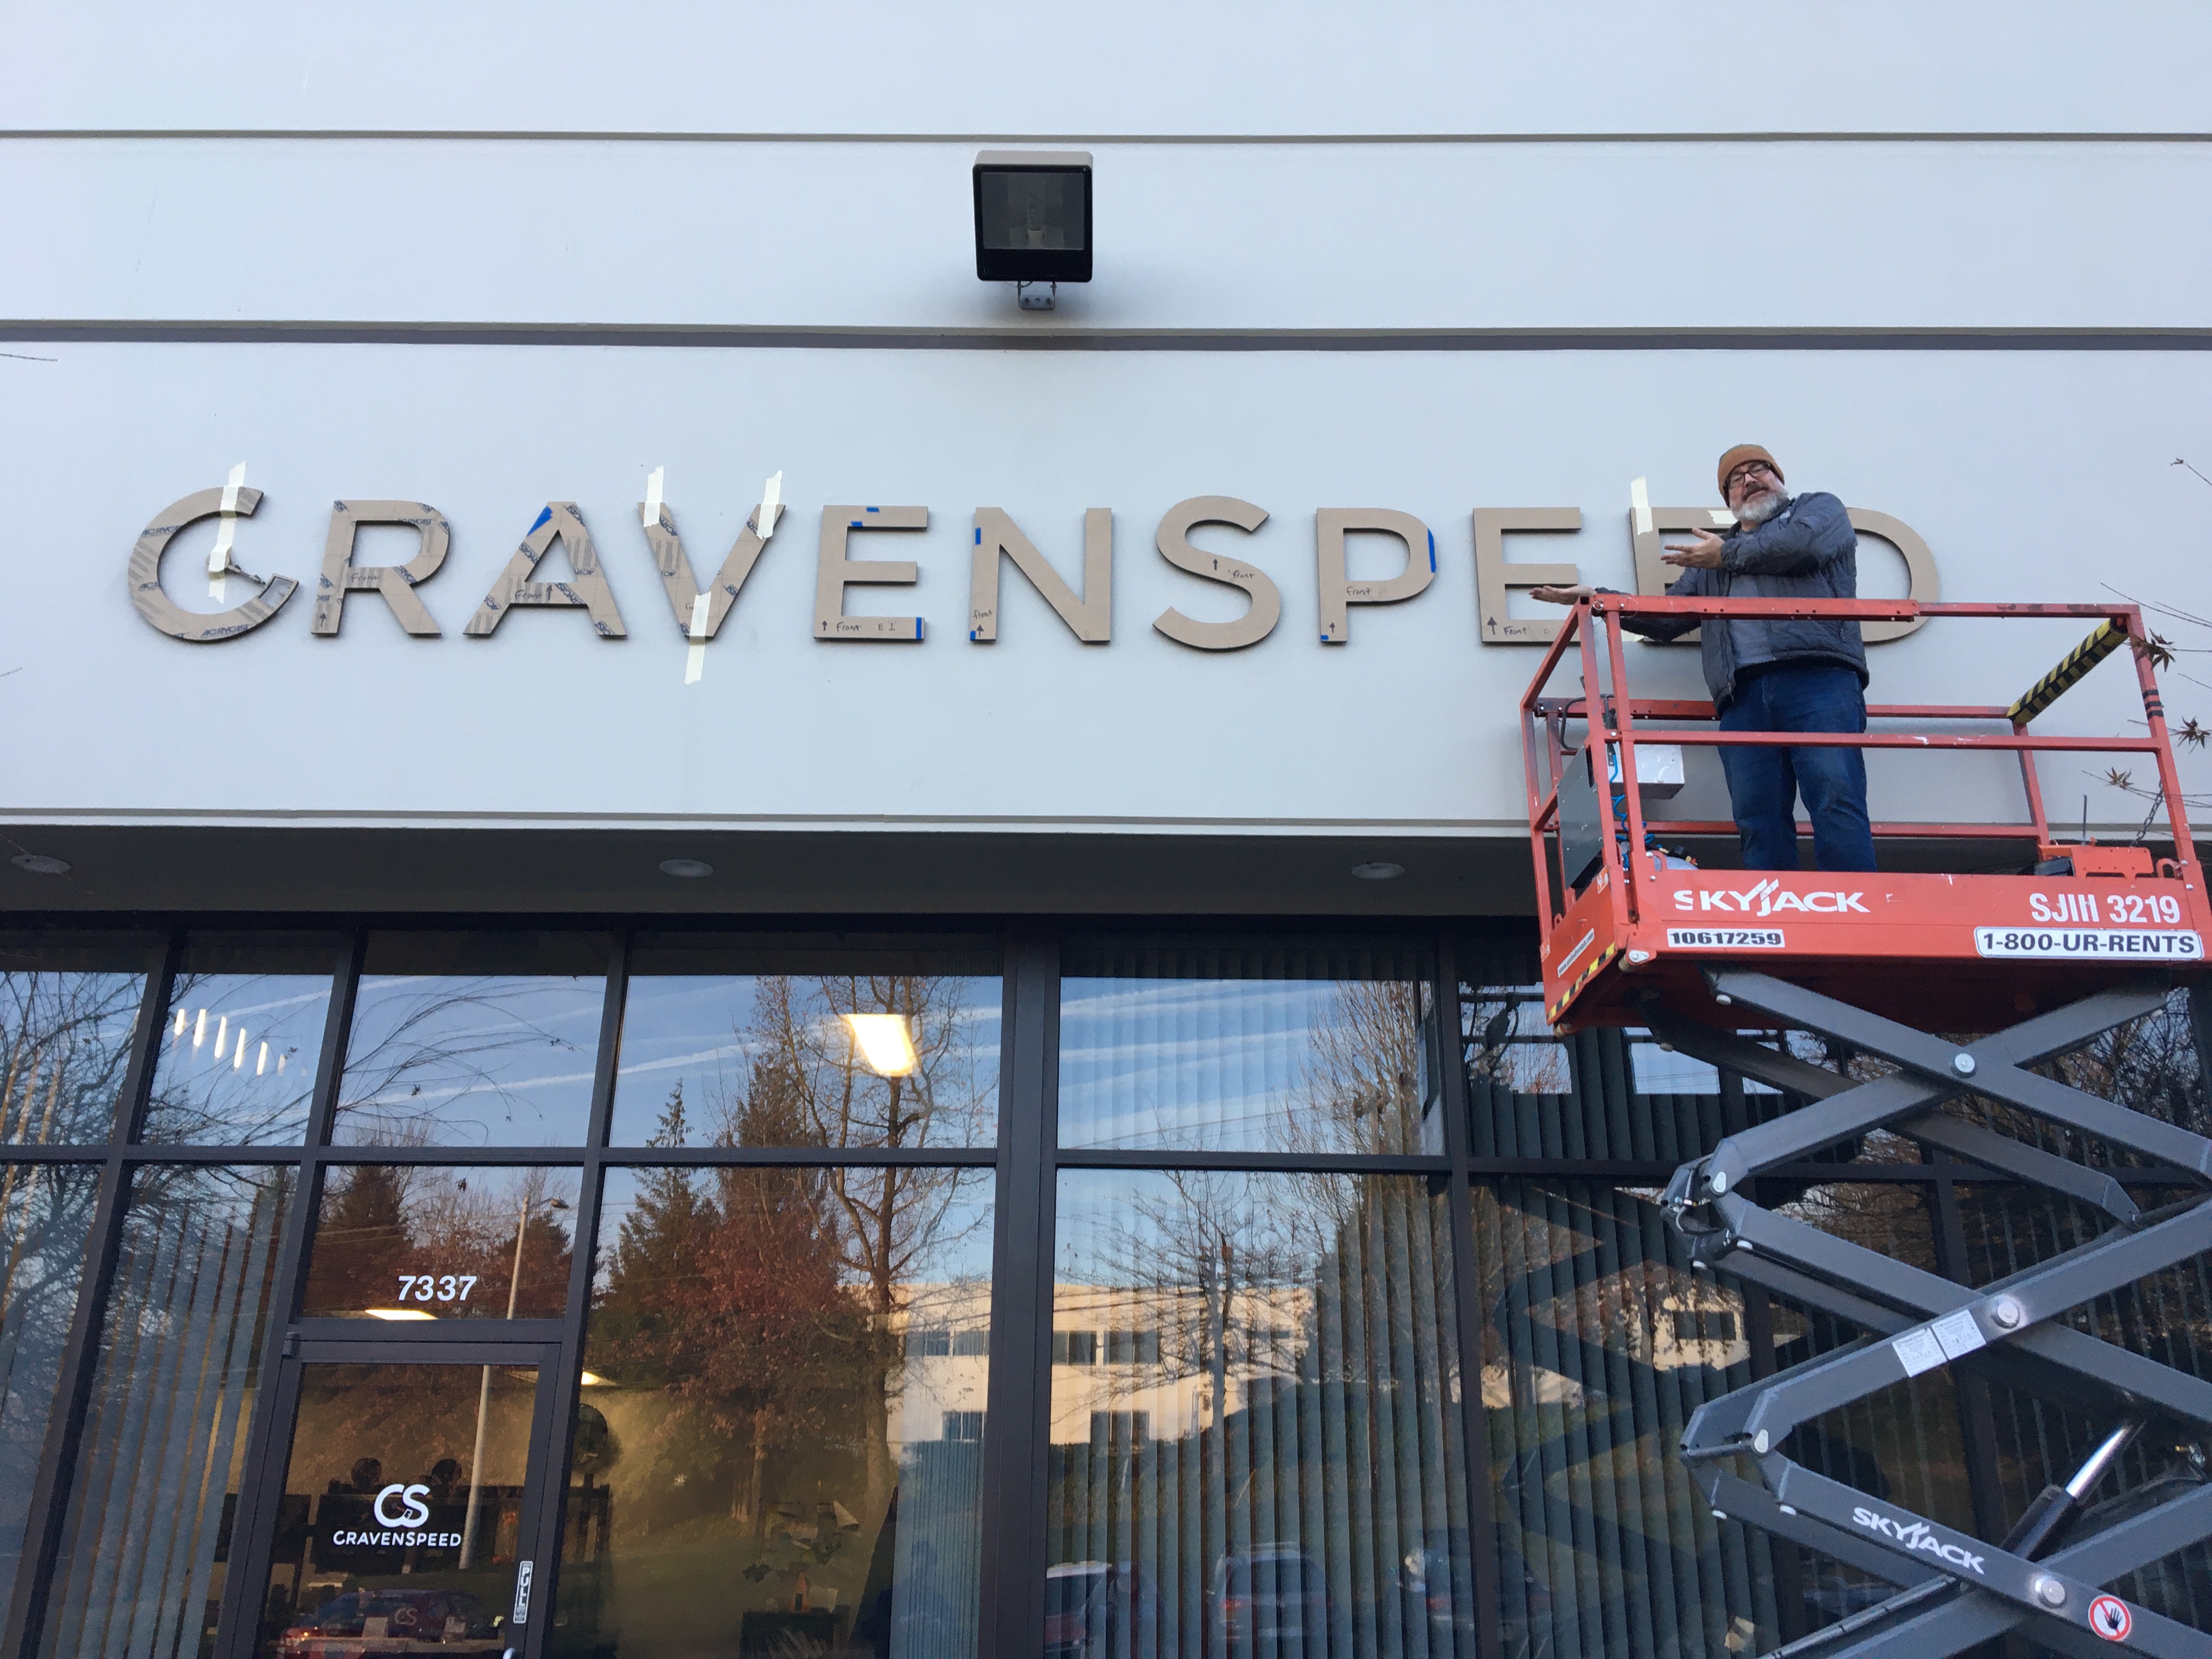
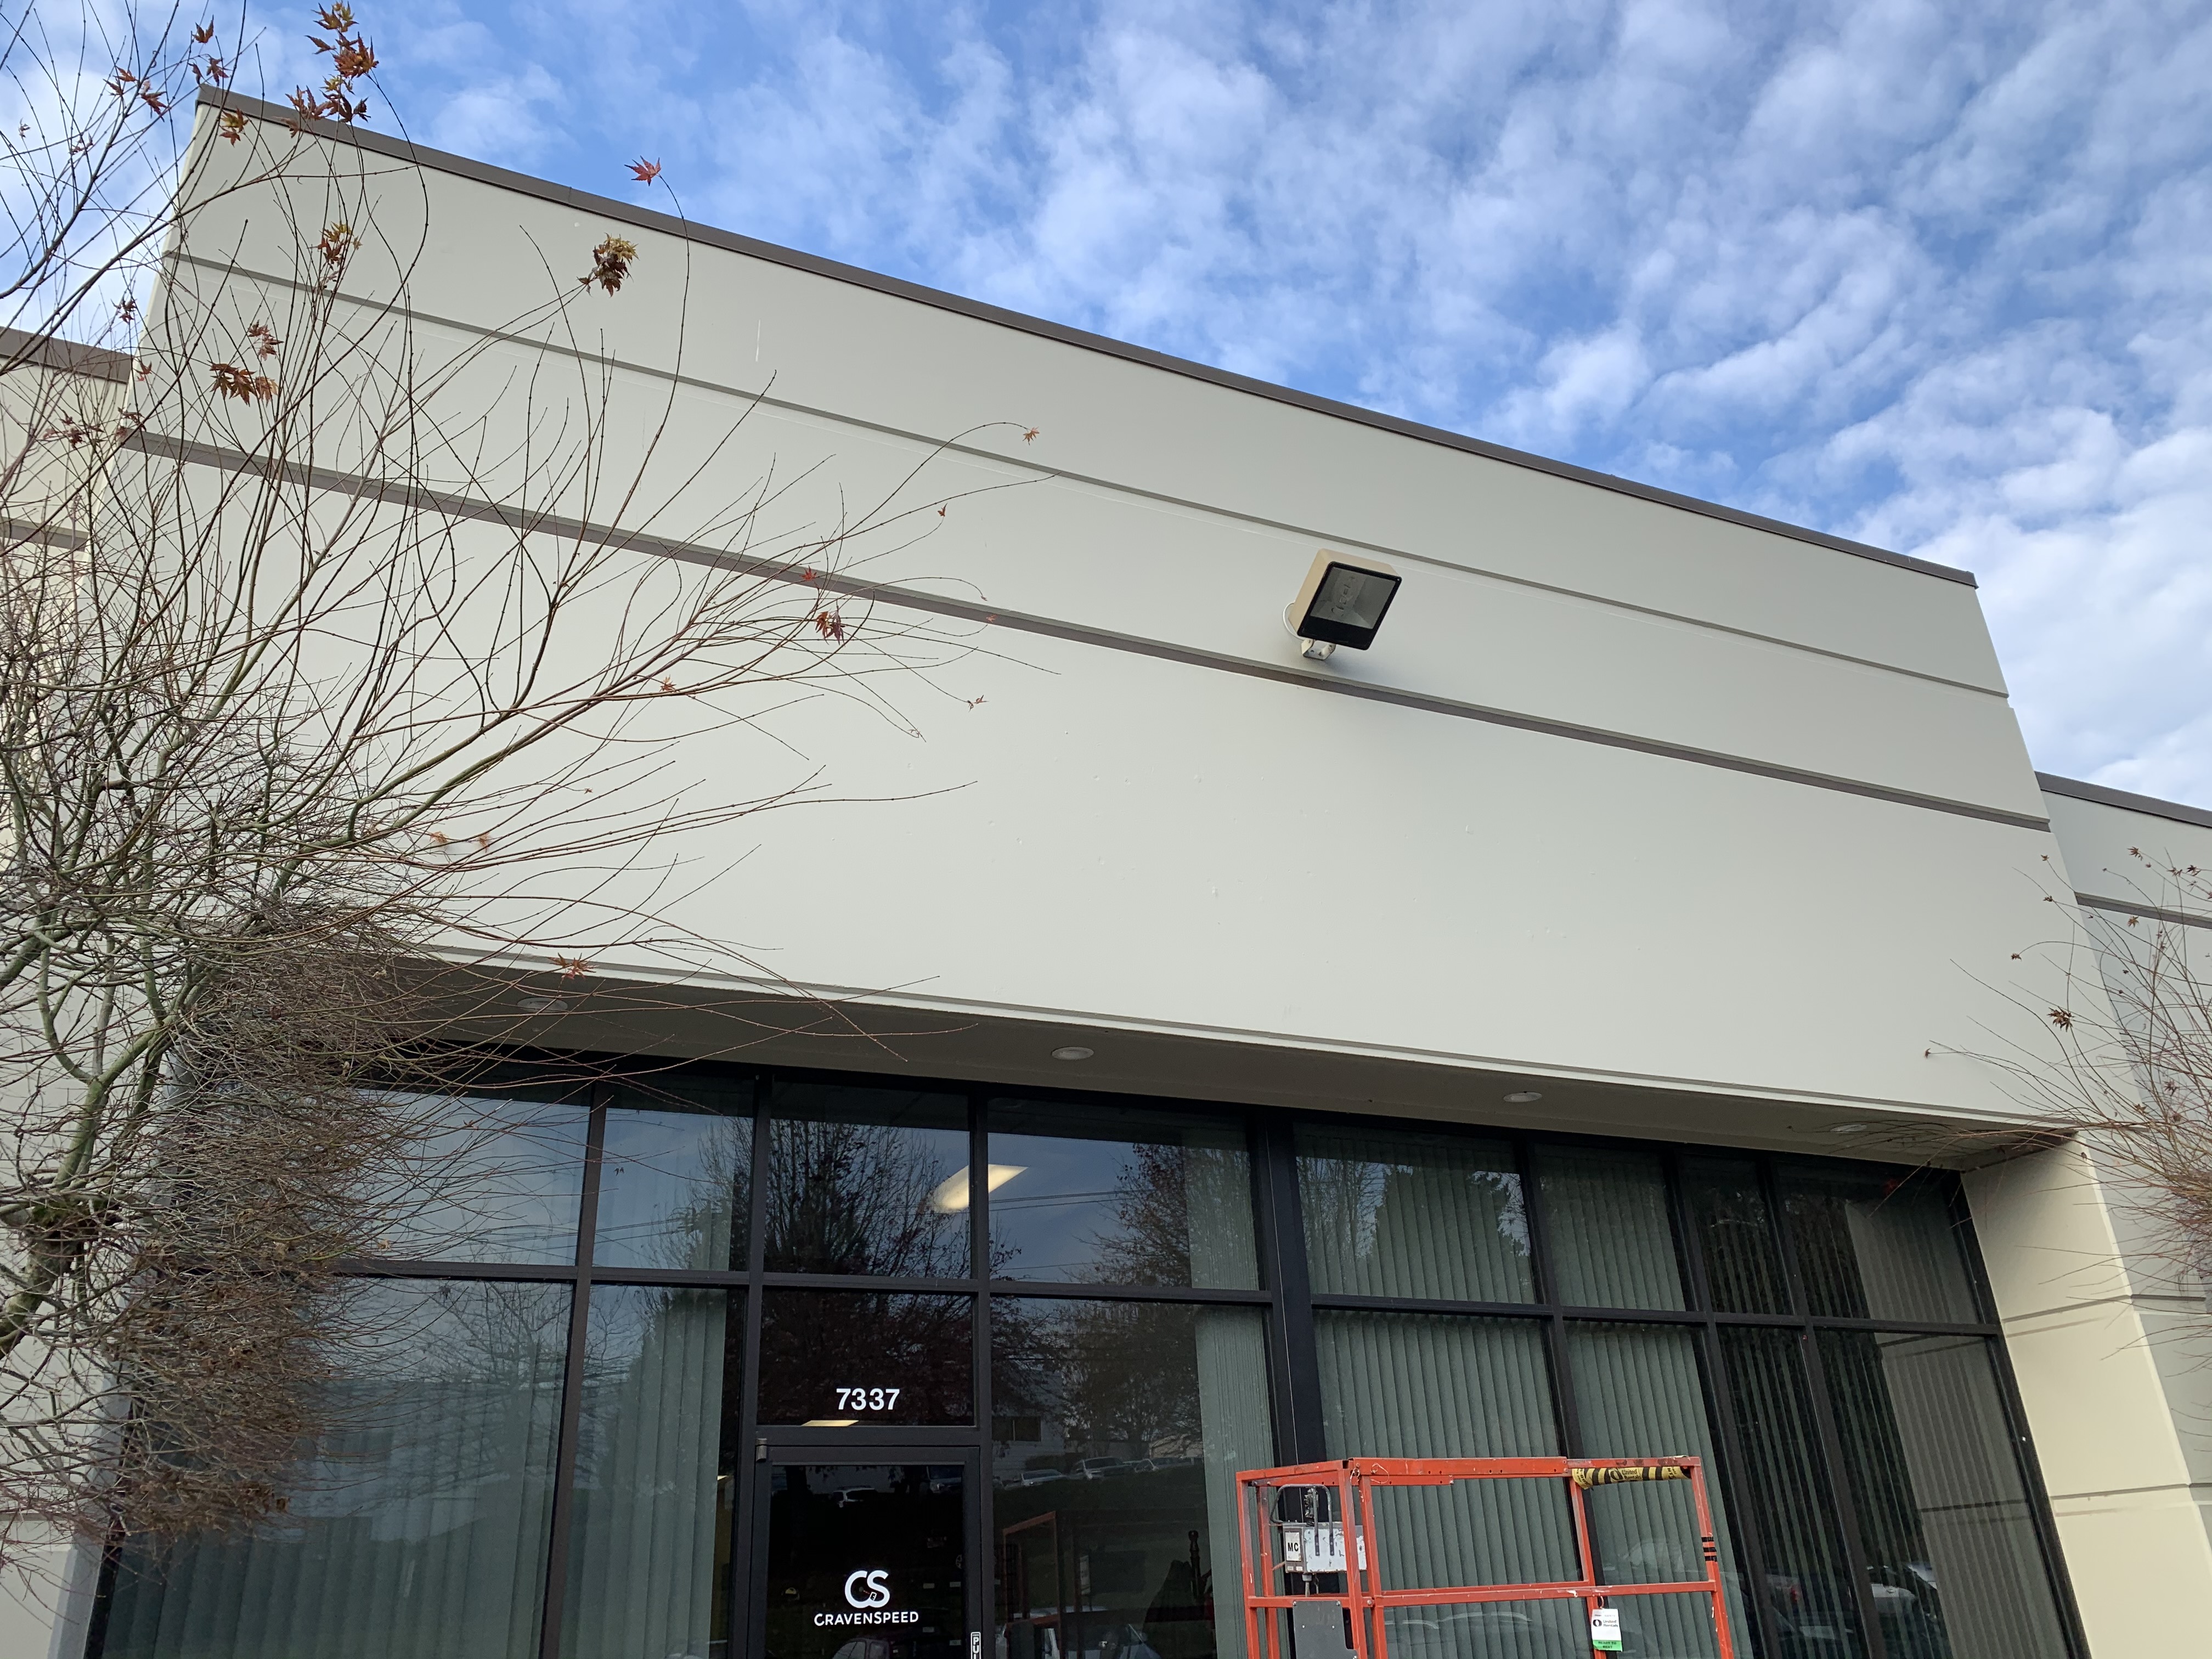
After giving the adhesive some time to cure overnight, it was time to unveil our shiny new sign.

Not too shabby, eh? We learned a lot and saved quite a bit with a little DIY ingenuity. So, if you're ever in the Portland, Oregon area and you'd like to swing by the shop, keep a look out for our cool new sign!
Cheers and Happy Motoring! -Steve